Soldner: Secret Wars Walkthrough
This walkthrough will get you well on your way to dominating the battlefield in this team-based combat game.
Design by Collin Oguro
Soldner: Secret Wars is a grand "Battlefield"-esque game in the semi-realistic war combat genre that has been popular recently in the gaming industry. Not just a "Battlefield" clone, however, Soldner has a few tricks up its sleeve to distance it from the rest. Perhaps the most imaginative and original aspect of Soldner is the Advanced Destruction System (ADS) that it implements. Maps no longer restrict where a bomb blast should go or how a building should look; you‘re able to destroy pretty much anything you want. Is the enemy team taking a road straight into your base? Knock over a few trees to block the roadway, or blow a hole in the middle of the road to make driving on it treacherous. The blast will stay there until the end of the round instead of being just a decal not affecting gameplay. The age of unchanging war landscapes is over. Teamwork and intelligent reasoning are essential. For the true war-loving general, Soldner will fulfill the thirst for a strategic action game.
First, this guide will give you an overview of how the single-player portion of Soldner works, along with tips on how to pass the random missions. Next, we cover the available multiplayer game modes, as well as detail some general multiplayer tips. With our help, you should become an elite soldier on the battlefield in no time. This guide will also give you tips regarding what equipment you’ll need on a particular map and how you should go about being successful on it.
After the map descriptions, you’ll find a listing of all of Soldner’s equipment, along with advice on which items are worth purchasing, and which aren’t. Since Soldner includes hundreds of different rifles, vehicles, helicopters, tanks, and other weapons, you can’t expect to stand by an armory and browse through menus without giving enemy snipers a long, clear shot at your head--check this section to cut to the chase and figure out which weapons you really need.
Table of Contents
Single PlayerMultiplayer Modes
Hostage Rescue, Bomb Run, Extraction, and Capture the Vehicle
General Multiplayer Tips
Lakeside, Silvereye, S-Valley, Fastlane, Fishhaven, First Strike, and Borderline
Pietrowsky, Deep Forest, Swamp, Cold Winter, and Winterbase
Riverside, Serpentine, Pattenbau, Armybase, and Villariva vs. Villabajo
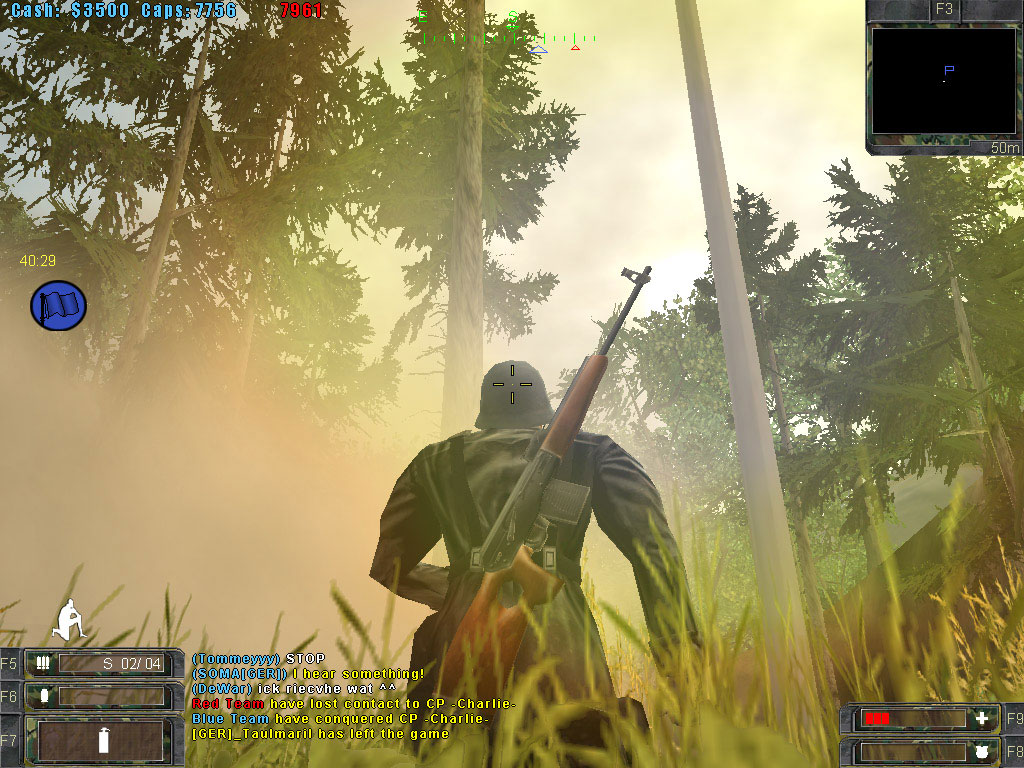
Single Player
Soldner’s single-player campaign is made up completely of random missions, so a step-by-step walk-through is impossible to write. However, some tips and strategies about the three mission types, as well as general single-player guidance, may be helpful.
No matter what random missions are generated for you, there are three types of objectives: Destroy, Extract and Deliver. Within these three types of objectives, there are three objects: human, vehicle and item. Therefore, there are nine different combinations that Soldner will randomly generate for you.
Along with the information of what objective and object are involved, you’ll see the client (who is giving you the job) as well as the location of where you will be doing this particular job. After completion of each mission, as well, you will receive a reward for your successful effort. You begin with a very limited amount of weaponry and vehicles, but as you proceed through the campaign, you will begin to have the ability to focus on getting better vehicles, more rifles, etc; anything you want to focus on getting more of, you can play towards.
Within each mission, the enemy usually has quite a few infantry as well as a couple of vehicles guarding your objective. It’s important to be prepared for this by bringing along a launcher. Also, there is no point in running to an objective--grab a vehicle and plow your way through the enemy force. You can take out most of the enemy soldiers simply by running them over. Therefore, it’s a good idea to upgrade your vehicles first rather than weaponry.
A good way to plow through the earliest missions is with the Bradley tank. This is the most expensive tank in the online version of the game, and can make things much, much easier for you in the single-player missions, especially on Destroy missions, where you can use the tank’s main cannon to take out your objective, rather than jumping out of the tank and using a launcher.
Even if you do bring along your tank, don’t forget a sniper rifle; most infantry in the game will have rocket launchers, and possess killer accuracy to boot, so if you get too close to a soldier, you might get blown away before you even spot him. It’s best to get within a few hundred meters of your target, get out of the tank, and start sniping away at any soldiers you see. With any luck, this will alert any other nearby infantry to come running towards you, so you can pop them as well. If you rile up any vehicles, though, get back in the tank and start firing away at anything that moves.
On missions on which you have to destroy a particular item, make sure you have enough firepower to do so. It’s important not to waste your destructive ammo on these missions. Even with the Bradley, it’s possible to run through your available tank shells before you get to your target if you’re not properly frugal. The larger the target, the more ammo you’ll need, so try to bring along a bunker-buster or other highly destructive launcher, as well. Destroy--Building missions are particularly tough, just because you sometimes need to aim at non-obvious places to take out your target. Keep an eye on the bottom-right area of the screen where it shows a health bar of the building you are trying to destroy. Look for the least-damaged areas (even inside the buildings sometimes) and fire a rocket at it. If you somehow manage to run out of ammo, you won’t have any choice but to head back to your base and pick up a new vehicle and/or launcher to finish the job.
In missions that you have to extract something, it really isn’t necessary to kill each and every soldier of the opposing force. Pick a reasonably quick vehicle, drive straight in, pick up your objective, and get out. By the time you’re on the way back to base with the objective, the enemy will be getting their forces together a bit too late.
Delivering things is fairly straightforward; take on the least amount of resistance possible. Get in and quickly get out.
Overall, the most difficult missions are Extract--Persons and, if you have a choice, you should probably just skip them. If you have to extract someone from a building, you can expect to have a fairly frustrating time getting them outside. This is 21st-century warfare, after all, and the sociopolitical factors involved in the global push for militarized conflict have obviously driven the forces opposing your host state to the edge of respectability. Gone are the days when nation-states declared truces on major holidays and played soccer together in no-man’s-land; no, nowadays, the information that individuals contain is so valuable that the persons you are being sent to rescue will often have been pushed to the brink of complete psychological breakdown through torture, sleep deprivation, and the thousand other heinous acts of desperate men. So you must forgive your weary charges if, indeed they forget how to use the stairs, or decide to run away from you, or are unable to pass through an open doorway.
If you want the truth, though, it must be said that Soldner doesn’t exactly have sterling single-player AI. You can expect opposing vehicles to forget that they have weapons at their disposal and attempt to ram into you. (This can actually be dangerous if you’re not in a vehicle, as they’ll kill you if they run you over.) You can also sometimes mange to kill a vehicle by getting its attention while it’s near buildings- more often than not, it’ll swerve around and hit the nearby structures and blow up before it manages to extract itself. The soldier AI isn’t much better--they’re more or less deadly with rocket launchers, but beyond that, they shouldn’t pose much of a threat to you at all.
Another unfortunate strike against the single-player game is that with the way it’s designed, it’ll be a while until you find yourself dabbling with all of the different weaponry and vehicles that are available in Soldner. If you wish to immediately begin messing around with equipment, your best option is to hop onto a multiplayer server that gives you a lot of cash at the beginning of each round. (Unfortunately, most JoWood official servers are somewhat miserly in the cash outlays.) Single-player is really for those players who wish to get the most out of the game by completing everything it has to offer or for people who have no Internet connection.
Multiplayer Modes
Deathmatch and Team Deathmatch (DM and TD)
Deathmatch and Team Deathmatch should need no introduction--your goal is to kill or be killed. In normal Deathmatch, your objective is to kill anything that moves; in Team Deathmatch, you’ll be placed on a team with other players, and will have to track down and kill the members of the opposing team.
Normal Deathmatch can be fairly overwhelming when you start out, especially if you’re on a server that doesn’t give you much money at the outset of a round. In general, the usual dichotomy between sniping and vehicles holds sway; you’re either going to want to get a sniper rifle and head for the hills, or buy a vehicle with some kind of machinegun and mow down anyone you see. If you do have to cover ground as an infantryman, keep moving at all times, and use the shot locator to target any snipers that try to open fire on you.
Team Deathmatch is a bit more relaxed than normal Deathmatch, since you’ll have teammates to use as human shields. Try to stick with your teammates as much as possible, especially when you’re in vehicles. Just don’t get too close together; you want to be able to combine your fire onto single targets, but not be so close that your enemies can kill two birds with one stone.
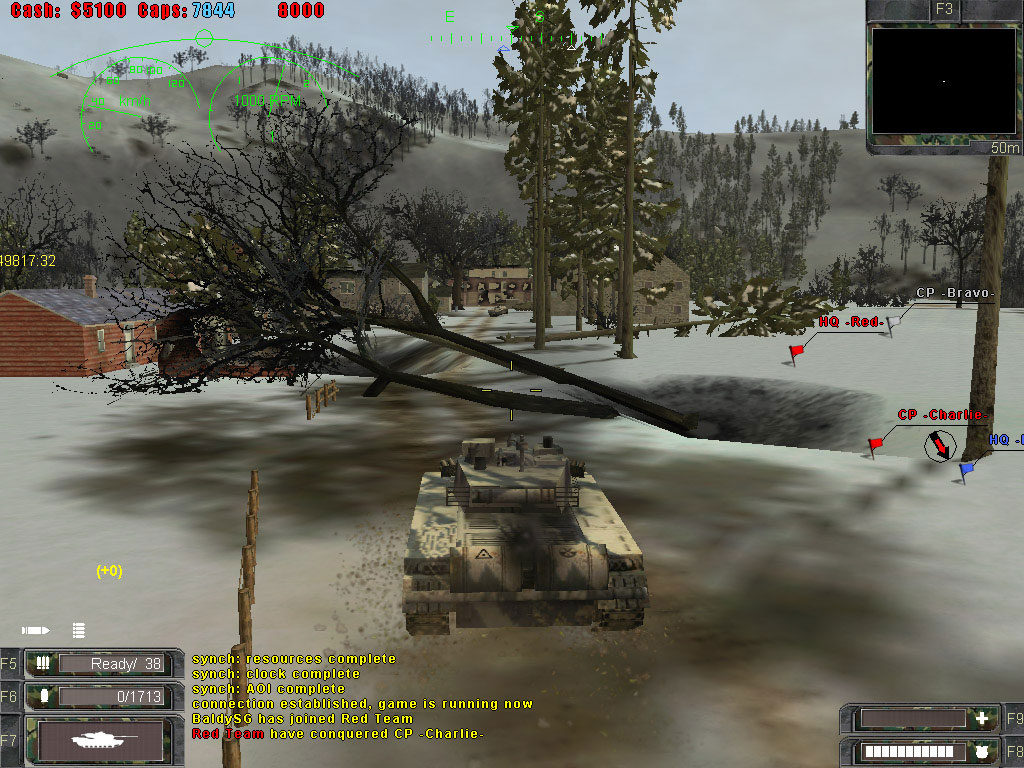
Conquest (CQ)
The most popular game type online at the time of this guide being written, each map has a varying number of flags (usually depends on map size--the larger the map, the more flags it has). Each team begins with one flag captured (their spawn point) and the goal is to capture all the flags. The flags are captured by standing next to them without an enemy nearby. Once a team has captured all the flags in the map, the game is over.
Behind the most important element of Conquest, teamwork, is the fact that a good commander is often what separates a great team from an average one. A commander that knows the map and knows how to use the commander interface can set waypoints, divide up team funds and direct his team to victory.
Surprisingly, only one member of a team is needed to capture a flag. Therefore, tactics involving a sneaky sniper or scout can prove to be smart when someone can get behind enemy lines and quickly capture a flag before the opposing force knows what happened. Don’t neglect the use of different-colored smoke grenades while playing the Conquest game type. Sometimes to grab the attention of a flying vehicle, the only real way to let them know where you are at would be to tell them to look for a certain color and toss that corresponding color’s smoke grenade where you’re at.
Capture the Flag (CF)
Although Capture the Flag isn’t often seen in objective-based teamplay FPSs anymore, Soldner bucks the trend by throwing in not one, but two different versions of the venerable gametype. Standard Capture the Flag is the first, and is exactly what a veteran FPS player expects. The goal of Capture the Flag is to sneak into enemy territory and steal a flag they have in a building or somewhere near their base and to bring it back to your own home base. Just retrieving the enemy flag isn’t enough, however; you’ll need to return their flag to the same location as your own flag, so if the enemy has captured your flag while you’re running around with their flag, something’s gotta give. The first team to lose the other team’s flag in this situation will usually be giving their opponents a free capture.
Of course, the inclusion of vehicles does make for some thorny strategic challenges. It’s a smart idea to mix up your forces. In most cases, it’s going to be best for your offensive players to load out with vehicles and concentrate on approaching the enemy base in groups, preferably groups of heavy-hitting tanks. You stand a much better chance of getting to the enemy base and back if you have speed and protection, and a tank or other vehicle offers both. Even if you manage to grab the enemy flag while you’re on foot, you’re extremely unlikely to survive the trip back to your base unless a friend comes to pick you up. So, the basic strategy is to get to the enemy base, hop out of your vehicle for a split-second next to the flag, grab it, then get back into your tank and roll on home.
Your challenge defensively, then, is to counter this tactic somehow. Luckily for you, most bases have plenty of buildings and other cover from which to observe your flag. Even when the flag itself isn’t indoors, you can usually hide away and keep an eye on it while remaining safely out of view of enemy snipers who may be around. (In any case, if you’re on flag defense and get sniped, alert your teammates immediately, as they’ll be the next to fall.) A launcher is usually the best tool for flag defense such as this, especially the M202A2 MRL rocket launcher that can fire four shells at a time. When you notice an enemy coming along in a tank to pick up the flag, wait for them to get close. When they pop out to get the flag, blow their vehicle; they’ll be left stranded, and may even be killed themselves. If not, you can switch to a rifle and finish the deed.
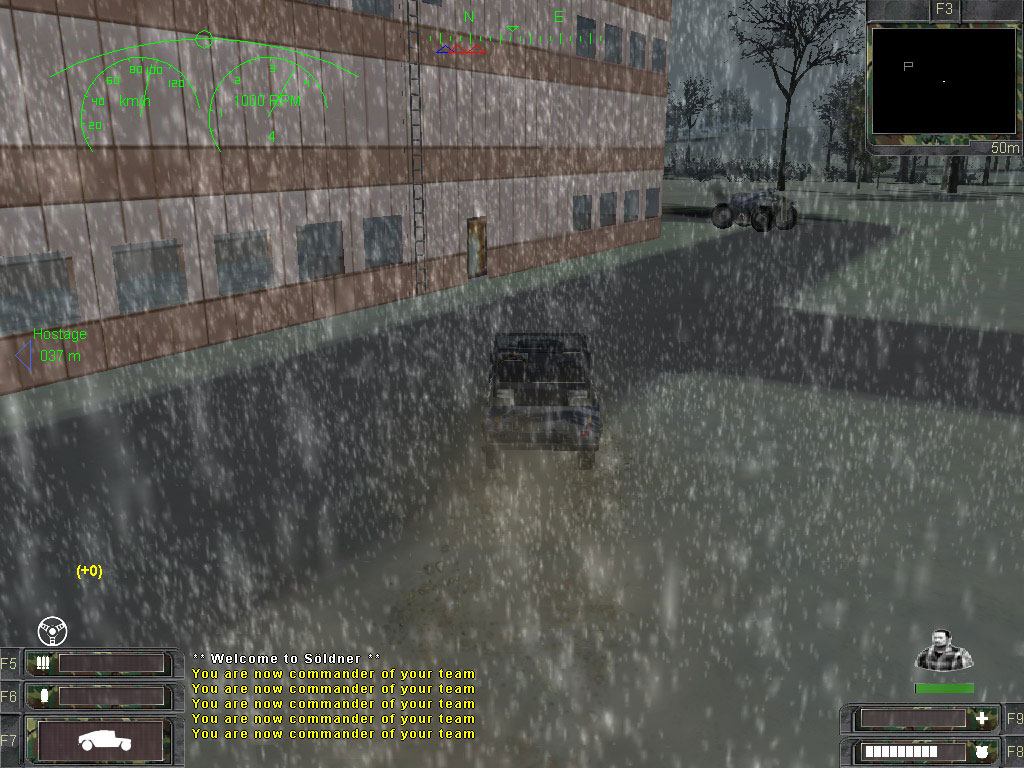
Hostage Rescue (HR)
In the Hostage Rescue gametype, a terrorist team spawns with hostages while the opposing force, the SWAT team, is tasked with returning all hostages, unharmed, back to their base.
Rather than sit and wait for the SWAT team to come, the terrorists have a much better chance of preventing the SWAT’s victory by putting pressure on the SWAT team. This involves finding a choke point on the map (preferably a place where the SWAT team must pass through to get back to their base, but not too far from where the hostages are located) and holding it, not allowing any members of the SWAT team to pass. Plus, if the SWAT does manage to sneak behind the terrorists and grab a hostage or two, you’ll be closer to the middle of the map, which will hopefully enable you to cut off the SWAT members as they attempt to travel back to their base.
Since the hostages in Hostage Rescue games will usually be inside a building, though, don’t neglect to have someone inside that building waiting for any members of the opposing team to arrive. A P90 or other close-range SMG will give you the upper hand in such defensive operations.
Bomb Run (BR)
As with Hostage Rescue, the two teams here will be broken up into a terrorist force and a SWAT team. The terrorist team’s objective is to bomb one or more targets located inside or near the SWAT’s base. Each member of the terrorist team spawns with the requisite bombs.
Many SWAT teams decide to camp inside or in close proximity to their base and wait for the terrorist team to come to them. This is a valid tactic, but you can’t neglect to inflict attrition on the enemy as they approach your base, or they’ll arrive in force and will be able to overpower you and kill you as you spawn. A good approach is to, again, find a choke point or middle ground on the map and control it with vehicles, snipers, and anti-vehicle weapons. If you make two lines of defense, then you’ll be able to wear down your enemy as they approach, taking a good deal of the burden off of your base defenders.
Once the terrorist team has broken through the choke point defense and put pressure upon the target area itself, make sure most of the SWAT team members equip weapons that are good for short-range combat. Weapons like the P90 and the M4 Carbine can dispatch an enemy quickly and efficiently when used at short range. Good communication is key since the terrorist force will at this point likely try to sneak towards the objective along multiple vectors, including some that might not always appear obvious. (Keep your eyes open for parachutists!) Always keep your SWAT teammates informed of where the enemy is.
Extraction (EX)
One team spawns as the terrorist force that has a valuable item in their possession. The other team, spawning as SWAT, needs to find the item and return it safely to their base.
If you spawn as a terrorist, make sure you keep the SWAT team at bay and away from the valuable item. Once the item begins moving around, your team needs to know where it is at all times and where the opposing force is approaching from. Always try to keep your team balanced, so far as equipment goes--you’ll want to have a mixture of snipers, anti-vehicle troops, and soldiers with short-range weapons to properly defend the objective.
Capture the Vehicle (CV)
Each team has a vehicle on their base. The vehicles differ from map to map but the objective stays the same: go to the opposing team’s base, steal the vehicle and drive it back to your base. The only way to score the point is to have your vehicle on your base as well. In this sense, CV is more or less identical to CTF, save for the fact that you don’t get to choose what type of vehicle you take back to your base.
Unfortunately, the vehicles that you need to capture are always plain transport vehicles--they’re never equipped with any type of armament. Thus, when you’re heading back to your base, you won’t be able to defend yourself at all--proper teamwork will be required if you intend to get back in one piece.
As with CTF, CTV can often result in a bit of cat-and-mouse, especially when both teams have taken control of the other team’s vehicle, which prevents either team from scoring a capture. You’ll need to ensure that you have a sizable force out hunting for the enemy vehicle, as well as a few soldiers back near the enemy vehicle with Stingers and anti-vehicle launchers to protect your own driver.
In these kinds of situations, it’s often best not to keep the enemy’s vehicle in your own base--that’s the first place your opponents are going to look. Hiding out in an out-of-the-way place, or simply keeping mobile and moving around the game map may be better options, as they should give your team a bit of extra time to track down and destroy the enemy vehicle. When you get the notification that your vehicle is back in your base, double-time it back there for the capture. The vehicles respawn in their home base within seconds of being destroyed, so you won’t have to wait long.
In fact, this short delay between destruction and respawning prevents a few of the more devious tactics that you may be planning. You can’t continually destroy your own vehicle to prevent the enemy from getting it, for instance, although you can definitely camp it and blast it with a launcher as soon as you spot an enemy getting into it.
General Multiplayer Tips
* Keep an eye on how many bullets you have available. Getting caught running into a firefight or squeezing the trigger expecting a fatal headshot from fifty yards out can be ruined with the sound of a click of an empty chamber. Soldner doesn’t automatically reload for you when you run empty, so you’ll want to keep that reload key close at hand. Don’t forget that you’ll be reloading the whole clip when you reload; any ammo you might have had in the previous clip is lost when you do this. Thus, you should try to stick with a clip until you’re almost out of ammo before reloading. If you run through your ammo too quickly, you’ll need to get back to a weapons terminal or pick up the weapon of another fallen soldier
* If using a scoped weapon, maximize your accuracy by lying prone while firing it. You can crouch if you wish to retain some of your mobility, but lying prone will reduce your visibility and get you the most accuracy for your buck. In point of fact, most weapons are much more accurate when you lie prone, so if you get stuck with a weapon that has poor accuracy, hit the dirt
* Smoke grenades are incredibly handy when playing the popular Conquest mode. While capping a flag, tossing a smoke grenade or two can provide just the right amount of cover to give you enough time to fully capture the flag.

* Infra-red visors are not just a gimmick. They can be used to see through any sort of wall or tree to find heat-emitting objects, including vehicles. Giving your team an idea of what the opposing force is up to by reporting on if they are using vehicles or not can help you plan your next move.
* Don’t forget to check around and see if any teammates need a ride when you get a transport vehicle! Moving soldiers in large numbers can be dangerous if you run across an enemy with a launcher, but transporting multiple soldiers to an enemy base or territory can sometimes swing the game in your favor.
* Soldner uses a system that shows where a bullet comes from if it hits you or is a near miss. A red indicator means that you were likely hit by the projectile; yellow indicates a clean miss. Thus, as a sniper, you have to be patient when taking your shots. If you miss a soldier that’s running, he’ll be able to get a rough idea of your position from the fire indicator. This can sometimes make him pause for visual scanning, but more often than not he’ll either start spraying bullets or take cover. Wait until you have a clean shot on a still enemy before firing.
* Don’t run and shoot. When you run, your crosshairs begin to vibrate wildly because of your increased heartbeat, and your shots will be all over the place. Take time to crouch and rest while letting your crosshairs calm down.
* No matter which camera perspective you choose to play in (you have a choice between 3rd and 1st person), utilize the 3rd person view when you want to peek around corners. Quickly switch to the 3rd person view and use mouselook to peek around the corner without moving your soldier.
*The massive number of vehicles in the game makes them seem like the most important part of Soldner. However, the most important part of any team is the ground infantry; they can purchase any sort of defense against any vehicle and destroy them easily if they choose their locations carefully. In some gametypes, it’s a better idea to spend your money on body armor, a good launcher, and a sniper rifle than it is to buy a vehicle. Of course, if you have the required cash, there’s no reason not to get a full infantry load-out and a nice tank.
* As tempting as it is, stay away from using the knife. Although knife kills are good for bragging rights, the knife in Soldner suffers from poor accuracy, oddly enough, even when you’re standing right next to an immobile soldier. If you’re close enough to knife someone to death, go for the sure kill instead and use your pistol or automatic rifle to do the deed.
Multiplayer Maps
Kurvanova
Kurvanova is an incredibly large map that features five main areas. There are two each on the outside and one in the middle of the map in a valley. The way the map is designed allows no real chance to surprise the other team; if you are in a land-based vehicle, you are going to have to stay on the road. The high valley walls and incredibly rough terrain make it difficult to off-road.
This massive map gives lots of opportunity for a lot of different types of battles. It’s a smart idea to set up a few anti-tank measures near the main roads. Sneak your snipers through the terrain and have them cover the anti-tank personnel from a camouflaged area.
Good team communication is essential in this map because of the size and terrain it encompasses. Making sure the team transports soldiers efficiently to places where they are needed can be the deciding factor here.
Nullgrad
A flat, snowy level featuring many urban areas for street fighting, Nullgrad is a guerilla warfare lover’s dream. One street extends through most of the map and is flanked by many buildings. The opportunity for city fighting makes Nullgrad an exciting map for all gametypes.
An effective strategy is to hide and duck in the buildings with a medic, an anti-vehicle soldier and some mixed infantry. You may want to split your team up, and have a small strike force of infantry go for your objective while a larger group of vehicles provides a distraction. The flat terrain makes it easy to spot enemy soldiers, so use the buildings as additional camouflage.
The way Nullgrad is set up also allows for easy blockage of roads via Soldner’s Advanced Destruction System. There are many large trees lining the roads and one way to slow an opposing team’s vehicles is by blocking these roads by knocking a few trees over. This is easiest to accomplish with a tank of your own, due to the number of shells that they pack.
Aspenovich
Aspenovich comprises two towns on the west and east sides of a canyon; this canyon acts as a choke point. The key to success is simple--own the middle area. Once you have your forces mobilized and stationed in the canyon, the other team won’t have any method to reach your side of the map without going straight through you. Beware of the opposing force trying to disrupt your control of the central area, though: be ready for some heavy machinery trying to force its way through there. Don’t forget to pack a heavy-duty launcher if you’re proceeding out on foot.
K-Town
A quaint farming town, K-Town’s southern region is made up of a singular road with farms flanking it. Rockier terrain can be found north, but most of the fighting will occur in the southern region. Make sure to use the buildings as protection from heavier armor and have snipers flank north, using the higher terrain to their advantage.
Don’t neglect the central part of this southern road. The church is important to capture and hold, as it provides a quicker path if your team decides to push along the southern road to reach the enemy base.
Also, make sure your commander reminds your team that K-Town gives the ability to purchase aircraft. An easy way to clear the southern road is by swooping along the road and clearing it out with one of the two VTOLs you can purchase.
Finding Lenin
The best way to describe this smaller map is a roadway shaped like the McDonald’s "m" archway with a town on each end. Finding Lenin is a foot soldier’s paradise. It is possible to drive a vehicle straight from base to base, although with the forest that covers the whole middle area of the map, it may prove difficult to do so without knocking over some trees, damaging your vehicle or bouncing around on the hilly terrain like a madman.
Sending a squad through the trees while also sending another diversionary group of soldiers with a vehicle on the main road may give the opposing force the indication that your team is focusing on transporting soldiers; use this distraction to approach the enemy base and complete your objective with your foot soldiers.
Lenskoje
A large, winter-themed map, Lenskoje has a few bases that are widely separated by long stretches of land and intermittent forests.
The first piece of advice is to invest in an infra-red visor. Smart soldiers will change their camouflage to blend in with the snow and if they lay prone, it is nearly impossible to spot them. Heat vision can help you spot anything that’s warmer than the surrounding area, so you shouldn’t have any problem detecting a soldier hunkering down in the snow.
Using the immense power of aircraft in Lenskoje can turn the tide in your team’s favor. If your team is pinned down by enemy snipers, let your pilots know roughly where the snipers are and have them take the snipers out from above.
Make sure to change your camouflage before you load Lenskoje up. Green or jungle camo is decent enough for most maps, but it’ll only serve to draw the enemy’s attention on this map.
Powerbase
Powerbase is a relatively simplistic map that features a single huge lake to the east, one main road, and not many other map features. Each team will have a base to the north or south of the road.
Without much cover in terms of trees or foliage, sticking to the ground on foot is a death wish. Truck the team’s soldiers around in a transport vehicle to ensure their safety, but keep up your visual scanning for enemies with launchers while you drive.
Lakeside
The map is entitled Lakeside, but the only true body of water you will be dealing with is an inlet. Lakeside has it all: an extensive roadway that goes through all major areas of the map; plenty of foliage and trees for sniper cover; and a strategically-placed body of water. There’s something for everyone to love in Lakeside. One particular location of note is the bridge that acts as a shortcut between the northern and southern bases. If you don’t wish the enemy to have easy access to your base, the first thing you’ll want to do is to destroy that bridge.
There is one major piece of advice that applies to Lakeside: get a rifle with a scope. There are many areas that you can see from a heightened viewpoint. Secondly, if you do shell out enough cash for a vehicle, stay on or near the roadway. There are quite a few sharp drops and the only thing you need is to buy a BRDM-2 for 13,500 only to roll it off the road, down a cliff and see it explode into a massive fireball. If you do take a vehicle out, you’re going to need to have heightened senses to avoid situations like this, especially in firefights, where the impulse to jam on the gas can be overwhelming. The last thing you want to do is to give your opponent a free pass because you didn’t see the drop you drove off of.
Silvereye
An incredibly large map, suitable perhaps only to a large group near 64 people or so, Silvereye has a base on a separate island to the east (the blue base for Conquest mode) way offshore of the main island. Obviously, team communication will be valuable because if you leave someone on the island without transporting them via helicopter, it’s quite a swim just to get to the shore of the main island.
The main island itself, with the rest of the bases and roadways, is a long hot-dog shaped island with roads passing through each of the bases. Maneuvering around this island can be a complex task, as it has many outlets coming into it, there are hills all over the place, and there are quite a few peninsulas--and the island features a whopping 11 bridges. At one point near the middle of the island there are three bridges almost side-by-side. Taking these three bridges out would prove to be devastating to a force that is reliant upon heavy tanks like the MIA2 Abrams.
The size of Silvereye will make communication an essential factor for any team that wants to win. Be sure that your team’s commander is halfway competent, let him devise a plan, and ensure that your teammates know their roles.
S-Valley
With a name like S-Valley, what else would you expect? This smaller map features a road that creates a little "s" with its curves through a valley. This map screams out "Sniper Paradise!" With the elevated terrain, the strategy of picking off people who roam the valley below is a good one
Fastlane
Fastlane is an absolutely humongous map. The distance from the north and south bases is immense, and is indeed far too long to actually cover on foot, so you should always find a teammate to hitch a ride with, or buy a vehicle of your own. Try not to be caught in the middle of nowhere without a vehicle because it’ll take you awhile to get back into battle.
The middle area is congested with buildings, so if you find yourself in a firefight in that area, use grenades and switch to a rifle that has automatic fire ability. To the north, there is only one roadway to the base and any other path takes a lot longer to traverse because of the terrain. Going south, however, you have two different roadways as well as much smoother terrain to contend with. In Conquest mode, if your team can capture everything except for the north flag, you’ll be in pretty good shape. You can easily pin the enemy down and constantly put the pressure on them to break their defense and win the game.
Fishaven
Bordering a water source, Fishaven is an interestingly designed map. There are two main bases on the east and west sides of the maps; however, there is a large cliff obstructing you from reaching them in a straight line. Therefore, the only way to get from one side of the map to the other without following the coastline is by climbing up very high in elevation towards the middle of the land mass. The map itself isn’t necessarily all that big, but the paths you’re required to follow can make it seem larger than it is.
Have the snipers on your team set up shop on the top of the cliffs looking down upon the bases and they should feast on the opposing team. You should purchase helicopters to divert attention away from your snipers and have a separate force sweep in and take care of the rest.
First Strike
First Strike is the map you’ll find all airplane lovers playing online. There is an airbase on each side of the map that offers numerous jets to strike the opposing force with. Near the middle of First Strike is where you’ll find a few areas of buildings. The map has a fairly consistent elevation, except for the northern and southern parts. To the south, you’ll find a couple of high hills; place snipers here so that they can keep their eye on what the enemy is up to. The northern area is quite unique. There’s a heavily-forested small island smack dab in the middle of a bay. There’s just enough water to make it inconvenient to swim to the island, so placing anti-aircraft soldiers or snipers here could be a very good idea. With the dense forest located on the island, a soldier can easily find a nice area to observe anything without the fear of being spotted by the enemy team.
Borderline
A somewhat skinny island stretched north-south, the middle of this map hosts a staggered road roughly in the shape of the letter "z." There are quite a few areas along the road that have many buildings in which you can take cover. When off the road, you’ll most likely find yourself among shrubbery or trees, so be careful when driving vehicles. The amount of vegetation, however, gives good cover for teams that would rather take an on-foot approach to whatever their goal may be.
Pietrowsky
Pietrowsky is a large map with a huge road going from a straight line towards the southwest region up to a large loop in the northeast. This is one map you will want to keep the vehicles off the roadway on. The roads can be spotted from quite a distance away, so if you decide to get a tracked or wheeled vehicle, it would be better to travel off-road because the hills on Pietrowsky aren’t as violent and steep as many of the other hills featured on maps in Soldner.
There are three areas that are densely populated with buildings, all of which occur along the long road. These areas should see plenty of action, so be wary as you approach them. Equip a short-ranged rifle to dispatch enemies and have a comrade bring along some sort of anti-vehicle weapon because there will be vehicles rolling around these areas.
Using a helicopter to survey the area is a good idea on Pietrowsky. The somewhat level landscape allows for helicopter pilots to fly around close to the ground without having to worry about hitting trees. Your helicopter scouts can let you know what the enemy team is up to so your team can load themselves out accordingly.
Deep Forest
A nice change-up from the usual larger maps featured in Soldner, Deep Forest is an incredibly small map that features a looping road and, well, deep forestry. You’ll find trees everywhere, obviously, so use them to your advantage. Stick to the densely wooded areas and be sure to use Soldner’s in-depth UCS (Unit Customization System) to provide your soldier with enough camouflage to blend in with the massive trees.
Deep Forest is notable because it has no vehicles available on it whatsoever. So there won’t be any sweating about what measures to take to stop an enemy vehicular armada here; just get a scoped rifle and be ready to run. If you’re not prone, you should be running. Walking or standing in this map will get you a nice bullet between the eyes.
There are small valleys littered around the middle area, so if you ever suspect that enemies are hiding in one of these locations, toss a grenade in there. A frag grenade only costs 280, so if you don’t hit anything at least you’ll be scaring the other team. Another strategy is to use flashbangs. Since everyone will be running around on foot looking through scopes, a blinding flash will disorientate them and give you enough time to cross a dangerous zone.
Swamp
The name of the map doesn’t lie--Swamp features one long road stretching north-south in the middle of a marsh. There are hardly any hills of any kind; the landscape is very flat with forests of dead trees providing most of the usable cover in Swamp.
Swamp is a showcase map for displaying Soldner’s Advanced Destruction System. Purchase a tank and stay on the road. If you see an enemy’s vehicle headed in your direction, just tear up the road with a powerful weapon. With the marshes around, water will fill up the hole you made in the ground and if you make the moat large enough, the tank will plow straight into the ditch and explode because of its inability to pass through water. Using the ADS, you can pretty much make a ditch large enough to make it an exercise in patience to take a vehicle north-south or vice-versa.
The best advice is to not be predictable. Don’t take your forces head-on to your objective. The nice flat terrain gives great opportunity for attacks via the flank. Use diversionary forces and suicide attacks along an opposite vector to keep your opponent guessing.
Cold Winter
An interestingly designed map, while Cold Winter may look large from its layout, this is deceiving. It actually plays fairly fast, at least until you destroy one of the bridges here; things slow down a bit after that.
The design of the map actually makes it so there are two separate land entities conjoined by three separate bridges on the eastern, western and middle areas over the water. The lone roadway makes a bit of an "m" design and goes to every main area that Cold Winter has to offer. You are able to get to the middle bottom area from the western and eastern sides, but the terrain is very bumpy, so be prepared for some rough driving if you are taking a tracked or wheeled vehicle.
Take out all three of the bridges, however, and you leave yourself with no way to take a vehicle from either land mass to the other. This makes things interesting. In any gametype, taking out the bridges can be a viable strategy, but watch out for air support. If you do decide to take out the bridges be prepared to be peppered with fire from the air. Get some anti-air weaponry and you’ll have the other team pinned down.
Winterbase
Nothing more than a tiny military base in a snowy region of Siberia, Winterbase can not be recommended for anything other than testing weapons or goofing around. Granted, Deathmatch or Team Deathmatch could be fun on Winterbase, due to the number of buildings, but for gametypes like Extraction, Conquest or Bomb Run, there’s no way it can be played seriously. If you do find yourself playing in Winterbase, though, take a look at the basketball court or the humorous signs posted around the base for a chuckle.
Riverside
A very popular map for the most popular gametype online, Conquest, Riverside is a wonderful map that shows off the different tactics and terrain that Soldner has to offer.
First, remember that most of the middle of the area surrounded by the winding river is quite high in elevation. With the high elevation, there are quite a few areas that have roadways take a sharp turn only to be left with an extreme drop-off. Be a cautious driver! It’s usually better to get a helicopter than a ground-based vehicle on Riverside. The roadways are the only safe way to travel (because of trees and the rising cliffs) and it takes awhile to climb some of the steep hills. With a helicopter, you can just sweep around the area or go over without a problem. On the western area of the map, there’s a base that features a bridge as its main connection to the land; if you destroy the bridge while your enemy controls the base, they’ll be left with few options for breaking out.
The high elevation in the middle along with lush vegetation in some areas turns Riverside into a sniper’s wonderland. Able to watch many different spawn locations as well as inform fellow teammates of where the opposition is headed, the sniper/recon player is a very valuable asset to any team.
Decide on a point of road to use as a choke area (preferably an area around the middle where the road gets narrow and hard to drive) and have your commander give your team an idea of how to handle incoming vehicles. Use a smoke grenade of any color or have the commander give a waypoint to show you where you plan on stopping the enemy force and have the sniper/recon soldier give your team an idea of what’s headed in that direction.
Serpentine
Serpentine consists of three main areas shaped in a triangle pattern, with roads leading to a smallish town at the center of the triangle itself. The mountainous terrain that surrounds the roads makes off-roading in vehicles very difficult, as does the dense forest in most sections of the map. Quick mobility will require you to grab a helicopter of some sort, or to stick to the main roads.
Unfortunately, the trees themselves can become a problem even if you’re on the road, as firefights between tanks will quickly topple the trees onto the paths, trapping combatants within the foliage and generally impeding the progress of land vehicles. If you get stuck in fallen trees, keep firing away at your target and attempt to kill them off before you die yourself. After the firefight is over, you can exit your vehicle and proceed on foot.
The small center village forms a choke point in the roads, which can let you set up some devastating ambushes if you position yourself correctly. A single soldier with an M202A2 MRL will be able to destroy any tanks or vehicles that pass through the area; try hiding inside or between the buildings here and listening for the approach of vehicles. You can also try the same thing with remote-detonated bombs; it’s very difficult to get past this village without traveling by road, so this is one location where infantrymen can get a foot up on soldiers in armor
Plattenbau
Plattenbau features a huge cascading bluff at the top of the map. A road makes a long oval circle around the map, and the only way to go up the huge cliff to the top area is by following it. This gives whoever controls the top area almost complete control over anyone who remains below. With the higher ground, the team controlling the northern area can easily see what the other team is up to and find measures to stop it. Sniping is especially easy from the higher elevation. Since there aren’t any flying vehicles, it’s difficult for the lower team to penetrate to the top of the bluff.
In a popular gametype like Conquest, make it a point to take all the top bases. If the other team wants the lower bases towards the southern beach, let them take them. You’ll be the one laughing as you watch their futile attempts to get up one of the two ways to the northern bluff area (by roadway, as stated before, to the west and east).
Armybase
Armybase is almost exactly like Winterbase…except without all that winter. They share almost the exact same building layout, have the same buildings and even the same basketball court! Once again, just like Winterbase, this map is far too small for an effective game of Conquest or anything with more than four players. Unless you feel like testing out the Pancor Jackhammer, messing around with a few friends or partaking in the various little training areas inside Armybase, this map is far too small to play any gametype on.
Villariva vs. Villabajo
The best way to describe Villariva vs. Villabajo is to explain that it has a road going from east to west with perpendicular roads going north to south on either end.. On these end roads you’ll find clusters of buildings. The main road, however, possesses no buildings, and mostly features trees and other vegetation. Most of the map is flat, but the middle of the map features a raised area, and there’s a cliff to the south.
The large size of this map requires the use of vehicles for transporting fellow soldiers. If you expect to go to your destination on foot, be prepared for a long run. The most effective way would be to use a transport helicopter or land-based vehicle to keep forces together as well as get them out to the main fields of battle. Splitting up your force is disastrous and the weakness of team communication can be a huge difference-maker on Villariva vs. Villabajo.
Perch a sniper or two along the southern cliff or near the middle and make sure they let the commander and the rest of the team know what’s happening. Invest in a rifle with a scope and be prepared for long-range fire mixed with powerful vehicles in this large map.
Equipment
(Name / Country of Origin / Price)
Country of Origin Key:
C = China
USA = United States of America
UDSSR = Russia
GER = Germany
IL = Israel
BE = Belgium
AT = Austria
FR = France
GB = Great Britain
IT = Italy
SP = Spain
JP = Japan
KR = South Korea
Pistols
Pistols fit into your 2-key slot when you’re on foot. You’ll almost never use a pistol, though, unless you’re packing a sniper rifle and notice someone closing in on your position.
The only really notable pistol here is the Freedom Arms Model 83, which incorporates a true scope that lets you snipe over very short distances. If you manage to infiltrate an enemy base, you can hide in one of the buildings and use this to kill off enemies as they stand in front of equipment boxes, switching to your rifle when you hear them coming to get you. Cheap, but effective!
Desert Eagle / IL / 700
Five-seveN / BE / 350
Freedom Arms Model 83 / USA / 1400
Glock 18 / AT / 750
HK Mark 23 / GER / 400
HK Mark 23 Silenced / GER / 400
M1911A1 / USA / 300
QSZ-92 / C / 350
Rifles
Rifles fit into your 3-key slot while you’re on foot. Most of these are either automatic rifles, which are useful for close encounters of the violent kind, or sniper rifles, which most people prefer to use when they’re not in a vehicle. There are also a few oddball weapons, like the Jackhammer automatic shotgun.
Most foot soldiers will want to pick up a scoped rifle or a sniper rifle. There are quite a few models of sniper rifle, but you don’t need anything too elaborate. Early in a round, a cheap model like the SVD or SV-98 will suit you fine; when you rack up the big bucks, you can try something a bit more expensive.
The HK G11 has both a scope and the ability to squeeze off a quick burst which makes it a nice choice if you expect to be picking people off from a long distance and fighting up-close as well.
The P90 is the way to go if you want to dispatch enemies who are in very short range. The 50-round clip allows you to pump a large amount of bullets into your target in a very short time. It also includes a scope which isn’t too advanced, but allows enough of a zoom to see a little further than the naked eye can.
AK-47 / UDSSR / 1600
AK-74 / UDSSR / 2100
AKS-74U / UDSSR / 1800
AWM (Arctic Warfare Magnum) / GB / 5000
FAMAS / FR / 2300
Galil ARM / IL / 1750
Hecate II / FR / 6000
HK 53A3 / GER / 1800
HK G11 / GER / 3000
HK G36 / GER / 3400
HK G36C / GER / 2600
HK G3A3 / GER / 1800
HK MP5 SD6 / GER / 800
HK MP5-N / GER / 800
HK PSG1 / GER / 4500
HK UMP / GER / 1100
L85A2 / GB / 3500
M249 SAW (Squad Automatic Weapon) / BE / 6000
M4 Carbine / USA / 3100
M4 Carbine/M203 Grenade / USA / 4200
M60 E-3 / USA / 5000
M82A1 ‘Light Fifty’ / USA / 6500
MG 3 / GER / 5500
MGL-MK1 (Milkor) / ZA / 3800
OICW / GER / 9200
P90 / BE / 2600
Pancor Jackhammer / USA / 1500
PKM / UDSSR / 5000
QBZ-95 / C / 2750
RG 6 / UDSSR / 3600
Saiga .308 Carbine / UDSSR / 3400
SPAS 15 / IT / 1100
Steyr AUG (Armee Universal Gewehr) / AT / 3500
Steyr TMP / USA / 750
SV-98 / UDSSR / 3600
SVD / UDSSR / 4500
USAS 12 / KR / 1200
VSS-Vintirez / UDSSR / 4000
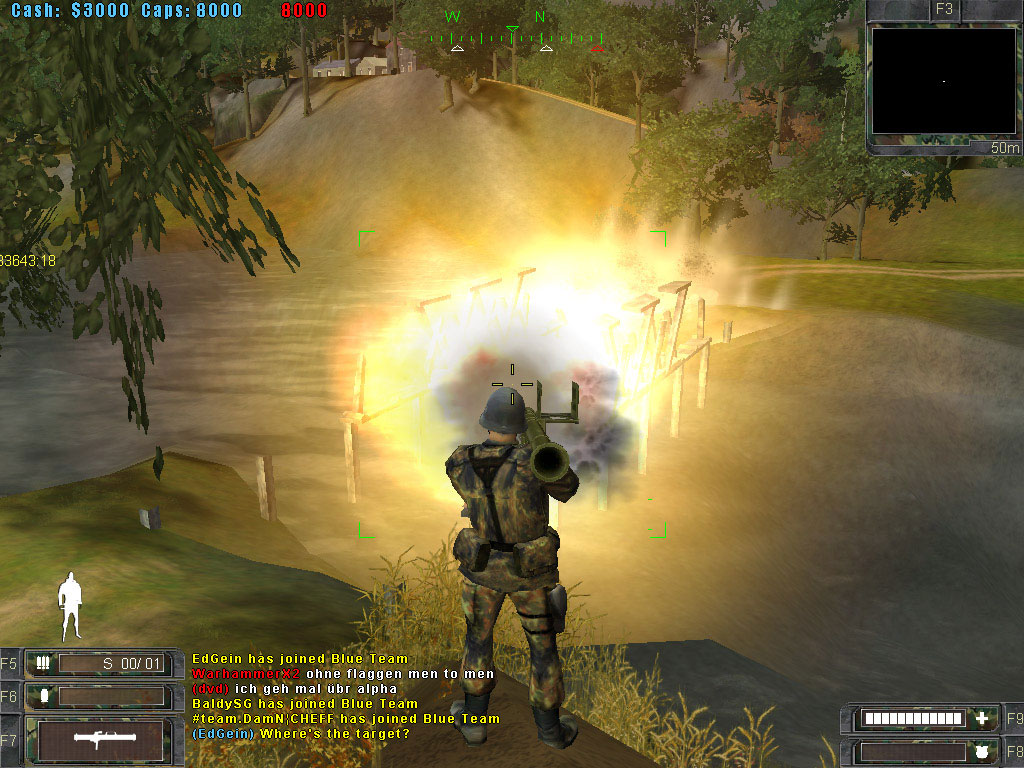
Launchers
Launchers are expensive backup weapons for your soldier that you’ll whip out when facing a threat you can’t deal with using a normal rifle. The bulk of these are anti-tank rifles, and they do their job well, so long as you’re close enough to your target or are good at adapting your aim to adjust for the dip in a rocket’s trajectory over long distances.
Of course, in most instances, it’s fairly silly to take a rocket launcher to a tank fight, since you’ll get mowed down by a tank’s machineguns before you have a chance to fire. Thus, it’s generally best to wait for a tank to approach you before unloading a rocket at it, preferably when you can aim at its rear side.
So far as tank launchers go, the M202A2 MRL is the clear leader in the field. Although it’s over 2,000 dollars more expensive than the next most costly launcher, its cost is justified due to the fact that it lets you fire four rockets without needing to reload; most other launchers will only give you one rocket at a time before requiring you to enter into a lengthy reloading animation. Eliminating the animation lets you unload a few rockets into a tank before it even knows you’re there, and that’s a very good thing.
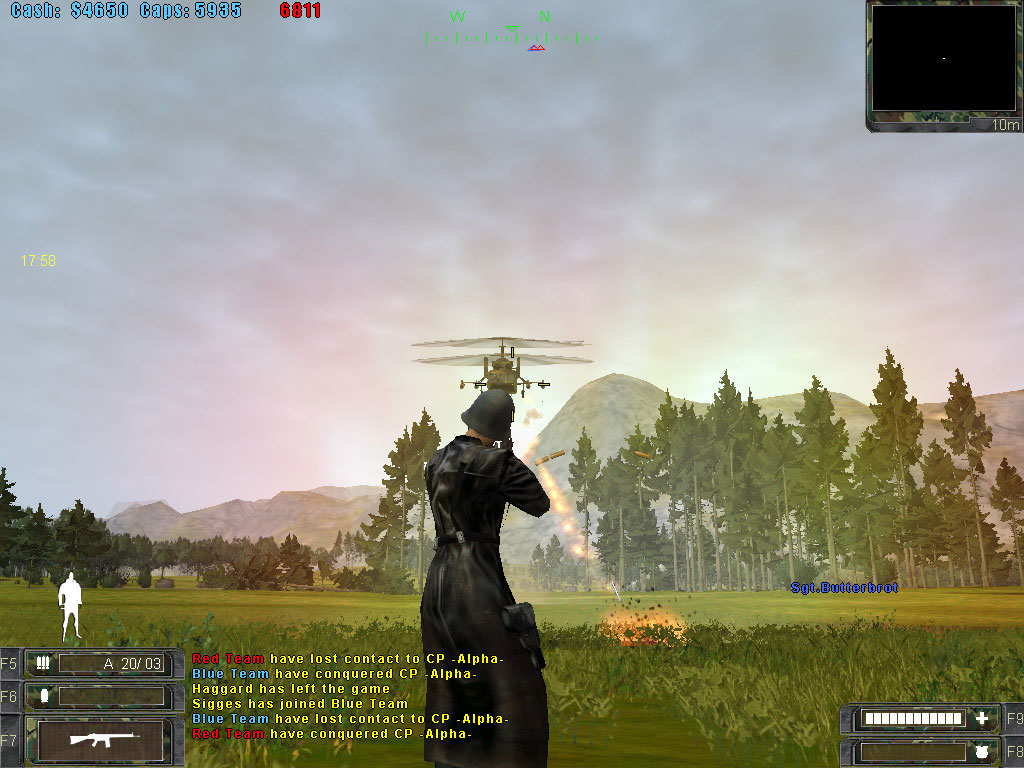
Besides the MRL, the Stinger is a good second choice, especially for snipers. The Stinger is primarily intended to take down helicopters, and it performs this task admirably; all you need to do is give it a few seconds to lock on, then fire away. Anyone can use a Stinger, but snipers who manage to overlook an enemy base will have the easiest time picking off helicopters as they make their first ascent.
CR90-CR (M3) Anti Bunker / SP / 3000
CR90-CR (M3) Anti Personnel / SP / 2500
CR90-CR (M3) Anti Tank / SP / 3500
FHJ-84 / C / 3000
LAW 80 / GB / 1500
M202A2 MRL / USA / 5800
Panzerfaust 3 / GER / 2200
Panzerfaust 3-T / GER / 2500
Panzerfaust3 BunkerFaust / GER / 1800
PF-89 / C / 2200
RPG 18 / UDSSR / 1800
RPG 29 / UDSSR / 2500
Stinger Weapon System / USA / 3000
Grenades
All the grenades are very cheap, so there’s no real reason not to pick one up whenever you find yourself at an equipment terminal. With the large nature of the maps in Soldner, purchasing a flashbang isn’t recommended unless you know you’ll be experiencing close-combat fighting. The different smoke grenades may seem gimmicky at first glance, but they’re actually pretty useful. Need some comrades to come to a certain area for any reason? Shout out a color and toss that corresponding color’s grenade to grab the attention of your teammates.
| Alhambra Frag Grenade / ALL / 280 | Powerful grenade |
| Flashbang / ALL / 120 | Temporarily blinds, disturbs hearing of those in the blast radius |
| Grenade / ALL / 200 | Creates an explosion |
| M15 Smoke WP / ALL / 100 | Emits smoke for cover |
| M18 Blue Smoke / ALL / 100 | Emits smoke for cover as well as strategic marker |
| M18 Green Smoke / ALL / 100 | Emits smoke for cover as well as strategic marker |
| M18 Red Smoke / ALL / 100 | Emits smoke for cover as well as strategic marker |
| M18 Yellow Smoke / ALL / 100 | Emits smoke for cover as well as strategic marker |
| MK3A2 TNT / ALL / 220 | Causes a fierce explosion |
Equipment
The descriptions of the different types of equipment are straightforward enough to realize that if you know you’ll be taking the role of a sniper on your team, you should purchase a Sniper-Kit, if you want to be a commander, take the Commander-Kit, and so on.. For servers that have the day/night cycle on, grabbing a night-vision visor isn’t a bad decision, especially for a low price of 250. The infra-red visor, on the other hand, can be valuable at any time. It basically gives you the ability to see through trees and buildings to find heat-emitting objects. If you’re unsure of an enemy being behind a certain object, flip on your infra-red visor and check it out for yourself. You will be one step ahead of your enemy with this cheap investment.
Body armor is a requirement for all soldiers. It only costs 800, and it effectively gives you two full health bars, so it’s well worth the price, no matter what you intend to do in-game.
| BodyArmor / ALL / 800 | Provides additional life in the form of an armored vest |
| Bombing-Kit / ALL / 6400 | Contains many kinds of bombs as well as a bomb detector |
| Commander-Kit / ALL / 100 | Provides binoculars with laser distance meter and a PDA |
| Engineer-Toolkit / ALL / 800 | Repair vehicles, provide ammo, ammo station, defuse bombs |
| Medi-Kit / ALL / 800 | Ability to heal soldiers, create a first-aid station |
| Sniper-Kit / ALL / 1600 | Provides camouflage and quicker aiming |
| Visor_IR / ALL / 250 | Infra-red / to detect heat sources |
| Visor_NV / ALL / 250 | Night-vision / ability to see in the dark |
Vehicles--Wheeled
Incredibly important in the facet of transporting troops, a few wheeled vehicles stand out from the rest as great bargains and important mainstays in any army.
If the opposing force is making a lot of attacks via the air, it would be smart to purchase an Avenger. While soldiers do have the ability to purchase a Stinger launcher individually, those soldiers would be more efficient focusing on infantry rather than helicopters if your team has enough money to purchase an Avenger. Drive the Avenger alongside your forces in order to get rid of those pesky helicopters while allowing your forces to gain territory at the same time.
There are quite a few normal transport vehicles. The BTR-70, EQ2102, HEMMT Cargo and MedEvac are fine choices, but if your force has the funds, the best way to transport soldiers via the ground is by using a BTR-90. Featuring better weaponry than the BTR-70, not only does it transport a large amount of troops but it can scare the heck out of the opposing force with its machinegun fire. The driver can transport his troops near enemy territory and blanket the enemy with supporting fire while the transported soldiers scramble and gain position on the enemy team.
In terms of anti-tank weaponry, the BRDM-2ATGM is the way to go. Saving your individual soldiers some cash and valuable time from whipping out anti-tank launchers, the BRDM-2ATGM easily dispatches tanks and other vehicles.
| Avenger / USA / 16500 | Carries 8 Stinger missiles |
| BJ-212 / C / 1900 | Jeep / Seats 8 / 105 mm recoilless anti-tank gun |
| BRDM-1 / UDSSR / 3500 | Armored Reconnaissance |
| BRDM-2ATGM / UDSSR / 13500 | Anti-Tank |
| BTR-70 / UDSSR / 8500 | Transport / Armored Personnel Carrier |
| BTR-90 / UDSSR / 10500 | Transport / Armored Personnel Carrier (better weapons) |
| EQ2102 / C / 2800 | Transport / Troop Carrier Truck |
| GAZ-3937 / UDSSR / 3200 | ransport / "Russian Hummer" |
| GAZ-66 / UDSSR / 2400 | Transport |
| HEMMT Cargo / USA / 4000 | Transport |
| Hemmt Mobile Respawn / USA / 4300 | Transport |
| Humvee / USA / 5000 | High Mobility Multi-purpose Wheeled Vehicle (HMMWV) |
| Izh 2126 / UDSSR / 1000 | Normal Automobile |
| Lada / UDSSR / 900 | Normal Automobile |
| Landrover / GB / 2000 | Landrover |
| MedEvac / USA / 4500 | Transport |
| PCV Jeep / C / 1800 | Jeep |
| PCV Jeep MG / C / 4200 | Jeep with weaponry |
| Supply V / USA / 4500 | Transport |
| Tractor / USA / 700 | Tractor |
| Type 93 / C / 10000 | Carries 8 Stinger missiles |
| Ural-6301 / UDSSR / 3500 | Transports 20 soldiers + driver |
| WZ-551 / C / 9500 | Infantry Fighting Vehicle |
Vehicles--Tracked
Realize that if you’re going to take a tracked vehicle over a wheeled one, you’re going to be sacrificing speed for power. Therefore, make sure the team knows you’re purchasing a tracked vehicle and have them help defend you--tracked vehicles can easily be taken out by launchers if you get too close to enemy infantry. No tracked vehicle is cheap--therefore make sure to not waste your money by purchasing something like an immensely powerful M2A1 Bradley only to have it easily shot down by anti-tank fire from the other team. Keep the team close and make sure to have snipers pick off people targeting the tank.
Basically, the more expensive the tracked vehicle is, the more powerful it will be. The HDT-10P is a bit different from the rest included in this list because its primary use is transportation, rather than combat.
The Tunguska is the most powerful ground vehicle in the game. However, in the current form that Soldner is in, it’s hard to recommend such an expensive investment, costing 20000, because you’ll be throwing your money away. Just a simple Panzerfaust that costs a fraction of the prize can destroy any vehicle very quickly.
| BMD-2 / UDSSR / 9500 | Airborne Infantry Combat Vehicle |
| BMP-1 / UDSSR / 11500 | Fighting Vehicle |
| BMP-3 / UDSSR / 13500 | Fighting Vehicle (upgraded weaponry) |
| HDT-10P / UDSSR / 3500 | Transport / 100 soldiers |
| M1A2 Abrams / USA / 20000 | |
| M2 Bradley / USA / 9500 | |
| M2A1 Bradley / USA / 11900 | Enhanced version of cheaper Bradley--has 2 missiles |
| Merkava MK2 / IL / 20000 | |
| T-80 / UDSSR / 17000 | Tank |
| T-90 / UDSSR / 18000 | Tank |
| Tunguska / UDSSR / 20000 | Anti-Aircraft Artillery |
| Type 63 / C / 13500 | Light Tank |
| Type 85 / C / 15000 | Main Battle Tank |
| Type 89 / JP / 10500 | IFV (Infantry Fighting Vehicle) |
| Type 98 / C / 17500 | Main Battle Tank |
Helicopters
Using the skies to transport soldiers as well as take out enemy ground-based vehicles can be a solid tactic. The Mi-24 Hind is an extremely powerful helicopter with a strong gun, enough missiles to take out anything that comes after you and space for 10 other soldiers for transport. It has the same price tag as the Comanche, but it is superior in the fact it can transport more people and has more missiles.
Be sure to become experienced at piloting helicopters before you have the responsibility of transporting other soldiers in one; these things are tricky to fly and are prone to oversteering, so fly solo for a while until you get used to the controls. It does take a bit of time to become proficient at piloting helicopters, and the last thing you need is to slam into a forest while transporting a dozen teammates.
The V-22 Osprey is a neat vehicle that launches off like any normal helicopter, but turns its rotators forward to become a plane-like vehicle. Check it out, if only for the "oooh" factor.
AH-64D Apache Longbow / USA / 20000
AH-6G Littlebird / USA / 10000
AH-6G Littlebird MG / USA / 12000
CH-47 Chinook / USA / 7000
HA-29 Helix B / UDSSR / 10000
Ka-50 Hokum / UDSSR / 18000
KA-60 Kasatka / UDSSR / 9000
Mi-17 Hip / UDSSR / 9000
Mi-24 Hind / UDSSR / 20000
Mi-38 / UDSSR / 9000
RAH-66 Comanche / USA / 20000
UH-60 Black Hawk / USA / 7000
UH-60L Black Hawk / USA / 8000
UH-60M Black Hawk / USA / 7000
V-22 Osprey / USA / 8000
Z-9 / C / 12000
Z-9 (SA 360 Transport) / C / 7500
VTOLs
Vertical Take-off and Landing vehicles are jets that can, well, take off and land vertically. There are only two VTOLs in Soldner. If you spend the extra cash on the Harrier, you’ll see the difference in the ammo outlay; the Harrier has a few more missiles available.
The primary advantage of the VTOL over a normal jet is that you can take off without needing a runway. Whether this makes them better or worse than normal jets is up to you to decide; give them a whirl and see if you like them.
Harrier / USA / 13000
Yak-747 Freestyle / UDSSR / 12000
Jets
Of the 15 jets available, only the An-24 Coke, An-72/74 Coaler, C-130 Hercules and Y-7H don’t have any weapons available. Obviously, an easy way to remember this is by looking at the prices and realizing that these four jets cost less money than the rest.
Piloting a jet is very tricky. Be prepared to burn a lot of money as you go through crash-landing after crash-landing. Eventually you’ll get the hang of it and will be able to use jets with ease.
A-10 Thunderbolt / USA / 20000
An-24 Coke / UDSSR / 6500
An-72/74 Coaler / UDSSR / 7500
C-130 Hercules / USA / 7500
F-117A Nighthawk / USA / 20000
F-15C Eagle / USA / 21000
F-16C Fighting Falcon / USA / 16000
F-22 Raptor / USA / 20000
F/A-18 Hornet / USA / 18000
F1-Mitshubishi / JP / 12000
Fantan Q-5 / C / 10000
Mig-29 Fulcrum / UDSSR / 18000
Su-37 Flanker / UDSSR / 14000
Su-39 Frogfoot / UDSSR / 14000
Y-7H / C / 7000
Got a news tip or want to contact us directly? Email news@gamespot.com
Join the conversation