Perfect Dark Zero Walkthrough
Joanna Dark is back in action against the evil dataDyne corporation, and GameSpot's Walkthrough has a full walkthrough, as well as tips for weapons, singleplayer, and multiplayer.
Design: Randall Montanari & Collin Oguro
Although we've had to wait almost five and a half years, the followup to Perfect Dark, Rare's stellar FPS for the Nintendo 64, has finally arrived. Perfect Dark Zero is actually a prequel to Perfect Dark, but it still features the eponymous Joanna Dark, who's role in this game is initially as part of a father/daughter bounty hunting duo. While things start off relatively smooth for Jo and her dad, events quickly spiral out of control, and Joanna will have to travel all around the world to discover what precisely is going on.
Luckily for fans of the first game, or for new 360 owners in general, Perfect Dark Zero is simply an excellent game, with plenty of variety and a lengthy single-player campaign. In addition to a full walkthrough for the game, GameSpot's Game Guide to Perfect Dark Zero offers up tips for singleplayer, tips for multiplayer, and descriptions of all the many, many weapons. Enjoy!
Hints and Tips
General Tips
Holster That Sidearm!
One of the commands that you might not consider very useful at first is bound to the up direction on your d-pad. When you press this button, you'll put away any weapons that you're carrying, leaving only your mighty fists of fury to take on your enemies. Obviously enough, this isn't going to help you defeat enemies at long range, but the purpose here isn't really to become more powerful (although it is fun to hit people). Instead, what makes this useful is that you move much more rapidly when you put up your dukes than you do when you're lugging around a plasma rifle or sniper rifle. If you have to cover ground quickly and you know there aren't any enemies around, just holster your weapons and you should be able to get where you're going faster than you would otherwise. If you're shot while you're not holding any weapons, though, you'll be slowed for a few moments.
Another little-used mechanic in the game allows you to run up to enemies and press the right bumper button to strip them of their weapon, assuming that you have nothing in your hands. If you have room in your inventory, you'll steal their weapon and use it yourself; if you don't have room for it, it'll clatter to the floor. Most enemies that wield SMGs or better will have a pistol for backup if their weapon gets stolen, though, and you obviously have to be pretty close for this to work, so it's usually more flash than substance.
Armor and Headshots

The bulk of the enemies in Perfect Dark Zero possess some degree of body armor, which will protect them from most of your fire, at least until you shoot the armor off of them and can attack them directly. Most of the time, this isn't anything more than an inconvenience; armor comes off relatively quickly when you're firing an automatic weapon at your target, letting you swiftly attack the meat inside the shell.
As per usual, though, shooting someone in the head will usually bypass the armor problem, allowing you to do more damage in general, and extra damage if you manage to land a shot directly on the head. Most enemies possess only body armor, meaning that their heads are unprotected, so, if possible, try to aim for the head as often as possible, especially when enemies are unaware of your presence. Some enemies, however, do have helmets, and thus will be resistant to headshots. Helmets are usually pretty difficult to shoot off, so you'll just have to deal as much damage as you can to these foes to make them drop.
Multiplayer Tips
All we can say about Perfect Dark Zero multiplayer is that it's terrifically fun. There's a wide variety of gametypes to explore here, so even if you're not a fan of traditional deathmatch, you should find something to whet your appetite. This section is going to go too in-depth on each gametype; we're just going to give you a few pointers to get you started.
Explosivo!
Explosive weapons, such as frag grenades, the FAC, and the Superdragon, are especially valuable in multiplayer games, since they'll often kill people straight off if you place your shot correctly. They're actually decent in any gametype, but since most of the other gametypes are team-based, free-for-all killcount is one of the few gametypes where you can safely launch grenades at anyone you see or hear, safe in the knowledge that they're hostile to you. Whatever the gametype is, though, be very wary of areas that have an FAC or Superdragon spawn point, as unscrupulous players will often camp these areas and continually run over the weapons as they spawn to hog all of the grenade ammo.
Killcount
The objective of Killcount, whether it's free for all or team-based, is to kill as many of your opponents as possible. Success here is generally a mixture of pure skill and knowledge of the game; even if you're somewhat better than another player is, he or she will likely consistently beat you if they know where all of the best weapons are on the map. So, you shouldn't expect to hop online and become king of the hill right away; you'll need to play around with each of the maps and learn all the little caveats before you start winning matches.
Capture the Flag
The main thing to note here is that the player that grabs the enemy flag and attempts to run with it will be incapable of attacking while he or she moves. They can still perform a melee attack, but won't be able to defend themselves against a gang of enemies. Thus, as with any decent capture the flag game, you're going to need to attack the enemy base en masse in order to get the flag out of there and safely home. You don't necessarily need to have a huge number of people defending your own flag, if the defenders are able to set themselves up with explosive weapons, or defend the entrances with Laptop turrets or Multimine proximity mines.
Territorial Gains
This gametype is essentially a Day of Defeat clone, where you have to capture various flags on the map by standing near them and holding them. When you do so, your team will periodically get points, and the team with the most points at the end of a round wins.
There's not much to say here, save for the fact that the more aggressive team will usually win. This is really a gametype where personal sacrifice becomes the name of the game; you aren't really going to help your team win if you aren't in the thick of things, going for flags, and laying your life on the line to capture the next hotspot on the map. If you're more of a solo player, then you can feel free to go lone wolf and try to avoid the action to get to one of your opponent's rear flags and capture it. If you're not going for a flag or defending one of your own, though, you're only going to have a marginal impact on the game, so you might as well stick to killcount if racking up kills is your goal.
Eradication
Eradication is a clone of another popular Half-Life modification; in this case, it's Counterstrike that gets an homage. Like Counterstrike, Eradication can be mindlessly addictive, especially when your team is on a role, but it can also be frustrating when you die within 30 seconds of the start of a match and have to wait three minutes before you can play again.
Almost more than any other gametype, knowing the maps is fairly critical to playing Eradication. While the maps here aren't as predictable as they often are in Counterstrike (if only because we haven't been playing them for half a decade), they still have their hotspots and alleyways where you can be sure that enemies are going to be coming through 20 seconds after a round starts. Knowing which areas of the maps become slaughterhouses will help you avoid them, and knowing where enemy snipers usually set up shop will help you approach from an odd angle and take them out. Eradication is really all about practice, and buying equipment that you're comfortable using.
Onslaught
Onslaught is an interesting take on your usual team-based challenges. In Onslaught, one team is assigned to defend a section of the map. They're capable of buying weapons and armor, but cannot leave their defensive position, or they start to rapidly take damage. The other team is tasked with charging in and taking out the defenders, but they're unable to buy new weapons, which usually means that they're limited to pistols, at least until they manage to start killing defenders and taking their weapons. You'll flip between defending and attacking multiple times, and the team that can defend the longest before getting wiped out will win the round.
As a defender, you have to both protect yourself and ensure that you can kill anyone that comes your way. Depending on the size and type of the map that you're fighting on, explosive weapons, such as the Superdragon, will be mightily helpful, especially if you can hole up in a tight interior location and bounce your grenades off the walls. In the early rounds of a match, though, don't hesitate to bust out flash or frag grenades, since you'll know that your opponents are going to be poorly armed and will usually bunch up together to swarm your position. You can even make good use of something like the combat shield or Hawk Boomerang here, since your opponents are always going to be lightly armed and armored.
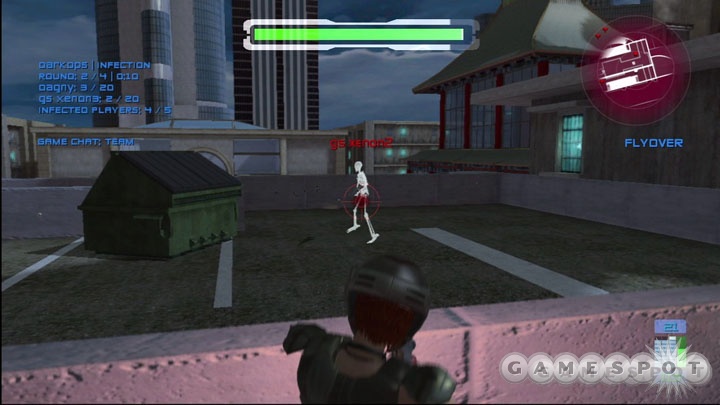
Infection
Infection is nominally a free-for-all game, but it winds up being more team-based. In it, a few of the players will start off the round in the infected state, where they show up as skeletons. The goal of the infected players is to kill all of the non-infected players as quickly as possible, while the non-infected players have to fight them off and attempt to survive until the end of the match. If an infected player kills a non-infected player, the non-infected players switches sides and becomes infected. This essentially makes this gametype reminiscent of a zombie film, where your best friends will eventually turn on you and attempt to tear the flesh from your bones, etc.
If you're infected, then all you really need to do is track down the non-infected players and kill them. Non-infected players can win by staying alive until the end of the match, in which case your kill count will be used as a tiebreaker. In reality, though, this kind of encourages the non-infected players to find a quiet corner of the map and just hole themselves up and hide. If enough of the non-infected players get the same idea, though, you can wind up with interesting situations, such as when all of the survivors hide in a building and attempt to defend all of the entrances from the infected hordes. Since the infected players respawn relatively quickly, it's going to be best to just stay out of sight whenever possible.
Sabotage
In Sabotage, your goal is to either defend or attack a number of property points on the map. Property appears on your radar as immobile enemies, and there are usually plenty of them, too. In order to win as an attacker, you have to assault the enemy positions and attack their property while keeping an eye out for enemy defenders, who will indeed take umbrage at your attacks and try to kill you.
There are usually going to be two kinds of targets for you to attack: soft targets, such as crates and other small objects, and hard targets, which are going to be bigger and tougher to destroy, but also worth more cash. If you intend to go after small targets, then you'll want a weapon that can fire quickly at multiple targets, such as a Superdragon or a Shotgun. The bigger targets can be taken down with normal weapons, but it takes quite a bit of firing; you're better off bringing a demo kit up to them and doing the minigame to blow them up directly. Of course, you'll be defenseless while you attempt to lay your trap, and will thus be an easy kill for any enemies that pass by.
Weapons
Oh me, oh my, there are a lot of weapons in Perfect Dark Zero. This chapter will describe their functions and give you a sense of their overall usefulness.
Note that you only have a limited amount of inventory space for weapons. You have four slots in your inventory for carrying weapons, but many weapons will take up more than one slot. You can thus carry four pistols, if you wish, since they take up one slot each, or you can carry one pistol and one M60 machine gun, since it takes up three slots. If you find a new weapon that you want to pick up, but don't have enough inventory space for the one you're looking for, you'll have to drop a weapon in order to pick it up. Usually this means dropping the weapon that you currently have equipped, but occasionally you'll drop another weapon, or two weapons, depending on the size of the weapon you're attempting to pick up.
Note also that many weapons have two uses, and some even have three. The secondary function on a weapon can be accessed by pressing the Right Bumper button, while the tertiary functions can be activated by holding down the Right Bumper button and clicking the Left Trigger.
Pistols
Pistols take up one slot in your inventory bar, and all of them can be dual-wielded, either with another pistol of the same type (you can hold different types of pistols, of course, but you can't dual wield two pistols of different types), or with grenades or a combat shield.
P9P
Damage: 2
Accuracy: 2
Vs. Armor: 2
Range: 2
Secondary Function: Silencer
Tertiary Function: Flashlight
The P9P is the first weapon you're going to find yourself handling in PD0, and it'll serve you well for the first few missions of the game. It has a decent scope, and can be equipped with a silencer, making it a great weapon for nabbing stealthy headshots on moderately distant targets. Its small clip size of a mere nine rounds, though, will limit its usefulness in firefights, where you'll spend just as much time reloading as you do firing.
Falcon
Damage: 1
Accuracy: 3
Vs. Armor: 2
Range: 2
Secondary Function: Firecracker
For close-range encounters, the Falcon is likely to be the pistol that most players are going to be most comfortable wielding. It's not an offensive powerhouse, but unlike the Magnum or the P9P, it has a large clip, allowing you to fire for a good length of time before you need to reload.
The secondary function here will eject a clip and throw it to the ground, which will then spit out bullets in all directions. You won't get a huge number of kills by doing this, but it can prove to be a useful diversion, at least in theory.
DY357 Magnum
Damage: 3
Accuracy: 1
Vs. Armor: 2
Range: 2
Secondary Function: Delayed diversion shot
The Magnum is the big gun of the pistol bunch, capable of dealing more damage than any other pistol...but that power comes at a cost. The Magnum is therefore not going to be very accurate, nor very fast. There's a lengthy delay between shots, the reload animation is also going to be somewhat long, you can only hold six rounds, and Magnum ammo is different than that of other pistols, meaning that you can only get more ammo from dropped Magnums. In single-player, you can overlook this somewhat, especially when dual-wielding Magnums, as you'll be able to kill most enemies with a pair of bullets, assuming you're really close to them. In multiplayer, though, you'd better be a master of getting headshots if you want to put the Magnum to full use, because it won't be much good to you otherwise.
The secondary function here fires a silenced round (which begs the question of how this is even possible for a non-silenced weapon). This deals next to no damage, but a split second after the shot lands, it'll fire off at full volume, drawing the attention of nearby enemies. This can set up some interesting situations in multiplayer (although, again, the likelihood that you're going to be using this weapon in multiplayer is pretty slim), but isn't all that useful in singleplayer, unless you can convince an enemy to look away from you long enough to bash him in the back of the head.
MAGSEC 4
Damage: 2
Accuracy: 1
Vs. Armor: 2
Range: 3
Secondary Function: Ricochet shot

The MAGSEC 4, hereafter called the Mag, is a counterpart weapon to the P9P; like that weapon, it has a nine-round clip and a scope, but doesn't possess a silencer. Instead, its secondary function allows it to fire bullets that ricochet off of walls, thus allowing you to fire around corners. The cover mechanic makes this somewhat less impressive than it sounds, at least in single-player, but it can still be useful at times, especially when dual-wielding, since you'll fire off all the rounds in one of your pistols, then fire off the rounds from the other pistol while the first is reloading. Still, the bulk of your pistol work later in the game will mostly consist of long-range sniping, and the Magsec can do that relatively well in the absence of a P9P.
Psychosis Gun
Damage: 1
Accuracy: 2
Vs. Armor: 3
Range: 2
Secondary Function: Psychosis
Your goofball pistol here is the Psychosis Gun, which is primarily intended to be a nonlethal tranquilizer-dart-esque weapon, and as such isn't going to be good for ripping through enemies. It's pretty good for a laugh, though, since the secondary fire will cause your target to turn on his friends, making for some pretty interesting scenes of commotion. Unfortunately this uses up an entire cartridge of six rounds, forcing you to reload after each shot, and it's a pretty lengthy reload animation. It's still an amusing weapon, though, albeit not one that's going to win you many fights on its own.
Sub-Machine Guns
RCP-90
Damage: 2
Accuracy: 1
Vs. Armor: 2
Range: 2
Secondary Function: Threat Detector overlay
Tertiary Function: Electronics reprogramming
The RCP-90 is going to be one of the centerpieces of your armory when you finally stumble across it late in the single-player campaign. It feels a lot more powerful than the other SMGs do, thanks to its large clip and armor-shredding rate of fire, has a scope for distance work, and also has a couple of handy extras. The Threat Detector overlays your field of vision with a sepia-toned look. This makes it harder to distinguish between environmental features, but it will outline enemies in red and allies in green, making it much easier to spot enemies that are hiding in a corner or to tell between friend and foe at a distance. Note that it does also significantly degrade your aim, though.
The tertiary mode here enables you to reprogram electronic devices, such as mines, turrets, and cameras. Doing so doesn't require you to use the normal RB+LT tertiary function button combo; just equip the RCP-90, point it at a valid target, and the Reprogram prompt will appear. Holding down the A button for a few seconds after this will let you convert the electronics that you're pointing at to your side; turrets will fire on your enemies instead of you, cameras won't recognize you as an enemy, etc. Pretty handy, all told, although there are relatively few electronic threats during most of the single-player game.
UGL Liberator
Damage: 2
Accuracy: 1
Vs. Armor: 1
Range: 2
Secondary Function: Makeshift mine
The UGL is the most common SMG during the early portions of the game, where it'll pop up relatively often in the hands of low-level goons. It's a weapon that's seemingly made to feel cheap, in that it doesn’t do a lot of damage, and is terribly inaccurate at anything beyond medium range. It can be dual-wielded, though, which will let you put quite a beatdown on anyone dumb enough to take you on head to head.
The secondary fire here can actually be pretty handy. When used, you'll discard the weapon and throw it to the ground, where it'll turn into a proximity mine. If you're almost out of ammo, or spot another weapon that you'd prefer over the UGL, feel free to drop it as a mine near a doorway and try to lure enemies towards you so that they hit the mine.
DW-P5
Damage: 2
Accuracy: 2
Vs. Armor: 2
Range: 2
Secondary Function: Silencer
Tertiary Function: Flashlight
The DW-P5 will be found fairly early on in the game, and will be a handy part of your arsenal for the remainder of the game. It's essentially an SMG version of the P9P, in that it has both normal and silenced firing modes, as well as a scope. If you don't have a sniper rifle available to you, but want to take down a distant enemy, then the DW-P5 is probably going to be your best friend. Just keep in mind that the silenced shots are actually much more accurate than the unsilenced rounds are, although they do do less damage.
CMP 150
Damage: 1
Accuracy: 3
Vs. Armor: 2
Range: 2
Secondary Function: Hologram
The CMP doesn't appear overmuch in the single-player campaign of Perfect Dark Zero; it seems to be favored by dataDyne employees and guards, but relatively few other types of enemies will use it. Although it packs a good punch, mostly thanks to its high rate of fire, it chews through a clip fairly quickly. Like the UGL, it can be dual-wielded.
The hologram secondary fire here is mostly just fun to play around with, albeit not necessarily 100% effective against either humans or computer enemies. It's difficult to explain until you've seen it in a multiplayer match, but it's fairly easy to tell which character is the human and which is the hologram, making this more of a neat trick than anything that'll really win you a fight.
Heavy Weapons
All heavy weapons require three inventory slots, and will greatly slow you down while you carry them.
M60
Damage: 2
Accuracy: 1
Vs. Armor: 2
Range: 2
Secondary Function: Caltrops
The M60 is one of the biggest and baddest weapons you can find in PD0. If you've played many first-person games, then you'll probably be familiar with the basics here: big, fires fast, slow to reload, really inaccurate at medium range. You can fire in bursts to help land your shots a little better; firing on full-auto will create such a spread that you won't be hitting anything except for the wall. Still, the M60 can fire for quite a while before it has to reload (although the reload time is substantial), making it a great way to mow down crowds of enemies at close range.
The caltrop effect is neat, albeit not a game breaker. Enemies that run over a caltrop won't be wounded, but they will be slowed down for a few seconds, making them easier to perforate.
Plasma Rifle
Damage: 1
Accuracy: 3
Vs. Armor: 2
Range: 3
Secondary Function: Cloak
We're frankly mystified by the plasma rifle's ranking for damage; in our experience, every direct hit we landed on an enemy in the singleplayer game (on Special Agent difficulty) was an instant kill. So you should probably consider this baby to have a three ranking for damage.
The plasma rifle is a pretty powerful weapon, no matter which way you look at it. Unlike most weapons, the rounds it fires create splash damage, allowing them to harm multiple enemies with each shot. It has unlimited ammunition, thanks to a battery that recharges when you're not firing. You should be able to fire off as many shots as you want without running out of battery juice, so long as you give it time to recharge after you let a few go. The main drawback here is that the bolts are slow-moving, so they're easy for enemies to dodge or move out of the path of if they happen to be mobile. If you're firing at stationary enemies, though, you're going to rock their world. Note also that the bolts are fairly large, which can cause problems when you, say, try to shoot down while standing up against a railing. Where bullets might have a clear path, you might find your plasma bolts hitting obstacles and blowing up in your face.
The secondary function here is a cloak, a la invisibility in Halo 2. It drains your batteries constantly when it's in use. You can stand still with a relatively minor drain, but when you move, you'll notice your battery drain quite rapidly. This isn't pure invisibility, either; it's just a light-bending function that will still leave you somewhat detectable, especially in multiplayer when you move. The single-player opponents will be more susceptible to your cloaking, though, especially if you cloak while you're out of their sight.
Rocket Launcher
Damage: 3
Accuracy: 2
Vs. Armor: 2
Range: 2
Secondary Function: Fly-by-rail rockets
Well, it's a rocket launcher. This, again, is fairly similar to the rocket launcher from Halo 2, at least in the way it feels. Each rocket launcher can only hold four rounds of ammunition, but when these rounds hit, they're going to kill anything that happens to be in the area of effect. There's not much more that needs to be said about that.
The secondary fire here will allow you to control the path of the rockets, although the controls are a bit shaky, and you won't be able to steer it indefinitely, as the rocket will run out of fuel and self-destruct.
Close Combat
The Viblade takes one inventory slot, while the Shotgun and Combat Shield require two each.
Viblade
Damage: 3
Accuracy: -
Vs. Armor: 2
Range: -
Secondary Function: Deflection Shield
The token melee-only weapon, the Viblade isn't going to rival Halo 2's plasma sword as the primary source of deathmatch killing sprees, but it should be interesting to see what online players make of it. As the name implies, this is a sword, capable of doing severe damage to enemies when they actually get in range of you. Of course, getting close to an enemy is pretty tough, so the secondary fire here will let you erect a temporary energy shield in front of your character which will deflect bullets right back at your attackers.
In the single-player campaign, most of your enemies will spot you coming from a ways away, making this weapon of limited value, although still entertaining.
Def-12 Shotgun
Damage: 3
Accuracy: 2
Vs. Armor: 2
Range: 1
Secondary Function: Radar Sweep
Tertiary Function: Radar Mimic
The DEF-12 Shotgun is going to be a handy weapon to have when you're fighting indoors. Although it only holds six rounds in its magazine, you really only need one to kill someone with, assuming they're fairly close to you. What's also handy is that the spread of the weapon allows it to hit multiple enemies at once, which will usually cause all of them to enter pain animations and thus stop attacking momentarily. Obviously enough, though, you don't want to be using this weapon against enemies at anything other than close range, because you simply won't hit anything.
The secondary and tertiary functions are primarily intended for multiplayer play. The radar sweep will highlight all nearby enemies, even those that haven't fired a weapon recently, while the radar mimic will cause you to appear as a friend on enemy radars. Both of these functions have their uses, but are only temporary; the battery limits the time that they'll remain active, although it does recharge quickly after it drains.
Combat Shield
Damage: -
Accuracy: -
Vs. Armor: -
Range: -
The combat shield isn't a weapon, as such; instead, it can be dual-wielded with another pistol or SMG (or just carried around by itself). While deployed, it'll grant you limited protection from bullets, depending on the direction from which they come. If they hit the shield, they'll impact it and the glass will crack, saving you a bit of damage, but eventually the glass will be destroyed and most of your protection will be rendered moot.
Assault Rifles
Assault rifles, like SMGs, take up two slots in your inventory, but use different ammo than do SMGs.
Laptop
Damage: 1
Accuracy: 3
Vs. Armor: 3
Range: 2
Secondary Function: Turret
While the Laptop may seem rather powerful at first glance, mostly due to its rate of fire, it isn't quite as good as it seems. It runs through ammo rather quickly, and doesn't do as much damage as other assault rifles will. It can, however, pop off armor like no one's business, it's relatively accurate, and can be turned into a turret with the secondary function button. These turrets are sometimes difficult to place so that they actually shoot at the targets you want them to hit, and they will self-destruct after a set amount of firing, but they can be useful (or annoying, depending on your experience) nonetheless.
Note that dropping a Laptop into a turret will remove it from your inventory. If you get close to it, though, you'll be able to pick it up again.
KSI-74
Damage: 3
Accuracy: 1
Vs. Armor: 2
Range: 2
Secondary Function: Bayonet

The KSI-74 is essentially an updated version of an AK-47, right down to the curvate ammo clip. There's nothing particularly extraordinary about the KSI; it's fairly inaccurate except when fired in short bursts. It does have a bayonet which can be fired for silent kills, but you'll usually need to get a headshot for this to actually kill your target. It does seem to do more damage than other weapons when used for melee attacks, however, or at least it does when it has a bayonet equipped to it; firing the bayonet will detach it from the weapon, and you'll be bayonetless until you pick up another.
Superdragon
Damage: 2
Accuracy: 2
Vs. Armor: 2
Range: 3
Secondary Function: Bounce Grenades
Tertiary Function: Nightvision
The Superdragon is one of the most powerful weapons in the game, in our opinion. Although its clip is fairly small, at only 20 rounds, it can pop off armor and kill enemies in just a few bullets. It possesses a comfortably powerful scope, can engage automatic fire while zoomed, and - best of all - has a grenade launcher with numerous grenades in its clips.
When you pick up a fresh Superdragon, you're going to have a total of 12 grenades, separated out into clips of six. When you press your alternate attack button, you'll lob a grenade that will detonate on contact with an enemy, or with the ground. Most of the time, though, they'll bounce off of the walls if they happen to hit one, which can make it frustrating to hit enemies that are slightly above you. There's very little delay between grenade shots, though, so feel free to fire another one immediately after the first, if necessary.
Note that running over a Superdragon weapon when you already have one won't always refill your grenades. If you're running low on grenades and see another Superdragon lying on the street, it's usually best to drop your current weapon and pick up the fresh one; this should top out your grenade supply.
FAC-16
Damage: 2
Accuracy: 2
Vs. Armor: 2
Range: 2
Secondary Function: Grenade Launcher
Tertiary Function: Silencer
It's difficult to draw comparisons between the FAC-16 and the Superdragon, but it's almost unavoidable to do so, since they are rather similar. Both have grenade launchers and are relatively powerful in combat. The main differences here are that the FAC reverts to semi-automatic firing when zoomed (a la the DW-P5), and that its grenade launcher requires a much lengthier delay between firing each grenade, on the order of a few seconds, making it important that you land your grenades accurately. You can't cancel the grenade reloading animation by firing, either, so you'll be stuck reloading until the next grenade is queued up.
Thrown
Thrown weapons take up one inventory slot.
Hawk Boomerang
Damage: 1
Accuracy: 3
Vs. Armor: 2
Range: 2
Secondary Function: Shrapnel Shield
The Hawk Boomerang is another one of those interesting weapons that doesn't work out so well when you go to actually use it. It's basically like a high-tech Krull, in that you can fling it at your enemies and it'll slice them up but good. The problem is actually getting it to hit them. Although you can lock onto enemies by moving your crosshairs over them while holding the left trigger, this doesn't actually guarantee a hit, especially if they're above or below you. The boomerang doesn't home in on them; it simply attempts to ricochet towards their position. What's more, you're completely defenseless while the boomerang is in the air, and it usually takes quite a while for it to return to you, so you don't want to fire this unless you’re relatively clear of enemy fire.
Multimine
Damage: 3
Accuracy: 1
Vs. Armor: 2
Range: 2
Secondary function: Triggered detonation
A decent weapon in their own right, multimines are going to be tough to find in the singleplayer game; we only noticed one enemy packing them through an entire playthrough on Secret Agent mode. (The soldier in Mission Ten, near the bridges that pass over the water.) They're probably of more use in multiplayer, anyway; although they only give you five rounds to use, laying them down all over the place will certainly cause some mayhem, as their primary fire acts as a proximity mine that will kill or severely damage anyone caught nearby when they detonate. The secondary fire will let you lay down mines and trigger them via remote control when someone passes by your favorite camping spot.
Frag Grenade
Damage: 3
Accuracy: 3
Vs. Armor: 2
Range: 3
Frag grenades have a timer that's set to four seconds. If you hold down the fire button before throwing it, you can "cook" the grenade and lessen the timer. Grenades can't explode in your hand, though, luckily; if the timer goes down to zero, the grenade will detonate on impact with anything it hits. In single-player, though, it's usually best to cook the grenade down to one or two seconds, then bounce it around a wall to hit enemies around the corner from you.
Flash Grenade
Damage: -
Accuracy: 3
Vs. Armor: -
Range: 3
Now these have the potentially to be really annoying, especially in multiplayer. As you'll find in the single-player game, flash grenades blind you temporarily when they go off while you're facing them; you'll be unable to see anything for a few seconds, then will regain some of your sight back, and only after six or seven seconds will you be able to see everything as you normally could. Since these can be dual-wielded with pistols and some SMGs, it'll be interesting to see how many players attempt to take advantage of flash grenades online, even though they aren't technically capable of dealing big damage themselves.
Sniper Rifles
Sniper rifles each take up three slots, and slow you dramatically when wielded.
Jackal
Damage: 3
Accuracy: 1
Vs. Armor: 2
Range: 2
Secondary Function: EMP Marker
If you land a shot with the Jackal, your target should die pretty much immediately. This is one of the most powerful weapons in the game, as you might expect from the sole true sniper rifle, although it does feature a lengthy delay between each shot. The secondary feature here is exclusive to multiplayer, as far as we can tell; it'll scramble your target's radar for a short while, and also highlight their position on the radar of all players near the target.
Shockwave
Damage: 2
Accuracy: 2
Vs. Armor: 2
Range: 3
Secondary Function: X-ray
The Shockwave is the counterpart to the Jackal. Although it doesn't do quite as much damage than the Jackal, it can fire a bit more rapidly. The drawback here is that the tracer is much larger and will give away your position more readily; the weapon is also prone to overheating (like the Covenant Beam Rifle from Halo 2) after multiple shots, and will force a cooldown period before you can fire again.
The x-ray specs feature here has the potential to be somewhat game-breaking in multiplayer, as it'll let you see enemies through walls. Try it for yourself and see what happens; you can use it to communicate enemy positions to your friends, or just line up a headshot on someone before they come around the corner to fight you.
Walkthrough
Note that this walkthrough is intended to get you through the game on Secret Agent difficulty, which should be quite challenging, even for FPS veterans. The Perfect Dark difficulty is available when the game begins, and features tougher enemies and different objectives than the Secret Agent difficulty does. The Dark Agent difficulty is available only after you beat the game on Perfect Agent, and is for hardcore players only!
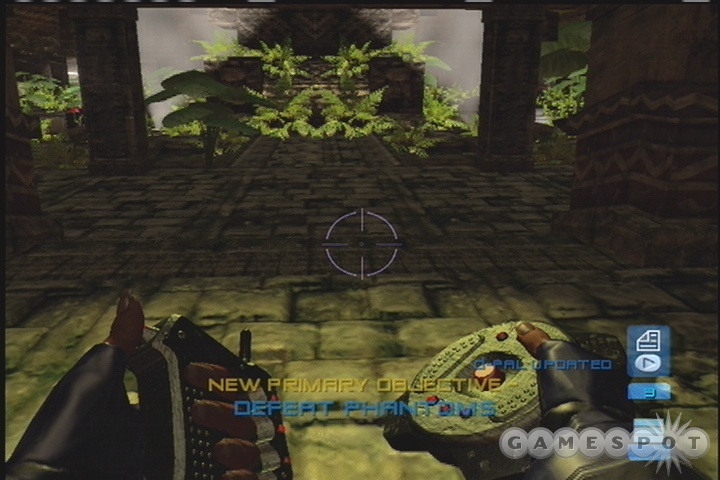
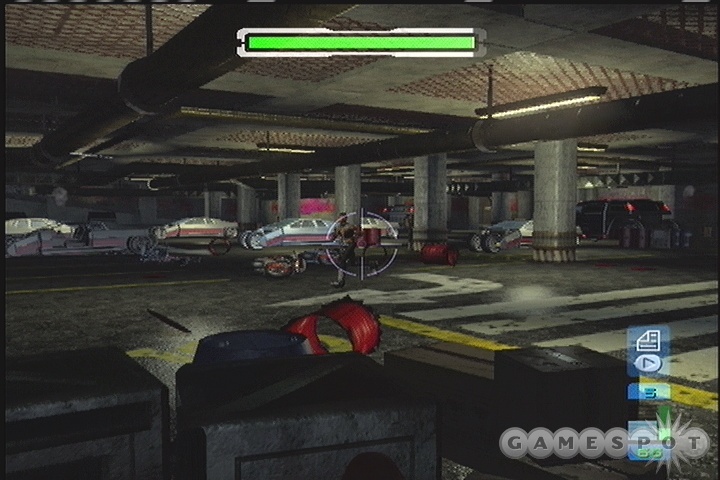
Mission Zero: Datacore Demolition
Location: Pacific Ocean
Although this is only a training simulation, things might get pretty hairy here, especially towards the end of the level.
Objective: Evade dataDyne Security
Well, it’s time for Joanna to go out and get to work. Her first mission here involves infiltrating an underwater laboratory, then finding and destroying the computer core that is her initial objective. Along the way, she’ll have to learn about her movement controls. You don’t have to worry about your weapons or gadget loadout at the beginning of this mission here. All you can do is screw yourself up by actually disabling the options you need to succeed, so just leave everything alone for the moment and get right into the action.
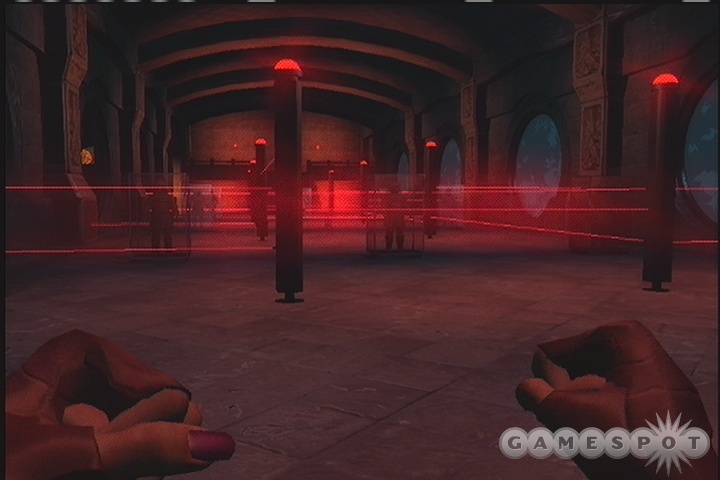
Most of the early tasks here are relatively simple; you’re just going to be learning about moving around, shooting straight, and ducking under obstacles. Things get a little more complicated when you get to the laser tripwires that you have to roll through. No matter what you do, you can’t avoid tripping the wires, so be sure to roll through the area twice to avoid the fire from the urrets that’ll be coming your way after you trip the wires themselves. If you don’t move through quickly enough, the turrets will probably take off the bulk of your armor.
Around the corner from that area, you’ll come across your first instance of cover. Just press A to creep up against the wall, take aim at the security camera, then hit the right trigger, and you’ll automatically dart out from behind your cover and take it down. Note that you can only destroy the camera if you use your P9P in unsilenced mode; silenced rounds will just bounce off the armor plate of the camera.
With the camera out of the way, move forward and take cover along the railing overlooking the two guards and repeat the process on them. Both of them will drop P9Ps, allowing you to pick up more ammo for your guns, as well as dual wield, if you wish. Dual wielding will probably be handy, as it’ll let you fire twice as fast, with the only penalty being that you won’t be able to zoom your aim.
The hacking minigame is pretty easy to figure out. Stand in front of the keypad next to the door here and press left or right on your d-pad to open up your hacking makeup kit. After that’s done, watch the moving transparent block that rotates around the edge of the pad. You need to wait for it to overlap the blue block (which will then glow a bit), before pressing A to move on. You’ll have to do this a couple of times before you can bypass the lock and move on. Don’t worry if you make a mistake; you can try as many times as you like until you get it right. This will move faster on harder difficulties, but you should still be able to figure it out.
Objective: Destroy CPU
Now that you’re into the core of dataDyne’s facility, you’ll have to use your Camspy to reach the CPU and destroy it. Doing so involves threading your way through a few air vents nearby. The Cambot’s primary attack allows it to shoot out an EMP blast, which will overload any circuitry that happens to be nearby. In order to get past the laser wires in the air vents, you’ll need to trace the cords back to the nearby circuits and overload them. There are two easy-to-spot circuits near the first tripwire, and a single circuit in the ceiling of the vent near the second set of tripwires. With those out of the way, it’s a short trip to the CPU, where you can blow your explosives and destroy the facility’s central processor.
Objective: Escape Trinity Platform
After heading up the corridor here and into the room to the left, you’ll come across a researcher who’s trapped in a room that’s crawling with spiderbots. You’ll need to kill all of the spiderbots to free him. They can be killed with a single swing of Jo’s fists, so press up on your d-pad to hide your weapons and go to town; you’ll save yourself a bit of ammo this way.
Support Objective: Escort Scientists to Elevator
When the spiderbots are dead, you’ll be able to move on, thanks to the scientist. You’ll soon come along a few more scientists, who are handily armed with rifles. You don’t necessarily have to keep these guys alive, but if you stick near them, they’ll automatically fire at the spiderbots as they come along and make your job a bit easier. They are quite fragile on the hardest difficulties, though. There’s a spiderbot obscuring the door lock that’ll let you leave this room; shoot it, then activate the lock to move on.
At the end of the corridor here, near where the security guard is facing off against spiderbots descending from the top of the cylindrical shaft, you can pick up an FAC-16 rifle, which should be a nice little upgrade over your P9P. The right bumper button will let you fire grenades while you’re equipped with this gun, but that’s probably going to be overkill against these spiderbots; you can still use it to take out a few of them at a time, should the opportunity arise. The guard himself also drops a MAGSEC 4 pistol that can fire around corners with its ricochet function. It won’t be much more useful than your P9P dual-wielding for the purposes of this level, though.
When you reach the large hangar where multiple guards are going up against spiderbots dropping from the ceiling, walk down the ramps that are available to you until you reach the bottom of the area, ignoring the spiderbots and the guards for the moment. The scientists will follow you, until you reach the area where the elevator is supposed to be.
Support Objective: Deploy Sentry Gun
Across the way from the elevator control terminal, there’s a set of Laptop rifles. These guys aren’t going to do an insane amount of damage, but they do have an interesting secondary fire mode, which converts the rifle into an automatic sentry. If you pick up a Laptop, then throw it on the ground with your right bumper button, you’ll be able to polish off this secondary objective right quick. Just be sure to pick up another Laptop to actually fire with.
While the scientists are busy restoring power to the elevator, keep firing on the spiderbots as they rush your position; after a while, the elevator will appear, just as you’re about to get overwhelmed. Funny how it always works out like that. Anyway, according to Chandra, your only way out of the facility is to enter the rocket that’s positioned on the upper level of the facility.
When you do reach the top of the elevator, it’ll be time to put your marksmanship skills to work, as the dataDyne corporate security up atop the platform will be ready and gunning for you. You’ll definitely want to use one of your rifles here. Although the Laptop doesn’t have a lot of damage, its precision will let you zoom in with it from behind cover and snipe away at the soldiers within your line of sight from a relatively protected position. You can aim directly for their heads, if you wish, and that’s a pretty efficient way to go, but take note of the many explosive barrels that the soldiers are conveniently hiding behind. If you fire at those, you’ll be able to kill off multiple soldiers with a single bullet.
As all this is going on, Jack will be running out into the middle of things, gunning for the soldiers on his own time. He’s unkillable, so don’t worry about him; just focus on the soldiers in the area. When the coast is relatively clear, head for one of the large blue elevators, wait for Jack to join you on the platform, then hit the A button to start riding it up to the top. Along the way, you’ll come under fire from more soldiers in jetpacks. You can fire on them if you wish, but when you reach the top of the platform, there’ll be too many of them to shoot down, so just book it for the entrance to the rocket and hit it to end the level.
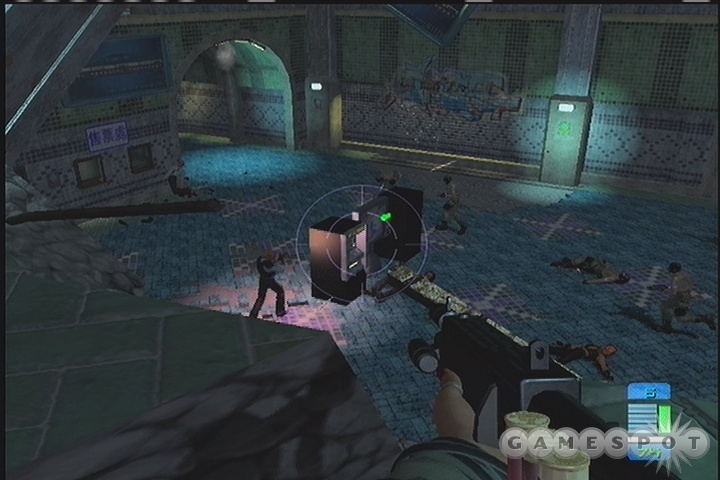
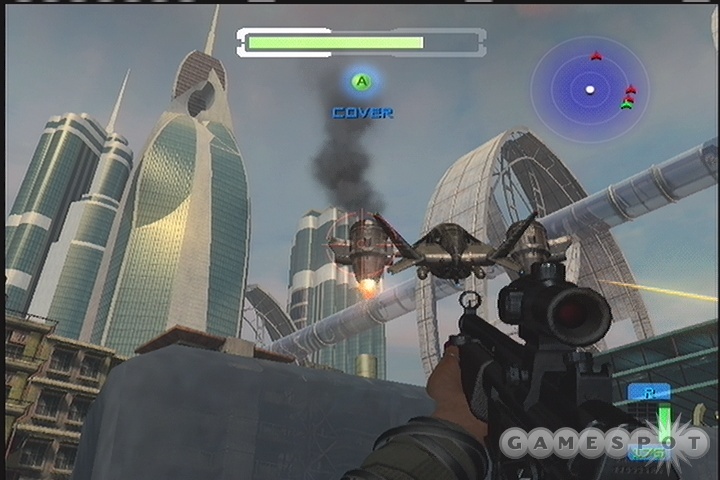
Mission One: Nightclub Stakeout
Location: Hong Kong
You can’t change your gadgets here, but you can grab a second P9P from the equipment screen before you head out for your job. Your task here is to support your father from the outside of a nightclub that he's infiltrating, by identifying any guards on the perimeter of the area. Things are predictably going to get complicated here, so get ready for some firefights.
Objective: Identify Enforcers
Your initial goal on this level is to find and "idenfity" three enforcers of Killian's, by finding them within the level, then locking onto them with your audioscope and tagging their vocalizations, or something or other. The number of enforcers you need to identify varies based on the difficulty level. On Perfect Agent, you'll have to identify all three, but the lower difficulty settings will require you to identify only one or two of them, allowing you a bit of leeway for mistakes. If an enforcer, or any soldier near him, becomes aware of your presence, they'll automatically start firing at you and your cover will be blown. Get ready to restart this mission a few times on the Perfect Agent setting, as it's rather difficult to get to all three of the enforcers without getting your cover blown a few times, and that's an automatic mission failure.
To begin with here, sneak forward from where you jump onto the docks, then use your P9P to cap the soldier sitting on the crates in the back of the head. Chandra will warn you about blowing your cover, but no one will hear your attack, and you'll be able to move on without fear of alarms. If you head to the left and take the main stairwell here, you'll be near the first enforcer. Stand just outside the low stone wall above his position, pop up from your crouch, then use your audioscope to hover over him and lock on. You'll know you're pointed at the right guy when his outline is green. After you have a full identification of him, duck back down behind the stone wall and start working your way around to the right of the nightclub, where there's a long alley waiting for you full of SUV-like vehicles.
There are going to be a few more goons waiting around for you near the cars, so if you're still attempting to keep a low profile, you'll need to sneak along the left wall beside the cars. Just crouch and stick to the wall as you pass by the guards, and they shouldn't spot you. You'll need to stick by the wall until you hit the gate, then creep along that until you can hit the small set of steps leading to the locked door here. Shooting off the lock with a silenced P9P won't alert any of the nearby soldiers.
With that accomplished, sneak into the dock beyond the door and start crouchwalking your way to the left. Be careful, though, as one of the guards here is on a patrol route that'll take him from the building here and out onto the little walkway you're on. You'll probably need to shoot him before you can lock onto the second enforcer. If he's inside the building, then you can wait for him to exit while waiting on the right side of the door, then peg him in the back of the head as he walks out. You can lock onto the enforcer from this same doorway; although he's on the far side of a window, you can still grab his voice samples from this position. Do so, and you won't have to worry about being stealthy anymore.
Objective: Destroy Killian's Powerboat
If you're playing on Perfect Agent difficulty, then you'll be tasked with destroying the boat that's at the bottom of the harbor here. You should've been equipped with a bomb gadget at the beginning of this area, so all you have to do is kill the enemies that come after you (it's best to wait for them to enter the small building, then shoot them as they come through the door), then drop down to the water below the docks and get up next to the boat for the context-sensitive bombing prompt to appear. Of course, the fighting here will be pretty tough to live through, especially with the low amount of P9P ammo that you start with. Try to use the explosive barrels to your advantage.
When the second enforcer is dead, you'll have to head through the rear door here. If you're playing on Secret Agent, you'll have a lockpicking device to use; just move your left analog stick around to find out where the next pin is and proceed from there to unlock the door. If you're on Perfect Agent, though, you'll have to find the keys that unlock the door. They're in the large building past the crane; enter from the ground floor, walk up the steps to the second level, and grab the keys off of the desk, then return to the rear door and unlock it.
There's one more goon in the alley behind the club, so take him out, then head towards the small lift near your position. Before you head up, note that you can bash in the grate across the way to find some frag grenades, at least on Secret Agent difficulty. Have your silenced P9P ready to go when you ride the lift, as you might have to kill a guard when you reach the top. If you kill him without alerting the nearby Enforcer, though, you'll be able to capture the last data that you need and move on to your next objectives.
Support Objective: Evacuate Civilians
Return to the alleyway where the lift was that led to the last enforcer, and head down the steps here to reach the nightclub's basement area. You'll need to be pretty careful through this next section of the level if you want to live, especially on Perfect Agent difficulty. When you hit the top of the stairs leading up to the basement, note the presence of a metal detector above the door on the right side of the area; it's essentially just a large bar placed over the door. You should avoid it for the moment, and instead head down the hallway to the left. This will take you into a security room; shoot the guard sitting at the desk, then deactivate the metal detector by using the device on the desk itself. After that's done, you can evacuate the civilians by shooting the fire alarm by the door.
Objective: Locate Jack Dark
The door here that leads out onto the dance floor (right next to the fire alarm that you shot) is going to be an important chokepoint for you, as there are a lot of enemies waiting for you to pop out so that they can shoot you. You should open the door, head out a bit to let the enemies know where you are, then return to the security room and wait for your foes to return back to the doorway before blasting them. You should be able to nab two or three goons in this manner, and dashing out over their bodies should help you restore a bit of your dwindling ammo supplies. Actually getting out onto the dance floor will be a more daunting task, since there'll be goons on the upper levels firing down on you, as well as a couple of bartenders on the same level as you. Luckily, there's also a set of armor in the room behind one of the bartenders, so check around for it before sneaking along underneath the railing and climbing the stairs leading up to take out the rest of the snipers.
At the top of the stairs, there's another little chokepoint near an upstairs bar, where you'll have to take down eight or nine more goons before you can break through to the bar itself. If you have a shotgun, then it might be worth using it here, but if not, you might want to either rush into the bar and attempt to find one of the empty rooms behind the bar itself, or backtrack down the stairs a bit and attempt to shoot the goons as they follow you. Be sure to switch out your P9P for a FAL before heading up here, though, as the reloading period on the P9P and the small clip will leave you open to fire for quite a bit of time. This is likely going to be your graveyard on Perfect Agent mode, unless you've gotten through the bulk of the game relatively unscathed.
When you do manage to get through the bar, though, you'll have to start heading back up the stairs until you reach the penthouse level of the building. There are only a couple of soldiers here, but there are turrets set up on the walls overlooking the corridor that runs left to right in front of you, and there's also another turret on the far wall, across from the top of the stairs. It should show up as vaguely red to you if you have a big enough screen to distinguish it from the wall; your crosshairs will also light it up for you when you see it. Shoot it, then dodge-roll your way through the corridor to get yourself through the fire of the other two turrets. If you're playing on Secret Agent mode, you'll be able to lockpick the left door near the fountain here to disable all the turrets here; if you're on Perfect Agent, though, you'll just have to shoot them before you reach the door leading to the penthouse apartment. When you do, though, the level ends.
Mission Two: Subway Retrieval
Location: Hong Kong
After retrieving Zeigler from the nightclub, he'll tell you about a case that holds all of his research that the Triads are holding. You have to retrieve the case to prevent the mission from being a total bust; Zeigler himself is important, but his research is what the Triads really want. You should be able to add a UGL SMG to your kit at the beginning of this level, so feel free to do so.
Objective: Retrieve Briefcase
The beginning of this level puts you down into an immediate firefight against a bunch of biker gangsters. Hopefully you're prepared for a fight, then; you can duck behind cover to your left or right as soon as you regain control of Joanna. It's best to head to your immediate left and duck behind the metal crates there, as that will seemingly prevent the bikers from surrounding you, which they tend to do when you move around a bunch. From there, you can start blowing away the explosive barrels to hopefully kill off multiple goons at once; you can also shoot the cars directly for a slightly less powerful explosive effect.
When all of the bikers are dead, grab the keycard off of one of their bodies, then use it at the terminal at the top of the ramp to leave the garage. You'll come out to a warehouse area that's packed with cameras, so be on the lookout for the suspiciously visible camera beams and shoot the cameras as you see fit. Just across from the first camera, you should spot a grating on the bottom of the brick wall that's blocked by a crate. If you melee the crate and the grate to death, you can crawl straight through the little vent here to reach a set of shipping containers, one of which holds a totally kickass DW-P5 weapon, which is essentially a fully-automatic version of the P9P, with a silencer attachment and a 4x zoom. It'll safely replace your P9P, if you wish it to, or you can keep the P9P dual-wield and the DW-P5 to avoid using two weapons with the same type of ammo.
Anyway, if you trip the alarm here, you're predictably going to have to fight off a number of goons, many of whom will be packing UGLs. At the very least they'll keep your ammo topped out for the DW-P5 when you kill them. Your goal here is to enter the main hangar at the end of the road. One of the doors here is unlocked, so that's the easiest way to get in; alternately, you can hotwire one of the heavy lifting machines in one of the other warehouses if you have a Datathief. It'll then open up the main door to the other warehouse, where you'll be able to take cover on one side and start popping caps at the soldiers within.
Support: Sabotage Armory
In order to move on here, you'll have to proceed into the warehouse and find the door along the left side that leads back outside. If you make your way up into the room at the rear of the warehouse, though, you'll find a large number of shotguns; your secondary objective here is to destroy this little armory. Doing so entails grabbing the frag grenades on a nearby table, chucking one into the area, then getting the hell out of the armory before it blows skyhigh. If you want a shotgun, be sure to grab one from the armory and drop it outside on the ground before blowing the armory, as they'll be tough to get to when everything's on fire.
When you're done with that, find the door leading on and start killing the soldiers in the streets. The building at the end of the street here has a safe inside of it. You can set a demo charge or use your Datathief to crack into it, or you can head up to the second floor and open the filecases until you actually find the combination. The second floor also has a suit of armor, so be sure to grab it before taking Zeigler's suitcase from the safe and heading to the subway.
Objective: Meet Up at Evac Point
Support Objective: Divert Enemies
After you make your way through the subway, killing off a few guys and busting through some padlocks to reach the main subway vault, you'll come across a tense meeting between Killian's men and the buyers of Kreigler's research. The buyers aren't happy at the way things are going, and Killian's men aren't exactly in the best of moods themselves. If only there was some way to get them going at each other's throats and save you the trouble of killing them all yourself...
Well, as it happens, there is. If you can shoot one of the soldiers without being seen by anyone else, then they'll start fighting against each other. The easiest way to do this is to bring some frag grenades down into the subway; chucking one from the top level down into the group will definitely kill someone, and there's no chance that they'll see you do anything. Apart from that, it's pretty difficult to accomplish this objective with guns, but you might want to try heading down the ramp here and attempting to find someone that's standing by himself and shooting him while you're out of sight of all the rest of the goons. Still, though, grenades are much easier than any other method.
When everyone's dead, search the bodies for shotgun rounds; one of these guys should also have a DW-P5 if you lost yours or had to reload from a checkpoint. Definitely worth taking another of those weapons at this point, since you'll have to fight your way into the subway system here, which has been overrun by guys in suits. Apparently there was some kind of terrorist attack here, or the subway maintenance guys are on strike, or something like that, because conditions aren't quite up to par. In order to escape the level, you'll need to climb into the ruined subway car, shoot your way through it, then exit on the far end. A nearby doorway will lead you back around to the other side of the tracks, near the elevator that Zeigler and Jack are in.
Mission Three: Rooftops Escape
Location: Hong Kong
Objective: Assist Jack
Well, again, this is going to be rather hectic. Be sure to bring along a DW-P5 if you have it available to you on the equip screen; its zoom distance will be quite handy to have along for the ride here.
This level sees you and Jack splitting up pretty early on; he'll be down on the streets with the cool kids, while you sit up on the rooftops and fire away at the soldiers near him, as well as the snipers on the rooftops. There are going to be three snipers at the beginning of this level, as well as three soldiers on the streets. Go for the snipers first, as they're capable of dealing serious damage to Jack if you leave them be. If Jack gets out of view of the snipers, though, they'll turn on you, so be careful! After two groups of street soldiers are dead, Jack will round the corner, and you'll be able to move on.
Support Objective: Jam Enemy Comms
Before you drop down to the platform where one of the snipers was, though, turn around on the rooftop where you begin the level to see three small radio transmitters. These guys are part of the Jam Enemy Comms support objective. Completing this objective involves finding and shooting out the shielding on a bunch of these little transmitters, but is difficult to do unless you're playing in co-op. Luckily for you, if you brought a demo kit along (and it was default equipment on the Secret Agent difficulty), you can polish off this objective right quick simply by blowing up one of these transmitters here. Don't worry if you missed these guys, though; there are more transmitters later on.
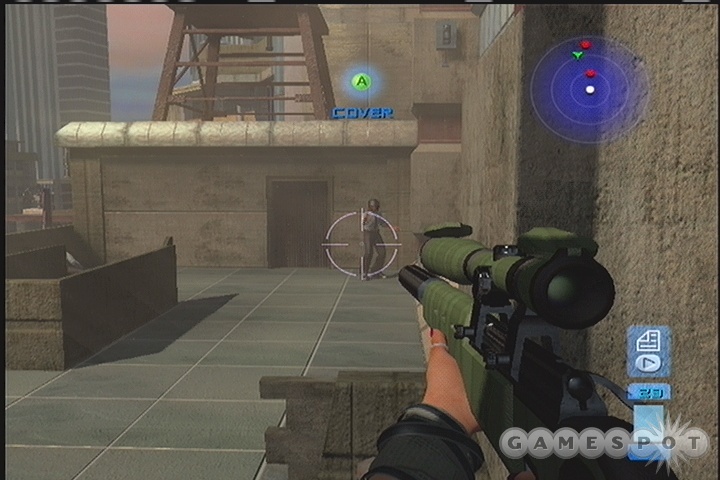
You should probably drop your DW for a Jackal sniper rifle when you have the opportunity to do so; it's a one-hit kill on all of the human opponents here, and can be fired without zooming if you wish to do so. There is a long delay between shots, though, so it's not ideal for wetwork or up-close encounters; keep a P9P on hand in case of emergency.
When you reach the three soldiers at the top of the stairs, take the zipwire over to the far building where one of the snipers was earlier, and provide cover for Jack from there. He'll eventually duck into one of the buildings at street level, allowing you to return back to the rooftops with another zipwire and continue on your way. There are a few ways to move on, but the simplest is to head through the large pipe, then shoot out the ceiling glass and drop down. When that's done, walk across the glass-enclosed walkway to reach the next support position for Jack. When you reach it, you may want to exchange your Jackal for a DW-P5 again, as the rate of fire will be more important to you than the one-hit kill factor. You can even use your P9P if you have to.
As Jack walks up along the walkway through the opposite building, be sure to kill anyone you spot, preferably by shooting the explosive barrels near them. When Jack's through, take the zipwire across to the far building, then flip the switch near where you land to let Jack move on via the cleaning rig.
Objective: Nullify Killian
As soon as you take the next zipwire, you'll be ambushed by Killian, who's still flying around in the craft you saw him take off in during the last level. You'd better hope that you have plenty of ammo for your DW-P5, or you'll probably fail this objective here. There are a couple of DW's on the ground near where you land, but they might not have enough ammo for you to do what you need to do here.
Killian's craft has a bulletproof cockpit, but can be damaged by aiming at the two large engines on either side of the vehicle; anyone who played through to the end boss of Soldier of Fortune 2 should find this fight familiar, although here, you just have to shoot the engine, not at a specific point on it. Move up behind the large metal...thing near where you are, but don't bother using it as Cover; just stand up behind it, and most of Killian's bullets should avoid you. Like most other vehicles of this type, Killian's craft will begin firing way, way off the mark, and will take a bit of time to lock onto you.
Your goal here, again, is to fire on the engines. This pretty much entails shooting at one of the engines for a while until it starts to heavily smoke, then shooting at the other until it goes into the red, as well. It sounds simple, but you don't have an infinite amount of time to do this; if you take too long, Killian will fly off and you'll fail the objective (but not the mission).
Move along the rooftops here until you reach one with more glass sun windows. One of the soldiers atop this roof will pack a Magnum, so look around for it if you want something a little more beefy than a P9P by your side when you move on. When you reach the bottom of the stairs nearby, you'll regroup with Jack and start to make your way to the evac point.
Objective: Escape to Evac Point
Regardless of whether or not you neutralized Killian before, you'll have to deal with him again at the end of the level here, so again, we hope you have plenty of ammo for your DW-P5. Instead of staying where you are at the beginning of the level, you'll want to move across the small bridge here to find another large structure that will protect you from the bulk of Killian's attacks. Just hide behind it while he's firing at you, then duck out when he's reloading or offloading soldiers and fire on the engines. If you can avoid the rocket fire that he dishes out, then you should be able to disable his engines and force him to crash before too long. Jack will deal with the soldiers, so leave them be and focus on Killian until you finish the level.
Mission Four: Mansion Infiltration
Location: China
Well, Jack's been kidnapped, but Chandra's been able to trace his whereabouts to a remote part of China. It's your task to get inside the mansion area and rescue him. You'll have to be relatively stealthy in the earlier parts of the level, so you'll probably want to pack a DW-P5 and a P9P in your weapon packs.
Support Objective: Disrupt Security Comms
Your first goal here is to disrupt the security communications so that the soldiers can't call for backup when you attack them; that will take some of the pressure of being stealthy off of you. To do so, immediately start heading up the path in front of you when you gain control of Joanna at the beginning of the mission; when you reach the circular opening with the lights, you should be facing the rear of a guard that's walking away from you. Unloading a bunch of bullets into his back should kill him, and he'll drop a radio. Grab it, then backtrack a bit, press left or right on the d-pad to bring up the radio, and call in to the comms officer.
Now, the tricky thing here is that the answer you have to give will depend on what the voice of the comms officer says when you call in. If you choose the right answer, you'll shut down the comms traffic; if you get it wrong, you'll get a squad of soldiers sent your way. Basically, it's bluff if they appear confused (or ask if you're maintenance), threaten if they seem nervous, and charm if they seem friendly. This will vary from game to game, so you never know what's going to work and what won't.
Support Objective: Activate Satellite Server
Next up, Chandra needs you to get to the satellite dish that's set up on the first set of exterior walls here and hack it so that it'll receive her signal. First, though, you'll have to take out the soldiers in the yard here. Most of them are armed with MAG's, but the soldiers in the sniper towers obviously have Jackals. Deal with them first, using the scope on either a P9P or a DW-P5 to nab your headshots, before moving up to the wall. You can't get in through the main gate, but if you head off to the left a bit, you'll find a path leading up to the interior of the wall.
It's here that things get rather tricky. One of the soldiers on top of the wall packs an M60, and it'll do a number on your armor if you let him fire on you. Luckily, he usually walks around directly in front of the top of the stairs, so if you head up with your DW-P5 at the ready, you might be able to fill him full of lead before he manages to unload on you. Otherwise, you might want to try getting everyone's attention, then retreating to the bottom of the stairs and using dual MAG's to fire around the corner at them as they come down the stairs.
When you've cleared off the top of the wall and the surrounding area, find the control panel for the satellite switch; it's actually on the far side of the wall, opposite the satellite. When that's unlocked, you can backtrack to the satellite controls, near the satellite itself, and datathief your way inside to allow Chandra access to the server.
Objective: Infiltrate Mansion
With that done, head up to the mansion's main gate, but shoot the camera in front of it before heading up to the comm switch. With that done, you can attempt to finagle your way past the guard with your voice modulator. You might automatically fail on your first attempt; we did each time we tried to get past. This prompt is usually the same as the first one in the level, so you may want to try whatever reaction you used before.
When you do enter the mansion, press Up on your d-pad to hide your weapons, then take a right to reach a museum that's rigged with laser tripwires. You can duck under most of these, including the ones that move up and down, if you time your movements correctly. You can pass through half of the maze and smash the window to move on to the main event, or complete the entire thing (there's a Viblade in the single un-secure pedestal in the middle of the room) to find the armory, where you can load up on any number of weapons of your choosing. If you haven't finished a level with them yet, try picking up a Viblade and an M60, which will let you choose these weapons at the beginning of upcoming levels.
After you're past the laser tripwire maze, you'll come to a door leading into the mansion's abattoir du jour, where the Deathmatch contestants are gathered to watch the show. You'll soon find yourself with a new objective....
Objective: Defeat Mai Hem
Damn. This girl's tough, that's all we can say about her! She's got a number of tricks up her sleeve, including bilocation, duplication, dematerialization, and some other -ations for which we're not sure what the word is.
To begin with here, you're going to have a mere Mag at your disposal, while Mai Hem will possess an M60. Yeah, that's fair. Anyway, there's not much you can do about this except attempt to shoot her; we found it easiest to just duck down behind one of the railings at the top of the stairs and fire at her head when she stopped moving. No need to use it as cover, necessarily; just open fire from the crouch position and she'll "die" eventually.
When she goes down for the first time, she'll force one of the statues here to attack you. These guys have no ranged attacks, and will attempt to close in on you for melee mashings. They are vulnerable to headshots, albeit not as much as real humans are; still, if you can shoot off their heads, you can take them down without wasting as much ammo as you otherwise would. Around this time, Chandra will probably pop up, offering you the chance to select one of three weapons. The shield is nice, but you'll probably run out of ammo for your Mag if you select it. The Hawk Boomerang is an interesting little toy, but does too little damage to really be useful to you here. The M60 is probably what you're going to want to select.
Further rounds of combat here will up the difficulty, particularly when Mai Hem starts spawning in duplicates of herself. Each of these duplicates will pack a Superdragon weapon, which is a hardcore assault rifle/grenade launcher combo. Luckily, all of the replicas seem to do shock damage to you, which you'll regain back after getting out of combat for a few seconds, but Mai Hem herself is still in the mix somewhere with her M60, so you'll have to act quickly. What you want to do here is kill one of the static-covered duplicates. All of the static duplicates actually drop Superdragons when they die, so you can pick one up and start using its grenade launcher as your first line of defense. Since ammo will be virtually limitless for this weapon, you can feel free to run up the tab with its primary fire, as well.
After a while, Mai Hem will eventually spawn in three statues at once; after they're dead, she'll appear by herself one last time. Killing her now will cause the match to end and win you the level.
Mission Five: Laboratory Rescue
You've infiltrated the lab underneath Li's mansion, where you suspect your father is being held prisoner. Unfortunately, the entire base is crawling with soldiers, so things are going to get a bit tricky...
Support Objective: Shutdown Power Generator
Your first goal here should be to head to the power generator and disable it. Although this is listed as a support objective, it's right on your way to the first keycard that you'll need to acquire.
After leaving the room where you start out, use your DW-P5 or P9P to start systematically killing off the guards in the area. It's important that you don't trip security here, because, as Chandra will tell you, there's a security system in place that's tracking your movements, and as soon as security is called, they'll come right to where you are. Theoretically that's kind of what all security systems should do, but for this laboratory, it means that you're going to be facing a half-dozen female guards that pack Magnums each time security gets alerted. So yeah, avoid it if possible.
Anyway, there's a guard across the way from the first door you can snipe. Wait near the door you come through until another guard walks up the steps and starts walking away from you, then snipe him as well. When he's dead, head over to the walkway that he came across and blast the guard near the door below you. He'll drop a KSI-74, an automatic rifle of the AK-47 variety, if you wish to pick it up; just be sure to retain something that's silenced.
Make your way around the upper walkway, towards the only unlocked door that's available to you. This is what will lead you down to the power generator area, but you'll have to take out a half-dozen or so guards before you can reach it, all of whom are packing KSI's. Be careful here, but don't worry about silencing your weapons; just go to town with whatever your most powerful weapon is.
When you reach the generator, shut it down and head out into the airflow vent by destroying the grate near the shutdown generator. There are two large fans on either end of this hallway that you can destroy with your demo kit, if you're packing one. What purpose does this serve, you ask? Who knows, really. It's just something you can blow up, apparently. It probably has some relevance to a mission on Perfect Agent difficulty, but doesn’t do much for you on Secret Agent.
Anyway, the far end of the vent has another grate you can smash to reach a research lab. The Silver Keycard is on one of the tables here, near the large globe at one end of the room. Grab it, then use it to open the door at the top of the steps, but be ready for a fight, as there are undoubtably going to be numerous security agents on the opposite side of the door when you open it. Gun them down as best you can without getting yourself killed; you should be able to staunch the flow of incoming enemies after a dozen of them die. When the coast is relatively clear, head back out onto the walkway and take a left towards the door that led to the generator. Instead of going in there, though, head around the walkway to the red door on the far corner and open it up to enter the computer server room.
Secondary Objective: Disable Tracking System
Your primary objective in computer processing is to find the gold keycard. It's on one of the desks in the middle area of the room, between the ground level and the upper level, in the small chamber with three desks scattered around. Search the middle desk for the card (it's fairly dark and hard to see), and...well, you'll have a new keycard.

As far as the tracking system goes, you can find the generators that you need to access in a small room here; head up to the top of the server room, then find the steps leading down and around to a darkened chamber with two scientists (who appear to be talking about either Half-Life or Half-Life 2, if you listen to their conversation). In order to destroy the tracking system, aim at the system on the ceiling and try to shoot out the four small green nubs on the bottom of it. They can each take a bit of fire, so just fire away until they start to smoke and then explode.
Objective: Access Containment Facility
The containment facility door is located back near where you first killed a soldier that dropped a KSI, on the lower level of the main research area that you've been passing through over and over again. When you reach it, pop the door and head through.
Objective: Locate and Rescue Jack
When you're inside the control area, you'll be facing off against a large number of soldiers - again - who're scattered all over the inside of the cavern. There's a lot of verticality here, so if you can't hear where gunfire is coming from, look up! Also beware the turrets that are manned and firing at you from the uppermost levels of the area; they'll open fire when you walk out into the center of the room. They don't possess very good aim, but they do a lot of damage when they hit. Try to snipe out the gunners before moving too far out into the open.
Your initial goal here is to get to the top of the central spire here and unlock the doors in the containment area. To do so, take the lift to the left of the entrance, drop the bridge, then start heading to the central structure and walk up to the top. After you find the security camera switch, blow the structure with your demo kit, then walk back down to the walkway and head across to the sole remaining green door.
Behind this door is the long-awaited containment facility. As soon as you open it, bust a few caps in the soldier there, then backtrack to the nearby turret and hop inside. More security guards will be coming towards you, but you can easily dispath all of them with the turret. Before you scout around and find jack, be sure to pick up one of the M60s (if you can find one), because you're about to finish the level. If you have one in your inventory when you finish, it'll be added to your pre-mission equipment selection options.
Mission Six: River Extraction
Well, you've gotten to Jack; now it's time to bust him out of the lab. If you have one available, select an M60 as your beginning weapon for this level; you'll have a fight on your hands when you start out here.
Objective: Escape to Airbase
There's only one objective here, and that's to escape! You start out with Jack in your care, but luckily he seems to be a bit more resilient to damage than he was in the previous tag-team mission, or at least is a bit more capable of dodging fire. Work your way back to the control center, and Jack should automatically move into the turret across the way and open fire on the soldiers that've taken up positions on the central spire. You can do the same with the other turret and set up a crossfire effect on the goons; you won't be able to kill all of them due to their cover, but you should be able to eliminate the bulk of them, then run up and finish them off from close range.
After you pass through to near the weakened wall, you'll have to protect Jack while he lays the explosives. This will only take a few seconds, but there will be multiple soldiers incoming, so be on guard. When the bomb has gone off, follow Jack outside (or kill off any remaining soldiers here if he chooses to do so).
When you reach the exterior of the hangar complex, be prepared for a rather sizable assault on your position by dataDyne security. There are numerous turrets in the area, so grab some cover, preferably behind the large immovable support pillar to the right of the entrance to this area, then start taking down any footsoldiers that come your way. When you're somewhat in the clear, use a Mag or P9P to start sniping out the turret gunners from behind cover; just aim for their heads when they've rotated themselves away from you. Even with a 4x zoom, you should be able to take down most of the turret gunners from well far away. Also be on the lookout for distant soldiers that haven't spotted you yet, and go to town on them.
Support Objective: Incapacitate Hovercraft
This objective is pretty simple; one of the hangars near where Jack is located will open up when you enter the area, revealing a few more hovercraft, as well as a couple of the female guards. Kill the guards and shoot the hovercraft until they begin to spark, and you should be able to destroy them all relatively easily.
Support Objective: Steal Rocket Launcher
The rocket turret is located on a wall near the gate here; kill the soldier that mans it from far away, then get up there, get into the turret, and hit Y to grab the rocket launcher. There's also a suit of armor in one of the nearby pillboxes, so be sure to refill yourself before heading back to Jack.

To open the gate here, get back on ground level and use your Locktopus on the lock at the bottom of the tallest tower here, near the water. There's a small gear that you can unlock to open the gate. When you return to the hovercraft, hop into the gunner position and exchange your rocket launcher for the M60 there; this will allow Jack to use the rocket launcher when you're driving away from the hangar bays. This is exceedingly important, as having him use the M60 will make your job a lot, lot tougher when you're driving the hovercraft. Note that if you restart from this checkpoint, you won't be given the opportunity to grab the rocket launcher and letting Jack use it, so you'd better hope that you do everything right the first time!
Objective: Power Down Radar
After you have the rocket launcher on the hovercraft and have opened the gate, hop into the driver's seat and start busting your way out down the river. Your first obstacle here is a small fortress overlooking the river that has a radar tower set up. Your goal is to take out the five power units at the base of the radar tower; these are all outlined on your radar in yellow, while enemy units will appear in red.
Now, if you're using the M60, you're kind of screwed here, as Jack's aim is somewhat terrible, and the power units will be able to take plenty of shots before they blow up. You might be better off making landfall somewhere and getting out of the hovercraft before attempting to destroy the units on foot, but this will be difficult due to the number of soldiers in the area. It's much, much easier to get by here if you grabbed the rocket launcher; just stand still in front of one of the power units and let Jack hit it two or three times, and it'll blow up. (If you move too much, the rockets will fly by the power units when fired, so stay still.) The rockets are also much more capable of dealing with the enemy soldiers and hovercraft than the M60 is.
Your hovercraft will be taking damage here, of course, but it's fairly hardy, and you won't have to worry much about dying until your engines start to spark. The longer you take to destroy the power units, though, the more damage you'll be taking from the soldiers, so it's in your best interest to deal with them as quickly as possible before moving on.
When you do bust the radar, though, you should find that the rest of the mission is a bit easier. After passing through the cavern leading on and underneath the soldiers on the bridge, hang a hard left and pass over a couple of land bridges to avoid the mines in the water; you should come out near another tunnel that leads you to the airpad and the end of the level.
Mission Seven: Trinity Infiltration
It's time to strike back at dataDyne for their part in your father's death. As such, you're going to be infiltrating their underwater laboratory in an attempt to find Dr. Caroll, the man mentioned by Zeigler before he died.
Primary Objective: Eliminate 'The Brothers'
As soon as you begin this level, you're going to be launched into a fight with a pair of bounty hunters that are looking to collect a reward that's apparently been placed on your head, presumably by dataDyne themselves.
Begin by immediately ducking behind the metal crates that are set a ways back from the edge of the platform here; you can use the wooden crates, if you wish, but they'll fracture under fire from the Brothers and will leave you exposed after a while. From this position, well...shoot the guys. We went into this mission with a KSI-74 and a DW-P5 and found them to both work relatively well. Just stay behind cover while one of the brothers fires on you, wait for him to reload, then pop up and fire off a few rounds at his head, firing in bursts to improve accuracy. These guys will helpfully only fire on you one at a time, so you won't have to worry about them both simultaneously. You will likely get winged now and again, and will probably lose the bulk of your armor, but you should still be able to kill them without taking significant damage to your health, at least on Secret Agent difficulty. Also, don't forget that you can shoot through the wooden crates that the Brothers hide behind to eliminate their cover. Also, take note that there are a pair of X-ray goggles in one of the weapons lockers near where you begin; if you grab them, you'll be able to spot all of the weapons in the crates around this area, including a Hawk Boomerang.
At this point, you'll be able to either head out onto the main surface of the platform, or walk up the stairs that the guards enter by and take the elevator there. The elevator is the far safer choice, as the platform is overwatched by snipers that'll do a number on you if you walk too far out. After taking the elevator up to the control room, grab a Jackal, either from the wall locker or the sniper you kill, then walk out onto the walkway. There are at least two more snipers out in this area; one on ground level by one of the doors in the complex to your left, and one standing atop one of the cylindrical structures in the complex to your right. You can use your P9P scope to get a feel for where these guys are, since it has a less severe zoom than your Jackal will, or you can just lightly depress the left trigger button with the Jackal to zoom in partway until you spot the enemy snipers.
When the coast is clear, drop the Jackal for an SMG or a rifle, then take the zipwire down to the left complex and head in through the left door there; the right door is secured. There's a storage locker here, which you can open with a Locktopus; inside you'll find a Psychosis Gun. The elevator here will let you hit the underwater portion of the facility, but there'll be four soldiers in the area around where the elevator halts, so be ready with a heavy weapon, or use your Psychosis gun's alt-fire to turn one of them against the others.

Support Objective: Manipulate Personnel
If you take a left here (the right door is secured), you'll come to a branch in the path, with another elevator leading up and a corridor leading along. If you're interested in completing your secondary objective involving getting the scientists out of harms way, take the elevator up one floor, kill the soldiers, then head right from the elevator and into the small nest of corridors there. If you take a right at the first fork, you'll be facing an interface panel for Father, the base's HAL-9000esque AI program. You can attempt to converse with him to get him to move the scientists out of their area, but it's difficult to read his mood since he doesn't really get nervous or friendly or anything like that. If you choose correctly, though, he should shuffle all of the scientists off to the hangar bay, where they won't be able to spot you or call security as you make your way around the complex. Just be sure to hide from them as they run past this area, or they'll call security when they spot you.
With that done, feel free to poke around the rooms that the scientists came from, if you wish. Dr. Carroll may be in here, or he may be in another science area further into the level; if he's here, then you can walk up to him and start escorting him towards his lab. If not, return to the elevator you took to reach this level and return to the bottom level, taking a left and continuing into the large hangar nearby. This place is absolutely crawling with cameras, so hopefully you have either a DW-P5 or a P9P to silently search for and snipe them as you make your way across the bottom of the room. The scientists are clustered in the upper levels, assuming you managed to manipulate them through Father, so try to avoid going any higher than you already are.
Objective: Escort Dr. Caroll To Lab
When you reach the doorway leading on, on the far side of this room on the lowest level possible, head down the ramp there until you reach another Father terminal. Again, try to get him to move the scientists, if possible (or just ignore it if you have Dr. Carroll along), then duck behind one of the walls nearby before they see you on their way out of the area.
When they're gone, escort Dr. Caroll through the nearby lab, then follow him until he reaches his own work area, where you're safe from bugs and eavesdropping. A completely predictable betrayal ensues before the end of the level.
Mission Eight: Trinity Escape
Location: Pacific Ocean
Well, you've lost some old friends, made some new ones, and have found yourself in heaping handful of trouble, but what else is new? This level is going to be pretty satisfying if you enjoy run-and-gun action, because there's not much downtime here; it's pretty much all going to be scrapping and yelling.
Before the mission begins, take the time to outfit yourself properly. A lot of the combat here is going to be done at close range against multiple enemies, so you may find a shotgun handy. We paired one of those up with a DW-P5 and had good success.
Objective: Download Zeigler's Program
The data core is quite close to where you begin the level, so enter the room and use your datathief on the terminal to steal the precious, precious data. Mmmm....data. The datathief hack here is pretty complicated, so be quite careful when you're performing it and wait for the blue segments to flash before hitting the button! The hack shouldn't take too long, though, and when it's done, you can start your long, long journey back to the landing pad.
From the data core, start following the only paths available to you, and you'll start moving on through the facility. Occasionally, you'll get a support objective, such as...
Support Objective: Cut Off Pursuit
Support Objective: Flood Hangar
When you see the flashing symbol for "Cut Off Pursuit" pop up on your screen, pause for a moment and whip out your shotgun. One of the soldiers here will attempt to lay a charge on the ground and seal the door behind you, cutting off any soldiers that are attempting to follow you. All you have to do is protect him for a few seconds while he lays down his explosives. The shotgun is ideal for this, as it'll hit all of the soldiers that follow you with each blast, stunning the entire group. As a note, do not attempt to use the Father panel near here, as it will automatically send out a security squad towards your position.
From there, head to the right and find the elevator, taking it up to the top. At the next juncture, you'll have the "Flood Hangar" objective, which is essentially the same thing as Cut Off Pursuit; just watch the soldier's back as he works on the panel, and you'll eventually be able to flood the lower portions of the large, camera-infested room you passed through on your way into the facility. Since the lower levels are flooded, you'll have to walk across the higher areas this time. There aren't any cameras to worry about here, but all of the security forces will likely ambush you as you enter the room, so be prepared for that.
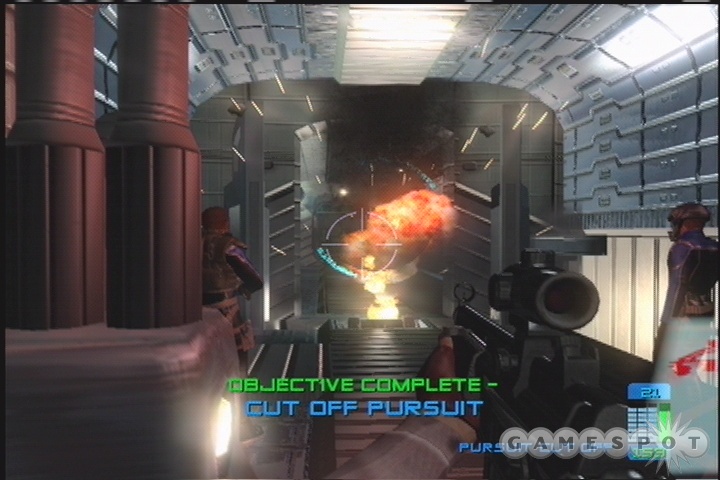
After you clear the large room, you'll find that the security systems have overridden the elevators; you'll have to find some other way out of here. Every so often, you might find that one of the soldiers will attempt to blast one of the doors shut, so just wait for them to do their thing, and be sure to avoid activating any Father terminals that you see. You'll eventually come to one of the science areas that you shepharded scientists out of in the last level; head down the long ramp between the two offshoot rooms to reach another science area (where you freed the scientist from the spiderbots in the first level of the game).
From here, you mostly just have to backtrack through the corridors that are available to you until you reach the elevator that leads back up to the flight deck. If you still have some of the grunts alive, the third demo charge placement will be near the elevator, and will let you finish off the Cut Off Pursuit objective.
Objective: Escape to Evac Point
You've got two more major firefights to survive before you can exit the level, in a mirror image of the two major fights at the end of the very first level in the game. First, fight your way down the ramps in the large room preceding the elevator, then go topside to reach the landing pad.
As you may recall from the first level, dataDyne does have some jetpack-suited employees, and there'll be one on the deck of the ship here. Instead of taking off, though, the guy inside it will be content to stay grounded and use his dual machineguns to do a number on your armor (if you have any left) and health. He seems to stick by the right side of the platform here, though, so you may be able to sneak up along the side, using the boxes as cover to avoid getting plunked, and take him out at close range with shotgun blasts.
Regardless, you need to get from the beginning of the platform to the jumpship to complete the level. The jumpship is emblazoned with a number of pink smoke grenades, so dash across the surface of the platform to reach it.
Mission Nine: Jungle Storm
Location: South America
Now that Chandra's no longer on your side, it's time to find Li and his daughter before they can use whatever information they extracted from Caroll's computer for...well, whatever it is that they're doing. You've learned that Mei Hem is in Peru, at a dig site, so you've been sent out to see what's what.
Operation: Defend Dropship
Unfortunately, your dropship is going to make a hard landing, and attract the attention of the soldiers at the beginning of the level. How many soldiers, you ask? Apparently all of them.
You're going to be seriously overwhelmed here unless you take some precautions to protect yourself, but no matter what you do, you can probably kiss your armor goodbye here. What we found helpful was to start the level, turn 90 degrees to the left, then book it towards the two wooden crates in that direction. You'll find a pair of RCP-90s on the crates, so pick them up, then backtrack towards the ship. Hit your right bumper button to turn on a quasi-EFF signal that'll highlight all of your enemies in red on your screen. This feature is going to be vital to surviving this level. The RCP has a pretty decent scope as well, which will still let you take advantage of the automatic fire capabilities of the weapon, so you can use that to get a bit of sensitivity for your aiming. With the Threat Detector function active, you shouldn't have a hard time picking out the targets in the trees.
Anyway, near the two crates there's a statue carved into the wall. You have to wedge yourself into the corner between the statue and the wall and use it as Cover. This is the ideal defense spot here, as most of the soldiers will come right up near you and start firing on the ship, allowing you to easily take them down. They'll fire on you as well, of course, when they get wise to your location, but the cover here is actually pretty good, so you should be able to avoid the bulk of the fire. If any grenades land near you, then you can kiss most of your armor goodbye, but we managed to survive this little bloodbath without too much damage. Make no mistake, though; if thing's don't go right, this is the toughest fight in the game thus far, especially on Perfect Agent difficulty. Don't neglect to talk to the pilot of the ship after you complete the objective; he’ll give you goggles that will replicate the RCP's Threat Detector feature for any weapon you have equipped. Press left or right on your d-pad to use them.
Support Objective: Disable Spiderbot Sensors
Before moving into the forest, be sure that you have a RCP and a DW-P5 in your inventory. Start crouch-moving when Carrington radios in about the spiderbot sensor nearby, and use a silenced round from the DW to shoot the soldier standing near it. With that done, you can either use a demo kit or just unload on the Spiderbot sensor with your RCP to destroy it, but there are more to come...
Objective: Breach dataDyne Dig Site
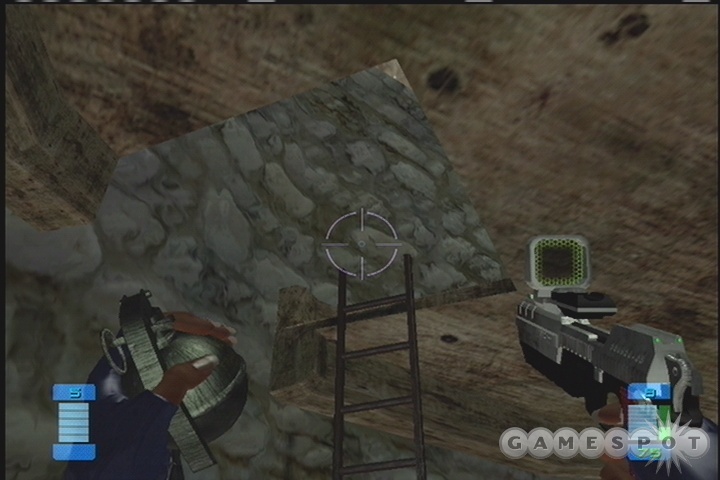
Near the first spiderbot sensor, you'll come across a little path that leads to a set of rural houses that have been taken over by the dataDyne soldiers. Approaching this area will be difficult, but if you creep along the path and use your goggles to highlight enemies, you should be able to kill a number of them before you get anywhere near the buildings themselves. Unfortunately, there is a turret atop one of the buildings that's obscured from your sight by a particularly large leaf. If you're crafty, you can edge your way out from around cover and use your crosshairs to let you know when you're aiming at the soldier in the turret and take him down, or you can just run around and dodge your way up to the statue on the right side of the path and use it for cover. There are a number of soldiers in the village, so take them down from behind the statue before moving out to explore.
Your ultimate goal here is to reach the large stone building at the upper end of the village. Most of the other buildings here will have one soldier inside of them, though, so proceed slowly with your Threat Detector on and take out the soldiers as you go. When you do reach the stone building, you'll have to carefully move up the ladder there and kill the soldier (who'll probably get some cheap free shots in on you, unless you have grenades to throw up there before you move up) before grabbing the armor refresh. There are actually grenades in one of the nearby buildings if you want to throw a few up there; just be sure not to have any hit yourself.
Support Objective: Rescue Dropship Pilot
The pilot of Eagle 2 is apparently alive, but he's been taken captive by dataDyne security. It'll be up to you to find him and free him, if you choose to do so.
Start making your way down the river here, with your TD goggles going full steam. You'll eventually come to a canopy area, with multiple streams running along underneath wooden bridges. In order to rescue the pilot, you're going to have to find the island near the entrance to this area with a little ramp leading up to its top. From there, start making your way across the bridges until you hit another cavern passage. (You can follow the water to another path, if you wish, but that'll lead you underneath the pilot's position.)
When you catch up with the pilot, quickly kill any soldiers near him, and he'll grab a couple of pistols and start helping you out. Follow the path along the jungle until you reach the crashed dropship. Poke around this area until you start seeing mines (again, the TD goggles will be a big help in spotting them). The mines indicate the presence of another Spiderbot sensor, to the rear of a large temple structure. Taking out the mines without alerting the Spiderbots to your presence will be tough, although they can be shot to detonate them; we found it easiest to just creep along the left side of the temple until the sensor was in sight, then use our RCP to unload a full clip into it. After it's destroyed, you'll complete your objective, and the rest of the spiderbots will be destroyed. The mines will remain, though, so watch your step!
When the spiderbots are dead, start shooting the mines to clear your path. Carrington will let you know that jetpacks are headed your way. You have to be very careful as you proceed around the corner here, as the ground troops that are near the landed jetpack will chuck grenades at you as move ahead. One bad grenade will kill the pilot and fail the secondary mission for you right quick, so you might want to get their attention, then backtrack a bit and fire at them as they approach the area where the mines once were.
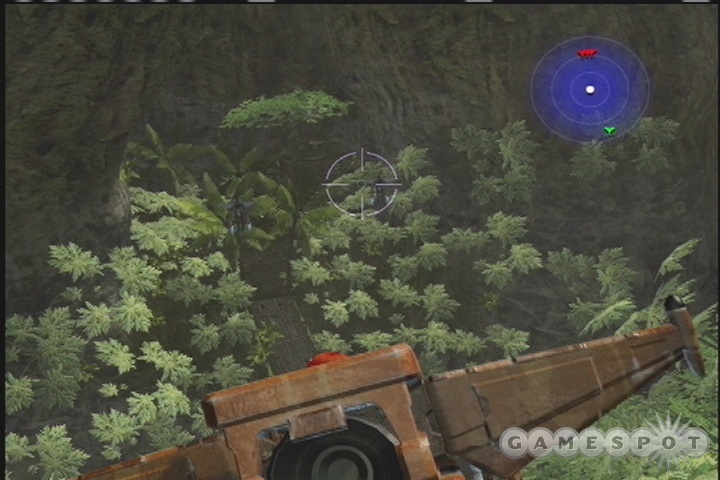
Clearing the area around the jetpack won't end your troubles, though, as there are still two enemies actually in jetpacks to deal with, as well as a soldier on the bridge with a Hawk Boomerang. Although the jetpack that's near your position looks like a tempting target, you'll probably be better off using the cliff face for cover and firing on the soldiers in the jetpacks from the ground. Actually using the jetpack leaves you well exposed to fire, and makes it difficult to accurately aim while you're moving. Of course, it has to be said that the jetpack soldiers can take a lot of damage, so feel free to backtrack and pick up some more SMG ammo if you start to run out.
When you do finally manage to clear out the jetpacks, grab the landed jetpack and cross the bridge, heading deeper into the jungle towards an ancient stone temple. (If you're interested in having the Hawk Boomerang available at the mission loadout screen, be sure to pick it up before you move on.) Again, plenty of soldiers around here, so the easiest way to proceed might be to get out of the jetpack, clear out as many of them as you can see from the entrance to the temple area, then get back into the jetpack, take off (right bumper), then fly up to the top of the area (left trigger) before sniping out anyone you see. Don't forget to use your DT goggles to highlight their positions.
When you can't move on any further with the jetpack, ditch it and head through the small passage nearby to end the level.
Mission Ten: Temple Surveillance
Location: South America
Well, now that you're in the dig site, you have to find out what the heck dataDyne is doing there. You know that there's something that's emitting a lot of energy, so you'll have to track it down and plant a tracking device on it before Mai Hem manages to escape. You do have a time limit for this level, and a fairly restricting one, so you'll need to be on your game if you want to escape. Note that giving instructions for this level is fairly difficult, so if you're having problems finding where to go, we recommend that you check our video walkthrough for the level.
Support: Sabotage Lifting Gear
From the entrance point, head down the steps and take a right. If there's a guard here, kill him, then head across the planks that stand in your way. This is actually a trap, and you'll fall onto some spikes if you fall for it; crouch across the planks to avoid having them fall underneath you. Fight your way past the soldiers and scientists in the next passage (the stone one, not the earthen one), then head down one level, reloading your weapons as you go.
On the lower level, find another passage with a pair of trap doors; from there you'll come to a room full of flame-spitting dragons. It is possible to avoid these flames, since they only shoot out of one dragon head at a time, but if you can't don't worry too much about it; they mostly deal armor damage, and there's another suit of armor soon after this segment.
There's another set of steps leading down from here, so head down and find another stone passage. You should eventually come to a pair of bridges suspended over water, beyond which a soldier with a Multimine is waiting for you. Kill him, then move on through the passages until you come to a set of steps leading down. (Note that there should be a small room with a set of X-Ray Goggles inside them on either this floor or the next. They're handy at the end of the mission, but not required.) Instead of heading down, though, take a left and stay on the same level to reach the elevator controls. The controls themselves can be demo kitted and destroyed, which will temporarily halt the progress of the lift here. A small room behind the controls will house an armor refresh, so grab it before moving on.
Objective: Plant Tracking Device
Return to the junction past the Multimine soldier and head down. On the next level that you come to, populated by two soldiers with Laptops, you can either find more steps leading down (which lead to a river passage overlooked by yet more Laptop-wielding soldiers) or a passage leading to a long and involved spike trap room. The spike traps mostly deal shock damage, making them probably preferable to the soldiers on higher difficulty settings, but the soldier path is perfectly navigable if you have plenty of armor available to you.
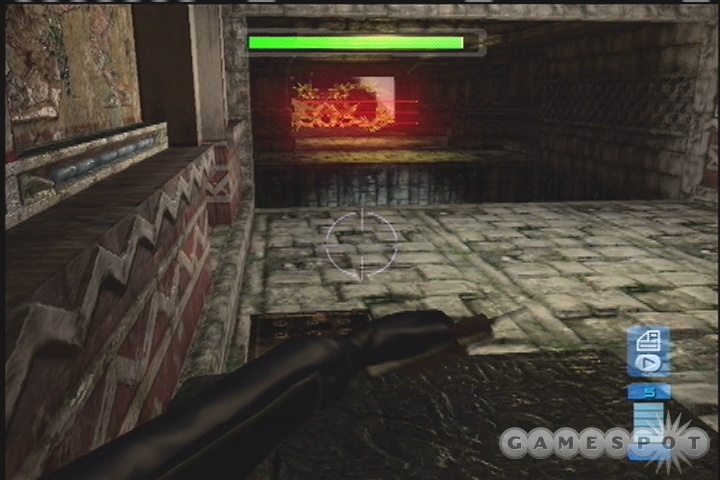
Regardless of the path you take, you'll come out on the second lowest level of the facility; another path here will lead out to another jungle area with a ramp that heads downward. Seeing people here will be difficult due to the foliage; if you have the X-Ray Goggles, you can use those, or the RCP's Threat Detector. When you get past these soldiers, you'll come to what appears to be a dead end. On the easiest difficulty setting, you'll be able to walk over the bridge here without a problem, but on the higher difficulties, you'll have to whack the stone blocks here with your melee attack to knock them into place on the two brown tiles in the floor. This will raise the bridge and allow you to get close to the tripwires, which will, in turn, enable you to launch your Spycam.
The power source here is in the middle of the area, near the feet of the large statue that's in front of you. Avoid going down the steps, and skirt around the stone wall that runs along the statue, and you should be able to reach it with time to spare.
Support Objective: Flood Foundations
As soon as you do plant your tracking device, Mai Hem will sic a bunch of new enemies on you. The Phantoms, as they're called, pack plasma rifles, and can turn invisible to boot, but they do move quite slowly. If you stay where you are at the beginning of this fight, you'll probably get overwhelmed and die, but if you move forward and down the steps, you'll be able to prevent them from cloaking themselves, thus giving you a slight advantage against them.
Immediately after the Mai Hem cutscene ends, press up on your d-pad to holster your weapons; this will allow you to move much more quickly than you normally would. Duck down the steps in front of you and wheel around to the long passage that runs underground here. Your goal is to shoot the four dragon heads that dwell in the small alcoves here; there are two on each side of the wall. If you pop all of them, the chamber will flood, and the Phantoms will not be able to cloak themselves when they come at you.
Objective: Defeat Phantoms
All that's left to do now is to defeat the Phantoms! As mentioned, they move relatively slowly, as do the shots from their plasma rifle, so you should be able to dodge the incoming fire without too many problems. The trouble here is that each shot that does hit you will take off a substantial portion of your life bar. Luckily, though, the checkpoint save here is at the beginning of the Phantom fight, so if you do die, you don't have to go back too far. Try getting one of the Plasma Rifles before you kill all of the Phantoms and end the mission.
Mission 11: Outpost Rescue
Location: Africa
Your tracking device has led you to Africa, where you believe Jonathan is being taken, along with the power source. Time to mount up for a rescue. This is going to be another run-and-gun mission, with plenty of combat, so outfit yourself accordingly. We went in here with a Plasma Rifle and a P9P. Although you may think to start out stealthy, you'll quickly find yourself in the thick of things, so you might also want to consider bringing along an RCP-90 if it's to your liking. The Threat Detector will work well against the multiple enemies here, especially since visibility is relatively low.
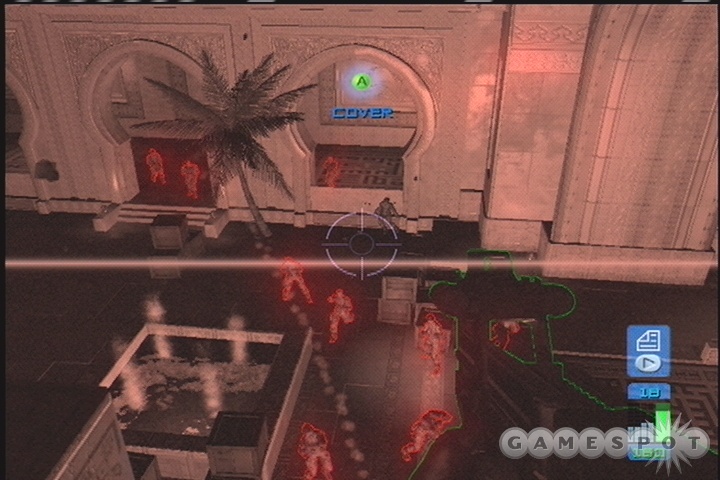
Objective: Rescue Institute Squad
Jonathan is alive, but he won't last long with dataDyne's torture squad; you'll have to effect his rescue relatively quickly. Unfortunately for you, there's a couple dozen soldiers in the area. There are three or four on the landing pad, another few in the room where Jonathan is being held, and around 15 more down on the lowest level of the courtyard here. You've got your work cut out for you, but with proper use of cover you should be able to take down the bulk of the soldiers before you rescue Jonathan, which will be helpful, because you'll want him and his soldiers to live through most of the level.
Begin with either your plasma rifle or RCP-90 and take down the soldiers on the landing pad. You have a pretty good amount of area to run around on, so get a good angle on them and shoot them from cover. When they're dead, you can either use the zipline to get down there, or head around to the ledge that's overlooking the landing pad and press up on your analog stick to jump over the small wall and drop down. From there, you can pick up all the SMG ammo that they've dropped, get behind cover, and start shooting anything that moves. The RCP's threat detection will be critical for actually seeing the enemies here.
When you've managed to bust through the bulk of the enemies in your way, hack the wall panel near the laser grid and move through to the interrogation room. (If you don't have a datathief, you can walk down the nearby stairs and circle around to reach the room.) Jonathan and his soldiers will be happy to see you, of course, and will outfit themselves at the nearby armory before moving out. Note that one of of the weapons lockers here holds FAC-16's, a fine little assault rifle with an underslung grenade launcher.
Support: Neutralize Dropships
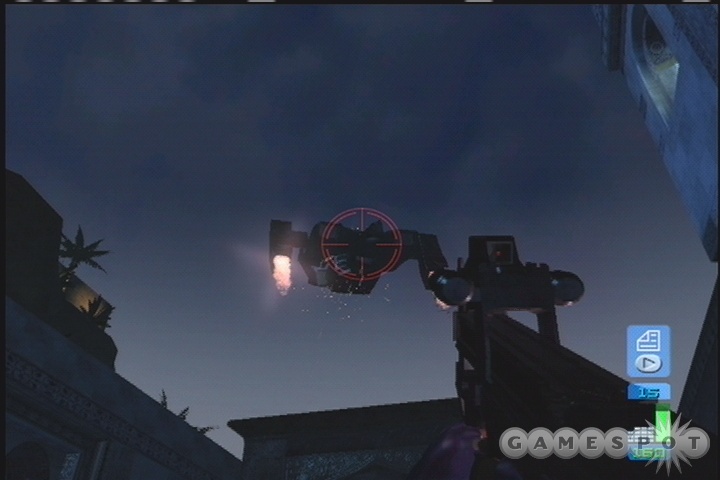
Carrington will radio in here to notify you of dataDyne dropships that are en route. There's no particular secret to taking these guys down; just shoot them a bunch! You don't seem to need to fire at their engines, in particular; shooting their main sections seem to do well as far as dealing damage to them goes. You won't see them immediately, but you'll spot them as you move through the level. They actually appear just after you and Jonathan activate the door panels in the courtyard. So, before you move on from this position, wait for them to fly overhead and unload on them with your FAC-16 or RCP. You should be able to destroy both of them, either when they fly overhead or after they make their drops and fly back. Don't fret if one gets away; you'll see it again eventually.
Note that if they do make a drop, then you'll have to deal with the soldiers incoming from behind you. These guys carry Superdragon weapons, so you should probably just wait for them where you shot down the dropships, kill them, then take one of the Superdragons along for the ride. Its grenade launcher will be quite handy in the upcoming fight.
Support: Ambush Convoy
Just beyond this area, Jonathan will tell you of a convoy that's coming up underneath the bridge you pass over. Killing these soldiers is mostly a matter of letting your friends do the firing. The only complication here is that a soldier will appear and man the turret above you during the fighting; when Jonathan calls him out, turn around and blast him before he does severe damage to your soldiers.
Primary: Disable Air Defenses
After the convoy goes down, it's time to start making your charge through the town here towards the air defenses. There's going to be some tough fighting here, no doubt about it, but your soldiers are fairly hardy.
Before you head through the first archway, take the stairs on your right to engage the rooftop soldiers. If you don't kill them now, they'll harry you as you make your way through the town. Note the presence of a sniper in the belltower a ways away; prioritize his death, then proceed to the top of the building here and use cover to start taking out any other soldiers that are firing at you. This whole firefight will take a few minutes to complete, but if you're lucky, none of your allies will die.
From there, you have two paths to follow through the town, roughly divided into left and right. The left path will feature a bit more interior combat, and will eventually take you over the main road and allow you to fire on the enemies from above, while the right path will take you through the urban areas of the town and take you up the main road towards the air defenses. We personally preferred taking the right path, using an RCP with threat detection to spot any enemies in our way. There's not much to say about either path, though, except that you need to keep your head on a swivel and be on the lookout for enemies on all sides of you. Don't worry if you lose a couple of soldiers here, as they won't be able to help you during the final fight.
When you reach the last major gunfight, involving eight or so soldiers firing on you without any cover, switch over to your Superdragon or FAC-16 and use your grenade launcher to deal them as much damage as possible, but save some of your grenade ammo here it at all possible. In fact, if you're running low on grenades, you might want to backtrack through the town to find another FAC-16 or a Superdragon, as grenades will make the upcoming fight much, much easier.
Boss Fight: Mai Hem
Mai Hem will come at you on a hovercraft as soon as you pass through the arches leading into the little arena near the air defenses. She'll man the turret on the craft while her pilot chooses to dash around ineffectually. The good news? There's plenty of cover for you to use to protect you from Mai Hem's machinegunning skills. The bad news? It's really tough to damage Mai Hem while the hovercraft is darting around.
And make no mistake, the goal here is to kill Mai Hem; the hovercraft is apparently un-blowupable, if that's a word. (And by the way, how the heck did they get that thing in this place?) However, you can destroy the cushions that the hovercraft uses to move around on if you do enough damage to them, and doing so will prevent the hovercraft from moving, making the Mai Hem kill a simple matter of ducking behind cover, then getting a headshot when she turns away from you. She's on the default turret-gunner AI setting, so she'll rotate in place when she can't see you, allowing you to get an unfettered shot at her. You can also kill the driver of the hovercraft, which has the same effect; just wait for him to turn, which will cause him to temporarily be motionless, then unload a few shots at him and he'll eventually die.
Unfortunately, it would appear that the hovercraft's cushions are only vulnerable to explosive fire; we unloaded most of a clip from an RCP and a Superdragon into them and they never deflated. If you did manage to bring along an FAC-16 or a Superdragon, though, unloading a few grenades into the bottom of the treads will deflate them, causing the machine to grind to a halt.
If you don't have any explosives available to you (and you likely won't if you have to restart from the checkpoint), then you'll have to go for Mai Hem herself while she rides around on the hovercraft. The good news is that she can't take an absurd amount of damage; four or five seconds worth of gunfire on her body or head should be enough to take her down. If you can hide behind cover, then she might rotate away from you, letting you fire on her without exposing yourself to her machinegun blasts. Even if she does fire on you, she's not terribly accurate.
Mission 12: Bridge Assault
Zhang Li's located the Graal, and is attempting to power it up. It's up to you to stop him! For your weapons here, you're going to need something with a decent scope. If you have a Jackal available, that'll be ideal; if not, bring along a DW-P5, a P9P, or a FAC-16.
Objective: Escort Jonathan
At the very beginning of this level, Jonathan's hovercraft will be taken out by dataDyne forces, leaving him temporarily unconscious. You'll have to take down the pair of jetpacks that are coming your way if you want to survive. You're rendered some shielding by your turret, so use the left trigger to steady your aim, then gun for the heads of the soldiers in the jetpacks for quick kills. You can take them down with body shots, if you wish, but they'll take a substantial amount of damage before they die.
When you're clear of the wreckage, walk down to Jonathan to get him up and running again. He'll follow you throughout the level, but he'll only be able to take so much damage before he dies; try to keep him under cover as much as possible.
Support Objective: Assist Institute Squad
Your first support objective for the level involves assisting an Institute squad that are holed up in some ruins near your position. There are a number of snipers in the ruins and on the hill to the left of it; watch for tracers to gauge their positions. Since Jonathan has a tendency to run ahead of you, stay back from the entrance to the ruins and use your scoped weapon from a distance. Again, a sniper rifle will be ideal, but even a DW-P5 can get headshots with maximum zoom and the silencer attached for extra accuracy. Some of the female snipers will have helmets, though, so aim for the body of those enemies.
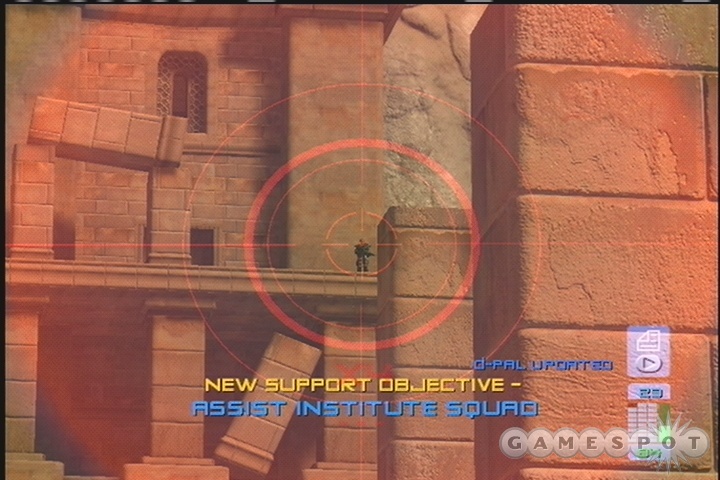
When the snipers have been eliminated, you can move forward and start dealing with the enemy grunts that will be rushing at your soldiers on the ground. Now, despite the implicit promise of backup when you complete this objective, you actually won't be getting any help from these guys, so don't worry about keeping them alive; just sit back and try to pick off the soldiers as they come in. When everyone's dead, you'll complete the objective and be able to move on. Note that there's a Shockwave sniper rifle lying on the ground here, if that's your bag. Getting it earlier would've opened you up to a lot of sniper fire.
Reaching The Bridge
Now, there are two ways to proceed here to reach the bridge here. The first will take you inside the ruins here; the second will have you plumping the depths of the temple along the road to the right. We went along the road, ourselves, but both paths will lead to the same spot eventually.
The archway up the road is blocked by overturned cars, so you'll have to head into the temples that line the road in order to find the passage on. There's no real point to sweeping through the entire temple complex, so just head up the road and enter through the second entrance up there. You'll enter into a room with two sets of steps to the left and right. To the right, you can find a pair of Superdragons, assuming you can convince their owners to give them up. The left path leads on through the caves to reach the top of a bridge that you need to get onto.

Before you head out onto the bridge, though, a picture-in-picture will pop up indicating the presence of a rocket launcher soldier around the corner. Grab some cover just before the bridge begins, then whip around and take the soldier out before he can fire at you. If he gets a rocket off, it's quite likely than Jonathan will die, so you really have to take him down quickly. There's also a soldier with a Superdragon on the ledge with him. (Note that the rocket launcher here will come in handy in a few moments, so you might want to grab it; just don't fire it at any grunts until you reach the bridge here.)
From there, head down the steps nearby and hit the road again. (You might need to press forward to hop from the stairs to the road, as the game interprets it as a ledge.) To the left, around the corner, is the rear entrance to the ruins; feel free to explore a bit if you wish, but there's nothing to see except more soldiers.
After you enter the position overlooking the bridge, you'll have to leave Jonathan behind and proceed on your own speed. Before you meet up with Carrington, though, return to the rocket launcher and pick it up if you can.
Support Objective: Destroy Mortars
Well, here's a challenge for you. You somehow have to get across the bridge here, without getting turned to Swiss cheese by the enemy soldiers and without being turned into mush by the enemy mortars. You've obviously got your work cut out for you.
First up, Carrington asks you to destroy the dataDyne mortars that have been set up on the far side of the bridge. They're tough to spot, and even tougher to take out, thanks to the fact that they're immune to small arms fire; you're going to need to use high explosives on them to take them down.

Speaking of high explosives...if you recall the rocket launcher you passed by earlier, that'll make for a handy weapon to take on these mortars with. If you didn't get the rocket launcher from the soldier you killed earlier, then you can find one in a locked box in the armory of the Institute's side of the bridge. It'll only open if you have a Locktopus, though, obviously. If you can get it, then you can walk back to the sniper positions overlooking the left side of the bridge, zoom out to catch a glimpse of the mortars (they look like tank cannons angled up at the sky), then take them both out with one rocket apiece. Hitting both of them will allow the squad holed up below you to move out onto the bridge itself, fighting the dataDyne forces as they go.
Objective: Infiltrate Coliseum
Now's your chance to get across the bridge! Although the Institute forces are helping you out, you still won't be able to make it across the bridge without dying a horrible, horrible death, if you attempt to cross it's surface. There are around, say, 75 soldiers or so that you're going to have to kill in order to get across this bridge. Needless to say, attacking them head on is going to be a recipe for disaster, but there are precious few other options.
Well, you actually do have a few ways to proceed here, but there doesn't really seem to be a way to avoid or evade the soldiers, so get ready for some killing. One avenue of attack involves heading down into the underbelly of the bridge. You can find steps leading down if you head out onto the bridge's surface and check the left side of the platform, a couple hundred feet from the end. (You can see these stairs pretty easily from the location where you shot the rocket launcher at the mortars.) When you're underneath the bridge, find the pipe that spans the broken section, crawl inside, cross the gap, then start making your way to the back end of the stairs. Unfortunately, this will spawn in two waves of enemies that'll start coming straights towards you, resulting in a firefight against many dozens of soldiers that come at you quite rapidly. It's by no means an unwinnable fight, so long as you find good cover, but it is quite difficult to live through.
Another quick method of getting across the bridge can be found at the top of the stairs to the right of you as you head out onto the bridge. If you head past the turret there and find the item you can unlock with your Locktopus, you'll find a ladder that will lead you up to a zipwire that can take you down to the far side of the bridge lickity split.
Our preferred method of winning here, though, involves using the turret on the right side of the bridge. There are some steps there leading up to an apparent dead end, with an MG turret on the first riser. If you head there as soon as you enter the bridge area, you'll find that you should be able to kill most of the soldiers in your field of vision without a problem. Some of the enemy soldiers will hide or otherwise be out of sight, though, so you'll have to leave the turret, return to the bridge surface, get cover, and shoot them the old-fashioned way to kill them, or at least roust them to move around so that you can kill them with the turret.
The unfortunate aspect of this strategy is that you'll have to trigger the next two waves of enemies by walking down the bridge, then retreating to the turret. The second wave (after the initial gang of troops are killed) appears when you're near the crack in the bridge, while the third and final (and biggest) wave will start coming in after you move a bit further down, near the second big hold in the bridge. Our strategy here was to move down the bridge with a combat shield equipped, wait until we saw an enemy or two moving, then backtrack towards the turret, keeping the combat shield between us and the incoming foes. It won't prevent you from being damaged at all, but the shield should cut down on some of the incoming fire that you're taking.
The third wave here is definitely the biggest, so be ready for them and keep firing from the turret until you can't see any more movement. Unfortunately, even after they're dead, you're still not in the clear; when you enter one of the two passages leading up to the mortars, you'll come under fire from Zhang Li's elite guard, which consists of a couple dozen female soldiers with plasma rifles. They'll all constantly be invisible, so as soon as you see the first one, return to the bridge and start taking them down. It's probably not necessary to retreat all the way back to the turret; one of the many RCP's on the ground here should be sufficient to kill these guys as they approach.
When you're finally done with the abattoir, you'll need to make your way up through the facility here and into the Coliseum. The passage leading on is fairly tough to spot, so you may want to turn on waypoints if you haven't had them on throughout the entire game.
Mission 13: Arena Showdown
Objective: Kill Zhang Li
The time has come! Zhang Li must die! Every sentence must have an exclamation point!
On Secret Agent difficulty, at least, Zhang Li shouldn't be overweeningly powerful. His attacks do some serious damage, but for the most part are easily dodgeable. As you'll discover after the first cutscene appears, this battle takes place on a set of floating platforms, with you at the center. Zhang Li will usually choose to jump around the exterior of the area, and we mean "jump" literally; the transformation that he's undergone thanks to his integration with the Graal has given him some incredible powers.
Attacks
Li's primary attack here is going to be a plasma rifle-esque bolt of blue flame. After he jumps, he'll usually compose himself for a second, then fire two of these at you. As with the plasma rifle fire, they're easily dodgeable - if you see them coming. If you've zoomed in on him to fire at him, the you might have a harder time getting out of the way. They do severe damage to your armor and a good amount of damage to your life, so be sure to get the heck out of the way when they start coming at you.
Apart from that, Li also has an attack where he'll pick up one of the large pillars from the exterior platforms of the arena and chuck them at you. This move isn't exactly quick or anything; you should be able to see it coming from a mile away and react accordingly. Strafing to one side or the other should get you out of the way, although the pillars will likely strike the platform you're on and leave rubble behind, which can make it difficult to get around.
Lastly, Li will occasionally jump onto your platform and attempt to track you down and swipe you with his Viblade. When he lands, he'll immediately throw up the viblade's power shield to protect himself from your gunfire and start coming at you. If he gets within melee range, he'll probably kill you in a matter of seconds, so it's well worth your time to try and prevent him from doing so. As soon as you see that he's going to land on your platform, press up on the d-pad to holster your weapons, which will give you a burst of speed. That should enable you to stay away from him while he follows you around; if he's thrown pillars at the platform, be sure to avoid the rubble.
Killing Him
Zhang Li will go down only after a mixture of ranged and melee attacks. To begin with, your weapon loadout will be critical here, mostly due to the fact that you definitely can run out of ammo if you're a poor shot, which will make the fight more difficult to take on. You can probably win with a Jackal and a Viblade, if you happen to have either one of those available to you; we managed the deed with RCP/Superdragon, a Superdragon/DW-P5, and a Superdragon/P9P/Viblade combinations. The Viblade is pretty handy to bring along, if you managed to snag one during the Mansion Infiltration lab, but it's not strictly necessary, since, as mentioned, Li carries one of his own.
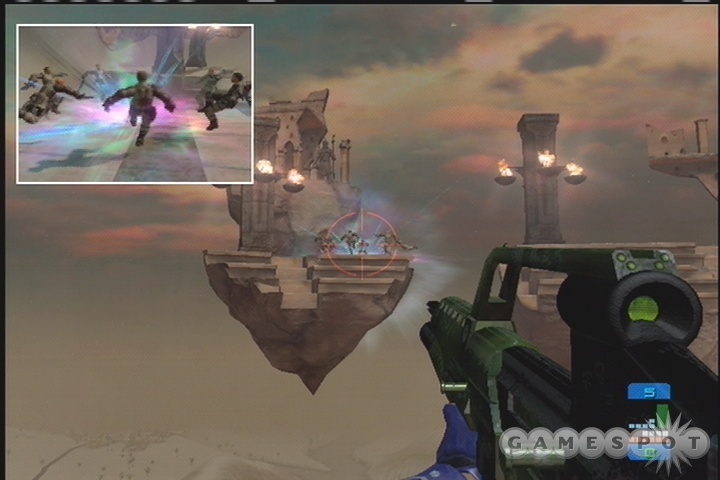
Anyway, the basic sequence of events goes something like this: use your long-range zoom weapon, such as the Superdragon or Jackal, to take potshots at Li when he jumps around. There'll be a couple of seconds between when he lands and when he starts firing at you, so try to land a headshot or bodyshot during that interval, then dodge his blast and wait for him to jump again. That's about the extent of your possible actions while he's moving around, although if he jumps to one of the nearest platforms to you, you might be able to hit him with a well-lobbed grenade from your Superdragon.
After you deal enough damage to Li, he'll eventually start attempting to regain his health by pausing for a second, then summoning up the bodies of six or seven of his soldiers and stealing their life forces. You can interrupt this pretty easily by shooting him, though, so the only threat here is if you lose sight of where he is and let him get the ritual off, but it's pretty flashy, so a quick rotation of your vision should reveal where he is.
Anyway, the primary method of dealing damage here will be with the Viblade. When he lands on your platform, Li will raise the Viblade's shield for a few seconds; backpedal away from him with nothing in your hands to avoid getting within melee range. If you have your own Viblade, then you can equip it when the shield drops and attempt to attack him; otherwise, just shoot him when the shield drops, and maintain your distance-keeping maneuvering. Eventually, in a move very unbecoming of a new god, Li will trip and drop his Viblade, allowing you to run over and pick it up. In the few seconds you have between Li getting up and jumping away, slash at him as much as you can with the Viblade, and you should deal lethal damage to him. (You can also try to use Multimines on him, by just throwing them at him while he chases you down.)
We managed to kill Li with one set of Viblade swings when we managed to enter the level with a Viblade already in our inventory; if you have to pick it up when he drops it, you'll probably have to go through this sequence twice to lay down the killing blow, but you should be able to survive so long as you don't let him get close with his own Viblade. Just be careful of pillar debris on the platform, as you can sometimes inadvertantly backpedal into a chunk of rock and get stuck, allowing Li to chop you up. Also note that Li will steal the Viblade back from you if he jumps away after you steal it from him, so you'll have to repeat the process of grabbing it when he trips. Lastly, you can't steal the Viblade from him with your melee grab maneuver, so if you try, be prepared to kiss most of your life total goodbye.
Got a news tip or want to contact us directly? Email news@gamespot.com
Join the conversation