Paper Mario: The Thousand-Year Door Walkthrough
Princess Peach is missing (again)! This guide to Paper Mario: The Thousand-Year Door includes a full walkthrough to help you uncover all the crystal stars, and tips on using each of Mario's sidekicks to his or her fullest potential.
Design by Marty Smith
Following in the footsteps of the first Paper Mario game for the Nintendo 64, and last year’s Mario & Luigi: Superstars for the Game Boy Advance, Paper Mario 2: The Thousand-Year Door has been a hotly anticipated title for Gamecube owners. Not only does it feature the most famous character in the history of videogames, but it’s also an RPG on a console that features all-too-few quality titles in that genre. It also offers a lengthy 30 to 40-hour campaign in which Mario attempts to - what else? - save Princess Peach.
Which isn’t to say that that’s all he’s trying to do; far from it. In addition to the standard Princess-rescuing duties, Mario will have to travel all around the world, assemble the seven Crystal Stars, and explore what lies behind a door that only opens once a millenia. In his travels, he’ll encounter numerous friends and even more numerous enemies; he’ll ply his trade as a professional wrestler; he’ll learn how to turn his body into a plane, a boat, and a tube; and, most importantly, he’ll woo all the ladies with the most impressive mustache in video games. And he’ll do it all without saying a word - what a classy guy!
So, if you want to get through a game with insults even whackier than the infamous "Spoony Bard" of old, this is the place to be, since Gamespot’s unofficial guide to Paper Mario 2 features a complete walk-through, including tips and stats for each boss monster you’ll find and details on how to unlock the game’s secret character. In addition, we’ll let you know how to get the most out of your teammates in combat, what Badges you should look out for, where to find all of the game’s Shine Sprites, and much more. Enjoy!
Table of Contents
CharactersBattle Tactics
Walk-Through
Miscellaneous
Characters
Mario will convince quite a few different characters to join him in his journey, each of which will bring valuable combat and field abilities to the table. Although you’ll undoubtably find yourself using some characters more often than others, you’ll have to use each of your partners’ abilities to make it through the game, so it’s worth taking the time to get to know them!
One of the most important aspects of your characters is their ability to be upgraded. You can do this at Merlon’s shop, which is directly next door to Frankly’s house in Rogueport. In order to upgrade one of your partners, you’ll need three Shine Sprites, which are found across the game world. (Check the Miscellaneous chapter for a complete list of Shine Sprite locations.) After an upgrade, a character will gain a bit more health and attack power, as well as a new combat ability. Later in the game, you’ll be able to upgrade all of your characters a second time, giving them even more health and offensive capabilities, as well as a final combat move.
Mario
Ah, Mario. What can you say about a character that initiated so many of us into the world of video gaming? He’s had a remarkably lengthy career, what with all the defeatings of Bowser and the foilings of Wario, but, as Paper Mario proves, he’s still willing to drop everything and run off in the hopes of finding treasure, when the opportunity arises.
In Paper Mario, Mario is the core of your little adventuring party, and has a number of unique abilities, such as how he can use Badges and Special Powers and how he can use two different forms of attack during battle. He’ll also usually be the strongest of your party members, if only because he can earn extra health at each level-up, if you choose to allocate your points there. He’s the tank of the group, so know him and love him. And keep him alive; if Mario dies, it’s game over for you!
Mario cannot be upgraded at Merlon’s Shop; he earns extra HP, FP, and BP when he levels up. Levelling up is accomplished by gaining 100 Star Points, which you earn after every battle (think experience). In order to gain new combat abilities, Mario will have to find new equipment around the game world; he can improve his boots and hammer attacks in this manner.
Attacks And Abilities
Jump: Mario’s basic jumping attack can hit an opponent twice, if you manage to hit the A button just before it lands. Useful against air opponents and opponents in the rear lines.
Spin Jump (2 FP): After you get the Super Boots, you’ll be able to use the Spin Jump in battle. In most cases, this isn’t going to be worth the 2 FP, as it usually only adds one damage to your attack when compared to a normal Jump.
Spring Jump (4 FP): Mario’s Spring Jump ability is much harder to time correctly than either of the previous jumps, due to the way you take a few seconds to land on your target’s head. If you can time it properly, though, you can deal quite a bit of damage, and it appears to penetrate through your opponent’s defense, but don’t quote us on that.
Hammer: Hammering is Mario’s other basic attack. Although you don’t get the opportunity to hit twice, as you do with Jump, you should deal around the same amount of damage when you time the release of your analog stick properly (which is extremely easy to do). The default Hammer can also easily be made into a Stylish move by pressing A as soon as the hammer makes contact.
Super Hammer (2 FP): When you use Super Hammer, Mario will deal a large amount of damage to the enemy in the front lines of the opposing group, and then knock them backwards into each other ground enemy behind them. The rear enemies will only take light damage, though, so this generally isn’t worth spending your FP on.
Ultra Hammer (4 FP): Ultra Hammer is essentially a beefed-up version of Super Hammer, where the enemies in the rear take slightly more damage from the contact with their flying friend. Still, this isn’t quite as cost-effective as Koops’ Power Shell ability, so you’ll only want to use it in emergencies. Note also that enemies that are rooted in place, such as Chomps, won’t be knocked backwards by Super or Ultra hammer attacks.
Goombella
Goombella is the first party member you’ll get, and she’ll be among your most useful party members throughout the game. Although she replicates Mario’s standard jumping attack, she’ll supplement with the very useful Tattle ability, which will let you keep track of how much HP each of your enemies has. Later on, she’ll learn Multibonk, which, when done well, is probably the most damaging attack in the game outside of a Supernova. She’s also notable for being one of the few female characters in that isn’t powerfully attracted to Mario’s soupcatcher of a mustache. More power to her, we say.
Goombella’s out-of-combat command will let her give you any compelling information about the area you’re in, such as hidden areas, details on NPCs, and so on. This isn’t often very useful - not as useful as Ms. Mowz’s information, at any rate - but she can give you hints on difficult puzzles.
Attacks And Abilities
Headbonk: Headbonk, Goombella’s basic attack, is identical to Mario’s basic Jumping attack. You’ll get one free shot on any enemy, even those in the rear of the battle lines, and if you hit the A button again just as you make contact with your foe, Goomy will ricochet up and bounce again for double damage. Getting the timing right for the second hit isn’t difficult at all, so learn it and love it.
Tattle: Every RPG has to give you some way to check your opponent’s abilities, and Tattle is Paper Mario’s version of the cheat sheet. When you Tattle an opponent, Goombella will give you a readout of any particular weaknesses or strengths that they have, as well as give you their vital stats. The best part of this is that, after you Tattle a particular monster, you’ll be able to spot their HP in each future fight against other instances of that monster. This even works against bosses, so if you wind up having to fight the same boss enemy twice (which happens a few times), if you check their health during the first fight, you’ll automatically get an HP readout for them during the second fight without having to re-Tattle.
Multibonk (2 FP): Multibonk is what makes Goombella a king-killer. When you use this ability, you’ll be able to continually jump away atop an opponent’s head, dealing extra damage each time you hit. Although the damage dealt will drop by one after each hit, you can still string together four or five extra hits for one damage apiece at the end of the move, letting Goomy easily deal seven or eight damage with a long string of hits. Although the move description seems to indicate that you can keep doing this until the enemy dies, the timing gets much more difficult as you move on, making it very difficult to do more than ten damage at a go. But for two FP, we’re not going to complain about that.
Rally Wink (4 FP): Activating this ability will let Mario take another attack during the same round, even if he’s already done something. This can be useful if you want him to perform a Special ability, or if there’s a spiky creature that Goombella can’t attack safely.
Koops
Although Koops is going to be constantly bringing you down with his bummer of an attitude - show some assertiveness, man! - he’s also one of the best characters to have in your party. He’s got a strong main attack that’s easy to get Stylish and a couple of fantastic FP attacks that damage all ground-based enemies. His main weakness is that he can’t attack flying foes; when you spot a Paratroopa or other aerial baddie, you’ll want to flip him for Goombella or someone else that can actually deal damage to it. Koops is also the only member of your party to get a natural point of Defense, but, on the other hand, he’s also susceptible to being flipped onto his back when an enemy uses a jumping attack, just like normal Koopas you fight against.
When you’re on the field screen, Koops is able to retract into his shell and shoot himself out at objects and enemies. If you hit an enemy with Koops, you’ll get a First Strike and some free damage. More importantly, though, this ability can be used to retrieve items that are out of reach, or to flip switches that are inaccessible. Many switches will also trigger the movement of another item, so you’ll need to use Koops’ levitation ability for these; if you hold down the X button after you "shoot" Koops out, he’ll hold himself in place until you let go, at which point he’ll complete his path back towards his point of origination. Using this ability, you’ll be able to fire Koops away from an elevator switch, hold the button while Mario makes his way to the top of the elevator block, and then release Koops to flip the switch. Pretty handy!
Attacks And Abilities
Shell Toss: Koops’ basic attack sees him retracting into his shell and launching himself at an enemy. Although this attack can only hit the first ground enemy in the opposing group, it still does appreciable damage, and is easy to make Stylish by hitting A just as you impact your target.
Power Shell (3 FP): Now this is useful. For a mere 3 FP, Koops will send his shell through all ground enemies on the screen for full damage each time. Although you can only hit enemies on or near the ground - flying enemies won’t be affected - this doesn’t change the fact that Power Shell will often let you dish out much more damage than it costs in FP. Although this is true of a number of powers, it’s rare for such a cheap ability to be able to affect all enemies on the screen. If you’ve been Tattling enemies, you should be able to predict exactly how much damage you’ll do to each of your targets, which will let you predict exactly how many enemies will be killed off when you use this.
Shell Shield (4 FP): If you use Shell Shield, you’ll be able to increase Mario’s defense for a single turn. There are a number of abilities that have a similar effect, and none of them are terrifically useful, so you might want to save your FP for something with a bit more utility, such as...
Shell Slam (6 FP): Shell Slam is almost exactly the same as Power Shell, save that it penetrates enemy defenses, meaning that enemies with high Defense, such as Clefts and Chomps, will take full damage from the attack. In most instances, Power Shell will be just as useful, but when you do face off against high-defense enemies, it’s always nice to have Shell Slam as a backup.
Yoshi
This member of the Yoshi species isn’t actually named Yoshi by default - you can choose what name you want to give him (it?) when he joins your party. We, being artistes of the highest order, chose to call him "Yoshi," but you can choose to pick a far less creative name for him if you wish to be a philistine.
Yoshi’s primary claim to fame is his speed and flight abilities. On the field map, Mario will be able to ride around on Yoshi, which will double your party’s movement speed; you’ll also be able to use Yoshi’s fledgling wings to scoot across any small gaps that you come across. In battle, he can also fly over atop enemies and bounce on them repeatedly, or gobble one up and spit them at the next-closest enemy.
Attacks And Abilities
Ground Pound: As mentioned, Yoshi can attempt to use his wings to fly above enemies and enact a little pounding punishment. This is considered to be a jumping attack, so he will take damage if an enemy is spiky, but when Yoshi does successfully pull this off, you’ll get a ton of damage. This isn’t as useful against armored enemies, though, as Ground Pound hits multiple times for small amounts of damage, instead of once for a huge amount.
Gulp (4 FP): Gulp is somewhat similar to Mario’s Super Hammer or Ultra Hammer attacks, in that it deals a lot of damage to an enemy in the front of a group and hurls him backward to hit whomever is behind him. Although the second character takes almost the same amount of damage as the enemy in front, enemies behind the second don’t take any damage at all, making this most useful when you’re facing off against only two ground enemies.
Mini-Egg (3 FP): Mini-Egg is one of the many abilities that can effect a status change on your enemies. In this instance, Yoshi can attempt to miniaturize enemies with his eggs, which will reduce their attack power on subsequent turns. This has some use against high-damage enemies, but in most cases, you’ll want to focus on dealing damage rather than lessening the damage that your opponents do.
Stampede (6 FP): Yoshi, despite having never seen another member of his species during this game, apparently has the ability to call in a hundred friends or so to come along and smash into any ground-based enemies. Koops’ Shell Slam will usually be more useful than this.
Vivian
Vivian is initially hostile to Mario and friends, due to the fact that she’s a member of the Shadow Sirens, an evil trio of sisters that’s working for the X-Nauts. After you help her out, though, she’ll join up with your gang, bringing along some unique combat abilities.
On the field, though, Vivian’s special ability allows you to hide away in the shadows. When activated, she’ll pull Mario into the shadow realm, making it impossible for enemies to see you and rendering you immune from such things as fire and spike traps. You can’t move while you’re in the shadows, but it does come in handy nonetheless.
Attacks And Abilities
Shade Fist: Vivian’s Shade Fist can hit flying enemies, and attacks from the front, giving you a rare method of hitting those annoying flying/spiky enemies that can so often baffle most of your other characters. It can also sometimes set your target alight; the resulting flames will deal extra damage on subsequent turns.
Veil (1 FP): Veil is the combat equivalent of Vivian’s field ability. When activated, Vivian and Mario will suck themselves into the shadows for a turn, meaning that all enemy attacks during that turn will deal zero damage. Unfortunately, coming out of the shadows will also prevent Mario and Vivian from attacking or taking any other actions, meaning that your enemies will be able to attack again immediately. Why is this useful, then? Well, it’s primarily intended to avoid attacks from enemies that have charged themselves up to deal obscene amounts of damage to both party members; typically, you’ll take far less damage during the "free" attacks after you hide than you would from the huge attack that they’ve stored up.
Fiery Jinx (6 FP): Fiery Jinx is your typical damage-all-enemies attack, save for the way that it will deal residual flame damage to afflicted enemies.
Infatuate (4 FP): Another status-effect ability. In Vivian’s case, Infatuate allows her to confuse enemies, which will sometimes cause them to attack each other instead of Mario.
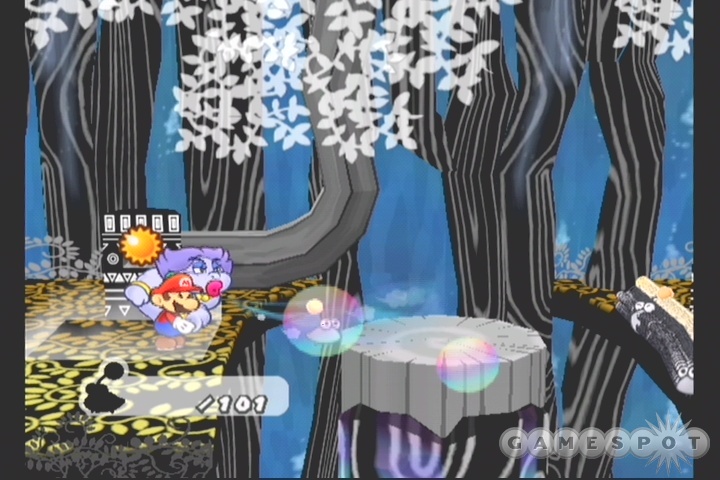
Madame Flurrie
This busty diva, as the name might imply, is an embodiment of the wind element; in combat, she can use her wind powers to literally blow away your enemies, or obscure Mario in a cloak of fog. Outside on the field, though, is where she’s most useful; you’ll often have to use her mighty breath to rip away paper from the background or to blow enemies out of your way.
Attacks And Abilities
Body Slam: With her Body Slam technique, Madame Flurrie can use her girth to slam an enemy for big damage. Getting a successful Body Slam off is simple; just move the targeting cursor into the aiming reticule and leave it there until Flurrie launches herself. Note that this is considered to be a jumping attack, so Flurrie will take damage if she tries this on a spiky enemy. You can make this Stylish by hitting A just as Flurrie hits the ground.

Gale Force (3 FP): Gale Force is useful against some enemies, but not all of them. When used, it can auto-kill some of the enemies on the screen (in effect blowing them off the stage), but won’t usually kill off everything. Larger enemies, or those that are rooted to the ground, are generally less likely to succumb to the force of her breath than are smaller, flying enemies.
Lip Lock (4 FP): Using Lip Lock, Flurrie can steal an enemy’s health and add it to her own. Since Flurrie will usually have plenty of HP when compared to other characters, it’s usually more efficient to just use a Body Slam; it’ll deal the same amount of damage and won’t cost you any FP in the meantime.
Dodgy Fog (6 FP): When you’re facing off against enemies that rely on physical attacks, Dodgy Fog can actually be quite useful, since it greatly reduces the likelihood that such attacks will hit Mario. (Flurrie herself will be hit normally, but if she’s in the rear slot, most enemies will still attack Mario by default.) What’s more, this lasts for a few turns, so it can potentially save Mario from a couple dozen damage!
Admiral Bobbery
This old grognard is the last party member you’ll obtain, but he’s one of the hardiest. After upgrades, he’ll have the highest HP count of any member of your party (save Mario), and he’ll match it with his powerful ability to detonate himself. On the field, you’ll be constantly using this to blast away at cracked walls, both to reveal secrets and to clear a path for you to proceed with the main storyline. In combat, Bobbery’s ability to blow himself up will lead to some prime hurtings for your enemies.
Attacks And Abilities
Bomb: Someone call the Department of Homeland Security, because Bobbery’s gonna blow! With this attack, he’ll wander over to a ground enemy and blow himself up for a mild amount of damage.
Bomb Squad (3 FP): Bomb Squad is useless in most fights, if only because it takes so long to go off. When you fire off the three bombs that consist the Bomb Squad attack, your enemies will take a turn, then you’ll have a turn, then your enemies will have another turn before the bombs explode. In other words, most normal fights will be over before these bombs even go off! During boss fights, Bomb Squad can actually be an efficient manner of dealing damage to a single target, if you can aim them properly.
Hold Fast (4 FP): Hold Fast is another effect that won’t see much use, since it’s largely a reactive ability. When you activate it, enemies that come into contact with Bobbery will themselves take damage. You’ll usually want to save your FP for offensive abilities.
Bob-ombast (9 FP): Although this ability is among the most expensive in the game, it makes up for it with pure destructive capabilities. When you successfully pull off a Bob-ombast, every enemy on stage, be they ground-based or flying, will take a heaping helpin’ of damage. This doesn’t do too much more damage than do other all-enemy attacks, so if you’re going up against an array of ground enemies, you’ll usually be better served by Shell Slam, but when you have a number of enemies in different positions, you can be sure that Bob-ombast will weaken all of them considerably. Against single large enemies, though, like most bosses, the damage dealt is not great enough to warrant the high FP cost.
Ms. Mowz
Ms. Mowz is the only "secret" character in the game. After you complete Chapter Four, you’ll notice that a mini-quest will have gone up on the Trouble Board in Rogueport, offered by someone only identified as ???. If you complete the quest (by using Flurrie to reveal a hidden treasure chest in Hooktail’s lair at the top of Hooktail Castle), Ms. Mowz will join you on your adventure. She’s quite handy to have around, too, if only because her field ability will let you find any hidden items.
There are some things you should note about the item-finding ability, though. The first is that she’s not very precise in her responses to your queries; using it is more like playing a game of hot-or-cold than it is like getting any specific advice. She’ll point herself in the direction of whatever item she’s sniffing about, at least, so you can keep walking in that direction until she flips the other direction; when this happens, you’ll know that the item is directly north or south of your position. When you get really close, she’ll say, "There’s something right under our noses!" When that happens, pick up your visual scanning and start shaking trees and looking behind obstacles and such, because there’s something nearby. If you really can’t find anything, try Spin Jumping; Ms. Mowz can pick up on Star Pieces hidden underneath the ground, and this is what you’ll often find.
Note that Ms. Mowz’s ability can and will pick up on objects that you can’t access yet. If you use her around town before chapter five, for instance, she’ll point you in the direction of objects that you’ll need to use Bobbery or your boating special ability to get to, even though you don’t have those yet. So if you honestly can’t find something that’s she’s pointing you towards, try coming back after completing a chapter and see if you have any better luck with your recently-obtained abilities.
Attacks And Abilities
Love Slap: It isn’t difficult to max out the Love Slap meter, but when you do, it’ll hit your opponent and disregard his or her Defense, making it perfect to use against solidly-built enemies.
Kiss Thief (2 FP): Kiss Thief is one of the more unique abilities in the game. You may have noticed that some enemies actually carry items around with them, even though they don’t often use them. With Kiss Thief, you can use Ms. Mowz to actually steal these items from your enemies and add them to your own inventory!
One particular enemy to note in regards to this ability is the Amazy Dayzee, which is often found in the Twilight Trail leading up to Creepy Steeple. These guys almost always carry an Ultra Shroom when you encounter them. They’re mindlessly difficult to actually defeat, so a good strategy is to switch Mario and Ms. Mowz, let Mowz steal the Shroom, then have Mario run away. It’s worth losing a few gold to nab an Ultra Shroom, as they normally retail for 200 gold in the Downdeep shop.
Tease (3 FP): Another status effect ability, Tease lets Ms. Mowz dizzify enemies for a relatively low cost. As per usual, though, you might as well be doing damage to your opponents rather than confuse them.
Smooch (10 FP): For being the most expensive ability in the game, you’d think Smooch would have some earth-shaking effect, wouldn’t you? Well, if you were expecting a hugely useful ability, look elsewhere, as all Smooch does is heal Mario for 10 HP. If he’s desperately close to death, and you just happen to have Ms. Mowz in the party, and you happen to have a ton of FP, and you don’t have enough Star Power to use a Sweet Feast, then maybe, just maybe, you might want to use this. Otherwise, it sucks.
Battle Tactics
Although battling in Paper Mario isn’t as complex as it is in some RPGs, that doesn’t mean that the game is lacking in options. Indeed, on any given turn you’ll have to decide whether or not you want your character to perform an attack, use a special move, use an item, switch places with another character, defend, appeal to the audience, and so on. Luckily, everything is turn-based, so you don’t have to worry about the constant threat of enemy attack, as you would in the voguish real-time RPGs that all the hip kids seem to be playing these days.
Before A Fight
Know Thy Foe
If we can interject an editorial opinion here, let’s go ahead and admit it: Paper Mario 2 is a pretty easy game, for the most part. Few, if any, of the roving bands of monsters will threaten your party with extinction. (Which isn’t to say that this never happens; wait until you run across an Amazy Dayzee to see what we mean.) Still, that doesn’t mean that you should just run around expecting to have a bunch of simple fights between the bosses, does it? Well...actually, yes, that’s exactly what it means.
Anyway, you may come across the occasional enemy that actually poses a threat to you, such as the aforementioned Amazy Dayzee. In most cases, this is going to be because of an opponent’s defensive capabilities than their offensive capabilities; even if a foe can only deal one damage per turn, they’ll still eventually win if you can’t hurt them at all. For this reason, preparation and planning become important.
To begin with, you should never wander outside of town without some kind of offensive item in your possession. There are numerous examples of these, and many have the ability to attack multiple enemies at once (such as the Ice Storm, Shooting Star, Thunder Rage, and so on). With one of these in your possession, you can rest easy in the knowledge that, even if an enemy is immune to all of your regular attacks, you’ll still have some way to deal damage to it.
Jackie Chan’s First Strike!
This ties in with the previous tip a bit. One of the good things about Paper Mario is that there aren’t any random encounters; every enemy that you come across (save for the bosses) will be visible on the field map. If you’re using the game’s First Strike mechanic (and you should be), tailor your first strike to the kind of enemy you’re facing off against.
This is especially important against spiky enemies! If you’re going up against a Chomp or a Spiky Goomba, for instance, and you jump on them in the field map for a first strike, Mario’s going to wind up taking damage when he lands, which is not a good thing. You can, however, use your hammer to make a first strike against a flying enemy, although you wouldn’t be able to hit them with a hammer in a normal fight.
The second thing to be aware of before you make your first strike is your choice of teammate. Some characters just aren’t effective against certain enemies; Goombella, for instance, isn’t going to be of much utility when you’re facing off against a bunch of Embers, while Koops won’t have any effect at all against a Lakitu. It is true that the enemy on the field map is only one member of the enemy party, and that there may be other foes within the group that your teammate can attack, even if he or she can’t attack the one that you see, but still, it’s worth planning for the worst-case scenario and shifting around your teammates to ensure that you can deal with a group full of the enemy on the field map.
During A Fight
The Order of Battle
After a fight begins, Mario and his teammate will attack first, unless your opponent managed to get a First Strike on you. When you do start a fight, you should take advantage of this first turn to deal as much damage to your opponent as possible, especially if you know how much HP they have (thanks to Goombella’s Tattle ability) and feel confident that you can kill the majority of them before they can take their turn. Your ability to do so arrives from knowledge of your own abilities (i.e. you should keep track of how much damage you can deal with each attack; this isn’t randomized, as it is in most RPGs) and some simple math.
Know When To Switch
There are two uses of the word "switch" in the battle system. One occurs when Mario and his teammate switch positions on the stage. Normally, Mario will attack first in any given turn, but if you wish for your teammate to attack first, press the Y button and they’ll shuffle around so that the teammate comes in front.
This is obviously useful against enemies with weaknesses or strengths against a certain attack, or if you will be able to kill extra enemies by virtue of the switch. For instance, if you have Mario and Goombella in a party, and are facing off against a Hyper Goomba and a Hyper Spiky Goomba, then you could use Mario to jump on the Hyper Goomba and kill it, but Goombella would then be unable to attack, since she can’t hurt the Hyper Spiky Goomba. In these kind of situations, it would be better to let Goombella attack first and kill the Hyper Goomba, then let Mario attack second and off the Spiky with his hammer. It’s common sense, people!
In addition to changing the order of attack, though, this will also place your teammate in front of Mario. When this occurs, the teammate will take most of the single-target attacks by default, allowing Mario a bit of time to rest.
The second "switch" term refers to the method by which your teammates can switch between themselves in the middle of battle, a la Final Fantasy X. Since you can only have one teammate on the stage at a time, you will need to use this ability (found in the Tactics menu) to switch out in case one teammate is low on HP, can’t attack your enemies, or has a special attack that you need to use. The unfortunate part of this is that, when you switch out your teammate, you’ll lose half your turn: if Mario switches out teammates, he won’t be able to perform any other action that turn, while if your teammate initiates a switch, the new teammate that comes into battle won’t be able to do anything until next turn. This is another good reason to go ahead and choose your teammate based on the enemies that you see on the field screen; if you don’t, and your teammate can’t attack for whatever reason, you’re going to have to switch them out and will probably take more damage than you would’ve otherwise due to the fact that you’re losing an attack.
Utilize Your Audience
One of the conceits of Paper Mario is that all the world’s a stage, with Mario and his friends as the players. As such, each of your battles will take place before an audience, complete with adoring fans, with a few hecklers thrown in for good measure.
Your audience is important because they’ll help you fill up your Star Power meter, which in turn will let you use your Special Moves more often. (See our Miscellaneous chapter for details on these.) In order to get more Star Power, though, you’ll have to perform moves that will please your fans and will have to encourage more fans to show up.
Stylish Moves
The easiest way to get a boost to your Star Power is to use a Stylish attack. A Stylish attack is initiated in the same way as a normal attack, but if you press A at a certain time during the attack, your character will flourish a bit, and do a dance or something else to entertain the crowd, who will reward you with extra Star Power, usually on the order of half a point or so.
Stylish attacks, as mentioned, are initiated when you tap A during a normal attack, but the timing on them changes for any given attack. In general, though, you’ll want to tap A either just as you hit your opponent (as with Mario’s Hammer or Koops’ Shell Toss attack) or just as your character is touching the ground (as with Flurrie’s Body Slam). You can discover these timings by accident, if you wish, or you can buy the Timing Tutor Badge from Charlieton in Rogueport, which will show you when to tap A to make your moves Stylish. This only costs one BP to equip, so it’s worth trying out if you don’t know how to make everything stylish.
Building Your Crowd

Your crowd size will naturally fluctuate as you battle. (Note that there is a maximum crowd size based on level; this begins at 50 onlookers and caps at 150.) If you want to increase the size of your crowd, you’ll have to build up a reputation for daring in combat, such as by using Stylish attacks, Special Moves, and so on. You can also displease your crowd, though, by performing such actions as running away. If you turtle up too much or run away too often, you’ll find your crowd size slowly but surely dwindling away.
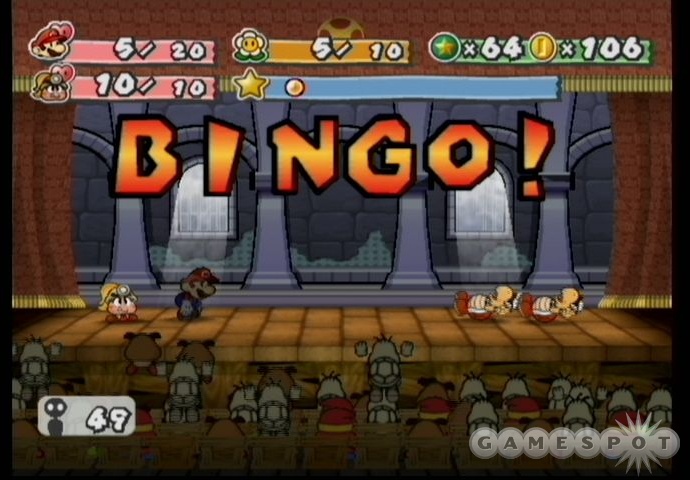
There is one method to gain a huge boost to your crowd population, though, and that’s to gain a Bingo! Every time you pull off an Action Command (such as by accurately timing Mario’s Hammer attack for extra damage, or by getting Goombella to jump on someone twice), you’ll notice an icon pop up next to your Star Power gauge. There are five icons in total: a Mushroom (representing HP); a flower (representing FP); a star (representing Star Power); a crowned star (representing all of the above; and a green mushroom (representing poison).
When you line up two icons of the same type, then perform another successful Action Command, the stage will be overlaid with a large slot machine, where your goal is to hit the button and line up a third matching icon. We’ll be honest and say that we never got the hang of doing this every time the wheels come up - it moves super-fast! - but if you manage to get good at it, then each successful Bingo! (which occurs when you line up three icons) will almost completely fill up your crowd. In addition, you’ll gain a complete restoration of whatever stat the icon represents. E.g., if you line up three mushrooms, you’ll get a complete health restore; if you line up three crowned stars, you’ll gain full HP, FP, and Star Power! The one to avoid is the poison mushroom; if you line up three of those, your HP, FP, and Star Power will all be cut in half.
After A Fight
Leveling Up
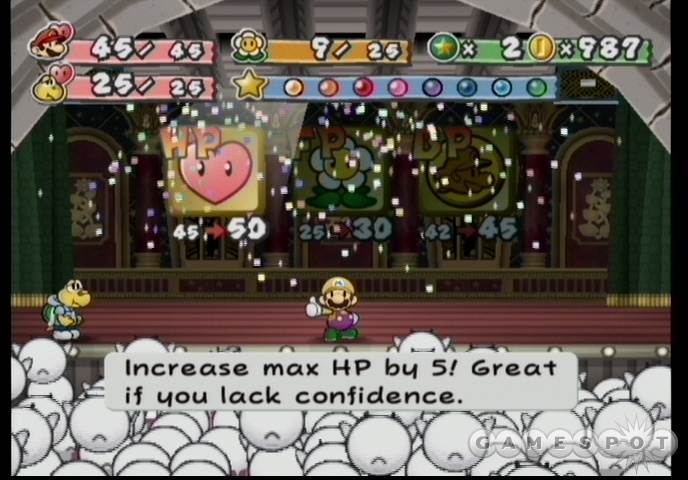
As in most RPGs, Paper Mario allows you to level up your characters, although in this case, only Mario levels up as a direct result of the experience that you gain in battle. When you do so, you’ll have to choose to increase either your health points by five, your flower points by five, or your badge points by three.
In the early portion of the game, you’ll probably want to get Mario another ten health points during the first couple of level-ups, with more coming later as you find yourself getting outclassed by enemies. For the most part, though, you’ll want to sink your level-ups into BPs, if only because they’re so much more flexible than anything else. Even if you level-up and gain three BP, for instance, you can take those three BP and use them to equip an HP Plus to emulate raising your HP, but you’ll still be able to remove the Badge and equip something else if you don’t find the extra HP useful. There are so many different Badges and different Badge effects that increasing your BP is almost always going to be useful, while increasing HP is generally only required for boss fights. (That said, you’ll still want to up your HP every once in a while; you won’t want to head into the final boss fight with less than 50 or 60 HP.)
FP can be safely ignored, for the most part; so long as you get your number here up to 25 or so by the end of the game, you should be set. You’ll find yourself using Sweet Feast fairly often to recover your HP in the boss fights; you’ll be able to easily regain any FP you’ve used during the same power use.
Walk-through
Prologue: A Rogue’s Welcome
Rogueport
In the beginning, there was Mario, and, for once, a game featuring him doesn’t immediately start off with the Princess getting kidnapped. (Don’t worry, that occurance is imminent, although it occurs offscreen.) As the game begins, the opening cutscenes will see Mario travel to Rogueport, where he’s supposed to meet up with Princess Peach. Unfortunately, Rogueport is something of a rough town, as the name would imply, and Princess Peach is nowhere to be found.
After taking your first steps off the boat, use the save point near the dock. Save points are easy enough to use; just jump when you’re underneath them and it’ll save your progress. You can’t make multiple saves from a save point, as you can in a game like Final Fantasy X, but you shouldn’t need to; you can always come back to areas where you suspect you missed an item or special event. (If you do want to make multiple saves for redundancy’s sake, you can choose to copy a save to another slot from the game’s main menu.)
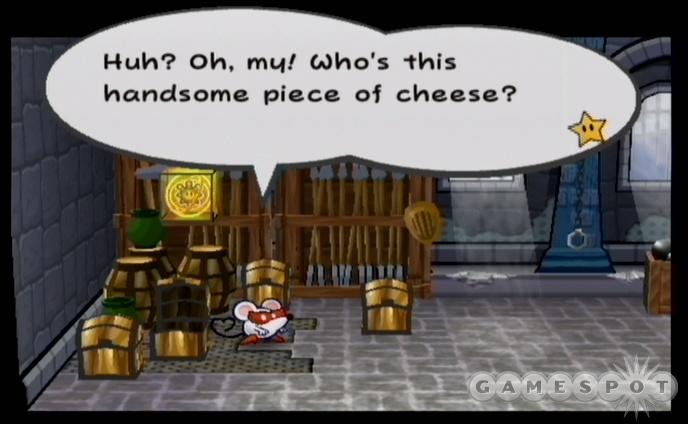
As you proceed into town, you’ll come across the vaguely-named Lord Crump, who’s accosting a cute little Goomba. You can’t avoid a fight with this guy, but it’s extremely unlikely that you’ll lose.
Boss Fight: Lord Crump
HP: 6
Attack: 1
Defense: 0
All you need to do here is Jump or Hammer on Crump until he keels over. Afterwards, he’ll announce that it’s "Go Time," which of course means that it’s Time for you to Go. Leave him and his gang of goons behind and proceed up to the town square.
In the town square, Goombella and yourself will exchange a more proper introduction, and she’ll ask to join your party. Let her in, and she’ll ask you to take her to Professor Frankly, but unfortunately, she doesn’t know where he is! Take this opportunity to explore the town; there are only two screens that really have anything of interest to you at the moment. The rest of Rogueport will be inaccessible to you for the nonce.
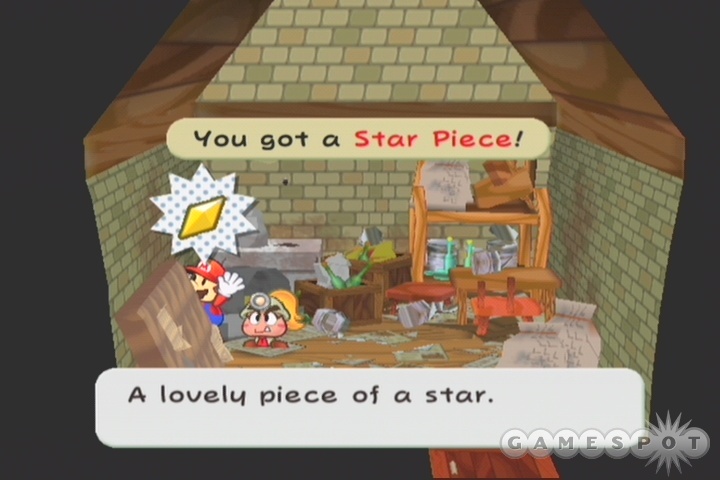
To begin with, start looking around the town square. Before you enter any buildings, though, check around the crates on the right side of the square to find your first Star Piece. Star Pieces are used to buy new badges for Mario, so you’ll want to make sure that you find as many of them as possible! There’s another one through the alleyway in the north-center section of this part of town; if you walk up that way, then check out the delapidated building to your left, you’ll grab another Star Piece behind a mattress that’s leaning against the wall. There’s yet another one found atop the cook’s house; you’ll have to go into the inn, jump up to the second story, walk out the door there, then jump up onto the roof from the walkway to find it.
Now that you’ve obtained those, you can start exploring the town more thoroughly. If you attempt to move off to the left side of town, you’ll come across an old Mushroom who’s lost a contact lense. You can’t "win" this encounter; all you can do is crush the contact lense and ask for a replacement at the item shop. Regardless, the left side of town will be blocked off for a while, as the crone will refuse to let you pass until you replace her lense. Instead, head right. Note that you’re going to lose half your coins as soon as you exit this screen, so you might want to take the opportunity to buy some stuff at the item shop before that occurs; losing half of 10 gold is much less painful than losing half of 100.
As mentioned, though, you’ll be hit by a pickpocket as soon as you move off the screen. There’s nothing you can really do about this at the moment; you’ll just have to suck it up and deal with the financial ruin. Cheap! At any rate, Professor Frankly’s house is on the right side of this screen, so head in to say hi.
After a long talk, Professor Frankly will show you to a pipe leading into a dungeon beneath the city, which coincidentally is where the Thousand-Year Door is located.
Rogueport Dungeon
First, take the first left door to meet a fortune teller, but get the Star Piece hidden nearby first. The fortune teller has nothing of interest to tell you - yet - so head back to the initial screen and fight your way through the Goomba gang that has an all-too-healthy libido for a Mario game.
You’ll be acquainted with the three varieties of normal Goomba enemies here. There’s a regular joe Goomba, a spiky-head Goomba, and a flying Goomba. This is your first introduction to the rock-paper-scissors element of Paper Mario; the first Goomba can be eliminated with either jumping or hammer attacks; the spiked one is immune to Jump attacks; and the flying Goomba can’t be hit by Mario’s hammer. All of these fools have two HP, so one attack for each should do the trick.
When you’ve passed by the Goombas, make your way around to the floating platform and take it across the gap to the pipe. After heading down, you’ll get your first taste of what field enemies will look like, as you’ll spot more Goombas wandering around the room. On the field, you’ll be able to hit monsters with your hammer or a jump attack (just like normal Mario platform games). When you do so, this will let you get a free strike on your enemies; in essence, this is a free attack that comes at the start of the battle. If you use Mario’s hammer on these guys, you’ll usually be able to kill them outright with your first strike, so it’s worth practicing! Note that your enemies can also get a first strike on you, should they aggressively bump into Mario on the field before he has a chance to hit them, so be careful. This is also the first time that you’ll be able to grab items from defeated enemies; after the battle, they’ll drop coins and other items on the field map, so grab them before they disappear.
Beyond the monsters, though, there are two treasure boxes here, so smash them with your hammer to get at the goods inside, then do the same for the two large boxes blocking your path to another pipe before heading down. You can explore the leftmost doorway, but there’s nothing that you can do beyond it at the moment.
Down the pipe, you’ll come across two more enemies, as well as a Star Piece hidden behind the large yellow block. When they’ve been put down, knock the blue square on the ground to reveal a set of steps leading up.
At the top of the stairs, you’ll have to walk to the left and drop down to reach the platform with the black key, which you probably spied during your walk through the room below. When you’ve grabbed it, head through the door at the top of the steps to earn the terrible curse of paper airplaneishness! There are a number of these cursed chests throughout the game; each one will contain a terrible, evil demon that will "curse" Mario with another special ability.
The Thousand-Year Door
Now that Mario has gained the ability to turn into a paper airplane, you can finally reach the Thousand Year Door. To do so, walk out of the chest room, find the arrow panel near the top of the stairs, and jet off towards the left side of the screen. It isn’t too difficult to control yourself in flight; all you need to do is tilt the analog stick left or right when you need to start moving up or down. A little practice should let you get the hang of it, and you can easily remount the stairs and try again if you fall short of the goal.
When you approach the Door, Goombella will point you towards the conspicuous pedestal in the middle of the room. Jumping atop it will let the Door reveal the location of one of the Crystal Stars, and will let Mario learn a new Special Move. You’ll automatically warp back to the Professor’s house, where he’ll school you on how to use your new move and give you your first Badge.
Now that you have a goal, it’s time to find Petal Meadows! You can explore the town if you wish, perhaps take a rest, or you can hop back in the pipe leading to the sewers if you wish to head out straightaway. Before exploring the dungeon to find the new pipe, you can head left to meet Dazzle, the Star Piece collector, who’s situated near the fortune teller. You should only have three Star Pieces at this point, so you won’t be able to get anything all that good; it’s best to just save your currency for now and come back when you can get something of value. Dazzle’s best Badges cost 15 Star Pieces, so you should probably hoard them up until you reach that mark.
Inside the sewers, you’ll have to head right on the initial screen and change into an airplane to reach the next screen. You should see a large papery tail coming up out of the water here, so whack it to get into your first boss fight with a large Blooper.
Boss Fight: Blooper
HP: 12
Attack: 1
Defense: 0
The Blooper isn’t too difficult to defeat. It’s protected initially by two tentacles, so defeat them both (they each have 3 HP) to force the Blooper itself to drop down to the floor. While it’s vulnerable, wail on it with your new Smash attack until it dies. It’ll take a few turns, since it has 12 HP, but you shouldn’t be taking too much damage in return.
After the Blooper returns to the sea from whence it came, a couple of movable platforms will appear; ride them to find the pipe leading to Petal Meadows. Don’t worry if you’ve come across parts of the dungeon that seemed inaccessible; you’ll be able to more fully explore the Rogueport Dungeon as you find new friends and unlock new abilities for Mario.
Chapter 1: Castle And Dragon
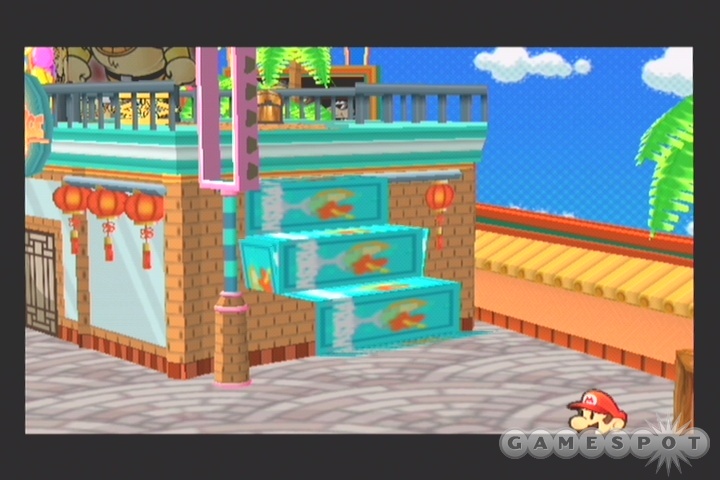
Petal Meadows
Welcome to Petal Meadows, home of sunshine and fallow fields. You’ll get your first hint of what’s to come when you start walking to the right; a gigantic dragon will give you a Maverick-esque flyby on its way to a castle in the distance. Not much you can do about it for now, so keep moving on. Don’t miss the various treasure cubes scattered about; Mario’s Close Call Badge is in a red one on the second screen. Also on the second screen is a pipe that will take you to the top of the screen when entered, revealing a hidden heart power-up; you can’t reach it yet, but note the location.
On the third screen, search the tall grasses near the river to reveal another pipe. This will take you into the background layer of the screen, where you’ll find both a Star Piece and a blue box, which, when hit, will construct a bridge over the river! Slam it, then go back into the pipe and proceed onward into Petalburg.
Petalburg
Like any other town, Petalburg has an inn and item shop, so feel free to heal up or buy items, if you need any. The important things to do here are to talk to the Mayor in the pink house on the second screen (he’s got a badge in his yard, but you won’t be able to reach it until you can fold yourself sideways) and Koops, who lives in the next house to the right. When you’re ready to move on, proceed to the right into the meadows east of the village.
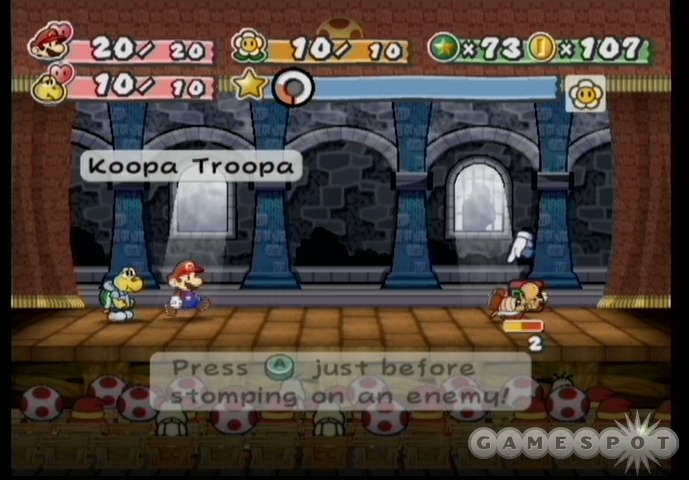
You’ll encounter your first Koopa Troopa enemies here. These guys are the first enemies thus far to have any amount of defense, which reduces the amount of damage that you deal. Luckily for you, though, you can reduce their defense to zero by jumping onto their heads; this will knock them onto their shells, preventing them from using their defence, and will also prevent them from attacking.
You might also run across your first level-up around here. Upon levelling-up, you’ll be able to choose to increase your HP, FP, or BP. At this point in the game, the only thing that makes sense to increase is HP, so up it and save the others for later.
Shhwonk Fortress
Inside the first part of the stone castle, you’ll come across two Bald Clefts whom, at this point, can only be defeated when you use your Superguard or a POW Block Item. The Superguard is difficult to time properly - you have to hit your B button just as they hit you - but you can use your Defend technique to take no damage from their attacks while you try to get the proper timing down.
Continue moving to the right until you come to another small guard house, but before you go inside, check your inventory to make sure that you have a POW Block! You should’ve gotten one out of a treasure block earlier; if you used it on the Clefts, you’ll need to head back to town and buy another one. The Bristles here are harder to get your Superblock off against, so it’s best to just bite the bullet and use your offensive item to kill them.
Keep moving to the right, and be sure to check all of the grass for additional items. In the screen beyond the Bristles, you’ll come across a block which you can hit for a full health recharge, but it’ll cost you five gold. Considering that this is half of what the inn charges, you shouldn’t pass it up, so heal before moving into Shhwonk Fortress and saving your game.
Paper Mario, Come On Down!
The Thowmp here makes it seem like you have a devestating fight ahead of you, but in fact, his method of torture is...a game show? He’ll ask you up to seven questions; answer any five right to proceed.
First question: What’s hidden here?
Answer: Stone Keys.
Second question: What does a Fire Flower and a Mr. Softener cost?
Answer: 16 Coins.
Third question: What is the name of the Mayor of Petalburg?
Answer: Kroop.
Fourth question: Where is the Crystal Star?
Answer: Hooktail Castle.
Fifth question: How can you get from Petal Meadows to Roguetown?
Answer: By pipe.
Sixth question: Which of the following creatures have hands?
Answer: Koopa Troopas.
Fifth question: What number question is this?
Answer: Seven.
After you beat the baddie in the quiz, he’ll let you through to the basement of Shhwonk. In the first screen here, you’ll nab the very handy Multibounce badge for Mario, so equip it if you have any free slots.
Inside Shhwonk, you’ll have to find both the Sun Stone and the Moon Stone, which are located in either of the corridors heading left and right. Grab them both, then return to the pipe room for a boss fight against a Gold Fuzzy.
Boss Fight: Gold Fuzzy
HP: 12
Attack: 1
Defense: 0
Statwise, the Gold Fuzzy isn’t all that intimidating; it’s his little helper, the Fuzzy Horde, that’ll lay the beatdown on you. The Horde has 20 HP, and although it’s only listed as one Attack when you scan it with Goombella, it’ll attack five times per round. You can guard against the impacts to take no damage, but you’ll still probably want to take out the Gold Fuzzy as quickly as possible, as the Fuzzy Horde retreats when he’s killed, thus obviating the need to fight them at all!
Heading to Hooktail
When you’ve beaten the Gold Fuzzy, he’ll let you return to Petalburg. Do so, killing all of the enemies in your path to earn more experience, then speak to the Mayor and save your game before exiting the town via the left path. You’ll gain a new party member as soon as you do so. Koops, a Koopa, will let you fire his shell out at objects and enemies on the field screen, and is required to unlock the path to Hooktail Castle, so keep him in your active party for now, replacing Goombella.
In point of fact, you can use Koops’ special ability immediately. If you recall the secret pipe which you unlocked on your first pass through this screen, you can now head up to the top of it and fire Koops at the heart icon to pick up Mario’s very handy Happy Heart badge. When you have it, proceed to the left to find the stony pipe that you have to use to enter Hooktail Castle.
In order to unlock the pipe, you first need to place the two Keys in the pipes on either side of the central pillar. This will unlock two blue cubes that have to be hit simultaneously. The secret here is to use Koops’ special ability; when you fire him, you can hold down the X key to prevent him from returning to you, thus allowing you to walk over to the other cube and hit it when you release Koops. So, stand next to the leftmost cube, facing left, and press X to shoot out Koops, but hold the button down. While Koops is in his holding pattern, walk over to the rightmost cube and, as soon as you let go of X, use your hammer to smash the cube next to you. Koops should hit the leftmost cube at the same time, thus unlocking the pipe and letting you proceed onto the castle.
Hooktail Castle
Inside the castle, you’ll find a new save point, so hit it and start exploring the environs. If you head out through the left doorway here, you’ll come to a ruined bridge. You won’t be able to get past it, but if you scout around at the bottom of the grassy patch, you’ll find a path leading down to a new badge for Mario, the fearsome HP Plus, which lets him gain five extra HP while he has it equipped. Bonus! When you’re ready to move on, head back to the save spot, then jump off of the catapult and airplane down from the upper level balcony to the far side of the bridge.
When you reach the interior of the castle proper, you’ll note that you’ll be running across a lot of Troopa enemies. Since Koops can’t jump, he won’t be of much use during battle against these enemies, so you should switch him out for Goombella. In addition to the enemies, you’ll also pick up Mario’s Power Bounce Badge, which lets him continue to jump away on top of an enemy for eight or nine consecutive jumps. Decent, but not very useful against the upcoming boss, so you might not want to equip it yet...
In the next room, Koops will come across...the corpse of his father! Fret not, it turns out it’s a case of mistaken identity; one would hope that Mario games haven’t fallen prey to that particularly brand of morbidity just yet. The corpse will let you know about Hooktail’s secret weakness, though, so read the letter in its clutches to get the skinny. Also in this room is a red key, but you can’t reach it just yet.
Boss Fight: Red Bones
HP: 5
Attack: 3
Defense: 1
Red Bones will be flanked by four Dull Bones; all together, these guys are ready to put the hurt on you! You’re unlikely to be able to hurt them with jumping attacks, so switch in Koops, if you still have Goombella in your party. Red Bones has to be the last enemy you defeat here, or he’ll continually regenerate, but that shouldn’t matter overmuch, as Koops’ special shell attack that hits all enemies will clear out all of the Dull Bones on the field, leaving only Red Bones himself. Switch your attack position so that Koops hits first, and have him attack everyone, or any Dull Bones that Red Bones regenerates. When Red Bones himself is the only person on the field, use Koops’ normal shell attack and Mario’s hammer; he’ll fall soon enough.

In the next room, you’ll start to see Dull Bones appear as normal enemies on the field. Do your best to hit them with your hammer for First Strikes, as this will usually let you kill all of them without taking any damage. On the eastern end of this room, you’ll come to a locked door with an array of cubes around it. First hit the purple cube to drop down a stepping stone, then hit the cube with the golden triangle inside of it (omg, it’s a Triforce!!!?!?!?!one!!!) to send the larger golden elevator up towards the ceiling. When that’s done, shoot Koops at the red alarm cube to swing the steps around, allowing you to access the first red key that you’ll obtain. After you have that, you can bring the yellow elevator back down, shoot Koops off to the left of the switch, then jump on top of the elevator and ride up to obtain another Star Piece.
Most Games Aspire To Multidimensionality - Not This One, Though
In the next room over, you’ll come across a green elevator cube, but there’s nothing up top that you can use just yet, so keep moving to the right. The room there features a couple of enemies, so blast them, then use Koops to unlock the prison gate via the red switch. The next Curse chest is here, but you haven’t seen a key yet! You can’t go back through the prison gates, but there is a door leading to the right...don’t worry, it’s the last one in this direction.
The treasure chest in the room here contains the Black Key you need to unlock the chest. Avoid the spike trap panels as you walk to it, though; after you get the Key, you’ll have 45 seconds to escape, and it’s easier to make it out if you can backtrack the path, rather than have to guess it all. You should have more than enough time to walk the path either way.
When you unlock the chest, the demon within will inflict upon you another terrible curse: Mario will now be able to turn sideways and slide through paper-thin gaps! The horror! You can use your newfound ability to shimmy back through the prison bars (and to obtain the Attack FX R Badge nearby, which you’ll need at the end of the chapter). You may also recall that red Castle Key you passed earlier, in the room where Red Bones and his gang horded you; you’ll need to head back and retrieve it, then return to the room with the green elevator and use the key on the door above the save point. You can’t get the Badge here - yet.
Finding Your Way Up
In the next room, start smashing the blue buttons to reveal new passageways heading left. Eventually, you’ll have to jump out the window into the background to proceed, but before you do, double back and head right - there’s a Star Piece hiding on the ledge behind the window there.
There’s another green elevator in the next room to the left, so use Koops to activate it and head up. You’ll notice a Mushroom on a ledge as the elevator ascends; drop off of the upper ledge while walking towards the upper end of the screen to find it. You’ll need to become paperish, but that shouldn’t stop you. This actually isn’t a Mushroom - it’s a Life Mushroom, which will restore one of your party members back to life if they take lethal damage.
Anyway, the only path available to you at the top of the elevator leads left, to Ms. Mowz, a dashing thief whom Koops seems rather smitten with. Remind him of his girlfriend, and of the inevitable heartache of interspecies romance, and get him back on task. There’s a Castle Key and a Star Sprite here, as well as a couple of restorative items; get them all and unlock the elevator room’s other door.
After destroying the enemies in the rightmost room, get on the yellow elevator and ride it up to the rafters of the room. These things are incredibly narrow, so you’ll need to be careful as you proceed! You won’t take damage if you fall off, but you’ll have to get the elevator back down and ride up again, which is just annoying. You’ll note an airplane station up here; before switching over, though, walk to the northern set of rafters and proceed to the right to find another Star Piece.
The next room to the right is actually the same room as where you probably last saved your game, only much further up. If you knock the yellow elevator down to the bottom, you can ride it to grab the Badge that you had to pass up earlier: it’s a Last Stand P, which cuts the damage your teammate takes in half while Mario is in Danger mode. If you get it, you’ll have to go through a few rooms to reach where you were before, but once you do, you’ll be able to use Koops to retrieve one more Castle Key from near where the elevator was. It unlocks a door up the stairs, near another Star Sprite. This should be your third, so you can look forward to upgrading one of your allies when you get back to Rogueport.
Next up is a bridge that leads up to a tower, the same tower that Hooktail apparently flew into before. Outside, you’ll have an opportunity to save and heal up, if you so desire, and desire you should, because you now face...
Boss Fight: Hooktail
HP: 25
Attack: 5
Defend: 1
Hooktail can be a bruiser if you didn’t pick up the Attack FX R Badge; this is what all the hints about crickets have been referring to. See, if you equip it (which is free), your hammer strikes and other attacks sounds vaguely like something that might be chirping. Ergo, it’s Hooktail’s hidden weakness. Look, no one said it was going to make sense; just roll with it.
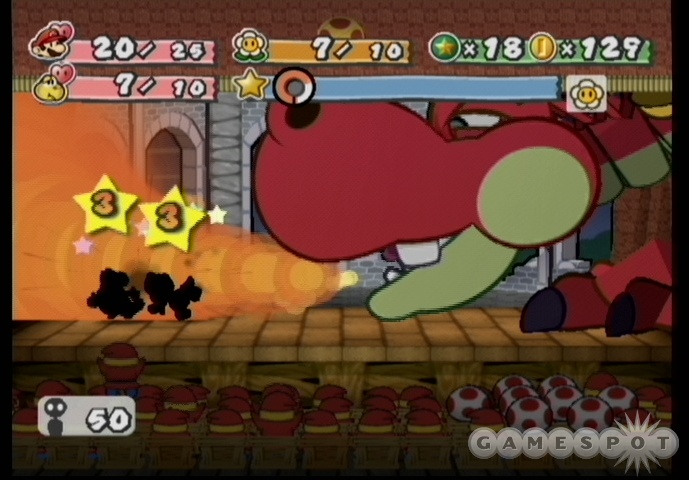
Anyway, if you have the Attack FX Badge on Mario, you’ll be able to make Hooktail woozy, which will reduce most of his attacks to a single damage. His primary attack is to burninate both of your party members, but he’ll also occasionally stomp on the lead character. When you take off 25 health, he’ll start with the tricksies on the little hobbits, asking you questions and trying to get you to let up on him. Refuse to cease the beating, no matter what he asks! After he realizes that you’re not going to give in, he’ll eat half the crowd of mushrooms, gaining back ten HP. That’s...well, that’s pretty awesome, come to think of it. Regardless, deal another ten damage and he’ll be toast, and you’ll have your first Star Crystal.
Interlude
Before you get back on the main adventure path with Mario, you’ll witness a cutscene involving Princess Peach and her - you guessed it - captors. These guys apparently want Peach to tell them where the map is, but she’s not budging!
Eventually, you’ll gain control of Peach herself. You need to find a way to send Mario a message. The plan, obviously, is to go take a shower, which will get the bad guys’ computer hot and bothered, which will encourage it to find out more about this crazy thing called love. Who knew Princess Peach could be so cunning?. Anyway, the computer will let you (Princess Peach) send Mario a message. Afterward, you’ll take over for the formidable Bowser for a short scene, wherein he determines that if anyone’s going to capture Peach, it’s going to be him.
Interlude, Part 2
Now that you have your first Crystal Star, you can return to Rogueport and show it to the Thousand Year Door to get the location of the second. Before you jump up onto the pedestal, though, use your newfound paper-thin transmutation to jump on the catapults in the Door’s room and locate another Star Sprite.

After you visit with Professor Frankly, who’ll clue you in to the location of the next Crystal Star, you can finally explore a bit more of Rogueport. Your first stop should be to power up another of your party members at the magician’s shop, next door to Frankly’s place. Goombella is a slightly better choice than Koops for now. After that, though, you can return to the item shop and grab the contact lense which you need to access the western part of town. There’s another item shop there, a casino, a lottery, and a train station, as well as a few Star Pieces: one hidden behind a trashcan on the far left end of the screen, one found by jumping up behind the pipe in the middle of the screen, and one behind the wall leading to Rogueport Plaza. There isn’t too much else that’s relevant to you at this point in the game, but feel free to look around. You can go skinny and drop through the grate in the middle of town to explore Deepdown, a hidden town underneath Rogueport, if you wish.
When you’re ready to move on, head back to the Rogueport Dungeon and proceed down to the Thousand-Year Door again. Eventually, you’ll come across one of the creatures that Frankly described, so shimmy through the bars of the nearby door and talk to it. It calls itself Punio, of the Punies, and wants you to come back with it to Boogly Woods to help clear out the X-Nauts!
Chapter 2: The Great Boggly Tree
Boggly Woods
Welcome to the headache-inducing Boggly Woods, apparently designed by someone that’s colorblind. It’s populated by Clefts and Spikes, both of which are difficult to kill, so you might want to just run from battles until you’re able to deal a bit more damage than you can now. Keep proceeding right, ignoring the X-Naut assassins, until you reach the Boggly Tree. Unfortunately, the tree itself has been locked off, precipitating the need for your little band to find Flurrie, a wind spirit, to help you locate a secret entrance. Before you leave, grab the FP Plus Badge in the waterfall in the right side of the screen.
The next screen to the right has a couple more enemies, so ignore them as best you can until you reach the far right edge of the lower area. Although it’s tough to spot, there’s a small passage at the bottom of the screen that will take you up into the background tree layer, from which you’ll be able to raise up the pipe and airplane platform, as well as grab a Star Piece. If you shoot Koops off to the left of the airplane platform, you can also get another Shine Sprite. (There’s also a hidden treasure block above the seventh white circle here, containing a Power-Down, Defense-Up badge. Jump to hit it!)
After raising the airplane platform, glide over to the eastern platform and grab the Quake Hammer badge from the box there, then proceed on to the right. This is the screen that Flurrie’s house is on, so shimmy through the fence, grab the Volt Shroom to the right, then take the pipe to the left to reach her homestead. Don’t miss the Star Piece near the pipe!
Unfortunately, although somewhat predictably, Flurrie won’t be able to help you just yet - it appears as though the Shadow Sirens have stolen her favorite necklace, without which she won’t leave her house. You’ll have to get it back, so make your way back to the entrance to the Boggly Woods, avoiding enemies as much as possible, to avoid taking unnecessary damage.
Boss Fight: Shadow Sirens
Beldam | HP: 9 | Attack: 1 | Defense: 0
Marilyn | HP: 12 | Attack: 2 | Defense: 0
Vivian | HP: 10 | Attack: 1 | Defense: 0

Marilyn, Vivian, and Beldam are fairly easy to defeat, especially if you use Mario’s Power Bounce Badge or Goombella’s Multibonk ability. All of the baddies are susceptible to jumping attacks, so if you can get your timing down, you should be able to take them out with a single special attack each. The main dangers here are Beldam’s spells; she’ll occasionally shrink one of your party members, reducing your Attack to zero, or enlarge Marilyn, causing her to do extra damage. If you can Power Bounce or Multibonk, take out Marilyn first, then Beldam, then Vivian. You’ll gain Flurrie’s Necklace if you do so, as well as a bunch of experience.
The Great Boggly Tree
After returning the necklace to Flurrie, she’ll hop into your party. You can then return to the Boggly Tree and use her to blow away the covering over the Secret Entrance. Inside, you’ll have to fight off two X-Nauts, but that won’t be too difficult, as they possess no Defence and only four HP apiece. Afterward, the rest of the Punies will come around to greet Mario, in their own way; they’ll refuse to help out, though, until you rescue the rest of their friends.
Rescue The Punies
Said friends are further up the tree, so start your ascent! It’ll be a few screens before you stumble across the Punies’ cage, so beware of enemies on the path. When you do reach the Elder, though, you’ll discover that you, as of yet, have no way to get them out of their cells. The remedy lies one room to the left, where an X-Naut will drop a key when defeated.
After unlocking the Elder (you can’t unlock Punio’s sister and the rest of the gang just yet), return to the entry room of the Tree and talk things over with her. She’ll let you take a bunch of the Punies along with you on your adventure, as well as give you the Puni Orb, which you’ll need to unlock further areas of the Tree. To begin with, head back up to the second screen here, gather all of the Punies on the black platform, then place the Orb into the pedestal; if you have enough weight on the platform, it’ll depress, revealing a new pipe.
The next room here is actually one to the right of the Elder’s screen, so unlock the metal door and save your game, if you wish, then return and drop down to the watery area to find a Star Sprite. Don’t forget to shake all of the grass that you see; there’s a Thunder Rage item here, and there’ll be other good stuff in the rooms to come.
When you’re ready to move on, return to the metal door and place the Puni Orb in the pedestal nearby. The Punies will all gather nearby, allowing Flurrie to blow them off the edge. They’ll slowly float back up in bubbles, allowing you to blow them across the gaps to the far side of the room. Join them, then ride the pipe down.
This next screen features another puzzle that Flurrie will let you bypass. If you head to the left edge of the screen, you’ll spot a large paper pot on top of a airplane platform; blow it off to use the platform, then double back to grab a Star Sprite. Regroup with the Punies, then take the pipe on the right side of the lower level to come to another screen. Immediately after you arrive, though, go right and head through a gap in the wall for a little rumble with the Jummi clan, after which you’ll be able to head yet one more screen to the right, where you’ll find the Blue Key, which you can use to unlock the cell holding Petuni and the rest of the Punies. Do so, and you’ll have a small army of Punies at your disposal.
Let’s Go To War
When you get the 101 Dalmations on your side, return to the room below the last Star Sprite and start heading left. The Piders that drop down from the ceiling will frighten off your Punies as you navigate the walkways, so you’ll have to kill both groups if you want to get all of your Punies to the left side of the room. Flurrie’s Gale Force ability is a decent, albeit expensive way to hit all of them, or kill them outright. Regardless, if your Punies get scared off of the walkway, you’ll have to drop down to retrieve them before moving on. As a note, if you use Flurrie to blow on the left side of the lower part of this screen, you’ll reveal a secret shop!
The next screen to the right features another royal rumble between the Punies and the Jabbis, which you should be able to win, thanks to your superior numbers. Proceed on through to the next room, then drop down the pipe and scout behind the lower portion of it to find another Star Piece. The next room to the right features another Puni Orb pedestal, and although it’s a trap that will imprison all of your Punies, you’ll still need to hit it to move on. Do so, then drop down the pipe that appears (after shimmying through the bars) to find another set of columns similar to those in the other Jabbi hive, as well as a black box you can smash for an as-yet-unrevealed effect. (There’s also another Star Piece hidden behind the pipe here.) Note the sequence of glyphs on the pillars. Or not; we’ll tell you what they are when you need to know!
These Boots Were Made For Supering
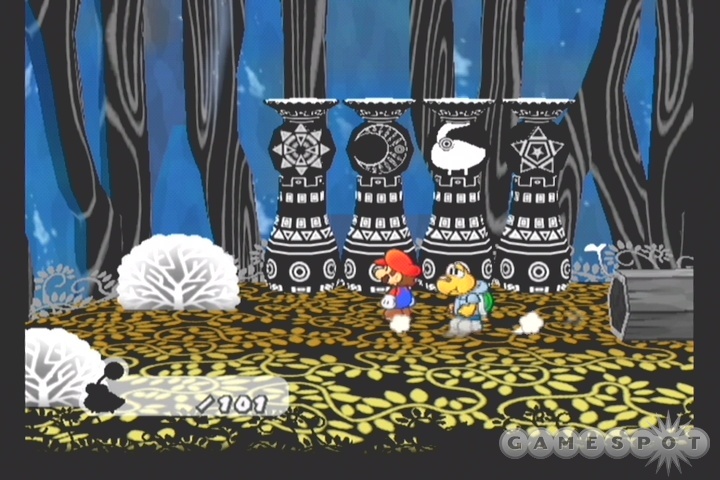
And you’ll need to know them more or less right away, so it all works out. Although you can’t free your Puni cohorts just yet, you can return to the other Jabbi hive that you destroyed earlier, where a sequence of blocks has risen that will let you enter the pillar code onto the pillars there. (The sequence is: eight-pointed star, moon, rabbit thing, five-pointed star.) This will unlock a passage leading to a large treasure chest, in which you’ll find Super Boots! This set of superlative footwear will let you increase the damage dealt by your jump attacks, and will also allow you to smash through the many x-marks-the-spot locations you’ve been passing by throughout the tree. The first spot you can bust through is located one screen below the Boots themselves; drop down to find another Star Sprite and the Charge Badge.
Now, return to the cage that’s holding the Punies in place and smash through the floor inside. You can use the Puni Orb to lock them into place while Flurrie blows them into the room below, but you’ll probably have to try a few times to get them all, as some of them like to line up where they won’t go into the hole. Once all 101 are free, drop down after them and group back up, then head upstairs to the smashable hole over the pipe in the tree stump.
Finding The Crystal Star

You’re now able to access areas of the tree even farther below the areas in which you already were, so get going. After a quick romp through a few enemies, you’ll come to a set of pillars that the Punies won’t pass over, so jump across, head up the nearby pipe, and use Koops to hit the blue switch above the water. (Jump on top of the blue block, shoot Koops off to the left, then jump off of the block and let Koops go when the switch reappears.) This will flood the room below, letting the Punies pass across the lilypads, and will give you access to a Shrink Stomp Badge and a new Shine Sprite.
Head down the pipe to reach another Puni Pedestal which, when activated, will bring you down to a room with a save point and a healing block. You should know that you’re near the end of the dungeon by the appearance of these in the same screen, so be sure to take advantage of the save point before moving on!
Indeed, calamity strikes as soon as you use the next Puni Orb Pedestal. It unlocks the Crystal Star, sure enough, but it’s quickly stolen by Crump, who activates a time bomb, which will detonate in no fewer than five whole minutes. This should give you plenty of time to get out of the Tree, so start heading back to the Elder’s position. You’ll have to fight against a couple of X-Nauts (and check the shrubs in this room for a Star Piece, by the way), but if you fought against the rest of the enemies in the Tree as you adventured through it, you should have a clear path back up.
Boss Fight: Magnus von Grapple
HP: 30
Attack: 2
Defense: 1

You’ll find that Magnus actually doesn’t do much damage; the highest he can do is two damage to both party members with a stomping attack that shakes the ground. When he detaches his hands, though, you’ll want to take care of them straightaway, as they do four damage per hit. When you get Magnus down to three or four health, though, concentrate all your fire on him and take him down! After you do so, you’ll gain the Emerald Crystal Star, which will end the chapter.
Interlude
First off, you’ll regain control of Princess Peach for a short time while she, uh, dances with TEC. This is a simple enough mini-game; hit the B, A, and Z buttons when they pop up on screen, and you should get through the dance without a problem. Afterwards, TEC will let you send another email to Mario.

Next up is Bowser, who’ll have to maneuver through a short platforming level, a la Super Mario Bros. You can use his fire breath to burn away any irritants in your path, or just stomp on them. If you get the pieces of meat hidden away in the level, you can also increase Bowser’s size until he’s just about as big as the screen itself.
Interlude, Part 2
Finally, it’s time to bring the next Crystal Star back to the Thousand-Year Door and unlock the next map location. Before you head back to Rogueport, though, return to Flurrie’s house to pick up a Super Appeal Badge and a Star Piece (by doing a Spin Jump to the left of the makeup table.) On your way to the Door, you’ll notice that there’s another piece of paper beneath the set of steps that you unlocked earlier; if you let Flurrie blow on it, it’ll be stripped away, revealing a Badge that will automatically heal your party members during battle. Your Spin Jump ability can also unlock no fewer than four more Star Pieces. If you jump up and hit the jump button in mid-air, you’ll sometimes note parts of the floor dislodging; if you Spin Jump just to the side of one of these panels, you’ll get a Star Piece. There’s one in the room with the pipe leading to Boggly Woods, one in front of the Thousand Year Door pedestal, one in the room where you obtained the airplane ability, and one in the first screen of the dungeon beneath Rogueport. Gotta catch ‘em all! (If you’ve been saving up, you can probably afford the Power Plus Badge from the Badge vendor near the pipe leading to Rogueport, which is very useful.)
After you speak to Frankly, power up your party members (you should have enough Shine Sprites to level them both), then beat up Gus, who guards the entrance to the slums to the right of Frankly’s house. You’ll now be able to get past him without having to pay 10 gold each time, so that’s a bonus. When you enter the slums, shimmy between the two houses to reveal a secret alleyway, containing a Star Piece hidden behind a barrel and the entrance to the Robbo’s hideout. He’ll offer to tell you how to get in touch with Don Pianta...if you pay him 64 gold. You can pay him, if you wish, or you can just read the next paragraph to figure out what to do. If you do find our advice useful, please send 64 gold directly to us. It’s only fair.
When you’re ready for your audience, go to the item shop in the west end of town, near Don Pianta’s casino. Buy a Dried Shroom and a Dizzy Dial, in that order, then, when the teller asks you what your favorite color is, tell her "yellow." Voila, you’ll be allowed in to see the Don. He’ll ask you to find his daughter Francesca and her "friend," Frankie. They’re at the port, where Mario initially rode into town; on your way there, you can find two more Star Pieces by Spin Jumping near the wanted Goomba (in the seedy alleyway north of the gallows) and in the port area itself.
When you speak to Francesca and Frankie, they’ll ask you to forget you ever saw them. If you want to be a good guy, you can agree to their request, and then tell Don Pianta that you can’t tell him their whereabouts. Regardless of your choices in this dialogue, the young lovers will return to the Don to explain their reasons for eloping, you’ll get your blimp ticket, and you can be on your way to Glitzville! Before you head out, check behind the pipe leading to the Blimp station for a Star Piece; there’s another one underneath a floorboard near the end of the train.
Chapter 3: Of Glitz And Glory
Glitzville
When you arrive in Glitzville, you can start picking up items around town. If you climb atop the crates on the eastern edge of the screen and do a Spin Jump onto the blue switch, it’ll open a path to a Power Plus P Badge, which will increase all attacks of Mario’s partner by 1 while he has it equipped! Definitely something you’ll want to put on when you have enough room for it. Besides that, there are five Star Pieces scattered around this screen:
1: Behind the telephone booth on the left side of the screen.
2: Underneath the poster on top of the Fresh Juice shop. You’ll have to use Koops to retrieve this one.
3: Hidden underneath a floorboard south of the blimp launcher.
4: Hidden behind the shrubs near the main building to the north.
5: Behind the counter in the juice bar.
There’s also an Inn Coupon north of the juice bar, and a Shine Sprite; to reach this latter, hit the area beneath it with your hammer and jump from the block that appears. All in all, not a bad haul!
When you head inside the Glitz Arena, do a Spin Jump next to the poster featuring a pair of Bob-ombs to receive another Star Piece, then head through the main doors to witness a match between Rawk Hawk and some no-name chump. No-name chumps never win in wrestling, but the more important thing to notice is that Hawk’s belt features none other than the Crystal Star you’ve come to win. The "choice" between stealing it and fighting for it results in the same outcome: you’re going to need to ascend to the higher ranks of a vicious bloodsport. Unfortunately, the developers chose not to include a training montage set to inspirational 80’s music, so you’ll just have to sing "You’re The Best Around" to yourself to make up for that disappointment. We did.
Let’s Get Ready To Rummmmmmble!
Speak to one of the men in black outside the doorways on either side of the main hall to obtain access to the backstage area. You can find another Last Stand Badge inside the open box down the hall; keep going until you reach an unlocked door. After a bit of an interlude with the fight promoter, Mr. Grubba, you’ll have to sign a contract; then you’ll be able to fight!
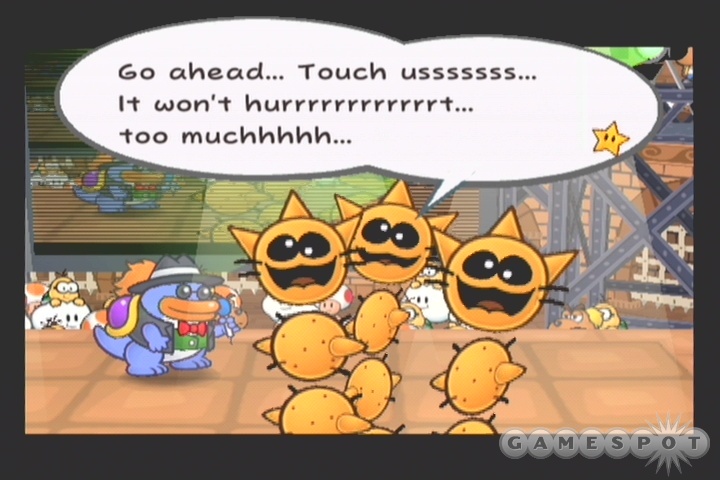
You start out at rank 20, and you’ll have to fight your way all the way up to rank 1 if you want to obtain the Crystal Star. This isn’t a simple matter of winning 20 fights in a row, though; each round will have certain conditions attached to it. For instance, one fight might require you to win in less than five rounds, while another might require you to Appeal to the crowd once or twice before dealing the finishing blow. The only way to increase your rank is to follow the guidelines, so be sure to note what they are before you enter the ring! They’re random, so you won’t get the same rules each time. Lastly, note that you can sleep in the bed in your locker room for a complete HP and FP restoration between each fight.
As you make your way up the ladder, stop and head outside to save your game between every few matches. You’re allowed to leave the locker room after a match, but only if you don’t reserve a new one first. There isn’t much to do in Glitzville beyond fight, though, so there’s no need to wander too far, with one exception: when the Koopa tells you about a new egg-based meal being served at the Hot Dog Stand outside the building, head outside to find an egg bounding about the main square. If you chase it for a bit, it’ll jump up to the roof of the Hot Dog shop; use the airplane platform atop the juice stand to fly over to reach it. If you free it, then let it follow you around, you’ll eventually wind up with a new party member, so you’ll definitely want to do so! (In actuality, you don’t have any choice, but still: think positive.)
Odd Events
Before your last fight in the minor leagues, you’ll witness Jolene escorting a new fighter, Sir Swoop, into the minor leagues. Your next fight, against the Armored Harriers, is rigged; you won’t be able to win, no matter what you do, so don’t use up any items or star powers. Just let the baddies wail on Mario until he keels over.
After the match, you’ll return to your locker room in shame, but at least there’s a pleasant surprise waiting for you: the egg that’s been following you around has finally hatched into a Yoshi! He’ll join your party; you can even pick his name. He’s the key to getting into the Major Leagues; the next time you face the Armored Harriers, you’ll be able to use his Gulp ability to spit the Harriers at each other. Two instances of this should be enough to defeat them.
In the major leagues, you’ll find that both Yoshi’s Gulp attack and offensive items will be indispensable, the latter coming in most handy when you get the "no special moves" proscription. You can buy a couple of simple ones at the item shop outside the Pit. When you reach rank eight, you’ll also be rewarded with a Super Hammer by someone calling himself only X. After he emails you, go to the juice bar outside of the Pit and grab it. The Super Hammer lets you smash through the biggest variety of blocks, such as the one in the minor-league locker room.
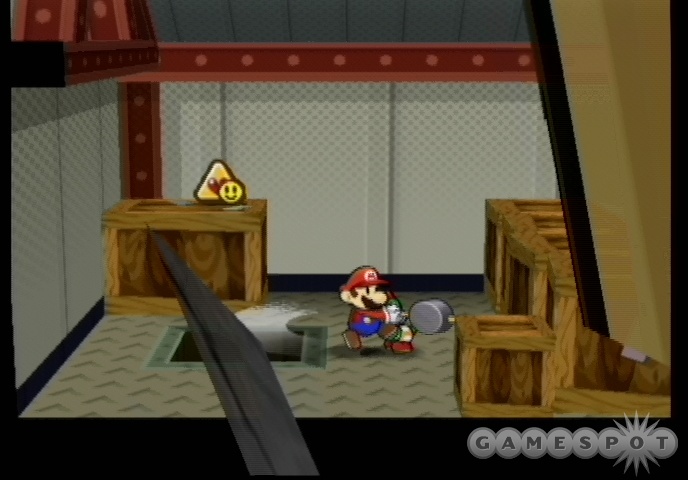
Speaking of which, you’ll soon get an email from X asking you to do exactly that, so proceed back to the minor-league room, smash the block with the Super Hammer technique, then jump atop the computer desk and use Yoshi to "fly" across to the piece of paper atop the bookshelves. The paper will be confiscated soon enough, leaving you without much to do except resume your conquest of the major leagues. The matches start to become somewhat devious as you gain more ranks, with small twists like having two fights in a row, so you’ll want to save your game between every round! You’ll eventually even fight against the great Bowser himself as an add-in fight, so stay on your toes.
Odder Events
Eventually, X will email you again and tell you to visit the phonebooth outside the Pit, where you’ll obtain the key that unlocks the storage room door in the arena. Head there, then use Flurrie to blow away the metal that covers up the crates; they then become smashable, so smash away! You’ll find a Charge P Badge, and the switch that reveals the stairs to the attic. (There’s also a Star Piece underneath a floorboard downstairs.) In said attic, you’ll find a Shine Sprite, and you’ll also be able to ride on Yoshi to find a Charge P badge and a block that conceals a hole leading to the arena’s network of pipes. From there, you can spy on Grubba and Jolene as they discuss some matters of concern to you. "Squeak" when you’re prompted for input to avoid any problems, then return back to your locker room and get back on your career track.
As you proceed up the ladder, you’ll notice more odd goings-on. For instance, you may have received cake earlier, which completely healed you; before your bout for second place, you’ll get another "gift," only this time, the cake-like confection considerably constrains your combat capabilities! Crikey! In other words, don’t ea, er, don’t consume it.
"I Must Break You!"
The only fight that will likely give you significant trouble, outside of the upcoming boss, is the Koopinator fight for rank one. This is the character that Hawk Rawk was making such short work of in the first battle that you witnessed in the Glitz Pit, but he’s no pushover; he’s got armor and five attack to deal with. If Mario starts getting hurt too much, switch him to the rear and cycle through your friends as appropriate to spread the damage around.
After Koopinator falls, you’ll receive yet another email from X, instructing you to remove all of the Gonzales posters from the main hall. Do so (using Flurrie’s blow maneuver), and you’ll receive the key to unlock the locked door inside the storage room. Check out that area to find King K and your friend from the minor leagues, who’ve apparently been squashed beneath a giant box. Dastardly! There’s a Star Piece hidden near the bodies, so grab it before returning to the locker room.
You’ll now be ready to face the one, the only, the Rawkinest of Hawks. (Before you do, it might be wise to make sure that you have an offensive item, such as the lightning bolt that the Item Shop sells, in your inventory.) Unfortunately, there’s a bit of conspiracy afoot (in case you haven’t already noticed), which will leave you locked in a run-down locker room without any way to get to the ring! To get out of the locker room, you’ll need to use Flurrie to blow through the poster of Princess Peach, and then take a lovely ride through the toilet sewage pipes to arrive back at the major leages locker room. From there, save your game and hit the ring for the boss fight.
Boss Fight: Rawk Hawk
HP: 40
Attack: 3
Defense: 1
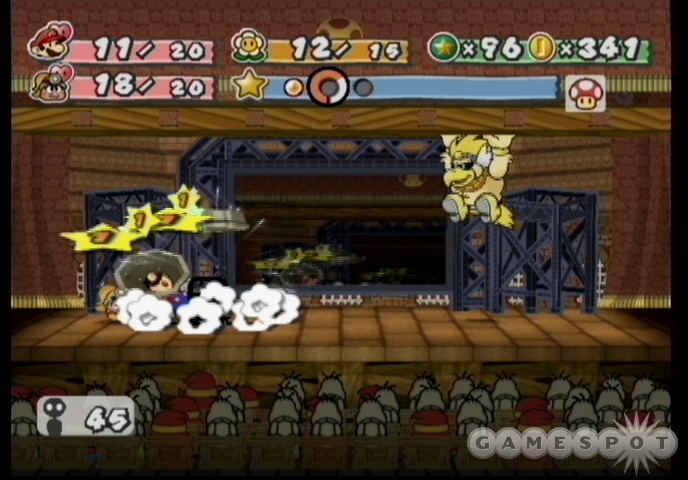
For our money, the Koopinator might even be tougher than Rawk Hawk, if only because you can actually use jump attacks on this chump. And jump you’ll probably want to do; as with Magnus von Grapple, either Mario or Goombella will be able to dish out plenty of hurt with their string-of-jumps attacks. Regardless, deal enough damage to Rawk Hawk, and he’ll eventually jump up to the rafters and start shaking items from them onto your group. He’s difficult to hit while he’s hanging onto the beam, so use your offensive item to knock him down before dealing the finishing blow.
When you find yourself in the Champion’s Room, use Yoshi to glide across to the vent, then Super Hammer it to pieces before walking through. You’ll overhear someone that your partner identifies as Grubba talking about the missing fighters, so smash through the other side of the vent and start rifling his desk. You’ll find both a paper detailing where the true Crystal Star is, as well as a Star Piece; there’s also a Star Piece hidden away behind the plant in the lower-left corner of the room. Head out to the ring one last time!
Boss Fight: Macho Grubba
HP: 60
Attack: 4
Defense: 0
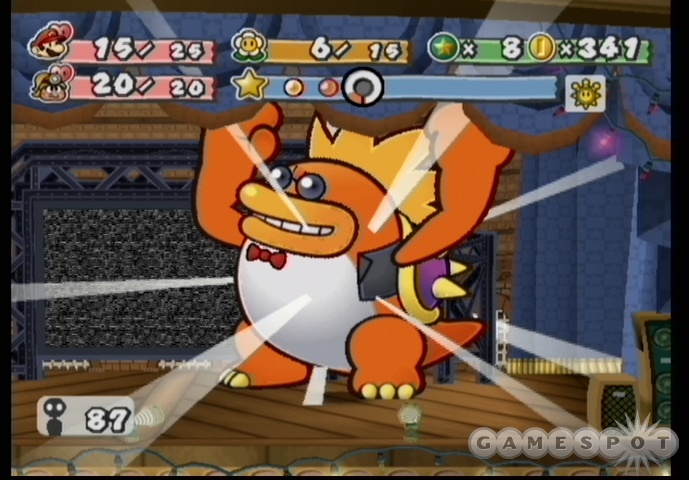
Macho Grubba may be intimidatingly big, but his Achilles’ heel is his lack of Defense; every time you damage him, it’ll be at full effect, which means that, as usual, you’ll be able to pound him with Mario’s Super Bounce and Goombella’s Multibonk until the cows come home. He can increase his attack, and will do so often, which will let him hit for seven points of damage each time, though. He can also increase the number of attacks he performs per round, so you can expect him to buff himself and attack without needing to pause. Use whatever restoratives you need to keep your fighters alive long enough to pound Macho Grubba into submission, after which you’ll obtain your precious Crystal Star. Hope it was worth killing all those poor fools who were only trying to earn a few dollars to feed their families. Yeah, some hero you are, Mario.
Interlude
Princess Peach’s next little song-and-dance with TEC involves her having to dress up as an X-Naut and speak with Grodus. TEC will outline all you need to do to complete this interlude; just use the change stall in the locker, then walk to the right to speak with Grodus before changing Peach back into her dress and returning downstairs to talk to TEC again.
Bowser’s scene is even shorter than Peach’s. All you need to do is shake the bushes that the Punies are hiding in until you reveal the elder. (She’s in the rightmost bush.) After Bowser learns of Mario’s prowess, he’ll be shocked into a stupor.
Interlude, Part 2
Back in Rogueport, you can use your newfound Super Hammer to open up a couple of new areas. If you travel to the west side of town and drop through the grate there, you’ll be able to use Yoshi’s minimal flight ability to unlock another Shine Sprite, as well as a Star Piece. There’s also a door leading to a wooden pipe here; try to go down, though, and you’ll be rejected.
On the other side of town, there’s a room below the pipe near Frankley’s house with a massive block and two blue switches. If you bust the block, you’ll be able to flip the switches with a Spin Jump, which will unlock new shortcut paths to the Great Boggly Tree and Petalburg. There’s also a Shine Sprite here, so grab everything and head back to the Thousand Year Door to get the next Crystal Star location.
Frankly will point you in the direction of someone named Darkly, although he won’t tell you where he is, except vaguely. If you leave the Professor’s house and rub up against the wall leading to the town plaza, you should reveal a side alley behind Merlon’s house; Darkly is hidden away back here, so talk to him to unlock the passage to Twilight Town. There’s also a Star Piece hidden away on the crates at the end of the alley, so grab it. To wrap up your Rogueport rampage, use Yoshi to fly across the river on the far eastern side of town to find two more Shine Sprites. One of these is located when you fly across south of the bridge, the other is found by shimmying through to the Robbo’s hideout and flying from there.
If you want to buy Badges, head back to the vendor underneath the pipe here before heading on to Twilight Town.
Chapter 4: For Pigs The Bell Tolls
Twilight Town
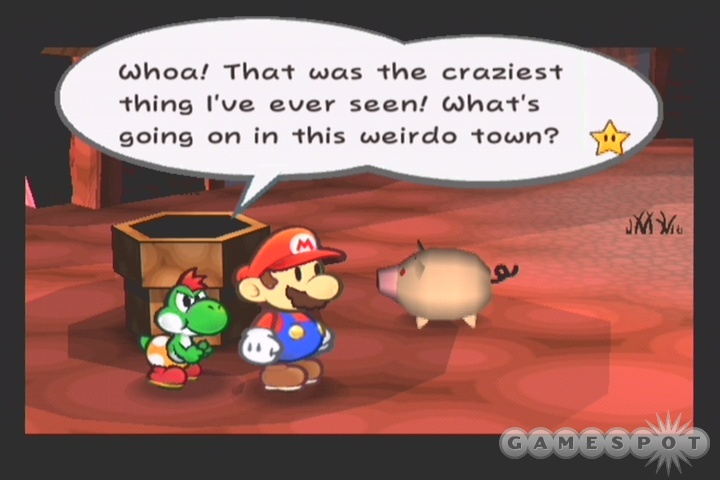
There isn’t much to see in Twilight Town, as it appears that all of the villagers are slowly but surely getting piggified by a terrible curse. Most of the NPCs here are already pigs, so you shouldn’t expect much in the way of in-depth conversation. After getting the basics of the problem from the mayor of the town, start exploring a bit. There’s a woman in the first house to the right that will trade a Shooting Star item for any food item in your inventory, as well as three Star Pieces scattered about. The first is in the gap to the left of the mayor’s house, the second is hidden in the grasses on the first screen, and the third is behind a fence above a tree near the graveyard on the second screen. You can also talk to the Item Shop proprietress to learn about her husband’s lost key to the storeroom; when you find this, you’ll be able to loot the place, so keep an eye out as you head into the forest.
The first screen of the wilderness has an abandoned farmhouse, which contains a Black Key. As you progress, you’ll notice that all of the enemies here are Hyper Goombas. These guys are more powerful than the Goombas you fought at the beginning of the game, obviously, but the same basic tactics apply.
On the second screen, you’ll come across an item block; stand atop it and jump to reveal a Super Shroom. The third screen contains a tree that blocks the path; use Koops to scoot under it and grab the Shop Key, then return to town and unlock the item shop’s storeroom. You’ll earn the terrible curse of the Mario Roll-up when you unlock the chest within (along with the awesome Defend Plus Badge in another chest), so use it to pass underneath the tree and continue on. Use Flurrie to blow away the haystack at the end of the path, and you’ll find a pipe leading to the woods.
The Twilight Trail
The first screen here may hold an enemy that’s almost impossible to defeat: an Amazy Dayzee. This thing can hit both party members for 20 damage, and will heal itself with a 50-point Shroom at least once during a fight. Needless to say, if you see one, you should run! Get yourself skinny and pass through the path between the trees as soon as you can; if you lose money running from a fight, leave it behind and take advantage of your termporary immunity to get away from the beast.
Proceed deeper into the forest. Flurrie will be required to move on at a couple spots; once when you reach a seeming dead end at a tree (blow on it to reveal a door) and once when you reach a large rock (blow on the grey spot nearby to reveal a hole; Spin Jump onto the boards underneath and push on the rock in the background to reveal the path).
Creepy Steeple
Eventually, you’ll come out at the Creepy Steeple. You’ll notice another save spot and portable inn setup, so do whatever you have to do to ensure that you’re ready for the trials ahead. If you wish, you can jump down the nearby well and fight your way through the horde of Buzzy Beetles and Spike Tops to win the Tornado Jump Badge; you’ll get plenty of experience in addition to that reward, as well as more than enough gold to pay for a healing afterward. Note that you will have to come through here again eventually, so if you want to hold off until then, feel free to do so.
When you’re ready to enter the haunted house, roll up and slide underneath the gap in the wall. There’s a Star Piece above the wall, near the locked gate here. Inside, note the gap in the wall immediately north of where you enter the house; roll through here for a Shine Sprite, a Star Piece, the Cookbook and another Badge for Mario. There’s another optional area found by pushing the statue of the Crystal Star at the end of the hall; down at the bottom of the ensuing pit, you can gain an Ultra Shroom by correctly answering the question of the ghost that comes out of the treasure chest (the answer is 200), and you’ll also get a Flower Saver by blowing away the wallpaper above the catapult.
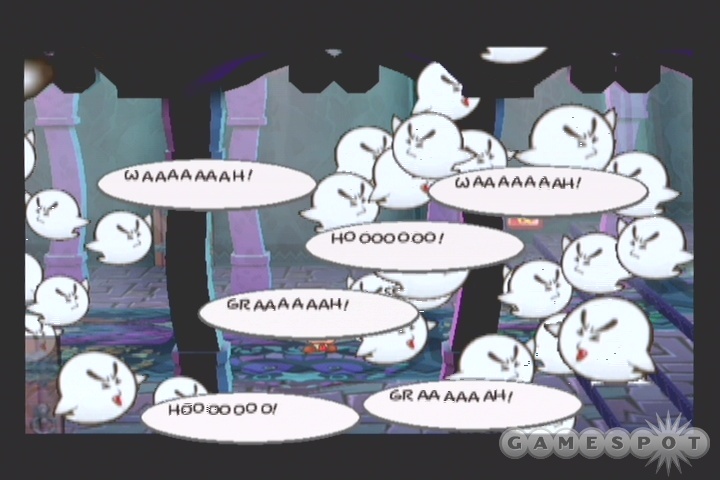
After you release all of the ghosts, you’ll find a single member of their ilk in the upstairs hallway. If you want to earn a bit of experience, talk to him and promise that you won’t be mean. The ghosts will start to swarm you; Super Hammer them off of you twice to reveal the Atomic Boo.
Boss Fight: Atomic Boo
HP: 40
Attack: 4
Defense: 0
Ye Olde Atomic Boo will usually attack both of your party members at once, so be sure to enter this fight healthy. As per usual, he can be best dispatched by using both Mario and Goombella’s multi-hit jump attacks. After you beat him, you’ll gain 20 Star Points and a Lucky Start Badge.
Climbing The Steeple
After he goes down, the front hall will become populated by Boos, so leave the room and come back if you want to farm for Star Points. If you’re close to leveling, you can probably earn one fairly easily here, especially if you combine with Goombella or Flurrie for her Gale attack. Regardless, you’ll eventually have to go through the southernmost door here and smash the red switch. After doing so, go through the nearby door and walk up the stairs to find a Steeple Key. (At the base of the stairs, there’s another Star Piece hidden beneath the floorboards.)
After you have the key, return to the stairs and exit through the northern door to find another red switch. When you hit this one, the stairs will shift to another position; the middle door doesn’t lead anywhere, so hit the switch twice to unlock the path to the door. (You can also get a Golden Leaf by shimmying through a gap in the fence here and hitting the tree nearby with your hammer.)
Now that you’re able to reach the locked door, head towards it, unlock it with the Steeple Key, and head up to the top for a boss fight.
Boss Fight: ???
HP: 40
Attack: 4
Defense: 0
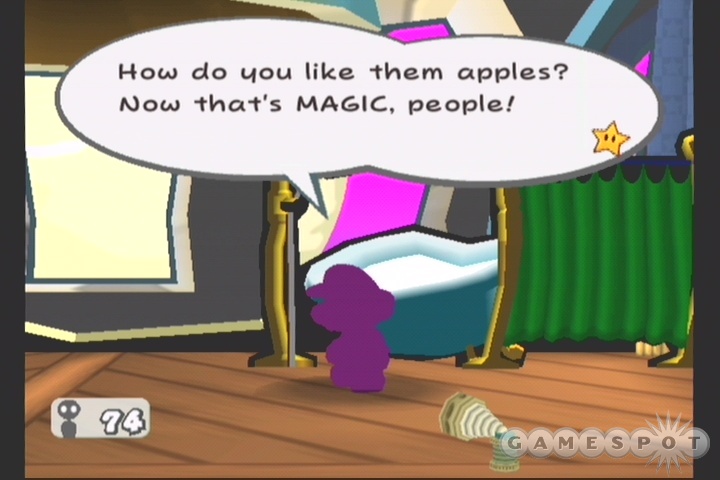
??? is very easy to beat, for a chapter-end boss; bop him on the head a few times with Mario and Goombella, and he’ll keel over just like that. Unfortunately, even though it may appear that you obtained the Crystal Star, you’ll find that something unpleasant has occurred; ??? has actually switched his body with yours, leaving you in control of a shadow version of Mario! You’ll have to make your way back to town on your own; all of your party members will have snuck off with the "real" Mario, leaving you alone.
When you get back to town, Mario will confront you. You can’t guess his name at this point, so just enter something at random and run away from the ensuing fight. Further inside the town, you’ll run into Vivian, who’s searching for the Superbobomb in the grass near the beginning of town. If you help her find it, she’ll join the party!
Now that you have Vivian to tag along, you’ll be able to listen to the conversations of the birds in the trees around town - all you have to do is press X when the dialogue prompt shows up. The only birds with anything relevant to say are in the tree near the graveyard, on the far eastern side of town, near the gate. They’ll reveal that there’s someone locked up beneath Creepy Steeple who knows ???’s name, so back you go. This is fun, isn’t it? Yep, nothing we’d rather do than walk around all day, either.
Back To The Steeple
When you reach Creepy Steeple, drop into the well and start busting through the Spike Tops there. Vivian can’t hurt the Spike Tops, and Mario can’t flip them over, so you might have to resort to offensive items to get through those groups, unless you want to continually run. Regardless, when you have a chance you’ll need to walk up to the grate on the right side of the screen and start pushing it up the ramp. After pushing it a bit, activate Vivian’s power and draw back into the shadows, which will let the grate run over you. When it’s past, pop back up and be on your way!
When you reach the end of the rolling paths, you’ll come across a room with only a single bird inhabitant. Check the chests first; among the prizes are a Power Plus Badge and the Letter P, which you’ll need to name the Mario interloper. After you grab it, use Vivian’s power to overhear the birdie saying the bad guy’s real name: Doopliss.
Now that you have the true sobriquet of the nefarious usurper, return to Twilight Town and spell it out for him. He’ll be a wee bit surprised that you actually managed to find it out, but won’t give up the ghost just yet; instead, he runs off in the direction of Creepy Steeple, so you’ll have to run all the way there again, and follow him up into his little bachelor pad at the top of the tower to face off against him for the last time.
Boss Fight: Doopliss
HP: 40
Attack: 4
Defense: 0
For the duration of this fight, Doopliss will actually fight as Mario, with your teammates on his side! You might not be used to boss fights against numerous enemies, but it doesn’t complicate things all that much, as you’ll only want to attack Mario anyway. (If you manage to kill off one of your teammates, another one will pop in to take his or her place.) So, go all-out with attacks on Mario; Vivian will eventually fight at your side and help you wail away. After Doopliss runs away, you’ll really get the Crystal Star.
Interlude
After the chapter ends, you’ll find yourself controlling Princess Peach during another interrogation with TEC. He’s willing to give you a bit of information, but his programming won’t allow him to just come out and give it to you, so you’ll have to pretend to play along in another quiz show to get it. The answers are as follows:
1: Thousand-Year Door Opens.
2: To conquer the world.
3: A 1,000 year old demon’s soul.
4: Bring the demon back to life.
5: Crystal Stars.
Next up is another Bowser mini-game; this time he’ll be underwater. The same rules apply from the last game, so swim around and don’t let any of the falling X-nauts bomp you on the head.
Interlude, Part 2
When you return to control of Mario, drop down from the pipe to Twilight Town and head towards the Thousand-Year Door to get the location of the next Crystal Star. Frankly will point you in the direction of the docks for more info on how to get to Keelhaul Key, but you don’t actually need to go there; talk to Flavio in the Inn, then again at the docks to learn about Admiral Bobbery, a legendary navigator. You can find his hideout by using Yoshi to fly across the river on the eastern side of town, then jumping up on top of the locked house and rolling into the chimney. Unfortunately, he’ll pretend not to be who he is, so return to the Inn and talk to the bartender to confirm your intel. After another trip back and forth, you’ll finally get Bobbery to join your group. Don’t forget to check the back room of his house for another Shine Sprite.
Before you leave on your trip to Keelhaul Key, though, there are some more items around town for you to pick up. Vivian’s shadow-hide ability will let you maneuver your way through one of the spike traps in the Rogueport Dungeon; you’ll find the door leading to it behind a set of bars in between two yellow blocks two screens below Frankly’s house. Your reward is a handy Spike Shield Badge, which will let Mario stomp away on spiky enemies without taking damage. In addition, you can find another Shine Sprite on the west side of town; enter the house with the circular window on its door and use your rolling ability to drop into its backyard.
In addition to these relatively mundane adventures, you can actually add another member to your party at this point. If you check the Trouble Board next to Bobbery’s house, you’ll note that one of the Troubles is listed with the name ???. No, this isn’t Doopliss back to haunt you; it’s actually Ms. Mowz. She’ll ask you to find a Badge that’s hidden away in Hooktail Castle. If you head all the way back to the Castle and use Flurrie to blow away the floor of Hooktail’s lair, high in the tower, you’ll find the badge. It’s a long walk, but at least you’ll have Yoshi along this time to help you out. Anyway, when you bring the badge back to Mowz, she’ll join up! She has the ability to sniff out hidden items on any given screen, so it’s definitely worth bringing her along.
Chapter 5: The Key To Pirates
Keelhaul Key
Unfortunately for you, your ship is attacked by ghosts on the way towards Keelhaul Key! It’s every man for himself as the vessel goes down, but luckily enough, you and your cohorts make it to an unidentified island safely enough. You’ll have to protect Flavio, et al, from a trio of the "ghosts" soon after you land; they’re easy enough to beat, but keep in mind that the flames atop their heads act as spikes - no jumping attacks, in other words.
On the screen containing your camp, you’ll have access to two Star Pieces, one in the ocean near Flavio, and one behind the rock to the right of the Inn. If you then head off to the left side of the screen, returning to where you were when you first gained control of Mario, you can find another Star Piece underneath a patch of grass near the screen transition with your Spin Jump. (Use Ms. Mowz to get a fix on this, if necessary.) There’s also a Whacka in the far northwestern corner of the screen; hit him with your hammer to receive an item that gives you back 25 HP and FP when used! What’s even more amazing is that this guy continually pops his head up if you wait awhile, then come back, allowing you an essentially infinite number of these things. You’d think he’d wise up to the fact that all you want to do is concuss him after a while, but no; he’ll pop up at about the same frequency with which normal enemies respawn.
Rescue Your Friends!
Now that you’ve cleaned out the first two screens, you’re ready to move on into the jungle. Don’t forget to shake the grasses; the first grass beyond the camp has another Star Piece. There’s also a couple of item boxes on this screen.

The second screen into the jungle is where matters are complicated a bit. You’ll note the item box on the path; get on top of it and jump to reveal a brick to which you’ll have to guide Yoshi to get past. Yoshi will also come in handy when trying to get the Shine Sprite on the left side of the screen. There’s another item box on the top path, as well as a Jammin Jelly hidden away. If you want this last treasure (which restores 50 FP), you’ll have to stand close to the bottom edge of the top path and use your Super Hammer technique to reveal the box, which is directly beneath the box containing the Thunder Rage.
On the bridge to the right, you’ll witness Bobbery fighting off a couple of the ghosts, allowing you to rescue two of your teammates. After you regain control of Mario, return to the bridge and check the bushes for an Inn Coupon. You can also drop down to the bottom of the left side of the bridge to reveal a path to a pair of Coconuts; the right side of the bridge also has a semi-secret area; if you get sideways on the eastern end of the bridge, you’ll obtain the Ice Power Badge.
Proceeding on, you’ll encounter a pair of Embers standing guard around a conspicuously conspicuous tree. Kill them, then hit the coconut tree with your hammer to reveal none other than Bobbery, faint to the point of death. And he was only three days from retirement! His dying wish is for a sip of Chuckola Cola, which only Flavio has; bring him back one of the Coconuts, though, and Flavio will hand over the Chuckola to your care. Bring it to Bobbery to get him to join your group, then retreat to the camp, where Flavio will join up (temporarily) as you attempt to find the treasure beyond the spooky dead end near the coconut tree.
Mario And The Goonies
After you return to the dead end with Flavio, examine the skull-and-bones on the wall to prompt a question for Flavio. He does indeed have a gem that will fit perfectly into the indentation on the wall - funny how things just kind of work out like that. You’re not through the door yet, though; if you paid attention to Flavio’s song, you’ll know that you have to Spin Jump three times on the red statue, then whack the blue statue four times with your hammer. Doing so will open up a small porthole through which Bobbery can be thrown. After all that’s done, you’ll finally be able to enter the pirate cavern. (Before heading in, check above the rocks near the water’s edge to find another Star Piece.)
Pirate’s Grotto
There’s a Star Piece inside the antechamber to the Pirate Grotto; look immediately inside the cave entrance to find it, then save your game and get to hustling.
Soon enough, you’ll come to a cave proper, with more powerful Embers lurking about. Fight them off, then start looting the place. To begin with, you can find a Shine Sprite if you jump above the prow of the first sunken ship here; you’ll have to make the jump blind, though, since you won’t be able to see much due to the overhanging stalagmites. You can find another Star Piece across a small jump nearby, but don’t worry about the item on the ship to the right; you can’t get it just yet. Use Yoshi to cross the spike trap.
Dodging A Bullet
In the next room, you’ll face off against the venerable Bullet Bills. These guys are getting launched from cannons far off to the right, so try to time your jumps so that you get a First Strike on them as they arrive; you should be able to defeat the groups easily if you do so. (You can actually jump over them if you time your jumps properly, but this is difficult to do.) You’ll have to fight your way through the Bill Blasters, as well, but they shouldn’t be much harder than their smaller counterparts.
Moving forward, you’ll find the winch that will open the sluice gate, but you don’t have the handle for it! It’s on the boat near the spike trap earlier, but again, you can’t get it yet, so keep going to the right. Save your game at the save spot, then ascend the cave to find another Shine Sprite. You remember how to get a cube that’s just off of a ledge, right? If not, whip out your Super Hammer and start Mario a-twirling while he’s standing directly next to it.

There’s a blue switch near the waterfall, but it’s too high to Mario to reach. As with most dungeons, the answer lies with your newest party member; in this case, it’s Bobbery. Throw him onto the platform and he’ll trip the switch, letting you pass through. In the next screen, there’s a Star Piece hidden underneath the floor just beyond the doorway, but beyond that, the room is clear.
In the storeroom to the left, you’ll be able to grab the Grotto Key, but only if you resort to the old-school method of having Koop levitate in midair while you scramble around to stand atop the small elevator. Once you’re in position, let Koop hit the switch, then grab the key. You should do this twice, actually; the second time, jump on top of the elevator’s weight, instead of to the key platform, and you’ll ride up to where a Shine Sprite is hidden. (There’s also a Star Piece in the open barrel in the foreground.)
Mario Makes Like A Boat
Return now to the save point, save your game, and unlock the door nearby. You can find a Star Piece in the first room if you’re willing to beat down the flying creepies and Spin Jump around until it pops up from beneath the floor. The second area here has another Shine Sprite, which you certainly are finding a lot of. In fact, after you roll yourself up into a tube and make your way underneath the spike trap here, you’ll find yet another Shine Sprite. Bonk the area underneath it with your hammer to reveal a stepping-stone.
From here on, you’ll have to proceed to the left for a few screens until you reach a half-sunken boat. Inside it, you’ll find the last of the cursed chests. Don’t worry if you haven’t found the key; it’ll appear on an enemy nearby as soon as you talk to the chest. Unlock it to receive the paper boat ability, then use it on the nearby boat platform and get back to the save point.
Now that you can boatify Mario, you’ll have to return to the boatlaunch above the save point and get back into the water. If you then float down the waterfall and head left for a few screens, you’ll come to the Gate Handle which you had to bypass earlier; grab it and use it to open the sluice gate near the save point.
After the gate’s open, you can return to the boatlaunch and head through the gate while in boat form. Follow the path - there’s not much opportunity for exploration here - until you reach a thoroughly pipified room, complete with Mushrooms stranded on a boat. You’ll need to maneuver through the pipes in the background and foreground until you reach the two blue switches in the background; smash both of them to let the Mushrooms escape from their wooden prison. Doing so will also open up the path to the pirate’s treasure!
Boss Fight: Cortez
HP: 20
Attack: 4
Defense: 1
Although Cortez’s stats might not appear all that impressive, you have to consider the fact that he has three forms, each of which has 20 HP, and that he’ll also eat half the crowd at one point to completely regain his health. Still, if you enter this fight at full health, you shouldn’t feel too pressured by the big bad pirate, as his offensive output isn’t significant enough to threaten you with death, if you proceed quickly.
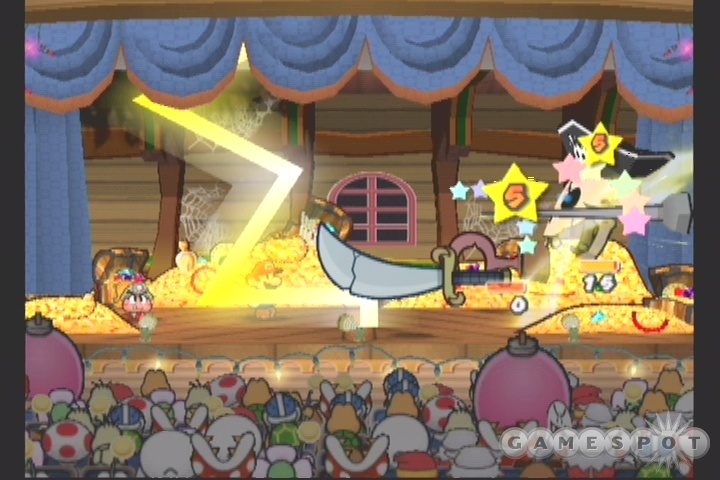
Cortez’s first two forms are relatively easy to defeat, as they are straightforward single-target battles. Bonk him on the head or do whatever you normally do when faced with a big baddie, but save your Star Power and items for his third form, which consists of his head and no fewer than four smaller targets, as his swords will join him in the struggle. The swords can do plenty of damage if you let them, so you’ll want to clear all of them out with either Earth Tremor, Art Attack, or an offensive item before concentrating on Cortez himself. Keep something in reserve, though, as Cortez will eventually heal himself up and bring all of the swords back from the grave.
In all, Cortez isn’t too horrible to deal with, even if you don’t have any offensive items in your reserve. Just make sure you keep enough Star Power for at least two Earth Tremors in reserve until the final form, and you should be able to defeat him and earn your sixth Crystal Star.
The X-Nauticus Pirates
Now that you have your new Star, exit the ship and save your game. If you were particularly taxed by Cortez, you’ll also want to use the small restore cube on the deck of his ship, as there’s another tough fight coming up.
After making your way out of the Grotto (by using Bobbery on the crack in the wall), you’ll be confronted with none other than Crump, now having shed his pirate disguise. You’ll need to bring Flavio back to Cortez, in an attempt to get him to take his ship out on the open waters; a fight with Crump quickly ensues.
Boss Fight: Crump
HP: 30
Attack: 3
Defense: 0
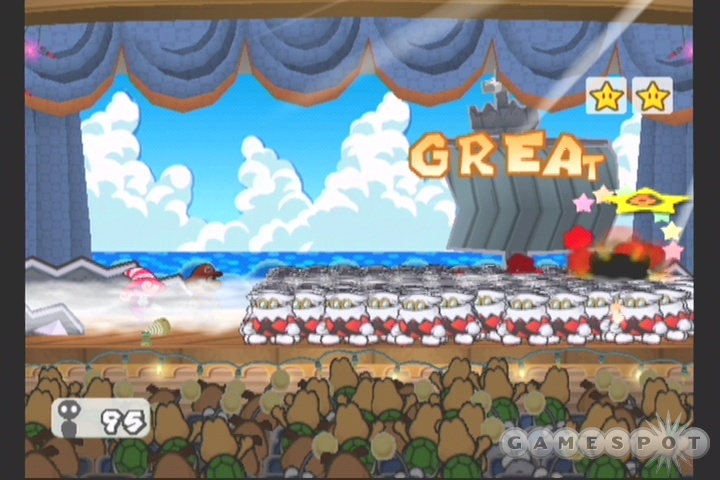
Crump is only difficult if you used up all of your health and Star Power on Cortez, and then neglected to heal up afterward. This fight has a large annoyance factor, though, because he’ll continually summon in groups of helper X-Nauts that will regenerate when killed; you’ll thus want to focus all of your efforts on the man himself. Note that the groups of X-Nauts can’t be knocked backwards, so moves like Mario’s Super Hammer or Yoshi’s Gulp won’t do much good for hurting Crump, who’s hiding in the rear. Use Mario’s Jump attack and another character that can easily attack enemies in the rear to finish him off.
Interlude
Princess Peach’s next little run-in with TEC involves a little bit of Mission: Impossible-esque subterfuge. Your mission, and you must choose to accept it, is to enter Grodus’ private chambers and hook it up to the network so that TEC can analyze data on one of his disks.
To begin with, follow TEC’s advice and head upstairs to the potion lab. The correct formula here, from left to right, is red, blue, yellow, green, if you’re too lazy to decipher the clues left scattered around the lab. When you have the reagents in their proper places, fill the beaker as it travels along the assembly line, then heat it for 30 seconds. (A silent count in your head should be sufficient; you can also get a clock or stopwatch if you want to be precise.)
After you turn invisible, it’s off to Grodus’ chamber, to the right of his throne room. There isn’t much l33t h4xx0ring involved here; just grab the disk off the shelf, plop it into the computer, and you’re done. Return to TEC’s room to finish off the scene.
Bowser’s scene is thankfully much simpler. All you really need to do here is talk to Crump to start a chain of events that lead to a West Side Story-ish rumble.
Interlude, Part 2
Back in Rogueport, you can start exploring a bit with Mario’s new boating ability. If you use it on the platform near Cortez’s ship, you can find a little hidey hole with a Star Piece and an HP Drain Badge. There’s also a Double Dip Badge in the east side, found when you boatify yourself near the Robbo’s hideout.
Plentiful Items Abound
In the Rogueport Dungeon, you can now bust through some of the cracked walls with Bobbery’s bomb attack. The crack immediately to the left of the pipe leading down from Frankly’s house will lead you to an Adjustment shop; if you need to shift around some of your level-up choices, you can do so here. For instance, if you regret having chosen to increase your HP instead of your FP at your last level-up, you can exchange one for the other, but it’ll cost you! Bobbery can also smash through the fallen pillar that blocks the east side of the dungeon from the town underneath Rogueport.
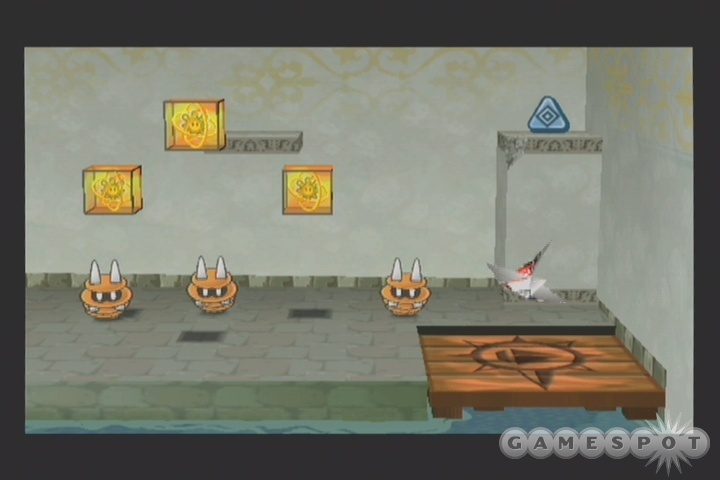
If you make your way to the western section of the dungeon, you can now access the secret area that lies at the eastern end of the canal that runs along four screens or so. The boatlaunch for this is far off at the western end of the canal, with the passageway leading to it hidden to the left of the pipe that drops you down near the Thousand-Year Door. If you follow the canal, you’ll net two Shine Sprites (with another one that’s inaccessible at this point), as well as an ever-useful Defend Plus badge. Lastly, there’s another boatlaunch near the pipe leading to Petal Fields (to the right of the first screen underneath Frankly’s house), which will lead you to another Shine Sprite. Yet another Shine Sprite can be located to the left of the item shop in the western side of town; use Bobbery to destroy the wall and waltz on through to find it.
The last important task to complete before the beginning of the next chapter is given to you by Merlon, the teammate power-upper person next to Frankly. If you speak to him, he’ll give you a bit of a riddle to solve; in essence, he wants you to get something from Hooktail Castle. Travel back there and start proceeding ever rightward towards where you were cursed with the ability to turn sideways. (There’s another Star Piece that you can find here, as well. If you slip through the bars in the room where you were attacked by Red Bones and Spin Jump around, you should be able to shake it from the floorboards at the left side of the room.)
To the right of the cursed chest is the spike trap room from which you escaped so long ago. Now that you have Bobbery along, though, you can use him to bust a hole in the eastern wall, which will lead you to a Up Arrow item. If you bring it back to Merlon, he’ll be able to upgrade your team members to rank two! You certainly won’t have enough Shine Sprites to upgrade all of them, but you should be able to buff two or three of them at least, so choose the ones that you consistently find yourself using in a fight and leave the rest for later. Goombella and Koops are good choices, if you’re stumped.
Back On Track
Now that you’ve sailed around and blown up every wall in sight, you can get back on the quest for the Crystal Stars. To start, talk to Don Pinata on the west side of town; he’s apparently been laid low with loneliness since Francesca left with Frankie. Awww.... It’s up to you to cheer him up by bringing Francesca back to Rogueport.
Francesca and Frankie are still on Keelhaul Key, so head back thataways and track them down in the jungle. As is always the case, there’s a bit of complication to this bounty-hunting task; Francesca has lost her ring, and won’t leave the island without it. It’s up near the large tree where Bobbery was hiding earlier, so grab it and bring it back, then head back to Don Pinata’s place in Rogueport to get your train ticket.
Chapter 6: 3 Days of Excess
Excess Express
Something strange is afoot aboard the Excess Express, and it’s up to Sherlock Mario to find out what! As soon as you gain control of him, you’ll discover a note that vaguely implies that something bad might befall the train unless you get off before it reaches Poshley Heights. In the real world, the train would be immediately stopped and evacuated while bomb-sniffing dogs searched every inch of it, but in Marioland, the only way to prevent disaster is apparently to let mustachioed plumbers investigate on their own time.
When you’re ready to move out, grab the Dried Shroom from the dresser (if you want it, that is) and the Shine Sprite from the box near the lamp, then move out. The other treasure in this area comes in the form of a Star Piece hidden underneath the floor of room 004.
A Succession of Mysteries
After you end your thievery of your sleeper car, head left until you come to the train’s conductor. Speak to him about the note, then grab the Star Piece in the drawer in room 008 before heading back to the kitchen. It seems that a pot of stew has gone missing...hmmm.... Luckily for you, there’s copious evidence, in the form of stains on the carpet, that will point you to room 003. Grab the pot from the drawer here, and that little mystery will be resolved without much fuss.

When you report back to Pennington, he’ll send you down to room 008 to check out the Bob-ombs. How these guys got past the station screening is anyone’s guess, but it doesn’t appear that they are interested in destroying the train; instead, you’ll be asked to find the youngest Bob-omb a present for his birthday. If you talk to him, you’ll find out that he wants an autograph; you may think that he wants one from Zip Toad in room 001, but if you speak to the conductor, you’ll learn that he actually desires one from the engineer, so head down to the rightmost end of the train and talk to the man behind the wheel to receive the paper from him, then return it to Bub to nab a Shine Sprite. There’s also a Star Piece beneath the floorboards near the engine itself.
Next up is the Mystery of the Missing Blanket, given to you by the conductor himself. After you pick up the quest, talk to the waitress in the dining car to get her little favor as well; she wants you to find her Shell Earrings. (You can also speak to Toodles in room 002 to get a mini-quest for her, as well.) When you’re ready to find the blanket, head down to room 003 and talk to the gourmand within; he’ll tell you about hearing strange noises in 004. Vivian is your key to locating the culprit here; hide away anywhere in the room, and a ghost will appear. Speak to it to learn what it desires most: it appears that it left a diary in the baggage compartment, and wants to have it back so that it can shuffle off this mortal coil.
When you next speak to the conductor, he’ll let you into the baggage hold, wherein you’ll find the diary by squeaking through a couple of boxes. Return it to the ghost, and you’ll get your blanket, which goes to the conductor, who gives you the super-awesome ultimate present of a mushroom. Sigh...you can’t kill him for his poor sense of gratitude, but you can whack him with your hammer for a bit if you like.
Day 2: More Of The Same
After the dawn of a new day, rife with possibilities, creep down to Pennington’s cabin to learn about a briefcase that was stolen from Mr. Ferret. Your first clue in the case is located on the other side of the train, in room 001, so nab it and bring it back to Pennington, who’ll task you with finding Zip Toad.
Said rascal is actually hiding out in your room, as you’ll find when you visit it again. Use Vivian’s ability to hide out until he appears, then chase him down to conclude the mystery of the Great Train Threat. Before you leave the train to check out Riverside Station, return the Earrings and the Gold Ring to their owners to pick up some small rewards, including a Star Piece.
Riverside Station
Unfortunately, the train is being blocked from leaving the station by a raised drawbridge. All of society depends on the timely running of trains, so it’s up to Mario to get it unstuck! Talk to the small Mushroom man next to the bridge to get the Station Key, which will unlock the station proper.
When you reach the interior of the musty, unused building, start heading right. You’ll need to unlock the stairs leading up in the second room by rolling underneath a grate and hitting a switch. From there, proceed ever-upward until you reach the great gear room, then leap across the gears and through the station machinery to find another Station Key. To get past the first set of gears, try to wait until both the yellow and green gears flip into place at the same time, then quickly leap across to the other side. There’s a Star Piece behind the pedestal which holds the Station Key, so grab it before returning to the bottom of the stairs and unlocking the door there.
Down We Go
There are a few enemies in this little outside area, but you can avoid almost all of them if you scout for a small slot at the bottom of the first set of stairs and roll up into a tube to fit inside. You’ll get an HP Plus Badge, and you’ll drop down directly in front of the door leading to the next area. You’ll also miss a Shine Sprite, though, near the eastern edge of this screen, so maybe it isn’t the wisest idea. You won’t know that there’s a door at the end of the path, unfortunately; you’ll have to use Flurrie to blow the posters off of the wall to reveal it.
Inside the next room, fight off the annoying Spiky Parabuzzies to get to a series of tube passages. (The Spikies are difficult to damage with any character; you may want to try Flurrie’s Gale or the Earth Tremor attack to kill them.) Inside the tube passage, you’ll drop down to a flat surface; you’ll need to roll right, then hit the jump at the bottom of the ramp, and then drop down into the hole on the next surface in order to reach the upper platform at the bottom of the room. It looks a lot more complicated than it is, but there’s only two possible outcomes to your journey, and you will of course be able to try again if you land in the wrong place. (There’s also a P-Up, D-Down Badge in the maze; after falling down the hole, make the jump leading to the left to find it.) Just keep moving to the left whenever possible, and you should eventually reach the next door.
These Boots Were Made - Oh, Wait, We Already Used That One
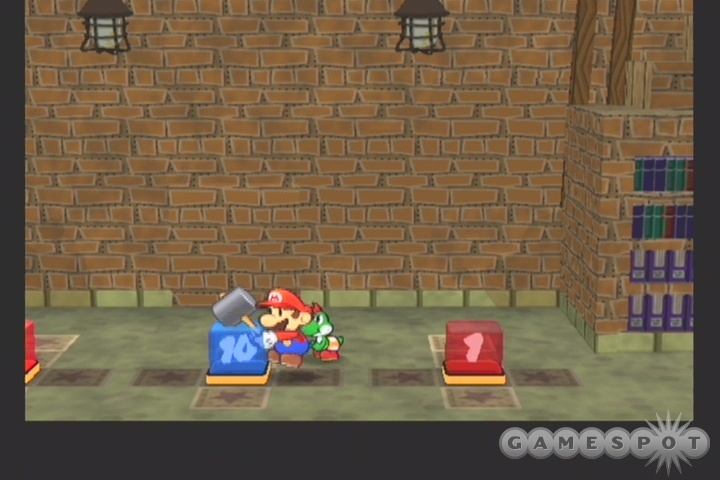
The Elevator Key beyond said door is locked up nice and tight, and is in fact inaccessible to you at the moment. You’ll need to walk past this room and kill off the Goombas in the library beyond to reach it. The Goombacide will reveal three switches; this is apparently a time-based puzzle, where you have to hit the 1 switch first, hit the 3 switch two seconds later, and then hit the 10 switch on the tenth second after you start. This is simplified by the fact that you can just bash away on the switches with your hammer without resetting the puzzle, so do so and head upstairs to grab the Ultra Boots, which let you jump super-high!
Now that you have the boots, make your way across the piping and fall down to the Station Key room. Before grabbing it, though, walk into the library again and grab the Shine Sprite, then use Yoshi and the Ultra Boots to access the Key. (You’ll have to stand underneath its shelf and knock it with your super-jump to get it.)
With the Elevator Key, you can now unlock and use the elevator in the first screen of the station, so ride it down to the basement and use Flurrie to clear out the pests that hide the drawbridge switch. After dropping the drawbridge, use your Ultra Boots to grab the Close Call P Badge near the door to the station, then head out and get back on the train.
The Express Incident
After you wake up, head up to the engineer’s station for a bit of a surprise - it appears that the beasts from the station basement have attacked the train! You’ll need to save the conductor from their grasp, so head back to the baggage compartment and bang away at the enemies until you free both him and the waitress.
When you get to the roof (by clipping onto the pipe from behind the boxes), you’ll have to fight your way through the crowd of Smorgs with either your hammer or Flurrie’s breath. You’ll probably want to use your hammer, and have your teammate be whomever you normally use in boss fights, because there’s another one upcoming.
Boss Fight: Smorg
HP: 50
Attack: 5
Defense: 1 The Smorg is one of the most difficult monsters you’ve yet faced, thanks to its propensity both for turtling and for dealing a lot of damage. Faced on its own, it has no way to resist any damage, and can’t deal any on its own, but it will generate three tentacles with which to slam you around. Each will do five damage a turn (for fifteen total damage - ouch!) and what’s more, while it has a tentacle alive, the main Smorg body won’t take any damage at all.

The obvious course of action is to kill off the Smorg’s tentacles, then wail on the beast’s heart. Use whatever you need to kill off the tentacles, preferably all at once - offensive items, special attacks, Earth Tremor, etc. - but save some FP for killing the heart, as it will only be vulnerable for a turn or two while it regenerates its arms. Goombella’s Multibonk and Mario’s new Spring Jump are both good candidates, but you’ll have to be careful about hitting jumps properly; you don’t press A as soon as your character intersects the outline of the heart, but rather when you’re somewhere closer to the middle.
Poshley Heights
After you kill off the Smorg, you’ll finally arrive at Poshley Heights. There are no fewer than three Star Pieces on the first screen: one underneath the circle where the ferret stands, one in the bushes off to the right of the screen (you can walk into them in the "crack"), and one obscured by the furniture below the pool. In addition, the leftmost house conceals an HP Drain P Badge; you’ll have to fold yourself sideways and walk through the narrowest of slots, hidden in the wall near the roses on the table.
On the second screen, you can find another Star Piece behind the foliage near the first house, as well as an Inn Coupon behind the pasta stand. On the third screen, there’s only a Shine Sprite to occupy your attention before you head into the Poshley Sanctum by examining the sign on the door.
Poshley Sanctum
Although Beldam and Co. may think that they’ve received the Crystal Star, Pennington will inform you that it’s actually hidden away elsewhere in the museum, and that they absconded with only a replica. So, it’s a museum that displays a single item, but the item that’s on display is actually fake? Makes sense.
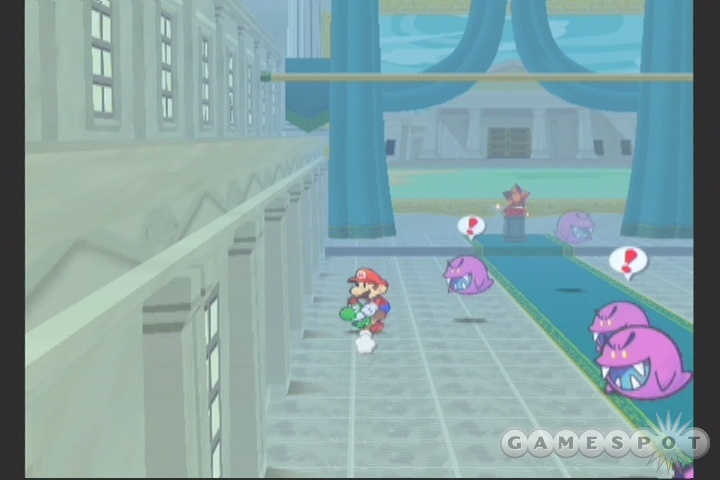
Anyway, to reach the Crystal Star, stand on the red spot on the ground and Spring Jump up to the pipe. Work your way to the right and jump up to the highest level to find an airplane platform; from the other side of the room, it’s an easy walk to a blue switch, which unlocks a pipe below. After you head through it, you’ll find yourself inside the painting on the rear wall, which turns out to house a replica of the museum itself. If you don’t want to deal with the Boos in the room, ride Yoshi and avoid them. Before you grab the real Crystal Star, though, repeat your pipe adventure to find a Shine Sprite and an L Emblem badge.
Interlude
After guiding Mario back to Pennington, you get to sit through another melodrama involved the Princess Peach and TEC. No running around required this time; just flip through the dialogues and you’ll be done in no time. Bowser, on the other hand, will have to run through another of his mini-game levels during another Keystone Kops attempt to find a Crystal Star.
Interlude, Part 2
Back in Rogueport, Mario can now unlock his Ultra Hammer by knocking the large treasure chest in the plaza off of its stand. With it, you can finally knock through the grey blocks in the Rogueport Dungeon. There’s one near the pipe leading to Twilight Town, but it unlocks a pipe that you don’t quite need to enter yet. In this same area - below the grate in the west side of town - you can also find a pipe that you can Spring Jump to reveal a Flower Saver P Badge. Further down, you’ll come to a huge grey block, which you can destroy with the Super Hammer technique; as with the room next door, this contains two blue shortcut pipes, except these go to Keelhaul Key and Poshley Heights. Also in this room is an FP Plus Badge.
There are also multiple Shine Sprites that have become available to you. If you return to the room where you obtained two Shine Sprites earlier, you can reach the last one with your Spring Jump technique now. There’s also a Shine Sprite available in Downdeep Town; stand between the two buildings atop the moving platform and Spring Jump when you’re next to the pipe. You can then walk to the right to find the Shine Sprite. And, last but not least, you can earn a Defend Plus P Badge by using your Spring Jump in the watery room that led to Petal Meadows lo those many chapters ago. Just jump to the Pipe, shimmy over to the left, then use Bobbery to blow the wall (despite the fact that no crack shows). You can also shimmy right on the pipe to find another Star Piece.
After all that is done, show your Crystal Star to the Thousand-Year Door, then talk to Frankly twice. He’ll point you in the direction of the pipe that you unlocked earlier, and you’ll be on your way to the penultimate chapter of the game.
Chapter 7 - Mario Shoots The Moon
After landing on the icy outskirts of Fahr Outpost, start doing your dance with Ms. Mowz to find items! On the first screen, there’s a Star Piece underneath the ice near the pipe, as well as a Double Dip P badge in an invisible item cube in front of the last tree before the screen transition. On the second screen, there’s a very well-obscured Shine Sprite behind the second tree which you’ll need to jump around to find; on the third, there’s a Heart Plus P in an item box, as well as a Star Piece hidden near the screen transition to the right. When you reach the town proper, you’ll be able to find a Star Piece behind the wall at the bottom of the first screen; on the second screen, you can nab another Star Piece by Spin Jumping near the large cannon, an Inn Coupon near the steps leading to the Inn, and another Star Piece by searching behind the boxes in the building to the far right. Phew!
Finding The Bob-ombs
Of the two Bob-omb NPCs that you have to find, Goldbob is by far the easier to track down; he’s located in Poshley Heights, near the train station. You can use the blue shortcut pipes beneath Rogueport to get there quickly, so do so and offer to give him all of your money in exchange for permission to use the cannon. He’ll ask you if you’re sure a half-dozen times or so, so keep saying yes, yes, yes! Don’t worry; although it appears that he takes all of your cash, he’ll actually give it right back to you immediately after giving you the Goldbob Guide.

Next up is General White, and he’s a much tougher nut to crack. To find him, you’ll have to play something of a world-spanning scavenger hunt. It’s not very inventive, and definitely isn’t much fun, but you gotta do it, so get going! First off, speak to the Koopa near the western entrance to Petalburg. (Don’t forget about the shortcut pipe; it’s in the next room over from the one leading to Poshley Heights.) Then head off to Keelhaul Key to speak to the Bob-omb there, who’ll point you to Glitzville. There’s no shortcut to that floating city, so you’ll have to take the blimp.
When you speak to the proprietor of the juice shop, he’ll point you towards the Great Boggly Tree, where a Puni will point you to "someplace dark." Head to Twilight Town and speak to the woman standing in front of the inn, who’ll only tell you that General White looked tired. Quite a clue! Regardless, you can now head back to Fahr Outpost and speak to the mayor; you’ll spot General White heading into a building nearby. If you follow him in and repeatedly bonk him while he lies on the bed, he’ll wake up, and you can speak to the Mayor to be on your way...to the moon!
The Moon
The moon is rather devoid of interesting things to do, save for getting pounded by the Clefts that like to blend into the background by hunkering down and looking like normal rocks. However, each screen here has a cracked rock that can be destroyed by Bobbery; the items to be found are a Stopwatch, a Volt Shroom, a Power Punch, a Ruin Powder, and a Courage Shell. Nothing particularly worth seeking out, in other words; if you just want to get on your way to the X-Naut facility, head three screens in either direction, until you reach an area guarded by a phalanx of Yux’s. One of the cracked stones here conceals a pipe that leads to the X-Naut Fortress.
X-Naut Fortress
After defeating the initial X-Naut charge, heal up and save your game, then start heading right. You’ll eventually come to a room with a number of colored panels; follow the path that’s shown when you first enter the room to make it to the chest and obtain the Elevator Key. You can use this to unlock the elevator in the hall outside; ride it down to Sublevel 2.
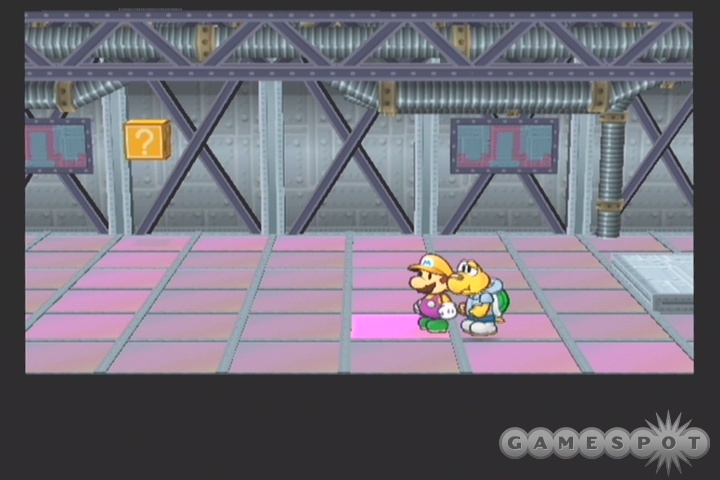
When you reach your destination, head all the way to the left to reach another disco-panel room. The path here won’t light up as it did before, but it’ll be displayed on the boards at the rear of the room (some security!), so you shouldn’t have a problem getting the Card Key. After you have that in your possession, you can start exploring the green doors on this floor; the important ones are the second, which contains a teleporter that will take you down to Downdeep Town, and the fourth, which will give you the code that unlocks the door on Sublevel One. Before you head up, though, keep going right until you reach Grodus’ inner sanctum, where another Card Key awaits.
Back on Sublevel One, you can enter the code into the door on the right end of the hallway to unlock it. Inside, you’ll have to face off against another Thwomp in an exciting round of trivia!
Answer 1: Elevator Key
Answer 2: Koopie Koo
Answer 3: 6
Answer 4: Hooktail’s Belly
Answer 5: Prince Mush
Answer 6: A Ring
Answer 5: Number Seven
For your daring success, you’ll obtain another Elevator Key; use it on the elevator near Grodus’ chamber to unlock Sublevel Three and Four. Four doesn’t have anything in it that you can use, so head to three and proceed through the door at the left end of the corridor to find another electric-floor test. This one is a bit trickier than the first; instead of following a set path, you’ll have to walk along as the floor panels light up ahead of you. The annoyance potential is rather high here, due to the fact that the path will turn backwards and will even double back onto itself at one point; if you step off the path or wait too long to move, you’ll have to start all over! That said, the only other penalty is a one-HP hit, so don’t worry too much about getting it done right off the bat.
After you get the last Card Key, move to the right end of Sublevel Three and swipe the cards in the card readers there. From left to right, you should swipe red, yellow, green; this corresponds to the order that they’re in in your inventory, so it shouldn’t be too hard to remember.
Factory Days
Now that you’ve reached the guts of the X-Nauts’ base, you’ll have to maneuver your way through the rafters and gears that make up the interior of the fortress before you’re able to proceed. To begin with, use Bobbery to flip the blue switch at the end of the small corridor you begin with, then shimmy through the bars nearby and let Vivian escort you underneath the sheet of metal that blocks your passage on the runway. From here, jump onto the platform that’s moving up and down, then make your way across to the green pipe up top.
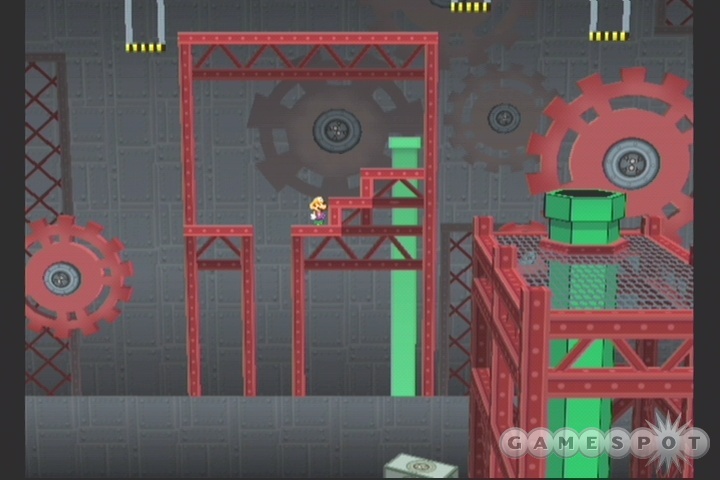
You’ll wind up in the background now, with more moving platforms to jump around on. Watch the way they move for a second, and you should be able to discern how to get to the Ultra Shroom above the pipe exit; after you grab it, you can jump off the rightmost platform onto the gears, moving from there to the next green pipe next to the set of red steps. This will take you back into the foreground, where a pair of platforms will let you off at a blue switch.
After flipping the switch, you’ll be able to reach the next door, but there’s a problem; you haven’t gotten the key yet. To reach it, drop off the bottom end of the platform next to the door and use the airplane platform there to fly as far west as possible, and voila; you’ll have your door key. Return to the door and head through for an unpleasant surprise....
Boss Fight: Magnus Von Grapple 2.0
HP: 70
Attack: 6
Defense: 2
Although Magnus might "only" have an attack of six, you should expect to take more damage than that on a regular basis. His two basic attacks, a drill maneuver from above and the release of a sharp whirly-thing (that’s a technical term) from his belly, will each do six damage to both party members, but he can also still release his rocket arms, both of which will attack for nine. In addition, he can also suck up audience members at shoot them at you, for up to ten damage. Sure hope you brought along some healing items.

Even though his stats have been increased, though, the strategy to defeat Magnus hasn’t changed much since the last time you faced him. As before, your first targets should be his arms, when they’re detached; they only have five HP, so you should be able to kill them easily with either Mario or Goombella (or offensive items), leaving only Magnus himself to deal with. So far as he goes, the same pair of characters can deal massive damage with their multi-hit jumping attacks, so go to town. You will be taking damage as the fight proceeds, though, so keep your Star Power up for a Sweet Feast, or use any healing items that you’ve managed to horde in your inventory - you haven’t been able to heal up for a while, so it might be worth your time to actually use these before the fight begins.
Interlude
After the boss fight, you’ll take control of Bowser for a moment, then warp straight back to Mario - no Peach cutscene this time around. Take Mario down to Sublevel Four to talk to TEC, then head back to the teleporter and Rogueport. Despite Frankly’s sense of urgency, you can feel free to take your time browsing around the town. In particular, this might be a good time to investigate the Pit of 100 Trials near the Thousand-Year Door; you won’t be able to complete the entire thing at this point in the game, but you can get down to level 50 and obtain a very handy item before you face off against the end boss. Check our notes on the Pit in the Miscellaneous chapter of this guide for more info. Regardless, you’ll probably want to check out the Item Shops on the west side of Rogueport and in Deepdown for Life Shrooms and Ultra Shrooms, which will come in exceedingly handy in the final bossfight.
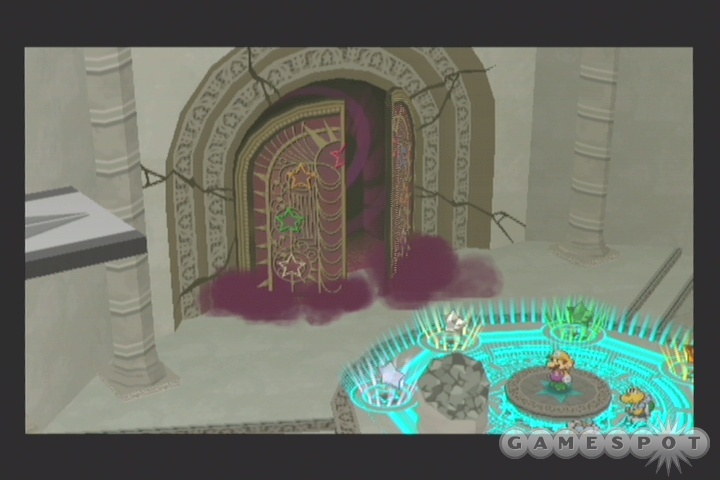
When you’re ready to rock, head down to the Thousand-Year Door and say open sesame!
Chapter 8: The Thousand-Year Door
Inside the Palace of Shadow, you’re going to be facing off against enemies that are about as tough as you might expect to find in the final dungeon of an RPG. Thankfully, they drop commensurate amounts of Star Points, so you should find yourself earning levels without too much trouble.
The first few screens are devoid of anything save monsters, for the most part. On the second screen (the stairs) you can find a Stopwatch by looking north of the western doorway. On the fourth screen, you’ll face off against a number of spike traps, but you won’t be able to tell where they are; walk slowly, though, and they’ll pop up before you reach them, allowing you to walk around them. The fifth screen sees the return of the venerable firetrap; jump over the ones on ground level, and use Vivian to avoid any that float just off the ground. (There’s also a Boo Sheet in an invisible cube over the platform where the Phantom Ember lurks.)
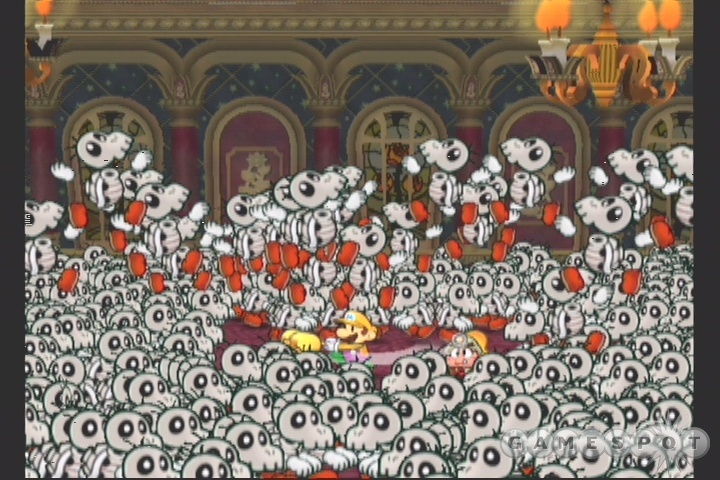
It’s on the fifth screen that you’ll face your first major challenge: a battle with Dark Bones. You should remember the basic process from your trials in Hooktail castle; you’ll need to fight your way through the crowd of skeletons to get to Dark Bones, but here, he’ll actually move around in the melee, forcing you to track him down. When you do, though, you shouldn’t have a hard time eliminating him and his cohorts; if you have enough Star Power, blast the group with a Supernova and mop up Dark Bones with your secondary character. He’ll drop the key that will let you unlock the door leading east.
Eventually, you’ll come to a room with a pair of staircases and two doors on either side. In order to pass on from this area, you’ll need to figure out which door on the right side to pass through in order to move on; if you move through the incorrect door, you’re going to have to start over. The secret is in the torches on the walls; the correct door will always have the torch nearby lit up. The sequence is nonetheless invariable; choose bottom, bottom, top, top, bottom, top, bottom to pass on.
The (Other) Underground City
Whomever this powerful demon is, he or she has good taste. Although the large park here is well decorated, there isn’t much for you to do except to heal up and save your game, then move on. After four looong hallways, you’ll come to the first boss fight of the Palace.
Boss Fight: Gloomtail
HP: 80
Attack: 8
Defense: 2

Gloomtail, Hooktail’s big brother, fights in much the same way as his sister did way back in Chapter One, save with much better stats. He’s much more likely to hit both team members at once with his jump-and-slam attack; you can guard against this, but it’s quite difficult to do so, and will only cut a single point off of the ten points of damage that you’ll receive. In addition to that, though, he also has poison breath, as well as a super-ultra-mega-Dragonball Z attack that will come after he charges himself up. Take Goombella’s advice and spend your turn before this attack goes off by using Vivian’s Veil ability to take yourself out of the path of the 16 or 18 points of damage coming your way. Gloomtail will be able to attack immediately after you pop up out of the ground, but no matter what he does, it won’t be worse than the Megabreath.
After Gloomy is dead, he’ll spit up the Star Key. Return to the underground city and blow open the pipes on either side of the area with Bobbery. After travelling through them, you’ll be able to boat your way up to the tower in the northern end of the room, so head on inside.
Inside the tower, you’ll be tasked with tracking down eight Palace Keys. There’s one in each room of the tower, so get hunting. If you want to try and solve the puzzles for yourself, feel free to do so; flip to the next page if you want some spoilers! (You can also use Goombella’s information ability for hints.)
First Floor
- Lower Left: Bang on the left block three times, then hit the right block twice.
- Upper Left: This room and the room above it are tied together. All you can do for now is to destroy the grey block on the ground floor, so do so and move on.
- Upper Right: The wall on the right side of the room is ethereal; walk through it and bop the block to earn your key.
- Lower Right: Use Flurrie to blow away the invisible blocks in the middle of the room to get the key.
Second Floor
- Lower Left: You have to kill the Bones here in order of their strength, from weakest to most powerful. This just happens to correspond to their position from left to right as you enter the room, so hit the white Bones first, then the pink, grey, and black. Your keychest will appear when they’ve all been killed in the appropriate order.
- Upper Left: This room corresponds with the room below it. You should be able to smash two more grey blocks at this point, so do so, then return to the room below and smash the final grey block. After all the blocks are smashed in both rooms, you should be able to pick up both keys.
- Upper Right: Although the wall here appears solid, you can actually use Bobbery to destroy it and reveal the path to the key.
- Lower Right: Lastly, hide with Vivian to reveal the blue block. It’ll disappear when you come out of the shadows, so try to remember where it is; you can still hit it when it’s invisible.
Third Floor
Pop quiz, hot shot: What does an orrery have to do with the floorplan of a dungeon? Apparently quite a bit. When you’ve collected all eight keys, head up to the third floor and use the Star Key to unlock the gigantic solar system model there. After activating it, and placing the eight Palace Keys into the pedestals that pop up, you’ll notice that the hallways leading to Gloomtail have been replaced by more puzzle rooms.
Unfortunately, before you can proceed down to the lower levels of the dungeon, you’ll get ambushed by another boss fight. Be sure to hit the save point and heal up before you head east, or you may have to do the entire palace over again.
Boss Fight: Shadow Sirens (And Doopliss!)
Beldam | HP: 30 | Attack: 5 | Defense: 0
Marilyn | HP: 40 | Attack: 7 | Defense: 0
Doopliss | HP: 40 | Attack: 7 | Defense: 0
Doopliss is the weakest link of this bunch; since you learned his true name, he can’t wield powerful magics, remember? All he’s really capable of is morphing into one of your characters and using their standard attacks, but he shouldn’t be able to do more than four or five damage a turn to one character. You can safely ignore him, if you wish; the two Shadow Sirens are the real threat here.
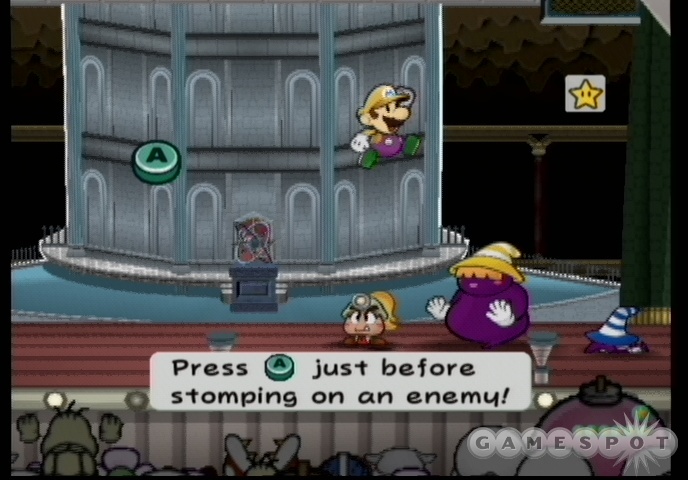
Beldam is your most pressing concern, as she has freezing breath that can potentially rob both of your party members of a full turn, thus increasing the chances that Marilyn will knock you out. Luckily, she has the lowest life of the bunch, and can be taken out with a couple turn’s worth of a Mario and Goombella jump-fest. Marilyn is the heavy hitter, though; her lightning attack will deal seven damage to each party member by default, but she can charge up for an extra seven damage. She can even stack charges, which allows her to bust out with over 20 points of damage on both party members if she gets a big shocker off. Needless to say, you don’t want this to happen, so either kill her quick or use Vivian to avoid the blow when it comes.
Doopliss is completely ineffectual, as mentioned, so save him for last, then bonk him over the head a few times until you defeat the gang. You should get the largest Star Point reward you’ve seen yet, so hopefully you’ll gain a level out of all this. If not, heal up before saving and moving on through the eastern door.
Downward, Ever Downward
Now that you’ve unlocked a passage further into the Palace, you’ll have to discover how to maneuver through said passage. To begin with, fight off the Dark Wizzards at the bottom of the steps, then use Flurrie to blow away the paper that covers up a corridor near the eastern wall. After you reach the top of the obscured stairs, you’ll have to Yoshi across to the doorway. Inside the next room, you’ll come across a veritably ancient form of puzzle; hang Koops in place near the red switch, then release him when Mario is ready to jump onto the platform that juts out when it’s flipped.
The next room features a couple of elevator puzzles. To begin with, walk up the steps to your right and hit the green switch; this will drop the green elevator in the eastern screen, allowing you to Yoshi across the gap that’s created. Of course, you only find another gap on the other side; you can’t jump this, so drop down and use Koops to raise the purple elevator before quickly jumping on it before it can rise up. When it reaches the top of the shaft, Yoshi across to the red switch. Place Koops in position to hit the switch, then drop down to the red elevator before letting him go. While the elevator rises, walk off of it into the small passage leading east. There’s one final jump to make, but due to the low height, you’ll have to roll yourself up into a tube in order to leap successfully across the chasm.
In the next room, you won’t appear to have a method of getting across the spike traps, but look up: pipes, a plumber’s best friend! Spring Jump to them until you come to a doorway into another geary room. If you want, you can head all the way to the western side of the lower level to grab a Shooting Star; if not, just jump up onto the steps near the door and throw Bobbery off the ledge to hit the switch below, then jump across before the platform retracts.

Upstairs, you’ll be faced with a locked door, which obviously means there’s a key somewhere around. It’s difficult to spot, but it’s actually to the east of the save point; you’ll have to ride Yoshi off of the small wooden platform at top speed (but not while jumping - just run off), which should see you fall onto another small platform below. From there, you can Yoshi across to get a Palace Key.
You’re now able to get through the locked door, so get moving! You’ll have to roll into a tube to get all the way up to the top of the steps; when you do reach the pinnacle, you’ll want to hit (counting from the right) the first, third, fourth, and sixth switches to activate the platform machine in the eastern room. Hop onto it, ride it around once for a Life Shroom, and be on your way.
The large block of stone in the next room doesn’t give much away; there’s only the smallest crack in the corner that indicates something off about it. Sure enough, it’s a false front; use Flurrie to blow it away, then smash through the floorboards (another old chestnut of a move) to fall down. The item block in the corner of the room can be stood upon and jumped upon to reveal a Point Swap item; joy, hallelujah, etc. You probably have enough good items at this point to just leave it behind.
After maneuvering over the narrow pathway to the next large room (the last puzzle room in the game - yay!), airplane over to a platform and head through the door there. There’s no trickery involved with the red switch here, but you do have to move quickly if you want to catch the platform before it retracts. As ever, Yoshi’s your man, so hit the switch, jump on Yoshi, scootch over to the platform and jump across. You should have barely enough time to get past before the platform retracts; your reward is a Palace Key. You can now return to the airplane platform (by dropping off of the door’s platform and heading west), and then airplane over the first platform onto a platform on the far eastern side of the room. There is a Life Shroom and a Shooting Star on the platforms between the door and the eastern side; don’t forget that you can hit B in midair, if you want to get these.
The next hallway features a healing cube and a save point; use them both before moving on.
Boss Fight: Grodus
HP: 50
Attack: 7
Defense: 1
Grodus is essentially a big Yux enemy; he possesses the same small orbiters that protect him from damage. When he has four Grodus X’s in orbit, he’ll be completely encased in an energy shield, but even when he doesn’t have a complete shield up, each orbiter will add one to his defense, and he can regenerate up to two X’s a turn, even if he also attacks.
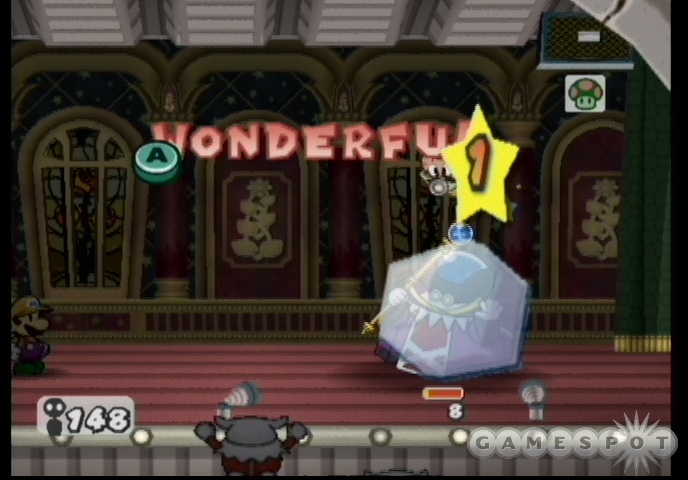
Needless to say, you have to take out the X’s before going after Grodus. Unfortunately, since he’ll be growing back more X’s each turn, you’ll have to rely on attacks that can hit all three enemies. Offensive items, Multibounce, Flurrie’s Gale ability, etc.; there are plenty of said abilities that can do the trick. Grodus himself can do plenty of damage, but you won’t have time to both attack him and heal yourself, so concentrate on attacking, and eventually he’ll go down.
Boss Fight: Bowser and Kammy Koopa
Bowser
HP: 70
Attack: 7
Defense: 2
Kammy
HP: 50
Attack: 5
Defense: 0
Like, omigod, this is soooo unfair! Hope you didn’t expect to heal up after Grodus, as Bowser and Kammy will quite literally drop in for a small chat. You know, the kind of chat that involves roasting Mario with flaming breath.
Anyway, Kammy and Bowser make quite the team. As you might expect, Bowser’s the muscle; he’ll do seven damage to each of your party members with his breath more often than not. If he’s not being king of burnination, he’ll be stomping on your teammate; when this happens, that teammate won’t be able to use their Attack menu for a few turns, and will thus essentially be worthless to you. You’ll have to switch out when this occurs.
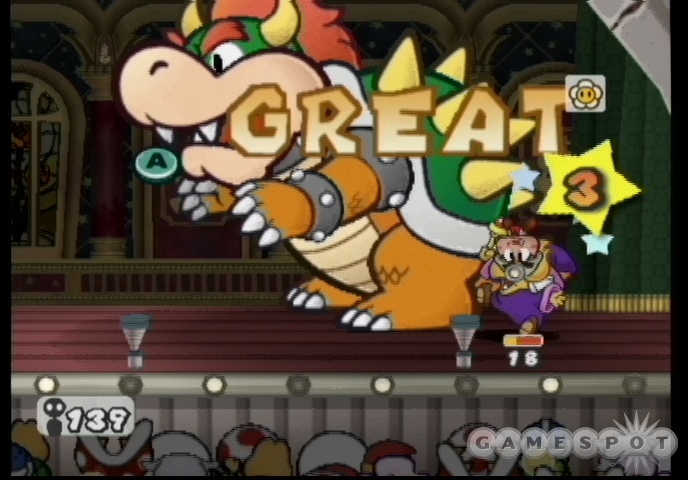
Kammy is actually more of a nuisance than Bowser is, at least in the beginning of the fight. She has a variety of attack moves that will burn you, or hit you with lightning, or so on, but the real threat from her is that she can heal up to eight damage per turn, either for herself or on Bowser. This will obviously slow down your offensive quite a bit, so you’ll need to get rid of her as quickly as possible, with jump attacks and anything else at your disposal. After she’s down, Bowser will be comparatively easy, so long as you can keep your health reserves up. Don’t forget to switch out for a new partner whenever someone’s in danger of dying.
The Finalest Fight
Now, you still have one last boss fight to go, so if you used up most of your Star Power, you’ll want to retreat back to the airplane room and fight the Embers on the floor until you either gain a level or refill your Power with Stylish moves. (You can also pick up the Life Shroom and Shooting Star if you used up any items in the above fights.) When you’re ready for the final showdown, heal up and save your game, then follow Grodus into the chamber behind the overturned chair.
When you enter the lowermost chamber of the Palace, you’ll be forced to watch through some looooong dialogues until you get to fight the end boss. Don’t just mindlessly press the A button, though; there is one opportunity for interaction with the Shadow Queen, wherein she’ll ask whether or not you wish to become her servant. Anyone who played the original Dragon Warrior way back when should know what happens when you decide to team up with the ultimate baddie in an RPG - it’s a one-way ticket to Game Overville. Say her nay, and get ready for the final fight!
Boss Fight: Shadow Queen
HP: 150
Attack: 7
Defense: 0
The final boss is so much harder than the rest of the bosses in the game, it's not even funny. If you thought the one-two punch of Grodus and Bowser was bad, then welcome to a whole new world of hurt!
To begin with, let’s describe the basic forms of the Shadow Queen. Her first form is that of a simple human being; she’ll attack with lightning, for the most part, and boost her stats periodically. You shouldn’t have any troubles here; just bash away with your highest-damage single-target attacks. Do NOT, however, use up any items during this portion of the fight, whether for healing or otherwise. Use your Star Power for healing, if necessary; everything else should be reserved for the second portion of the fight.
After you chop off around half of her health, the Shadow Queen will lift the veil and reveal her true form. You can’t hurt her at all during the first three rounds after this transformation, so keep your characters out of trouble and try not to die. After the third round, another epic-length cutscene will ensue, after which both the Shadow Queen and Mario & Co. will be restored to full health and stats.
This battle is mostly about preparation, which doesn’t help you much if you’ve rushed through the game. Your Star Power really needs to be full before you fight her, and you should try to save it for an emergency Sweet Feast during the second part of the fight, after you get your health back. Beyond that, you need to take a look at your badges and level. Mario should ideally be at level 25, at the very least, with around 60 health, if not more. (Don’t forget to check your Badge inventory for Health Plus Badges.) You’ll want to use as many Attack Plus and Attack Plus P's as you can; Defend Plus becomes less important here, as the Shadow Queen’s main attack seems to penetrate your defense. HP Plus and FP Plus Badges make good replacements for Defend Pluses. Other good choices include the Quick Change Badge, which you can buy from Dazzle; this will let you act with a teammate during the same turn you switch them, and you’re going to be switching a whole lot in this fight. Pretty Lucky can also be bought from Dazzle, and will let Mario dodge around one-quarter of the attacks that come his way. Other than that, Power Bounce (for the Shadow Queen) and Feeling Fine are both good choices. (If you get smacked down during your fight, don’t forget that you can walk all the way back up through the dungeon to Rogueport to get more items, or to try your hand at the Pit of 100 Trials.)
You also need to make sure that you have enough items to get you through the fight alive. Life Shrooms are particularly worth having; sometimes you just can’t prevent a boatload of damage from hitting your teammate before you switch him or her out. If you can make it down halfway to the bottom of the Pit of Trials (itself a tough challenge), you can find an item that can double your inventory size; if you can get this, then load up on Ultra Shrooms, Life Shrooms, and the Jammin Jellies, and you should have a much easier time with it. This certainly isn’t required to beat her, but it helps.
Beyond that, it's pretty much a matter of switching out your teammates when they get low on HP and ensuring that Mario doesn't die. The first form isn't too rough; it's when you get to the second form that you really need to start blasting away. The hands will regenerate after every turn, but they're still worth taking out with one of Koops' multi-opponent attacks or Bobbery's Bob-ombast, or offensive items, if only because you'll be saving 10-12 damage when you take them out. You definitely want to have Goombella examine her, preferably on the first form, so you know how close you are to killing her.
The Shadow Queen will also periodically charge herself up for +7 Attack; when this is the case, you can be sure that each of your characters will take around 15 damage on the next turn, in addition to whatever the Shadow Hands do, so you’ll want to either have Vivian use her Veil technique or just ensure that you have enough health to survive the onslaught. Your teammate will usually be the weakest link here, but if you have enough Life Shrooms in your inventory, you won’t have to worry overmuch about keeping them healed up; if they die, they’ll come right back to life and you can switch them out for someone else.
The End!
After you defeat the Shadow Queen, all will be returned to its normal happy state. You’ll be treated to a lengthy cutscene involving the fates of your compatriots, and then the even longer end credits. If you want to continue your adventures, let the end credits roll, then press A when the "The End" screen appears; Mario will return to Rogueport and you can keep exploring the game world according to your whims.
Miscellaneous
Trouble Center
The trouble center in Rogueport is located in the far eastern edge of town, next to the building where Admiral Bobbery is holed up. It’s intended to give you a means of exploring the world besides going through the main storyline, but many of the side quests given here aren’t worth touching, if only because their only reward is gold, which you should be finding scads of in your normal travels. There are a few that give unique rewards, however; we’ll point out any notable ones below. Note that not all of these will be available at the beginning of the game; more are unlocked after you complete each chapter.
Koopook: Try To Find Me!
Koopook is hiding out in Hooktail Castle, just below where you first encountered Ms. Mowz. After running into him, he’ll give you the Special Card, which unlocks a mini-game at the Casino.
Plenn T.: Order Me An Item!
This is a simple fedex mission. The shop in Rogueport has run out of Courage Shells, and want you to get five of them so that they can restock their shelves. You can buy five of them in Petalburg for five gold apiece; return them to Plenn T. for an Ultra Shroom, which costs 200 gold!
Pine T. Jr.: Help My Daddy!
Pine T. Jr.’s father has gone into the Pit of 100 Trials and hasn’t returned! You’ll need to go down there, locate Pine T. (he’s on the 18th level) and bring him back out (by descending to the 20th level and using the pipe there). In return, you’ll nab the Silver Card, which unlocks a new mini-game at the Casino.
???: Elusive Badge!
After speaking to Ms. Mowz atop the Item Shop in Rogueport Plaza, travel to Hooktail Castle and use Flurrie to reveal the treasure chest in Hooktail’s lair. Bring the badge back to Ms. Mowz, and she’ll join your party.
Frankie: Important Thing!
This is one of the easier quests to complete, albeit the one with the vaguest headline. When you take it, talk to Frankie outside the item shop on the west side of Rogueport, then check for the lost ring on the east side of town. Return it to him, and he’ll give you the Gold Card, which will open up a new mini-game at the Rogueport casino.
Toodles: I Must Have That Book
Mario takes a seamy trip into the underbelly of erotic addiction in this sordid tale of lust and betrayal! And surprisingly enough, that description is technically accurate; it seems that Ms. Jolene has borrowed a beefcake book from Toodles in Poshley Heights, who would like it back. Retrieve the book and return it to its rightful owner to receive the Platinum Card, which also unlocks a mini-game at the casino.
Pit of 100 Trials
The Pit of 100 Trials is an optional dungeon that’s located one room to the west of the Thousand-Year Door. Inside, you won’t find any inns, any save points, or any way to heal your characters up; all that awaits you is death! Well, death, and a few spectacular prizes.
You can enter the Pit as soon as you’re able to reach the pipe leading to it, i.e., almost from the time you begin the game. You shouldn’t attempt to plumb its depths until you’re fairly well-powered, though, as the lower levels of it (there are 100 in all, hence the name) hold some incredibly powerful foes, including the hardest boss in the game.
So, why bother with it? Because there’s some cool loot to be found inside, that’s why. On every tenth level of the Pit, you’ll find a new treasure chest with an item that is unlikely to be found anywhere but inside the Pit. Some of these are useful, many are not. In any event, we’ve included a list below for your edification.
At level 100, there’s also a special boss: Bonetail. This is the most intimidatingly powerful boss in the game, and packs no fewer than 200 HP, along with 8 Attack and 2 Defense. Since you can’t save your game or rest before this fight, you’ll have to conserve as many healing items as possible during your descent in order to have a chance.
| Floor | Item | Effect |
| 10 | Sleepy Stomp Badge | You can use your jump attack to put enemies to sleep. |
| 20 | Fire Drive Badge | Lets Mario attack all ground enemies and set them on fire. |
| 30 | Zap Tap Badge | Electrifies Mario, which deals damage to enemies that touch him. |
| 40 | Pity Flower Badge | Mario will sometimes regenerate one FP when he takes damage. |
| 50 | Strange Bag | Lets you carry twice as many items as you normally can. Incredibly useful, and relatively easy to get! |
| 60 | Double Dip Badge | Allows Mario to use two items in a single turn. |
| 70 | Double Dip P Badge | Allows Mario’s teammate to use two items in a single turn. |
| 80 | Bump Attack Badge | Weak enemies will be automatically defeated when you hit them on the field map. |
| 90 | Lucky Day Badge | Enemies will miss Mario fairly often when they attack. |
| 100 | Return Postage Badge | Mario reflects half damage back onto enemies that use physical attacks. |
Special Move List
Mario gets a new Special Move each time he recovers a Crystal Star. Special Moves, although they act much like magical attacks, don’t use FP; they use Star Power, which is recovered with normal and FP-based attacks (although you only get a small amount of Star Power from these), by Appealing to the crowd, and by executing Stylish attacks.
Sweet Treat (1 SP): Your first Special Move will be among the most useful in the first half of your adventure, as it’s one of the very few non-item methods of gaining HP back. When activated, you have to rapidly tap your analog stick to the left to shoot out stars towards a variety of icons. Icons include the heads of both of your party members, which restore HP, and flowers, which will restore FP. Also included in the icons are three poison mushrooms, though, which will prevent you from shooting stars for a few seconds if you hit one!
Your potential maximum restoration from this ability is eight HP for both members and eight FP. Thus, it will start out being very useful, but will start to become less effective as time goes on.

Earth Tremor (2 SP): Earth Tremor is one of the all-around best Special Moves you’ll obtain in your travels, and is especially effective just after you get it. When activated, you’ll have to press the A button precisely when a meter passes over certain marks on a bar; it sounds confusing, but you’ll understand when you see it. There are five different bars, each having more marks and moving more quickly than the previous one. If you can complete all of the bars correctly, Earth Tremor will deal six damage to all of your enemies, regardless of their Defense; if you don’t get them all, you’ll deal anywhere from one damage (if you manage to flub the very first bar) to five damage (if you make them all except the last). After a bit of practice, though, it’s easy to get maximum damage from this power every time you use it, and at the cost of only two SP, it’s among the most efficient and effective abilities in the game.
Clock Out (2 SP): Clock Out is another status-effect ability; in this instance, you’ll be able to immobilize your opponents by tossing a bomb over them. In order to increase the effect of the bomb, rapidly tap the button that appears over the heads of your enemies. We never got much mileage out of this; most bosses are immune to the effect, and in most normal fights, we’d just as soon deal damage to our enemies and get the fight over more quickly.
Power Lift (3 SP): Ah, an ability that lets you buff yourself! When activated, you’ll have to guide the cursor over the up arrows and hit them, while avoiding the poison mushrooms that appear. If you hit enough up arrows, you’ll increase Mario and his teammate’s Attack and Defense for a short while. It’s very difficult to get anything above +2 Attack and Defense, but this will still help you out quite a bit, especially when combined with multi-hit attacks like Power Bounce or Multibonk.
Art Attack (4 SP): Art Attack is another pure-damage ability. When you try it out, you’ll have to trace lines around your enemies; each time you enclose them with a line, they’ll take a few damage. The more of their body you get inside the lines, the more damage you can do! You get around 10 seconds to encircle them as many times as possible. This is obviously more useful against smaller enemies than against extremely large ones; you might even try to use this against an Amazy Dayzee and see if you can’t do 20 points of damage to it in one fell swoop!
Sweet Feast (5 SP): Sweet Feast is essentially the same power as Sweet Treat, save for the inclusion of some larger icons, and the fact that more icons overall will fall from the top of the screen. The max amount of restoration is around 24 HP per character and 24 FP or so.
Showstopper (2 SP): Showstopper is unique among the Special Moves in that it doesn’t attempt to damage or infict a status effect on your opponents; rather, it attempts to obliterate them completely! You’ll have to tap buttons as they appear on the screen in order to activate this ability; the more buttons you can tap, in order, without missing any, the better the chances that you’ll actually be able to kill your enemies.
Showstopper seems like a powerful ability, and it often is when used against weak enemies, but it can’t be used against bosses, and you’re usually better off going for the sure thing and just sticking with out-and-out damage. Against high-defense opponents, or enemies that are difficult to attack, though, Showstopper might be worth the two SP.
Supernova (6 SP): The last Special Move that you’ll obtain in Paper Mario is Supernova. Although it’s expensive, it’s also worth the cost, as it will let you deal more damage in a single blow than will any other item or attack in the game. And all you have to do is tap the A button! It’s very, very easy to get this thing up to maximum damage, and when it hits, it’ll deal 15 damage to everything on the field, regardless of defense.
The only "problem" with Supernova is that it costs so much. Unfortunately, Supernova is most useful against bosses, but against bosses, you’ll probably want to save your Star Power for use with Sweet Feast, since healing is so much harder to come by than damage is.
Finding and Using Badges
Finding Badges
There are a total of 85 Badges in Paper Mario. Many of these you’ll find in your adventures, but there are a couple of other ways to obtain them.
Buy Them: There are three places where you can buy Badges. The first is Dazzle, who hangs out in Downdeep town, below Rogueport. When you take the pipe below Frankly’s house, head one screen to the left and there he is! Dazzle will trade you Badges in exchange for the numerous Star Pieces you find throughout the world. Unfortunately, he only has three Badges that have any real use: a Power Plus, a Power Plus P, and a Quick Change; the rest can be safely ignored.
Next up are two vendors in the central area of Rogueport. Charlieton resides near the gallows and will often have a few Badges for sale; he changes his inventory periodically, so check back every once in a while. Ms. Mowz’ Lovely Howz, which can be found by entering the inn and exiting through the door on the second floor, also sells plenty of badges.
Gamble For Them: You can gamble at the Pianta casino on the west side of Rogueport. When you win, you’ll get your winnings in Piantas, which are effectively a form of alternate currency. (You can also exchange gold for Piantas, if you wish.) When you have a good bankroll of Piantas, talk to the teller behind the bars to exchange them for prizes, with Badges among those.
Using Badges
Although you can find many dozens of Badges during your travels, you won’t be able to use all of them; not all at once, anyway. The amount of Badges that you can use is restricted by your current Badge Power. Mario starts his adventure with a mere three BP; you can increase this number by three each time you level up, but you’ll have to do so at the expense of extra health or FP. Still, though, Badges can have such a large effect on your ability to kill enemies that they’re usually worth the lower HP or FP.
Many of the Badges that you encounter give you special abilities or attacks, and some of these can be somewhat useful, but in general, you’ll want to dedicate all of your BPs towards using three specific Badges: Power Plus, Power Plus P, and Defend Plus. Power Plus will increase all of Mario’s attacks by on; Power Plus P will do the same for whomever his current teammate is; and Defend Plus will increase Mario’s Defense by one as well. (There are Defend Plus P Badges, but they’re usually not worthwhile, if only because Mario will usually be in the front lines and will thus be the target of most enemy attacks.)
You can find the Power Plus and Power Plus P Badges from Dazzle; each will cost 15 Star Pieces, so save up for them and buy them as soon as possible. You can find another Power Plus Badge in the dungeon underneath Creepy Steeple, where the bird reveals Doopliss’ name; a second Power Plus P will be found atop the juice bar in Glitzville. Defend Pluses can be found in the item shop in Twilight Town (after you obtain the roll-up curse from the chest there), as well as in a secret room in the dungeon underneath Rogueport (accessible when you obtain the ability to turn Mario into a paper boat.) These six Badges will take up 34 BP between them, but are worth every penny, since they’ll have an impact in every single battle that you take part in, and cost no FP to activate.
Beyond that, a few other Badges stand out as being worth mention. One of the first Badges you’ll obtain is the Multibounce Badge, which pops up in the Shhwonk Fortress in Chapter One and lets Mario inflict a single jump attack on all enemies that you’re fighting with; this is especially useful against Koopas, as they’ll either be knocked out of the air or knocked onto their backs when hit, but can be used as liberally as you like, since it only costs one FP per use. Also of note is the Power Bounce, found in Hooktail Castle, which allows Mario to emulate Goombella’s Multibonk attack and bounce multiple times above a single enemy.
Lastly, the Quick Change, which can also be bought from Dazzle, will let you switch out partners in the middle of a fight without eliminating their action for that round. This isn’t important in many fights, but in some boss fights, where you have to switch out characters to prevent them from dying (such as in the final boss fight!), it can let you get in a lot of attacks that you would normally lose.

There are also a number of less-powerful Badges out there, with a variety of fun effects, such as costume and sound effect changes. You might’ve noticed that in some of the screenshots in the walk-through that Mario is dressed like Wario; this awesome effect is gained via a Badge you can buy from Charlieton. It costs a lot of gold - around 350 or so - but it’s worth every penny. You can also find a Luigi costume Badge in Poshley Sanctum.
Shine Sprite Locations
Shine Sprites are among the most valuable of the "hidden" items in the game, because they’ll let you upgrade the battle capabilities of your partners. Unlike Star Pieces, though, which you’ll find plenty extra of, there are exactly as many Shine Sprites - 48 - as you’ll need to upgrade all of your teammates twice. Here’s a list of all of them. If you’re towards the end of the game and realize that you must’ve missed one, ask at the fortune teller near Dazzle; she’ll point you towards any remaining Shine Sprites for a mere ten gold.
Rogueport (Five Sprites)
There are five Shine Sprites in Rogueport, although none of them will be accessible as you start the game. The first two will be accessible when you obtain Yoshi in Glitzville; bring him back to town and float across the river near the house with a padlock on its door. You can find one Shine Sprite on top of the houses near Merlon’s dwelling, and another behind the padlocked house. To find the latter, shimmy through the alleyway between Bobbery’s house and the Trouble Board and float across the river with Yoshi there. The other Shine Sprite in this area is inside Bobbery’s house, but you won’t be able to obtain that until just before chapter five.
On the west side of town, you can use Bobbery to blow open the cracked wall next to the item shop to find a Shine Sprite. There’s also one behind the houses in the northeastern corner of the screen; use your rolling-up ability to fall down a hole in the rightmost house and you’ll nab it easily.
Rogueport Dungeon (Eight Sprites)
There are more Shine Sprites down here than in any other area in the game! The first is located in the same room as the Thousand-Year Door; shimmy through the iron grates on the eastern side of the screen, jump up to the higher platform, airplane across to the other side of the room, and repeat the process to find your Shine Sprite.
Next up is a Shine Sprite located next to the shortcut pipe to Petalburg. This can only be obtained after you’ve gotten the Super Hammer from Glitzville, and is on the second level of screens below Rogueport. You can also obtain a Shine Sprite at this point by falling through the grate on the west side of Rogueport and using Yoshi to fly across to the platform to the left of where you land.
When you obtain the boat curse, three more Shine Sprites become gainable. One is in the room where you initially fought the Blooper to travel to Petal Meadows, and two more are found at the end of the long canal on the second level below Rogueport. To find these last two, drop down from the west side of Rogueport, take the pipe leading down to the second level of the dungeon, and then head towards the pipe leading to the third level. Before you head down it, though, walk to the left of the pipe to find a hidden passage leading to a boat launch.
When you have the Spring Jump, the last two Shine Sprites become available. One is in the same room at the end of the canal that you obtained the two previous Sprites; the second is in Downdeep town. Stand between the two buildings above the elevator block, find the pipe here, and Spring Jump before moving to the right to find your prize.
Hooktail Castle (Three Sprites)
All three of the Shine Sprites here are easy to find. One is in the first room beyond where you fight with Red Bones; one is in the room where you encounter Ms. Mowz; and the last is at the top of the large set of steps before you head outside and start walking towards Hooktail’s tower.
Boggly Woods (One Sprite)
On the screen before Flurrie’s house, you’ll have to reach an elevated airplane platform. When you do reach it, shoot Koops off to the left to find the Sprite.
The Great Tree (Four Sprites)
When you obtain your first 11 Punies and are forced to surround them with bubbles to get them across a gap, drop down to the bottom of the room and search for the Shine Sprite. The second Sprite here is obtained by using Flurrie to blow away a large obstacle atop an airplane platform; ride the platforms down to obtain your Sprite.
After you grab the Super Boots, you can Spin Jump into the first wooden panel nearby to find another Shine Sprite, while the last one is obtained by filling the water-room after you unlock all 101 Punies from their cages.
Glitzville (Two Sprites)
The first Sprite here is on the first screen, next to the entrance to the Pit; hit the shadow beneath the Sprite to pop up a block which you can jump onto to find the Sprite. The second is on the second floor of the storage room inside the Pit itself.
Twilight Trail (One Sprite)
The last tree on the screen before the entrance to Creepy Steeple will hide a Shine Sprite. Jump up and down while the tree obscures Mario to find it.
Creepy Steeple (Three Sprites)
The first Sprite here is located in the same small room that holds the Cookbook. You should be able to spot a small hole in the wall near where you enter through the front doors; roll through it to grab the Sprite. The other two Sprites are both obtained after Vivian joins the party and you fall down the well.
Keelhaul Key (Two Sprites)

The first Sprite here is located on top of a single small block on the screen where you first see Chomps; you’ll have to use Yoshi to fly over to it. The next is to the right side of the bridge screen; jump behind a tree to grab it.
Pirate Grotto (Five Sprites)
When you enter the cave proper, you’ll have to jump across a half-sunken ship. Stand on the prow and jump to reveal a hidden Sprite. The next Sprite is found in the same room as the save point, at the top of the stairs. You can either use your Super Hammer technique while standing on the edge of the ledge, or use Koops’ ability while standing on the top step to locate it.
The next Sprite is located in the same room as the Grotto Key. Jump from the elevator to the weight that suspends it, then ride the weight up to the top and jump off to find a Sprite. After you unlock the door near the save point with the Key, and head through to the spike trap, check the left side of that area to locate a Sprite suspended over the water; use Koops to get this one. Lastly, immediately after the spike trap you’ll come across another Sprite, which you can hammer beneath to reveal a hidden block.
Excess Express (Two Sprites)
One of the Sprites here is located in the room in which you begin; just walk behind the table to find it. The other is obtained after you give Bub the engineer’s autograph.
Riverside Station (Two Sprites)
The first Sprite here is located in the clear in the exterior area behind the station, while the second is obtainable in the library after you gain the Ultra Boots.
Poshley Heights (Two Sprites)
One of the Sprites is obtainable with a Spring Jump; you can find this one outside Poshley Sanctum. Inside the Sanctum, you can find another one by using your Spring Jump to explore the room where the Crystal Star is located. (The real Crystal Star, that is.)
Fahr Outpost (Two Sprites)
On the second screen from the entrance from Rogueport, stand behind the second tree from the left and jump to reveal a hidden Sprite. The last Sprite in the game (yay!) is located in the clear on the right side of town.
Got a news tip or want to contact us directly? Email news@gamespot.com
Join the conversation