Neverwinter Nights 2 Walkthrough
GameSpot's Walkthrough to Neverwinter Nights features a complete walkthrough, with details on characters, followers, and side quests!
Design: Randall Montanari
For fans of online role-playing games, the release of Neverwinter Nights in 2002 was a revelation. The game shipped with a robust suite of world-building tools, giving wannabe dungeon masters the ability to create their own scenarios and modules to share online. The game was an immediate hit, and while it was a big departure from the previous Dungeons & Dragons games from BioWare, like the esteemed Baldur’s Gate II, the game and its expansion packs went on to sell over a million copies.
Now, over four years later, Obsidian picks up the mantle with Neverwinter Nights 2. The game is superficially the same as Neverwinter Nights, but is improved in almost every way, especially for fans of in-depth single-player role-playing games. While the story of Neverwinter 1 was serviceable, the game was built around the multiplayer arena, and thus, even in the single-player game, you could only control one character, and your party’s maximum size was all of two characters, which was a far cry from the five or six-person parties of the older Infinity Engine games.
In Neverwinter Nights 2, though, these limitations have been eased, and your nominal party cap is now four players, all of which are individually controllable in battle. (At times, you may find yourself with as many as seven or eight characters or creatures in your party!) The game’s storyline has been given the standard Obsidian touch, as well, with character romances, the ability to shift alignment from good to evil (or back), and the ability to influence your followers as you advance through the plot. All in all, the package is a devilishly compelling one for fans of in-depth computer RPGs.
General Tips
Play On Hardcore Difficulty
Neverwinter Nights 2 defaults to a "normal" difficulty setting. This is probably a good difficulty setting if you just want to experience the storyline without too many problems, but if you want to reap the fruit of the game’s combat system, or if you’re used to the traditional D&D pen and paper rules, then bumping the difficulty up to Hardcore is a good idea.
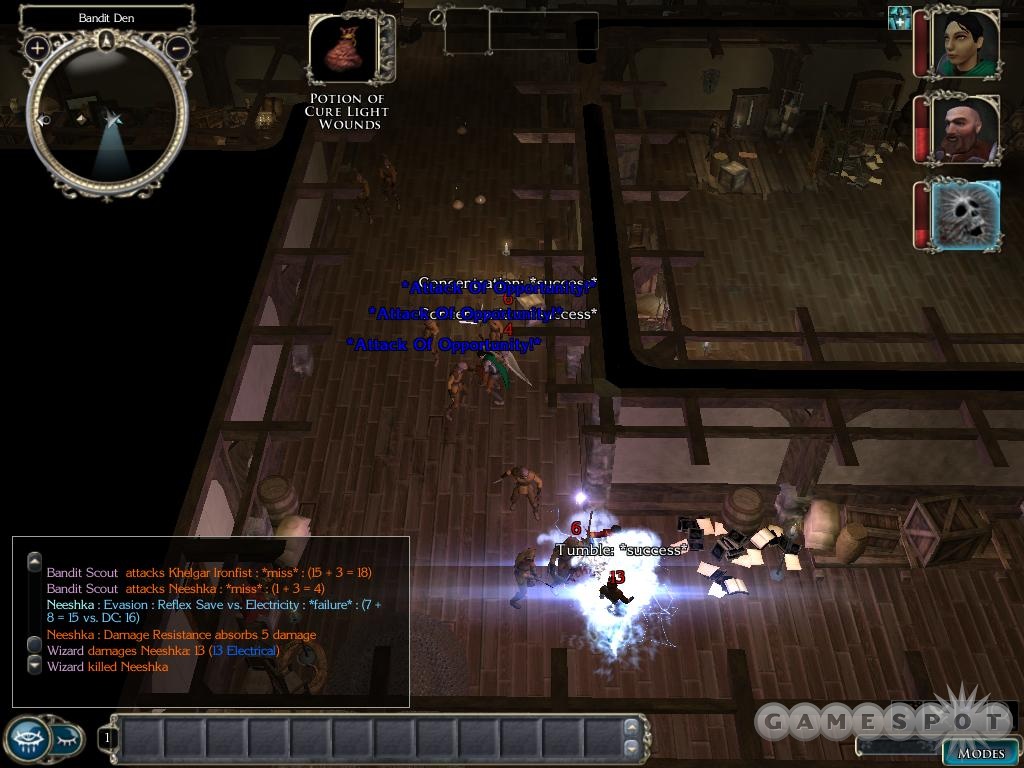
Hardcore difficulty initiates three major changes to combat. First off, your characters will be vulnerable to attacks of opportunity. That means that your enemies will get free attacks on you if they’re within melee range when a character casts a spell or attempts to use a scroll or drink a potion. (Your own characters can always use attacks of opportunity on your enemies, even on normal difficulty.) This makes it much more important to protect your spellcasters by keeping them away from enemies.
Secondly, enemies are allowed to score critical hits on you; they can’t do so on normal difficulty. You’ll take more damage, and thus will have to be more on the ball with things like healing spells and defensive buffs.
Lastly, your area-of-effect spells, like Fireball, will hit your teammates when they’re caught in the radius of effect. This is going to change the way you play quite a bit. On normal difficulty, you can feel free to throw down area of effect spells willy-nilly, since they won’t hit your teammates, but you’ll have to be a lot more cautious on Hardcore.
All in all, in our opinion, Hardcore difficulty is the way Neverwinter Nights 2 was meant to be played, and we suggest that you at least give it a try. While the bevy of defensive buffs will make most fights in this game fairly easy, even on Hardcore difficulty, the hardest encounters will at least be more challenging to you than they would be on normal difficulty.
We've Come To Buff - YOU UP!
Buffing - the act of casting spells that enhance your character's abilities or offensive or defensive capabilities - is a long-standing tradition in RPGs, and in D&D games especially. While you can probably beat the game without ever casting Stoneskin or Bull's Strength, knowing what spells to cast and on which characters is a big, big help.
Most of the spells listed below are arcane spells, which means that you'll need to have a sorcerer or wizard in your party to cast them. Some of them can be cast by divine spellcasters, as well, so bringing along a priest or druid may be helpful. Some are castable by any class. Most well-balanced parties, though, will have at least one divine and one arcane spellcaster in them, so it shouldn't be too difficult to cover all the bases.
Important Buff Spells
This list of important buff spells is ranked in the order that you're likely to acquire them in. We're not going to list every buff spell in the game; just those you'd likely want to use fairly often. If a spell's not on this list, that usually means that its duration is too short when compared to the effect it lends; there are plenty of spells that offer a nice buff, but which only last for six seconds per level of the caster, which is good enough for only one fight, on average.
Endure Elements/Resist Elements/Protection from Energy: Endure and resist elements will protect the target from a certain amount of elemental damage before fading away. Good against most caster enemies, since it works against Fireball and Lightning Bolt spells and all other types of elemental damage.

Mage Armor/Improved Mage Armor: Along with Magic Missiles, Mage Armor is undoubtedly the first-level arcane spell with the most application throughout the length of the game. It adds a large +4 AC bonus to the target, and can be cast on anyone in the party, not just the caster. This is a standard magical effect, so this won’t stack with most equipment-based magical AC deflection bonuses, such as Rings of Protection, but is still going to be the largest AC bonus you can cast onto a character most of the time.
Improved Mage Armor is available at the third level of spells and lets the AC bonus go even higher, but it’ll be a bit more difficult to fit it into your spellbook since the important Fireball and Flame Arrow spells are there as well. Best to save that only for your frontline fighters and use regular Mage Armor for everyone else.
Second Level Buffs: Bear’s Endurance, Bull’s Strength, Eagle’s Splendor, Fox’s Cunning, Owl’s Wisdom, and Cat’s Grace are all excellent spells, since they add a whopping four points to a character’s ability score. Although they don’t last quite as long as they used to, at 10 rounds per caster level they’re unlikely to fade away before you’ve gone through a number of fights. These can either be used to shore up a character’s weaknesses (a low-HP wizard or sorcerer can make use of the extra health afforded by Bear’s Endurance), but are more commonly used to emphasize a strength. All of your melee characters will want to have Bull’s Strength applied to them, while ranged attackers and characters with light armor will benefit from Cat’s Grace. These are available at the second level of spells for clerics, druids, and wizards/sorcerers (not all classes can cast all of the spells listed, though), so they’ll come in handy fairly early on in the game and will remain so until the end.
Note that these bonuses don’t stack with magical bonuses from equipment, so if you get a Belt of Storm Giant Strength that adds +4 Strength to your character, casting a Bull’s Strength on that character wouldn’t do anything.
Barkskin: One of the only reasons you probably want a druid in your party, Barkskin will add anywhere from +2 to +5 AC to the target, depending on the level of the caster (it maxes out at caster level 12). This is a bonus to the target’s natural armor rating, which very few other magical effects can boost, so this will rarely overlap with other magical AC bonuses, such as Mage Armor. If you don’t want to bother with keeping a druid around, though, you can let a player-created Cleric earn the ability to cast this spell by giving him or her the Plant domain at character creation.
Stoneskin/Greater Stoneskin: When you gain a character that’s capable of casting Stoneskin on everyone in your party, you’ve effectively switched on easy mode for the bulk of the game: it’s that damn good. Stoneskin gives your party the ability to ignore the first 10 points of damage that come their way from every physical attack unless the weapon that’s being used against them is fused with adamantium, up to the point where it absorbs 100 points of damage, when it then fades away. Greater Stoneskin ups the resistance to the first 20 points of damage, up to 150 damage total.
Put bluntly, these skills make your characters all but immune to physical damage until they run out of juice, which in most cases won’t happen until you need to rest anyway. Enemies that can bust out large critical hits (which only occur on the Hardcore difficulty anyway) will be able to get up and over the damage resistance, and it won’t affect magical damage at all, so you’ll still take normal spell damage. That said, the bulk of the enemies you’ll face will be the regular joes with swords, so these spells are great ways to extend the length of gameplay before you have to rest. As with Mage Armor, save the Greater Stoneskins for your frontline melee characters and use regular Stoneskin for your archers and spellcasters.
Haste: Haste is a fantastic spell to cast just before entering into a tough battle, assuming that you can see it coming and don’t have to deal with any kind of lengthy conversation beforehand. When cast, the target and all nearby allies will be granted with haste, which confers a +1 bonus to attack rolls and AC, a 50% movement speed bonus, and, most importantly, one extra attack per round at full attack bonus. With the powerful weapons that you’ll be getting in the course of the game, an extra attack is going to make quick work of most enemies.
Note that the 50% movement speed bonus makes this a great spell for getting around town quicker, as well.
Improved Invisibility: Improved Invisibility renders the subject invisible for one round per level of the caster. Unlike normal invisibility, though, the improved version doesn’t wear off if the subject attacks. Thus, if you cast this on a melee warrior, they’ll gain all the benefits of invisibility until the spell wears off. This is especially valuable to melee characters, since becoming invisible will give all attacks thrown their way a full 50% chance to miss, and they’ll also be immune to attacks of opportunity. They may also be untargetable by spells. This confers an obvious advantage upon the subject in battle. The lower-level Invisibility spell has its uses, but Improved Invisibility is the better choice if you intend to fight while under the influence.
Dealing With Artificial Intelligence
We’ll be honest with you here: the default AI settings in NWN2 are going to be fairly poor for most players. It’s nice to have characters that are willing to act on their own, but all too often, if you leave characters to their own devices, they’ll do things like run past two opponents and get Attacks of Opportunity thrown there way to protect the party leader or cast Dispel Magic on enemies without any magical effects on them. You’re going to want to tweak your party’s AI settings to make the most of them, and most players will probably want to tone the AI down a bit to give themselves more control over the proceedings.
Here’s a list of the AI options in the game, along with our preferred settings. You can find all of these by opening a character window (the "c" button by default) and browsing to the Behavior panel.
Puppet Mode: Setting this to "On" will prevent your followers from acting on their own initiative. They won’t fight, cast spells, or even move, unless you’re outside of combat. This is a pretty severe step to take, since you’ll have to constantly be pausing and issuing new orders to a character with puppet mode on. If you’re going to be using this, it’ll usually be best reserved for spellcasters with ranged weapons. If you keep them on puppet mode, they won’t attack when you start a fight, thus hopefully preventing enemies from getting angry and attacking them, thus letting them sit back for a round or two until the melee is ongoing before busting out their spells. You pretty much never want to have a melee character turned to puppet, unless you’re trying to retreat from enemies or need to prevent them from attacking, such as if they’re under the effects of an Invisibility spell.
Follow Distance: The difference between following near or following far is so small that this choice is effectively meaningless. You may want to have archers and spellcasters set to medium or far distances, just so that they lag a bit behind you if you stumble across an enemy while running around, but keep in mind that setting them to far following will often put them out of the range of a merchant when your main character speaks to them, thus forcing you to move them closer to the merchant and speak to him or her again before you can actually buy or sell anything for the character. It’s generally best to just set everyone to Near; these follow settings have a marginal effect in combat.
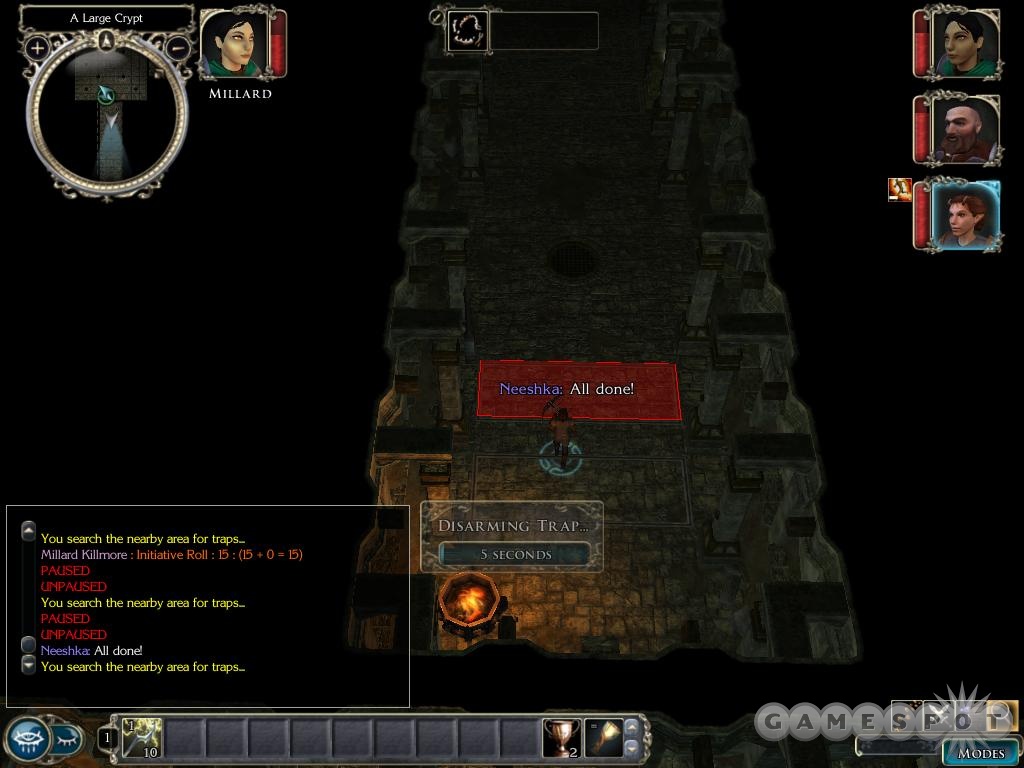
Disarm Traps: You may as well disable this, even for rogues. Disarming traps is a simple matter of right-clicking on a trap, and enabling this behavior will sometimes cause rogues to run away from combat to disable a trap on the far side of your enemies.
Defend Master: When this is enabled, any character that has it turned on will switch targets in combat to strike at enemies that are attacking the character you’re currently controlling. For the most part, Stoneskin and other buffs will make this necessary, and if you’re playing on Hardcore difficulty, this is actually a bad thing to enable, at least for melee characters. If you’re in a scrap and get whacked, causing your other melee characters to come to your aid, they’ll often turn their backs or run past enemies, causing attacks of opportunity from all of them, which will more often than not get them dead real quick.
Best to simply disable this and manually re-target your characters to defend any characters that are getting pounded. A much more helpful AI setting would’ve been something like "target same enemy as master" or something similar.
Open Locks: Same deal as disarm traps, although you’re less likely to run into problems with this in the middle of combat, since the AI setting doesn’t take over until you actually click on a locked item. Feel free to keep this on for rogues.
Stealth Mode: Personally, we’re not great fans of stealth mode in computer versions of Dungeons and Dragons. It has some applications, but for the most part you’re going to have to fight everyone you encounter no matter what, so attempting to sneak past them isn’t usually necessary. This can be useful for getting sneak attacks on enemies, but for the most part that can be affected by simply moving Neeshka or your rogue behind their foes before unleashing their attacks. We usually kept this disabled, not least because your characters move at half speed while stealthed.
Spellcasting: A controversial option! You have four options here, with the obvious choice being "Off". While it might seem nice to have your spellcasters able to cast spells on their own during combat, it’s an unfortunate truth that the AI for selecting appropriate spells is somewhat retarded. (It’s possible it was improved in the 1.01 patch, however.) For our part, we got tired of seeing our cleric character attempt to cast Cure Minor Wounds every time they got hit and Elanee casting Dispel Magic on enemies without any magical effects on themselves. It’s generally best to just control all your spellcasting manually.
That said, if you want to automate your spellcasting, be sure to weed your memorized spells to eliminate anything you don’t actually want your casters to throw out during battle. Clerics, especially, have a tendency to overheal, so eliminate all the healing spells from their spellbooks and use spontaneous conversion to cast them from the quickcast bar.
Dispel Spells: Dispel Magic will work on positive buffs that have been cast on friendly characters. Since you’ll probably be casting Stoneskin and many other buffs on your friendly characters, this option should be turned off for all characters. If you get hit with something particularly nasty, you can still cast it manually, but disabling this option will prevent your characters from getting wiped everytime they get a minor debuff.
Item Usage: If you turn this on, characters will use wands, scrolls, and other items during combat. The utility of this depends on your mood; personally, we hated knowing that our characters would be using up charges on powerful items without our direct say-so, so we turned this option off. Note that even with this option off, characters will still burn through Cure potions when they feel it’s necessary to do so.
Ability Usage: We’re not sure if this flag actually does anything; we noticed Khelgar continually using Knockdown, despite having this flag turned off. We personally don’t trust the AI enough to know when using an ability is smart or not, so we turned this off and used abilities and feats manually.
Combat Mode Usage: This will effect whether or not your character uses things like Rapid Shot, Parry, and Power Attack. Since some combat modes are more useful than others, and we’d be dismayed to find that our character with a -15 adjustment to Parry was using that mode, so we typically kept this off. There isn’t a fight in the game that’s unwinnable without modes, so choosing these manually is the best bet.
So...yeah. Basically just turn all the AI options off. This will let your characters pick new targets to attack in combat on their own, but not much else - and that’s just the way we like it.
Broadcast Commands
One important thing to remember about commanding a party is that you have Broadcast Commands at your disposal. If you right-click on the ground, or on a party member, and hold the button down, you’ll open up a context menu with a number of commands available to you. Arguably the most important one here is Stand Your Ground, which, when issued as a general command, will tell all of your party members to simply stand still. This is really useful when you know there’s a big group of enemies coming up, since it’ll let you move just your spellcaster over and drop a Fireball on them from afar, without having to worry about your other teammates running off and automatically attacking the foes, thus dispersing them from their tight little group. Just be sure to issue the Attack Nearest Target afterwards, or your teammates will likely stand around like zombies.
These commands temporarily override the Behavior flags you set for your AI teammates, so feel free to use them liberally in situations in which they’re warranted. Another situation in which you might want to park your party is when you know there are traps up ahead; you can move your rogue forward to deal with them solo, without having to worry about your AI teammates running forward like stupid people and tripping them all.
Character Creation
Neverwinter Nights 2 has one of the most exhaustive character creation and advancement systems you're likely to ever find in any role-playing game, for computers or consoles. There's a simply stunning array of choices to choose from, and to a certain extent, the game assumes a bit of pre-knowledge with the Dungeons and Dragons set of rules. That's not a bad assumption, considering how many games have been based on the rules over the past 20 years or so.
If you've never played Neverwinter Nights, Temple of Elemental Evil, or any other recent Dungeons & Dragons computer game, then you're going to have a lot to absorb. Your best bet, if you actually want to understand the rules that govern your game experience, is to take a couple of hours and look through the game's manual, starting at the beginning and reading it until your eyes glaze over. It's more of a textbook than anything else (although it is well-written). That said, it's not really necessary to know all of the rules to play the game; if you want to just jump right in, you can pick one of the pre-made characters from a simple class, like a fighter or barbarian, and go to town. You'll be playing in no time.
A Note On Races
There are a lot of races in the game. A lot of races. If you played Neverwinter Nights, most of these should be familiar to you. All of them are described in-depth in the game's manual (which is also available in the Documentation folder in the game's directory as a PDF file), as well as in the game itself.
Even though your racial choice is the first one you'll make when you select a character, you'll probably want to decide on your class first, then work backwards to decide on which race best fits the class you've chosen (the game's recommendations are usually good in this regard). If you're a hardcore role-player, or want to make a character that'll have a more challenging time getting through the game, then by all means make a gnome barbarian or a half-orc wizard. Your choice of class will have a greater impact on your gameplay experience than your racial choice will, but an odd mixture of the two can make for a somewhat gimped character...or one that's interesting to role-play as.
Ability Adjustments
That said, if you want a simple tip on picking a race, then know that the most important aspect of most races are the ability adjustments that they receive. Most races will take a bonus in one score in exchange for a penalty to another. Halflings, for instance, receive a -2 penalty to Strength, but in exchange for that, get a +2 bonus to Dexterity. Thus, they obviously make a poor choice if you're planning on playing as a fighter, who use Strength to wield weapons and who don't have much need for Dexterity, but they'll work well as a bow-wielding rogue, who can use the Dexterity bonus to increase their ranged attack rolls and their dodge AC.
Level Adjustments
Some of the sub-races that are available in Neverwinter Nights 2 are powerful sub-races. These are races that haven't typically been available in Dungeons and Dragons games, whether computer or paper, before the advent of the 3rd Edition ruleset, having mostly been featured as NPCs or enemy races. Their inclusion in Neverwinter Nights 2 will allow you some flexibility in terms of what kind of race you wish to be, and many of them are quite powerful when compared to the normal races, but they all come with a drawback: the dreaded level adjustment.
When you pick a class with a level adjustment, you should be aware that they'll require more experience before they gain levels, at least when compared to characters of the normal races. For instance, if you start the game with a Tiefling, who have level adjustments of plus one, your character will always be one character level behind the normal races in your party. If your partners get to level six, then, you'll be at level five. The most severe level adjustment in the game is that of the deep gnomes, who will be a full three levels behind their teammates as they play through the game.
Whether or not these adjustments are worth the bonuses these races get is up to the individual player. Their impact will usually depend on the class that you choose, although every class will obviously be impacted by them. Rogues are arguably the least impacted by level adjustments, especially if you counteract the lack of speed in skill increases with a high Intelligence score, while spellcasters are perhaps the most crippled by it, since they'll gain their spells more slowly, and, well, spellcasters live and die by their spell selection.
Personally, we wouldn't recommend taking a level adjustment of more than plus one for your main character. Tiefling and Aasimar planetouched characters make great rogues and clerics or paladins, respectively. The Aasimar level adjustment is mostly due to the fact that you get two ability bonuses and no negatives; none of their special abilities are particularly noteworthy. Still, extra charisma and wisdom are very helpful. Making a Tiefling rogue isn't really necessary, since Neeshka appears so early on in the game. You can feel free to make that chaotic good drow ranger that dual-wields scimitars if you wish, but you will definitely lag far behind your traveling companions if you do so.
Don’t Count Out The Humans
A human character might not be as exotic a choice as a half-orc or a deep gnome, but they’re solid nonetheless, and oftentimes their bonuses will be more useful than the specialized races. They’re not much to talk about (one extra feat at first level and one extra skill point at each level-up), but the extra feat can be critical for classes that advance in feats very slowly, like sorcerers and wizards. Don’t think that just because they’re the baseline race that they don’t have their uses!
Standard Classes
There are a large number of classes available to you at the outset of Neverwinter Nights 2, and a larger total number of classes in the game than has probably ever been seen in a Dungeons & Dragons game. This chapter will introduce you to the standard classes that you can start the game as, and give you some of the pros and cons that come along with them. Again, if you need specific details on each class, check the manual.
Barbarian
Barbarians are an interesting class, and a powerful one for players who aren't particularly concerned with niceties or talking their way through situations. Arguably the best pure warriors the game has to offer, barbarians are ideal for anyone who just wants to use weapons to cut their way through whatever challenges the game throws in your way.
The main ways in which a barbarian differs from a fighter class is in their hit die (d12 as opposed to d10, which means more hit points at each level-up) and their ability to enter a rage state, which nets you large bonuses to your Strength and Constitution for a short period of time. The former is more important than the latter; even on hardcore difficulty, you likely won't have to rage very often, even in tough fights, thanks to defensive buffs.
If you do play as a barbarian, then you may want to focus on using two-handed weapons and forgo the use of shields entirely. This is less of a drawback than it is for a fighter class, since you can't use tower shields anyway, which are going to be the source of the biggest AC gains for other combat classes, and you can make up the lost AC with a Mage Armor or Barkskin spell anyway. Hell, if you want to get really crazy, go for the Monkey Grip feat along with the Two-Weapon Fighting and get a pair of two-handed weapons to pulverize your opponents. Yeah, you'll take a large attack penalty for each of your attacks, but when you do hit, you'll deal some wicked damage!
Pros
- Large reservoir of health to draw from.
- Uncanny Dodge renders them immune to sneak attacks from rogues.
Cons
- Inability to use tower shields and heavy armor. You can remedy this by splashing for one level of fighter.
Bard
Bards are decidedly not for beginners or powergamers. Instead of focusing on one kind of tactic (combat, spellcasting, trickery), bards attempt to roll together a number of different strengths and weaknesses into one class. As such, they're capable of dealing damage with long swords, arcane spells, or by singing songs.
Singing songs, you say? That's right, bards are capable of singing two kinds of songs: inspirations and bardic music. If you've ever played World of Warcraft, then you might as well think of inspirations as being effectively similar to a Paladin's aura abilities; when activated, they remain active and give all the characters in the party some small benefit, such as increased attack rolls or DC, or affect all enemies with a negative effect. Inspirations can be kept active while the bard performs other actions, such as attacking, but you can only have one active at a time, and they'll be cancelled if you try to sing a bardsong.
Bardsongs are more along the line of a classic spell; when sung, these songs will grant some kind of positive effect, but only for a short duration, after which point they'll need to be re-sung. Most bards will have the Lingering Song feat, though, which will extend the duration of their songs by five rounds.
In addition to the music, bards will be able to cast arcane spells in the same manner as a sorcerer, without having to worry about scribing scrolls or managing a spellbook. They're prevented from casting the most powerful direct-damage spells, but should be able to learn some basic buffs to supplement their bardsongs.
Since Charisma is so important to bards, this class is also a good choice if you want to try maxing out your bluff/diplomacy/intimidate skills and use them to avoid some of the game's fights.
Pros
- Jack of all trades: many different abilities to draw on.
- Unique, interesting gameplay experience.
- Excellent at buffing party members and using speechcraft to avoid fights.
Cons
- Master of none: lack of specialization can make the class feel unfocused.
- Difficult to find a slot for bards in a four-person party. Or even a five-person party.
Cleric
Clerics are heavy-armor wearing divine spellcasters. While they're typically thought of as healers, clerics are just as adept at "kicking ass for the lord" when the need arises; they're adept at wielding heavy armor and all manner of blunt instruments, such as flails and maces, although their need to focus their ability scores in Wisdom prevents them from getting super high Strength like fighters. Which isn't to say that they aren't very good as healers; their range of healing spells is indeed much more broad than any other class, and their ability to spontaneously convert memorized spells into healing spells makes them quite adaptable when selecting what spells to memorize.

Thanks to their ability to wield heavy armor and arms, clerics typically work best as supplementary front-line fighters with the ability to memorize buffs and healing spells. Keep in mind that in the hardcore ruleset, your clerics involved in melee combat will incur attacks of opportunity when they attempt to cast spells. Luckily, buffs like Mage Armor and Stoneskin will all but eliminate the need to cast healing spells in combat by the time you reach level seven or so.
Note that clerics are able to choose two domains when you go through character creation. You can find the domains and their various bonuses on page 140 and 141 of your manual. For our money, the two best choices here are Healing, which will empower all of your healing spells and neat you some powerful healing spells earlier than you would normally get them, and either Animal or Plant. Animal will give you the ability to summon an animal companion which, when combined with Stoneskin and Mage Armor, makes for a very effective fifth target for your party, while Plant grants you the ability to cast Barkskin at third level, which is a very handy spell.
Pros
- Capable of wearing heavy armor without impacting spellcasting.
- Can turn undead to stun or destroy undead enemies. (This ability doesn’t seem to work very well in NWN2, though.)
- Good general fighting skills.
Cons
- Takes attacks of opportunity when casting spells in melee combat.
- Cannot use most bladed weapons.
Druid
The druid is a nature-based spellcasting class capable of weaving divine spells like a cleric, but with a focus on animal and nature spells. They add to their spellcasting abilities a number of other exotic traits, such as the ability to summon an animal companion and the ability to shapechange a number of times per day, eventually even into elemental forms.
In pure gameplay terms, there isn't too much to recommend druids over another, more specialized class. Shapeshifting is neat and all, but in general it's not going to lend your party that much more offensive power than a dedicated fighter or barbarian character would. Druids are capable healers when targeted towards that end, but they lack the cleric ability to spontaneously convert their spells to heals (they can convert spells, but wind up with various ranks of summon creature instead of heals). One noticeable benefit to having a druid in your party is the ability to cast the Barkskin spell, which lends a nice AC bonus to characters it's cast on, but clerics with the Plant domain and rangers are both capable of casting this spell.
Pros
- Can shapeshift.
- Barkskin!
- Elemental Swarm!
Cons
- Not particularly fantastic in combat due to armor restrictions.
- Shapeshifting doesn’t scale well at high levels.
Fighter
Ah, fighters. The classic class of Dungeons & Dragons. These stalwart warriors are one of the most solid classes in the game, even if they do come off as feeling a bit generic. There isn’t a huge amount to say about them; they don’t get any of the crazy special features that the other classes do, but instead are capable at wielding almost any kind of weapon or armor that you find with ease. The main benefit to rolling a fighter is the extra feats; you’ll gain a bonus feat at every other level, letting you easily obtain most of the powerful abilities that can only be obtained through feats. Fighters are an excellent class for players who want to use all the magical weapons that you find throughout the game.
The other big benefit (which goes unmentioned in the Fighter section of the manual) is that Fighters are the only characters capable of obtaining the Weapon Specialization feat. When you reach level four, you can obtain Weapon Specialization for a given kind of weapon (assuming you obtained the appropriate proficiency and the Weapon Focus feat), which allows you to deal +2 damage with it on every successful hit. If you level up further as a Fighter, you’ll unlock the Greater Weapon Focus and Greater Weapon Specialization feats at levels eight and twelve, which further increase your mastery over a single weapon type, such as a longbow or a bastard sword.
A fighter with Intelligence and Dexterity scores of at least 13 will be able to unlock feats that allow them to proceed to the Weapon Master prestige class later in the game, which further increases their specialization and makes them more or less the powerful engines of destruction you’re likely to use in the game.
Pros
- Extra feats make mastering multiple weapons and obtaining new combat abilities a breeze.
- Weapon specialization allows them to further increase the damage they deal with their specified weapon.
- Excellent class for multi-classing, especially with other warrior-type classes.
Cons
- Have a somewhat generic feel to them, owing to their lack of special skills.
Monk
Monks are one of the most unique classes in Dungeons & Dragons, and offer up some intriguingly non-standard gameplay talents. The most obvious difference about monks is that, although they’re frontline fighters, they don’t rely on weapons or armor in combat, instead preferring to deal damage with their fists and resist damage with their ability to focus their ki energies.
Monks start off somewhat slowly and will be a tougher class to gain levels with early on when compared to a fighter or barbarian. (Luckily, the fact that you go up to level three automatically if you skip the tutorial will help you here a bit.) When you reach higher levels, though, you’ll be quite powerful. While a Weapon Master will likely still be able to handily out-damage you in combat, a high-level monk can still be quite useful, especially in specialized roles, such as scouting ahead of the main party for enemies or for taking down weaker rearguard foes like mages and archers.
Pros
- Broad range of extra abilities when fighting unarmed and unarmored.
- Less reliant on equipment than other classes.
Cons
- Starts off slowly.
- Requires high scores in multiple abilities (Dex, Str, and Wis) to make the most of their combat skills.
Paladin
Paladins are holy warriors, dedicated to serving the public trust, protecting the innocent, and upholding the public trust. They emphasize the warrior aspects of their faith, taking the high hit die of a fighter and most of the same weapon proficiencies (although they’re unable to wield tower shields without acquiring the feat). Their special abilities are generally weaker derivatives of abilities that clerics get earlier on as they level up (turn undead, divine spells, etc.), but some of their abilities, such as Lay On Hands, will come in handy in many a pinch.
Typically speaking, it’s generally wiser to play a cleric if you enjoy the divine abilities of the paladin; you’ll lose some health and the ability to wield bladed weapons, but will still be a powerful force in combat and will have many more spellcasting choices available to you. Even a multiclassed fighter/cleric will often be a better choice than a paladin. There’s nothing wrong with them, but the benefits of playing them won’t often be overwhelmingly great.
Dedicated paladins do gain the ability to wield the mighty Holy Avenger sword, which is generally the best weapon available in any given Dungeons & Dragons game. That said, you’ll be getting a paladin follower by the end of Chapter One of the single-player game, so there’s no real need to make a paladin yourself unless you want to role-play as a lawful good character.
Note that veering away from a pure Lawful Good alignment in NWN2 will prevent you from gaining levels as a paladin.
Pros
- Can use some powerful unique abilities, such as Aura of Courage and Lay On Hands.
- Are the only class capable of wielding the Holy Avenger.
Cons
- Emphasize multiple abilities, making it difficult to excel in any one of them.
Ranger
Rangers are an interesting class, blending elements of druids, rogue, and fighters all in one. They’re not quite a jack-of-all-trades, though, since their abilities definitely lean towards those that supplement combat.
Taken on their own, rangers are somewhat weaker than most other classes. Since they’re restricted to light armor for most of their bonus feats (which they begin earning at level two), and they don’t have the Sneak Attack ability, they’re going to be a bit more fragile and weaker in melee combat than rogues or fighters, although their ability to specialize in two-handed fighting will let them get some free feats. Specializing in archery will also let them earn free feats and can make them fearsome opponents when attacking from range. That said, most of the nature-based skills of the ranger are usually better suited for a pen-and-paper campaign.
Rangers do gain an animal companion at level four, which is a helpful addition to a party in combat. They’re not going to be taking down many enemies, but if you load up an animal companion with Stoneskin and Mage Armor, they can be effective distractions in battle and hopefully take an enemy off of your main combatants until you can run over and Sneak Attack it with your rogue.
Rangers make for decent multiclassing characters, especially when combined with rogues or wizards/sorcerers. Two levels of ranger will net you martial weapons proficiency, a favored enemy, and either the Rapid Shot or Two-Weapon Fighting feat, making this a neat little package for the classes that don’t get many feats to choose from.
Pros
- Favored enemies, animal companions, combat style specializations all help out in combat.
- Excellent class to splash for when multiclassing.
- Can eventually cast Barkskin.
Cons
- Abilities aren’t that much better than a fighter/wizard multiclass.
Rogue
The rogue is one of the classic four Dungeons and Dragons classes, along with fighters, wizards, and clerics. Rogues are adept at sneaking through shadows, picking pockets, bypassing locks, and generally engaging in skulduggery.
Rogues are more or less indispensible in Neverwinter Nights 2, mostly for their ability to detect traps and pick locks. Although both of these abilities can be replicated by spells (such as detect traps, knock, and so on), or can be thought of as non-essential due to the fact that you can heal trap damage and bash open locks, it’s simply easier to have a rogue along to deal with them. Picking pockets can also net you some decent cash and loot throughout the game; you can perform it by right-clicking on a merchant or other character and selecting "Sleight of Hand".

In combat, rogues can be among the most deadly damage-dealers you field in your party. While they won’t be able to dish out the massive critical strikes that a fighter or weapon master can perform, their ability to sneak attack will let them routinely dish out damage well in excess of their normal weapon strikes. There are multiple conditions that have to be met before you can perform a sneak attack, but at heart, all you need to be doing is attacking the enemy from behind. The easiest way to do this is, of course, to run behind an enemy that’s attacking another party member and attack them from there. This will result in attacks of opportunity, but with a high enough Tumble skill, that shouldn’t be a problem. Sneak attacks can also be performed with ranged weapons, in which case you should move the warrior or frontline character that’s being attacked so that the enemy’s back is facing the rogue. Practicing both of these maneuvers will let you chew through enemies rather easily.
Pros
- Sneak attack is a huge source of damage.
- Can pick locks, detect traps, and pick pockets.
- Huge range of class skills to choose from.
Cons
- Needs to stick to light or no armor (heavier armor restricts the Dexterity bonus rogues receive, which plays into most of their skills).
Sorcerer
The sorcerer is a variant on the wizard class, with access to the same spells. Whereas wizards need to learn spells from scrolls and memorize them from a spellbook, though, sorcerers are capable of learning spells automatically when they level up and casting them based on instinct. They gain access to spells more slowly, and cannot know as many spells as a wizard can, but can cast more spells per day than a wizard is able to.

Sorcerers are thus usually going to be a better choice for players who know precisely what spells they want to use and don’t feel the need to experiment with many of the less-immediately-useful spells that are packed into Neverwinter Nights 2. Seriously, how many times have you been in a situation where you drastically needed to cast Clairvoyance or Shroud of Flame or Stone Body? For the most part, if you’ve been playing D&D for a long time, you’re going to know the spells that you will be casting over and over again: Flame Arrow, Fireball, Stoneskin, Magic Missiles, Bull’s Strength, Meteor Swarm, etc. Sorcerers can learn these spells automatically and cast them more times per day than a wizard is able to, making them often a better choice for Neverwinter Nights 2, especially if you just like running around and blowing stuff up.
Wizards have their uses, obviously, but the narrow focus of a sorcerer often makes them the best bet for parties in NWN2, especially if they focus on offensive spells (as Qara does in the single-player game).
Pros
- Can cast more spells per day than a wizard can.
- No need to find rare scrolls to learn rare spells.
Cons
- Less versatile than a wizard.
- Inability to memorize large array of spells make them less efficient at crafting magical items.
Warlock
The Warlock is likely going to be the class that players of Neverwinter Nights 2 are least familiar with. It wasn’t in the base 3.5 Edition Player’s Handbook, like all the other base classes in the game; instead, it was introduced in the Complete Arcane supplemental sourcebook. Although Warlocks are technically considered to be spellcasters, they’re much different than wizards or sorcerers, in effect becoming something of a ranged magical attack class.
Instead of memorizing traditional spells, warlocks have the ability to bust out eldritch blasts an unlimited number of times per day. These are effectively ranged touch attacks (meaning that they require an attack roll, but bypass your target’s armor when determing their AC), meaning that they’re likely to hit warriors and other spellcasters, but that enemies with high dexterity scores may be a bit tougher to take down.
Eldritch blasts start out at 1d6 damage, and increase by the same amount at every odd level, meaning that they rapidly become quite powerful as you hit the low teens. Although it may sound impressive to do 6-36 damage at level 11, you have to consider that you can only cast one eldritch blast per round, whereas most fighters will be attacking three times per round at that point. Luckily, you can modify your blasts with shapes that either allow you to hit multiple targets with your blast or invoke an essence that lends your attacks secondary effects, besides the plain old damage.
Unfortunately, Warlocks do tend to require some micromanagement in single-player. Your blasts are a lot more effective when you boost them with blast shapes and essences, but a warlock left to the tender mercies of the AI will all too often simply bust out a vanilla blast without any modifiers, or simply use whatever weapon they have in hand. Since modifiers are free, they should be used pretty much all the time, so a computer-controlled warlock will be far less effective than a human-controlled warlock will be.
Pros
- Good single-target damage.
- Can modify blasts with numerous effects and cast long-lasting buffs on themselves.
Cons
- Poor at crafting magical items due to being unable to cast many of the spells required.
- Requires some micro-management to be effective in combat.
Wizard
One of the other archetype classes, the wizard has been along in one form or another since the earliest eras of Dungeons & Dragons. Whether it’s the arcane loremaster studying books in his magical tower or a stalwart adventurer casting Magic Missiles at an orc, wizards are to be found throughout Faerun. We’re going to bet you’re more likely to want to play the latter, though.
Anyway, wizards and sorcerers are fairly similar in execution; it’s in the details that they differ. Wizards rely on a high Intelligence score to cast their spells. Unlike sorcerers, they use a spellbook to keep track of which spells they’ve learned, and they can learn quite a few more spells per level than sorcerers can. The drawback is that they have to memorize spells each day, which are then eliminated from memory as they’re used, meaning that they won’t be able to cast as many spells before needing to rest as sorcerers will. They’ll also need to find scrolls and scribe them to their spellbook to learn new spells, which can be a pain when you start getting up to the level eight and nine spells.
Wizards do generally make the best crafters of magical arms and wondrous items, due to the fact that they’ll have a high intelligence, which directly boosts their scores in those skills, and because they’ll have the ability to cast most of the spells required to craft the items, assuming you can find the scrolls for them.
Pros
- More versatile spellcasters than sorcerers, capable of bringing more spells to any given situation.
- Intelligence is really the only attribute they need to rely on, allowing them to either specialize or pick another attribute for multiclassing.
- Gain powerful spells slightly more quickly than sorcerers will.
Cons
- Can’t cast as many spells per day as a sorcerer.
- Need to find or buy scrolls to allow them to learn new spells, excepting those learned at each level-up.
Tutorial Walkthrough
The tutorial module in Neverwinter Nights 2 is more focused on teaching you the game's interface than showing you the inner workings of the D&D engine. That said, it'll still be a good idea to play through it, even if you've played the first Neverwinter Nights. If you want to skip it, though, feel free; you'll automatically be warped to the night after the events of the tutorial, and will gain most of the experience that you might've missed by playing through the tutorial.
Quest: The Fur Trade
The first quest you'll receive will revolve around a simple transaction: selling your foster father's furs to Galen, a wandering merchant, and using the money to purchase a bow for him. Retrieve the furs from Daeghun's chest in your house, and they'll be added to your inventory. Later on, when you find Galen in town, double-click on the furs to sell them to him, then double click on the special bow in his inventory to buy it for Daeghun. Deliver it to him (he'll be standing near the archery range) to polish this quest off.
Quest: High Harvest Fair
Much of the tutorial's gameplay mechanics will be explained to you through the High Harvest Fair, a collection of four challenges. Winning three of them will earn you the right to call yourself a champion, while winning all four will net you a special prize.
To begin the competitions, meet your friends Amie and Bevil by the bridge leading into town; they'll join your party and help you out in the tasks. Speak to Georg in town to learn about the four challenges. They take the form of their own small quests, which we'll collect here.
Sub-Quest: The Harvest Brawl
Yeeee-haw! Time to celebrate the fulgent blossoming of all the year's labors by beating the crap out of the other kids in town. Head over to the small square beating ring where the priest is administering the fights and speak to him. He'll tell you to grab some clubs from the barrel nearby, so pick them up, hand them out to your friends (press I and drag them from your inventory onto your party member's portraits), and be sure to equip them by dragging them to the active weapon slots.
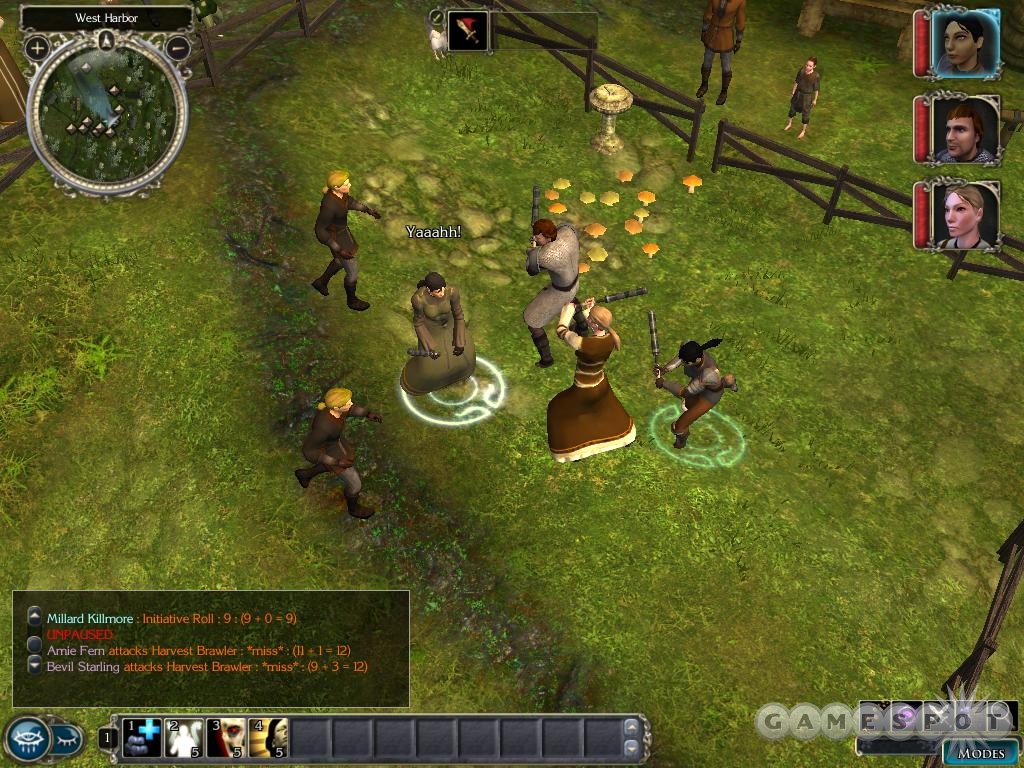
You have to fight two fights in order to win the Brawl here. The first should be easy to win for any characters, but the second, against the Mossfelds, will be substantially tougher. To have a chance at it, it's best to complete the other sub-quests and earn enough experience to boost yourself up to level two before attempting it, giving you more hit points and possibly a better attack roll as well. If you do so, your chance of beating the Mossfelds will be quite a bit higher.
Note that you can bet the Mossfelds on the outcome of the fight if you wish to do so, even though the priest tells you that it's against the rules of the tourney. The most you can bet is 10 gold, which is a pittance in the big scheme of things, but if you do bet, you'll earn some Chaotic points. Don't forget to speak to Wyl after the match to collect your winnings.
Sub-Quest: The Tourney Of Talent
Speak to Retta Starling, the woman in the red dress, to start the Tourney of Talent. Unlike some of the other contests, you can't really lose this competition; you'll be walked through the basics of spellcasting, make some generic spell effects, and win the tournament outright. Don't forget to to hit F to call up your quick-casting interface.
After you win this competition, you'll unlock the bonus quest "A Man And His Pig", which will be available should you choose to pursue it.
Sub-Quest: The Archery Competition
When you track down Daeghun, speak to him to begin the archery contest. After equipping yourself with the crossbow from the barrel and taking some practice shots, you'll be told to take potshots at the bottles and jars mounted on the crates nearby. Again, it's more or less impossible to lose this competition, since adjusted rolls as low as 2 will still be counted as a hit. Knock down all of the bottles and return to Daeghun to be counted as the winner.
Sub-Quest: The Knave's Challenge

Speak to Tarnas, the village mage, to learn more about this challenge. It's a walk-through of the thief mechanics. If your main character can't do thieving, you'll be able to pick up Kipp, who's standing by the building near Tarnas's little tent.
Your goal is to find three feathers hidden around the village. One is located in the woodpile near the brawling square (use Disable Device to remove the trap set on it), one is in the chest you passed by earlier (pick the lock on it), and one is in the pocket of the Man In Green (use Sleight of Hand on him after right-clicking on him). After you have all three, return to Tarnas for your reward.
Completing The Fair
When you have three or four of the sub-quests completed, feel free to run back to Georg and report your progress. He'll give you your rewards on the makeshift stage near the field on the edge of town, and you'll complete the tutorial, and earn the very helpful Harvest Cup as well as a magical cloak if you managed to win all four of the events. Just don't forget to perform the last quest here...
Bonus Quest: A Man And His Pig
After completing the Tourney of Talent competition, Orlen will approach you with an offer: prove that Lewy Jons has enchanted his pig in the hog competition, and he'll reward you. If you go and examine the biggest pig in the lot, Amie will report that it's definitely been enchanted. Speaking to Lewy will let you entertain a counter-offer: he'll give you a potion if you report that the pig's clean. If you don't want to be part of his mischief, use the Lesser Dispel scroll that you won in the Tourney of Talent on the pig to dispel its enchantment (Amie can use the scroll if your character can't), then speak to Orlen to turn in the quest.
Chapter One Walkthrough
Main Quest: West Harbor Under Siege!
After the events of the Harvest Fair, it would appear that everything is hunky-dory. Yep, nothing to see here, just another sleepy little town. Sleepy, that is, until the forces of darkness invade in the middle of the night. As a member of the town militia, it's your job to see to it that the invaders are repelled.
After gaining control of your character, flip the camera around and check the chest by the wall here. It'll contain some equipment that will be appropriate for your character class, so equip everything you can. You can also walk into Daeghun's room and loot his chest, as well. With that done, head downstairs and take out the three grey dwarves that bust into your house. Each of them will leave behind some loot, including a quarterstaff for Amie. Grab whatever you can nab from the workbench, as well, then head outside to receive your marching orders.
When the priest is done blessing you, fight your way to the bridge nearby. When you've killed all of the attackers, you can speak to Georg to get the next quest.
Quest: Reporting For Duty
If you're going to protect West Harbor from the invaders, you're going to need to muster the militia. Georg wants you to find at least five militiamen and tell them to report to the field on the far side of town. The first of these is Ward Mossfeld, who's standing near the fire that burns near the bridge. If you speak to him, you'll find that he's desperately wounded. If you're going for the evil route, feel free to cut his throat and put him out of his misery. Otherwise, you can attempt to heal him (if you have healing spells, this will happen automatically, without wasting a spell), or you can run back to Brother Merrin to retrieve some healing mosses. Give these to Ward and he'll be the first recruit for the militia.

Other recruits are scattered around town as follows:
- Lazlo Buckman: Standing near center of town's buildings.
- Wyl Mossfeld: Standing near Tarmas.
- Webb Mossfeld: Near Tarmas' house.
- Anonymous Militiaman: Near the banks of the river, by Tarmas' house.
- Pitney Lannon: Near the farm where the Tourney of Talents was set up.
- Pierson: Barricaded inside his house, one of the smaller ones in the collection of buildings. Talk your way inside or bash the door down, then guilt him into joining the militia. Looting the items in his house is both chaotic and evil.
When you have 5/5 militiamen recruited (you can get more than that if you wish), head to the field. Be sure that you've spoken to Tarmas, though. Also note the dying grey dwarf near the burning building; if you want some Evil points, you can threaten to burn him alive, then cut his throat. That’ll teach him.
Bonus Quest: A Magician's Arsenal
After Amie gets offed by the Githyanki mage, Tarmas will tell you to gear up for the fight by looting whatever's in his house. Go there (it'll be marked on your map), and steal everything you can find. The armoire is trapped, but since you can rest inside, you should be able to rest up to heal any damage that you take.
Hell Among The Starlings
Bladelings and duergar will be attacking the fields in force, but with all the militiamen on your side, you shouldn’t have too many problems beating them back. Unfortunately, the third wave of enemies will bust through to the Starling farm, where Bevil’s brothers and sisters are located. It’ll be best to help them out, so accept the challenge and head over for a brief diversion.
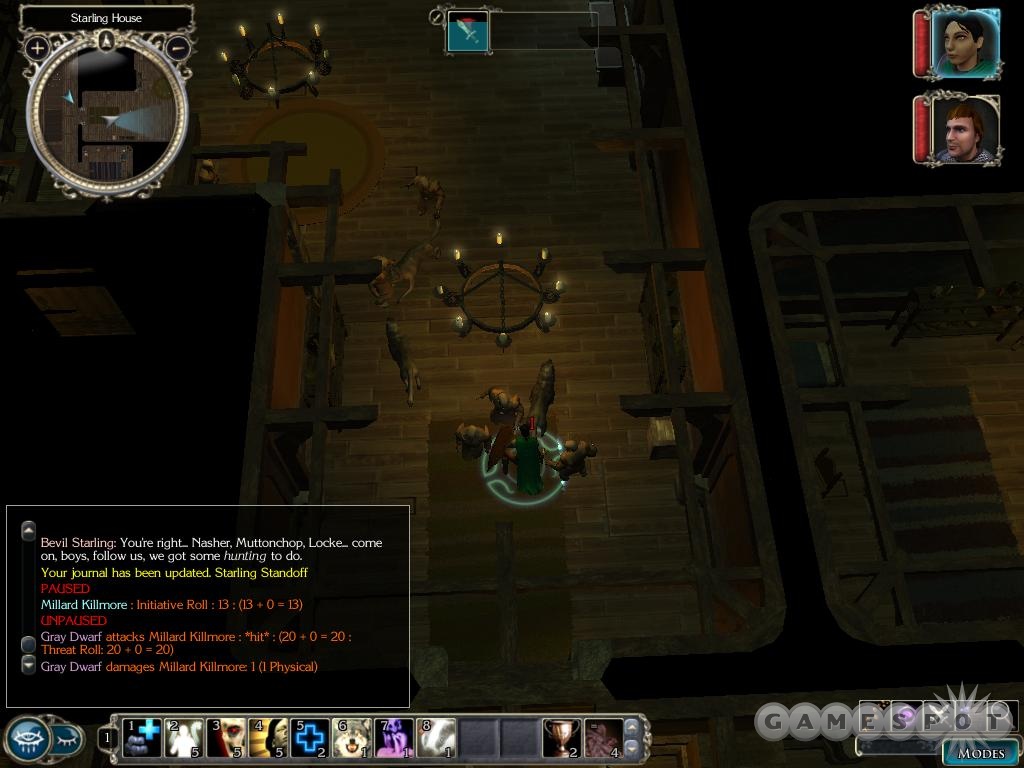
You can loot anything you want in the Starling house, so search thoroughly. Remember that if a chest or armoire is locked, you can right-click on it to bash it. A Dagger +1 is located in the small bedroom near the front door, for instance. Bashing chests will break some items, but won’t destroy everything. If your main character isn’t a rogue, you’re going to be forced to bash in some stuff until you manage to take one into your party.
When you speak to Retta, accept her offer to take the dogs along on the adventure, then head into the nearby room and kill the dwarves there. The children are located in the nearby room, so open it up and tell them everything’s going to be all right for some good points. With that done, return to the fields and get back in the fight.
Finishing the Fight
After leaving the Starling house, return to the field and fight as best you can. Daeghun will quickly appear and finish off the remaining enemies, thus ending the assault on the town.
Main Quest: Ruins Of The Past
Daeghun will fill you in on a little secret: he found a silver shard after a major battle in West Harbor many years ago. Knowing that they were important, he hid it in the ruins outside of town. Said ruins are doubtless going to be dangerous, so he wants you and Bevil to explore them, find the silver shard, and return it to town.
The Swamp
Head down to the swamp ruins when you’re good and ready and start taking on the Lizardlings and Swamp Beetles there. If your main character is a weaker, non-fighter, like a mage or a rogue, get used to using Bevil as the character you control and moving with him; he’ll be better able to take hits from enemies if you let him get spotted first.
Eventually you’ll come to a structure guarded by Lizardlings. (There’s another building nearby, but you won’t be able to enter it anytime soon.) Kill the guards and head inside, but be sure to rest up first.
The Swamp Ruins
More lizardlings reside within the swamp ruins, mostly congregating in groups of two or three. Quicksave as often as you like, and you shouldn’t have too many problems here.
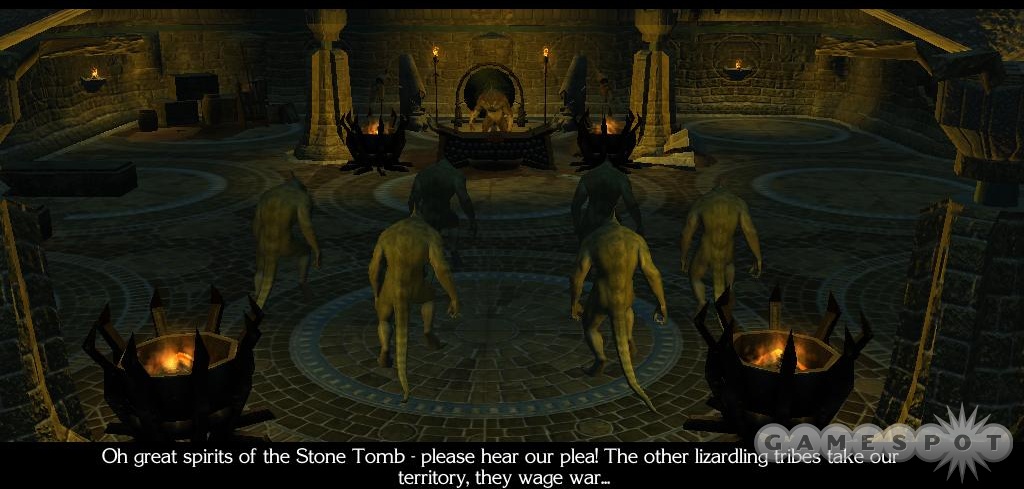
The last room will hold a convocation of a lizardling shaman and perhaps six of his followers. They’re understandably perturbed to learn that you’ve killed all of their troop, but if you’re quick with the Bluffing or Diplomacy, you may be able to talk them out of a fight. If you’re not particularly overawed by their numbers (and you probably shouldn’t be, especially if you can summon creatures to help you), you can just attack them and rout the lot of them. You’ll earn more experience, and it’s an alignment-neutral choice. When you find the Silver Shard in one of the chests, tell Bevil you’re ready to head out, and you’ll automatically warp back to West Harbor. Be sure to take all of the items off Bevil before doing so.
Main Quest: Investigate The Silver Shard
With the Shard in hand, Deaghun will ask you to head off to Neverwinter to find his half-brother, who also possesses a shard. He’s going to send you off alone, so you’ll have to leave behind Bevil. (Hence our advice to strip him of equipment; sell whatever you don’t need to Tarmas. If you didn’t manage to take everything off him before leaving the ruins, his effects should be on the ground next to him when you return to the village.)
Be sure to speak to everyone in the village before you leave. Many of them will have items to give you, and Retta will even have a World Quest for you, A Soldier’s Story. (You won’t be able to solve this quest for a long time, just so you know.) Buy and sell from Tarmas, if you wish, then walk out via the world map exit and head towards the Weeping Willow Inn.
Quest: Under Assault
Outside the Weeping Willow, you’ll encounter Khelgar Ironfist, a Neutral Good Dwarven Fighter who’s being accosted by some vagabonds. Whether you’re good or evil, you’ll want to have Khelgar’s help in the upcoming sections of the game, so help him out, then retire to the interior of the Inn to enlist him in your party.
No sooner than you enter the Inn, though, and it’ll be attacked by duergar and bladelings. Can’t a man get a little peace and quiet? Kill off everyone that attacks you on the first floor, rest, then speak to Gera, whose husband is on the second floor. If you head up, you’ll face off against a single Duergar at the outset, but many more will start coming your way, so cast any summoning spells you can before they mob you.
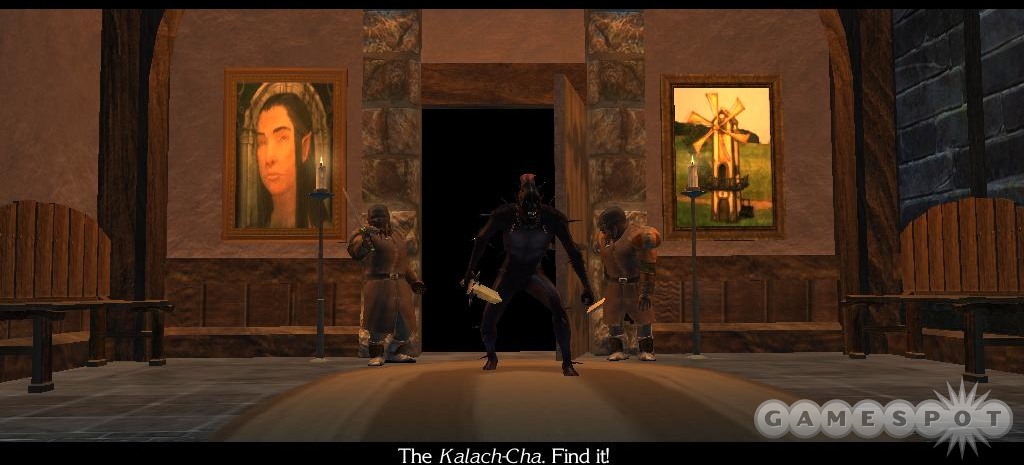
When everyone’s dead, speak to Zachan and let him know about his wife’s predicament. He’ll head downstairs and you can start looting the place; doing so isn’t evil or chaotic, so grab everything you find, in all the rooms. Galen is also up here; he and his guards are likewise being attacked by the beasts, who are looking for something that they call the Kalach-Cha. No use in trying to talk sense into them; just bust a cap.
When you’ve checked the entire second floor, return to Gera and get her reward; you can refuse it for a point towards a good alignment. When you’re ready to move on, you can sell your items to the innkeeper and leave the Inn. Khelgar will offer to accompany you all the way to Neverwinter, if you’ll have him. Better to keep him than to leave him behind, in our opinion; there are some tough fights ahead.
Fort Locke Exterior
Shortly up the path from the Inn, you’ll find Fort Locke. You won’t appear outside the Fort itself, though; you’ll need to travel up the path a ways. If you want, you can indulge in some off-track betting: are you strong enough to kill off all the wolves, including the Dire Wolf, in the area? If you can, you’ll be able to take home some leather hides, which will be helpful if you plan on crafting items later on.
Further up the trail, you’ll come across Galen, who’s being accosted by his two mercenary guards. You can fend off the guards, if you like, and come to Galen’s rescue for a bit of a reward, as well as the items that the guards drop.

Lastly, you’ll eventually come across Neeshka, a Tiefling Rogue who’s being set upon by Fort Locke soldiers. These soldiers are corrupt, though, so it’s all right to kill them, whatever your motivation! There are four of them, though, and Neeshka will be fighting unarmed, so you’ll have an uphill fight on your hands.
When you kill off the soldiers, Neeshka will be available as a party member. She’s a rogue, as mentioned, and will offer up the usual suite of lockpicking and sneak attacking that you might expect. She’ll make an excellent archer if you happen to need one. Have her pick the lock on the chest here to find her gear, then head on up into Fort Locke.
Fort Locke features a number of amenities, such as a couple of vendors, a set of crafting benches, and a few quests. We’ll start with the optional quest first, then move on to the main quest here. You’ll want to use this as a staging area for your upcoming quests, buying potions and perhaps a bow of some sort for Neeshka if she doesn’t have one already.
Quest: Bandit’s Ransom
Sub-quest: Tor’s Holy Symbol
You can obtain Bandit’s Ransom by speaking to Liza, near the center of the fort. She’ll explain that the bandits have taken to kidnapping the inhabitants of the surrounding area and holding them for ransom; they’ve even taken her husband! She’ll ask for your assistance in retrieving the missing citizens, if you’re willing to lend a hand.
Tor’s Holy Symbol is a sub-quest given by the priest of Ilmater in the town, appropriately named Tor. He stands by the small stone chapel. Apparently the bandits made off with his holy symbol when they robbed him, and he’d like you to retrieve it for him. You can kill two birds with one stone, in other words!
If you brought Neeshka along with you, she’ll be able to tell you the precise location of the bandit camp. Otherwise you may have to ask around with some of the other named characters here to see if any of them know.
The Bandit Ambush
As you head off to the bandit camp, you’ll be waylaid by, well, some bandits. They’ll require you to pay a road tax of ten gold. This is chump change for you, obviously, so you can just pay it if you don’t mind losing it, or attempt to bluff your way through it. If you stand up to the bullies, though, they shouldn’t be an overly difficult fight for you, and you’ll get to loot their leader for some decent items and gold.
The Bandit Camp
The bandit camp can be a difficult fight, mostly because there are numerous bands of bandits strung together in small ground of three. Your AI teammates can get pretty stupid here, in that you’ll take out one group, then they’ll run on to the next before you can properly heal up. You may want to use the Broadcast Command "Stand Your Ground" for all of your characters (do so by right-clicking on the ground), hide your main character and Neeshka, then use Khelgar to lure the enemies back to your position, to ensure that you only have to take on a couple at a time. This won’t always work, since sometimes your teammates will follow you no matter what, but at least you should be able to thin the herd a bit.

Now, when you’ve cleared the camp out a fair amount, you can choose to either head into the main building here to loot it and get Tor’s Holy Symbol, or free the prisoners for the main quest. The fights inside the house are sometimes difficult, so it’ll be best to free the prisoners first. You can do this by walking up to them and speaking to them; they’ll ask you to escort them out of the camp. Unfortunately, this causes the entire bandit population of the camp to respawn! It’s not fair, but you’ll have to fight your way through the entire mess of them before you can get back to the camp entrance and send the prisoners on their way back to the fort, which they’ll go to automatically. Just keep in mind that all of the enemies will primarily rely on ranged attacks, so any spells you have that give you any kind of defensive bonuses would be good here.
If you manage to survive the fighting, bring the prisoners back to the main gate and they’ll walk on from there, leaving you to rush into the bandit boarding house and finish the rest of them off. If you tell Neeshka thanks for helping out, you’ll gain an influence point with her.
The Bandit House
It’s here that matters get somewhat complicated. There are a whole mess of bandits, but most of them are holed up in the individual rooms of the building. The problem is that, if the fighting spreads out into the hallways, you’ll roust the soldiers in the rooms and they’ll all come out to play, resulting in a fight with the three of you versus maybe ten or fifteen bandits, and you’re not likely to win.
Begin by entering the trapped door room to the right of the entrance and clearing that out, getting the stuff inside, then heading back outside and resting. (You can always head outside and rest while you’re fighting through the house, and you’ll probably need to do it a couple of times before you’re completely through it. You can sometimes rest indoors if you get far enough away from the enemies.) From there, head through the nearby door in the corner of the hallway. There’ll be a wizard inside, and attacking him will bring more archers from the other door here. If you can kill the wizard, then try and shephard your troops back through the door you entered from, you can force all of the archers to follow you. If you wait just outside the door for them, they’ll be at point-blank range, perfect for some attacks of opportunity.
The chest near the wizard has Tor’s Holy Symbol, so grab that before you move further into the house. Technically, you don’t have to clear the place out, but as always, the lure of experience and loot will likely drive you on. There’s surprisingly little of the latter, but when you reach the final room, you’ll find some of it on the corpses of the bandit leader and his friends, as well as in the chests around them. Just keep in mind that there are plenty of traps in the hallways here, so move slowly if you can and use Neeshka to disarm them.
When you do finally reach the bandit leader’s room, keep in mind that he’ll be accompanied by a wizard. If you can keep your fighters out in the hallway, one way to approach the fight is to lure the leader out into the hall, then have one of your characters sneak behind him and close the door leading into the room. This might be a temporary expedient, but it should hopefully let you get a round or so in on the leader alone before his friends come out to join the tussle. Just be sure to buff up ahead of time with whatever you need, and hopefully the fight shouldn’t be overly problematic. The bandit leader will drop an Astral Blade +1 that will fit nicely in Khelgar’s hands, should your PC not be able to use it.
With everything done right, return to Liza and Tor to receive your rewards for your little adventure.
Main Quest: Safer Travels
If you speak to Marshal Cormick here in town, he’ll give you a quick rundown of the problems in the fort. The administrator has apparently not returned from one of his patrols, and the replacement administrator, Vallis, has shut down all patrols as a result, with the intent to focus on raising the discipline level of his soldiers. Thus, the roads simply aren’t safe to travel between the fort and Neverwinter. It’ll be up to you to convince Vallis, a pompous, self-righteous man if there ever was one, to relent with the patrols and clean up the roads again.
If you speak to Vallis, who stands outside the stone section of the fort, he’ll tell you that the previous commander, Tann, went out to look for one of the patrols that went missing and never returned himself. One way or another, you’ll let him know that you’re willing to investigate for him, and he’ll point out an abandoned cemetary east of town, which is the only notable landmark near where all of the patrols were lost. Guess what kind of enemies you’ll be facing when you get there?
Graveyard
Hey, there are skeletons here! Go figure!
By now, skeletons should be relatively easy kills for your characters. If you have a cleric character, feel free to blast away with your Turn Undead ability and kill them right off. The only marginally difficult challenge you’ll face is the Skeleton Captain, but even he will fall with a couple of blows. Kill everything and loot the corpses and graves (not an evil act). There are two crypts here, not including the one that’s truly locked up (Lock Pick DC of 99!).
Western Crypt
The western crypt has plenty of traps in its first little corridor, so tread softly. Check out the left and right rooms for loot, first, then head east. If you get diseased by encountering the zombies here, you can attempt a Heal on yourself (healing kits will boost the chance that this will succeed, as will a high Wisdom score), or use the aforementioned Potions of Cure Disease.
The easternmost room here has a sarcophagus and a lever. You can disable the trap and unlock the sarcophagus without flipping the lever, but you know you want to flip it anyway.... Unfortunately, all it appears to do is unload a massive Turn Undead effect in the previous room, which was filled with zombies. If you’ve already killed them, then it won’t really do anything!
Eastern Crypt
After killing off the enemies in the main corridor here, head southeast to find a locked and trapped sarcophagus with a Ring of Insight in it. It’ll net you +5 to Lore, making it handy to equip on Neeshka to boost her identification skills, if your PC isn’t handy with it.
When you get past the large room with the statue in the middle, use Neeshka to disable the two traps in the nearby hallway; you may have to park your teammates well back in the last room to prevent them from charging ahead and setting off the traps. There are plenty of traps to go around here, so be sure to have Neeshka moving forward in Search mode whenever it’s feasible.
Quest: Fort Locke Investigation
In the southeastern corner of the building, you’ll find a strange altar with a Shadow Priest standing in front of it. He’ll raise some zombies when you approach, but they shouldn’t be too hard to deal with; kill him, and them, then speak to Commander Tann. He’ll ask you to help him find the three men he entered the crypt with. You can refuse, if you like, but that’s rather anticlimactic. Rescuing the men is likely to be a Good action, though, unless you demand payment from each of them.

Flip the switch next to Tann to open the metal grates out in the hallway. To the north you can find Bruneil, and to the east you’ll find the body of Garret, as well as Blaine at the end of a trapped hallway. The doorway at the southeastern corner of the crawl of corridors will lead you back out to the graveyard.
Unfortunately, as soon as you return to the Fort, Vallis will meet you outside the walls and relive Tann of command. The Intimidate and Diplomacy checks to avoid conflict are rather high, so don’t be surprised if he attacks you. Kill Vallis and his cronies, and grab the magical items that Vallis drops, including a Chainmail +1.
With that done, return to the fort and speak to both Tann and Cormick to finish off the quest. Cormick will promise to reward you with work when you finally reach Neverwinter. Feel free to sell off any items that you found (you may want to pick up a sling and some bullets, as well as leather armor, if you don’t have any).
Druids Of The Mere
On your way to Highcliff, you’ll encounter yet more bladelings and duergar. Before they can attack you, though, Elanee, the strange woman who’s been shadowing you since you left West Harbor, will appear and Entangle them. She’ll immediately join your party, and probably get some level-ups in the process.
Elanee and your team will make short work of the horde. If you decide to bring her along into your party, she’ll offer to bring you to Maiden’s Glen, a small clearing in the forest where druids traditionally gathered to rest or heal. This isn’t a quest, but it will get you some backstory to the game, and what’s happening in the Mere, if you agree to follow her.
Maiden’s Glen
Not much to see here; the animals have gone crazy and will attack you, but you shouldn’t have any problems with them by this point in the game. Elanee will request that you let her charm them instead of killing them outright. If you agree to charm them, you’ll gain an influence point with her...and then you can proceed to slaughter the animals anyway.
In one corner of the glen, you’ll find a Huge Enraged Bear. Kill it, and you’ll reveal that it was Kaleil, a fellow druid of Elanee, who’s been driven crazy by some kind of taint in the Mere. Killing him isn’t part of any quest or anything, as mentioned, but again, you’ll be learning more about what’s going on in your homeland. The learning will be vague, but hey - it is what it is. When you’re done poking around, head out to Highcliff.
Highcliff
No sooner than you arrive in Highcliff, you’ll find that your chances of getting a ship to Neverwinter are slim to none: lizardmen are attacking the ships as they leave port, sinking them almost immediately. Those bastards! You’ll obviously have to do something about that if you want to get to Neverwinter on time. Speak to Grishnak to learn of two sources of information: his captain, who dwells in the town inn, and the village elder.
A group of drunken sailors will accost you when you near the inn. Khelgar’s probably not going to let their insults slide, so you’ll likely have to fight them off. If you want to earn some influence with him, try to egg on the fight as best you can.
Captain Flinn is indeed standing outside the inn, but he doesn’t have much to say except to see the village elder. If you speak to Elder Mayne, you’ll learn some things about the goings-on...
Side Quest: Disturbance at Par’s House
Par is a villager standing by his corn field on the eastern edge of town. When you speak to him, he’ll complain about noises coming from his house. If you head inside, you’ll find a group of drunken sailors that are attempting to rob the place. You won’t have any choice but to kill them. There’s a bunch of loot in the house, and you won’t take any alignment hits for taking it, so feel free to rob the place yourself before heading out and speaking to Par to complete the quest.
Main Quest: Ship Sabotage
Sub-Quest: William’s Fate
Sub-Quest: Adventurous Children
Sub-Quest: Mozah’s Backpay
In order to get to Neverwinter, you’re going to have to figure out why the lizardmen are attacking the ships. Part and parcel with this quest is the plight of Juni’s husband, William, who has been missing for a day ever since he ventured outside of town. Speak to Juni after talking to Elder Mayne to pick up the quest to look for her husband. Also speak to Gera and Zachan over at their house to pick up the Adventurous Children quest; apparently their kids disappeared at the same spot as Juni’s husband. Lastly, speak to Mozah by the north gate; he’ll explain that another group of adventurer’s also disappeared in the same area. Damn, this sounds like it’s going to be awful dangerous!
Shandra’s Farm
Shandra is the only lead you currently have; she’s the woman who stubbornly has refused to retreat from her farm into Highcliff. If you speak to her, she’ll tell you plenty of tales about the area. Apparently the old ruins are the remains of what once was called Castle Highcliff, which was destroyed long ago and never rebuilt for some reason. She thinks the lizardpeople are camped up there, but if you read between the lines of all these conversations, that seems unlikely by now. Unfortunately for Shandra, her barn will be torched as you talk. There’s nothing you can do to prevent it, so accept her offer to mark the ruins on your map and be on your way.
Highcliff Castle Ruins
Dealing with William
As you head northeast on the path to the castle, veer off to the east when you hit the dirt trail to find William, Juni’s husband. He’s apparently been so overwhelmed by familial duties that he’s simply given up on the whole affair and has set out to make a new life for himself, far away from his wife and children. He can be difficult to convince to return back home, although of course you don’t have to convince him to return; you can extort him for money not to tell Juni, or you can lie for him and tell Juni that you found his body. It’s up to you how you want to play this. If you want him to return, you can agree to lie for him, then tell Juni where he is later on, or you can attempt to use Diplomacy or Wisdom to get him back to town. (The Diplomacy check for the "you’ll get eaten" option is easier to hit than appealing to his ethical nature.) If you agree to lie for him, you can get some Chaotic points by breaking your promise when you talk to Juri a bit later on. Note that you can’t take his money, and then turn him in to Juni; he vanishes when you grab his gold.
The Kids Are Alright
If you head to the southwestern corner of the map (follow the wolves), you’ll find Alex and Andrew, the kids of Zachan and Gera. They’re cornered by a number of wolves, but they shouldn’t be much of a challenge for you. Cut through the wolves, free Alex and Andrew, then decide whether or not you’re willing to lie to their parents for them. Again, it has no effect on the outcome of the quest.
I Conquered The Castle
Head up the stone path towards the castle ruins to start getting back on the track of the main quest here. You’ll quickly come across Slaan, a scout for the band of lizardmen. If you speak to him after fighting off the zombies, you’ll have a choice: you can attack him after he admits that his people are responsible for sinking the ships (+3 chaotic points, and you’ll find a map on his body that leads to the lizardman lair) or you can agree to free the lizardmen that are captive in the ruins in exchange for Slaan leading you back to his chieftan, in the hopes of a parlay (+1 Good). Since the latter option is more complicated, we’ll assumed that you chose it. Slaan will also temporarily join your party if you agree to help him out.
Into The Ruins

As you explore the delapidated corridors, you’ll find another Shadow Priest, who’s deep in conversation with someone named Garius. As you probably expect, this is going to end up in a fight, so you’ll be forced to kill the Shadow Priest as well as the Zombie Adventurers around him, who are much tougher than normal zombies. Kill everything that moves, then start looting the bodies; there’s some better-than-average stuff here, including boots that add +3 Dexterity to anyone who wears them, as well as Mozah’s Backpay, part of the quest of the same name. Don’t hesitate to run outside to rest after this fight.
In the northernmost room of the castle, you’ll find Slaan’s warriors. If you killed Slaan, you’ll probably have to kill them, too; otherwise, they’ll run off and warn the chief of your impending visit. Complete the investigation into the ruins, if you like, or you can run off with Slaan to his village by asking him to take you. If you like, you can also head back to Highcliff and turn in the various sub-quests that you picked up (oddly enough, no one takes notice of Slaan running around). The resolutions will depend on your choices in the quests, but Zachan and Gera will give you a decent amulet, at least, for helping them out.
The Lizardman Cave
Now, if you brought Slaan back with you to the Lizardman cave, you’ll have the opportunity to parlay with the lizardman chieftan. If you take the opportunity to kill everyone, you’ll earn a sharp swing towards an evil alignment and some marginal magical items from the storehouse nearby. (Includes a helmet that can cast Searing Light five times a day and the Ravager +1, a magical halberd.) On the other hand, if you follow through on your promise to speak to the chieftan, you’ll easily convince him to come to town and speak with the village elder, no Diplomacy rolls required. The evil path will net you more experience and loot, to be sure, but it’s also...the evil path.
Return to Highcliff
When you’re done with all of the quests in Highcliff Castle, return to town and speak again to Elder Mayne. With a bit of talking, you’ll be able to convince him that it’s in his best interest to accept the deal with the lizardmen. Keep in mind that this is definitely a good outcome, as well as probably a lawful one.
When you get done with the chitchat, Mayne and the rest of the quest-object villagers will gather at the docks with you, allowing you to chat with all of them and receive your rewards for their quests. Mayne, himself, will have a bit of cash for you, as well as the Armor of Loyalty, a light armor suit that renders the wearer invulnerable to Charm Person and Dominate Person.
Neverwinter
Ah, Neverwinter. Town of a thousand charms. It might not exactly be a bustling, Assassin’s Creed-ish metropolis as seen in the game - the streets are strangely underpopulated - but it’ll be big enough to satiate your need of adventure, you can bet on that.
To begin with, hit the shops in the Docks District, if you like, then make your way to the Sunken Flagon Inn to meet with your foster Uncle.
Events
There are a number of events that occur in this district when you start your sweep through it as part of either the City Watch or Moire’s Gang questlines. Most of these revolve around your followers (the wounded wolf can only be talked to if you have Elanee in your party), so deal with them as you see fit. We’ll deal with most of them in our Followers chapter, but for the moment, here’s a rundown of the Qara event:
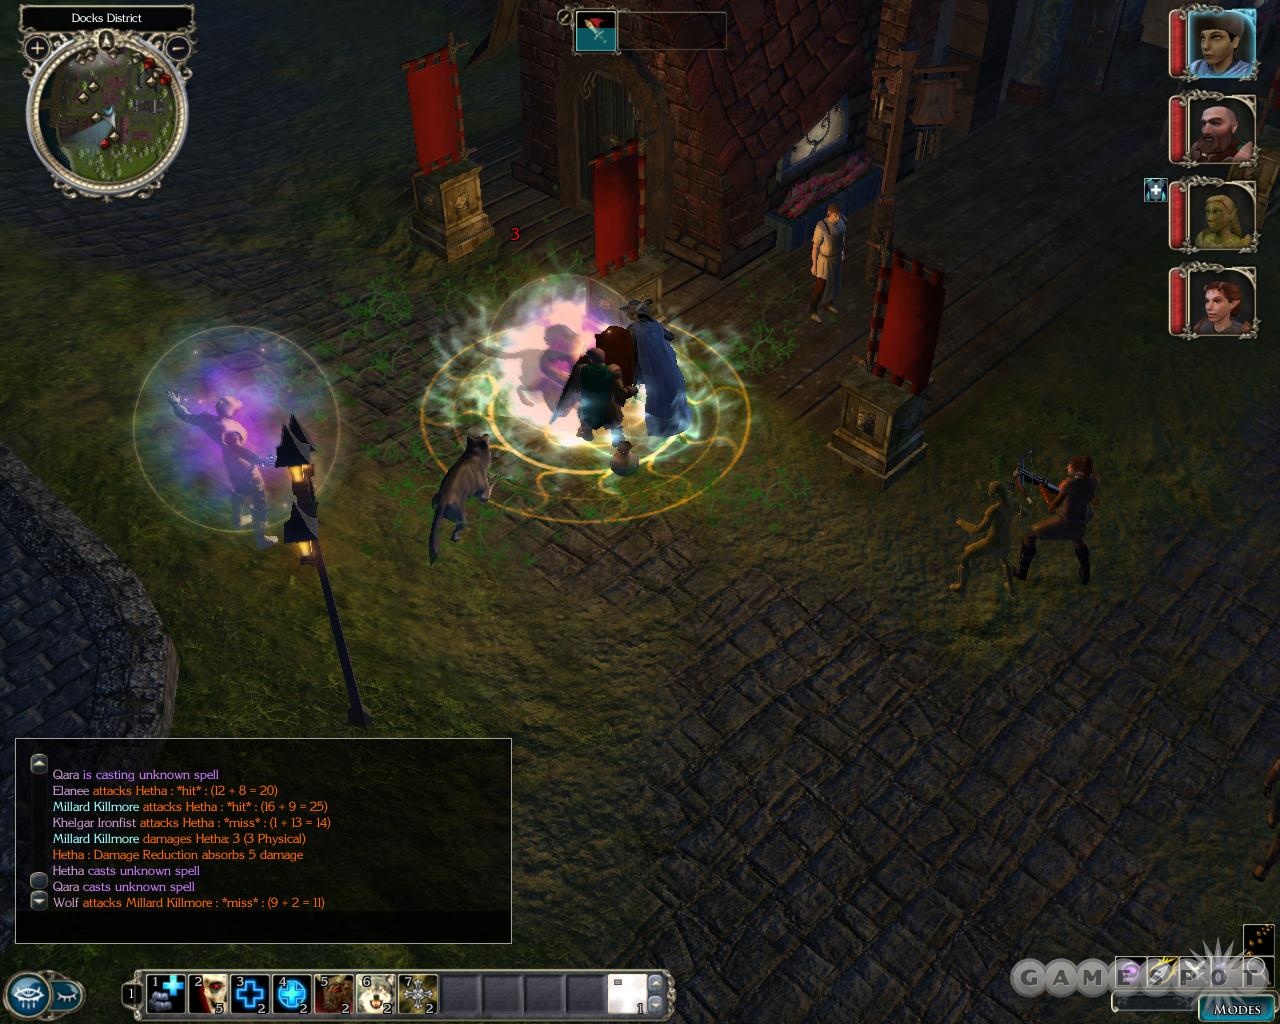
At one point, you’ll encounter Qara, a young sorceress, fighting with two of the Mage Academy students outside the Sunken Flagon. Combat will almost surely ensue, with the two mages attacking you, as well, although you can definitely use your skills of speech to quell the fight before it occurs. (Killing them will net you a Ring of Protection +1 and a Quarterstaff +1, though, and you can avoid alignment shifts if you speak correctly here. Killing the students will have repercussions later in the game, though.) You’ll have the opportunity to take Qara into your party at this point, and if you need some magical support, you’d be wise to head inside and bump someone else out of the way to get what you need. If you head inside and talk to her, be sure to tell her that instinct and experience is the best instructor; you’ll get a large influence gain with her. Another big influence gain is "so long as you know when to unleash your power". She’s a firecracker, this one!
If you do accept her into your group, you’ll be accosted by Praven and more Academy wizardlings outside the Inn. Have Qara cast a quick fireball to off the bulk of them, and follow through to finish them off.
Sunken Flagon Inn
Speak to Duncan here for a long conversation about the shards you’re carrying. He insinuates that they’re somehow connected to your mother, but refuses to speak on it further. Soon enough, a character named Sand will walk in and attempt to scry the shards. Hilarity ensues.
Main Quest: The Blacklake District
The long and short of it is like such: in order to find out more about the shards, you’ll have to get into the Blacklake District somehow, to speak to Aldernon. Unfortunately, the Blacklake District is shut off from you at the moment. As Duncan and Sand explain it, you have two options here: you can attempt to enter the Blacklake District surreptitiously, which would entail joining up with the local mafia, or you can attempt to become a member of the Neverwinter Watch and rise in the ranks until you gain enough trust to enter that way. If you choose the former, you’ll be pointed out to Caleb, a local mafia lieutenant. If the latter, you’ll meet up with your old friend Marshal Cormick at the City Guard station here in the Docks.
The Blacklake District: City Watch Route
If you choose to align yourself with the forces of law and order, head to the City Watch post and speak to Cormick. He’ll quickly sign you up for service; you’ll need to be a member of the City Watch if you want to get into Blacklake. He’ll also give you an assignment.
Sub-Quest: Neverwinter’s Newest Watchman
One of the merchants in town, by the name of Hagen, is unwilling to put up with the constant protection money demands of the local gang. Since he’s willing to stand up to them, you’re going to be tasked with protecting him from the inevitable retribution.
If you head out to the shop, Hagen will send his daughter away, and you’ll all have to wait for the thugs to show up. The conversation tree here is pretty complex, but if you want, you can either fight them right off, double-cross Hagen and the Watch by accepting payment from the thugs (this oddly enough doesn’t cause you to break the questline; you can continue on with Cormick as usual), or triple-cross the thugs, which is our personal favorite option, albeit one that will shift you towards the chaotic spectrum of the alignment tree. To do so, pick "You’re all under arrest!", "I could do that, but it’ll cost you," "That’s a lot of money. Too bad I wasn’t being serious. You’re also under arrest for trying to bribe a Watchman." Heh.
If you don’t take the money, you’ll have to fight off the thugs, but that should be a simple matter. Return to Cormick for your next assignment.
Taking Out Caleb
Cormick will send you to deal with Caleb, one of Moire’s cronies in the docks. He’s not so bright, Caleb is, and will goad you into a fight seemingly no matter what you say to him. Kill him, then report back to Cormick.
Sub-Quest: Enforcing Order In The Docks
Cormick wants you to make a sweep of the sector, checking in at all the guard posts. If possible, ensure that none of them have been swayed by Moire’s offers of cash. There’s at least three events involving other characters, including the opportunity to get Qara in your party outside the Sunken Flagon.
There are four guardposts you need to check out, all of which are marked on your map.
Northeastern Post: These guys admit to taking bribes. If you select "I’m going to have to report you/You turn the gold into Cormick," though, you can force them to hand the bribe money over to Cormick, which effectively funnels the bribes from Moire to the Watch. No muss, no fuss.
Near Sand’s Shop: The sergeant here is an inveterate bribe taker, and will encourage you down the same path. Don’t speak to him until you’ve cleaned out the area of gangsters; otherwise you may wind up having to fight the guards as well as the thugs. You can simply file away his advice and walk away, though; he’ll only fight you if you threaten to report him.
Near Hagan’s Shop: These guys are being harrassed by a Luskan gang. There’s no need to really antagonize the guard here, even if he is on the verge of accepting the bribe. If you rebuke him and the Luskan gang harshly enough, the gang will attack, letting you kill all of them while reinforcing the tenets of good policework for the guard.
Southernmost Exit: This fellow says he has suspicions on who the traitors are, but definitely isn’t taking bribes and is reluctant to do anything too drastic. Check in with him and move on.
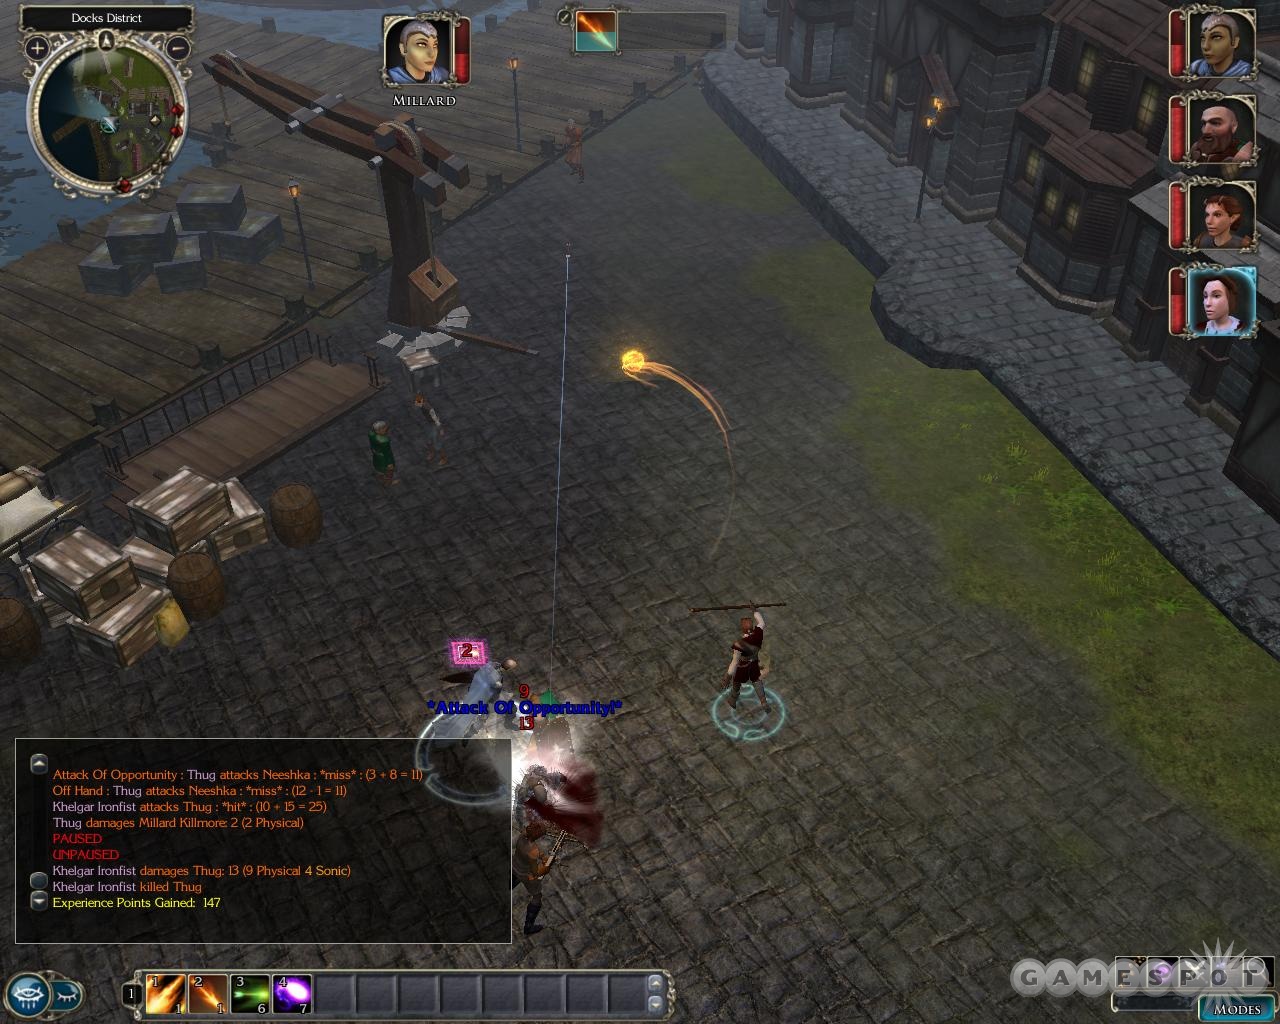
There are also a couple of incidences of gang activity.
Northeastern Gang: These guys are near the red marker for the Back Alley on your map. They’re surrounding a cart. If you ask to inspect it, they’ll let you, and you’ll find that it contains illegal goods. Play the conversation as you like, but threatening to arrest them is a lawful action. It’s worth it, though, as after you defeat them you can search the cart (chaotic shift) and loot it; it’s got a lot of crap on it.
Reylene: Reylene is a shopkeeper in the southeastern corner of the map. While there’s no gang activity here, you can attempt to press her for protection money if you like. Nothing happens if you do, but it’s an amusing conversation nonetheless.
Burglars: Directly south of Moire’s house (in the northwestern corner of the city), in a small alley, you’ll stumble across a pair of burglars. Kill them or convince them to join with Moire.
Robbers: If you check near where Caleb was previously standing, you’ll find some robbers. You’re too late to save their victim, but you can kill them off if you like.
Roaming Gangs: In the center of the city, as well as in the northwestern corner, there are some roaming bands of gangsters. They’re automatically hostile to you, so track them down and kill them. You can get some good experience for this.
Sub-Quest: Speak With Brelaina
When you return to the Watch post, you’ll find that it’s burning to the ground, apparently having been set alight by Moire’s gang. The guard outside is livid, but levelheaded enough to point you towards the Merchant District, where Marshal Cormick is speaking to one of the mucky-mucks in charge of the Watch. Time to crack some skulls...for real.
If you head to the Merchant district and go into the City Watch building there, you’ll be able to speak with Captain Brelaina. She’s a weak-willed leader of the Watch, and insinuates that you and Cormick may have prodded Moire into destroying the Watch headquarters. After a long conversation, though, she’ll task you with heading to the Back Alley and stopping the shipment of weapons that are headed towards one of Moire’s warehouses.
Sub-Quest: Weapon Smugglers
Head out back to the Docks district and go towards the point marked "Back Alley." On the way there, you’ll encounter Wolf, who’s apparently the leader of a gang of children. You can help him out of his jam by lying for him, if you wish; you’ll encounter him again later on.
As soon as you enter the Back Alley, you’ll come across some Watchmen accepting a bribe. You can speechcraft your way through them, or simply kill them all to move on. You’ll eventually come to a much larger group of Watchmen and thugs, standing together in harmony. There’s probably too many of them to take on directly, so accept Qara’s offer to set a nearby building on fire to distract the Watchmen away from their post. (Neeshka may be able to serve the same purpose if you don’t have Qara along.) That’ll leave a much smaller set of thugs for you to deal with. If you want, you can track down the Watchmen afterwards and fireball the lot of them.
Soon afterwards you’ll come to a small barricade where a gang leader is setting up shop. These guys are from one of the other gangs in the area, and are intent on stopping the shipment to Moire. If you try to Diplomacy them, they’ll walk off and you can get a good alignment shift. If you tell them to stay at their post, you can get a chaotic good shift. Up to you.

Alley Fight
At the very end of the alleyway, you’ll come across another large contingent of corrupt Watchmen and thugs. You’re going to have to kill all of them if you want to get the wagon back to the Watch. The best thing to do here is to immediately pause as they go hostile to you have and have Qara bust out a Fireball spell in the path of the soldiers that are coming your way. Don’t cast it on them, cast it in the middle ground between you and them, and set your melee fighters to run backwards a bit (unless you’re playing on normal difficulty, in which case they can just run in, since they won’t get hurt by the flames). When the Fireball goes off, it’ll take out easily two-thirds of the soldiers and hopefully damage the thugs a bit. (Most of them have Improved Evasion, so they may wind up taking no damage at all.)
If you can defend yourself well (if you had Qara learn Stoneskin when she leveled up, that’s an ideal spell to cast on all your party members), then you shouldn’t have too many problems mopping up the rest of the bunch.
Neeshka will want you to sell off the weapons to a fence to get some cash before you report back to Brelaina. You can do so, if you wish. Checking the cart for weapons will only net you a rapier, so that’s not really worthwhile.
Sub-Quest: The Warehouse
After clicking on the cart, you’ll be warped back to Brelaina. She wants you to head back to the warehouse and deal with the people who were the weapons’ intended recipients, and attempt to track down any documents that might lead you further up the gang’s food chain. If you head to the northwestern corner of the Merchant district, you’ll find an entrance to the warehouse.
Your only real goal here is to find the documents, but there’s plenty of people to fight and plenty of loot to grab while you’re in the area. Check every crate you see. Some of them will be full of short swords or longbows, or whatever, but if you scroll down the list, there’s usually at least one item that’s either magical or rare somehow.
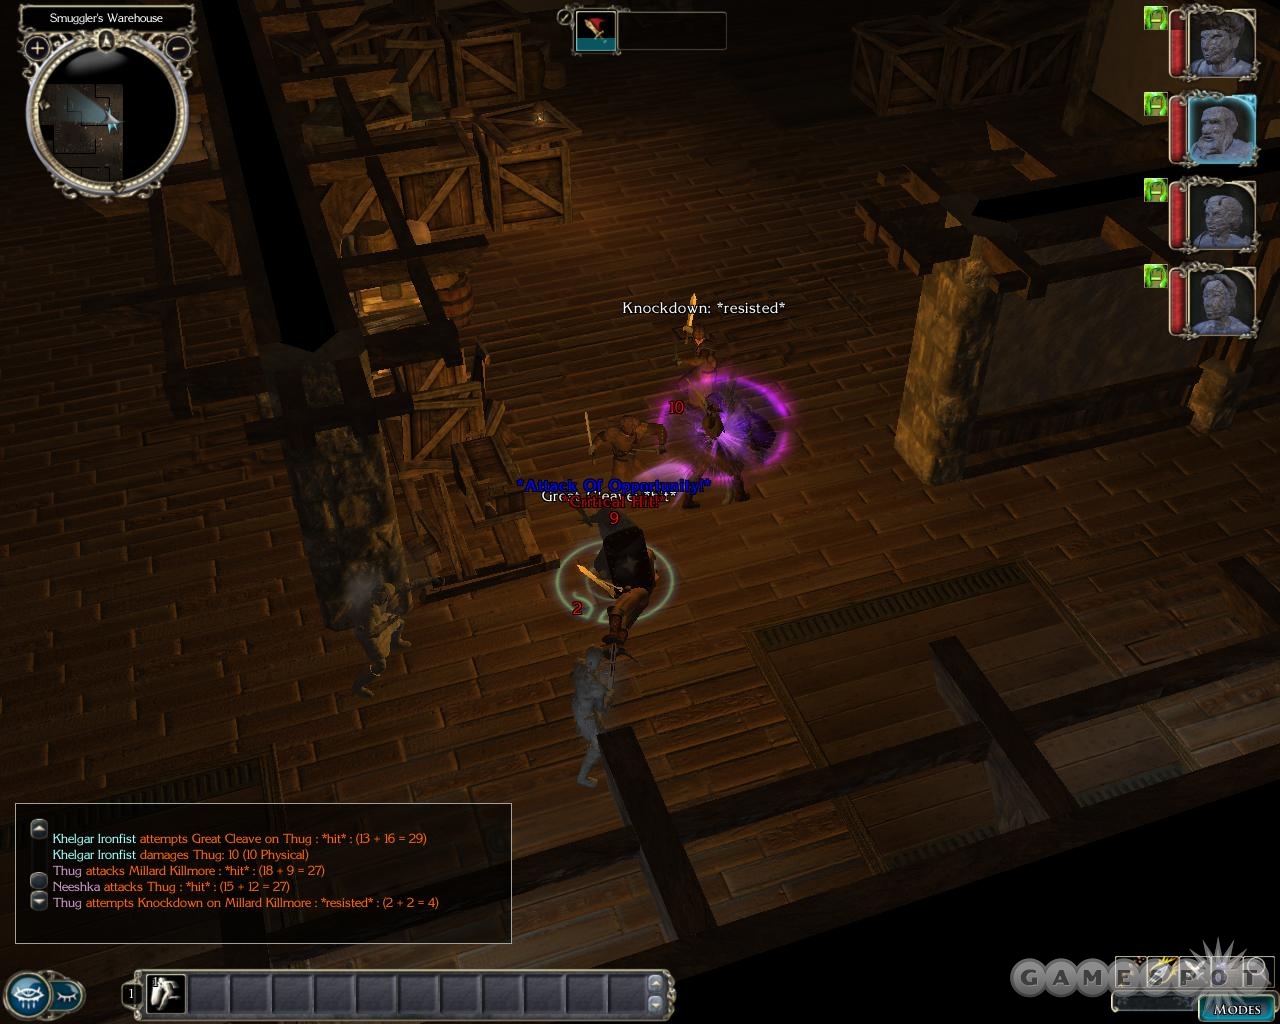
When you reach the documents, a named NPC will be standing behind some crates, chucking grenades at your party. You can bash through the barricades fairly quickly, or you can just blow all of them with a fireball. The documents on the table are contact lists, in code, to bring back to Breliana. You can let Neeshka look around, as well; she’ll grab a little something for herself, but it’ll be tough to talk her into telling you what she found unless you have some high speechcraft scores. She’ll also hand over an excellent magical greatsword, though.
You’ll come across Sir Darmon as you leave the Warehouse. He’s a pompous sort, from the imperial guard, and has been sent to clean out the warehouse. Unfortunately for him, you’ve already got things well in hand. Deal with him and head back to Brelaina. You may encounter another kid’s gang run-in, so act according to your gameplay styles.
Sub-Quest: Protect The Watch’s Informant
You’re now told to book it for the house of the Watch’s informant in Moire’s gang, a man named Fihelis. He has a stately manor elsewhere in the Market district, so go there and protect him.
Unfortunately for you, the manor is overrun by shadowy thugs when you arrive. These fellows are master Sneakers, so they’ll attempt to hug the shadows as they creep up on you for massive Sneak Attacks. There’s little you can do about this, it seems, although staying in Search mode may help a bit, but they’re really, really good about hiding. Try to Stoneskin everyone to protect them from the sneak attacks, and mob the enemies when they finally reveal themselves. Qara can Fireball enemies fairly easily, since they walk so slowly as they approach you.

Before heading upstairs to the second floor, loot the house thoroughly, being careful of traps, especially in the vault area (marked on your map). When you’re ready to get your hands dirty, proceed up to the second floor. After checking the area thoroughly, you’ll come across a closed door that leads into Fihelis’s main dining hall, where Moire and some guards are threatening him with deadly force. You have the opportunity to buff up before heading inside, so get some Stoneskin on everyone, cast Bull’s Strength; the works. When you fight Moire, her men will come straight at you. Moire herself will take a lot of damage, so it’s best to chop down her flunkies first before dropping all your bombs on her directly. She’ll drop off a Moonstone Mask and a Rapier +3, both of which are great weapons for Neeshka.
Speak to Fihelis and question him if you wish, then return to Brelaina to finish off this portion of the quest. This is where the two branches merge back together; both Axle and Brelaina will send you off to find the missing Waterdeep emissary at this point. This is a great time to start tracking down some of the sub-quests in Neverwinter, such as the character missions.
The Blacklake District: Mafia Route
If you don’t mind taking a bit of a more evil route to getting into the Blacklake, you can talk to Caleb, who’ll be marked on your map when you leave the Sunken Flagon. This route is better suited for characters who don’t mind being evil; indeed, some of the options here, including the first quest you’re given, will come with mandatory evil alignment shifts attached.
Sub-Quest: Extortion
Caleb’s first task for you is to head over to a shopkeeper named Hagen who’s refusing to pay the protection fee that Caleb and his bosses are asking. Head on over to his shop near the waterfront to see what all the fuss is about.
Inside the shop, you’ll meet Reesa, Hagen’s daughter, who’ll attempt to dissuade you from harrassing her father, but harrass you must. It’s easy enough to get him to pay up if you don’t mind being chaotic and evil; just start breaking things! Intimate that things look fragile, then start dropping things on the floor, and Caleb will cave in soon enough. If you want to avoid alignment shifts, then Diplomacy may work if you have enough ranks in it. Those are your only options; you can’t choose to beat Hagen down or anything like that.
With Hagen’s payment in hand, return to Caleb. Go ahead and ask for some of the money; he won’t hold it against you. Unfortunately, Hagen will be hot on your heels, with the City Watch with him. He’ll obviously accuse you of the crime (justly, we might add), and demand that you be arrested. You can bribe your way out of a confrontation, if you wish, or you can just tell them to blow off and they’ll attack. Either way, Caleb will exit, stage left, and leave you with instructions to find Moire, his boss.
Sub-Quest: Sweep Through The Docks
Head north to Moire’s house and speak to her to get your next assignment. She wants you to make a sweep of the docks, investigating all of the Watch guard posts. Bribe the guards to help Moire out, or kill them if they’re too stubborn to listen to reason. While you’re at it, check for activity from other gangs and convince them to join up, or pay the price.
There are four guardposts you need to check out, all of which are marked on your map.
Northeastern Post: If you press hard enough, this guy will accept a bribe in exchange for staying out of your way.
Near Sand’s Shop: Again, either bribe them or kill them.
Near Hagan’s Shop: These guys are being harrassed by a Luskan gang. If you tread lightly, you can get the guard to fight with you, and keep them on your side; otherwise, you may have a bit of a tough fight in front of you, with both the guard and the other gang coming your way.
Southernmost Exit: This guy’s really worried about what he feels Moire represents, but he’ll still take a bribe if you convince him that no one will get hurt.
There are also a couple of incidences of gang activity.
Northeastern Gang: These guys are near the red marker for the Back Alley on your map. They’re surrounding a cart. If you ask to inspect it, they’ll probably let you; if you bully them enough, they’ll eventually start fighting. It’s well worth your effort to beat them, as the cart contains stolen goods, including 1,000 GP and a Wand of Stinking Cloud that’ll sell for a good price.
Reylene: Reylene is a shopkeeper in the southeastern corner of the map. While there’s no gang activity here, you can attempt to press her for protection money if you like. Nothing happens if you do, but it’s an amusing conversation nonetheless.
Burglars: Directly south of Moire’s house, in a small alley, you’ll stumble across a pair of burglars. Kill them or convince them to join with Moire.
Roaming Gangs: In the center of the city, as well as in the northwestern corner, there are some roaming bands of gangsters. They’re automatically hostile to you, so track them down and kill them. You can get some good experience for this.
Sub-Quest: Destroy The City Watch Post

Damn, Moire doesn’t mess around. When you’re done with your sweep, return to her for a new assignment. She wants you to make sure that everyone knows that you’re for realz, dogg, and by that, she means to have you burn down the City Watch post in the center of the Docks. Damn. All she gives you is a torch; she expects you to figure the rest out by yourself.
This one isn’t really as bad as it seems. There are three combustible piles outside the post; two piles of crates and one wagon. If you have the torch equipped in your shield hand, you’ll be able to interact with them and set them alight. The guards will try to stop you, obviously, but guards are made to be killed, amiright?
Sub-Quest: Speak With Axle Devrie
Well, one more run-around. It appears that Moire doesn’t actually run things; she, too, has a boss. You’ll need to speak to Axle Devrie in order to get your release into Blacklake. Head off to the Market District to find his home.
Sub-Quest: Smuggling Weapons For Moire
A shipment of weapons for Moire’s gang is coming in at the docks, and you need to ensure that neither the Watch nor the Luskans get a hold of them before they reach his warehouse. He leaves it to you and Moire to plan the operation. Feel free to start sowing the seeds of discord between the two in your talk with Moire. Unfortunately for you, the Watch is planning on stepping up its activities against the gang just as you get ready to head to the Back Alley to oversee the shipment. More troubles come up when you re-enter the Docks; it seems that the Shadow Priests are intent on getting into Blacklake, as well. Sounds like it’s going to get sloppy!
Feel free to intervene on Wolf’s behalf when you encounter him as you walk to the Back Alley, if you wish. You’ll see him again later on.
Back Alley
Speak to the Smuggling Contact before heading into the Back Alley, and be sure to have some decent weapons for everyone involved. Qara, especially, should be moved over to a ranged weapon if you haven’t done so already.
The gist of the matter here is that you can either fight the thugs that are standing in your cart’s path, or you can pay or fight the Watch to let you through unmolested, or a combination of both. Don’t worry about the cart itself; it’ll automatically follow you through the alleyway as you proceed, and can’t be attacked directly, or so it would appear.

The first little set of Watchmen can be avoided by ducking into the alley on the left side of the street, but the next group is altogether bigger; perhaps ten soldiers, all told. That’s a lot! You can attempt to take them head-on, if you wish, but if you have Qara in your party (or perhaps Neeshka), you can divert their attention by creating a fire down the street. Head into the alleyway off the main road to proceed. Be sure to rest after each fight here, as the thugs can be difficult to bring down.
Near the end of the alleyway, you’ll come to a group of thugs that aren’t immediately hostile to you. Unfortunately, their posturing will cost them their lives: cast all your defensive buffs and summon creature spells that you have available before walking towards them. When they attack, they’ll bring in reinforcements from behind you, so if you have Neeshka and Qara in your party, they’ll probably be quickly killed. Even so, a properly buffed Khelgar can probably take most of these fellows down.
Defeating The Raid
When you reach the Warehouse Supervisor, speak to him to end your little excursion. You’ll net a full 2,000 GP for your efforts. Unfortunately, the warehouse will immediately be raided by the Watch. You’ll have to defend the shipment from them in order to ensure that all that effort didn’t go to waste!
This is where things are going to get very, very tough. The City Watch will be attacking in force, and attempting to destroy each of the weapons caches that the Supervisor has set up. There are four main caches spread throughout the building, with plenty of smaller chests and barrels full of items for the taking. Keep in mind that although some of them seem to be full of short swords or longbows or what have you, if you scroll down you’ll often find a magical weapon in the manifest.
You can rest inside the warehouse, so long as you’re a decent distance away from your foes. They’ll attack in groups, most of which will come with a cleric, which can cause problems. If you can, try to plug them into doors with Khelgar or your main character preventing them from reaching the ranged characters behind you. What’s problematic here is that the Watch will often just appear out of nowhere; this seems to happen after you rest somewhat often. With that said, you’re not on a timer or anything, so you can proceed at your own pace.
Axle, Again
Return to Axle’s house when you’re done in the warehouse. He’ll give you 750 gold, and tell you to head to Old Owl Well, where he suspects an emissary from Waterdeep has been kidnapped, or killed, by orcs. If you can rescue the emissary, then do so; if not, investigate. Sounds simple enough.
The Old Owl Well
Well, surprise, surprise. You’ll be able to pick up a new member for your party here. Grobnar Gnomehands is a loquacious gnome bard that’ll automatically join up with you when you enter the area. If you want to gain his services in the future, you apparently have to add him to your party right this moment. Otherwise, he won’t be waiting for you when you head back to the Sunken Flagon. Although you might turn your nose up at the thought of bringing a Bard along on your travels, he will be pretty handy at crafting some items. Just go ahead and take him into your party, then head to the Old Owl Well from the map transition point. If you don’t want to bring him into battle, head back to the Sunken Flagon and switch him out again.
Old Owl Well - Greycloak Camp
Feel free to take a look around here, if you wish. Not much to see except for Simmy, the merchant, and Callum, the camp commander. Speaking to Callum will cause a group of orcs to descend upon the camp. They shouldn’t be difficult to defeat, and when you do, Callum will give you a new task: find the lair of Yaisog Bonegnasher, a local orc leader, and press him for answers about what happened to the Emissary.
Bonegnasher Lair
Head to the Bonegnasher Lair section of the map to propel the story along. You’ll be fighting some trolls, so be sure to bring along a spellcaster capable of flinging around fire spells. Acid works on them, as well. You can probably buy the appropriate arrows or bolts at a vendor somewhere, perhaps even at Simmy, but spells are the easiest way to go.

Make your way past the orcs and trolls to the cave opening in the northeastern corner of the map. There are plenty of trolls in here, so be prepared for them. When you reach the end of the cave, you’ll come across a box of Blastglobes. You need to take the entire unstable box with you; if you noticed in the outside area here, there’s a rockslide that’s currently impassable. The Blastglobes, when placed in the rockslide and detonated, will cause the whole mess to come crashing down. Bring them back and walk towards the landslide to do exactly that. This is a triggered action; no need to do anything special.
After fighting your way past the orcs beyond the rockslide, you’ll come to the Orcish cave. Note the appearance of Guyven of the Road by the crate on the slope near the cave; if you talk to him, he’ll tell you a bit about the Ironfist Stronghold and its history. It’s interesting, maybe, but not critical knowledge. At the cave entrance, you may be able to talk your way past the guards and head straight to Yaisog, but more likely than not you’ll have to kill them to move on.
Yaomig’s Cave
Get your hands dirty first off by heading northwest and making a circuit through the barracks in the cave. Plenty of orcs, plenty of experience, not so much on the loot side of things. You’ll eventually circle back around to the eastern passage, where you can rescue a group of miners from the well by picking the lock on the door.
Move into Yaomig’s little area nearby to speak to him. He’ll offer up more orcs as slaughter, so kill them, navigate the traps in his room and loot it, then head into the northern passage to take on Yaomig himself. He’s a tough little bastard, so save your game before approaching him. If you have someone capable of casting it, then a Protection from Energy spell on your main fighters would be a wise addition to the cause. Yaomig’s axe causes fire damage with each swing, so a Protection from Energy spell will likely negate that.
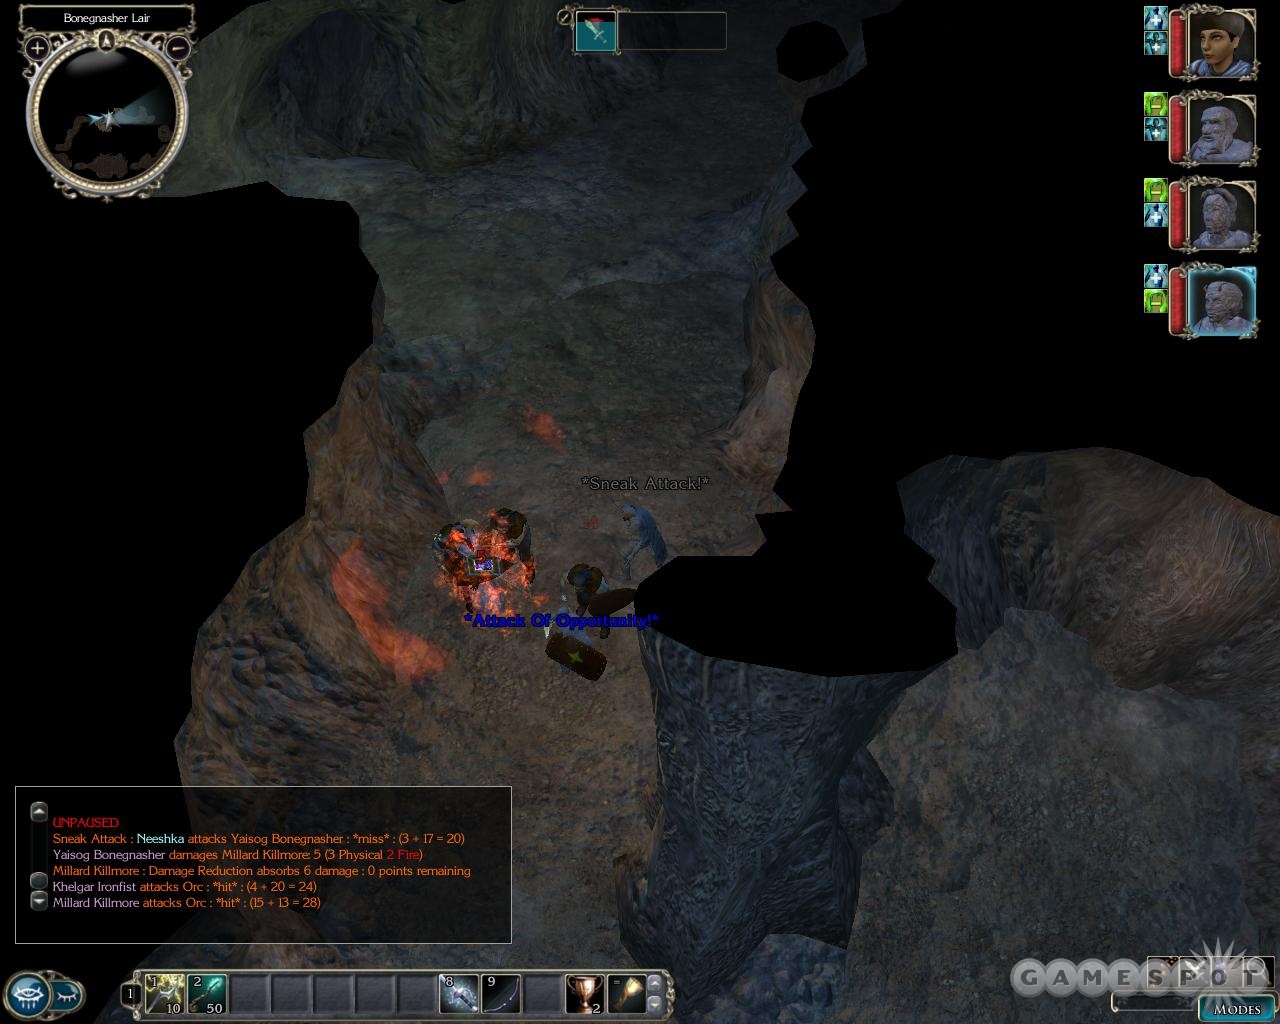
Regardless, when you enter combat with Yaomig, have everyone start wailing on him, ignoring his friends. When the fight’s over, he’ll reveal that his clan is indeed holding the emissary, and begs you not to kill him, supposedly so he can continue to rule over the half-dozen orcs you haven’t killed. Offing him is a minorly evil act, but doing so will let you pick up some Mithril Chainmail (which acts as light armor instead of medium armor) and a Fiery Stoneaxe +1, which is basically a two-handed axe that deals an extra two fire damage on each successful hit. Leaving him alive nets you the satisfaction of a job well done and little else, but you will get the chance to kill him again later.
When you find the emissary, he’ll insist on scampering off to Neverwinter on his own. Head out through the doorway nearby and get back to Old Owl Well.
Mountain Pass
Before you actually can get to Old Owl Well, you’ll encounter a band of orcs that attempt to ambush you. Soon enough, though, Katriona and Casavir, two holy warriors, will intervene on your behalf and route the orcs. After a conversation, Casavir will all but insist on leading you to the Bonegouger Lair, where Logram is holed up. You can boot out Khelgar in exchange for the paladin.
The Canyon
If you head from here back to Neverwinter, you’ll come across a canyon with another orc ambush. This time, though, they’re allied with...a human? He doesn’t identify himself, but instead insists on simply killing the emissary to Neverwinter. Presumably he hasn’t done so - yet. Kill the group and loot their bodies for some nice items.
Now, at this point, you can travel around to Old Owl Well or Neverwinter all you like, but the emissary is nowhere to be found. Presumably Logram got him as he attempted to escape the mountains. Travel to the Eyegouger Clan marker on your map with Casavir in your party to finish off the orcs once and for all. Note that you’re going to be finding a fair amount of loot in these caves; if you don’t have some Lesser Magic Bags, you may want to check the merchants in Neverwinter and buy a couple, or simply make a run through the first level of the cave before leaving it, selling to a merchant, and returning to finish it off.
Eyegouger Clan
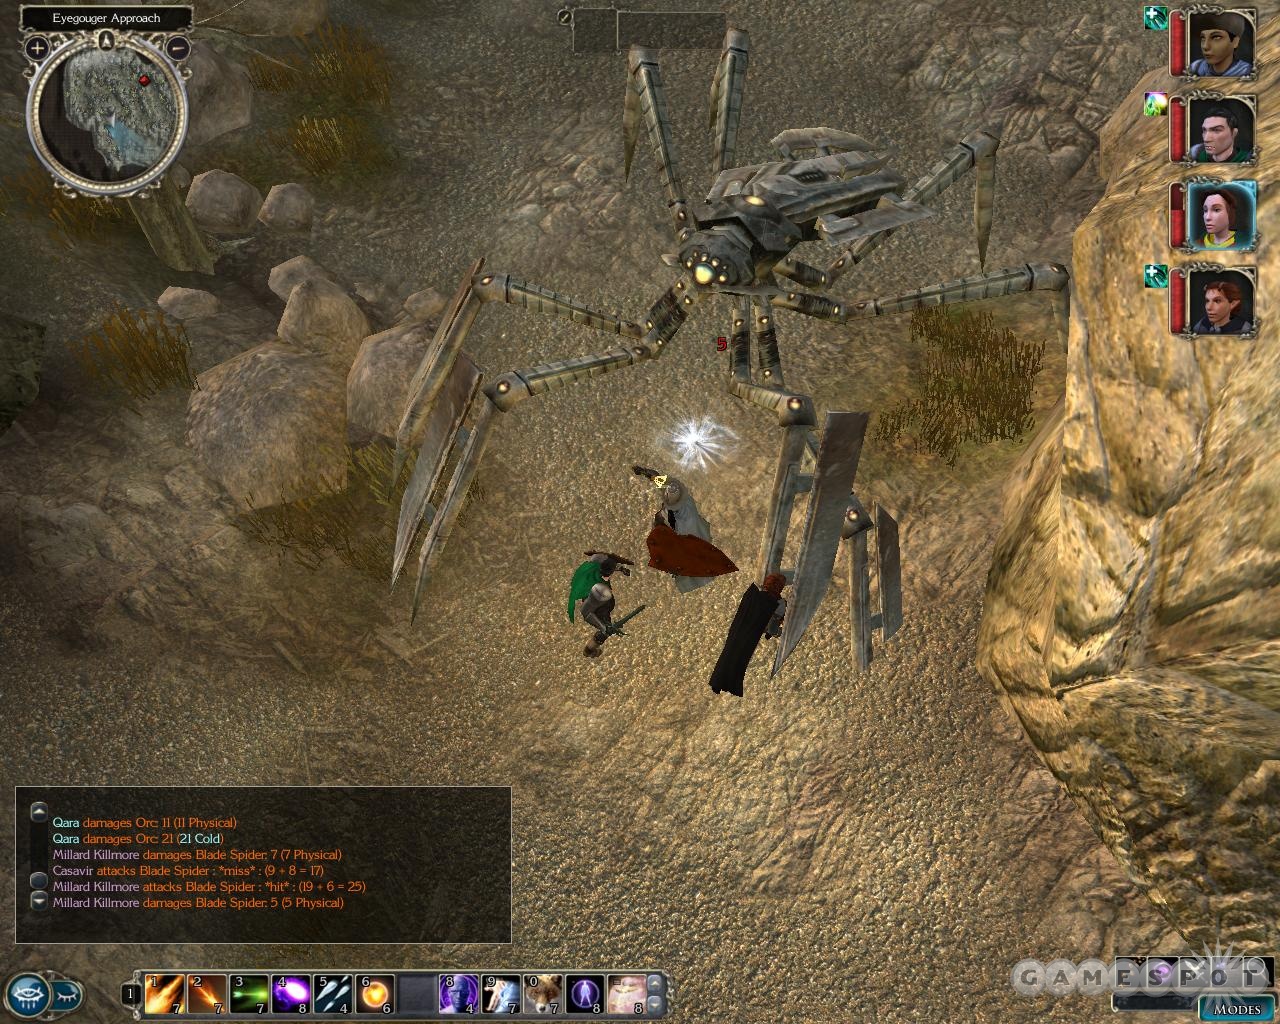
The Eyegouger Clan area is another large set of canyon corridors. When you come across barricades, stay back and fling a fireball at the orcs behind them; they’ll take severe damage, the barricades will be destroyed, and you can charge ahead and quickly finish them off. After taking down the huge blade spider outside the entrance to the cave here, rest up and cast any buffing spells you can before heading inside.
Eyegouger Lair, Level One
Note that this is only the first level of the lair here; you’ve got a bit of a trek in front of you, apparently. There’s plenty to see and kill here, including a room of humans in the northwestern corner that are apparently torturers in the employ of one mysterious "BG", according to their journal. Their journal also notes that they’ve captured the Emissary and have been working him over. Elsewhere in the level is a pack of winter wolves (we suspect the Elanee can interact with these guys somehow and perhaps turn them to your side, but she wasn’t in our party when we reached them). Also, to the northwest, you’ll come across a room full of wounded orcs. Putting them out of their misery by attacking them without provocation (they’re neutral to you) will net you some huge chaotic evil swings, to the tune of six points each. Yow! You do get a handaxe +2 if you kill them, though.
Eyegouger Lair, Level Two
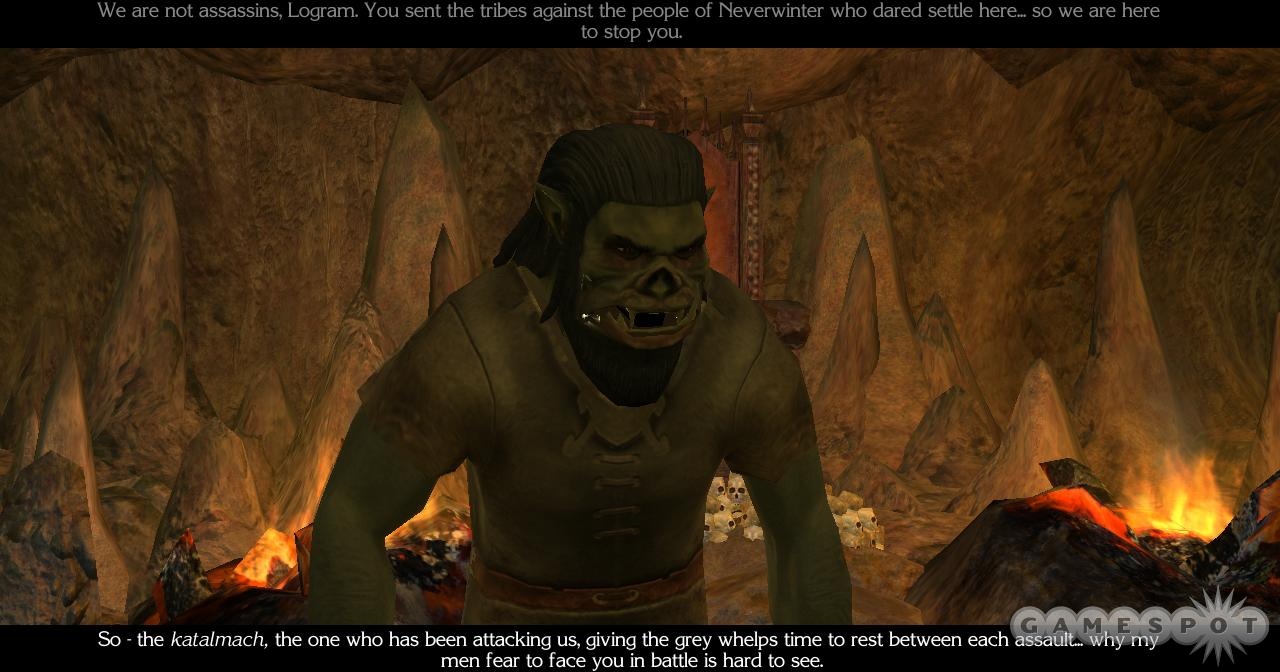
More enemies to kill here. Eventually you’ll come across an interrogator, who’s discussing the problems he’s been having bending the emissary to the will of the Luskans. That emissary’s one tough SOB! You should probably get to rescuing him before anything too bad happens to him.
Speaking of which, Logram awaits you in the large room on the north end of this map. He’s not hostile at first glance, so take your time to buff yourself thoroughly before entering the fight. As soon as he attacks, plop down a couple of area-of-effect spells on his troops, then start ganging up on them and finishing them off. The loot here is fairly good, so be sure to get it all and stash it away in a magic bag for eventual sale.
Eyegouger Lair, Level Three
The conversation at the beginning of this level can either be really short or long, and lucrative in terms of influence gains. For the latter, select "These bodies deserve funeral rites" and "no one deserves to be piled here like this" to get a good shift in influence with Casamir. The last choice will depend on your teammates. If Neeshka’s coming along, then "there might be something valuable beyond" will lightly influence her.
Later on in the level, you’ll come across Wynn, one of the students at Qara’s magical academy, who’s writhing on the floor in pain. Soon enough, a shadow priest will come around the corner and insist on attacking you, with two of Qara’s other classmates in his necromantic thrall.
Shadow Priest Fight
This fight can be difficult, no doubt, since the magical attacks these guys will be spitting out are going to punch right through your Stoneskins and Barkskins or whatever else you normally use to protect yourself in combat. The shadow priest will also set himself up as barricade in the hallway, preventing you from getting to the two lesser spellcasters until you take him down. They’ll also summon in a couple of wolves to protect them.
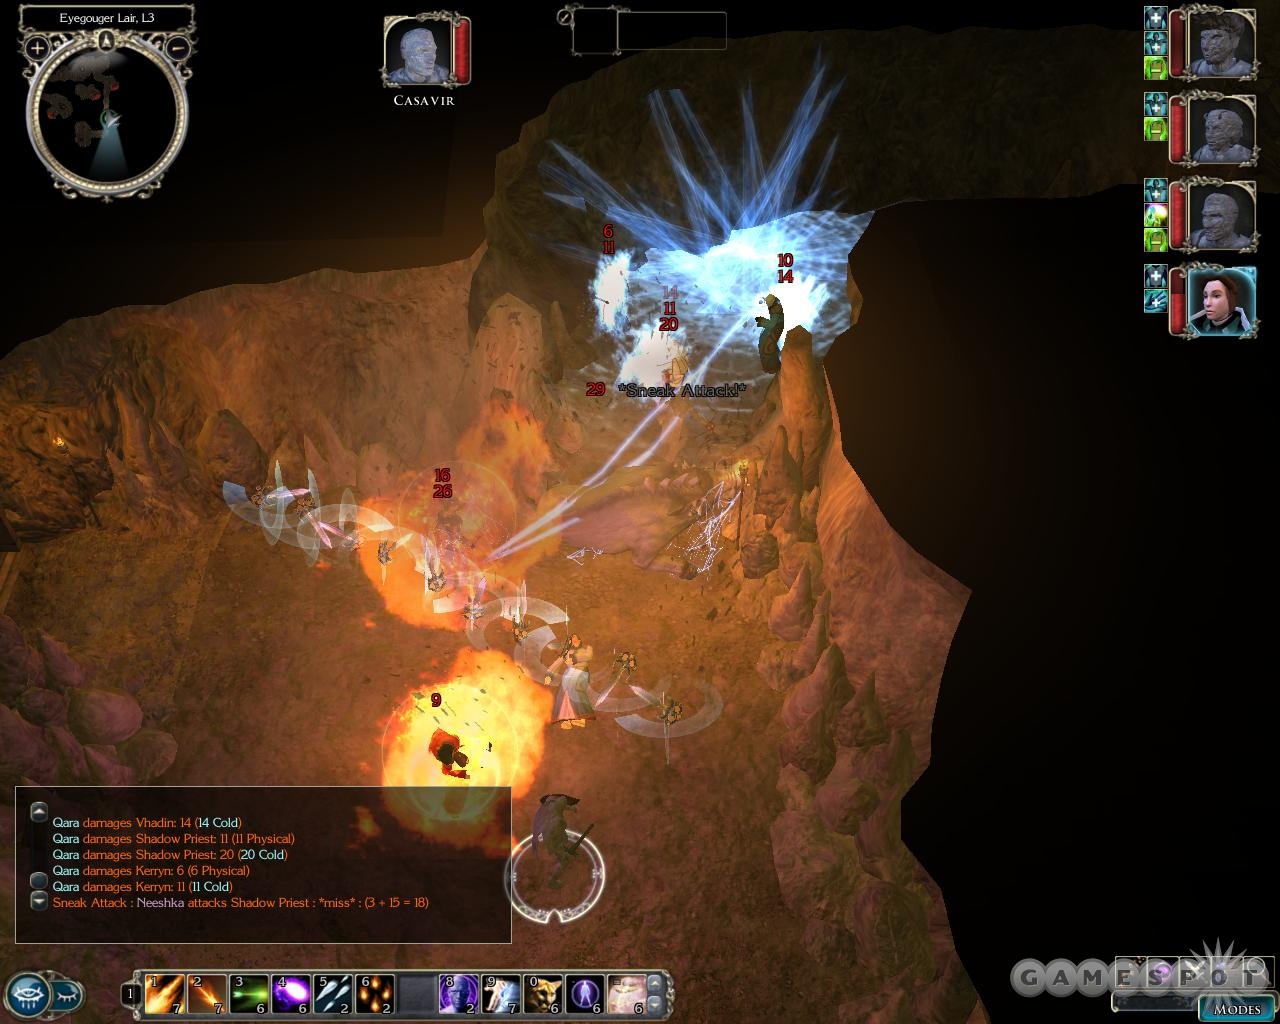
If you can, buff yourself with with Protection from Energy spells and Haste, and whatever offensive buffs you can cast. When you approach Wynn, your main character and Qara, if she’s around, will warp ahead of your teammates for the conversation, so the other two will probably lag behind a bit. Haste will help them catch up somewhat. If your main character or Qara can cast a high-level Summon Creature spell, then as soon as you regain control of your party, run up to the shadow priest and cast it behind him, in between the two student wizards. That will distract them a bit and hopefully make them burn some spells on the creature instead of on you. (Alternately, you can open up with Qara casting her most powerful area-of-effect spell, but they’ll likely resist much of the damage.)
Apart from that, you can try to silence the mages by using a Silence spell or a Thunderstone grenade on the lot of them. Regardless, put your strongest fighters right next to the shadow priest, and they’ll get attacks of opportunity on most of his spellcastings, so he shouldn’t take overly long to go down. When he does, the two lesser spellcasters will quickly follow suit, being more dangerous on offense than on defense.
Rescuing the Emissary
The emissary is in a room near where Wynn is lying about. (You apparently can’t do anything to help Wynn, by the way.) Unlock the door, speak to him, and he’ll fly off to the Old Owl Well; apparently the first emissary you spoke to was merely a decoy. Check the rest of the area for some more items and goodies, then head out through the stone wall in the necromancer’s workshop to reach a secret passage back to the world map.
Back To The Old Owl Well
When you reach the Old Owl Well, speak to Callum to ensure that the emissary made it back safe and sound. You can earn more influence with Casavir here by selecting "Whatever trouble Casavir is in..." and "You’ll have us to protect you as well." Callum will reward you with a huge two-handed axe that’s well-suited for taking out orcs, if you can equip it. It’s an especially good weapon to give to Khelgar, and since it does an extra 1d6 damage to evil enemies, well...let’s just say that that’s going to work on pretty much every enemy you see in the game, save for stuff like elementals and animals. It’s not uncommon for Khelgar to bust out criticals for over 60 damage with this thing.
Quest: The Sea Ghost
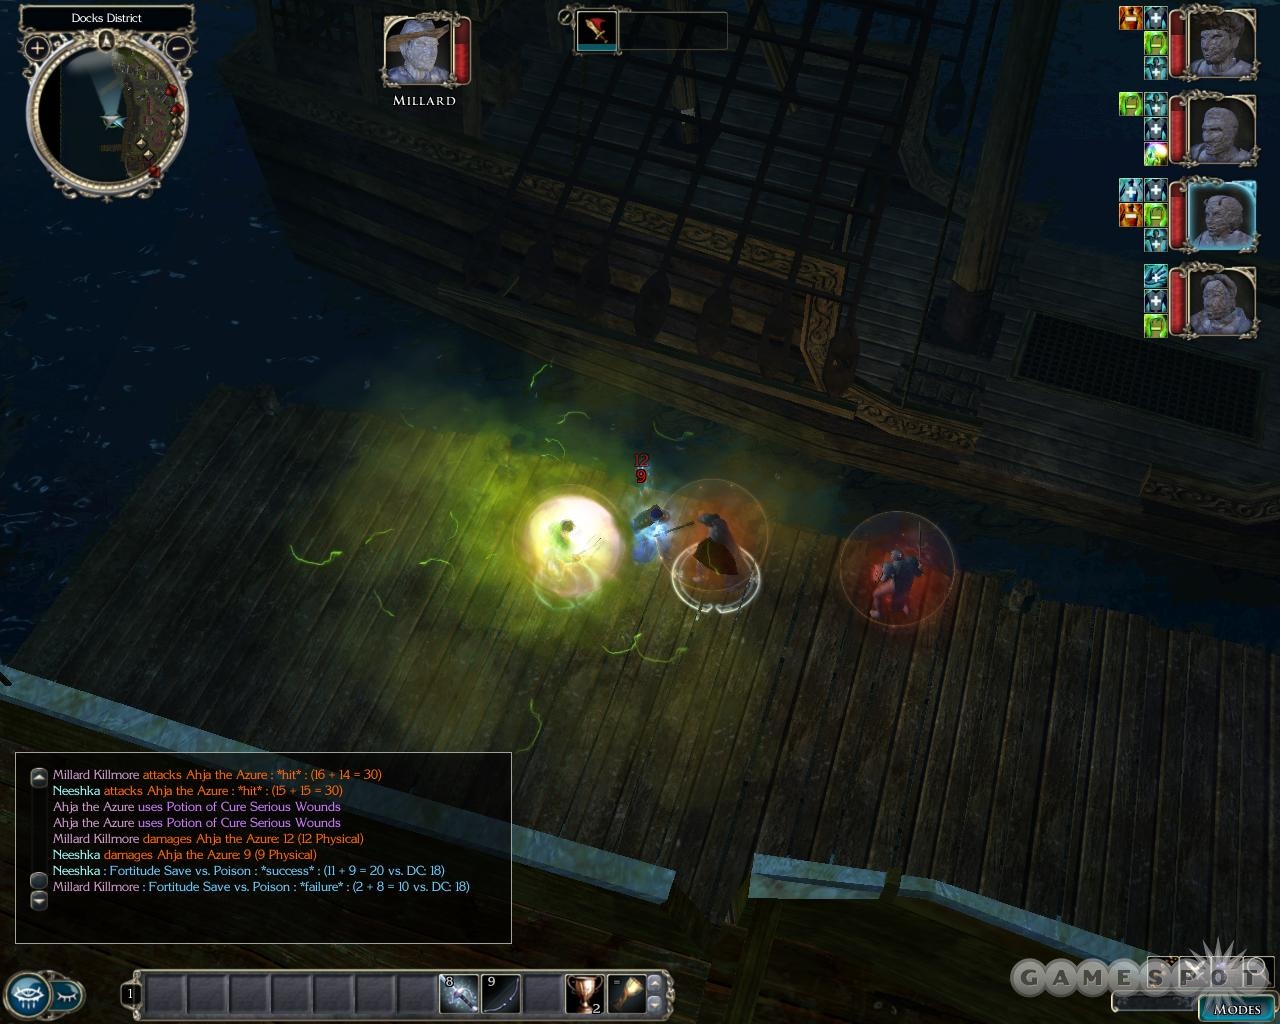
If you return to your handler in Neverwinter (either Axle or Brelaina), they should both wind up giving you a quest revolving around the appearance of more Luskan spies. Apparently one of them is attempting to dock at the Neverwinter harbor aboard a ship called the Sea Ghost. Brelaina wants you to travel to the ship and kill the spy; presumably Axle has something similar in mind.
Anyway, when you hit the docks, you’ll see one huge ship and many Luskan Minions standing next to it. You’ll need to defeat the first wave before your target, Ahja the Azure, will show his face. He’ll stand at the far end of the dock and spawn in a bunch more minions, but even though he’ll be hostile to you, he likely will be so far away that you’ll be able to take the minions down by themselves, then turn your attention to Ahja and fight him solo. He’s a fairly difficult wizard, so be sure to haste yourself and surround him to get your attacks of opportunity. He’ll stop in the middle of the fight to reveal that he’s not actually Luskan - he fights for Black Garius. He’ll attempt to potion himself back up to fighting strength, but if you’re taking him on solo you should be able to really wail on him and kill him.
Quest: The Only Thing Worse Than Luskans...
Time to clean out a nest of githyanki. Find the house that’s marked in the Market district and head inside. There’s nothing really complicated here: there are plenty of bladelings and numerous githyanki that will appear from the shadows as you scout through the house. When you reach the summoning portal in the northernmost room, though, you’ll be surprised at the appearance of a blade golem. Or maybe not so surprised, since the last cutscene you saw with Garius and henchmen featured it. It will attack the githyanki, then turn on you, but with a four-on-one advantage you shouldn’t have too much trouble beating it back. It’ll deal good damage to you, but doesn’t feature the annoying weapon resistances of other golems, so at the very least you should be able to damage it provided you have magical weaponry. It is immune to sneak attacks and will likely resist many of the spells you cast at it, so rely on physical attacks to take it down.
When you return to your handler, you’ll discover that they have finally arranged for you to enter Blacklake District. Time to get back on the hunt for the origin of the shards that you carry.
Quest: Aldanon The Sage
When you make your way into Blacklake district, you’ll likely be escorted directly to Aldernon’s house. He’s a somewhat distracted old wizard, but a nice enough fellow if you treat him with respect. After a long, winding conversation, he’ll tell you all about what he suspects the shard are - fragments of a broken silver sword of the githyanki. He’ll also tell you of a now-deceased court wizard, Ammon Jerro, who reportedly did much research into the subject matter. He had a private retreat somewhere in Faerun, but the only way to find out precisely where it was is to visit the Neverwinter Archives.
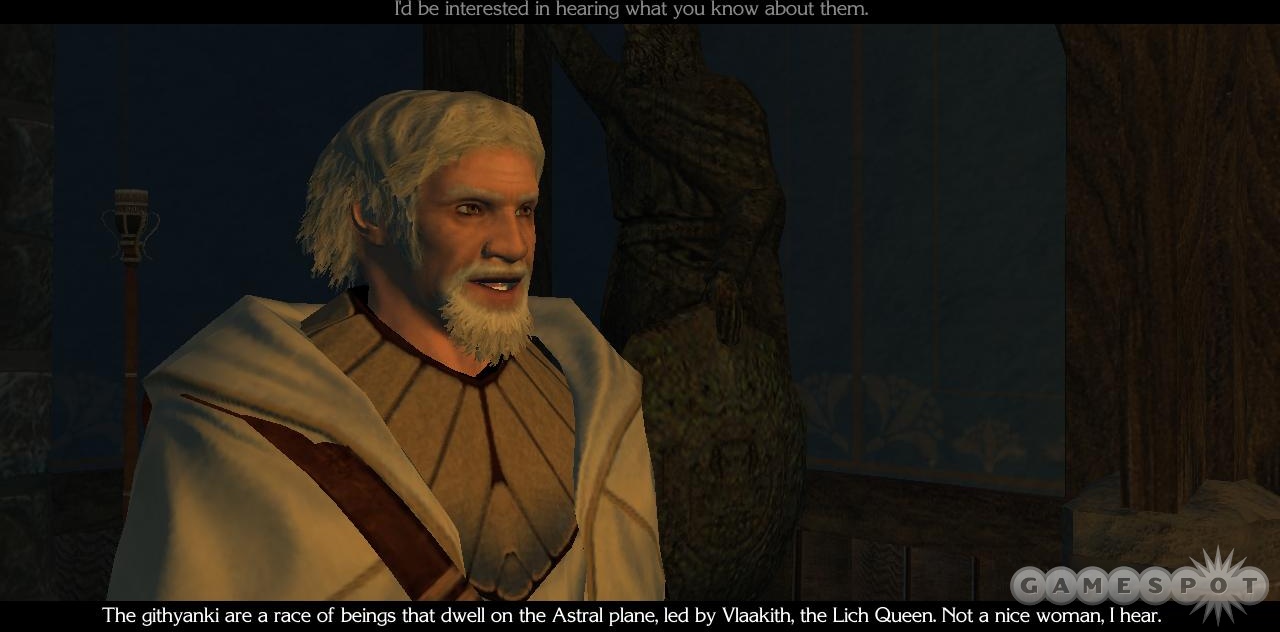
After you’re done with Aldernon, talk to the guard outside and choose your best speechcraft skill to convince him to take you to the Archives; odds are you’ll succeed. Unfortunately, when you enter the room, you’ll come across githyanki in the antechambers! Kill them if you like, then head north to reach the Caretaker. After a bit of banter, he’ll agree to let you into the vault, but only if you promise to keep secret anything that might harm Neverwinter. Lying here will gain you chaotic points, as well as an influence gain with Neeshka, while swearing to secrecy will likely result in a Lawful gain, and probably an influence gain with Casamir if he’s around. He’ll let you in on a couple of secrets: in order to enter the main vault, you’ll need to solve a puzzle, which in turn is only visible if you wear one of the veils that the caretakers are sworn to keep over their faces. You can kill the guy you’re talking to and take his, or you can find one on one of the dead caretakers in the archives themselves.
The Archive Puzzle
Before you put on the veil, though, regardless of how you get it, you’ll want to sweep through the area and kill off all of the githyanki in the area, and there are plenty of them. The veil will allow you to see secret areas and hidden doors, but will also greatly reduce your AC and Dexterity while worn, so it’s not something you want to be wearing in combat. Anyone can wear it, though, so if you have a spellcaster that’s not often involved in combat, they can set it up on a quickbar for true seeing fun whenever you fight invisible creatures during the rest of the game.
When the githyanki are done for, head out and track down the secret rooms that are scattered on the outside of the area. These will only be visible to you if you have the veil on, remember. Some nice scrolls and books with details on high-level magical item crafting are contained within. There are also a number of bookshelves on the walls, with books that will be key to solving the four puzzles required to open access to the vault.
When you’re ready to hit up the puzzle, start checking out the books in the four rooms here. Each of them can only be seen if you have the caretaker’s veil on.
Southwestern Puzzle: Illefarn Cypher
This book requires the Illefarn Cypher book, which can be found on one of the bookshelves. If you don’t want to bother with reading it, here are the solutions to some of the puzzles. Most of the puzzles have the word Follow in them at some point; that coordinates with the number 4, if you want to try solving some of them yourself.
Nix You Nix Me Nix Nature: Answer is Death 8 Death 9 Death 5.
98764321: Me You Shadow Weave Follow Lead One Life.
You Follow Nature, Nature Follow Me: 845549.
There may be other puzzles, but one of these will eventually pop up and let you solve this book.
Northwestern Puzzle: To Counter The Assumption of a Flat Faerun
More questions, more answers.
Forms of travel not used in exploration: Teleportation
Gravity was first explored by: Ancient Illefarn
What is revealed at the end of the book: Nothing
Northeastern Puzzle: The Luskan Threat to Neverwinter
More questions!
What does the author recommend?: Build more alliances.
Who wrote this document?: An anonymous source.
What’s the first thing Luskan will do?: Undermine Neverwinter’s political alliances.
Who is the current Luskan ambassador?: Torio Claven.
Southeastern Puzzle: Death of a Sailorman
Questions!
Name of Trenor’s ship: The Sable Crow
Weapon used to kill Trenor: Jewelled dagger.
Name of Luskan flagship: Gilded Sovereign
An Old Ally

With the vault opened, head back to it and walk inside to encounter more Githyanki. Kill them, then check the book in the center of the room to learn that Jerro has one surviving descendent: Shandra Jerro, the stubborn farmer near Highcliff whose barn was burned earlier. You’ll be able to immediately warp there, if you like. Keep in mind that you’re going to have to do a bit of solo battle fairly soon; if you need to switch spells around (so that you have things like self-buffs and summoning spells available), do so.
You’ll arrive to find a very confused Shandra running into her house, attempting to evade the githyanki that are giving chase. Kill everyone in the farmyard, then head into the house yourself. If you find Shandra, she’ll repeatedly attempt to run away from you, to the point where she actually leaves the house and attempts to leave before finally realizing that you’re there to help her. She’s kind of a dumb git, but she’ll come around eventually. You’ll be able to take her to the Sunken Flagon when you’re ready to advance the plot a little bit.
The Fight At The Flagon

The conversation at the Sunken Flagon can be as long or as short ("Look, let’s just do this quickly, and I’ll copy it in my journal," heh) as you like. After a bit of talking, though, she’ll retire to her room, where she will of course be kidnapped by githyanki.
When you get roused by Duncan, you’ll be quickly forced to run into the center of the inn and fight off the githyanki that are taking on the soldiers there in force. Here’s where the solo fighting skills will come in handy; summon creatures to help you out and buff yourself up until all of the Githyanki are dead.
Quest: Chasing Shandra
When the githyanki have been eliminated, the enigmatic Bishop will finally weave his way into the story’s plotline. He’s apparently a Luskan, and has been hanging around in Duncan’s bar, waiting to pay back an unmentioned old debt. Duncan calls in the favor for you, and you add one chaotic evil ranger to your party. He’ll be a mandatory addition to the group, but one that will be capable of dishing out some major damage with his longbow. If you need to sell off goods before leaving for Luskan, do so, then right-click on Bishop and hold the button down to talk to him. If this eventually stops working, head to a map transition and go to the Village of Ember, to the north of Neverwinter.
Note that having Qara in your party will make the upcoming fights a lot easier, unless your main character can cast Fireball. You’ll also want to have a better weapon for Bishop than a Longbow +1. The Elven Court Bow that Repko sells in the Docks district is a good fit.
Githyanki Ambush
As you enter the town, you’ll notice that it’s quiet...too quiet. Sure enough, a githyanki ambush is right around the corner, so take a moment and buff everyone up as best you can before moving forward. You’ll come under attack from many, many githyanki here, including numerous archers. Don’t forget to add Bishop’s "Summon Animal Companion" ability to summon his wolf friend, Karnwyr.

After the first wave of enemies is defeated, another group of foes will rush at you. Kill them all, and start talking over your strategy with Bishop. If you want to remain and check on the villagers, then you’ll gain a good alignment shift, but lose influence with Bishop. Alaine, a villager, will eventually come out and conveniently tell you which way the githyanki were going.
The only other person in the village (the doors are all locked and unpickable) is Marcus, a curious little boy who radiates power, according to Qara. He seems to think that Ember will be destroyed at some point in the future, but that your party might have something that can help him survive. If you let him poke around in your bags, he’ll ask for Bishop’s skinning knife. You definitely want to force Bishop to hand it over, as it’ll come back to you with returns later in the game.
Githyanki Approach & Cave
As you walk up the path here, you’ll find your way blocked by a few fire walls. These don’t appear to be magical, so Dispel Magic won’t rid you of them; the only way through is apparently to just run through them. They do light damage, and you should be able to rest fairly often. Guyven is located beyond the second wall, and will give you a nice XP bonus for talking to him.
Make your way up to the top of the path and into the cave there. A large number of githyanki will be waiting to attack you here, so buff yourself before heading inside. When you’re done talking to the loquacious foes, start making your way through the cave. You’ll come across a Succubus that has apparently charmed a few githyanki and convinced them to fight on her side.
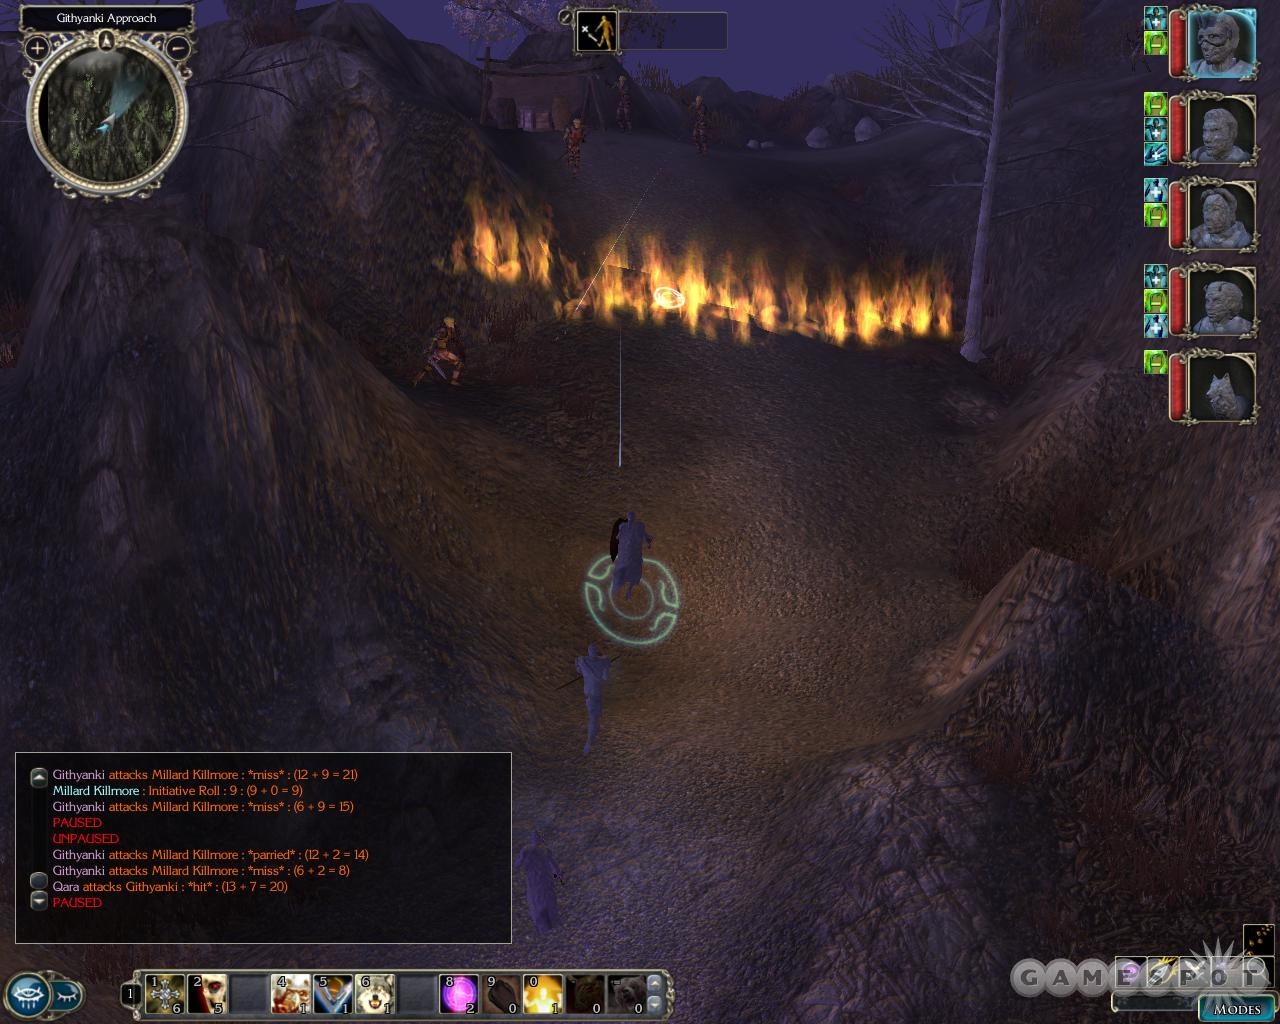
Succubi are difficult foes, with excellent spell resistance and damage reduction, thanks to their Stoneskinning of themselves. They may try to charm your characters, so preparing for these fights with some kind of charm-resistance spell may be worthwhile, at least in the case of your most powerful fighter. Your best bet for taking them down is to lure them into close quarters, where their attacks simply aren’t all that powerful, and try to overload their damage reduction with critical hits from Bishop (use magical arrows) or Neeshka’s sneak attacks. If you can’t get massive crits, just wear them down until their Stoneskins fail, then finish them off. They can be annoying, but hey - now you know what your enemies feel like. You can use Dispel Magic to eliminate their spells, but they’ll also likely remove your own buffs.
Further down the path, you’ll come across a pair of Succubi musing over a blade golem. Defeat them, then agree to Bishop’s plan to come back for it when you find Shandra before fighting your way through the rest of the corridor.
Devil Chamber
When you head through the door, you’ll come across a trio of succubi that are tormenting a devil that’s caught in some kind of restraining field. Try to nail them with a Dispel magic just as they start coming your way, and you’ll be able to knock off their defensive spells without affecting any of your own.
When you speak to the devil, emphasize that you don’t trust him any more than Neeshka does to get some cheap influence. You can continue to gain influence with her throughout the conversation with speech options like "You are doing an excellent job of boring me." The devil wants you to free him from his servitude to the enemies that have bound him here, where his powers are used to keep the extraplanar wall intact. He wants you to banish him, but you can only do so by saying his true name, which he gives you in exchange for a pledge to only use it for the purposes of banishment. If you agree, then attempt to extort him for 10,000 gold, you’ll gain three chaotic points, but you won’t actually get any cashola.
Check the wings off to either side before exploring the corridor to the north. As you may suspect if you thoroughly interrogated the devil, there are going to be some tough fights ahead, so rest up, recast all of your buffs, and save before moving on.
Zaxis
Zaxis is one mean tanar’ri. He’s attempting to bash open the door that conceals the githyanki, and thus Shandra. You have to get past him if you want to rescue her.
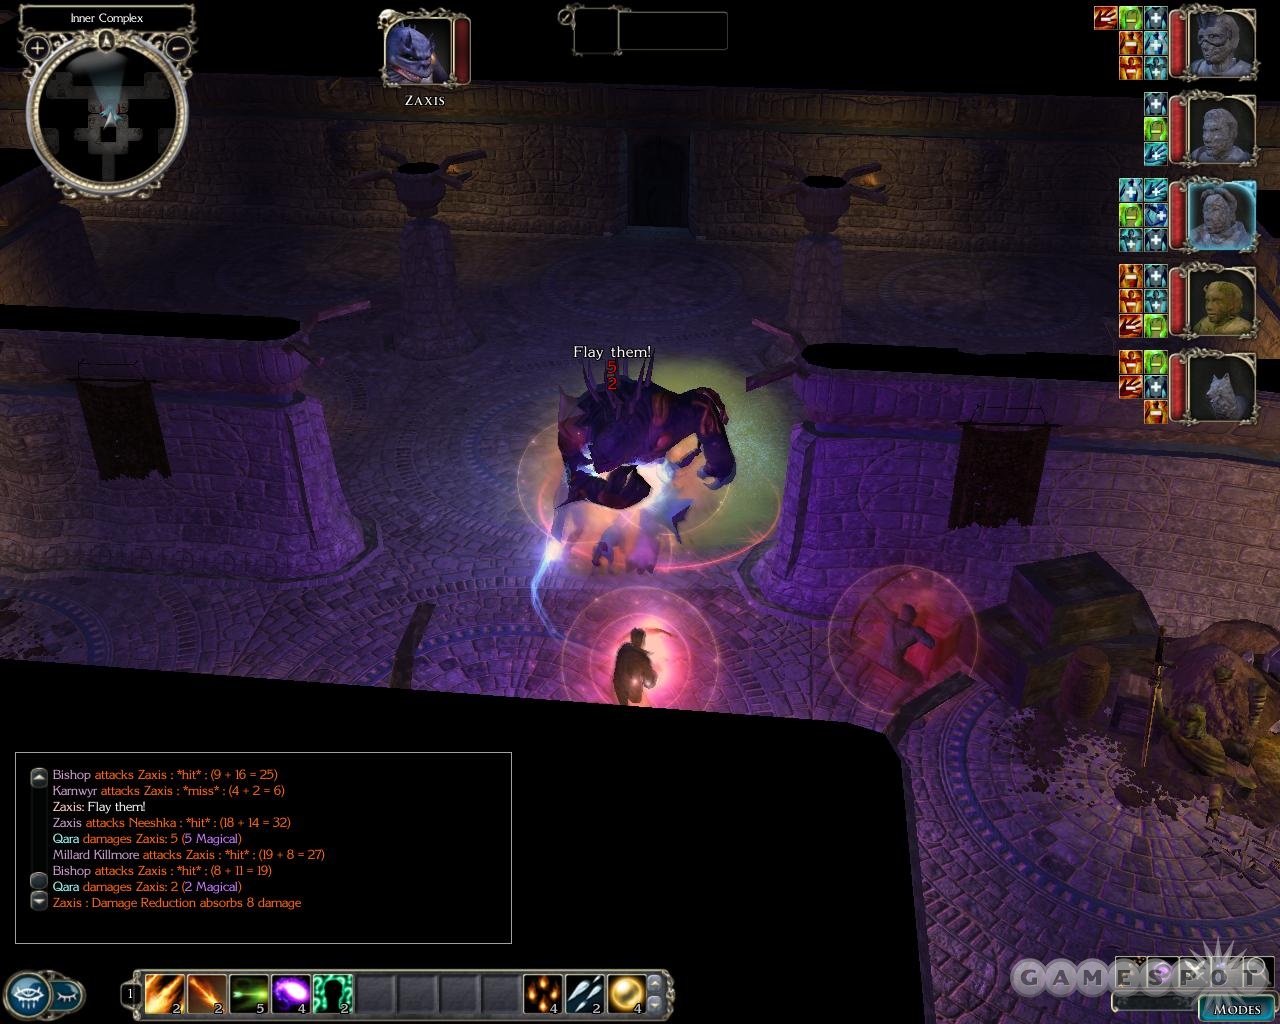
There are a couple of ways to do so. The easiest is via speechcraft. If you have a high score in Diplomacy, Intimidate, Bluff, or maybe Taunt, then you can attempt to talk Zaxis into admitting his own defeat, which is apparently something of a self-fulfilling prophecy, in that admitting his defeat will cause him to actually die, without you having to lift your weapon. After the first round of questions (the Bluff/Lie option will always succeed, it seems), the meaningful one here is "Wait...if your task was to breach the door...." Asking him this will cause him to protest, but another successful speechcraft roll will cause him to topple over and die. (Attempting to Taunt at this prompt will let Neeshka taunt her way past him, thus killing him even if you fail, assuming she’s in your party.)
Alternately, there’s combat. Zaxis will first send two succubi your way, then bring up the rear himself. The succubi aren’t so tough, but Zaxis can be. He’s got pretty good resistance to damage, somewhere up in the 10 or 15 range, so not many of your weapons will do much damage to him. Magic Missiles, though, are going to be tough for him to do anything about (although he may occasionally resist magic). Wear him down like you would a succubi with Stoneskin, while having Qara or your spellcaster continually bust out Magic Missiles, and he should go down fairly smoothly. You get the (disappointing) loot from the encounter either way, but killing him in battle will net you 250 experience or so, on top of the experience you get from the succubi.
Zeeaire

It’s time to finish off the Githyanki threat once and for all. Having Qara or another character that can cast area-of-effect spells here will be a big help. As always, rest up and buff yourself thoroughly before heading through the door. If you have the spells to spare, casting Stoneskin and Mage Armor on Karnwyr, Bishop’s animal companion, will provide you with a good distraction.
When you’re ready to get the fight on, head into the room and get ready for a long-winded conversation with Zeeaire, one of the upper-level mucky-mucks of the githyanki empire. The clock will be ticking on your buffs while you engage her in small talk, so if you have any short-duration buffs on yourself, you may want to either cast them after the talk is over, or simply explore the conversation tree, then reload your game and blast through it by goading her into a fight.
After Zeeaire steals the shards from you, the fight begins in earnest. Zeeaire’s minions will attack you while she casts spells from behind the portal. Obviously enough, when dealing with an enemy that can’t be hit, your best bet is to avoid them until you can deal with them proper-like. Tell all of your troops to leave the room and congregate in the hallway nearby (be sure that Bishop moves far enough to ensure that Karnwyr follows him), then order them to stand their ground.
All of the minions will follow your troops, and Karnwyr, outside of the room, where you can easily chop them down; Zeeaire will have no choice but to stay inside her portal. When the minions are finished off, keep your troops parked at one end of the corridor, then send Qara or another spellcaster down in front of the door leading to Zeeaire’s chamber. The portal spires here are targetable, so casting a Fireball or Ice Storm centered on Zeeaire will damage them all. (You can also use the small dimensional sphere that Mephasm gave you on the portal to collapse it immediately.) After two or three Fireballs or other area-of-effect spells, the portal will collapse, causing Zeeaire to lunge out of her portal and rapidly age. She’s nothing more than a githyanki with slightly better equipment at this point, so mob her and take her down.
Chapter’s End
Man, that was a hella long chapter, if we do say so ourselves. After speaking to Shandra, you’ll warp back to the Sunken Flagon, where Duncan will fill you in on precisely how you managed to wind up with a silver shard in your chest. Surprisingly enough, Shandra becomes a member of the party at this point. Her class may be dependent on the choices you’ve made thus far in the game, but for us, she was a fighter, with 13 Strength. What’s more, she’ll actually become a "free" member of the party, and doesn’t count towards the four-person cap. Fun!
Act II
Plenty of stuff to do in Chapter II. The first thing you’ll probably want to tackle is incorporating Sand into your party; he’ll offer up a number of interesting opinions on the game’s main storyline as you proceed. He’s not as useful a spellcaster as Qara is, due to the fact that he can’t cast Conjuration spells (which include things like Flame Arrows, Melf’s Acid Arrow, and all Summon Creature spells). In point of fact, he won’t even know many critical spells, like Fireball. The first thing you’ll want to do is bring him back to his own shop (where a merchant elemental has been situated) and buy him plenty of spells. Don’t forget the second-level buffs!
After that’s done, a trip to Blacklake and the new merchants there is in order. There are two main merchants here: the magic merchant near the Magic Academy, and the priest in the Temple of Lathander, near where the gnome is painting pictures. There’s some badass equipment in both of these inventories, including arguably the best bracers in the game, the Bracers of Blinding Strike, which permanently Haste the wearer.
Quest: Murderer!
As you heard during the first part of this chapter, the Luskan ambassador is accusing you, personally, of wiping their town of Ember off the map. Maybe you actually did so, if you’re evil, but either way, you’re going to want to defend your reputation vigorously. Luckily for you, the Neverwinter lords are eager to help. One in particular, Sir Grayson, is offering to make you a squire of his, which will grant you some measure of diplomatic immunity.
Head to the City Watch hall in the Market District to speak to Grayson. He’ll give you a rundown on the knight’s code of honor, which is basically an opportunity for you to make fun of him, if you wish, or agree to be an upstanding citizen. Either way he’ll tell you that you have to perform a vigil before you can become a squire, which basically means that you have to spend a night alone in the Solace Garden. Sounds simple enough. Brelaina will also have a quest for you if you speak to her.
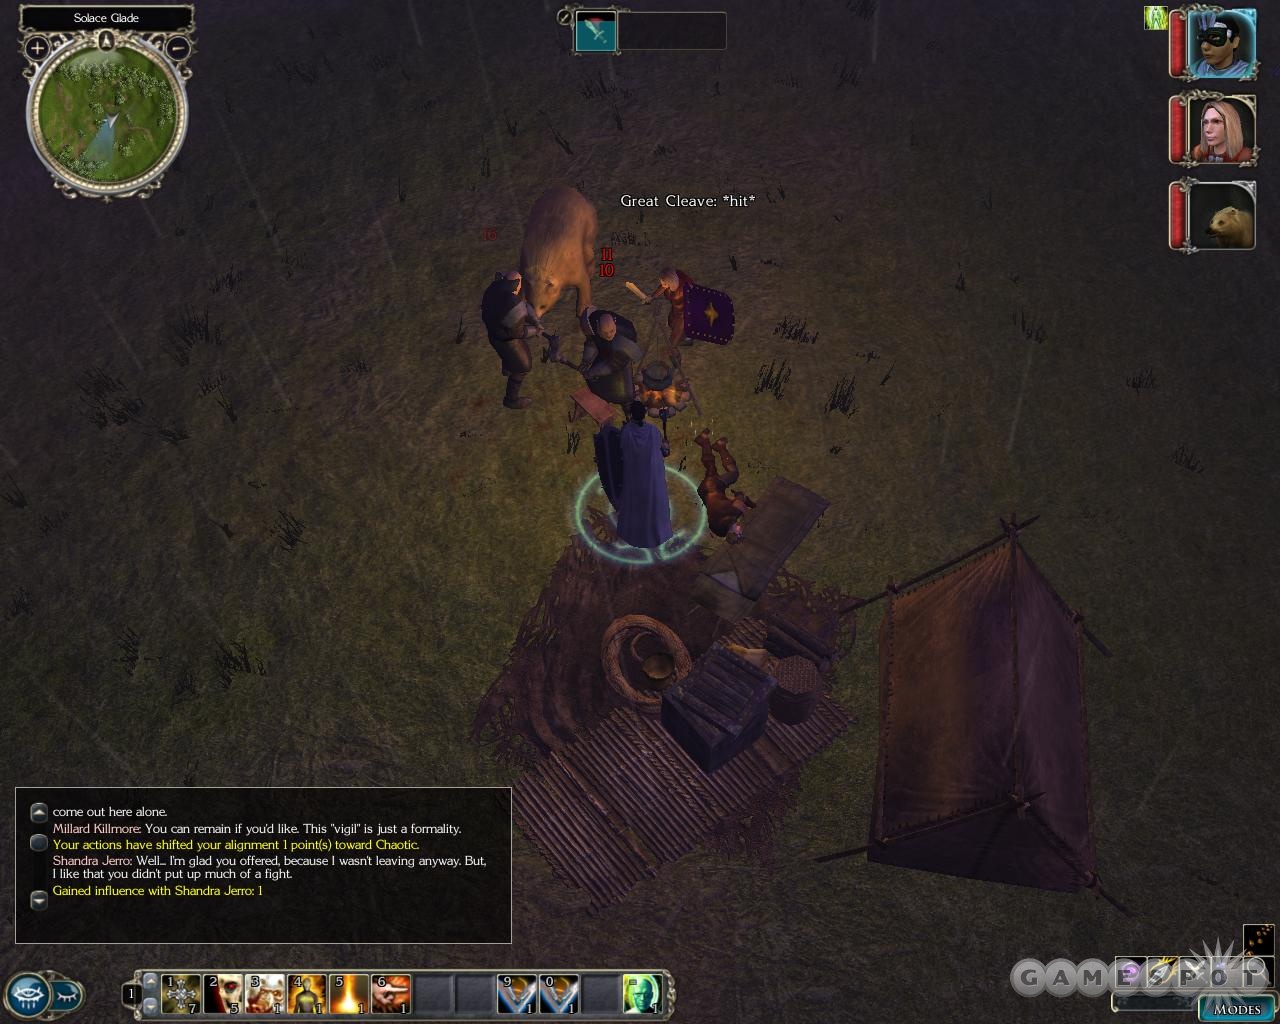
Grayson will escort you to the Solace Garden, then take his leave. Shandra will quickly walk out of the mist, having followed you to your destination. Treat her as you will (welcome her to stay if you want to gain some influence over her), and let her help you out against the Luskan assassins that quickly attack you. The leader of the assassins will drop an odd ring; if you refuse to immediately leave with Grayson and check the body of the leader, you’ll also find a Scimitar +1.
When you return to Castle Never, you’ll become a squire, and will be able to move on to the next phase of the quest.
Quest: The Trial
Time to head out to Port Llast. For flavor purposes, it might be best to bring Sand along as a member of your party. You’ll be able to interact with him in a lot of ways, and he’ll have plenty of suggestions for you as you move along. If you do, be sure to end the first conversation here with "I’m glad to have you along" for some cheap influence.
With that done, wander around and speak to the merchants. They’ll have some powerful items for you, and Nya, the magical merchant, will even have a quest for you. Definitely check out Nya’s trinkets; she has Nasher’s Ring of Strength for sale, which offers up +3 Strength to whomever wears it. Nearby, you’ll run across a group of guards who are intent on killing you for what happened at Ember. If you can talk them down, do so; otherwise you’ll have to fight them. They’re not tough, but they don’t have much in the way of loot, and killing guards likely won’t look good at your trial.
People To Talk To
If you want to find as much information as you possibly can before your trial (and you should), here are some people to talk to.
Falgor: This fellow stands just inside the Alliance Arms Inn. He’ll give you some of the rumors about what happened at Ember, but nothing concrete. He’ll also tell you of a witness that Haeromos has sequestered away in the guard quarters.
Malin: This ranger stands by the fire in the Alliance Arms Inn. Doesn’t know much about Ember, but will mark the Duskwood Grove on your map, which is important.
Elgun: This raconteur is in the middle of the Alliance Arms, spreading tall tales about his exploits in the Duskwood. He claims to have witnessed the attack on Ember and to have helped fight the attackers, but he’s more boast than glory. He gives you the sub-quest "Elgun’s Tale".
Haeromos Dothwintyl: What a name this guy has. He’s the captain of the guard in Port Llast, and doesn’t think too highly of you, since he does suspect you of murdering Ember. You can question him thoroughly, if you like, and he has plenty of information of you. If you talked to Falgor, you can attempt to get him to bring out the witness to the attacks, but this will require speechcraft. If you can’t convince him to talk to her, you’ll have to pick the locked door nearby and head back to speak to her.
Alaine: Alaine is the survivor of Ember, but is convinced that you’re the one responsible for murdering the village; apparently she saw someone that looked precisely like you. Question her thoroughly; most of the choices don’t involve speechcraft, but can shift your alignment to evil if you threaten her enough. With enough questioning, her story will begin to reveal its holes. It’s necessary to talk to her to complete the Elgun’s Tale sub-quest, but you’ll want to do so regardless, as she’s going to be a major factor in your trial.
Sub-Quest: Nya’s Duty
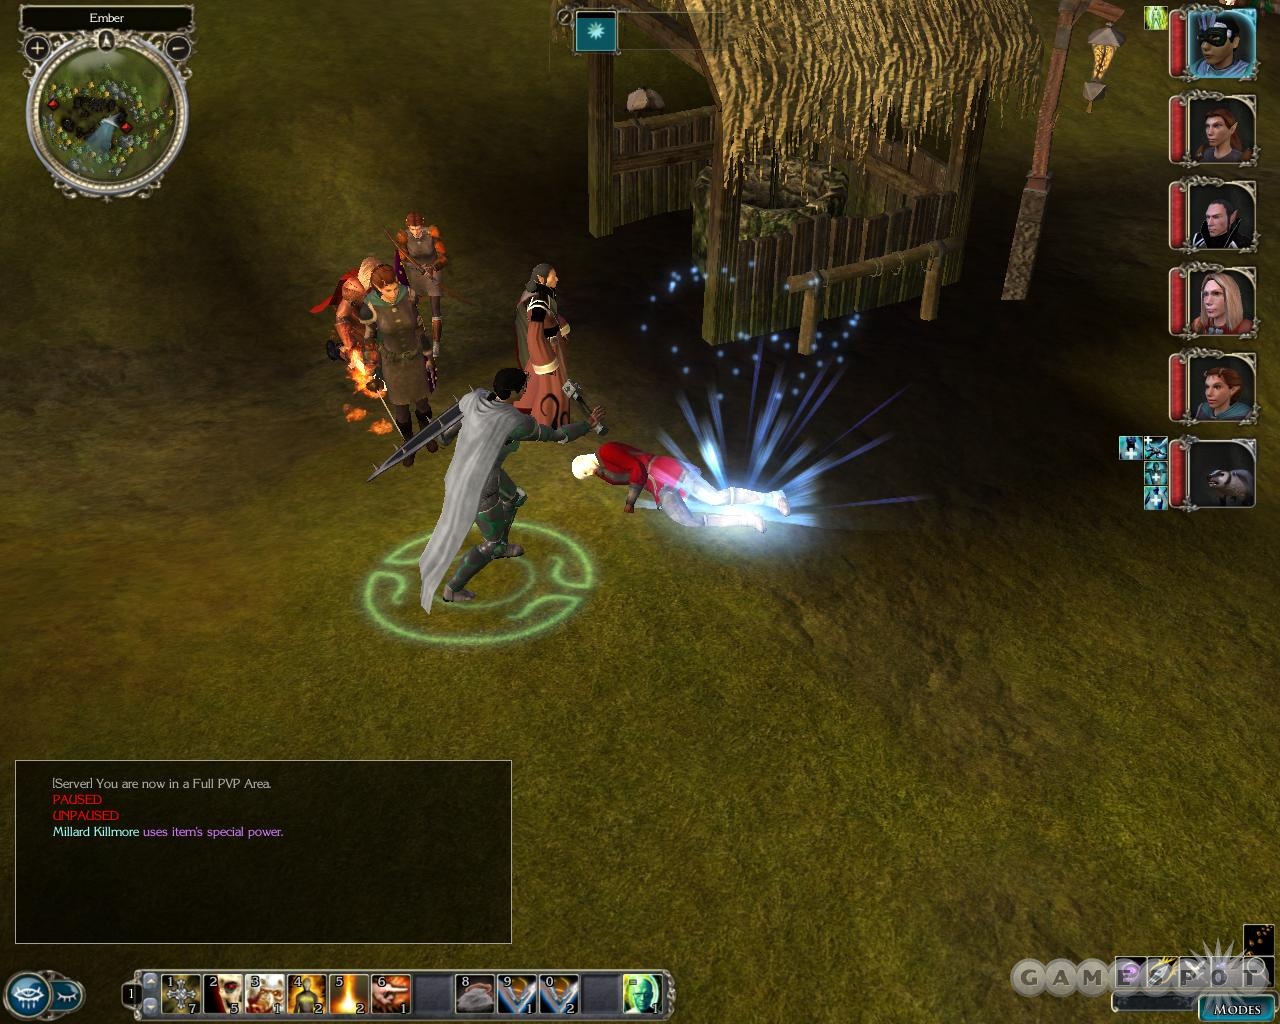
If you talk to Nya, the magical merchant in Port Llast, she’ll explain that the bodies of the dead inhabitants of Ember are at risk of being used for necromancy. It’s up to you to put a stop to that; she asks you to travel to Ember (which you won’t be able to do until later on) and sprinkle wyrmsage on the bodies, which will prevent them from being reanimated by any necromancers that happen to head there.
When you head to Ember, move the wyrmsage to a quickslot, and use it on the scattered bodies there. Only the human bodies need to be worried; the cats can go all Pet Sematary, for all Nya cares. Each of the bodies will disappear as you sprinkle your fairy dust on them. Be sure to make a circuit around the outside of the area, as some of the bodies are between the homes and the fence. Your journal will update when you get them all.
Sub-Quest: Bradbury’s Disappearance
Speak to Calindra, who stands by the counter in the Alliance Arms Inn, to pick up this quest. She and Bradbury are miners, but Bradbury disappeared on his last trip into the Duskwood and is late for their most recent meeting. She wants you to keep an eye out for him if you head that way.
Bradbury is indeed in the Duskwood, in the cave inhabited by Jilla and Milli, two gnomes. See the "On Duskwood Ridge" quest description in the Duskwood section below for more details on finding him. You can return to Calindra and report your find to earn 1,000 XP. When you earn the right to expand Crossroads Keep and repair the quarry there, return to Calindra to enlist her aid.
Sub-Quest: Elgun’s Tale
After talking to Elgun in the Alliance Arms, you’ll learn of his feats of skill, but won’t believe them. You’ll have to head out to Port Llast and inquire with the other people in town to learn more of his tall tales.
After speaking to Alaine, who’s being guarded by Haeromos, and getting her story, you can return to Elgun and quickly punch holes in his fable. He’ll agree to retract his story, and the quest will end.
Ember
Ember and Duskwood are connected by a tunnel, so you’ll likely wind up heading from one to the other without heading back to the world map. We’re going to assume that you start off in Ember.
Begin looking around. Sand will detect a noise coming from the well, but ignore it for the moment. If you look around, he’ll also find a Strange Corpse (which is a quest that’s immediately opened and finished) which he believes has been poisoned...by a Luskan style of venom. He’ll take a piece of the body as evidence during your trial. You can also start using the wyrmsage from Nya on the bodies here to purify them. You can also find Guyven of the Road standing behind one of the homes. The Quartermaster’s journal is just sitting around for you to discover, as well.
Well/Cave
When you’re ready to move on, head down into the well and find Marcus, the odd boy whom you met when you passed through Ember previously. He’ll tell you what he witnessed, and hand you back Bishop’s Dagger if you let him have it earlier in the game. It’ll be by far the best off-hand weapon for a dual-wielding character you’ve found thus far, with a Dex bonus of +2, 1d6 massive criticals, and keenness. Let Neeshka go to town with it in her off-hand, and she’ll bust out some big crits. Note, however, that it doesn’t have an enhancement bonus, so you’ll want to enchant it at some point.
Sub-Quest: Earned in Blood
Head out through the door nearby to run into the cave that links Duskwood and Ember. You’ll soon run into goblins - lots of goblins. If you want to be evil, feel free to start a riot and kill everyone around, but we’re going to assume that you’re playing as a goodie two-shoes. Ulip, the guard, will soon allow you access to Glek, the clan’s leader, and an oddly well-spoken goblin. He holds trinkets from the body of one of the Ember attackers; proof that might come in handy should you gain access to them. He won’t let you have them, though; he asks you to travel further into the caves and kill a flock of spiders that have infested the nether reaches of the area before he hands over the ring that the attacker was wearing.
The Glow Spiders that Glek is referring to are difficult, but not impossibly so. They’ll poison and blind your party members, to be sure to soften them up first from a distance with a fireball or two before heading in and taking them down. If you return to him and report your success, he’ll give you another ring, which Sand identifies as belonging to a member of the Circle of Blades, a Luskan assassin’s guild.

There’s more to see in the cave, though. Near the bad spiders you can find Kistrel, a huge spider that seems to be intelligent. She’ll give you the An Overly Clever Arachnid sub-quest, but apparently only if you have Elanee in your party. Nearby, you can also find a dead body with a very nice crossbow on it, sitting near a vein of ore. Could this be adamantite? Examine it to "discover" it officially. You can also steal the Glowstone that the goblins attempt to protect, but this will cause all of them to attack you. It isn’t an evil action, and it will allow you to grab all of the loot off the goblins’ bodies, but the Glowstone itself isn’t really all that great; all it does is cast Searing Light three times a day.
The loot you get for killing the goblins, by the way, includes: The Regal, a helmet that penalizes your search and spot scores but gives you resistance to acid and fire; the Staff of Power, which can use charges to cast Fireball, Magic Missile, and Ray of Enfeeblement; and a Gladiator’s Club +1, which can daze enemies that it hits.
There’s another exit from the cave, which leads to the Duskwood.
Sub-Quest: An Overly Clever Arachnid
You’ll run across Kistrel in the caves beneath Duskwood and Ember. You can kill her if you wish, but if Elanee is in your party, or if you’re a druid or ranger, you can also attempt to communicate with it. Elanee will deduce that the beast is hungry, and that you may be able to feed it if you find some insects for it.
If you head up into Duskwood and find the cave with two gnomes outside, you’ll find the insects inside. (We’ll talk more about that incident in the On Duskwood Ridge sub-quest below.) If you return to the spider, you’ll be able to feed it the bag of insects (we had to leave the area completely and come back for this option to appear.) It’ll ask to come along with you. Accept for a large XP bonus. You’ll see the spider again when you get your stronghold.
Duskwood
When you first enter the Duskwood, Elanee, if she’s in your party, will detect some kind of poison that permeates the zone. If you tell her that you wish to try and get to the source and have her heal the place, you’ll gain influence with her. Sand will tell you something similar; ask what "damper" means, then tell him you weren’t too clear on what he meant to gain influence. What these folks are detecting is some kind of field that will cause all of your spells to fail while you walk around in the Duskwood. This will also eliminate all the buffs on your characters, no matter where they were cast.
Sub-Quest: Lorne’s Disguise
Head to the marker on your map designated as the Ancient Tree. A dryad, Lyssa, resides there. Try to bluff and pretend that you’re Lorne to avoid getting an influence penalty with Sand, then inquire with her to see what the heck she’s doing here. It turns out that she procured alteration powder for Lorne, the large Luskan assassin you’ve seen in a few cutscenes, to allow him to assume your appearance while he attacked Ember. That wasn’t very nice of her.
She’ll offer to supply you with a sample of the alteration powder on one condition: she wants you to head back into the Goblin caves and retrieve the Glowstone from them. She refuses to say why she wants you do so, but claims that it’s poisoning the water of the forest. Whether that’s true or not is for you to decide; all we know is that she helped frame you, and she’s not exactly a good creature to begin with. If you threaten to kill her unless she hands over the powder, she’ll attack you, and attempt to bring in all the dire animals to aid her. However, if you have Elanee around, her druidic abilities will be sufficient to turn the animals back, ensuring that you only have to fight Lyssa herself, which should be easy.
Sub-Quest: On Duskwood Ridge
Remember the ranger Malin who told you about seeing smoke from Duskwood around the time of the attack on Ember? Well, if you head to the northwestern corner of the map, you’ll find two gnomes, Mirri and Jilla, kicking it near a campfire. They claim to be insect collectors, and will tell you that they happened to find a woman in the cave nearby, who ran off a short while ago. They seem innocent enough. Despite their protestations, head into the cave nearby.

Inside, you’ll find plenty of wolves...and the body of Bradbury, the focus of Bradbury’s Disappearance, a quest given to you in Port Llast. As soon as you stumble across the body, Milli and Jilla will reveal that they’re actually werewolves and attack! This fight can be tricky if you don’t have any silver weapons on you, but if you take out the dire wolves first, you should be able to slowly wear down the two by inflicting extra fire damage from enchanted weapons, critical hits, and the like. If you find the fight to be too tough, retreat and buy or craft alchemical silver weapons, and then come back for them.
You can loot the bodies, obviously; one of them will have an Insect Collection, which you can use in the An Overly Clever Arachnid quest.
The Trial
Now, time for the main attraction. If you haven’t yet, head to Old Owl Well and speak to Callum; he’ll agree to testify on your behalf when the time comes. Before you start the trial, you’ll also want to gain some brownie points with Shandra. If you haven’t already spoken to the painter in Blacklake, do so and get him to paint a picture of Shandra, then buy it for more than the asking price. This will put you far into her good graces, if you haven’t already been treating her poorly.
When you’re ready to start your little sham trial, head to Neverwinter Castle and speak to Navalle. He’ll point you toward Lord Nasher, who’ll start the trial proper.
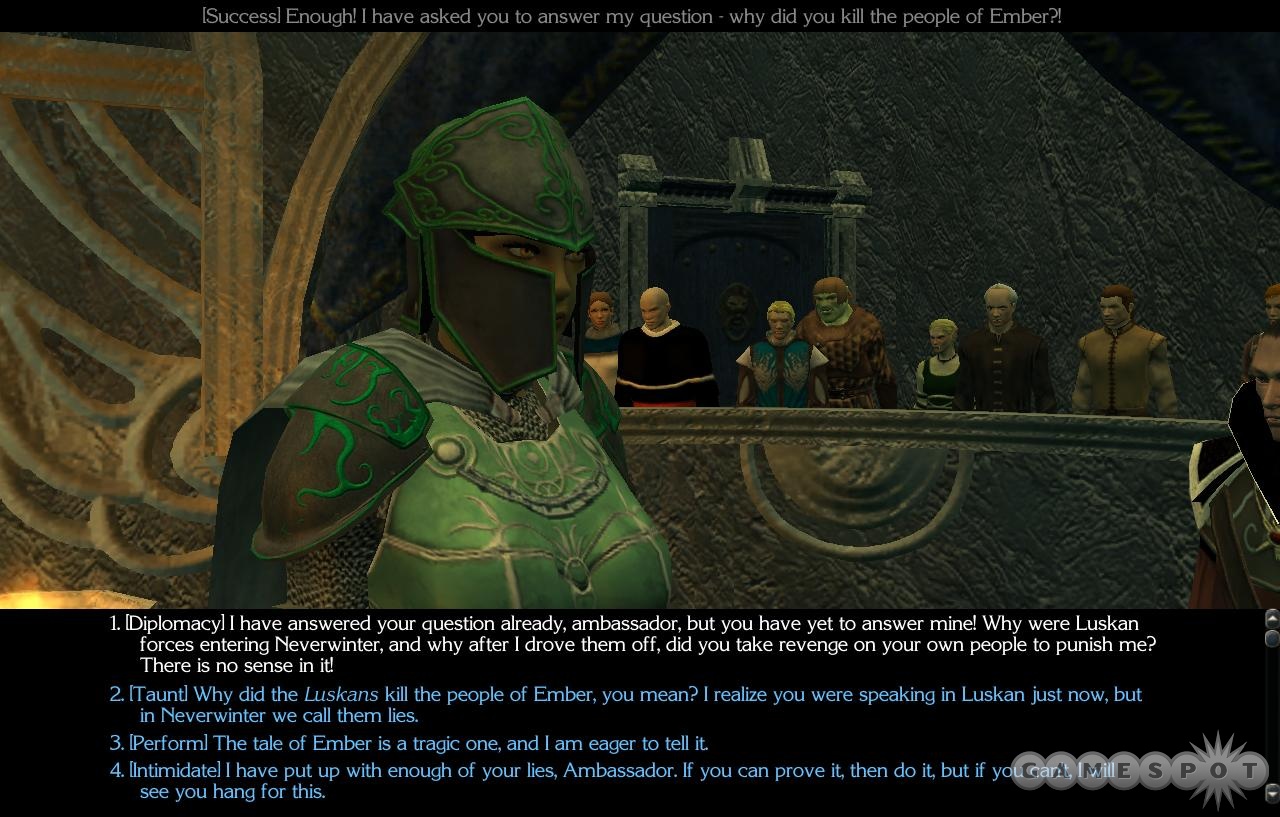
Now, no matter what you do here, you’re likely going to wind up with the same resolution, so feel free to speed through the trial or talk to Sand to have him argue the case for you. If you’re completely inept in speechcraft skills, then this may be the best option for you, as it also is if you’re just looking to get back to hitting things with your axe. But if you find courtroom wrangling to be a hoot, then feel free to stick around and get your jabs in. If you defend yourself, then your ability to win Lord Nasher’s favor will largely depend on your speechcraft abilities, the evidence that you’ve collected (which is automatically presented as you speak to Sand before the trial), and your actions in the game thus far (treating Marcus, Shandra, and Callum kindly will work in your favor here).
Basically, if you have a good Intimidate or Diplomacy skill, then you should use that whenever you can. Note that your helmet or mask is unequipped before the trial. Since most of the items that raise speechcraft skills are head-slot items, you may want to invest in a Cloak of the Nymph or another Charisma enhancement before heading into the trial.
Witnesses
Alaine
The first witness is Alaine, Shandra’s friend. If you’ve been treating Shandra well, then ask her to speak to Alaine. If that influence check succeeds, then feel free to cross-examine Alaine and ask her the first questions in your list, which relate to Shandra. If you can remind her that Shandra was traveling with you while Ember was attacked, you may be able to cause her to admit that it may not have been you that attacked Ember.
Shandra
Torio calls Shandra next and questions her. You can’t cross-examine, but if your Influence ranking with Shandra is high enough, she’ll come to your defense.
Yourself
Lastly, Torio calls you to the witness stand. If you don’t have speechcraft at your disposal, your options here are limited, so hopefully you’ll have raised at least one of them to the point where you can use it. Otherwise, you’ll simply have to rely on stock denials of the accusations against you.
Callum
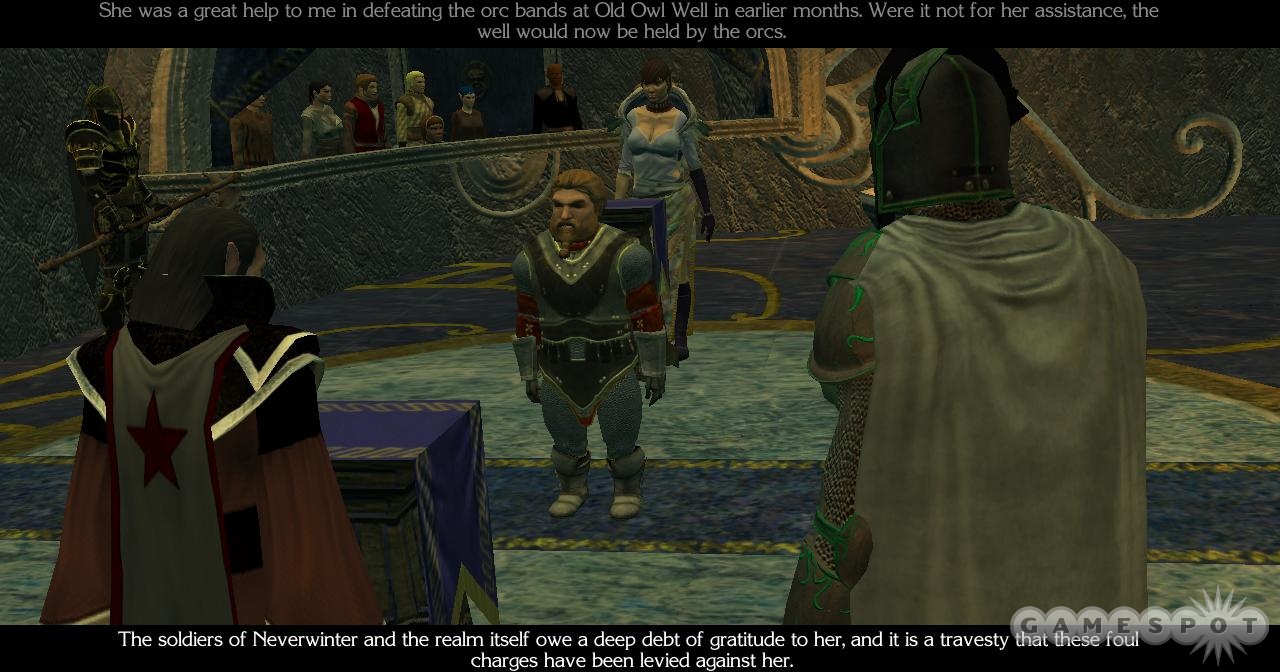
Sand will start acting in your defense here and call Callum to the stand. You have the chance to say one thing when Sand is revealed to be Luskan himself, so if you can make a successful speechcraft roll, do so; otherwise, it’s best to let the matter lie and move on.
Nya
If you completed Nya’s quest relating to putting the dead to rest in Ember, then she’ll appear next. Do whatever you can to make yourself seem appealing to the audience here.
Marcus
Your star witness, if you offer Torio the chance to question Marcus, she’ll call your bluff and reveal that he does indeed have the ability to act as a seer, doing damage to her case in the process.
Sandra
Sandra’s an optional witness. If your influence with her is appreciable, she’ll act as a character witness one last time.
The Verdict
If you presented all the information you had available to you, then you’ll likely be completely successful in your defense, convincing Nashar to set you free, and boot Torio and the rest of the Luskans out of the city. Yay! Unfortunately, Torio will insist on an appeal and a trial by combat, naming Lorne as her champion. Boo! There’s no way to avoid this outcome, so you’ll have to fight off Lorne.

When you’re ready to fight, head to the Temple of Tyr in the Marketplace District and head inside. You’ll have to spend the night there before you fight Lorne, which gives your teammates the chance to lobby you for the right to act as your champion. The list of characters that approach you will likely vary based on which you’ve used the most or which you have the most influence with; we had Khelgar, Qara, and Casamir all approach and offer their services. Keep in mind that only the last character that you accept the offer of will fight for you; if you accept the offer from everyone who offers to fight for you, then the last one that approaches you will be the fighter. Pick one, and politely decline the offers of the rest. Khelgar is all but a sure bet to appear; ask him why he wants to fight for you, and you’ll polish off another one of his vision quest miniquests.
The fight with Lorne is a tough one-on-one fight, so you’ll probably want to take Khelgar up on his offer if you have him in your good graces; he and Re’s Redemption will do a number on the Luskan terror. Be sure to equip your champion with your best equipment before you speak Hlam in the Temple to start your vigil; you may need to sit through the night and find out who’s going to offer, then reload. Be sure to offer up a few Potions of Cure Serious Potions or something similar, as well; Lorne’s going to do a number on yourself or your champion. If you can make them, a Potion of Heal or two will be welcome, and if you bought it from the merchant near the Magic Academy, the Bracers of Blinding Strike will be especially useful, since they’ll automatically haste the character that wears them.
The Fight!
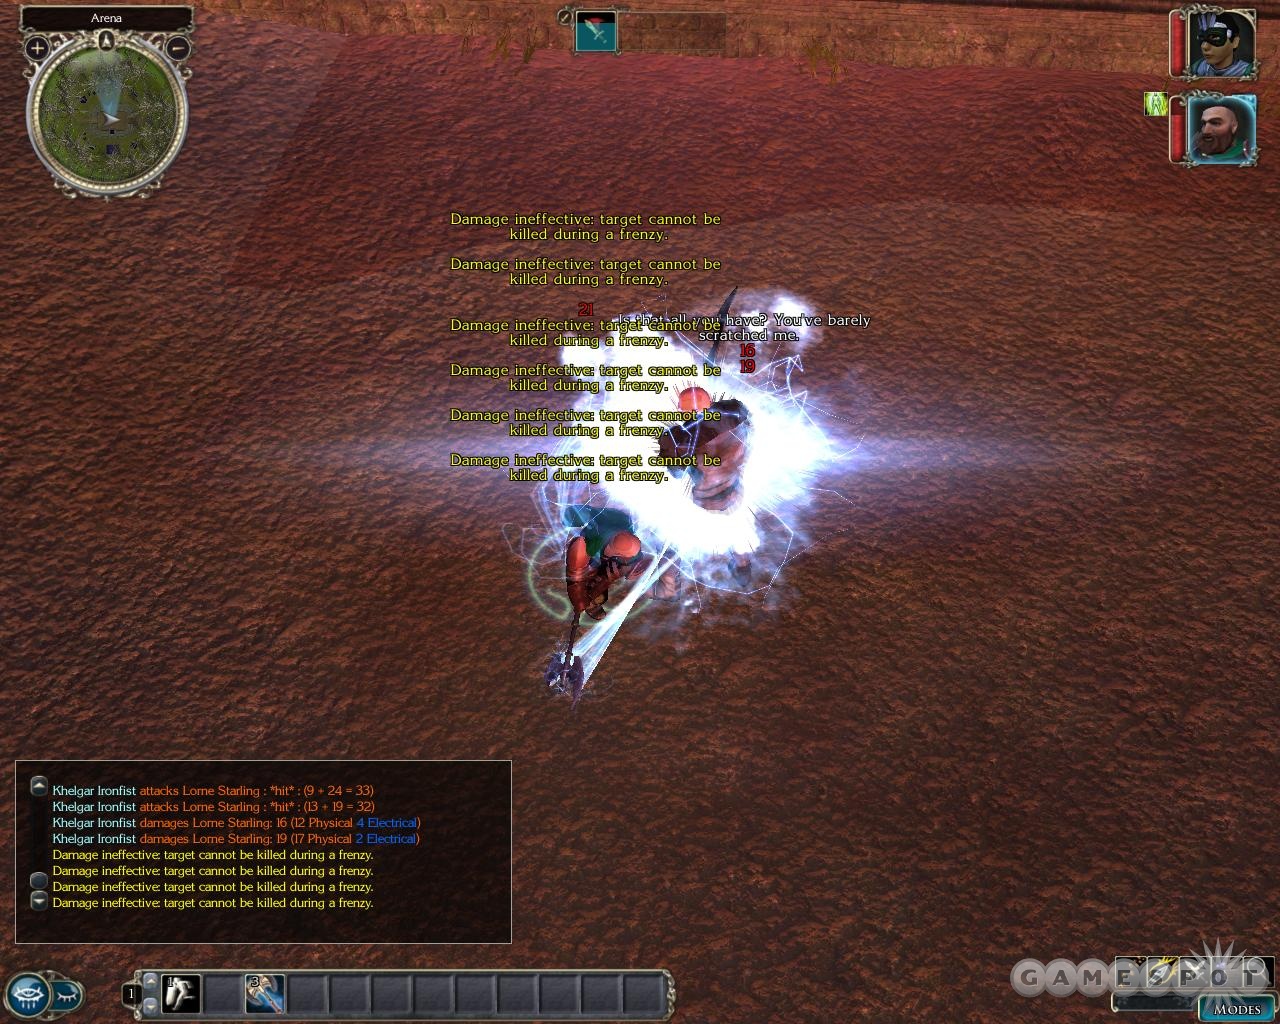
Not much to say here; Lorne is a badass fighter, and you won’t have the ability to engage in your normal buffing before the fight begins; any potions that offer up buffs like Barkskin or Bull’s Strength will be useful, or especially a Potion of Speed if you didn’t manage to equip the Bracers of Blinding Strike. Apart from that, this is a simple knock-down, drag-out fight. You can damage Lorne quite severely at the outset, but he’ll eventually enter into a Barbarian Rage that will prevent you from taking him below one HP. At this point, activate your Potion of Speed or Haste and run away from him! You should be able to outrun him by switching to free camera mode and clicking on each corner of the arena in turn; that’ll put the most distance possible between you and he. When the Rage wears off, turn on him and take him down to end the fight, and the trial, permanently.
Nasher will order you to rest, so you’ll find yourself back in the Sunken Flagon. The two chests by the door will contain a amulet that offers up True Seeing, as well as Lorne’s possessions, including a Belt of Hill Giant Strength and a Falchion that can only be used by evil characters.
Quest: The Sage’s Manse
Aldanon will request your presence at this point, indicating that something involving a shard is in progress there. If you head out there, you’ll come across a standoff: two men are defending the door, and have apparently shot at Cormick with a magic wand, leaving him wounded and in need of aid. The problem is, they have more charges in the wand and are threatening to finish off Cormick if you approach the house.
If you want to keep Cormick alive, take over the negotiations yourself and offer the thieves a full pardon if they surrender. Completing this minigame without earning Chaotic points will be difficult unless you have some Intimidate or Diplomacy points, but if you want to keep Cormick alive, you can lure them out with the pardon, then lie to them and tell them that the watchmen won’t arrest them. Alternately, you can attempt to Intimidate them with tales of what you did to Moire, or Diplomacy the guards to force them to accept the full pardon angle. If you lie to the thieves, you’ll earn three Chaotic points.
Into The Mansion
After properly buffing yourself up, head into the mansion and get your fight on. There are plenty of thugs here, of the stealthy sort; you’ll see some in the hallways, but many more lurk in the shadows and will reveal themselves only when they sneak attack you. There’s a large concentration of enemies in the kitchen. If you poke around, you can find two separate entrances to the basement area, which is where you need to head. Only one of them (through the kitchen) is passable, though; the other requires a key.

Have Neeshka or a rogue take the lead and proceed slowly, in Search mode, down the hallway, disabling the traps as you find them. Be sure to tell your teammates to Stand Their Ground by the door leading up to the ground floor. When you unlock and open the door leading into the central room here, you’ll draw the attention of a couple of guards, so lure them back to the door where your team is to be found and take them out. Do the same for the other guards in the area, then take out Old Scab and his cronies. Focus your attacks on Ketts first; he’s the one attacking the hostages. If you manage to save Harcourt, the maid, and the cook, then you’ll earn some bonus XP. Harcourt will fill you in on the details after the fight: it appears that Aldanon has been kidnapped! Before leaving, disable the trap on the floor near Harcourt, and be sure to check the chests in the corner of the room for some nice loot.
Quest: Lord Tavorick’s Shard
When you speak to Lord Nasher about the events in Aldanon’s mansion, he’ll order you to immediately head to Tavorick’s house in Blacklake and do whatever’s necessary to protect him from the attack that seems likely to come soon.
Find Tavorick’s house on your map and head there. Head inside and speak to Tavorick himself and Captain Ballard, who’s been leading the plans for the defense of the house. Agree to barricade the doors, then ask to take a look around. You’ll find a couple of barrels of blastglobes. Don’t pry the lids open or you’ll get a toasty surprise! When you’ve found them, speak to Tavorick and send him upstairs, then speak to Ballard again to have his men barricade all the doors but the one leading to the entrance hall, and also have him place both of the blastglobe barrels by the same entrance hall door.
When you have your preparations done, agree to head upstairs with Tavorick. Events will soon transpire, and you’ll have to tell Comely and Deowin whether you want them to fight or stand guard on Tavorick. In our opinion, the more people you have downstairs, the more confusing the fight seems to get, so we told them both to stand guard upstairs.
The Fight
You’re going to have a fairly lengthy fight down in the main hall here, so even if you don’t normally do so, load up your characters will all the buffs you can fit on them: Stoneskin, ability buffs, Mage Armor, the works. As you enter the hall, two of the guards will tell you of a swarm of demons coming your way through the front door. Fire Mephits, and a lot of them! These guys will come through the entrance hall, and will also quickly burn through the barricades you’ve set up around the hall, making for a somewhat confusing melee here. After the first wave is done, tell Ballard and his men to stay by the stairs and use their bows; the enemies will be rushing for the stairs, so it’s what you have to protect.

After the mephits get worn down, Succubi and Erinyes will begin appearing in greater numbers. Try to position a ranged attacker or spellcaster in front of the door leading upwards to prevent them from bypassing you, and rely on your melee attackers to wear them down.
When you hear the scream from upstairs, head upstairs (refresh Haste on your party if you’re not already hasted), where you’ll find him under attack by three Fire Mephits. If you left Comely and Deowin as a rearguard, they’ll be attacking the enemies and doing their best to repel them, and you should have enough time to kill them off before Tavorick dies. He and the other guards will join your party, allowing you to cast a heal on Tavorick and protect him with Stoneskin and Mage Armor. This is, in fact, a good time to rest, heal, and recast the buffs on all of your party members.
To The Crypts
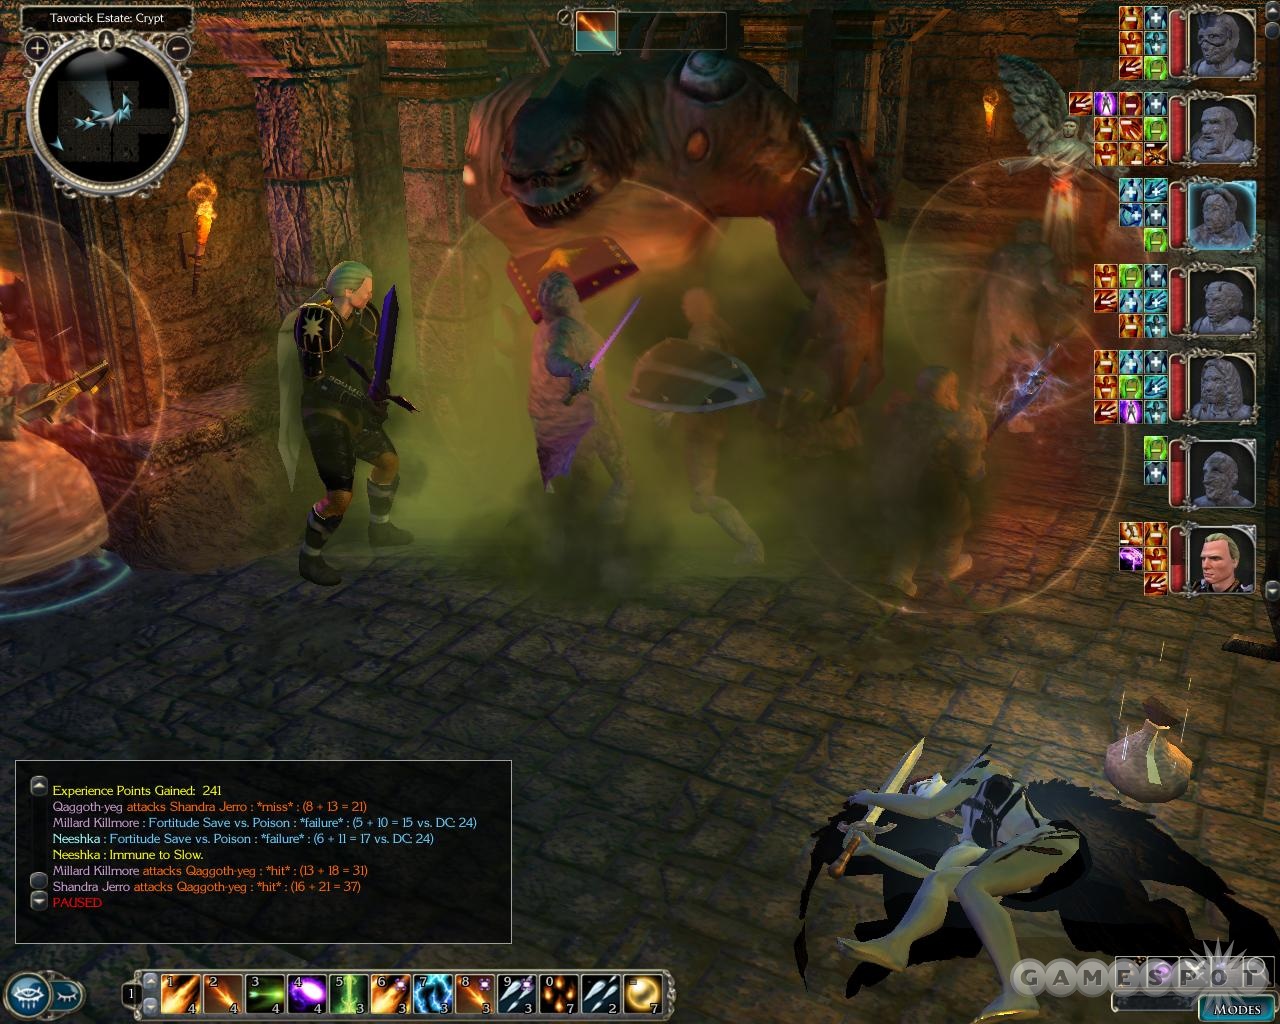
After you enter the main hall, more mephits will attack you. Smash through the barricade on the western side of the room when you’re done with them, and enter the crypt, where a Succubus and assorted other demons await you. Kill them, then proceed further to the west. When you hit the main tomb, you’ll come across a demon. A big one, in fact; Quaggoth-Yeg is a massive toad-like demon that will assault you in the crypt, along with an Erinyes and a Succubus. He’s so big, in fact, that he can’t fit in the door to reach you. That may not matter, though, since the guards here will run through and attack him, and if you’re going to feel bad about letting them rush ahead to their deaths, you’ll probably want to follow along behind them and start wailing on him. He’s not incredibly tough, although his stench will likely act as a kind of poison on your troops.
When Quaggoth is dead, speak to Tavorick to learn that he doesn’t actually possess the silver shard; he had actually handed it off to Melia when she left earlier. That wench! She’s at the Moonstone Mask, so now you have to go there and protect her.
The Moonstone Mask
Head to the Mask, buff yourself, then head upstairs to the second floor. Clean out the enemies in the entrance hall, then head into the large room nearby to find Melia and the King of Shadows. The King will summon in a pair of demonic dogs to aid him, then teleport away. Kill the dogs before reporting your findings back to Nasher.
Nasher will introduce you to Sydney Natale, whom you’ve seen before in cutscenes. She’s Luskan’s new ambassador to Neverwinter, and tells you much about the collusion of Garius and the King of Shadows. You can gain some brownie points with Shandra by pressing Nasher on having Luskan "answer" for their actions in Ember, and by continually disbelieving her protestations that the Hosttower didn’t know anything of Garius’ acts.
Quest: The Master of the Fifth Tower
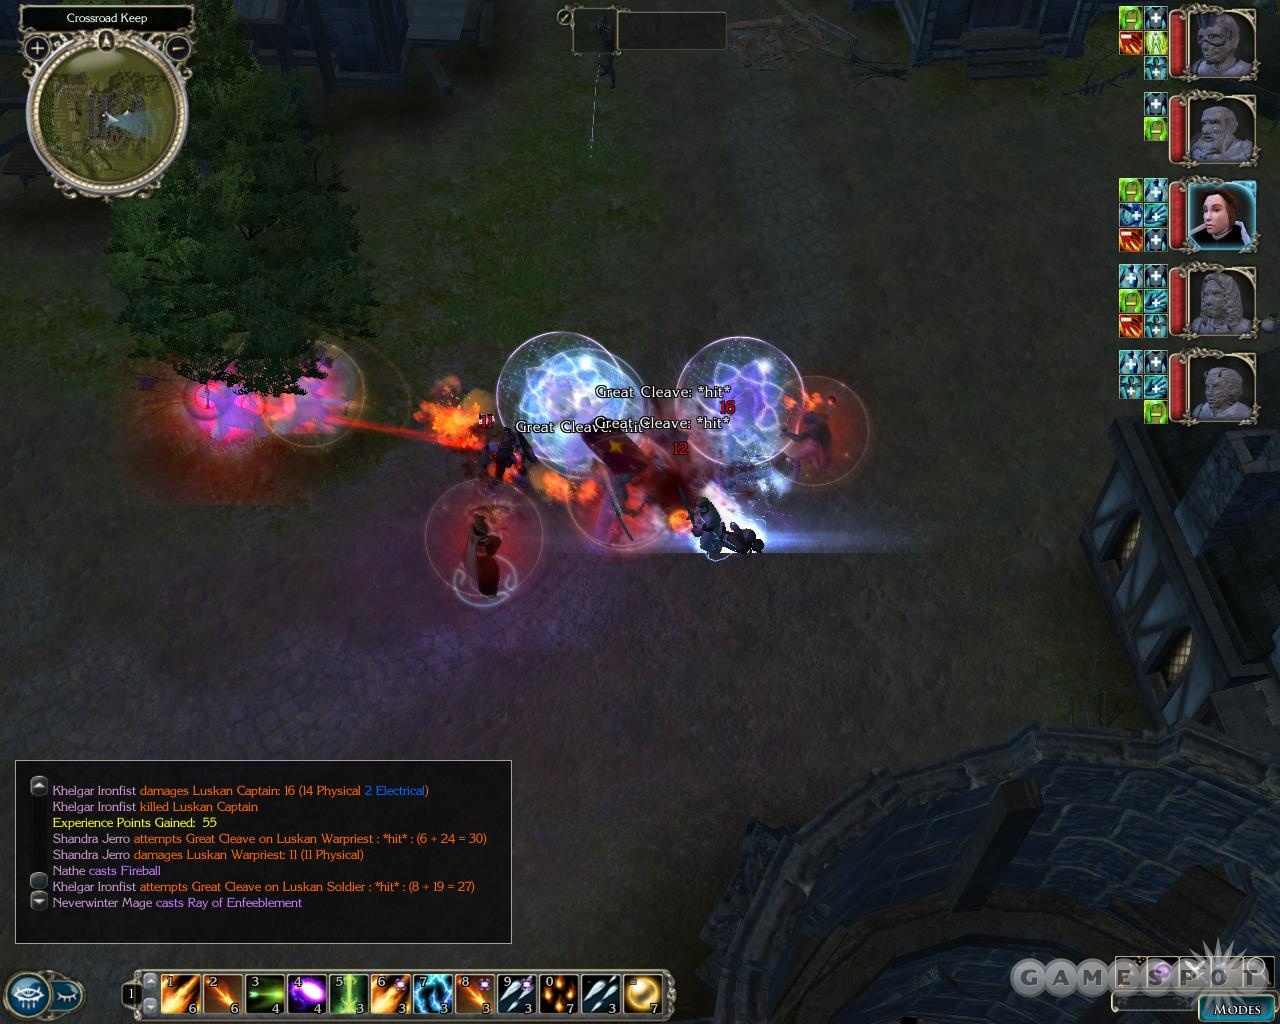
Sydney will tell you all about Garius, and point you towards the Crossroads Keep, where she believes he and his forces are preparing the ritual that will let Garius steal the power of the Shadow King and absorb it himself. Sounds like that’s a bad thing! Anyway, since Crossroads Keep is on Neverwinter territory, she basically says "Well, it’s up to you guys to stop him! Good luck!" and takes off.
Your goal? Head to Crossroads Keep, rescue Aldanon, and defeat Garius. When you reach Crossroads Keep, you’ll come across the Many-Splendored guardsmen, who are preparing to attack the keep head-on. That’s unwise, but they’re insistent. Ask them to wait a couple of minutes, then buff yourself up and head inside.
When you reach the interior of the keep, you’ll have to face off against numerous enemies, but they shouldn’t be able to do much to you, especially not since you have a few wizards fighting alongside you. Kill them, then check the door; it’s locked, and protected from the inside by magic. Vale will ask you to find the keep’s emergency exit and enter through there. Brilliant plan.
Walk, Do Not Run
Vale’s marker for the exit to the castle is located on the world map, so loot all the bodies in the exterior and head back to the farms to reach the world map. Warp to the escape tunnel exit and head inside, using a rogue to advance slowly down the hallway. There are plenty of beetles and bugs crawling around, but there are also a lot of traps that are perfectly avoidable, should you detect them before you run across them. Be sure to check out the vein of ore in the middle of the central room here. Also be sure to nab the loot from the chests and stands in the last off-shoot room before the exit.
When you encounter Aldanon upstairs, tell him to warn Neverwinter that the ritual is underway, then loot the bookcase nearby to grab a Manual of Golemcraft, which will enable a sub-quest revolving around a certain golem you encountered earlier in the game.... Check the Side Quests chapter for more information on this quest.
After passing through a couple of doors, you’ll come across more Luskans, including the wizards that are barring the door leading outside. Kill everyone, then speak to Vale and head after Garius.
Finding Garius
The door nearby leads to an encounter with a few shadow priests and priestesses. They’ll summon in shadows to occupy you, but won’t otherwise be very difficult to take down. Someone will cast a large fire spell in here, so if you want to retrieve all the items from the crates here, do so at the outset; otherwise stuff will get broken when the crates are destroyed.
Fight your way into the basement, bypassing the blade golem that guards the door in front of you. Beyond lies Black Garius and his assorted goons.
Disrupting The Ritual
Garius is surrounded by four of his closest lieutenants, but he and his goons won’t attack you when you enter the room; he’ll leave the dirty work to three Luskan Champions and four Arcane Brothers. Seven enemies, versus your collection of five party members and five Neverwinter Mages. You’re pretty much going to win this fight, although the selection of spells that your foes throw against you will likely cause at least some of your characters to be debilitated for the bulk of the fight, whether due to fear or immobilization. They’ll also cast summoning spells of their own, so be ready to face off against dire bears and the like.
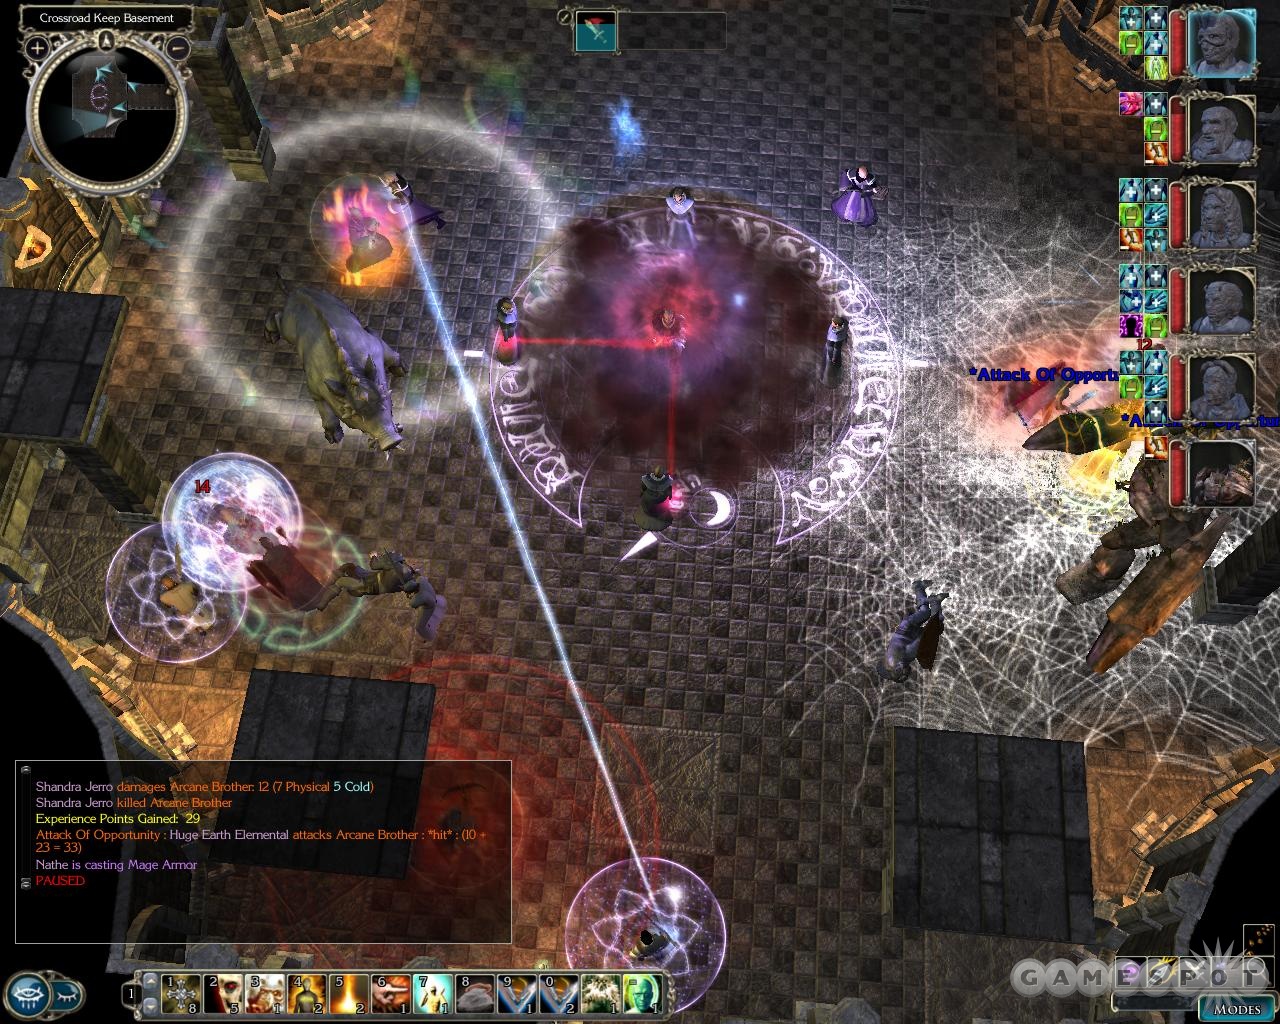
If you want, you can just send in all of your troops into the room as soon as you open the door; the brute force approach will likely win the day. If you want to get cagey, use your main spellcaster or monster-summoner as the character to open the door, then cast your highest-level summoning spell into the room to get the party started. That’ll at least divert the attention of some of the spellcasters here. Still, though, you’ll definitely have numbers on your side. We took down the Luskan Champions before the spellcasters, then started moving out and dealing with the Brothers. If your characters get tied down in the muck, it might be wise to have them switch to ranged weapons and deal with the enemies from afar, assuming none of them close to melee range. Without any supremely powerful boss monster here, though, you shouldn’t have too difficult of a time with the fight.
When you loot the bodies and speak to Vale again, you’ll automatically warp back to Neverwinter, where you’ll encounter Zhjaeve, a Githzerai cleric that will join your party. If you’ve been using Elanee as a healer all this time, then Zhjaeve may be an appropriate substitution, but she’s not particularly fearsome or well-equipped for battle. The main strength of a cleric is the ability to wear heavy armor and wade into battle with the rest of your troops, but with only 10 strength, Zhjaeve will have a hard time getting good attack bonuses with melee weapons and will be nearing the limit of her encumbrance capacity when you fully equip her with weapons. She also has a fairly poor Dexterity score (13) which will make it difficult for her to hit targets if you keep her in the rear with a crossbow. To her credit, she does have a huge amount of spell resistance (20), making her a decent pure spellcaster if you want her to fulfill that roll. All that considered, she’s a useful ally if you still desire a pure healer, since you can load her up with plenty of combat spells, then use the quick conversion ability in the quickcast bar (F button) to convert them to healing spells when necessary.
Quest: Return to Crossroads Keep
When you’re able to leave the jail, return to Crossroads Keep and speak to Vale to learn something surprising, or perhaps not so surprising: you’ve been given the Keep as your own personal demesne. You can find details on this aspect of the game in the Stronghold chapter. If you’re interested, feel free to flip to that chapter and use it for information. Otherwise, Zhjaeve will offer up another quest for you, and one that sounds fairly important. You’ll have to bring her along for this quest, so outfit her carefully.
Quest: Ritual of Purification

With Zhjaeve in your party, head to the Ruins of Arvahn on your map. You’ll witness a cutscene wherein the King of Shadows implies that something wicked is about to occur in West Harbor; it will ominously disappear from your world map at this point. Zhjaeve will tell you that you need to find five statues in the Ruins in order to complete the ritual, which will hopefully weaken the King significantly.
There five statues are scattered around the area, with the first appearing near the entrance. Kill the orcs and ogres that are fighting nearby, then speak to the statue to earn the Aurora Chain special ability. It will add one to your attack rolls and damage against evil creatures for every four levels of the caster; it lasts for five rounds and can be cast once per day and affects all party members. One down, four to go.
The other four statues are all underground, but before you explore any of the structures in the area, it’d be wise to clear out the land of any remaining goblins, orcs, and ogres. You can find an orc encampment in one corner of the area where you can pick up a couple of quests. When you’re ready to explore, head into the one of the four sub-areas here to find the statues. You can take them in any order that you like.
Sub-Quest: Uthanck Thin-Blooded
The chieftan of the orcs is Uthanck. If you speak to him, he’ll ask you to kill an ogre named Ghellu. If you disagree, he’ll attack you, and that’ll end the quest right quick. It’ll net you some magical items, including a very nice amulet for clerics, that you can find on the bodies, but it’ll prevent you from fully completing the quest (and will also prevent you from getting the Ilrah quest).
Sub-Quest: Ilrah Broken-Ribs
If you speak to Uthanck’s shaman, Ilrah, he’ll tell you that Gruumsh, the Orcish god, has predicted that you will lose your left foot in battle. Okaaaayyyyy....
To be honest, we beat the entire game and never found a resolution to this quest, so we’re not sure what to make of it.
Riverguard Keep
Sub-Quest: Ralidor the Restless
You can find Ralidor the Restless on the first floor of this keep. He’ll offer to leave the keep and not stand in your way if you find and kill Ghellu. Since you’re probably going to do so anyway, you might as well take him up on the offer. Feel free to kill him if you wish, though. He holds the Master’s Blade, so if you want to obtain that, you’ll either have to kill him now or kill him later. Waiting to kill him until later will allow him to call in more bugbear helpers, which will make for more experience during the battle.
Apart from that, just kill and loot everything that you see. Don’t worry about the sarcophagus or the locked door near the entrance just yet.
On the second floor, the first door you come to reveals a man named Ribsmasher, who appears to be a combat-loving monk. If you want to set him free, he’ll help smash through the doors nearby and kill enemies for you, but you may want to skip the door for the moment and set him free later; he may steal a kill or two from you, thus reducing the amount of experience you receive. He’ll also smash the treasure chests on the floor, breaking items inside. Feel free to clean out the floor before setting him free. Elsewhere on the floor, you can find The Master’s Shield on the body of one of the ogres.
Ghellu
None of the enemies on the third floor will be hostile to you, so leave them be and start looting everything you see. You’ll be able to attack Ghellu here, if you like, or simply accept a counter-mission that will see you returning to Uthanck and killing him instead. If you want to instigate the most wreckage and get the most loot, then obviously you’ll probably want to kill both groups of foes. The Ghellu fight is definitely harder, since the man himself is both a fearsome warrior and a spellcaster, and he’ll be surrounded by plenty of goblin shamans and a couple of ogre barbarians.
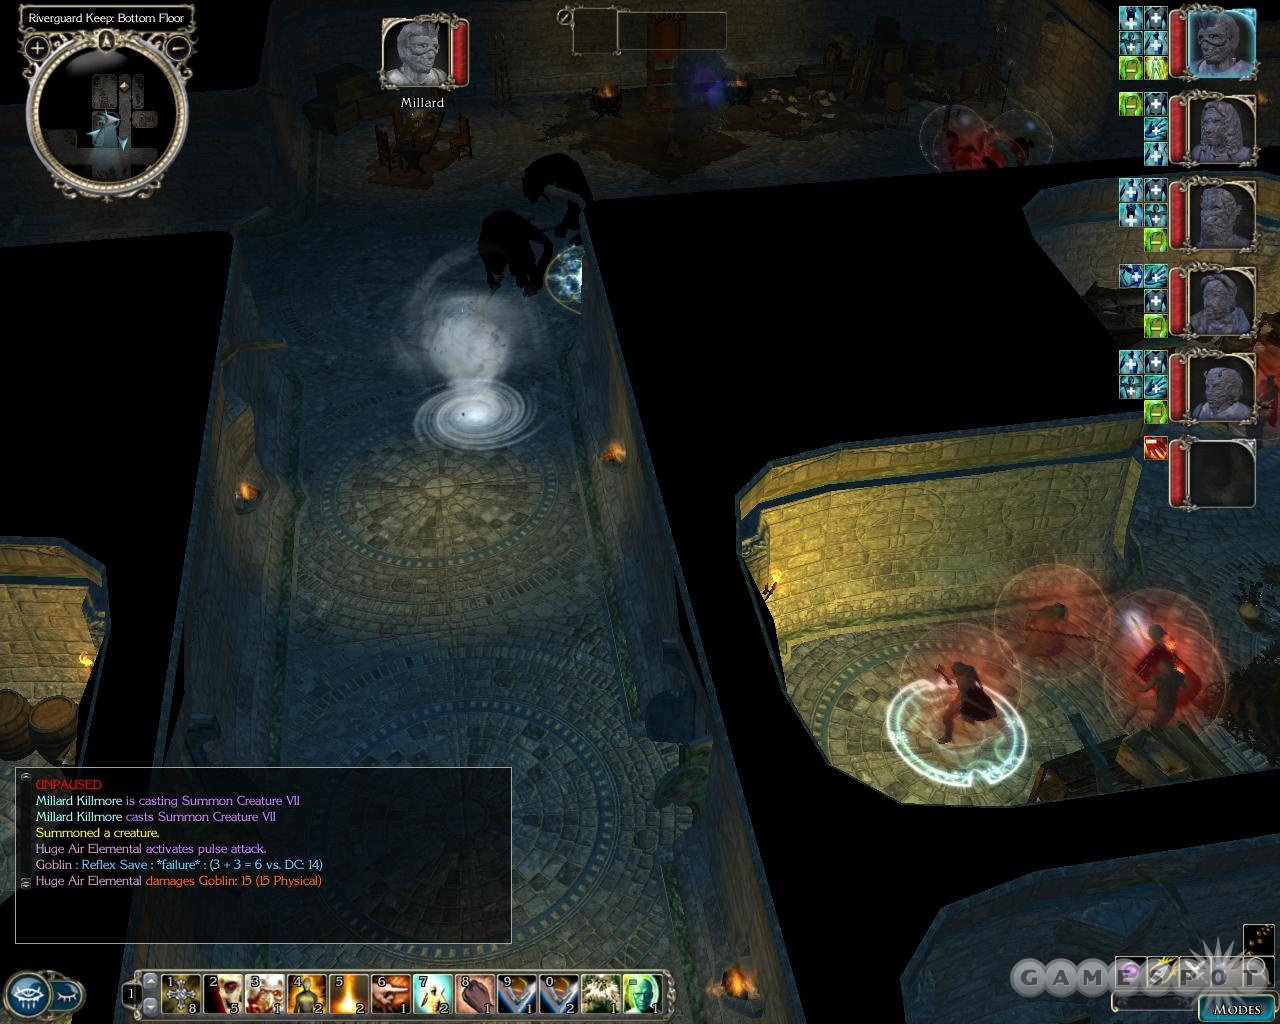
For a relatively easy victory, have Zhjaeve memorize a couple of Summon Monster VIII spells, and maybe one or Summon Monster VII’s as well. Park your entire troupe in one of the empty rooms near Ghellu, preferably the one shaped like an L, and try to get them out of sight of the door. When you’re ready to fight, run your party leader around to Ghellu, tell him that he’s a dead man, then quickly run back to the rest of your party members, closing the door behind you. A few goblins will likely come to you and attack, so take them down, but be sure your party members remain parked in place. When things have calmed down a bit, use Zhjaeve to cast her Summon Monster spells through the open door, where they’ll be in full view of Ghellu and his troopers. With any luck, the elementals that come to your aid will be capable of wearing down a few of the goblins and maybe even a barbarian or two before you run out and attack Ghellu and his remaining forces. The goblin shamans are going to be annoying, so focus on them before ganging up on Ghellu, who’ll mostly be Improvedly Invisible anyway. His body contains the Master’s Scepter.
The door nearby here guards your path to the second statue you need. There are multiple ways to open it. If you have the Master’s Scepter, Shield, and Blade, it will apparently open for you; you can goad Ribsmasher into attacking it (which earns you Evil points); you can have the goblins sacrifice themselves to open it if you killed Uthanck for Ghellu; or, finally, you can simply attempt to open it over and over again until the magic wears off of it. You’ll be shocked for 30 or 60 points of damage after each round, but if you use the door outside of combat, you’ll simply pop right back up if you die, so there’s no real danger involved. Opening the door in the last manner will earn you some influence with Zhjaeve.
The statue will teach you the Shining Shield skill. Although it looks neat, it only lasts for a couple of rounds, and gives your party Negative Energy Protection and protection from Cold damage.
Return to Uthanck
If you agreed to Ralidor’s deal earlier on, he’ll be waiting for you outside the keep. If you show him Ghellu’s head, he’ll leave you be, but there’s really no reason to keep him alive. Before approaching him, park your teammates a bit away and summon a creature or two. When Ralidor gets upset and attack, his his clerics and archers with a maximized fireball or two to weaken the group up, then proceed to demolish the lot. You’ll receive a magical crossbow, the Master’s Blade, a Darksteel Shield, and some crafting materials for killing them all, on top of the experience; the bugbear tusks will net you Glowing Water Essences. (You gain no experience from proving that you killed Ghellu.)
When you return to Uthanck, you can choose to tell him about Ghellu’s death for 1,500 XP. This is likely more than you’d get for slaughtering the orcs, but you do lose out on a bit of loot this way, including the nice cleric necklace. Presumably you’ll also be prevented from completing the Ilrah Broken-Ribs quest. (Did this guy have a run-in with Ribsmasher?) If you want to finish off the Orcs later, though, speak to Ilrah and insult his god to earn the ire of all of his tribe.
Gem Mine
Balaur in the entrance hall here will weave an interesting tale for you. He was apparently one of the last mages of the Illefarn empire, and helped to partially debilitate the King of Shadows in ages past. He’ll share with you all of his knowledge of the King, and tell you much about the Mines. Apparently, in order to reach the statue here, you’ll have to kill many undead foes, then extinguish a number of spirit-prohibiting flames in order to circle the central stone tree with three dwarf and three elf spirits. Or something. Sounds pretty complicated.
Begin by moving out near the tree here and attacking Baelnom, who’ll summon in annoying Ghasts to attack you. There are six of these fellows in all, and you’ll need to find all of them in order to gather them around the tree. They come in a few different forms, though. One is simply standing free in the mines, while another will take the form of a very difficult-to-kill Iron Golem. For that fight, you’ll have to ransack your bag for adamantine weapons, if you’re not already using them; they have damage reduction 15/adamantite, so your normal weapon attacks will likely glance off them, although you may get lucky with critical hits and the like. They’re also almost completely immune to magic, so that won’t help overmuch. If your weapons deal extra magical or elemental damage, then they may be capable of wearing down the golem over a long period of time, but again; it’s best to use some kind of adamantium weapon if you have one.
Some areas of note include the Smithy, where you’ll find a Rune Inscribed Iron Piece, which will come in handy during the Reactivating the Construct quest. There’s also a small chapel on the eastern side of the area where you’ll find a mighty Mystran Belt of Priestly Might, which will net the wearer +4 Strength and +2 AC.
Guiding The Spirits
When you kill the creatures that hold the spirit’s souls, talk to the spirit that remains behind, and extinguish all of the spirit lights on the walls to open up the path leading back to the central tree. It’s best, however, to kill the creatures, leave the spirit alone, and continue to clear out the entire area (it’s one big floor) and grab loot before returning to the spirits and attempting to guide it to the tree.
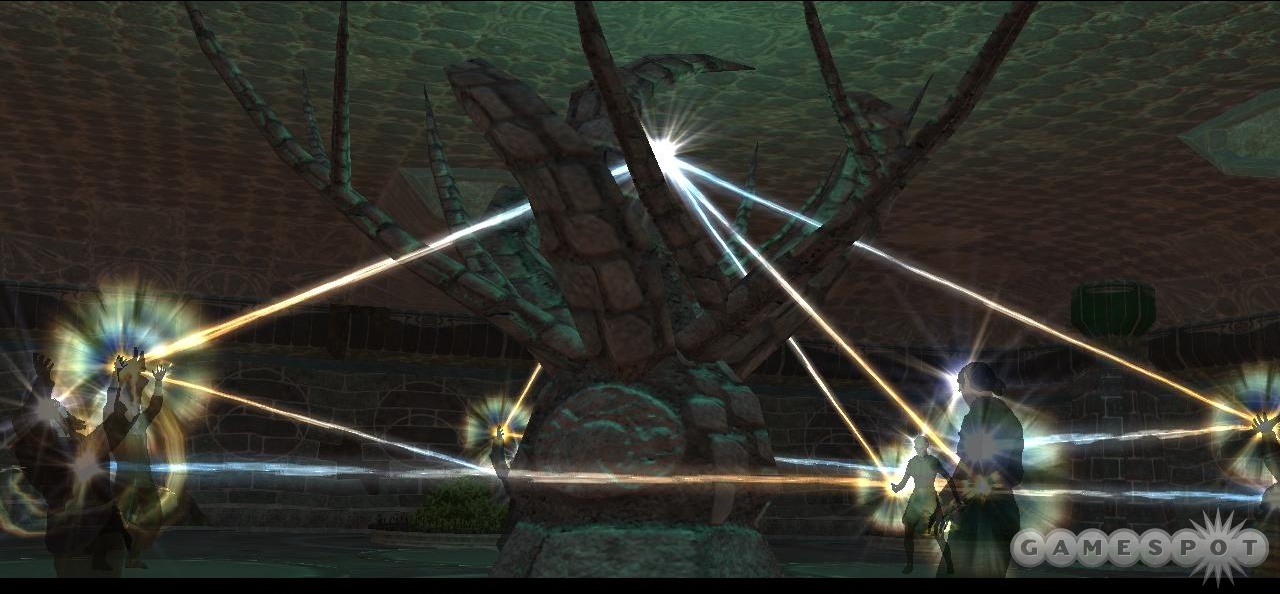
Note, however, that the spirits will not all simply walk straight back to the tree; they get confused easily, and will often simply choose any path that’s available to them. If you simply keep all of the wall lights turned off, they’ll run around in circles. What you have to do is guide them by turning the lights on and off. Click on them once to get them moving, then turn on the lights behind them. You’ll have to cut off all paths that don’t lead to the central tree, and continually turn on the lights that dwell behind the ghosts, to get them to the tree. It’s a lot of running around, but if you manage to clear out the entire level, you can park your party somewhere and use a single hasted character to maneuver all of the spirits into place.
When all of the spirits are around the tree, the third statue will be revealed. It will teach you the very handy Soothing Light spell, which eliminates negative energy effects from your teammates and causes your entire party to regenerate damage for five rounds.
Temple of Seasons
The Temple of Seasons is devoted to the memories of four great Illefarn, and is (obviously) a seasonally-flavored dungeon. Get ready to ward off a few different elemental types of damage!
Trial Of Winter
The first trial you face off against is the Trial of Winter. Cast any energy resistance spells you can on your characters, focusing on preventing cold damage. When you open the book in front of you and flip the pages a few times, the trial will begin. It’ll pit you against a few waves of Winter Wolves and Ice Mephits. Nothing you can’t handle if you’re adequately buffed, although the elemental damage will likely seep past your Stoneskins and Mage Armors; be ready for healing if need be.
Note that the door to the north of here leads to the statue you need to visit. It’s apparently possible to pick the lock and visit the statue now, but it would seem that this isn’t supposed to be able to occur, since it’ll cause some wonkiness in the other rooms of the dungeon. For now, ignore it, and head to the east towards the Trial of Spring.

Trial of Spring
Nothing too difficult here. Four Earth Elementals and a few archer statues. Be sure that your spellcaster doesn’t get pounded by the Elementals before you manage to take them all down.
Trial of Summer
Don’t even bother with protecting yourself from fire damage here, despite the appearance of the room; your foe here will be an Iron Golem. Equip adamantium weapons and take it down.
Trial of Spring
A fairly easy fight here, as a bunch of sylphs will attack you. Kill them!
After completing the four trials, you’ll earn the Cleansing Nova skill. Nab the equipment from the chests and head outside.
The Strange Dias
After you have four blessings from the four statues you’ve visited thus far, the portal atop the hill in the middle of this area will open up, allowing you passage through. You’ll wind up in...West Harbor? The King of Shadows has had his way with the area, destroying most of the inhabitants. Daerghun is nowhere to be found, nor Bevil. Bring Zhjaeve to the black scar in the ground near the Starling field to get her opinion on it before heading out to the swamp.

The crypt that the lizardmen were originally inhabiting is sealed, but the nearby building that you couldn’t enter way back in Chapter I is now open to you. Buff yourself and head inside.
The Shadow Reaver that appears here is more fearsome-looking than actually dangerous. He, two Shadow Priests, and a couple of wraiths will launch themselves at you after you enter. Destroy them quickly, loot the bodies, then leave through the portal at the rear of the room to return to the Ruins of Arvahn. From there, return to Crossroads Keep to learn a bit more about your quest now. Since you can’t complete the Ritual of Purification, you have to somehow find Ammon Jerro’s Haven and unlock the secrets of reforging the silver sword.
Quest: Finding Ammon Jerro’s Haven
The first step here is to return to the Keep and speak to Aldanon, who’ll be standing outside the library if you haven’t rebuilt it yet. You may have to enter the keep a couple of times before he shows up. After a lengthy conversation, you’ll get the Haven’s location marked on your map. If you have the time and the equipment, now would be a fine time to make some weapons with the Holy enchantment you found in the Book of Banes, which you should’ve picked up recently. (If you didn’t, it’s at the end of this guide.) That extra 2d6 damage against evil creatures, especially since it’s at a fairly cheap material cost.
Ammon Jerro’s Haven - Exterior
Make your way to the Haven with a powerful party; note that Zhjaeve is no longer a required member here. Buff yourself and start making your way through the courtyard. There are plenty of enemies here, including half-invisible Shadow Mastiffs. Their howls cause Fear, so you may want to let Casavir take the lead when fighting them, or use anti-fear magics on your party. The gargoyles are just beaters, so take them down.
When you’ve cleared the area a bit, head towards the marker for the Jerro Guardian in the northwest. He’ll tell you about three trials you’ll need to pass to gain access to the Haven.
Path of Sight
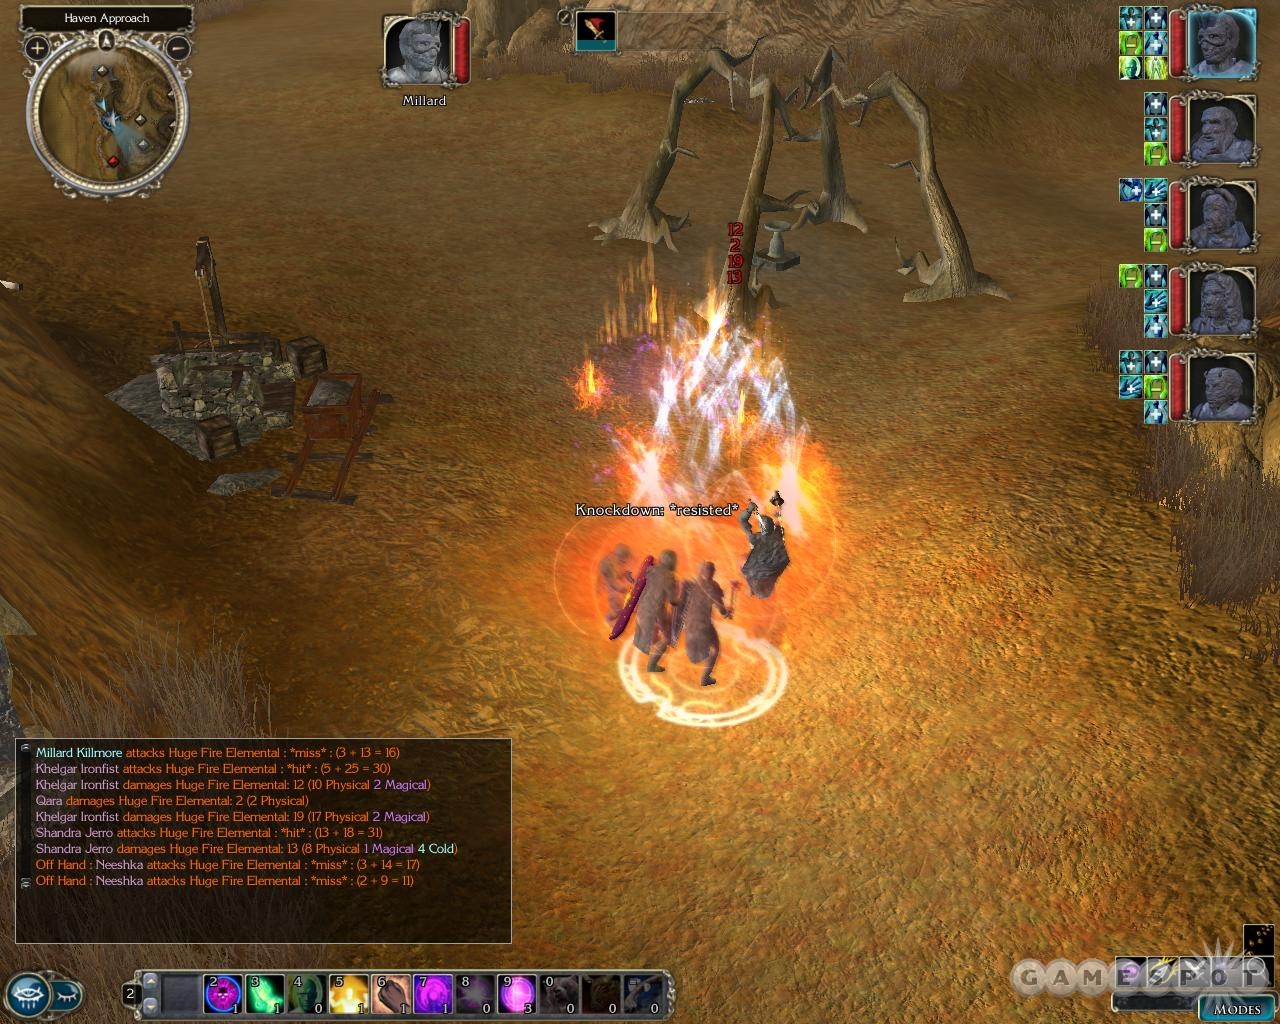
Easy enough. The three braziers you likely already cleared out will be surrounded by fire elementals when you return to them. Kill all of the fire elementals, and you’ll find a Fiery Heart on the body of the Huge elemental. With that in your inventory, activate the brazier to light it, then kill the Shadows and Shadow Mastiffs. Repeat the process three times (you’ll have to look around for the third set of elementals) to finish the test.
Path of Determination
The Guardian will give you an empty flask, and task you with filling it in the geyser in the northwestern corner of the area. You’ll take some damage here, so you may want to give your main character a Ring of Regeneration or something similar. To avoid the worst of the damage while approaching the spring, try sticking close to the southern edge of the ridge to avoid the spray. When you reach the geyser, try a dexterity check to grab the water, or a Tumble if you happen to be decent at it. Even if you fail your check, you’ll still fill the vial; you’ll just take damage as well.
Path of Sight
The barbarian shaman can be found on the hill. If you choose to kill him outright, you’ll gain a magical flail and shield; if you totally refuse to kill him, you’ll have to fight off six or seven very tough barbarian spirits. The best way to approach this if you’re a good character is to initially refuse to kill him (netting Influence with Shandra), then change your mind and strike him down. The fight against him is easier than against the spirits, and you get better loot to boot.
When all three paths are completed, return to the Guardian for your reward: access to the Haven itself. Before you enter, strip Shandra of all her equipment and give it to other characters in your party. If your main character can’t open locks, then you may also want to buy the Chime of Opening from Raylene in the Docks district and place it in his or her inventory. You’ll also want to make a full save before entering the dungeon.
Quest: Ammon Jerro’s Haven, At Last
Now that you’re inside the structure, you’ll come across an old friend: Mephasm, the devil who helped you defeat Zeeaire at the end of Act I. He’s bound to a summoning circle here, again, and tells you that there are five more demons and devils bound elsewhere in the dungeon, as indeed there are. The catch is that you can’t actually fight any of them, and instead will need to somehow convince three of them to help you gain access to the central laboratory. You can do so either with diplomacy, or by tricking them into lending you aid. As you walk through the corridors, cutscenes will play out as Shandra warps around the level.
Each of the demons in the level will have their own mini-quest involved with them. Some other interactions with each of them are possible, as well. If you have Neeshka along for the ride, you can earn influence with her by joining her in taunting the trapped demons, but this will occasionally cause the demons to summon enemies to attack you through their portals.
Baalbisan: The Torment of Baalbisan Baalbisan is the first demon you encounter. He hates females, so if your main character is a woman, you may have an interesting conversation with him. This hatred of his is the cause of his feud with Hezebel, a succubus elsewhere on the level. If you agree to deal with her succubi servants, he’ll help you port to the lab.
Hezebel is the next fiend that you come across in the dungeon. Feel free to hear her out, if you wish, or simply attack the Erinyes she sends your way right off the bat. When you’ve vanquished all of the servants, return to Baalbisan and he’ll reward you by lending his energy to the portal. This will prevent you from allying with Hezebel, though.
Hezebel: The True Name of Baalbisan’s Matron
Hezebel desires to know the name of Baalbisan’s Matron. As far as we can tell, this is a straight-up Taunt check. If your character has a good Taunt skill, then you can pull this off; otherwise, Baalbisan will usually refuse to take the bait.
Zaxis
Zaxis doesn’t have any quests, so far as we can tell. He simply refuses to help you, owing to the fact that you pwned him at the end of Act I. Beat his minions to move on. Their poison will greatly debilitate you, and it’ll be difficult to find a place to rest in here, so have Restoration spells at the ready to remove its effects.
Feel free to explore the hallways between Zaxis and the next demon, if you wish. There’s an iron golem and some nice loot on the equipment stands. The bedroom has a random gem in the footlocker, so you may want to save and reload until you get someone nice from it and the armoire. Don’t worry overmuch about the Imp here for the moment.
Koraboros: In Koraboros’ Service
If you speak to the demon with burning wings, he’ll tell you that he recently misplaced an Imp servant of his, and wishes for you to find the Imp and return it. You can find it floating in front of one of the bookshelves in the bedroom between Zaxis’ and Koraboros’ rooms. Nab the Ancient Book off the shelf there, right-click on it in your inventory, and use it on yourself. The Lore and Spellcraft checks are all but impossible to make apparently, so read the third intonation (Tilo Ut Lon) to free the imp.
Blooden: Demonic Carnage
After fighting your way past Blooden’s succubi (and likely dealing with a couple more from the portal), she’ll make you an offer: if you can convince Koraboros to send some devil dogs to spar with her own minions, she’ll reward you by opening the portal to the laboratory. Koraboros will agree to this without much confrontation; you may want to quicksave beforehand just in case you insult him, though. If you lead the dogs back to Blooden, you can choose to stay out of the fight, or choose a side to fight on. If you fight alongside the dogs, be prepared for a lot of mind-affecting spells from the succubi.
So, in the end, Blooden, Koraboros, and Baalbisan are all fairly easy to divert to your cause. With the portal open, check the area for any items or loot that you may have missed, then head through it. Be sure to buff yourself first. Before you head through, be aware that your main character is about to embark on a lengthy fight all by their lonesome; be sure to load them up with useful magical items like the Ring of Regeneration, or potions to heal his or herself.
The Master

Well, surprise surprise: the man you thought was the King of Shadows was in fact someone else all along. All will be revealed shortly; just focus on taking him down for the moment. This fight isn’t difficult, honestly, although there are minor annoyances, such as the appearance of a demon in the portal near the wall and the lasers that fly off the four spires in the center of the room. You can destroy the spires by attacking them, if you wish, but if you simply focus on the Warlock, you should be able to serve up a beatdown fairly quickly. You will, however, net yourself a large experience bonus if you take down the Lesser Horned Devil first.
After the fight is interrupted, a lengthy set of cutscenes will warp you back to Crossroad Keep Inn, where you’ll be able to speak to Ammon as long as you like. Quicksave before you speak to him and periodically check your chatlog to ensure that you don’t lose influence with him. The Act will end when you speak to Sir Nevalle near the doorway. You won’t have any opportunity to change your inventory before heading out, so we sure hope you’re not encumbered! Spellcasters should focus on anything that will help them fight by themselves; Tenser’s Transformation for wizards or sorcerers, self-buffs of all sorts, and most importantly, big bad summon creature spells will all be a big help.
Act III
At the beginning of this act, you find yourself in Castle Never alongside Sir Nevalle. Soon enough, a fight will break out, forcing you to fight on your own, sans teammates. Depending on your class, this is either going to be fairly easy (cleric) or really difficult (bard). Unfortunately, there isn’t much you can do to help yourself except prepare; those preparations should have started as far back as when you first entered the Haven. Of course, it would’ve been difficult for you to know what was coming that far back, so you may have to improvise a bit.
Quest: Defend Castle Never
At the outset, you’ll be dealing with Elite Vampires, Shadow Priests, and Wraiths. A tough assortment of foes, to be sure; your Ceremonial Blade will protect you from death magic and disease, but it won’t be an offensive powerhouse for you. Honestly, there isn’t much we can say to help you survive here; you’ll need to use all of the abilities granted to you. Spellcasters should definitely bring down the biggest creature or monster they can summon to help out. Keep in mind that your cloak has been changed out for a Neverwinter Knight’s Cloak, which will let you regenerate your health, albeit slowly. It’ll also give you a good Deflection Bonus to your AC, as well as Freedom of Movement, so feel free to change out other magical items that have those abilities, since they won’t stack.

After the first round of enemies are dead, take a moment to rest, switch out spells, examine your inventory, etc. When you’re ready to proceed on, head towards the guard room that Nevalle entered. He’ll tell you to go on alone to help Lord Nasher. Brilliant plan! "Go risk your life while I cower in shame!" You can’t kill him, unfortunately, but you can heal yourself at the cleric here. Feel free to return to the cleric should you be wounded in the fights later on. Also note that the Wraiths you’re going to be attacking are half-invisible, so if you can cast Blindsight on yourself, that’ll help you hit them.
Make your way through the hallways here; the toughest fight will be against two Vampire Champions. You may have to keep the Ceremonial Sword equipped to protect you from their level draining ability. We never got level drained ourselves, but we imagine the cleric near Nevalle will take care of you if you return to him. If you have a hard time with these guys, get their attention, then run all the way back to Nevalle, who’ll help you kill them; just keep in mind that you won’t get any XP for the kills if he gets the killing blow.
Neverneath
Smack the tapestry on the wall near the three Shadow Priests to reveal a secret door, then head down to the Neverneath. You’ll have to fight your way through a few rounds of Mephits to proceed. There are also a few questions to be answered when you talk to the statues; a test of loyalty. If you fail, you can still proceed, but you’ll have much, much tougher fights to deal with. Want to take on multiple Iron Golems by yourself? Then feel free to get these questions wrong.
- How many fingers?: Nine.
- Name of the lake?: Black Lake.
- Where are enemies of Neverwinter buried?: Tomb of Betrayers.
- What is the other name of the Artery?: Neverwinter River.
- Where would an enemy find a map of our city?: (Say nothing.)
- How many gates to pass through?: Three.
When you’re past all of these, you have to take an oath of loyalty. If you lie, you’ll gain chaotic points. If you say No, then a number of floating swords will attack you. If you can take them out (summoning a creature is a big help here), then you’ll be able to pick up six or seven Longsword +1’s and sell them later.
If you accept the oath, though, whether you lie or tell the truth, the nine swords here won’t attack you unless you break the circle that the statues form. To bypass fighting them, circle around to the north side and reach the body of Never by walking past the statue that faces north. Grab the Rod Of Never from the crypt and head up the stairs nearby.
When you attack the Shadow Reaver, it will disappear, Lord Nasher will knight you, and you’ll gain a bevy of quests. Nasher wants you to find a way to kill the Shadow Reavers permanently, adduce some way to gain access to the King of Shadows’ lair in the Meredelain, and foster alliances with races that may be able to help you out. He also wants you to fortify Crossroads Keep to withstand a possible attack from the King’s forces.
Return to Crossroads Keep and talk your options over with your compatriots. You have a lot of different options available to you now, so feel free to choose a path that suits you. We’ll go ahead and do the same. (By the way, if you’re looking for Shandra’s belongings, they’re in the inventory of Ammon Jerro.)
Keep Upkeep
Before you head off on your grand adventures, check around the Keep to see what’s going on. Bevil has appeared in the courtyard, near the ruined tower, and will join you as a sergeant. You can now build the church and the tower itself if you speak to the architect. The library inside the keep will have been built now, even if you didn’t pay for it earlier, and there are a few books you can pluck from the shelves.
If you head inside the keep and then walk back into the courtyard, you’ll meet up with Daeghun again; he has a task for Elanee. He says that he thinks the druids of her circle may yet be alive. If they can be contacted and convinced to join, they’ll be powerful allies.
Exploring the Market District

Before you move out on your grand adventure, you may wish to prepare yourself with new equipment. If you can find Randolph the merchant in the Market District of Neverwinter, he’ll sell you plenty of rare gems, like a beljuril, king’s tear, a jacinth, a blue diamond, a canary diamond, etc. He’ll also have a number of break-downable crafting items for your mortar and pestle.
Near the entrance to the Market District, you’ll find a woman named the Light of Heavens. Buff yourself for a fight before speaking to her, and cast a summoned creature if you can; she’ll offer to fight you if you accept her challenge. She claims to be testing you to see if you’re capable of fulfilling your destiny. She doesn’t offer a quest; she simply challenges you to a duel, then walks away when you win, promising to return later. You can find her in Port Llast later on.
You can also find Joy, a dancer, dancing near Randolph. You can recruit her for your Inn at the Keep.
Alliances
Of the three tasks that have been set before you, finding a way into the King’s base and finding a way to defeat the Shadow Reavers are both going to have to wait; your goal at the outset is to forge some alliances with races that might be able to help you in the upcoming battle. You can apparently do these in any order; we’ll describe them in the order in which we attempted them.
Quest: Alliance With The Wendersnaven
Head to Port Llast with Grobnar in your party and speak to the two gnomes on the western side of town, near the tent in the clearing. You have to simply sit back and let Grobnar listen to them talk for a while before he begins to understand what they’re saying. When he’s able to interpret, you’ll be able to ask them yes or no questions to try and adduce where and what the Wendersnaven are.
Start with the direction. If you guess east, you can then guess northeast. Choose "This is getting us nowhere" to learn about a map the two scholars have. They won’t give it or sell it to you, but they’ll show it to you, and Grobnar will be able to deduce the location from that.
The Strange Clearing
Head to the Strange Clearing on your map. Find the ore deposit first before heading towards the bones in the middle of the area. Grobnar here will find an invisible instrument...or something wacky like that. Long story short, tell him you want to believe in the Wendersnaven to gain some influence with him, then fight the orcs and head home to report the ore find. That’s about as good a resolution as you’re going to get. Grobnar will also get the Wenderkazoo, one of the most powerful bardic instruments in the game.
Quest: Alliance With The Lizardfolk
Head to Highcliff to find a disturbing scene: Lizardfolk are attacking the citizens of town! Gera and Zachan will meet you outside the city limits. Quickly move to kill off the lizardmen and save them; they’ll tell you that the reptilian rascals have camped on the southern side of town and are attempting to besiege it. If you check your journal, you’ll discover that there’s a new leader of the lizardmen that is influencing them in some strange way.
Continue down the road to reach Highcliff, where you’ll be told to talk to Elder Mayne. Before he goes off to anchor Sportscenter, he’ll give you some background on the situation, which basically amounts to the fact that they don’t know anything at all.
If you go to the center of town and approach Vlssk, the lizardman captive, you can patch up his wounds to interrogate him, if you wish, or leave him to die. If you question him, he’ll tell you about Batha, the new leader of the lizardmen, who apparently has the power to divine the future. If you ask him how Batha managed to gain his powers, and succeed in a speechcraft roll, you’ll learn that Batha "danced with shadows in swamp." Sounds like he made a deal with the devil...Vlssk will tell you that Batha is waiting to speak to the shard-bearer, though.
Dealing With Batha

Head to the southern lizardman camp here to meet up with Slaan again, assuming you let him live earlier in the game. (Be sure to fully buff yourself before heading into the camp.) He’ll introduce you to Batha. A fight seems to be all but unavoidable here, since he’ll attack whether or not you choose to provoke him. Although he tells his men to stand back, they’ll still pile on, so be sure to immediately summon an elemental or two to help out in the fight. Batha’s the toughest of the bunch; after you drain his life meter once, he’ll morph into a huge earth elemental, so concentrate your firepower on him to eliminate his big hits from the fight before finishing off his men.
At this point, we’re presuming that evil characters can kill the remaining lizardmen if they like. Since we were playing as good characters, though, we let Batha look into our minds to discern the truth of our intentions, and showed him that the powers that were granted to him had led him astray. It didn’t take much coaxing to convince him to join our alliance at the Keep.
With that done, return to Mayne and report your success. Before leaving town, head down to the docks to find a bunch of locked chests with more loot in them. When you return to Crossroad Keep, you can speak to Lasshiva in the basement if you wish to interface with the Lizardmen.
Quest: Alliance With The Circle Of The Mere
Take Bishop out of your party, if he’s in it, and add Elanee. Be sure that Bishop is outfitted properly, though, as he’ll show up in your party when you reach the Circle of the Mere, even if he’s not in it! Six people! If you have Elanee and Bishop both summon their animal companions, then you can have a truly ridiculous number of party members here.

Head forth and speak to the druids of the Circle. It quickly becomes apparent that they’re loco. They’ve trapped the elder member of the Circle in a tree, and are intent on deifying the shadows that have ruined the land. Nothing to do but kill, kill, kill...although you may want to couch your terms in slightly softer language when attempting to convince Elanee of the necessity of the task in front of you. The druids are not exceedingly tough to take down, but you still may want to summon some elementals or Mordenkainen’s Swords to help you out. You can buff yourself before walking up to the druids, if you like.
With the druids dead, talk to Naeve to end the mission. He won’t join your cause, so this alliance is kaput even before it started. Wusses.
Quest: Alliance With Clan Ironfist
Head to the Ironfist Stronghold with Khelgar in your party to start this quest. You can Khayer in the main hall to learn of the arrival of Keros, leader of the Ironfists, who you’ll have to entreat to join your alliance. Before you head there, though, you may want to shop at Revorax’s smithy; he sells some insane items, like a +6 Warhammer, and a +7 set of full plate armor that only dwarves, goblins, or halflings can use. If you can afford the steep asking price, that’ll be a big boon to Khelgar’s outfitting. The Lesser Golem Armor or the Shield of the Void may be useful for him, or for other characters.
Keros will turn you out on your tail and refuse to speak with you; he and Khelgar definitely seem to share some ill blood. If you want to earn his trust, Khulmar will tell you of the Hammer of Ironfist, a great weapon...which lies elsewhere in the clanhold. Like Thor’s Hammer, though, it’s magics prevent it from being lifted by anyone who isn’t strong enough to wield it. You have the gauntlets of Ironfist, but you’ll need to match them with a magical belt if you want to be able to wield the set. Khulmar will mark the location of a clan of fire giants on your map, and tell you that that’s where the belt is located. Time to get your fire on!
Before setting out, try and distribute any fire-resistant items amongst your party members, and be sure to memorize some energy immunity spells.
Mount Galardrym
Feel free to buff yourself up here, with Energy Immunity being especially important. There’s obviously going to be a lot of fire effects, including hell hound breath and fire-based traps, so set yourself up right. When you reach the first fork in the road, take the western path to reach a small camp with a vein of ore in it. Kill the fire giants, loot the place, then head back to the fort and start climbing the hill up to the main camp. There’s a smallish camp on the eastern side of the map that’s easy to miss, so keep your eye out for it; a nice katana can be found on a weapon rack there.
Eventually, you’ll reach another fork in the road in the northeastern corner of the map. You can choose to head straight to the canyon beyond this area, if you like, but if you’re ever on the hunt for experience and loot, like we are, then you’ll want to head to the main camp nearby and deal with the situation directly.
Sub-Quest: Battle Atop Mt. Galardrym
If you speak to the prisoners in the camp, they’ll refuse to tell you why they were in the mountains; they’ll simply request that you kill the nearby fire giants and open the path to the exit to the zone. You can’t free them otherwise.
Now, if you wish, you can simply wade into the fire giant camp and kill them all; they’re not too difficult to take down, assuming you have some decent offensive firepower. If you want to complicate matters, though, you can feel free to take the eastern path leading to the canyon in the north. You’ll find some rocks at the top of the hill, which you can push (if you’re strong enough) to eliminate some of the giants.
What’s more, you can find a massive dragon in the Fiery Canyon beyond. Tholapsyx, with a bit of talking, can be convinced to help you attack the fire giants. You can also attack her, if you like; we’ll deal with that possibility shortly. If you want the maximum possible loot, but with a couple of tough fights, you should avoid speaking to her altogether.
Regardless of whether you ally yourself with the dragon or not (you don’t even have to talk to her, if you don’t wish to do so), kill the giants, and be sure to check out another ore vein in the area. Grab all the loot from the chests, then return to the prisoners and interrogate them. Luskans! They’ve been sent to encourage the spread of the King of Shadows! Bastards! They claim to have seen the light, though, and will tell their masters about the true threat of the King, should you let them go. Being a good party, we decided to do so, and the quest log stays open, so we’re betting at this point that this will result in more forces for your alliance down the road.
With that done, you can pick your path to reach the canyon. The western path will lead you past at least six more fire giants, who will drop a couple more fire giant heads which you can convert into Radiant Fire Essences, and some loot.
Choices, Choices
Now, you have some choices to make. If you haven’t spoken to either the Fire Giant King or Tholapsyx, then your options are still wide open. The deal is this: the Fire Giant King wants you to help him kill Tholapsyx, while Tholapsyx wishes for you to help kill the fire giants altogether. If you agree to Thol’s terms, she’ll help you kill the giants, but will demand all of their treasure after the battle is over, letting you keep the Belt of Ironfist so that you can still complete your task. If you help the Fire Giants out and kill Tholapsyx, then they promise you the Belt in return, but seem likely to betray you.
Two Big Fights
Killing the Fire Giants
For maximum loot and experience, your best bet is to simply kill both the King and Tholapsyx. You should start with the fire giants. Fight your way to the Seat of the Mountain and speak to the King; he’ll insult the Ironfist clan, so back up Khelgar on their pride and tenacity to earn some influence. Feel free to agree to kill Tholapsyx for them; that will let you move around the area and position your troops more effectively before you start the fight. Be sure to have some high-level summoning spells memorized and, obviously, you should rest and fully buff all of your teammates before beginning the fight. Stoneskin, Improved Mage Armor, Energy Immunity; the works. You might even want to bust out Improved Invisibility for your melee characters.

When you’ve set yourself up properly, park all of your party members in the small corridor that leads into the open area here; you want to bottleneck yourself so that not all of the fire giants can attack you at once. You may want to cast a Blade Barrier in the small gap there to damage anything that comes your way. Cast a high-level summon spell into the area, then have your strongest melee character run forward and speak to the King, informing him that you won’t, in fact, be killing the dragon. Everything will turn hostile.
With that done, run your character back to the corridor and use it as a base of operations. All of the fire giants will attack at this point, although most of them, including the King, are exclusively melee, so they’ll be forced to run at you to get to you. If you can summon a huge elemental or two (depending on the classes you have accompanying you), you’ll be able to divide and conquer them. The King will be the fiercest foe around, obviously, so be ready with the heals, as he can easily overwhelm your Stoneskin protection. If need be, you may be able to run back to the previous map to rest and rebuff in the middle of the fight; we honestly never had to try, though.
With the King dead, loot the belt off of his body and grab everything else in the area, as well. There’s a drow merchant in the prisoner’s pen here, whom you can speak to and convince to return to Crossroads Keep. Just what you need, another merchant! On your way out of the area, earn more influence with Khelgar by assuaging his doubt about what the King said. You can warp off the mountain, if you wish, but you have one more enemy to deal with here...
Killing Tholapsyx
Tholapsyx is arguably the toughest fight in the game thus far, despite being only one enemy. Energy Immunity is going to be a requirement for this fight, so nab a spellcaster that can cast it at least five times; Elanee or Zhjaeve should both be capable of doing so, or perhaps Sand. You need to set it to resist fire, obviously, as Tholapsyx’s breath can deal over 100 damage when it hits you. Other spells you might want to consider include Magic Circle against Alignment and Blindsight for your melee characters, since Thol will spend much of the fight in an invisible state. Laying down a Prayer will be a good last step before heading into the fight. Also, don’t forget that Ivarr in the church in Crossroads Keep will offer up an important quest relating to Tholapsyx if you speak to him, assuming you built the church instead of the monk abbey. It’s not too late to go back and get it before assaulting the wyrm.

When you’re ready, approach Thol and goad her into attacking you. When the fight begins, immediately pause and queue up a couple of summoning spells. If you’re lucky, one of your summon creature spells will plop down a fire elemental, which will be immune to her fire breath alongside your party members. We also had earlier had Qara learn Mordenkainen’s Sword which, while not as powerful as it was in the Baldur’s Gate days, is still a good, cheap summon that will distract the beast from attacking your party. Since you’ll be immune to her fire breath (assuming Thol doesn’t Dispel your immunity), her most powerful attacks will be physical ones from her claws. If you can keep up a summon or two in front of her (they’ll get closer to her than your party will) you should be mostly in the clear. We don’t mean to make it sound easy, but if you’re lucky, she’ll go down quickly. Otherwise, keep the Heal spell on your hotbar, because she’ll lay on damage quite quickly if she gets to one of your party members.
When Thol goes down, you’ll be able to nab a third ore vein in the corner of her lair, then approach her treasure pile. Tell your companions that you’ll send the Greycloaks to retrieve the gold later on, then loot all of the chests. There’s a massive amount of loot here, including enough gems and ingots to craft pretty much any kind of magical armor or weapon you desire. If you had the Path of the Holy quest, you’ll also net yourself a powerful magical weapon. It seems to change depending on what character class you are, or perhaps what weapon proficiencies you have; our cleric got a decent Loremaster’s Mace, but we hear that paladins will receive their Holy Avengers at this point.
(If you manage to kill Thol, and your Greycloaks are at least decently capable of combat, then you should receive a boon of around 150,000 gold when you get back to Crossroads Keep and speak to Kana.)
Return to Ironfist
Return to Keros and challenge for the right of rule. He won’t believe that you actually recovered the Belt of Ironfist, but when Khelgar pulls the hammer from the stone, he’ll be forced to cede rule. Return to the Keep to report your success to Nevalle, as well as report all of your ore findings to Catrina. You may want to speak to Bevil at this point, as well, and learn about the beating he took earlier on; it’ll help him with his training of the men. The drow merchant you saved from the Fire Giants will be in the merchant’s shop in the courtyard, selling the usual odds and ends.
The Hammer of Ironfist is a powerful weapon, no doubt, but its ability to cast a circle of lightning around Khelgar will be all but useless if you’re playing on Hardcore difficulty, since you’ll hit the other members of your party as well (and potentially deafen them, preventing your spellcasters from casting spells). It’s still a decent weapon with a large Strength bonus for the wielder, but since we had already had Khelgar specialize in greataxes, we preferred to keep him with the +5 Adamantine Holy Greataxe that we had crafted for him. The +6 Strength bonus isn’t even all that impressive, since you have to use the Hammer while wearing the Gauntlets of Ironfist, which already add +4. Since the bonuses don’t stack, all you lose by not wielding the Hammer is two strength and some minor electrical resistances.
Meeting With Sydney
Khralver Irlingstar will have appeared by the entrance to your castle after you finish up the alliances quests. He tells you that Sydney Natale wishes to meet with you, Qara, and Zhjaeve. The only way to move the story along is to agree to the meeting, so gird these characters for battle and head out with Khralver.
Hey, guess what? It’s an ambush. Before you speak to Khralver here, buff yourself thoroughly; Qara and Zhjaeve should both have decent enough spells. Sydney will, at first, summon an Animus Elemental to deal with you and your followers. Kill it quickly, but note the fact that it has a fiery aura surrounding it; negate it with fire resistance, if possible, especially for your melee characters. If you can beat it down, it’ll die quickly.
When the elemental is done, Sydney will attack, along with three or four invisible Luskan Assassins. Her bodyguard, Jalboun, is easily enough swayed to your side of the fight by offering to pay his wages, or double them; either way, he should fight for you. Sydney herself will make a show of teleporting around the area, so have Zhjaeve and Qara summon their best monsters to help distract the assassins, then focus on Sydney herself when the game is up. Be sure to check the vein of ore before leaving the area to return to the Keep.
When you return, Ammon will be waiting to talk to you. If you wish, you can order Zhjaeve to hand the scroll of the True Names over to him; that will let you use him, instead of her, in your fight against the Shadow Reavers. Speaking of which, Kana will have marked the location of one of the Shadow Reavers on your map when you speak to her, so when you’re ready, head out and start looking for a fight. Either Ammon or Zhjaeve will need to be in your party before you leave. It doesn’t particularly matter which, but Zhjaeve may be able to better defend herself.
Shadow Reaver Fight
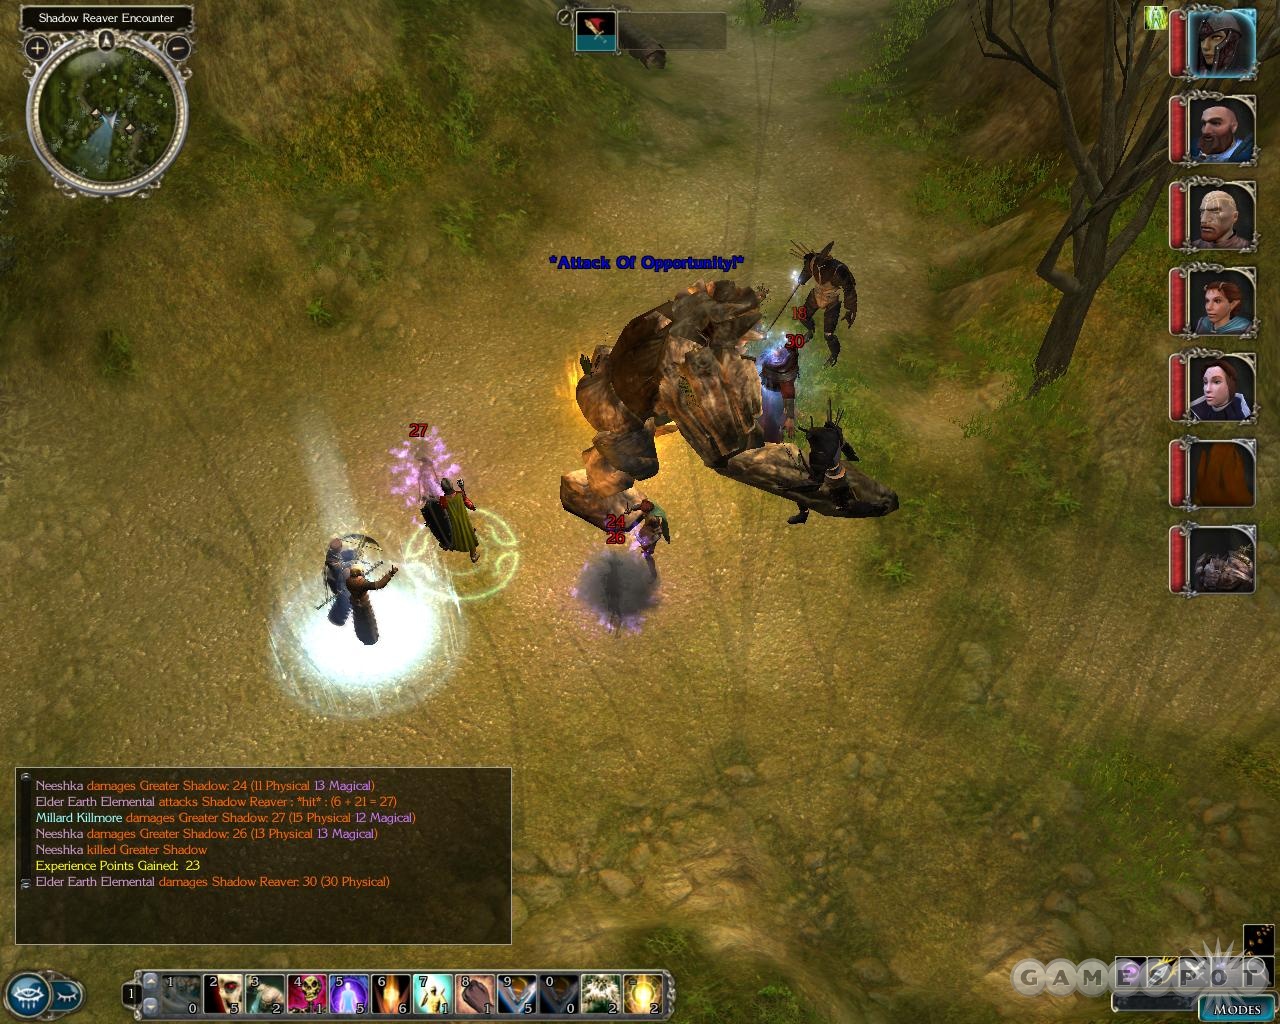
You won’t have time to buff yourself before this fight begins, so quickly summon an elemental or two in front of the Shadow Reaver and wade into the fray. Zhjaeve or Ammon will require time to read the beast’s true name, so you have to protect them for the 20 seconds or so that this requires. With two large elementals on your side, though, this fight will be a piece of cake; eliminate the blade golems and shadows before taking down the Shadow Reaver for extra experience. The Reaver can obviously only be killed after its true name is read, but you can feel free to attack it beforehand.
When the Reaver dies, it drops a magical scythe and another silver shard, which nets you death magic immunity. Plenty of magical items offer this immunity, so if you have one equipped, be sure to give the shard to another party member.
Return To The Keep
When you return to the Keep courtyard, you, Ammon, and Zhjaeve will have a conversation. Ammon reveals the location of an ancient dragon that once fought the King of Shadows. You can earn influence points with either of these characters by siding with them during the conversation.
Quest: Reform The Sword
Zhjaeve has to be in your party for this trip, while Ammon must not be. Your journey now takes you to Nolaloth’s Valley, where you believe the spirit of the ancient dragon can be found, even if it is guarded by a horde of red dragons as Ammon indicates. Good of him to stay back at the keep and protect it!
Quest: Find the Great Dragon Spirit
Walk down the path here (note the ore vein near the map marker) to find a great clearing, with a large crystal heart floating above the water. If you approach it, two water elementals will rise up from the water and attack you, so take them out to learn of your greater foe: dragons perched on the ridge above you, desirous of the heart’s power. They won’t attack - for now.
If you wish, you can attack the heart now, but this would be jumping the gun. Your best bet is to walk towards the Cliff’s Edge marker on your map, past the earth elemental. (If your game bugs out like ours did and doesn’t let you click on the ground near the cliff, leave the area entirely and come back.) Doing so will let you commune with Nolaloth himself, or his spirit, at the very least. For a smooth conversation, tell him that the Illefarn are dead, and avoid mentioning that you know Ammon Jerro. After a lengthy bit of back and forth, he’ll tell you that the silver sword can only be reforged in West Harbor, at the exact spot where it was destroyed - the black scar on the ground where Zhjaeve heard wails earlier in the game.
As a favor for this information, Nola asks a favor: its own death. In order to grant Nola the sleep of ages, you have to destroy his crystal heart, which you passed by earlier. As he hints, though, this fight won’t be easy, as the two dragons you saw before will act to preserve the object of their fancy. It’s possible that you may not even need to worry about the dragons; you can theoretically just leave and not worry about the fight. We didn’t try to do so, since the loot the dragons drop is pretty good.
Two Dragons Enter, No Dragons Leave
The two dragons that attack you here are black dragons, which breathe acid. The usual preparations apply, but your Energy Immunity spells should be focused on repelling acid instead of fire, obviously.

When you attack the crystal heart, both dragons will attack simultaneously. Zhjaeve should be capable of casting ninth-level spells at this point, so have her cast a Summon Creature IX spell towards one of the dragons. If you have Qara or Sand along, they also should have some kind of high-level summon, so plop it down in front of the same dragon. We were lucky enough to be playing as a cleric, so we had three Summon Creature IX spells at our disposal, which was more than enough to distract one of the dragons while our forces concentrated on the other one. Two elementals should be enough for this purpose, though.
While the elementals distract one dragon, concentrate on the other and take it out. Its acidic aura and acid breath should both bounce right off of you, if indeed you casted Energy Immunity on yourself, leaving its powerful melee attacks as your sole source of concern. Generally these will be focused on one party member, allowing you to draw them off the line and heal them if need be. When one dragon is down, switch to the other; with the help of the elementals (which you can, of course, recast if they die), it should die quickly. Grab all of the loot from their bodies (they have really handy amulets that’ll add to your AC), then Bash or cast spells on the heart to destroy it. Be sure to loot the crystals that fall into the water for an alchemy item that will net you some radiant shards. Also be sure to check out the ore vein in this area before returning to the keep.
Note that if you're having problems with this fight, you can attempt to either attack the heart before killing the dragons (destroying the heart will kill both of the dragons if they're not already dead), or simply run back to the passage that led into the glade. If you run back towards the entrance to the zone, the dragons will be too big to follow you, allowing you to take them on one at a time from a distance.
To The Mere!
The Ruins of Arvahn will be on your map again at this point, so bring Zhjaeve to them and head towards the portal through which you passed earlier, which led to West Harbor. Zhjaeve can open the portal here, so step through to find the ruins of the fifth Purification statue. Buff yourself for battle, then head out into the ruined town.
As you travel through the town, you’ll occasionally find shadow versions of your friends; they will almost always turn into actual shadows and attack after a spot of time. Nothing to do but kill them! If you wish to cross the water, you can attempt to track down the four pieces of wood and make a makeshift bridge, should you have the appropriate skills. We didn’t, so we had to cross the poisonous water. It greatly reduces your Constitution score with its poison, and you can’t rest in this area, so be sure to have Zhjaeve use Restoration on anyone affected.
You’ll come across Danan Starling across the river. Kill the shadows that appear, then watch him talk to Retta. If you force Retta to reveal herself for the shadow that she is, you can convince Danan to let go of his own undeath and earn yourself some XP.
The Scar
With Zhjaeve’s help, you’ll be able to visit the scar and reforge the Silver Blade of Gith into what it once was. Whether or not you wish to use it at this point is up to you; it’s a powerful weapon, no doubt, but you may have crafted something that works more to your character’s strengths by this point. If your character is a spellcaster, then holding it for the buffs alone may be worthwhile. It’s up to you. For our cleric, we personally stuck with our Holy Adamantine +5 Mace.
Regardless, you’ll need to fight off a Shadow Reaver and assorted minions after the blade is complete. The usual suite of elemental summons will protect you at the outset of the fight while Zhjaeve performs the ritual of saying the beast’s true name. She was actually interrupted in our fight; if this occurs, have her summon an elemental, then find the scroll of True Names in her inventory and use it like an activated item on the Shadow Reaver to restart the ritual. When it’s dead, loot the body and leave. Head back to the Illefarn Ruins, and from there return to the Keep.
The Roadside Battle

When you return to the Keep, turn around and enter the map waypoint behind you to add Ammon to your party; he’ll be joining anyway pretty soon, and you can take the opportunity to have him ready to fight, if he wasn’t already travelling with you. Nevalle will inform you of a battle taking place between Callum and a Shadow Reaver on the road nearby. Get to the fight and help out!
When you arrive, you’ll be thrown into battle against the Shadow Reaver and five of its golem buddies. Tough odds, to be sure; you may want to cancel Ammon out of his invocation and let him aid you in the fight against the golems. (You can buff yourself before heading down the hill towards Callum, if you wish.) When you join the fight, cast your elementals to distract the golems, and focus on taking them out while Ammon recites the True Name. When you kill the Reaver, you’ll net the important Tome of Ilskatar. You can also get a ring and a greatsword off of its body (although it was obviously using a scythe when it attacked you).
Preparing For War
Return to the Keep and give the Tome of Ilkstatar, or whatever its name is, to Aldanon, who’ll start leafing through it in an attempt to find a way to open a portal to the Mere. He won’t make any immediate progress until events unfold.
When you’re ready to move on with the story, talk to Nevalle and tell him that the Keep is ready for a fight. After the cutscene that ensues, he’ll tell you to batten down the hatches, so take a moment to buy and sell at the merchants, then walk inside the keep to speak to Aldanon. He’ll relate a surprising factoid: Ammon Jerro has left the building. Take Bishop up on his offer to track Ammon down. (The party that you create doesn’t have to include Bishop, by the way.)
Ruins of the Jerro Farm
Ammon is to be found at Shandra’s farm. Buff yourself completely before moving up the path to talk to him, including Energy Immunity (Fire). When you approach, Koraboros, one of the demons from Ammon Jerro’s Haven, will appear and attacking, summoning in two Horned Demons to fight alongside him.

This can be a difficult fight, since Kora will continually resummon the demons as you kill them. Obviously, the answer here is to focus your attacks on Koraboros, but this can be problematic; in one of our fights with him, he managed to completely avoid all damage from our attacks for at least ten straight rounds until we could penetrate whatever shield he had managed to throw up in front of him. The second time we fought him, though, he didn’t cast whatever spell he had used before, and we managed to overwhelm him fairly quickly. When he goes down, finish off the demons to speak to Ammon Jerro. To gain influence, indicate that the only reason you followed him was because he knew the last portion of the Ritual of Purification, then commend him on his tactical thinking and ask what item he came to retrieve. It turns out to be Balafour’s Gnashing Rod, a huge warmace almost as big as Ammon himself is.
Return to the Keep and equip Zhjaeve and Ammon for battle. They don’t need to get all of your best stuff, but they should at least be equipped to defend themselves. You’re going to be partaking in some small-party battles here (consisting of three party members at most), so you also want to ensure that your other favorite party members are ready for battle.
The Battle Of Crossroads Keep
When you’re ready to proceed on with the lengthy battle sequence at your castle, head inside and speak to Nevalle. You’ll gain 2,000 XP for completing the fortifications on the keep, and another 2,000 for cementing the two alliances. Head inside and speak to Lord Nasher, then find the war room to begin the sequence.
The Bridge Battle
You need to destroy two bridges leading to the Keep. You’ll get to choose two party members to accompany you, and you’ll be able to bring along a single squad of soldiers to accompany you. It doesn’t matter if you use fighters or archers, as you’ll get the opposite type of unit as soon as you enter the battle to join you. We were playing as a character, so we brought along Khelgar and Qara, mostly for buffs, but if you’re not a cleric, you’ll probably want to bring along Zhjaeve; there’s going to be plenty of undead to fight here.

Start the fight and talk to Daeghun, then quickly have Qara or Zhjaeve buff your characters. Run down the hill and assist the soldiers there in their fight against the undead, then assign them to one of your other party members. It doesn’t really matter which one, but pick the one you have the most influence with to net the soldiers a bit of an attack bonus. If you have Qara in your party, then Stoneskinning the melee soldiers would be a wise idea. You can heal them, as well, should you need to, or just rest in between the fights here. If she has the spell, you might also want her to cast Protection from Arrows on your main party members, as there are plenty of skeleton archers to fight against here.
Continue moving down the path towards the bridges, using Qara to Fireball the groups of enemies from long range to lighten the load. When you near the second bridge, rest and buff yourself thoroughly, then head across to face off against Black Garius. He’ll supersize all of the undead that attack you, so immediately pause and summon elementals when the fight is joined. Clean out the fireballs with Daeghun’s help, then return to the keep.
The Battlements
It appears that Garius and his men are more prepared than you thought; your diversion to ensure that they were tied up for days now appears to have merely delayed them for a few hours. You need to head to the walls and prevent their siege towers from disgorging hordes of undead into the keep. You’ll need fire to do so, so Qara or Sand will be a good choice to bring along, or Zhjaeve, especially if you have her using Flame Strike or similar spells.

This is one of the lengthiest and arguably the most difficult of the fights that you need to undertake to defend the Keep. You have a couple of seconds to pause at the beginning of this fight, so have Qara cast Stoneskin on your main party members before the first siege tower arrives.
The Shadow forces will be sending six or so siege engines to the towers. You can’t destroy them, but you can destroy the doors leading to the ramparts and prevent the enemies from entering the keep through them, which is just as good. They’re most weak to fire damage, so wait for them to dock with the wall and have Qara pelt them with Flame Arrows, Fireballs, and Delayed Blast Fireballs while your other characters engage the undead that spill forth from it. You definitely will want some help on the battlements; although your soldiers will respawn as they die, you want to cast your elemental spells to help staunch the flow of troops from the towers.
When you’ve destroyed six of the towers, this section ends. If you run out of fire spells, then you’ll have to attack the towers directly.
Courtyard Battling
At this point, Bishop will likely desert you, and sabotage your gate to boot; if you have a high influence with him, then another event will occur, likely one with the same basic result: you, two teammates, and some soldiers will have to hold the enemies off as they stream into the castle. Again, Qara is going to be an excellent choice here, as will Zhjaeve, assuming your main character can’t cast high-level summon spells. When the fight begins, summon an elemental or two in front of the gate, quickly Stoneskin your party, and go to town. The elementals should keep the fiends penned up in the gate area, so if you want to sit back and pound them with spells, that’s your right. You have to kill a whole lot of enemies before this fight ends, so take it slow and steady.
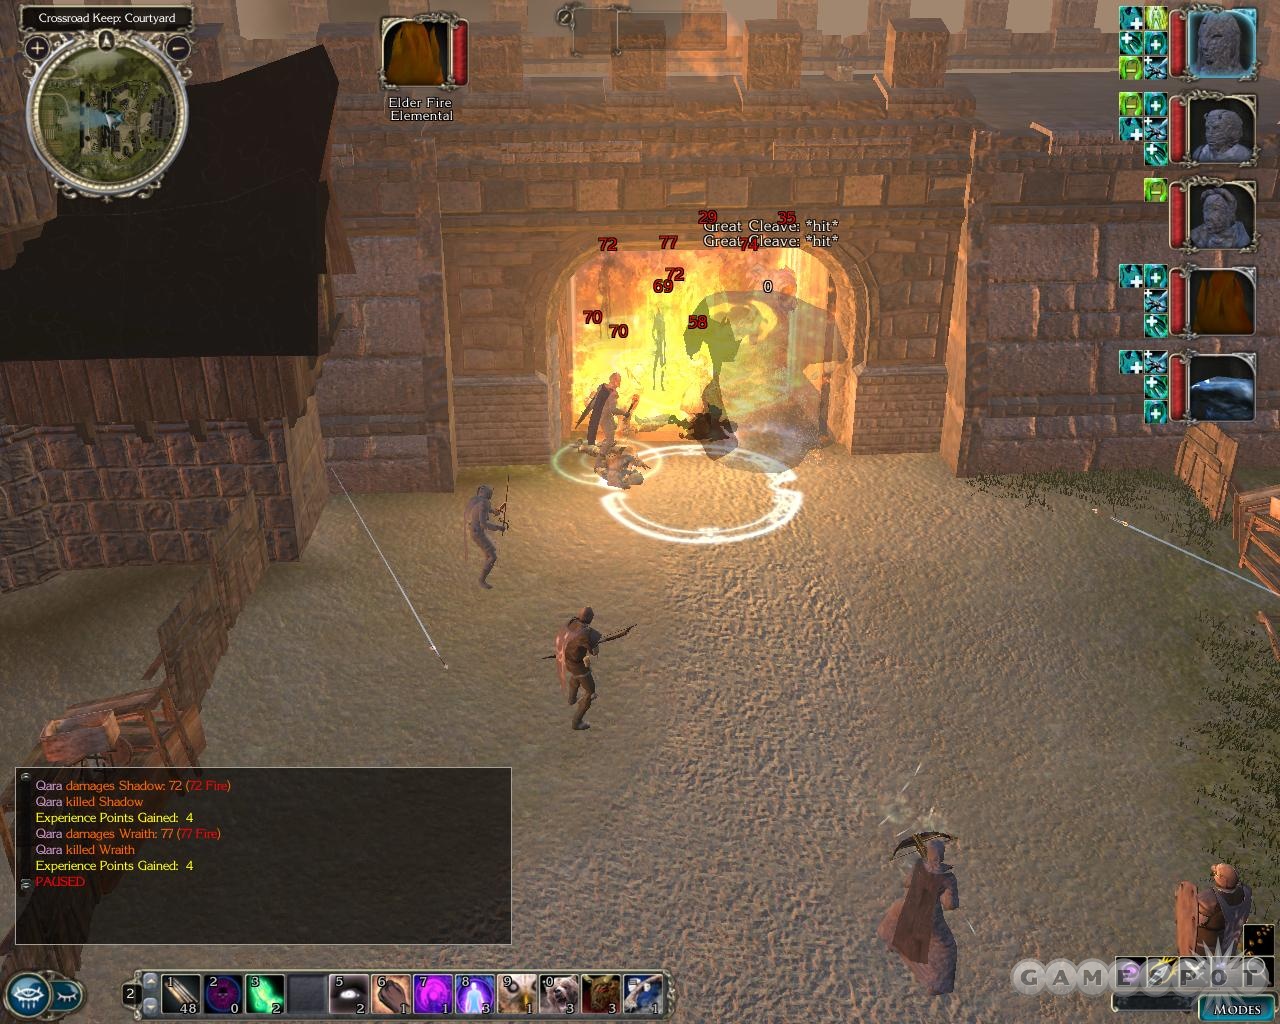
When all of the enemies perish, Black Garius appears and summons an avatar of the King of Shadows. You’ll want to make a quicksave as soon as this fight begins, as Garius’ first action will occasionally be to call down a Meteor Storm on the whole lot of you, and it’s difficult to survive that, at least for your weaker characters. You’ll need to equip the Sword of Gith in order to damage the Avatar here. This fight can be massively difficult, but sometimes it’ll end in seconds - it’s odd that way. You definitely want to cast as many Summon Creature IX spells as you can at the outset, both to give the Shadowalker extra targets to attack as well as give Garius more targets for his spells. Garius is the real threat here, with Horrid Wiltings, Meteor Swarms, Dispel Magic, and other annoyances. There’s not much you can do about him, so focus your attacks on the Shadowalker and bring it down as quickly as you can. It has powerful physical attacks, so if it drops the Stoneskin on your main fighters, try to refresh them.
When the beast falls, you have to choose a character to recite the True Name of Garius. You can choose either Ammon or Zhjaeve; presumably the character you pick will get a healthy influence bonus. Although it looks like the character that you don’t pick gets zapped, don’t worry; they’ll appear alive and well in the next section of the encounter.
After Garius runs off like a dog with its tail between its legs, you’ll return to the inside of the keep. Both Zhjaeve and Ammon will be required members of your party for a while, so be sure that you have enough equipment for them to wear. You may want to buy anything that Uncus offers to sell you at this point; you won’t have any use for cash after this.
The Endgame
Settle the bickering here to discover that Neeshka has been kidnapped - if your character isn’t a rogue, then you’ll have a hard time finding and disabling traps from now on. Move through the room and kill all of the Bone Spiders that attack you - it can be difficult to maneuver due to the tight corridors. When you reach the locked door at the end of the walkways, bash it down if you can’t pick it to move on.
Exploring The Mere
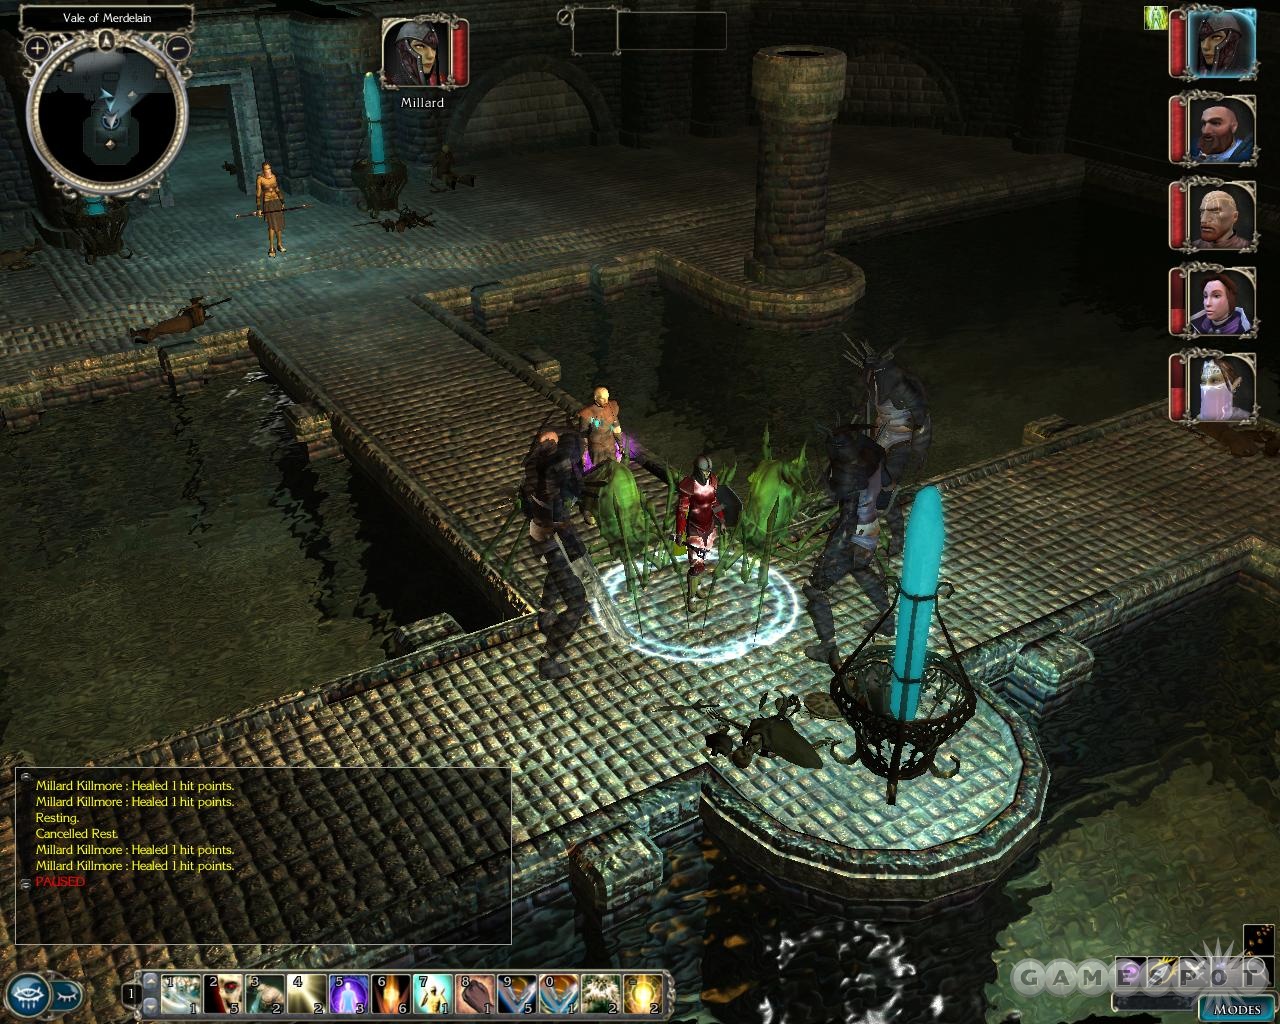
Plenty of undead for you to deal with here, so bust a few caps and clear the room out. There are a huge number of corpses for you to check out here, and a few of them are trapped. Note that attempting to rest here will usually result in your rest getting interrupted by enemies, ranging from Blade Golems to a wicked group of Vampire Rogues that will tear you up. Even if you return all the way to where you entered the zone, you can still be attacked by enemies when you rest. If you’re worried about getting taken out while you rest, try quicksaving before resting, then reloading until you manage to make it through the five seconds without being ambushed. It’s generally best just to not rest, if possible; if you get lightly wounded, use regeneration to get your health back, or cast a heal with Zhjaeve.
While checking bodies, it’s probably best to let your healthiest character move ahead so that, if you do set off any traps, he or she will be able to absorb the damage and hopefully regenerate it while your other party members sit back somewhere safe. Check all of the bodies in the large room here and in the small antechamber to the west before moving off to the east to check out the Strange Black Fog that awaits you at the bottom of the steps there. When you approach it, it’ll warp you to another area of the room, where you’ll be able to bash down another door to move on.
When you do bash down the door and proceed, four Blade Golems will appear as you traverse the pit in the middle of the room. If you keep your team parked outside the door, you can lure them back and take them on one or two at a time. When you’re done looting the room, break down the door to find another Black Fog teleporter. It’ll lead you to a room where a number of Greater Shadows will attack you; you should be able to take most of the ones close to you out before the Nightwalker in the pit below you notices you. Be prepared for its assault, obviously, as it’s still a hard hitter. Use the Sword of Gith to cut it down, then finish off the rest of the shadows before looting the room.
When leaving through the door here, you’ll be ambushed by shadow priests and vampire; casting a large elemental should keep them busy for a few minutes. When you defeat them, take a moment to compose yourself, then move around to fight the lich and vampires nearby. If you don’t think you can survive this fight (it’s not markedly tougher than the others that you’ve been facing, but liches are badasses), then simply haste a character, run around to the black cloud on the far side up the upper walkway (the one at the bottom of the stairs is the one you passed through earlier) and head into it to warp past them.
Wow, seven Mummy Lords at once! This is certainly getting interesting. After we defeated them, with liberal help from Summon Creature IX spells, we managed to get a full rest in (after getting ambushed twice and defeating the attackers). Might want to try it yourself here, as you’re no doubt getting spell fatigue by this point, if you haven’t rested yet. There’s a tough fight coming up.
The Three Reavers
How many Reavers was the King of Shadows capable of making? Seems like he’s managed to throw together at least half a dozen of the things since he started coming back to power. Well, if that’s an accurate count, then you’re going to be able to wipe out half of them in one blow here, as three Reavers will attack you at once when you head down the path here. You can see them coming, though, allowing you to thoroughly buff yourself at the top of the stairs. When you get done buffing, make a save.
Prep Work

Now, if you run ahead and attempt to assault the Reavers head on, you’ll be a fish in a barrel; the narrow pathway will allow the strong Reaver in the middle wail away on you, while another Reaver will warp behind you, and the third Reaver will launch spells at you from across the water, where you can’t reach him. It’s probably possible to win this fight, but if you have to read the True Names of each of the Reavers in turn, it’ll definitely be difficult.
With a little preparation, though, you can make things a lot easier on yourself. We’re going to assume that you have a character in your party, alongside Zhjaeve, that can cast high-level Summon Creature spells, either VIII or IX. You’re going to need a little help to get through this fight in one piece.
The idea here is to have your entire party Stand Their Ground at the eastern end of the room, well away from the top of the stairs, where the Reaver will warp to. This is kind of complicated, so pay attention:
- One spellcaster, Caster A, should cast a Summon Creature spell while standing against the wall. The elemental that pops out is Elemental A.
- Caster B should stand near the top of the stairs, along with a character that’s been Hasted.
- The Hasted character runs down the stairs to trigger the cutscene where the Reaver talks to you. In what might’ve been an oversight, your entire party isn’t warped to where this character is (normally they would be).
- After the cutscene is over, the middle Reaver will begin running towards you, while the northern Reaver will teleport to the top of the stairs, near Caster B. Have your Hasted character run back up the stairs, past the Reaver that just warped in.
- As the Hasted character runs up the stairs, have Caster B cast Summon Creature on the stairs. If you time this correctly (pausing the game will help), you’ll be able to cast Summon Creature on the steps and have your Hasted character run past the summoning circle before Elemental B appears.

If everything goes according to plan, Elemental B will take up the entire width of the stairs, preventing the middle Reaver from following your Hasted character up the stairs. Elemental A will begin attacking the Reaver that teleported all on its own, while the other Reaver near the water will likely not move, since your characters moved far enough away to avoid triggering its AI. At worst, it’ll cast spells at your Elemental B.
At this point, unload on the teleported Reaver. Have Ammon start the True Name ritual, aimed at that Reaver (you may want to turn on Puppet Mode here to prevent him from breaking away from the ritual). It will, as per usual, take a while to complete, but when it does, the Reaver will die, probably before the middle Reaver has had a chance to kill off Elemental B. If Elemental B is still alive, it’ll provide a perfect buffer for Ammon while he recites the True Name ritual. When the second ritual is done, the Elemental will wear the Reaver down, allowing you to finish it off. At this point, the third Reaver is likely still standing off in one corner of the room, oblivious to the action. Send an Elemental at it and True Name it to finish it off.
The Final Fights
Decisions, Decisions
Head into the last room here and listen to the glorious sounds of characters levelling up. That’s right, the entire gang will join you at this point, so spend a few minutes levelling everyone up. Before you spend a huge amount of time levelling up and buffing yourself, though, you may want to make a solid save and wander into the room in front of you. As soon as you do, a longish cutscene will begin to play out, in which...events occur. Here’s where all of your choices in the game come back to haunt you, or reward you.

Garius will appear before you and tempt most of your teammates with promises of power, wealth, etc. Neeshka will be here, and under sway of a powerful demonic binding magic that is attempting to convert her into a tool of the King of Shadows; you’ll need to have a pretty strong influence over her to prevent her from switching sides. If your main character isn’t a rogue, then you’ve likely been using her all game long and will probably have built up enough influence with her to prevent the switch, unless you were outright mean to her. If your main character was a rogue, then you probably haven’t used Neeshka in quite some time, which means that she’s probably underlevelled and underequipped, and thus not that big of a threat. If she’s well-equipped and manages to turn against you, though, you may have problems taking her out.
If Bishop betrayed you earlier, then it seems to be possible to get him back on your side, but only if your influence is sufficiently high. On the other hand, if your main character is female (or perhaps even if you’re playing a male), it’s possible to get Bishop to turn away from his new master. Choose "That’s not what happened" and "I don’t know what you’re talking about" when given the choices to do so (these may or may not show up depending on your interactions with Casavir), and he’ll leave the fight altogether, fighting for neither side.
After you know whether or not Neeshka will betray you (tell her you need her!), Garius will tempt Sand, Qara, and Ammon (or, at least, those were the characters that he picked from our party). We happened to lose Sand, but kept Qara and Ammon. Your mileage may vary.
Reverse!
Now, remember the save you made before you entered this room? Reload it, and take the time to redistribute your equipment. Take all the equipment off of characters that are going to leave your party, and empty their spellbooks, save for spells that you can use to buff other party members before heading into the room. Yeah, it’s cheating, in a sense, but it’ll make things a bit easier than they would be otherwise.
When you have your equipment sorted out, buff yourself thoroughly, and use the short-duration spells last. Don’t bother with any six seconds/level duration spells, like Haste, as they’ll time out during the conversation with Garius. When you’re ready, head back into the room, blow through the Garius scene as quickly as possible, and get to fighting. Don’t forget to activate one of Grobnar’s songs; Inspire Courage will help increase your attack and damage quite a bit. Also don’t forget to summon Elanee’s little pet, and Bishop’s as well if you manage to have him around.
Black Garius
Garius is a difficult fight, as he’ll summon in a Balor demon right off the bat and start warping around the room. To win this fight, you’ll have to defeat him, his Shadow Golems, the Balor, and any of your teammates that fought against you.
One thing to keep in mind here is that you’re going to be able to rest in between this fight and the game’s real final fight, so feel free to use any once per day actions. Don’t forget that you can right-click on the ground and select "special" to call up the spells that were taught to you by the Ritual of Purification; the Soothing Light ability will be especially handy as you and your teammates start to take damage across the board, but are too spread out to easily heal.
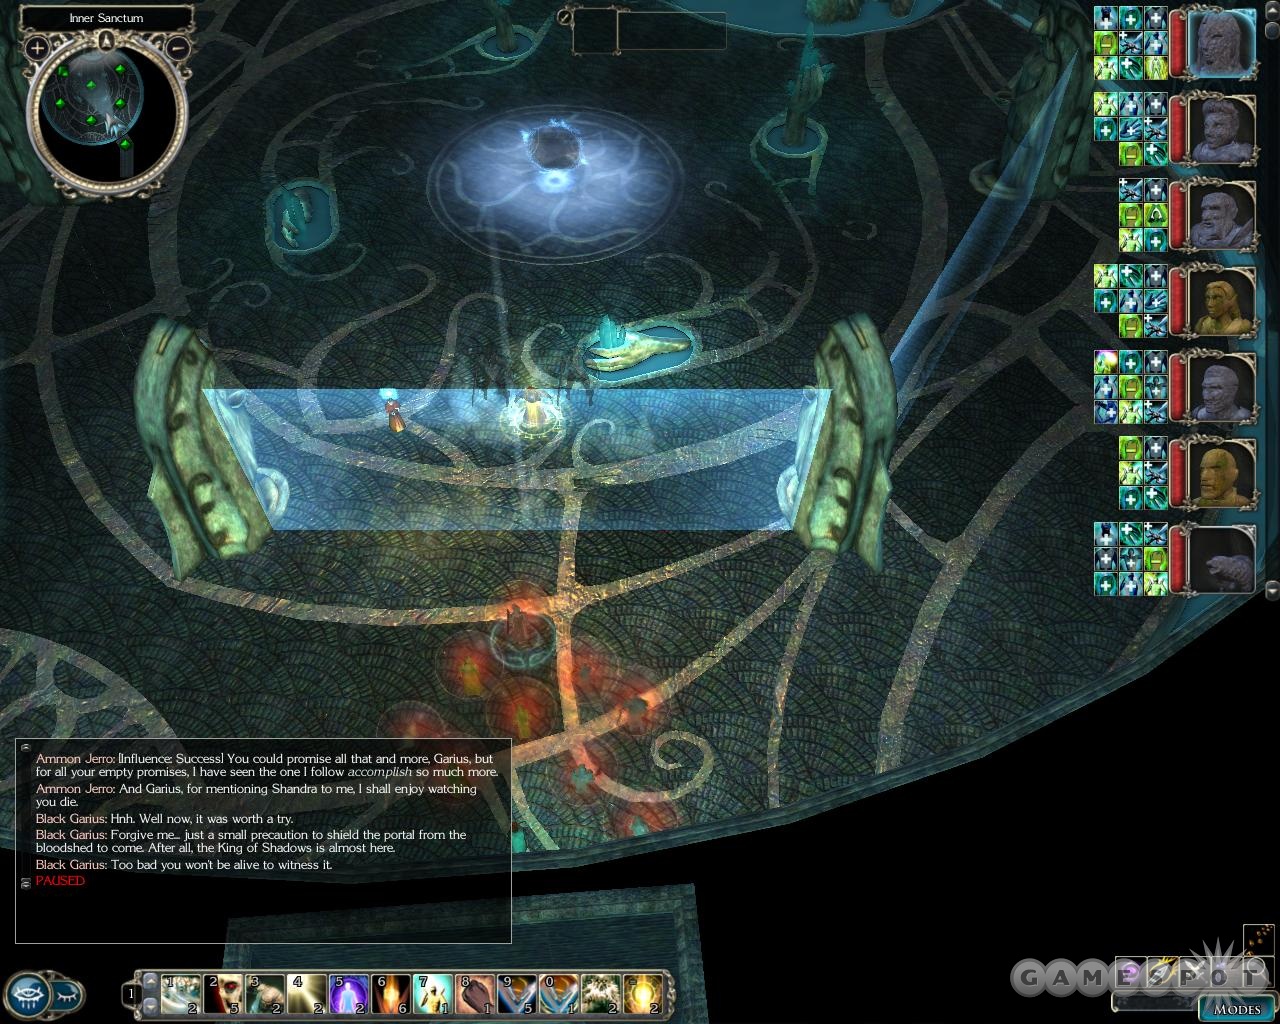
Anyway, you’ll want a hasted character to start running at the beginning of this fight. The shards of light that keep you separated from Garius can be brought down, but only if you run behind them and activate the statues on Garius’ side of the room. Light walls will rise up behind you as you move, though, so only the first two characters to pass beyond the statues of the Shining Sun and Aurora Chain will be able to move on; any other characters behind them will be stuck in the first quadrant of the light shields. There’ll be plenty to do there, though, as the Balor will keep them busy, alongside multiple Dread Wraiths that appear.
So, you’ll want your two strongest melee attackers to move past the Shining Sun and Aurora Chain statues and wrap around to where Garius and his team is located. You should have at least three characters (Zhjaeve, Elanee, and either Sand or Qara) capable of casting Summon Creature IX, so plop a couple of them down next to the Balor, and the last character cast the spell through the shield so that it pops up next to Garius. That will keep him distracted while your two melee characters move in and start wearing down the Shadow Golems and your erstwhile teammates.
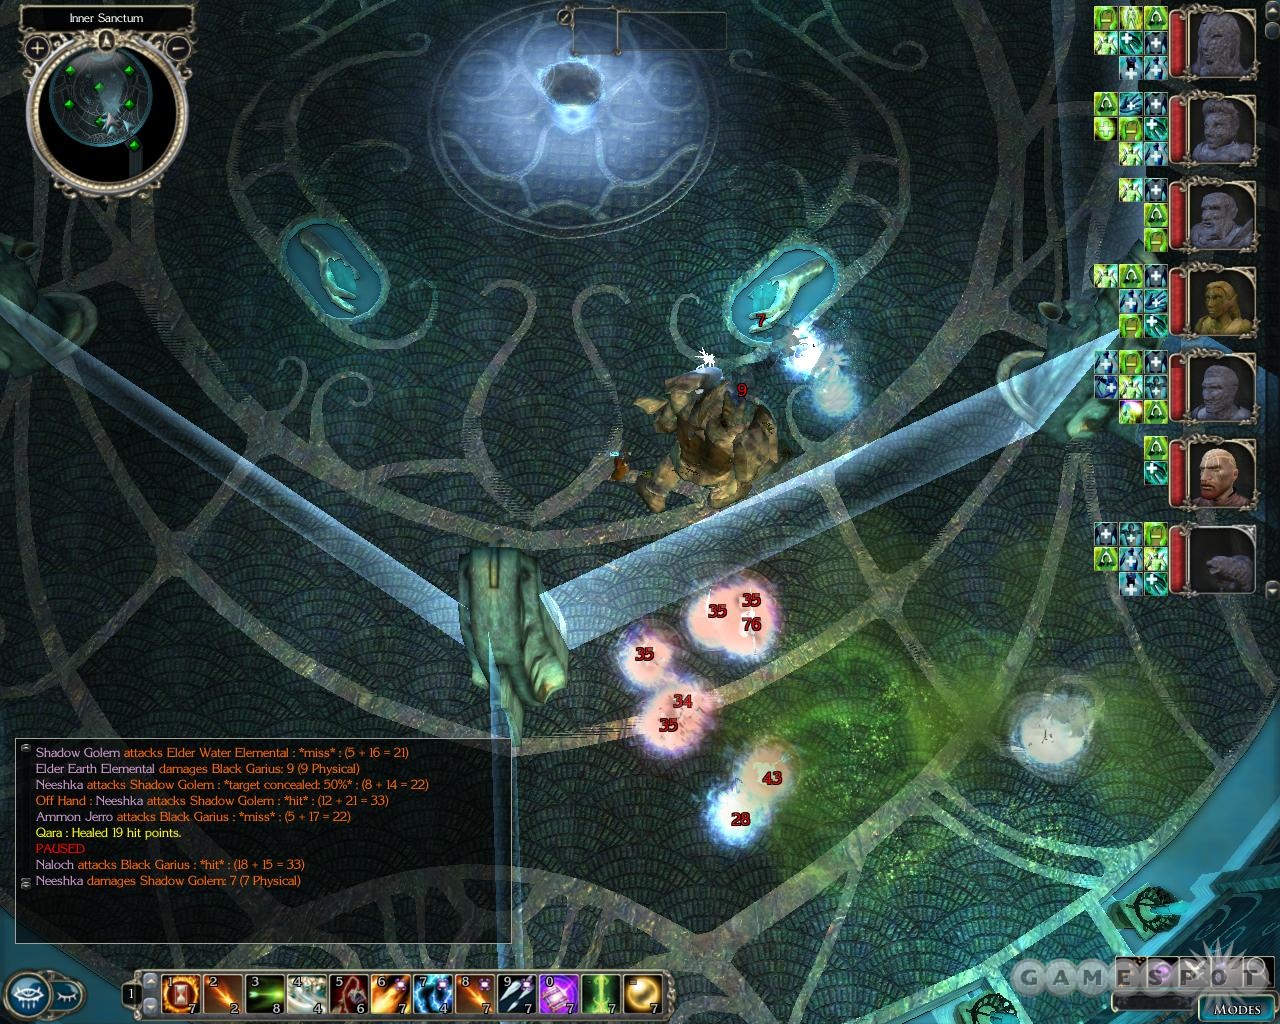
When the Balor and the other Wraiths are dead, have your spellcasters re-cast their Summon Creature spells through the shield to the area where your two melee characters are fighting Garius. Even if the melee characters go down, the elementals should still be able to finish off Garius and his cronies. Don’t forget that you can fire arrows and cast other spells through the barriers as well, so feel free to use them. You don’t need to use the True Name ritual on Black Garius, thankfully, since you already did it in Crossroad Keep.
When Garius is dead, you have as much time as you need to rest and rebuff before the final fight begins. Click on top of the portal here (you may have to switch camera views) to start it. One thing to remember to do is to have Zhjaeve memorize the spell Undeath’s Eternal Enemy. Although it may seem like it doesn’t have very many effects for a level nine spell, if you cast it while your group is in a tight bunch, it will render all of them immune to level draining effects, which the King absolutely adores.
The King Of Shadows
First Phase
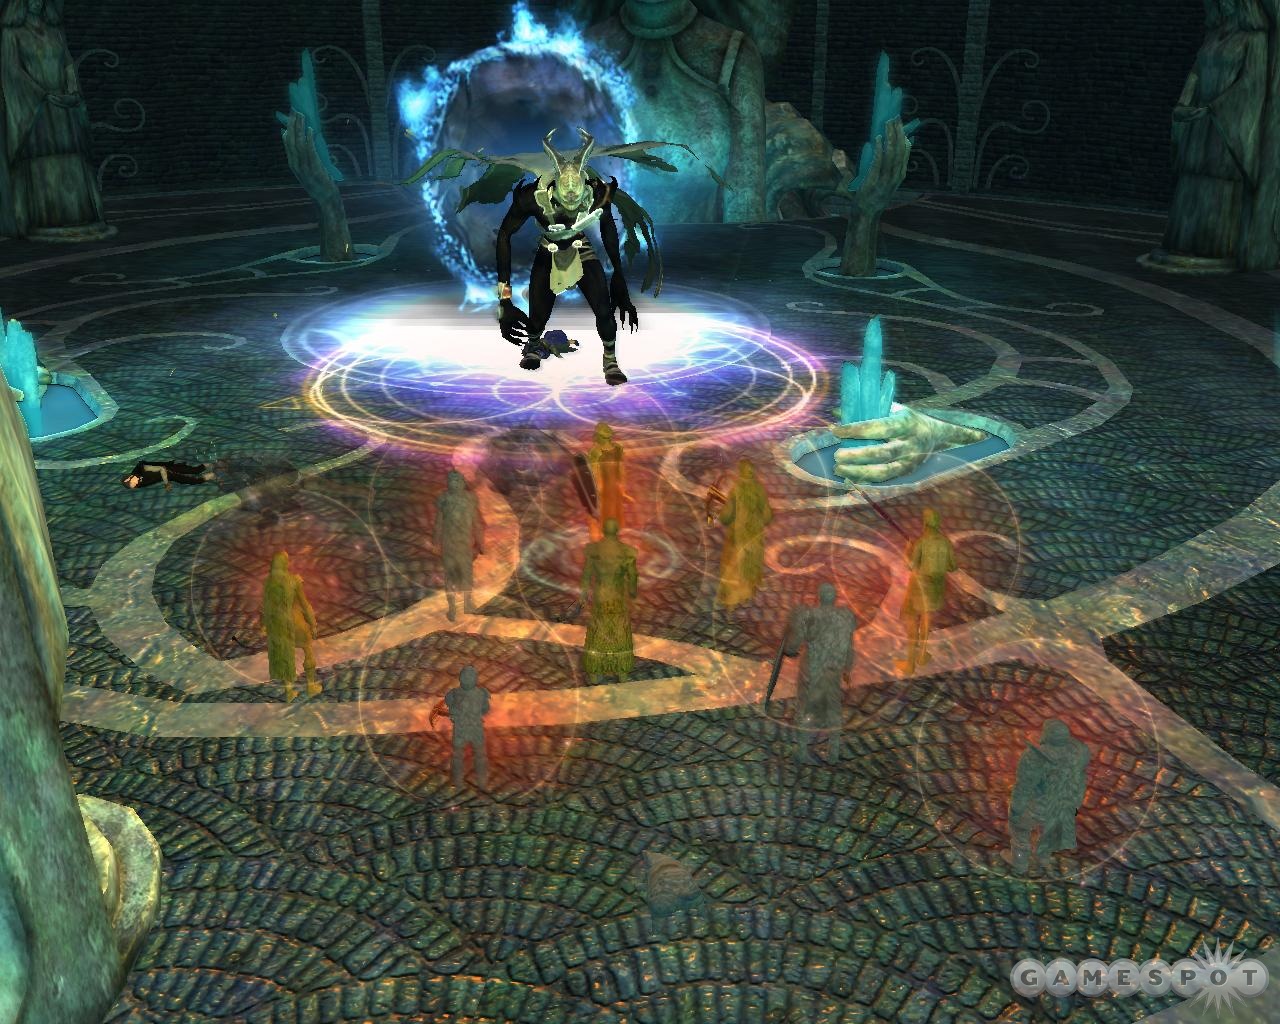
He’s heeeerrreeee. Guess you arrived just in time, as the King is ready to enter the building. He’s big, he’s bad, he’s ugly. Equip your Sword of Gith and go to work.
There actually isn’t a huge amount to say about this form of the King. He warps around the room attempting to unload melee attacks on your party members, making it difficult to track him or even know what the heck he’s gettig himself up to. At the outset of the fight, have your spellcasters cast their summoning spells while your melee characters rush in and start their business. This is a pretty straightforward pounding after this point, and the beast should all relatively quickly.
Second Phase

After the King is harmed enough, he will split himself into a large number of smaller creatures and attack with those; they’ll come flooding out of the statues that are scattered around the area. Again, not much to do here save attack them. Be sure to check and ensure that you have as many elementals running around as you possibly can; they may get level drained, but that’s not really a concern to you. If they go down, resummon them as best you can.
As you defeat the smaller Kings, the statues here will become purified, one by one. When you’re down to one or two statues to cleanse, you may want to gather your party around Zhjaeve and recast Undeath’s Eternal Foe on everyone. You can turn Puppet Mode On for all of your characters to get them to stand still. You may also want to pop out a Mass Heal if you have the time, along with any other wide-area buffs from your other team members. When that’s done, turn off Puppet Mode and finish off the remaining enemies.
Third Phase
Meet the new boss, same as the old boss...but bigger. The King has regrouped for the final fight, and you have to take him down before he manages to wipe the lot of you off the face of Faerun.
At the outset of this fight, the King will begin stealing power from the five Illefarn statues that circle the area. You’ll have to run up to each of them and bash them in order to actually harm the King at this point; use as many of your melee characters as needed here to quickly plow through them, since they won’t be able to damage the King. Your elementals and summoned creatures should be able to hold him back while you work on the statues.
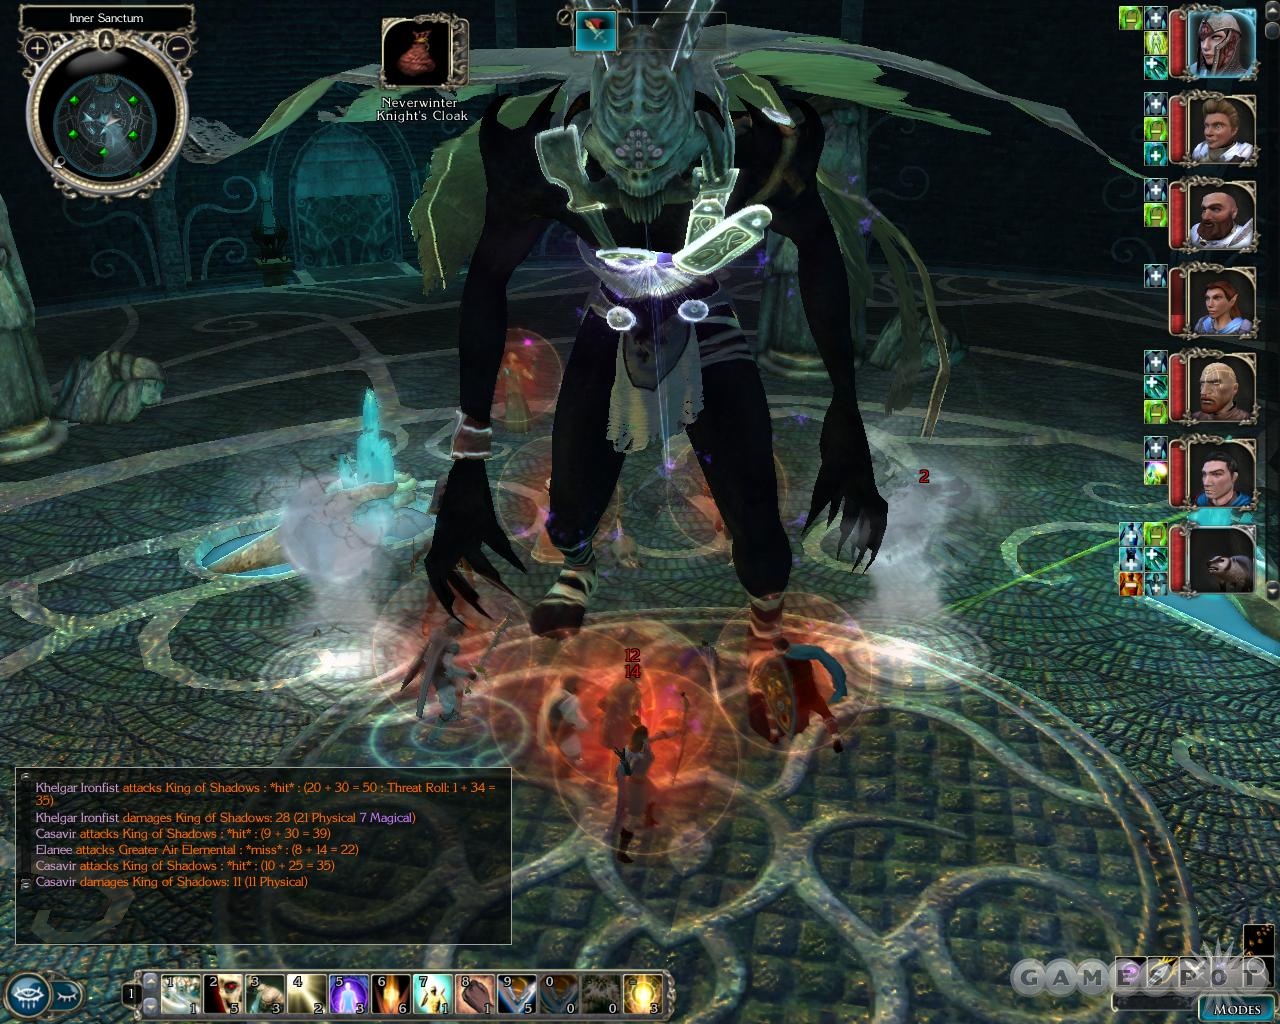
When all of the statues have been bashed to death, head to the portal in the center of the room and attack it with the Sword of Gith. It has a huge amount of damage reduction to any sources of damage except for the sword (something like 25/-), but you may be able to use Khelgar to overwhelm it if you want to use him as a secondary attacker. Of course, if your main character is poor at melee attacking, you may want to just give Khelgar the Sword of Gith and let him use it. He won’t get the buffs that it confers on its owner, but he’ll be able to attack more often than you will.
After the portal falls (it will take quite a while!) unload all your characters on the King of Shadows. When he goes down, he goes down for good. Congratulations on finishing one heck of long game!
Side Quests
There are a number of quests in Neverwinter Nights 2 which are entirely optional, and which don’t necessarily fit neatly into any part of the walkthrough. Those quests are here!
Act I Side Quests
Quest: A Soldier’s Story
If you speak to Retta Starling in West Harbor, she’ll tell you of a son, Lorne, who went off to fight in the Luskan war that was told in the original Neverwinter Nights. He never returned home. She wants you to find out what happened to him, since you’ll be heading off to Neverwinter anyway. This quest is automatically completed after some courtroom drama in Act II. Return to Retta after discovering the fate of her son.
Quest: Marshal Cormick’s Reward
After you speak to Cormick in Fort Locke, he’ll offer to reward you if you clean up the area of bandits and undead. He doesn’t have any cash on him, but if you speak to him when you reach Neverwinter (he’s in the City Watch post in the Docks district), he’ll fork over a few hundred cash.
Quest: Adamantine for Simmy
If you speak to the merchant here in camp, he’ll make you a trade: he has the recipe for a potion that offers giant strength to its imbiber, but he needs powdered adamantine in order to make it. Find some for him, and he’ll give you the recipe. We never managed to locate any powdered adamantine, so we were unable to complete this quest. We’ll update the guide when we can locate a sample.
Quest: Tomb of Betrayers
Speak to Judge Oleff in the Temple of Tyr in Neverwinter to pick this one up in Chapter I. It appears that the Tomb of Betrayers, the place where all the traitors to Neverwinter are buried, has been somehow disturbed; the priest who was last sent to check the Tomb out has failed to return. Oleff doesn’t know what’s going on there, and if you offer to help, he says he’ll unlock the tomb for you. There’s a good amount of loot inside, but he makes you promise not to loot the place. Feel free to lie to him for a chaotic shift.
The Tomb is located elsewhere in the Market district, so head on over and pop your head in. This is a puzzle palace, so get ready for some tricky puzzles.
Fireball Trap
If you head left (west) from the entrance, you’ll first come across a room with shadows and ghouls. Dispatch them; there’s nothing of worth in the room there. Nearby, however, you’ll come to a trap room, where two fireball traps are located on the southern side of the room. They’ll fire whenever someone steps on the pressure plates in front of them, and can’t be disabled.
Now, Neeshka has Improved Evasion, which lets her avoid all damage from fireballs when she makes her saving through, so she should be able to just run through the traps, pick the lock on the chest, and get the special ring inside without too much trouble, except for maybe a heal when you get done. Just be sure to park your other teammates well outside in the hallway using your Broadcast Command ability (set to Stand Your Ground), since they’ll automatically start following her at some point if you don’t
Theoretically, if you were able to do this the right way, it would involve flipping the lever here once to move the stone block in front of the first fire traps, moving Neeshka over to the gap in between the plates, having a follower flip the switch again, moving Neeshka over again, picking the lock, then performing the trick in reverse. It takes a while, though, so it may be easier to just run Neeshka across the rails.
Rats In A Cage

In the southwestern corner of this little abattoir, you’ll come across a small corridor with numerous Fireball traps in it, all of which are apparently pointed at a number of indestructible rats. We’re not 100% sure how to avoid the fireballs here, but we’re betting it either involves invisibility or using Charm Animal or somesuch to move the rats out of the way. It’s best to, again, simply park your party way back in the hallway while Nishka quickly runs across and opens the chest to nab the loot. Nothing critical inside: some gold, a Wand of Lesser Summoning, and a couple scrolls.
Room Of Traps
In the southeastern corner of the map, there’s a room full of pressure plates. Again, send everyone out into the hallway and use Neeshka to run across, avoiding the plates as best you can, before popping the chest, grabbing the shield, and beating a retreat.
Pressure Plated
In the northeastern corner of the area, the trap room here features no traps. Instead, a series of pressure plates will control the grate here; you need to have a character on it in order to keep the gate open. So, tell Neeshka to run towards the chest while another character is parked on the pressure plates to keep the door open. When Neeshka opens the chest, flip the lever to move back out of the room.
Onan Of Tyr
When you’re ready to free the priest that was sent here, head to the room in the center and direct south of the map. You’ll find Onan inside. Speak to him, but be sure not to let him get any of his seed on you! He loves to do that, the little rascal. It’s all right, God will smite him soon enough.
Anyway, he’ll tell you that one of the foulest betrayers has risen from his grave and controls the exit panels to the tomb. If you head directly north from where Onan is located, you’ll be able to fight off this beast.
Fenthick waits for you in the room there, all by himself, save for a rat. He’s a tough one, perhaps not physically, but he will try and trick you into hurting yourself. The room is littered with pressure plate traps, and if you get close to Fenthick, he’ll run across them, forcing your AI teammates to get littered with crossbow bolts from the walls. It’s ugly, and there doesn’t appear to be much of anything to do about it; the lever here doesn’t do anything in this particular encounter.
There is one way to avoid the traps, though: have everyone in your party use ranged attacks. Qara can probably kill Fenthick by herself with Fireballs, Flame Arrows, and Magic Missiles fired from the doorway; if anyone else has ranged weaponry on them, feel free to sit back and fire away. Fenthick himself will attempt to fire back with his own shortbow, but he won’t be able to deal nearly enough damage to save himself. When he’s dead, grab his loot and move the lever here. You need to flip it so that the lever itself swings south. When you do, feel free to return to Onan and tell him the good news. (If you don’t get the "The way is clear" prompt when you talk to him, flip the switch again.) He’ll join your party, and you can return to Judge Oleff to complete the quest.
Act II Sidequests
Quest: My Sister, The Rebel
You can find this quest in Chapter II, in the Blacklake District, near the Collector’s mansion. When you approach, you’ll find a young girl named Kyli who’s fighting with her sister, Lisbet, who’s about to go into the crypts nearby with her goth friends. Spooky! If you choose to accept the mission, it’ll be up to you to head into the crypts and rescue Lisbet from whatever her misguided mind has cooked up.
And as it turns out, that’s nothing at all: it turns out that her goth friends are in thrall to the King of Shadows and have something nasty planned for her. Kill their ghouls, then kill them. They’re spellcasters, so be ready with Protection from Energy spells if you have a hard time with the fight. Grab the key from one of the bodies and move through the dungeon. Be very careful when you come across Shadow Initiates, though, as they will cast instant-death spells that can kill off characters with low Will saves.
Further down the line, you’ll run across Savannah and Raven. Raven’s the real core of this little misbehaving group of misfits, but Savannah’s not so bad, merely a little slow-witted. With a high enough Diplomacy score, you can turn her away from her friends and convince her to fight on your side, which will net you a 400 experience bonus if you win the ensuing fight. Otherwise you may have to take her down alongside her friends.
Arval
In the last room of the dungeon, you’ll encounter Arval. You’ll be able to see him coming, so feel free to rest up and buff yourself thoroughly. If you’re planning for a fight, you can make it easier on yourself by parking your team back where Savannah is (or her body is), then moving your main character up forward by his or her self to talk to him. A fight is unavoidable, but you can adjust your alignment a bit by carefully selecting your choice.

When Arval goes hostile, move your main character back to where Savannah was. A few of Arval’s minions will follow you, including his monks and probably his rogue characters, but he and his wizards will probably stay where they are, allowing you to divide and conquer. When they’re all dead, rest up if you need to before speaking to Lisbet; she’ll resurrect all of the corpses as Greater Shadows, which are annoyingly difficult to hit. Turn Undead or any kind of evil-affecting spells will be handy here.
When Lisbet joins you, or you choose to leave her behind, start grabbing the loot from the bodies and the chests in the area; don’t miss the small room in the rear of the ritual area, where Arval’s journal is to be found. Lisbet’s ritual unfortunately turned all of the bodies in the area into Greater Shadows. If you’re having problems with them, try to let Qara or Sand blast them with Fireballs as you come across them; they’re easier to take down with area-of-effect magical spells than they are in straight combat.
After escaping the tomb, speak to Kyli for a bunch of experience, then bring the journal to Lord Nasher in his castle for an extra bit of XP and gold.
Quest: Disturbing Connections
In Chapter II, when you gain access to Blacklake, head to Nasher’s palace and speak to Sir Nevalle, Nasher’s majordomo, who’ll assign you a bit of a task. He suspects that Larim, a local tailor, is a Luskan spy. (Possible Star Trek reference ahoy!) Larim has recently been seen entering the home of one Lord Temar. Nevalle wants to know why, and asks you to head to Temar’s estate and arrest Larim.
Head to Temar’s estate in Blacklake and buff yourself thoroughly before heading inside. When you do, Temar will almost casually admit that he’s a traitor to Neverwinter and summon guards to attack you. Kill him and Larim both, and loot their bodies for some very nice equipment, including a rapier that’ll be nicely equipped on Neeshka. With that done, return to Nevalle...and you’ll be done. Pretty simple quest, all things considered.
Quest: Blacklake Lute Contest
You’ll eventually witness a lute cutscene at the ampitheater in Blacklake. If you speak to the bard there, you’ll be offered the chance to compete with him in a contest of luting skill, regardless of whether or not you’re a bard yourself. (Having Grobnard in your party won’t allow you to use him in the contest, although he may come in handy.)
Here are the number keys for the four songs that you have to play.
- 44124754
- 234451122
- 2332233175
- 35345272725

Even if you play all of these correctly, though, you still might not win completely; you should try to select one of the options between each round that suits your particular set of skills, whether it’s Taunting, Intimidation, or whatnot. If you are a bard, then Perform will be your best bet. There’s a different set of options for and after the fourth round, so hopefully you’ll find one that suits you and at least win a single round, which is all that you need in order to win the competition.
If you manage to beat the lutist, you’ll earn 250 XP and the use of his lute. If you absolutely cannot beat him, you can set him on fire and take his loot; you won’t earn any XP, but the only penalty is a mild Evil shift of one point. Or you can skip the entire contest altogether and not miss out on much.
Quest: City Watch Undercover
If you speak to Brelaina in the City Watch in the Market District after you begin Chapter II, she’ll give you a task. A group of thieves is apparently trying to take advantage of the vacuum of power in the Docks, but need supplies before they can start taking control of the area. She believes that they’re planning to meet a vendor in an abandoned estate in the Blacklake district, and wants you to go undercover in a sting operation.
Head to the "empty estate" (as it’s marked on your minimap) in the Blacklake district and walk inside to talk to the undercover watchmen inside. As in any good sting operation, you’ll have to wait for the money to exchange hands before you can arrest the bad guys, so you won’t be able to just spill the beans and arrest them right away; they’ll attack you. That’s going to happen anyway, but if you manage to get through the dialogue and actually exchange the money with them, you’ll gain an XP bonus.
Getting all the way to the money exchanging hands can be difficult, though, and appears to be almost impossible unless you can pull off one or two speechcraft checks (bluff, diplomacy, etc.) (Be sure to cast Eagle’s Splendor on yourself, or equip items that improve these skills, before you start the conversation.) From the beginning of the conversation, here are the choices that appear to be the best choice if you can’t make a speechcraft roll. (If you ever see an option for a speechcraft that you know you’re good at, it’ll usually be best to select that instead of one of these.)
- "I am. Who are you?"
- "It helps to be prepared..."
- [Show him the goods.]
- "It works. That’s what matters."
- "Half-price it is, then."
- "You suppose correctly."
- "That will be adequate."
- "We do."
Keep in mind that selecting all of these choices won’t let you arrest the bad guys; they’ll know you’re a fake and attack you before you get to that point. They’re simply the best available choices if you can’t make a speechcraft check; everything else will harm your influence with Limm. If you can’t do any speechcraft at all, then you may as well goad the baddies into attacking you right away. If you can substitute any of the above choices for successful speechcraft rolls, though, you stand a good chance of arresting the baddies. You’ll earn 300 XP and 7,500 GP for doing so, and you’ll still get to kill them and take all their equipment, which includes a Dagger +3. Note that any area-of-effect buffs you cast will also affect the City Watchmen here; a Haste spell dropped in the middle of combat will be pretty handy.
Quest: Natrisse’s Request
If you speak to Natrisse in the Temple of Lathander in the Blacklake District, she’ll give you a tithe box to take back to Brother Merring way back in West Harbor. This is an easy quest, and one that nets you a large reward: 1,500 XP. This seems mostly intended as a way to catch you up with the characters in town. Presumably you can open the tithe box and steal the contents, should you be an evil character.
Quest: An Imp’s Dilemma
When you reach the Blacklake District in Chapter II, you’ll spot an imp being harrassed (or harrassing) a merchant near the Mage Academy. If you find Kiggo, the imp, in a small alcove nearby after he disappears, then you’ll be able to talk to him and get this quest. He’ll ask you to use a key to free his mates. Doing so is a fairly chaotic action. In fact, it’s mad chaotic; actually going through with opening the crates will nab you 10 Chaotic points. Kiggo only rewards you with some low-level magical scrolls, so don’t worry about skipping it if you feel like it.
Quest: Reactivating The Construct
You’ll encounter a dormant blade golem in the Githyanki tunnels at the end of Act One. When you take possession of Crossroads Keep in Act II, it will be relocated to the basement there, where Grobnar will ask you to find some items to help reconstruct it.
Manual of Golemcraft: When you enter Crossroads Keep for the first time, after approaching it through the exit tunnel, you’ll encounter Aldanon, who’s been kept prisoner in the library. One of the books here will be the Manual of Golemcraft.
Rune-Inscribed Iron Piece: You can find this rune in the smithy of the Gem Mine in the Ruins of Arvahn.
Glowing Liquid: The Glowing Liquid is found in the caves beneath Ember and the Duskwood, near where all of the goblins worship the magical stone. Apparently you need Grobnar in your party to extract the liquid from the pool there.
Since we never found the Glowing Liquid ourselves, we weren’t capable of completing this quest. We’ll try again when we play through the game again and update the guide with the appropriate information.
Act III Sidequests
Act III is relatively short on sidequests. Many of the Act II sidequests will roll over to this Act, but few new ones appear.
Crossroads Keep
After you enter and take over Crossroads Keep, it will become your personal property, ceded to you by Lord Nasher. It’ll be your responsibility to rebuild the property and restore security to the lands surrounding it. Although it will be expensive to do so, spending your cash on repairing the keep will lead to some marked benefits, including a return on your investment in the form of tithes and taxes. It’s also just kind of fun.
Finances
Your stronghold’s income is mostly dependent on the taxes and tithes that you can exert on the farmers that live nearby and the merchants that travel along the road. The amount of these taxes depends on the security of the nearby lands and of the roads that pass by your castle. Unfortunately, it takes a long time to provide security for these areas; you’ll need to have your soldiers patrol one or the other, or both at the same time, to clean them up a bit. In the meantime, the cash that flows in will mostly be a trickle.

Luckily (or unluckily, as you may see it), you can use your own party’s cash on castle upgrades. If you have 10,000 gold in your castle fund and want to build an upgrade that costs 25,000 gold, then the difference of 15,000 gold will be deducted from your party’s available cash. It sounds like a pain, but this will let you build a lot of structures in Act II, especially after you recruit Edario and Jacoby. Since these merchants buy items back from you and pay up to 20,000 gold, you can sell off the high-level loot that you don’t have any use for to them, then put that cash back into your castle. Granted, you’ll have less cash to buy items with, but by the time you start working on your keep, you’ll probably be making most of your own weapons and armor. What’s more, by the time you start Act III, you’ll be able to withdraw castle funds into your party’s pockets, so everything becomes fungible then.
Construction
The master craftsman of the keep, Master Veedle will be in charge of repairing the keep for you. You have 70,000 gold to work with at the outset; a gift from Lord Nasher. You can use that to repair some of the structures in and around the Keep; as more are repaired, the more followers you’ll be able to attract, and the better your city will grow. More cash will flow into your coffers as you increase the number of merchants that use your roads and attract more villagers and farmers to tax.
Here are some of the things that you can improve. When you ask Veedle to make a repair, he’ll run away and will return after you leave the screen and come back. Simply head into the keep nearby, then return right back to the courtyard, and he should be back, ready to work on the next project.
Keep Interior
Personal Suite (15,000): The personal suite consists of a small room with a locked desk in it. What’s inside? Well, if you have the Crossroads Keep Key from unlocking the West Wing, you will be able to open the desk and obtain a Bag of Holding which will reduce the weight of anything placed in it to zero. Pretty handy, and well worth the 30,000 gold it takes to obtain it.
Library (15,000): Gives you access to a few books and scrolls that are lying around the area, and also lets Aldanon have a place to stay. Don’t bother building this right away; it’ll automatically be constructed for free at the beginning of Act III.
West Wing (15,000): Restoring the west wing seems somewhat pointless, although it will net you another few rooms to walk around in and a desk in which to store items. You can also obtain the Crossroads Keep Key in that same desk, which unlocks the desk in the Personal Suite.
Courtyard
Smithy (10,000): Talk to Edario in the middle of Highcliff to recruit him when you have this built. He’ll eventually be able to equip your soldiers with new armor, and will also sell some massively expensive armors for your own personal use. In addition to Edario, Jacoby in Fort Locke will be your weaponsmith.
Both of these gentlemen will sell you items, in addition to their roles as armorers for your Greycloaks. What’s more, they’ll buy back items from you and pay you up to 20,000 GP for the best items that you find, so you’ll want to save your best loot and sell it to them.
As you find veins of ore and tell of their locations to Catrina outside the keep, Edario and Jacoby will be able to upgrade the weapons and armor of your men. They won’t be able to form upgrades after each new type of ore is found, but if you speak to them when you’ve found two or three veins in a row, they should be able to make new weapons from the stuff you’ve found.
Merchant’s Shop (10,000): Allows you to recruit a merchant. Speak to Deekin in the Merchant District of Blacklake when you’ve built the shop to recruit him to your cause. Later in the game, you’ll be able to rescue a drow merchant from a gaggle of giants who will also take up residence here.
Tower (50,000): If you speak to Lord Navalle in Act III and ask him what to do with the tower, he’ll tell you that it should be made into a base for the Neverwinter soldiers. Doing so provides some immediate benefits, as the tower will make it easier to train your Greycloaks and will also provide added security for the lands and roads around the keep. Nevalle will also be able to spar with you for a permanent bonus to your attack modifier. There’ll also be a quartermaster inside the tower that will buy and sell items.
Church: The church can be constructed in Act III. It can either be made into an abbey for a monk (75,000) or made into a proper church for a priest of Tyr (50,000). The church isn’t anything special, it would appear; you can get healed there, if you like. The shopkeeper here sells some ridiculously expensive gear, such as a quarterstaff that costs almost 500,000 gold. You’ll also get a quest that will lead to your obtaining the Holy Avenger (for most characters). If you build the monk abbey, you’ll be able to apply for extra training if you’re a monk (and perhaps if you have any monk followers). The store here focuses on monk items, obviously, but will also sell a rogue stone.
Fortifications
Wall Repairs (25,000 - 75,000): The wall repairs will make the keep more defensible when the inevitable battle occurs. They’ll also improve the appearance of the keep as you walk around.
Castle Exterior
Road Repair (20,000 - 100,000): Allows merchant caravans to reach the keep, thus increasing the flow of cash to your coffers.
Quarry: You can recruit both Calindra (in Port Llast’s inn) and Pentin (in Old Owl Well) to serve as your quarry masters. We’re unsure of what specific functions require both of them to be present, but you can tell either of them about your ore locations. Pentin gets somewhat snippy about his pay later in the game, so if you don’t want to talk to him, just ignore him completely and report to Calindra exclusively. She’ll only come along if you happened to complete the quest she gave you in Port Llast.
Farms: Orlen, in West Harbor, will come along and run your farms if you recruit him, thus providing food for your soldiers and staff. He doesn’t require any overwatching, so feel free to simply ignore him after you recruit him.
Kana: Security
Kana is the master-at-arms of the castle, responsible for taking care of the keep’s security and that of the surrounding lands. You’ll need to supply her with recruits and extra sergeants, and she’ll repay you by training the men, giving you reports on the keep’s status, and allowing you to organize the Greycloaks to either train, recruit more men, or patrol the roads and surrounding lands.
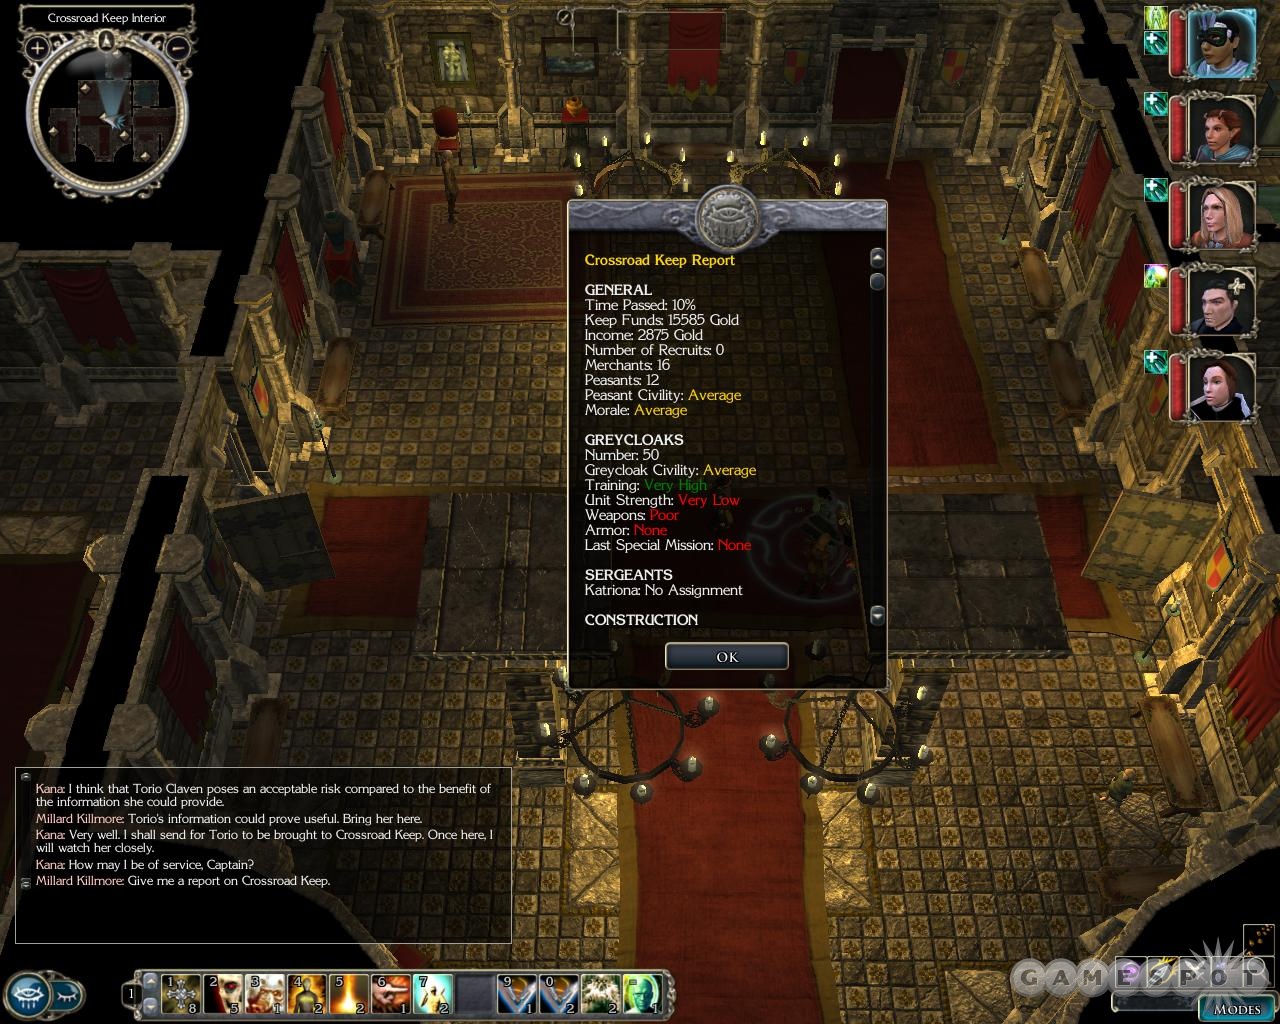
Dealing with Kana can be complicated, but worthwhile. Be sure to select her to send your Greycloaks out on any special missions that she offers you; this will earn you extra gold for your keep and let your men get some experience. If you want to deploy the men on a mission, tell her to do so; she’ll eventually return and give you an after-action report, which usually involves adding a small amount of gold to the coffers. Some of these missions, such as tax collecting, will require your input; play your character’s alignment as best you like. Being cruel and selfish will often strengthen your Keep’s stature, but will often result in evil alignment shifts.
Kana will also be responsible for managing the sergeants you recruit. The first of these will likely be Katriona, Casamir’s old teammate. If you speak to her in Old Owl Well while Casamir’s in your party, you’ll be able to recruit her as a sergeant. If you inquire with Kana about her, you’ll be able to reassign her to different duties, much like you can the Greycloaks. By default, she’ll help out with special assignments, but if you wish, you can move her to another position, such as recruitment. There are at least two more sergeants you can recruit throughout the game, one of which will show up out in the courtyard in Act III.
Uncus
Uncus is a NPC merchant who offers to set up shop near Kana, should you be willing to agree to turn the other cheek as to how he acquires his merchandise. He’s shady, to be sure, but there’s no reason to really turn him away, so far as we can tell. He’ll buy items back at up to 15,000 gold, which isn’t too shabby, at least until you manage to get Edario and Jacoby to come set up shop.
Torio
Eventually, Kana will tell you that Torio has been captured, and that Nasher wishes to send her to the Keep to help aid you. If you accept her help, she’ll tell you much about the situation in Luskan, and will also offer up tips as to whom you can recruit to the Keep.
NPCS (Spoilers!)
This is a (quite possibly incomplete) list of NPCs that you can recruit to your castle.
Sergeants
- Katriona, in Old Owl Well. Only joins if Casamir is in your party when you speak to her.
- Bevil. He appears in the courtyard of the castle in Act III, near the tower.
- Jalboun of the Two Blades. A bodyguard of Sydney Natale. You’ll encounter her in Act III; bribe Jalboun to fight for your side, then recruit him to your side.
- Light of Heavens. This character is first encountered in the Market District in Act III. If you defeat her in a duel, she’ll relocate to Port Llast (near the entrance to town). Lastly, she’ll show up near the quarry of the Keep for the final duel. Defeat her each time (buff yourself before talking to her, and summon foes if your character is capable of doing so) to earn her as a sergeant.
Merchants
- Deekin: Head to the Market District and recruit him when you have the Merchant’s Shop built.
- Jacoby: The weaponsmith in Fort Locke will come and work for you when you’ve built the smithy.
- Edario: The blacksmith in Highcliff will join up, as well.
- Uncus: When you first inhabit the keep in Act II, this shady character will offer you some shady items if you shadily look the other way at his shady activities. Shady! It’s not evil or good to keep him around, so you might as well.
- Caelryna Seerar: You can find this woman in a makeshift prison in the Seat of the Mountain area on Mount Galardrym.
Miscellaneous NPCs
- Orlen: Recruit him from West Harbor to run your farms.
- Pentin: Recruit him from Old Owl Well to run your quarry.
- Calindra: If you completed her quest in Port Llast, she’ll join up as an alternate quarry-master.
- Joy: When you reach Act III, look around for a dancing woman in the Merchant District. She’ll come and dance at your Inn if you wish her to.
- Guyven: Guyven is supposed to show up at your stronghold at some point, but apparently there’s a bug where he sometimes won’t. He never showed up in our game and nothing untoward happened, so don’t worry if he doesn’t appear.
- Kistrel: If you completed the Overly Intelligent Arachnid quest and fed Kistrel, he’ll show up in your basement and knit you a sweater.
Followers
Most of your followers will have their own special quests which are only attemptable if they’re actually in your party. These pop up at sometimes inopportune times, but can be important to the character development of your followers, and they’re always a good chance to earn more experience and loot for everyone in your party, so they’re worth doing when they pop up.
Khelgar Ironfist
Khelgar is the first permanent party member that you'll encounter, right near the beginning of the game. As a dwarf fighter, he'll add a great deal to the combat acumen of your party. If your main character is a barbarian or fighter, then he'll likely be cast aside in favor of other characters as they become available, but otherwise, he'll be a valuable ally in your journeys, and when properly equipped will be capable of dishing out more damage than any other character. Khelgar's also one of the few party members that can be switched to a different class; with a little work, you can change him from a fighter to a monk.
Feats and Skills
Feats: Point Khelgar at your enemies and let him loose! Khelgar's a powerful warrior and is more than capable of going toe-to-toe with anything in the game. As a fighter, he'll get a ton of feats to use, allowing you to specialize him in a couple of weapons, if you wish. Generally, though, it'll be best to pick one class of weapon and get all of the associated Weapon Focus and Weapon Specialization feats to go with them, along with Power Critical and Improved Critical for the selected weapon. If you wish, you can forego the second round of Improved Focus and Specializations and grab the associated feats for a second class of weapon, just in case you find one that you like.
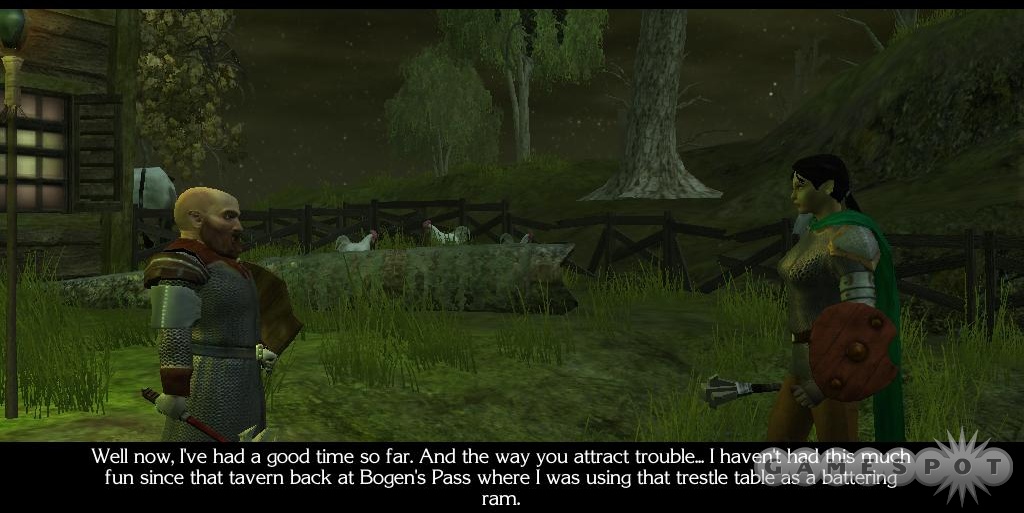
We personally didn't use a shield for Khelgar, instead choosing to equip him with a big two-handed weapon. We went with greataxes, which deal big damage on normal strikes and have a 3x critical bonus, allowing Khelgar to occasionally bust out criticals for almost 100 points of damage in a single blow. The next time we play through, we're going to let him bust out with scythes, which deal less damage per blow but crit for 4x damage. Likewise, we didn't bother obtaining most of the special combat feats, like Improved Power Attack; we got him Cleave and Great Cleave and let him do his thing with minimal input from us.
It's worth pointing out, though, that Khelgar's "best weapon" in the game is a warhammer. You won't get it until Act III, and it's arguably not quite as good as some of the weapons that you can craft yourself, so don't feel pressured into preparing him to use it. If you wish to do so, though, you'll find plenty of decent magical warhammers as you play the game.
Skills: So far as skills go, Khelgar will only get a couple of points to spend at each level-up, and will have fairly few skills that are actually class skills. Feel free to start leveling him up in Craft Weapons or Craft Armor, if you like, and he'll be able to make most of your base weapons for enchanting by the time you get to that point in the game.
Equipment Choices
Khelgar's largely an open book when you find him, so feel free to pick a weapon to specialize in for him, even if you don't happen to have an example of that weapon handy. For instance, scythes are fairly scarce in the early going, but you'll find plenty of magical scythes in the late game. If you want to start getting the Weapon Focus and Specialization and Improved Critical feats for scythes, feel free to do so, and simply use the best weapon Khelgar can handle until you find a decent scythe. If you want to go with a one-handed weapon, then we recommend a dwarven waraxe. You’ll find virtually no dwarven waraxes in your travels, so you’ll have to craft your own, but they offer almost all of the benefits of a greataxe (they roll for 1d10 damage instead of 1d12, but are otherwise mostly the same) while also allowing you to use a shield.
Aside from that, you'll want strength and constitution buffs from your equipment to make Khelgar even more of a powerhouse. His Will and Reflex saves aren't going to be great, so anything that can add Freedom of Movement or immunity to mind-affecting spells will be nice, as will anything with regeneration; Khelgar will be taking plenty of damage in fights.
Khelgar Vision Quest
For a dwarf fighter, Khelgar has an odd aspiration: he wants to travel to Neverwinter to learn how to fight like a monk! When you finally reach Neverwinter, you’ll be able to help him reach his goal, by heading to the Temple of Tyr in the Market district of the city. Unfortunately, when you first get there, you won’t be able to do much. Hlam, the priest, will tell you of the three trials you have to pass before Khelgar can become a follower of Tyr.
Trial of the Maimed
Trial of the Maimed takes place in the Ironfist Approach, which is listed as "Dwarven Scouts" on your world map, but only after you pass through the Old Owl Well area. When you arrive, you’ll run into a clanmate of Khelgar’s, who tells you of the bugbears that are blocking entrance to an ancient mine of the Ironfist clan. Gain some cheap influence points on Khelgar by telling him "we stand with you" or the closest equivalent near the end of the conversation.
As you head down the path here, you’ll find a dead dwarven scout. There’s no way to gain influence with him here, but you can lose some; choose the first dialogue option as the safe choice. Further down the road, you’ll come to Khayar Ironfist, who’s about to be roasted by the bugbears. If you kill his captives, you’ll be able to talk with him. You can pester him about the situation, if you like. When you finally free him from his bonds, tell him that you’re honored to gain some influence with Khelgar. If you ask Khelgar about why he left his clan after that, he’ll tell you that he didn’t abandon them. There’s no correct response here; all of them will lose you influence with him. Pick the "let’s move on" option to avoid hurting yourself.
Ironfist Clanhold
When you reach the entrance to the Ironfist Clanhold and head inside, you’ll immediately run across a bugbear named Grumm, who’s giving out orders to a small group of the bears. The guy’s huge, but you won’t have to face him right off the bat; instead, you’ll kill his followers and then be free to roam the area. Be sure to pick up the Strange Part from the chest nearby.
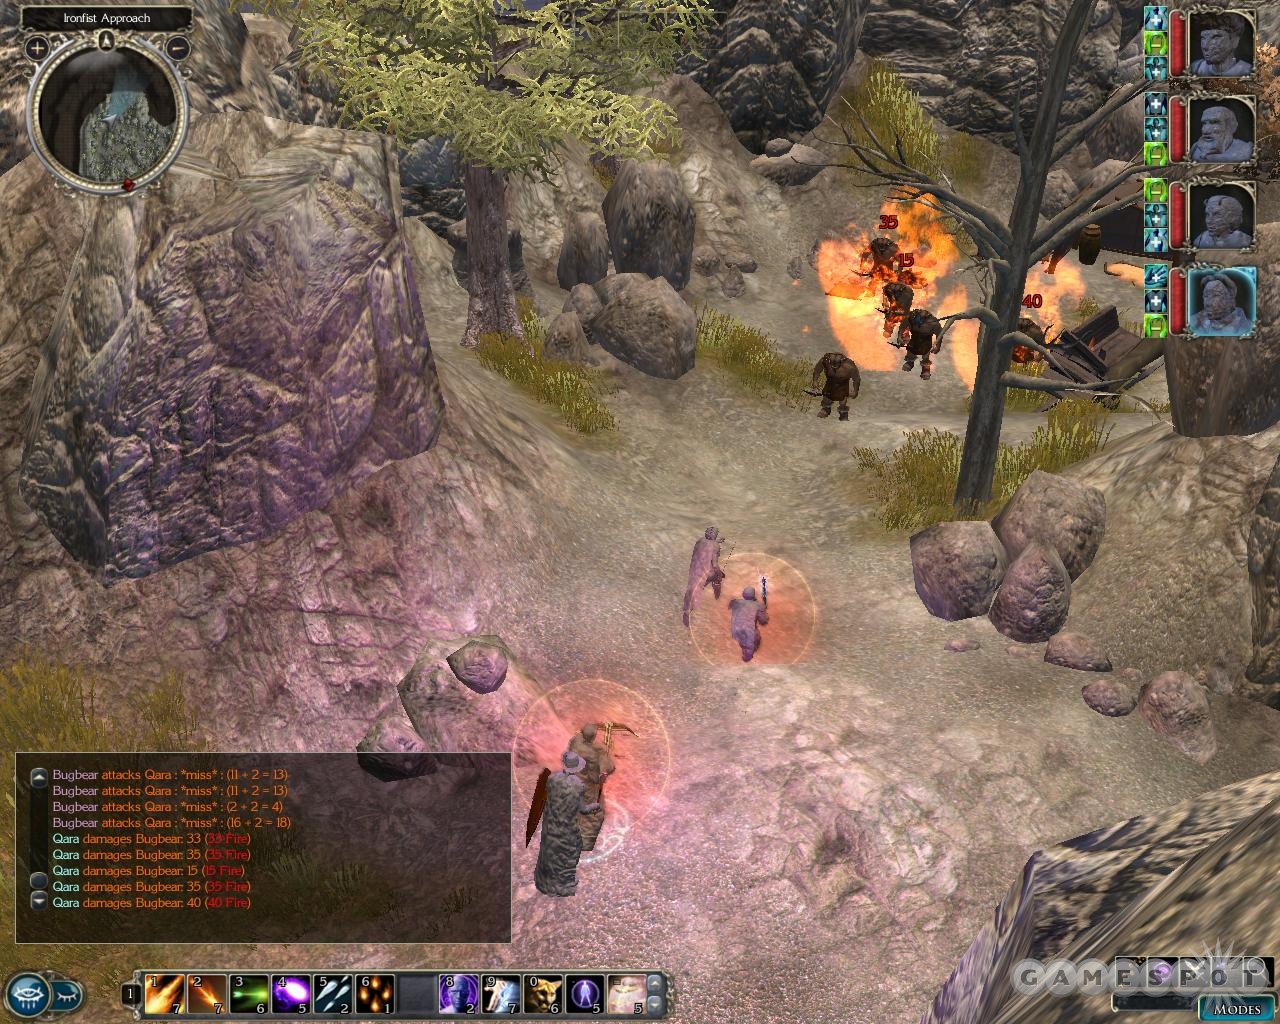
Grumm and his brother Grishk are nearby, in a room to the northwest of the entrance. They’re not that difficult to defeat, although they do put out a pounding if you’re unprepared for them. Kill them, loot their stuff, and move on.
When you move all the way to the northeast, you’ll find an ornate lock that’s protecting a portcullis. You can pop the Strange Part into the machine nearby to unlock it. If you tell Neeshka that you aren’t there as scavengers, you’ll lose some influence with her but gain some with Khelgar. You can also take a more neutral approach, if you like.
The last of the Bugbear brothers resides in a room on the eastern side of the map, beyond the locked door. Kill him, then loot the chest here to find the Gauntlets of Ironfist, a pair of powerful gloves. To earn a big influence gain with Khelgar, tell him that they belong to an Ironfist when he attempts to give them to you.
Trial of the Even-Handed
In order to fulfill this trial, you have to earn a fair amount of influence with Khelgar before speaking to him. If you run through the Ironfist Clanhold and complete the tasks there, you’ll probably have enough. Right-click on Khelgar in the field and hold the button down to get a prompt for talking, then select "I wanted to ask you about some of our companions." From there, you can ask him about Neeshka or Elanee; if you have enough influence with him, he’ll admit that they’re handy to have around in a fight, and that will qualify as passing the trial.
Trial of Justice
Khelgar’s third trial will likely be concluded during your own trial in Act II. After Torio puts you on trial for what happens in Ember, Khelgar will probably come to you in the Temple of Tyr and express his outrage at the (hopefully false) accusations. When this occurs, he’ll realize the true meaning of justice, and will be able to pass this trial.
Becoming A Monk
With the three trials completed, return to Hlam and turn all of them in. After that’s done, you can convert Khelgar into a monk at any time you wish; it only takes a second. Khelgar immediately loses all of his fighter levels, and you’re able to level him up as a monk from level one. There are some advantages and drawbacks to letting Khelgar become a monk, obviously.
On the plus side, there aren’t any other monk-class party members available to you, so if you want to try and see how monk characters perform, then he’s the only option you have. You’ll also be able to use all of the monk-specific equipment that you’ve found in the game. On the drawback side, it’s unlikely that the damage output of Khelgar as a 20th-level monk will outclass the damage output of Khelgar as a 20th-level fighter with all of the feats rotating around a specific weapon, although of course there are plenty of monk-specific bonuses that the fighter version won’t (The Gauntlets of Ironfist will definitely be a big help if Khelgar does become a monk, though, as they’ll add plenty of damage to his unarmed strikes.) Khelgar will also lose the ability to wear armor, and since his dexterity and wisdom scores aren’t all that great, he’ll be somewhat weaker than a character you’ve built from the ground up to be a monk, even if he is a bit healthier and capable of dealing more damage.
There’s no real right or wrong answer here, but for our sake, we decided to keep Khelgar as a fighter and tank. One thing to note is that, when you start over as a monk, Khelgar keeps all of the ability bonuses he gained when he hit every fourth level he gained as a fighter, so you’ll be able to effectively gain even more ability points when leveling him up as a monk.
Neeshka
Neeshka is a tiefling Rogue that you’ll encounter quite early on in the game, early enough, in fact, for you to mold her mostly as you see fit. If your main character isn’t a rogue or bard, you’ll probably be using Neeshka throughout the entire game, so it’s best to find some way to focus her feats and abilities to make her as useful as possible in combat.
Feats and Skills
Feats: Early on in the game, you can feel free to use Neeshka as a ranged attacker, especially if your main character uses melee combat. As the game progresses, though, you may want to start netting Neeshka some weapon-related skills, such as Improved Criticals for rapiers or shortswords, along with the Two-Weapon Fighting feats. We personally had her dual-wield rapiers and daggers, but you could just as easily go with short swords or kukris, or whatever else you prefer. (Combining a rapier/shortsword in the main hand with a kukri or sickle in the off-hand is a good way to mix up piercing and slashing damage.) Just be sure that your choices of weapons go along with the Weapon Finesse skill; Neeshka will only add her dexterity modifier to her attack roll if you're using a rapier or a weapon that's categorized as "light".
You can only level up Neeshka as a rogue, so she'll get some massive sneak attack bonus damage as you do so. We personally took control of her most of the time during our fights to position her behind enemies and pound them with sneak attack damage. Just be sure to rank up her Tumble skill as you increase her level to prevent her from taking Attacks of Opportunity as she moves around the battlefield. (If you're playing on normal difficulty, then you won't have to worry about this.) Most enemies will turn to face Neeshka after they take 60 damage from two attacks, and she's somewhat fragile since she relies on light armor, so be sure to buff her with Stoneskin and Mage Armor whenever possible.
Skills: So far as skills go, most of these will be pretty obvious: Neeshka's your lock-picker and trap-disabler, so keep both of the related skills maxed out. We never had much use for Hide, Move Silently, or the other stealth skills, preferring to take our enemies on face to face. Slight of Hand will allow you to pickpocket merchants for cash and goods. We ignored Parry for the most part, as it's purely a reactive ability and thus won't be much use while you're trying to backstab your opponent.
Equipment Choices
Neeshka is, again, reliant on light armor. Since she has such a high Dexterity score, you're going to want to find her a suit of armor with a high Maximum Dexterity Bonus. Anything with a +5 or +6 maximum bonus should be fine for the bulk of the game; if you get her up to a truly absurd dexterity score, you might want to enchant a set of padded armor for her, which lets her use up to a +8 dexterity bonus.
For weapons, pick something that will let her use her Weapon Finesse bonus to the attack score. Most of the weapons that she can use as part of her class proficiency should be fine. That class basically includes any weapon that's classified as "light", along with rapiers, which are technically considered to be "one-handed" weapons. If you wish, she can obviously excel at archery or crossbow attacks due to her high dexterity.
So far as other equipment goes, you need to compensate for Neeshka's shortcomings. Equipment that adds to her low strength will be handy, as will items that add natural AC bonuses.
Quest: Neeshka And Leldon
As you roam around Neverwinter’s Docks district with Neeshka in your party, you’ll be set upon Bennon, an assassin in the employ of one of Neeshka’s old partners in crime. After you fight off the assassins, Neeshka will spin a yarn of double-crosses and betrayal, and eventually winds up revealing that she ripped off Leldon for most of the loot from a particularly lucrative heist. He’s not exactly pleased about it.
When you move off to the Market District, another goon named Tremmel will show up and attempt to do the same thing. Finish them off, and Neeshka will suggest dealing with the threat at its source. If you agree to do something unexpected, you’ll gain chaotic points; attempting to turn Leldon into the law will obviously move you towards the lawful end of the spectrum.
Leldon’s Hideout
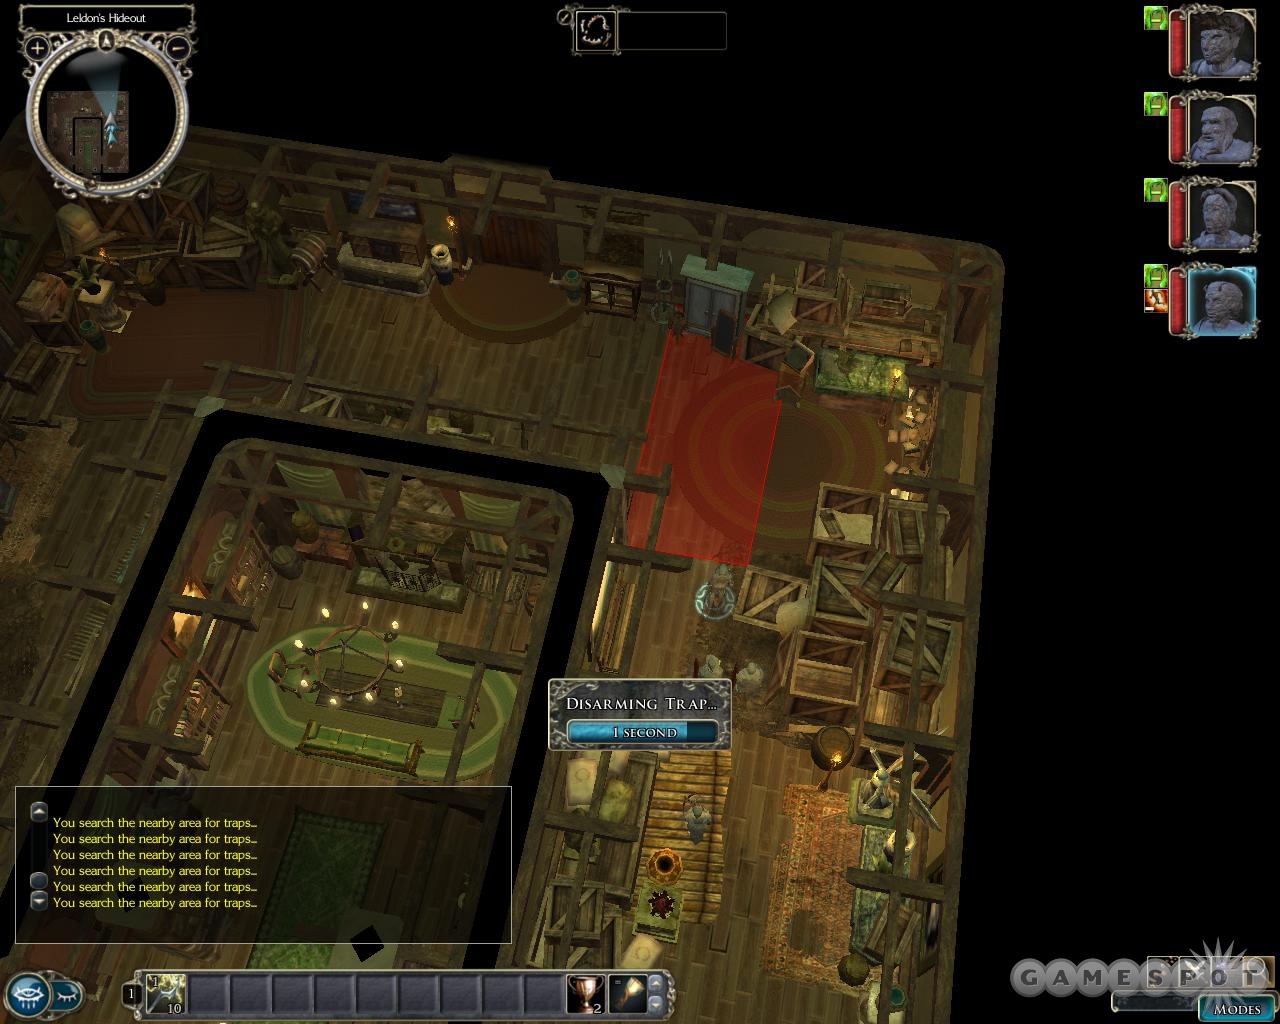
Head over to the Moonstone Mask to check in with Ophala, who’ll point you towards Leldon’s home in the Market district. Head on over and step inside. You’re going to find plenty of traps inside, as well as some guards, but you shouldn’t have too many problems getting inside, stealing the Lucky Coin from the treasure room, and getting back out again.
Of course, Neeshka’s not telling you the whole story here. It turns out that Leldon had actually stolen the coin from her at some point in the past. You won’t be able to progress the story after this manually; you’ll have to wait for events to unfold for themselves.
Leldon In The Park
After a bit more adventuring, you’ll get a note (probably from Wolf of the kid’s gang) that Leldon wants to meet you in the park in the Market District. It’s a trap, obviously, but a pretty dumb one - he’ll simply attack when you show up, then use a smoke potion and escape when you take the upper hand.
Sub-Quest: Neverwinter’s Greatest Thief
In Chapter II, a woman named Tasha will accost you and Neeshka as you exit the Sunken Flagon. She’ll tell you of Leldon’s plans to rob the home of someone known only as the Collector, who resides in Blacklake; after he does so, she and Leldon will retire as kings to a faraway land, etc., etc. It’s obviously a trap, but Neeshka wants to try robbing the Collector before Leldon gets the chance to do so. If you agree to rob him first, or even suggest it, you’ll gain some chaotic points and influence with Neeshka. This is a great quest to do as soon as you get it, since you’ll get some nice gems to craft with.
Head out to the Collector’s mansion and buff yourself thoroughly before heading inside; the Collector’s guards are fairly beefy individuals. Before exploring further, head down the hall and check to the left, where all of the servants are. There’s a table and a barrel of water here. If you grab the Empty Jar from the table, then place it inside the barrel of water, it’ll turn into a Bottle of Water, which you’ll need shortly.
Elsewhere on the first floor, you’ll find Vania, the Collector’s mistress. You need to nab her key in order to move on to the second floor. To do so, you can play yourself off as one of the guards, then use Sleight of Hand on her to pickpocket her (you’ll also net a valuable Saintsblood Pearl if you do this). If you speak to her again, you can attempt to convince you to escape her loveless relationship by helping you force your way into the Collector’s vault. This will automatically warp you up to the second floor, where you can use Vania as a hostage to wheedle the Collector’s key out of his hands. If you find that distasteful, you can also grab the painting on the wall near him and threaten to destroy it. Or you can kill him! You’ve got plenty of options, but you do need that key.
The Second Floor

When you hit the second floor, douse the flames in the fireplace with your water jar, then grab the Ornate Silver Key inside. Nab the key from the Collector however you can, and he’ll tell you that you need one more piece of the puzzle to get into the vault: a three-digit-code. Check the bookshelves nearby for the book of Numerological Nursery Rhymes. (If you loot the Just Desserts book, you’ll spring a trap.) The puzzle inside is somewhat obtuse; suffice to say that the answer is 513.
When you crack the door of the vault, Leldon will appear behind you and insist on attacking. He’ll somehow be stealthed after the conversation, so the first character he attacks will take some huge damage. He won’t be able to sneak attack anyone after the first round, though, so you should be able to take him down by ganging up on him and giving him an epic beatdown. Grab the disappointing loot off of his body, as well as all the loot in the vault, to end the quest.
Qara
Qara, as the first arcane spellcaster you'll be adding to your party (assuming your main character isn't a spellcaster), will likely be a member of your party for a good long while. She’s an excellent sorcerer, capable of casting plenty of buffs on your party members and dealing lots and lots of damage at range. If you’re playing on normal difficulty, she’ll probably be responsible for the bulk of your kills; on Hardcore difficulty, she’s a bit more difficult to use well, but will still be a valuable member of your party.
Feats and Skills
Spells: If you’re going to keep Qara in your party, you have to be careful about which spells you choose for her to learn. Although she can cast more spells per day than a wizard, she won’t be able to actually learn as many spells for her spellbook, so you won’t have as much flexibility. If we had to pick the spells we used most for her (playing on Hardcore), we’d say that Stoneskin, Mage Armor, Improved Mage Armor, Haste, Flame Arrow, and Summon Creature VIII and IX were the ones that got the most use. If you’re playing on normal difficulty, then things like Fireball and Isaac’s Greater Missile Storm will be used fairly often.
Feats: So far as feats go, don’t worry about any weapon feats for Qara. She’ll likely be using a crossbow or something similar for most of the game, but she’s not going to rely on a weapon for dealing damage, and she’ll have very few feats to spend anyway. Stick to the metamagic and item creation feats. As far as metamagic goes, Maximize Spell will be the most useful, as will Extend Spell when you want those one round per level duration spells to last a bit longer. (Persistent Spell can come in handy with things like Haste, but, that’s about the only spell you’ll be able to consistently use it on, so it may not be worth spending a feat on it.) Quicken spell can help you cast two spells in a single round, but that’s generally only useful on normal difficulty, where you can chuck out fireballs willy-nilly.

If you want, you can have Qara pick up Craft Magic Arms and Armor. The difficulty with Qara as a crafter, though, is that she’s simply not going to know all of the spells that you need to make a diverse variety of weapons. You can make this up somewhat by having Sand make her scrolls to use when crafting items, but that seems counterintuitive.
Skills: So far as skills go, Concentration is the only must-have. Craft Alchemy is a natural skill for her, so have her carry around the mortar and pestle. If you don’t intend to actually make any poisons or grenades, though, you can stop adding points to it when you get up to around level 10, as that’ll probably be all you need to break down most of the magical materials you come across. Lore and Spellcraft are obvious other choices, although Spellcraft will only work to identify enemy spells as they’re being cast if Qara’s fairly close to your target.
Equipment Choices
Qara’s fairly restricted in her choices of equipment. She can’t use armor, but she can wear robes, so try to find her a decent set of threads when possible and supplement her low AC with Bracers of Defense or Amulets of Natural Defense. So far as weapons go, there are plenty of daggers and staves that are lying around, but you’ll usually just want to plop a nice crossbow in her arms. You’ll find a nice one in a cave under Ember in Act II that will fit the bill just fine. Keeping her with a ranged weapon will be ideal, as that will let her stay out of melee encounters where she’ll quickly be killed. Apart from that, any kind of charisma-enhancing items should go to Qara, as they’ll help her memorize more spells and increase the difficulty of the saving throws when she casts spells on enemies.
Qara Quests
Qara doesn’t seem to have any actual quests to follow, although she does have plenty of backstory. After you encounter her outside the Sunken Flagon, a series of events will occur that eventually result in a woman named Ashni appearing with no fewer than 14 wizardling friends to back her up. If you fight them off, a man named Johcris will intervene and stop the fight. He’s apparently a wizard at the local mage academy, and blames Qara for the death of his daughter, one of the girls you fought outside the Sunken Flagen when you first encountered Qara back in the day. (Presumably he’s upset with you for something else if you managed to avoid that encounter.) He won’t do anything to you now, but he does promise retribution in the future...
Anyway, you’ll encounter a number of cutscenes in the first chapter here before any action actually takes place. Sydney of the Hosttower will collude with the father of one of the girls who was killed and create a shadow creature to attack Qara. We encountered it in the forest as we headed off to Crossroads Keep in Chapter II, and then again in Act III, where it’s destroyed along with its master. The plot involving the girl’s father apparently dangles as a loose end, or perhaps we didn’t follow through on all of the clues.
Elanee
Elanee is a druid, and the third character that you’ll come across in your travels. As a druid, she’ll be a helpful healer in the early going if your character is incapable of doing so, and even if she isn’t the most fearsome presence in a battle (in our opinion, anyway), she will at least be capable of chucking around arrows or bullets from a distance while her animal companion serves as a worthy distraction.
Feats and Skills
Spells: We personally didn’t bother to use Elanee all that often - our main character was a cleric, so we didn’t have much use for her abilities. If you do use her, be sure to have her memorize the Barkskin spell, which adds a natural armor bonus to a target’s AC. Natural armor bonuses are difficult to come by, with the only other easy way to obtain them being Amulets of Natural Armor; they stack with everything and will be a big help compensating for any low-AC members of your party. Elanee is also unique for a druid, in that she can cast Stoneskin, which will be handy if you’re not using a wizard or sorcerer in your party for some reason. Apart from that, her best spell will be Elemental Swarm, which will automatically cycle through elemental summons, allowing her to automatically summon in new ones as the old ones are defeated.
Elanee, as a druid, can convert any spell to a Summon Creature spell, unlike a cleric, which can spontaneously convert spells to healing spells. If Elanee’s acting as your party’s healer, then, have her load up on healing spells and use them with spontaneous conversion to summon monsters as needed.
Skills: Concentration is the only one you really need here, as far as we can tell. She can excel at Survival, but we never found that skill to be necessary at all. Heal will let you cure diseases and poison if you need to, but you’re rarely afflicted with those ailments, and by the time you are, you should have Restoration spells to use instead.
Feats: Since we didn’t use Elanee very often, we had her learn Craft Magic Arms and Armor and Craft Wondrous Items. She can’t cast arcane spells to create these items, which is a problem, so be sure to double up with Sand or Qara with the same feats. You may also want to have her learn Brew Potion, so that you can start converting your extra cash near the end of the game into Potions of Heal for your party members.
Equipment Choices
Again, we didn’t bother using Elanee much. If you want to keep her in the party, try equipping her with a sling or bow to allow her to attack from range when she’s not casting spells.
Quest: The Wounded Wolf
During your sweep of the Docks in Neverwinter, you’ll encounter a Wounded Wolf in one of the alleyways to the west of the City Watch post. If you speak to it while Evanee is in your party, it will be revealed as a druid, who says that the sickness in the land of the Mere is spreading closer to Neverwinter. He requests that you and your party travel to a place called the Skymirror, to commune with one of the druid circles that may know more about what’s going on.
When you want to head to the Skymirror, get Elanee into your party and find it on the world map. She’ll tell you that the Skymirror is protected by certain challenges, but she’s not sure what precisely they might be. It’s not too difficult: there are four trees that you have to examine, and each one will have a symbol on it, each one corresponding to a second-level Druid spell. If you have Elanee cast the spells directly on the trees, you’ll be able to unlock the Skymirror for talking.
In the order in which you seee the trees from when you enter the area, the spells needed are:
- First Tree: Bull’s Strength
- Second Tree: Cat’s Grace
- Third Tree: Barkskin
- Fourth Tree: Owl’s Wisdom
When you’ve cast the required spells on each tree, you’ll get the Skymirror Offering item. When you have it, approach the Skymirror to start the divination. Elanee will commune with Elder Naevan, a spooky member of the Mere Circle of druids. After she’s done talking, get the hell out of dodge; many elementals will begin attacking you as you may your way out. When you’re almost at the edge of the area, a Shadow Priest and his mercenaries will ambush you. Kill them to leave the area.
You have to complete this quest before the end of Act I to start Elanee’s quest chain. Unfortunately we forgot to do so when we played through the first time; we’ll update this guide when we have a chance to do so again.
Casavir
Casavir joins your group before the end of Act I. This stalwart paladin is a holy warrior of the highest order. Like other paladins, though, he suffers from some of the weaknesses of being a mixture of the cleric and fighter classes, in that he won’t be able to cast spells or turn undead as well as a cleric and won’t gain as many feats as a fighter would. He’ll be an able warrior if you outfit him correctly, but if you have a cleric in your party, then he probably won’t be a required companion.
Feats and Skills
Feats: Like any other melee combatant, grab some weapon-related feats for Casavir and specialize him in something. Long swords would be a good choice, as you may be able to nab him a Holy Avenger weapon later on, which is one of the best weapons in the entire game.
Skills: The standard fare for warriors. You’ll probably be best off dedicating him to crafting weapons or armor. The game likes to autolevel Concentration and Healing for him, neither of which are terribly useful in his case.
Equipment Choices
As mentioned, the best weapon in the game is the Holy Avenger, which you can obtain if you build the church in Crossroad Keep and speak to Ivarr the Blessed inside of it. Building the monk abbey will prevent you from obtaining it. It’s not easy - there’s a tough monster you need to kill on Mount Galardrym to obtain it - but it’ll push Casavir right to the top of your list of damage dealers. Aside from that, focus on the usual: high-AC armor, a nice shield, and anything that will buff his Strength.
Sand
Sand is an acerbic shopkeeper in Neverwinter who will be enlisted to aid you when the forces of Luskan are brought to bear in an attempt to destroy your reputation. He’s an able wizard, capable of casting a wide array of spells, and will be helpful in battle should you dislike using Qara for whatever reason.
Feats and Skills
Spells: Even if you don’t use Sand in your party very often, you should still periodically add him to your party and dump any scrolls you’ve found into his inventory. Sand can learn new spells by scribing scrolls into his spellbook (right-click on the scroll to find this option), allowing him to learn many more spells than Qara will be able to. That said, his focus on the arts of one of the spell schools will prevent him from learning or casting any Conjuration spells, which is...bad. We played on Hardcore difficulty, in which Summon Creature spells are going to be what your spellcasters most often use at high levels, and his inability to cast them weakens him greatly in battle.
Feats: Since we used Qara for most of our combat parties, Sand languished in the wings for most of the game. He’s still an adept craftsman, though, and he has the breadth of spells required to finish most of the magical recipes that you can cast. Giving him the ability to Craft Magic Arms and Armor is a no-brainer, and you may want to give him the Craft Wondrous Items feat as well.
Skills: Like Qara, Concentration is the only real requirement here.
Equipment Choices
Since Sand’s an elf, he’ll naturally fit in with a bow and arrow at the rear of your party. Keep him out of harm’s way to allow him to cast spells without getting mauled.
Bishop
Bishop is an interesting character, a chaotic evil ranger that will reluctantly agree to help your party cross the border into Luskan territory as part of the adventurer, then stay on when you start raising hell, which he seems to like. His acerbic personality will rub most other characters the wrong way, but he’ll be a natural companion for your main character if he or she is also evil.
Feats and Skills
Feats: Most of what you want here will be weapon feats, obviously. Note that Bishop, as a ranger, is specialized in two-weapon fighting. Had we been given the option, we would’ve specialized him in archery, but the game makes that choice for you before he even joins your party. You can still start picking up feats that will enable him to focus on longbows, if you wish, and pair that up with Manyshot to let him chuck out a huge number of arrows each round. If you do let him use two weapons, you’ll have the advantage of free Two-Weapon Fighting feats as he levels up, but you’ll need to get him the Weapon Finesse skill so that he adds his dexterity modifier to the attack rolls. Neeshka is probably a better bet for two-weapon fighting than Bishop is, since she will add some massive sneak attack damage to her blows.
Skills: Bishop naturally gravitates towards skills like Craft Trap, Set Trap, and Survival...which you can easily get through the entire game without using. If you intend to use him in melee combat, then you’ll probably want to get him some ranks of Tumble so he can attempt to avoid enemy attacks when he moves around.
Equipment Choices
We personally had Bishop use a longbow when we had him in our party, which seemed to work out well. Longbows get a chance for 3x damage on a crit, and if you use Manyshot or Rapid Shot along with Improved Critical, you’ll be landing way huge numbers of arrows on your target. You’re going to get enough decent melee characters in the game to make using him in up-close-and-personal combat unnecessary.
Zhjaeve
This Githzerai cleric will join you midway through Act II, and will be a welcome addition to most adventuring party due to her ability to cast divine spells. She’ll be a much more capable healer than Elanee, due to her ability to spontaneously convert her spells to healing spells as needed. (The exception to this are the spells Heal and Mass Heal, which can’t be spontaneously cast. Keep some in her spellbook!)
Feats and Skills
Feats: You won’t get to spend many feats on Zhjaeve, so be careful with what you pick. Your first choice will probably be Improved Critical for whatever type of weapon you choose for her. As a cleric, she can wear heavy armor and wade into melee combat, so pick something appropriate. The metamagic feats probably aren’t really necessary to use for her, as she’ll usually either be casting buffs, heals, or Summon Creature spells, at least in our experience. You can have her learn Craft Magic Arms, if you like, or Brew Potion to crank out some Potions of Heal for your party at the end of the game.
Skills: The game will attempt to auto-level Parry for Zhjaeve if you let it, which you shouldn’t, as it’ll be worthless to her if she’s wearing heavy armor, which inflicts severe penalties on this skill. Go with Concentration. Lore is optional, since Zhjaeve can cast Identify on anything you don’t auto-identify when it enters your inventory.
Equipment Choices
Zhjaeve comes equipped with a spear, and for whatever reason, we kept her with it for a while, nabbing her the Improved Critical feat for spears. There aren’t a lot of super-powerful spears in the game (we didn’t find any with enhancement bonuses greater than +3), but you can always craft one for her later on. Her main weakness as a fighter is poor numbers in strength, constitution, and dexterity. You’ll definitely want to invest in a good Belt of Agility and Amulet of Vitality for her. Strength can be buffed in a number of ways; we bought the Lesser Golem Armor in the Ironfist Clanhold for her, which adds +10 AC and gives a +4 strength buff to boot.
The Warlock
The Warlock is the last companion to join your party, coming along at the beginning of Act III. We aren’t going to give the specific name here for fear of spoilers.
While the Warlock is powerful, for a warlock, he also suffers from a lot of the AI problems that warlocks do in this game. Unfortunately, there’s no AI setting that will keep him in the rear and cause him to cast his Eldritch Blasts in any kind of intelligent fashion. Instead, sometimes he’ll use his Eldritch Blasts (although he won’t do so very often), sometimes he’ll attack, and sometimes he’ll use his other spells and abilities. To use him in any kind of intelligent fashion requires a lot of babysitting. Unfortunately, he’ll be a mandatory member of your party through decent stretches of Act III, so the best you can sometimes do is equip him with a bow and try to keep him out of harm’s way. He can wear medium armor, so he can take a few blows if required, but his low strength will prevent him from doing much melee damage.
Feats and Skills
Feats: By the time you actually add the Warlock to your party, it’ll be unlikely that you’ll be able to choose more than one or two feats for him; you’ll probably be closing in on level 20 by that point, and warlocks don’t get a lot of feats to begin with. Note that his specialized weapon will eventually be revealed to be a warmace later in the game, but like most spellcasters, you may want to keep him back in the rear by equipping him with a bow or something similar.
Skills: Similarly, the warlock is mostly skill-independent. Level him up in whatever you choose.
Equipment Choices
The warlock can use a good variety of weapons, but as mentioned, he has fairly low strength, so having him run around with a melee weapon might not be the best idea. We kept him in the rear with a bow when we needed to use him. Note that he does have the Battle Caster feat, and as such can use medium armor. If you can swing the cost, buy the Lesser Golem Armor for him from the Ironfist Clanhold.
Crafting Recipes
There are plenty of crafting abilities available in the game. For the most part, the ability to craft weapons, armor, and traps is fairly simple; you simply need a good rank in the appropriate skill, a mold, and materials. The method for crafting an item can be found by examining the mold.
Alchemy, Wondrous Items, and Magical Arms and Armor are all a bit more complicated. You don’t need molds for these. Instead, you place a few items on a workbench, then cast a spell on the workbench (or use your mortar and pestle on it in the case of alchemy), and then voila! Your ingredients are turned into another item. For Alchemy, you will need to have skill ranks in Alchemy in order to make these items, but Magical Arms and Armor and Wondrous Items are created by characters who have the appropriate feats; there’s no skill associated with either of them.
Following is a small selection of recipes that you’ll find early in the game. A much more complete FAQ on crafting can be found at gamefaqs.gamespot.com.
Alchemy Recipes
Alchemy, for the most part, isn’t worth the effort. You can make grenades with it, but they’re usually only good for small effects. Alchemy will be more useful when you come across an animal part. If you have a high enough alchemy skill, you’ll be able to use your mortar and pestle on the Lich Dust or Bat Fang or whatever you find, which will turn it into an essence, which in turn will be useful for crafting magical items.
| Recipe Name | Requirements | Reagents |
|---|---|---|
| Acid Flask | Rank Four | Venom Gland, Quicksilver |
| Creates a thrown weapon that deals 1d6 acid damage. Handy for taking on trolls if you don’t have a mage or someone that can deal magical fire or acid damage. | ||
| Recipe Name | Requirements | Reagents |
|---|---|---|
| Alchemist’s Fire | Rank Four | Fairy Dust, Distilled Alcohol |
| Can either be thrown for 1d6 damage or used on a weapon to temporarily add 1d4 fire damage to all attacks from that weapon. | ||
| Recipe Name | Requirements | Reagents |
|---|---|---|
| Choking Powder | Rank Four | Garlic, Belladonna |
| Creates a Stinking Cloud effect that lasts five rounds. | ||
| Recipe Name | Requirements | Reagents |
|---|---|---|
| Holy Water | Rank Four | Amethyst, Powdered Silver |
| Deals 2d4 holy damage to undead when thrown. | ||
| Recipe Name | Requirements | Reagents |
|---|---|---|
| Tanglefoot Bag | Rank Four | Quicksilver, Belladonna |
| Creates an Entangle effect that lasts for two rounds. | ||
| Recipe Name | Requirements | Reagents |
|---|---|---|
| Thunderstone | Rank Four | Diamond Dust, Amethyst |
| Deafens target for five rounds. Useful against spellcasters. | ||
Craft Wondrous Items
Wondrous Items are magical items that are created whole; these aren’t enchantments that are laid onto already existing items. Thus, you’ll usually need to supply some kind of crafting material, like iron or leather, as well as the essences and jewels before you can make the item you want.
Keep in mind that finding the jewels for most of these recipes will be wickedly difficult, at least in the early game. Most cheap jewels simply aren’t used in recipes at, so feel free to sell all those flouspars that you find, but keep anything that even sounds like it might be valuable. Later in the game you’ll get more rare gems, but they’ll always be the rarest part of these recipes. You can find animal parts to change into essences at some merchants, especially those in Blacklake in Chapter II.
To make a Wondrous Item, place all of the listed reagents on a magic workbench, then cast the spell listed under the requirements on the workbench. Voila, your magical item will be ready to use. Be sure to make a quicksave before every item you make, though, as mistakes will sometimes prove costly, especially when you deal with the very rare gems.
Note that if your spellcaster can’t cast the spell listed in the requirements, you can attempt to find a scroll for the spell (or have another character, like Sand, scribe one for them). Scrolls work just as well as memorized spells for the purposes of crafting items.
| Recipe Name | Requirements | Reagents |
|---|---|---|
| Ring of Divine Power | Caster level 8, Owl’s Wisdom Spell | 1: Iron Ingot, Faint Fire Essence, Obsidian 2: Iron Ingot, Weak Fire Essence, Diamond 3: Iron Ingot, Faint Power Essence, Weak Fire Essence, Canary Diamond 4: Iron Ingot, Weak Power Essence, Glowing Fire Essence, Star Sapphire |
| Rings of Divine Power allow the wearer to memorize an extra divine spell per day. The power of the ring (1, 2, 3, etc.) indicate the level of the spell that can be memorized. | ||
| Recipe Name | Requirements | Reagents |
|---|---|---|
| Ring of Wizardry | Caster level 8, Fox’s Cunning Spell | 1: Iron Ingot, Faint Air Essence, Obsidian 2: Iron Ingot, Weak Air Essence, Diamond 3: Iron Ingot, Faint Power Essence, Weak Air Essence, Canary Diamond 4: Iron Ingot, Weak Power Essence, Glowing Air Essence, Star Sapphire |
| Rings of Divine Power allow the wearer to memorize an extra divine spell per day. The power of the ring (1, 2, 3, etc.) indicate the level of the spell that can be memorized. | ||
| Recipe Name | Requirements | Reagents |
|---|---|---|
| Periapt of Wisdom | Caster Level 8, Owl’s Wisdom spell | +2: Iron Ingot, Faint Water Essence, Diamond +4: Iron Ingot, Weak Water Essence, Star Sapphire +6: Iron Ingot, Glowing Water Essence, Rogue Stone |
| Periapts of Wisdom are headpieces that add a certain amount of Wisdom to the character that wears them. | ||
| Recipe Name | Requirements | Reagents |
|---|---|---|
| Headband of Intellect | Caster Level 8, Fox’s Cunning spell | +2: Leather Hide, Faint Fire Essence, Diamond +4: Leather Hide, Weak Fire Essence, Star Sapphire +6: Leather Hide, Glowing Fire Essence, Rogue Stone |
| Headbands of Intellect are headpieces that add a certain amount of Intelligence to the character that wears them. | ||
| Recipe Name | Requirements | Reagents |
|---|---|---|
| Nymph Cloaks | Caster Level 8, Eagle’s Splendor Spell | +2: Two Leather Hides, Faint Water Essence, Diamond +4: Two Leather Hides, Weak Water Essence, Star Sapphire +6: Two Leather Hides, Glowing Water Essence, Rogue Stone |
| Nymph Cloaks are cloaks that add Charisma to those who equip them. | ||
| Recipe Name | Requirements | Reagents |
|---|---|---|
| Medallion Of Thought | Caster Level Eight, Owl’s Wisdom | Iron Ingot, Weak Power Essence, Weak Water Essence, Canary Diamond |
| The Medallion of Thought grants its wearer immunity to mind-affecting spells and effects (fear, confusion, etc.) | ||
| Recipe Name | Requirements | Reagents |
|---|---|---|
| Gem of Seeing | Caster Level 10, True Seeing Spell | Weak Air Essence, King’s Tear |
| The Gem of Seeing can cast the True Seeing spell once per day. | ||
| Recipe Name | Requirements | Reagents |
|---|---|---|
| Cloak of Displacement | Caster Level 3, Displacement spell | Two Leather Hides, Weak Air Essence, Blue Diamond |
| A Cloak of Displacement can cast the Displacement spell three times per day. | ||
| Recipe Name | Requirements | Reagents |
|---|---|---|
| Bracers of Armor | Caster Level 7 (for +1 through +3) up to Caster Level 16 (for +8) | +1: Two Iron Ingots, Faint Earth Essence, Obsidian +2: Two Iron Ingots, Faint Earth Essence, Diamond +3: Two Iron Ingots, Weak Earth Essence, Canary Diamond +4: Two Iron Ingots, Weak Earth Essence, Jacinth +5: Two Iron Ingots, Glowing Earth Essence, Blue Diamond +6: Two Iron Ingots, Glowing Earth Essence, Rogue Stone +7: Two Iron Ingots, Radiant Earth Essence, Beljuril +8: Two Iron Ingots, Radiant Earth Essence, King’s Tear |
| Bracers of Armor net the character that wears them a set bonus to AC. This usually comes in the form of a deflection bonus, making this incompatible with many magical sources of AC, such as Rings of Protection. | ||
| Recipe Name | Requirements | Reagents |
|---|---|---|
| Amulet of Natural Armor | Caster Level 5, 6, 9, or 12, Barkskin spell | +1: Iron Ingot, Faint Earth Essence, Sapphire +2: Iron Ingot, Weak Earth Essence, Emerald +3: Iron Ingot, Faint Power Essence, Glowing Earth Essence, Jacinth +4: Iron Ingot, Glowing Earth Essence, Weak Power Essence, Blue Diamond +5: Iron Ingot, Radiant Earth Essence, Weak Power Essence, Beljuril |
| Amulets of Natural Armor lend the character that wears them a bonus to their natural AC. Like the Barkskin spell, this bonus will stack with deflection effects, like those of Bracers of Armor. | ||
| Recipe Name | Requirements | Reagents |
|---|---|---|
| Cloak of Elvenkind | Caster Level 3, Invisibility Spell | Two Leather Hides, Faint Water Essence, Fire Opal |
| When worn, a Cloak of Elvenkind will net the wearer a +5 bonus to his or her Hide skill. | ||
| Recipe Name | Requirements | Reagents |
|---|---|---|
| Boots of Elvenkind | Caster Level 3, Silence Spell | Leather Hide, Faint Water Essence, Fire Opal |
| When worn, Boots of Elvenkind will net the wearer a +5 bonus to his or her Move Silently skill. | ||
| Recipe Name | Requirements | Reagents |
|---|---|---|
| Belt of Agility | Caster Level 8, Cat’s Grace Spell | +2: Leather Hide, Faint Air Essence, Diamond |
| Crafting a Belt of Agility will add Dexterity to whomever wears it. | ||
| Recipe Name | Requirements | Reagents |
|---|---|---|
| Scabbard of Keen Edges | Caster Level 5, Keen Edge spell | Wooden Plank, Faint Earth Essence, Jacinth |
| The Scabbard of Keen Edges can cast the spell Keen Edge once per day. | ||
Magical Arms And Armor
Magical arms and armor aren’t created out of nothing, like wondrous items. Instead, these spells are cast on an existing weapon or piece of armor, further supplementing it with a bonus enchantment.
Keep in mind that finding the jewels for most of these recipes will be wickedly difficult, at least in the early game. Most cheap jewels simply aren’t used in recipes at, so feel free to sell all those flouspars that you find, but keep anything that even sounds like it might be valuable. Later in the game you’ll get more rare gems, but they’ll always be the rarest part of these recipes. You can find animal parts to change into essences at some merchants, especially those in Blacklake in Chapter II.
To make a magic arm or armor, place all of the listed reagents on a magic workbench, then cast the spell listed under the requirements on the workbench. Voila, your magical item will be ready to use. Be sure to make a quicksave before every item you make, though, as mistakes will sometimes prove costly, especially when you deal with the very rare gems. Magical weapons and armors can have up to three enchantments on them, but keep in mind that enhancement bonuses don’t stack; only the largest one applies. (You can enchant an armor with a +2 enhancement and a +3 enhancement, but afterwards it will only be +3, not +5.)
Note that if your spellcaster can’t cast the spell listed in the requirements, you can attempt to find a scroll for the spell (or have another character, like Sand, scribe one for them). Scrolls work just as well as memorized spells for the purposes of crafting items.
Weapon Enchantments
Enhancements will work on bows, but most of the other weapon enchantments won’t, or at least won’t affect what actually hits the enemy: your arrows.
| Recipe Name | Requirements | Reagents |
|---|---|---|
| Weapon Enhancement | Caster Level 3, 6, 9, 12, or 15; Light spell | +1: Weapon, Faint Air Essence, Obsidion +2: Weapon, Faint Air Essence, Diamond +3: Weapon, Faint Power Essence, Weak Air Essence, Emerald +4: Weapon, Weak Power Essence, Glowing Air Essence, Star Sapphire +5: Weapon, Glowing Power Essence, Glowing Air Essence, Blue Diamond |
| Enchanted weapons gain a bonus to their attack and damage rolls, and many powerful creatures require magical weapons in order to be hit. If you’re going to bother to enchant a stock weapon, don’t buy one from a store; have one of your armorers make an adamantium or other exotic-material weapon, just in case you run across an enemy with that particular kind of weakness. | ||
| Recipe Name | Requirements | Reagents |
|---|---|---|
| Holy Weapon | Caster Level 7, Cure Critical Wounds | Weapon, Faint Power Essence, Faint Water Essence, Diamond |
| Holy weapons deal an extra 2d6 damage against evil creatures. Since virtually all of the enemies that you’ll be facing in the game (outside of beasts and elementals) are evil, this is pound for pound one of the best enchantments you can add to a weapon. | ||
| Recipe Name | Requirements | Reagents |
|---|---|---|
| Flaming Weapon | Caster Level 10, Fireball or Flame Strike spell | Weapon, Weak Fire Essence, Ruby |
| Enchanted weapon deals an extra 1d6 fire damage. | ||
| Recipe Name | Requirements | Reagents |
|---|---|---|
| Frost Weapon | Caster Level 10, Ice Storm spell | Weapon, Weak Water Essence, Star Sapphire |
| Enchanted weapon deals an extra 1d6 cold damage. | ||
| Recipe Name | Requirements | Reagents |
|---|---|---|
| Shock Weapon | Caster Level 10, Call Lightning or Lightning Bolt spell | Weapon, Weak Air Essence, Canary Diamond |
| Enchanted weapon deals an extra 1d6 lightning damage. | ||
| Recipe Name | Requirements | Reagents |
|---|---|---|
| Poison Weapon | Caster Level 10, Poison spell | Weapon, Weak Earth Essence, Emerald |
| Enchanted weapon has a chance (DC14) to deal 1d2 Constitution damage on a hit. | ||
| Recipe Name | Requirements | Reagents |
|---|---|---|
| Acid Weapon | Caster Level 10, Melf’s Acid Arrow | Weapon, Weak Earth Essence, Emerald |
| Enchanted weapon deals an extra 1d6 acid damage. | ||
Armor Enchantments
Most armor enchantments will only work on body armor.
| Recipe Name | Requirements | Reagents |
|---|---|---|
| Armor Enchantment | Caster Level 3, 6, 9, 12, or 15; Light spell | +1: Weapon, Faint Earth Essence, Obsidion +2: Weapon, Faint Earth Essence, Diamond +3: Weapon, Faint Power Essence, Weak Earth Essence, Emerald +4: Weapon, Weak Power Essence, Glowing Earth Essence, Star Sapphire +5: Weapon, Glowing Power Essence, Glowing Earth Essence, Blue Diamond |
| Enchanted weapons gain a bonus to their attack and damage rolls, and many powerful creatures require magical weapons in order to be hit. If you’re going to bother to enchant a stock weapon, don’t buy one from a store; have one of your armorers make an adamantium or other exotic-material weapon, just in case you run across an enemy with that particular kind of weakness. | ||
| Recipe Name | Requirements | Reagents |
|---|---|---|
| Armor of Acid Resistance | Caster Level 10, Resist Energy spell | Armor, Faint Earth Essence, Jacinth |
| Enchanted armor causes wearer to gain acid resistance of 10, which means they ignore the first ten points of damage from any acid source. | ||
| Recipe Name | Requirements | Reagents |
|---|---|---|
| Armor of Cold Resistance | Caster Level 10, Resist Energy spell | Armor, Faint Water Essence, Jacinth |
| Enchanted armor causes wearer to gain cold resistance of 10, which means they ignore the first ten points of damage from any ice or cold source. | ||
| Recipe Name | Requirements | Reagents |
|---|---|---|
| Armor of Electricity Resistance | Caster Level 10, Resist Energy spell | Armor, Faint Air Essence, Jacinth |
| Enchanted armor causes wearer to gain electricity resistance of 10, which means they ignore the first ten points of damage from any electricity or lightning source. | ||
| Recipe Name | Requirements | Reagents |
|---|---|---|
| Armor of Fire Resistance | Caster Level 10, Resist Energy spell | Armor, Faint Fire Essence, Jacinth |
| Enchanted armor causes wearer to gain fire resistance of 10, which means they ignore the first ten points of damage from any fire source. | ||
| Recipe Name | Requirements | Reagents |
|---|---|---|
| Armor of Sonic Resistance | Caster Level 10, Resist Energy spell | Armor, Faint Power Essence, Jacinth |
| Enchanted armor causes wearer to gain sonic resistance of 10, which means they ignore the first ten points of damage from any sonic source. Seriously, now, don’t even think about using this recipe. | ||
| Recipe Name | Requirements | Reagents |
|---|---|---|
| Acid Weapon | Caster Level 10, Resist Energy spell | Armor, Faint Water Essence, Jacinth |
| Enchanted weapon deals an extra 1d6 acid damage. | ||
Got a news tip or want to contact us directly? Email news@gamespot.com
Join the conversation