Metroid Prime 3: Corruption Walkthrough
Did Samus receive a briefcase full of cash from Mother Brain? Find out in GameSpot's Walkthrough to Metroid Prime 3: Corruption!
Metroid is the last of the major Nintendo franchises, after Zelda and Mario, to make it to the Wii. After the series was rebooted with Metroid Prime for the GameCube, though, it's perhaps the franchise most suited to the platform; it doesn't take a genius to see the potential for a first-person adventure game using the motion-sensing systems built into the Wii's controllers.
Thankfully, the wait is over, and Metroid Prime 3: Corruption is now on store shelves. This new Metroid adventure does indeed incorporate the full range of Wii controller functions, and will let you use the Wiimote to point and shoot as if you were really walking around on these alien worlds. The controls here are well-done, which is obviously important, but perhaps even more remarkable is the way the Metroid universe is finally brought to life with the inclusion of a stronger storyline and multiple characters you can interact with; no more wandering around sterile worlds filled with nothing but enemies, in other words.
You've got a lot of ground to cover before you finish the game, but Gamespot's Game Guide is here to help. The guide includes:
Complete Walkthrough
We'll take you step by step through every area of the game, from start to finish!
Item Lists
Want to know where to track down all those missile expansions and energy tanks? Check the guide; we've got full lists!
Walkthrough
Note that we're going to be playing through the game on Normal difficulty. In retrospect, we probably should've gone for Veteran difficulty, since Normal is a bit of a walk in the park, at least compared with the difficulty settings for the previous Metroid Prime games.
As with any Metroid game, you're going to have a lot of exploration to do in Corruption. We typically take the stance that it's best to find the suit expansions that are immediately available to you after you find a new weapon or tool, even if they're not precisely necessary at that exact moment. If you disagree and just want to get on with the game, feel free to skip our sections on collection runs and proceed through the walkthrough. You can always check our lists of powerups later on and go back to find what you've missed.
Prologue
You begin the game aboard Samus Aran's ship, which is in interstellar space. You need to find your way back to the fleet and dock with the command ship Olympus. In order to do so, you first have to reorient your ship, then enter your command code, and then use your thrusters. None of this is particularly difficult, so shake your Wiimote and get going.
When you land on the Olympus, you can start scanning everything around you, if you enjoy doing that kind of thing. There's tons of stuff to scan in Corruption, as there was in the previous two Metroid Prime games, but we're not going to detail every single thing in this guide; if you're looking to get a 100% complete logbook, then you might want to find a dedicated guide for that purpose. Typically scanning only unlocks art galleries. If you want to scan, hit the minus button on your Wiimote and move the cursor to the top of the screen. The other visor you have is the Command Visor, but that's currently not of much use to you.
Juggles
If you stand on the platform to the right of the soldiers here, you can start a shooting minigame. Two small targets will pop up from the ground; the objective is to shoot them into the air, then continue to shoot them before they can fall to the ground. It's difficult to do, but if you manage to get a string of over 10, you'll get a "Juggling Bonus", which will net you credit towards unlocking art galleries and such. If you manage to get up to 20, you'll get an extra credit.

Head into Docking Bay Access nearby. The platforms that will let you move on are malfunctioning; shoot the red targets on the wall with a fully-charged blast (hold down the A button to charge). Shooting both of them will reveal the path upward.
In Docking Bay 4, you'll be asked for an access code to get through the locked door. You can find it by accessing the terminal across from the door. It's 13576: enter that into the door to move on. You'll have to pass through a DNA scan before you're cleared for the command bridge. In the meantime, you'll get a first look at one of your fellow bounty hunters, a cyborg named Ghor.
Head up to the command bridge. Before you can meet with the commander, you'll have to find a save spot and save your game. It's located behind a nearby door; you'll need to destroy the boxes in front of it to find it. Don't forget to scan the health pick-ups!
The Briefing
Proceed into the briefing room. (You can't scan any of the bounty hunters through the doorway, so you'll have to wait until later to get those.) The briefing involves the story of a virus that had infected the organic supercomputers that the Galactic Federation uses to control its network, along with the vaccine that was administered to the computers. (Not to nitpick, but a vaccine is what you get before you catch a disease.) Before long, though, the briefing will be interrupted by a Space Pirate attack. You'll have to fight your way back to your ship.
Escape!
Get past Admiral Dane and return to Flag Bridge Access, where you'll encounter your first Space Pirates. Tag ‘em and bag ‘em. Head through the Port Observation Deck to the Xenoresearch Lab. (Protecting the troopers in their encounters with the Pirates apparently earns you some kind of reward, perhaps towards Logbook completion?)
Head through the Lab and into the hallway beyond. As you do, the hallway will be destroyed by a missile from outside, forcing the blast doors to close. Before it does, quickly scan the red target that appears before it.
With that done, return to the Lab, where more Pirates will appear. Kill them and retrieve the Energy Cell that they've stolen. After inserting it into the energy receptacle, Crawltanks and Crawlmines will appear. Blast a few of them until the grates on the ground get blown away, then drop down in ball form and roll out of the room.
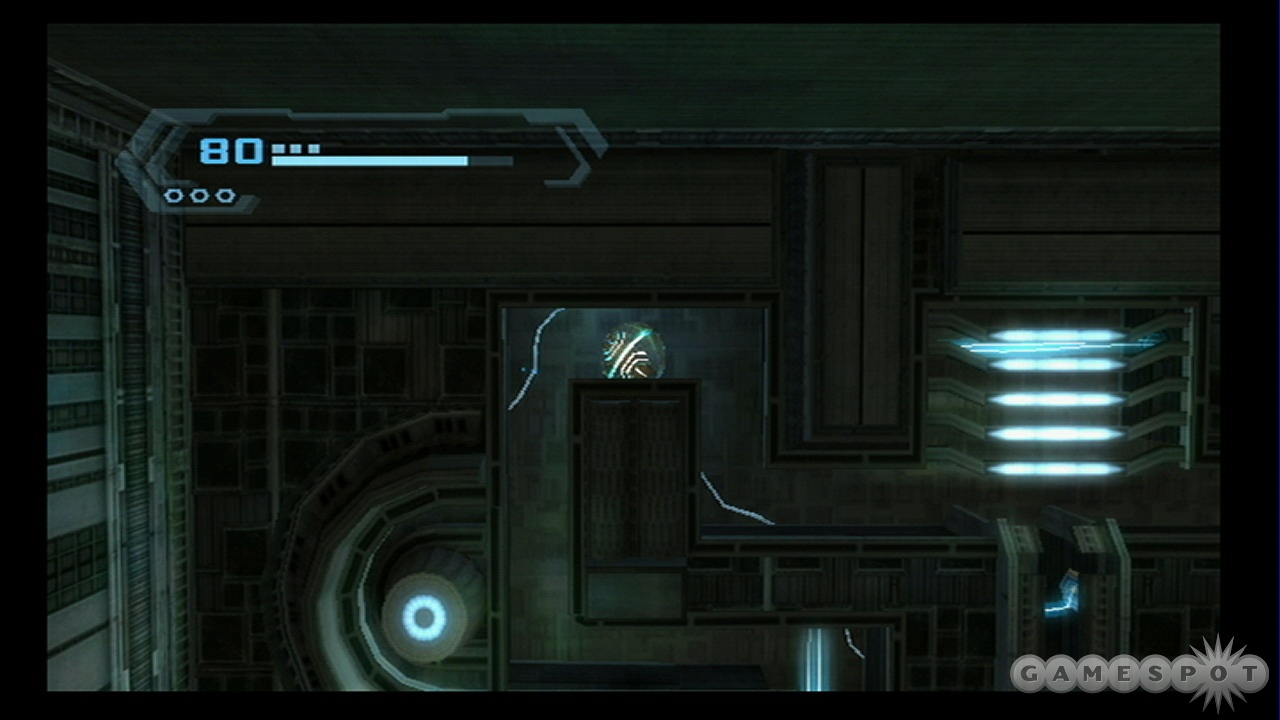
Straight Ballin'
As you roll through the tubes of the ship, you'll obtain your first Energy Tank. When you land in the garbage recycling area, scan the panels to shunt yourself out into space. You'll soon wind up in Repair Bay A, where you can jump to the top of the area to find a Missile Launcher. Use that on the debris that blocks your access to the door controls and move on. Aeromines will attempt to block your path: simply shoot the unshielded one until they're all dead and move on. There's a minor boss fight through the large door here, so head to the left into the smaller door to save your game.
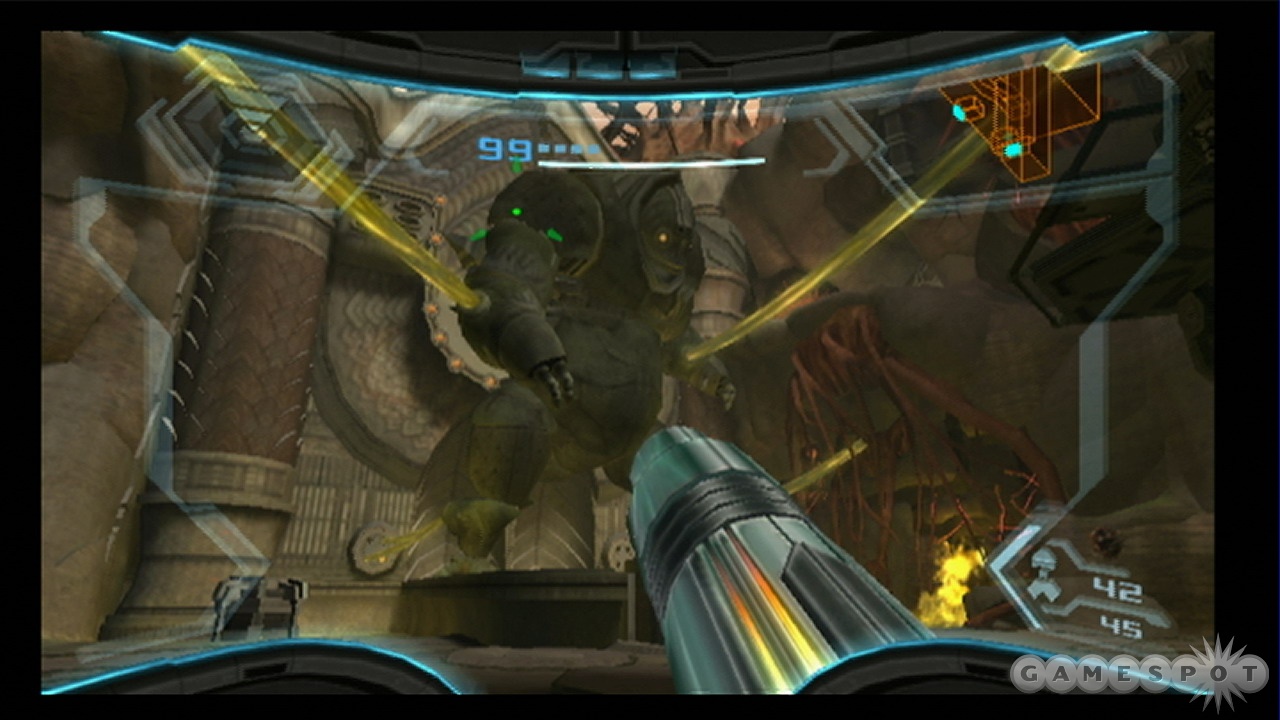
Boss Fight: Berserker Lord
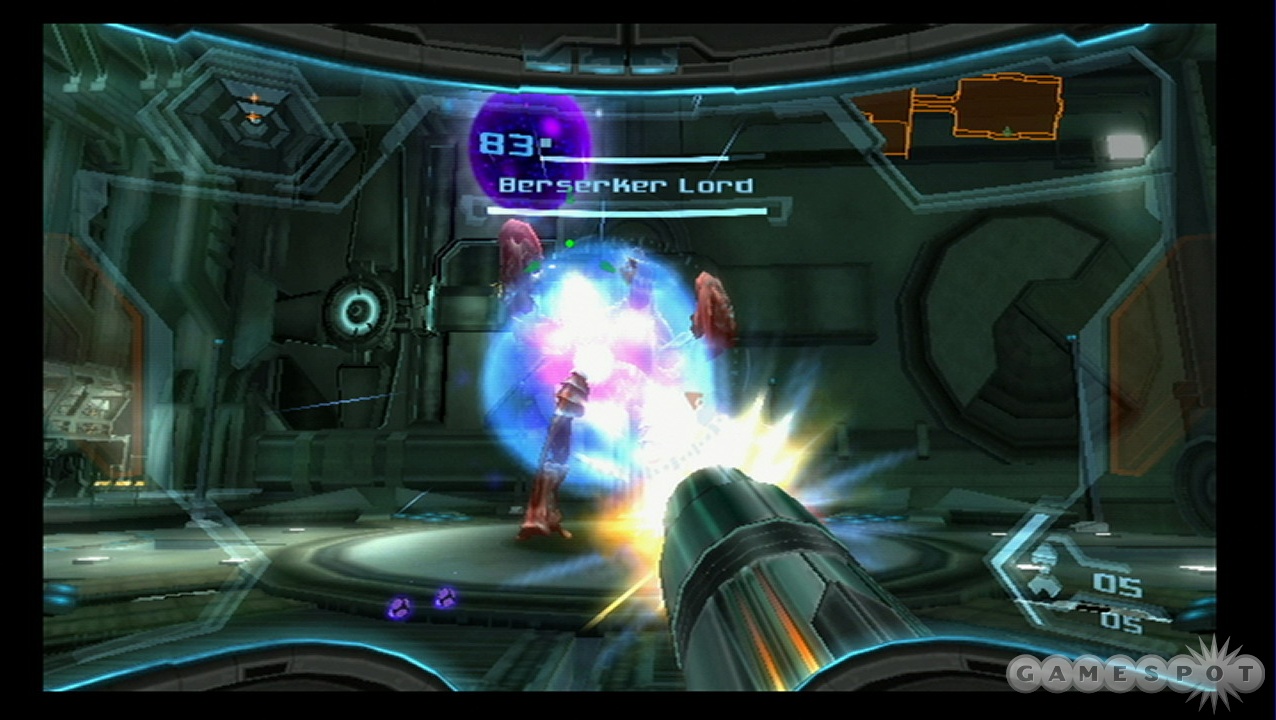
The Berserker Lord, as you might expect, isn't all that difficult: he is only the first boss in the game, after all. In order to defeat him, first lock onto him, then start blasting away at the pink glowing spots on his shoulders. He'll attack you as you do so, periodically sweeping a blue laser along the ground, but you can easily jump over this.
After both pink shoulder spots are destroyed, the Berserker will become enraged. He has a couple of attacks here, but the one you're looking for will send blue balls floating through the air at you. Shoot these with your gun, and they'll impact him on the head. Repeat this process a couple of times, and the protective shell on the Lord's head will disintegrate. At this point, repeated shots to the weak spot on his head will finish him off.
Norion
Time to make planetfall on Norion, the planet nearby that's being attacked by the Pirates. Head into your ship and select it as a destination; you'll fly there automatically. When you land, speak to the soldier nearby, then shoot the small targets on the door to move on. If you shoot the door across the way when you enter, you'll obtain the Grapple Lasso. That'll let you pull on objects that block your passage.
Cargo Hub

Head up the nearby elevator and enter the Cargo Hub. (You'll need to be in your firing visor toyou're your grapple on the door that blocks your passage.) There's a powerup hidden here. Head down the hallway and defeat both waves of Aeromines, then return to the door through which you entered. There's a panel you can grapple near here; pull it off and hit the switch beyond. That'll let you enter a rollerball puzzle nearby. You'll need to bypass the timed spurts of air that block your passage. Eventually a machine will come down and zap you; you can't attack it, but it should only deal one point of damage per hit on normal difficulty, so it's not too troublesome. Eventually you'll spot a Missile Expansion; time your drop so that you hit the jet of air that pushes you towards it, then return to the Cargo Hub.
Grapple the debris away from the smashed barricade to move on. In the next room, you'll see an Energy Tank. Roll up into a ball, then use a bomb to blow yourself up into the Energy Tank's little storage area. From there, roll along the wall to reach the next part of the room. Wait until the panels here retract, then quickly roll before they push you out onto the burning floor.
In Conduit A, you'll come across a missile-locked door to your right. Blow it with a missile and head in to find the Map Station. Return to the Conduit and keep on moving. You'll have to blow through some debris with your missiles, and shoot some Jumpmines to prevent them from dicing you, but eventually you'll reach the door leading to Cargo Dock A.
Cargo Dock A
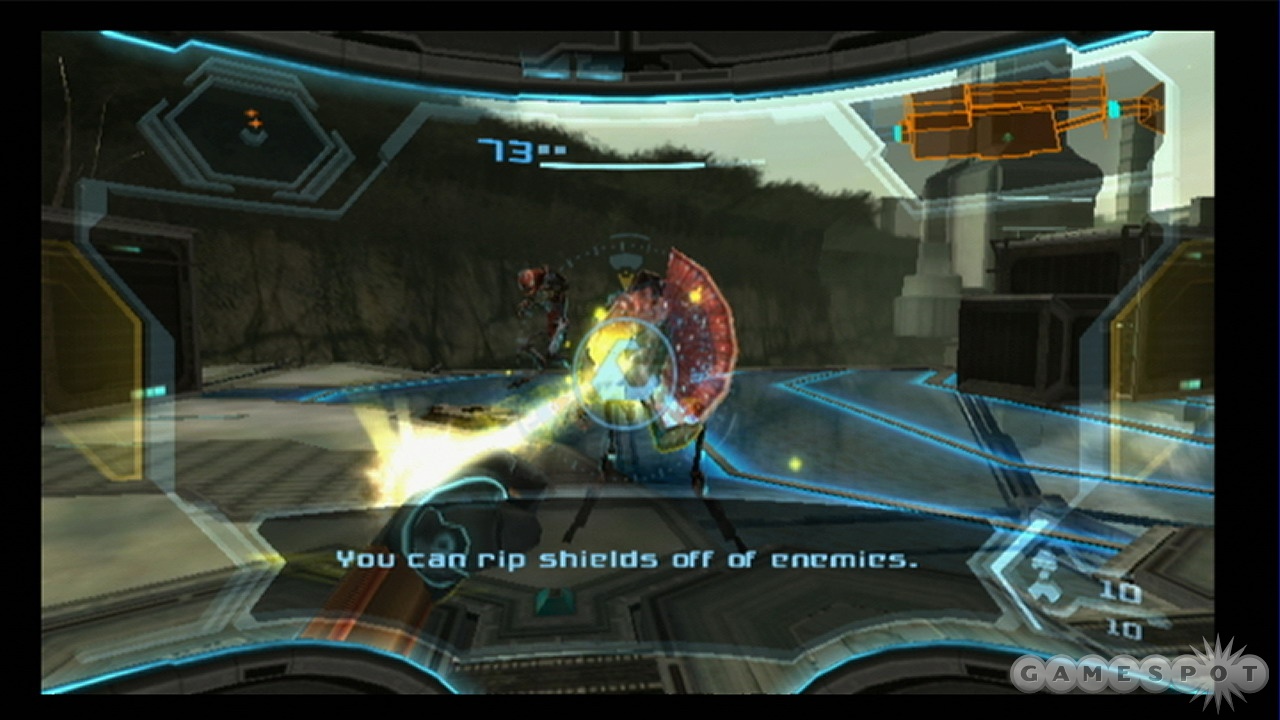
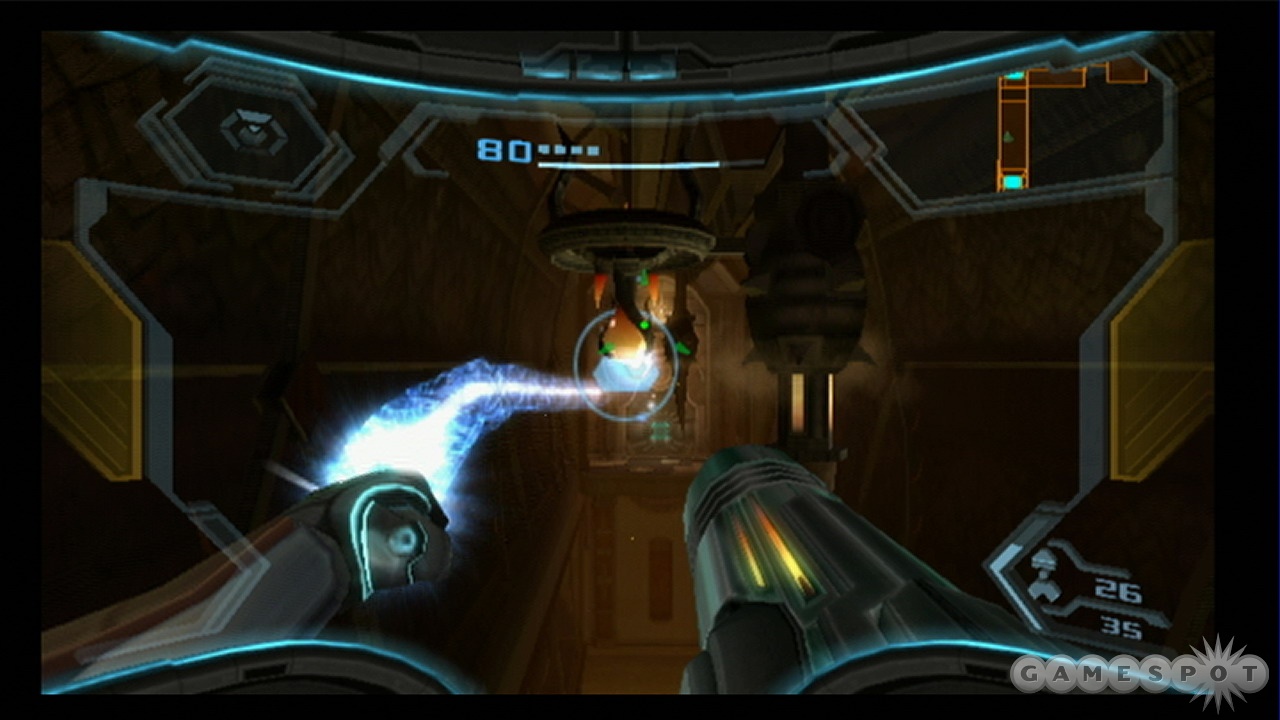
A minor fight here. The first wave of enemies will include some new Space Pirates, so scan them if you need to. All of the first four people should be easy enough to kill; just lock on and fire away. After a while, though, a Space Pirate ATC will throw down some Shield Pirates to give you a hard time. In order to hurt these guys, you need to lock onto their shields, thrust your Nunchuk forward to grapple them, then pull them away. After that they're easy to kill.
Two aerial troopers will attack you after that. Take them down by locking onto them and hitting them with missiles. After that, the ATC itself will appear. You can lock onto it, but it can only be damaged by hitting it on the very small orange plate at the front of the craft. If you're locked onto it with auto-aim on, you might not automatically aim at the plate, so you may have to adjust your fire. The ATC will flash red when you land a good hit, so use that to judge when you're actually damaging it.
Summoning the Ship
After the Pirates are destroyed, one of your fellow bounty hunters will appear. He'll inform you of his plan to restart one of the three generators, leaving only two for you. You can now use the Command Visor to summon your ship, as well; do so by hitting Minus and moving the cursor to the lower right. Lock onto the summoning beacon while in that visor, and you'll be able to summon your ship and save your game.
Do so, then head through to Generator A, which Pirates will destroy as you enter. Scan around for a bit, then move down to the center to take on some Jolly Roger drones. These guys aren't difficult, but they are annoying in that they move around quickly. Wait for them to stop and fire, then lock on and shoot them. After destroying three waves, you'll be able to jump over to the manual override controls. Destroy the debris in front of them with a missile, then use the controls to restore auxiliary power. With that done, hop back to the control room and flip the switch there to restore power. Don't worry about all the ball tracks here; they'll come into play in the next generator room.
Moving On
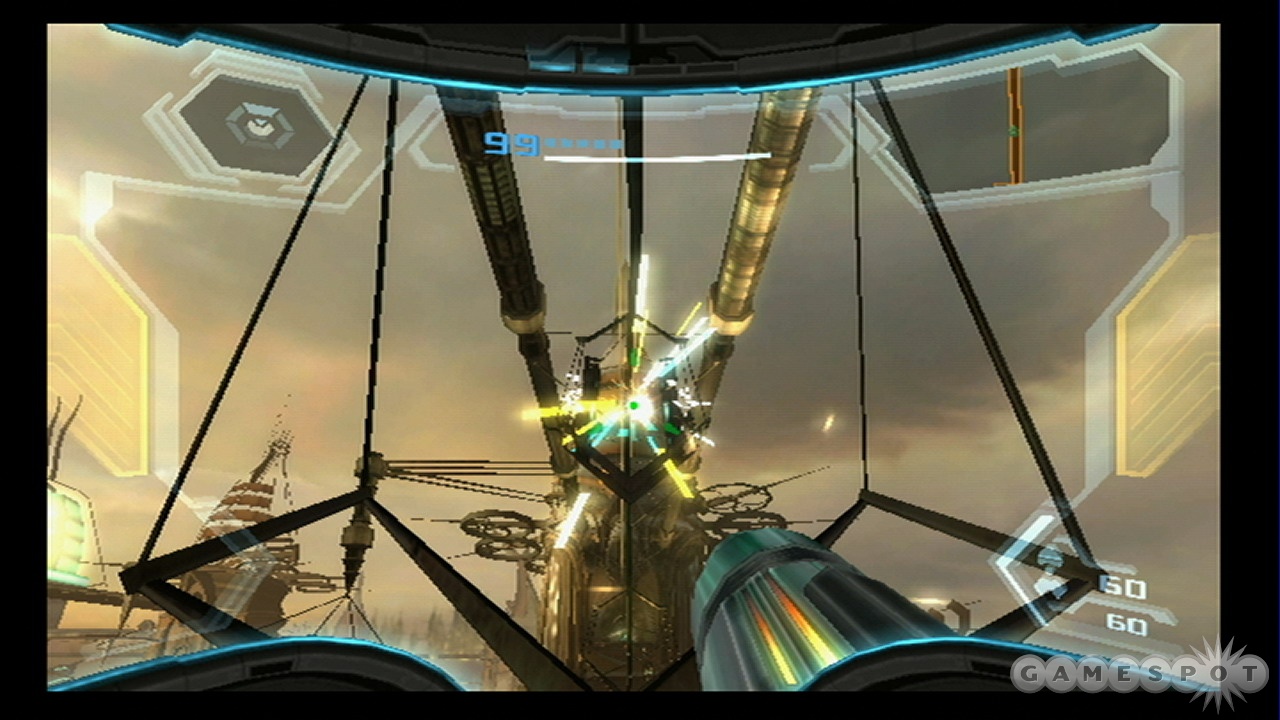
Head back to the ship area and save your game if you wish; you'll see Ridley pass by on your way back. If you backtrack all the way to the Cargo Hub, you'll come across Ghor taking out a Berserker Lord. Wait for him to be done, then blast the locks off the door nearby and head through to Conduit C. Find the ball channel on the upper level here and head through until you reach. Cargo Dock C.
Use a bomb on the blast passage in front of you to continue moving forward in bomb form. Ridley will attack you as you attempt to move. He'll lock you into place on the track, then attempt to laser you and use his mouth to damage you. You can avoid the lasers pretty easily, then roll back and forth to avoid the mouth. Eventually he'll get stuck on the track; roll next to him and bomb his mouth at this point. You can also just let him bite you and bomb him that way; he doesn't do much damage. Eventually his leg will kick up off the trail, letting you move on.
Repeat that process a couple of times before reaching Generator C. Save your game before entering the room!
Generator C
After the bounty hunter eliminates the pirates, scan away at the room and jump across to the override switch again. The control pillar won't drop down this time; something's jamming it. You'll have to enter ball mode and head up to the top yourself to clear it out.
In order to do that, you'll have to morph into ball mode and enter the tube near the control room. Follow the path here, using bombs to jet yourself upwards when needed, and you'll eventually find yourself underneath a bomb terminal. Bomb yourself up on the jet of fluid to reach it, then lay a bomb in the terminal to extend a rollway above you. Repeat this process twice (you'll need to go backwards to reach the second terminal), then ride up to the upper level and take the path there on up to the upper reach of the generator. Activate it, then get ready for another boss fight.
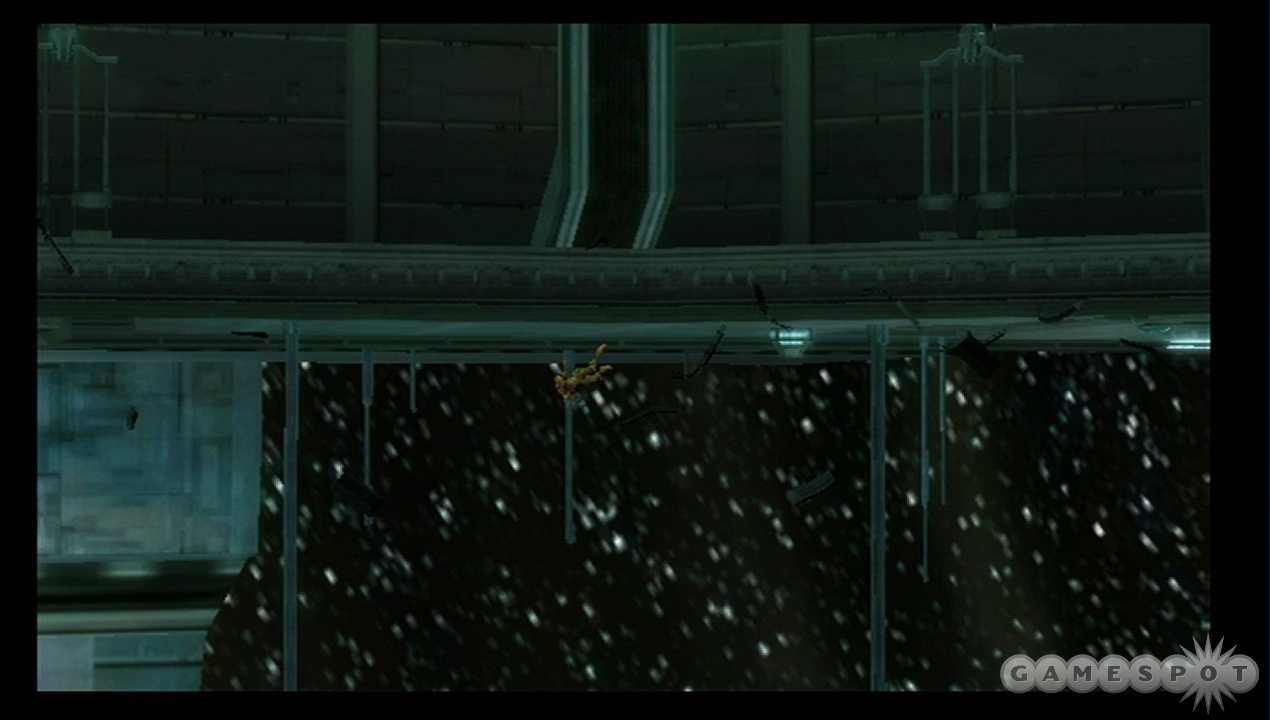
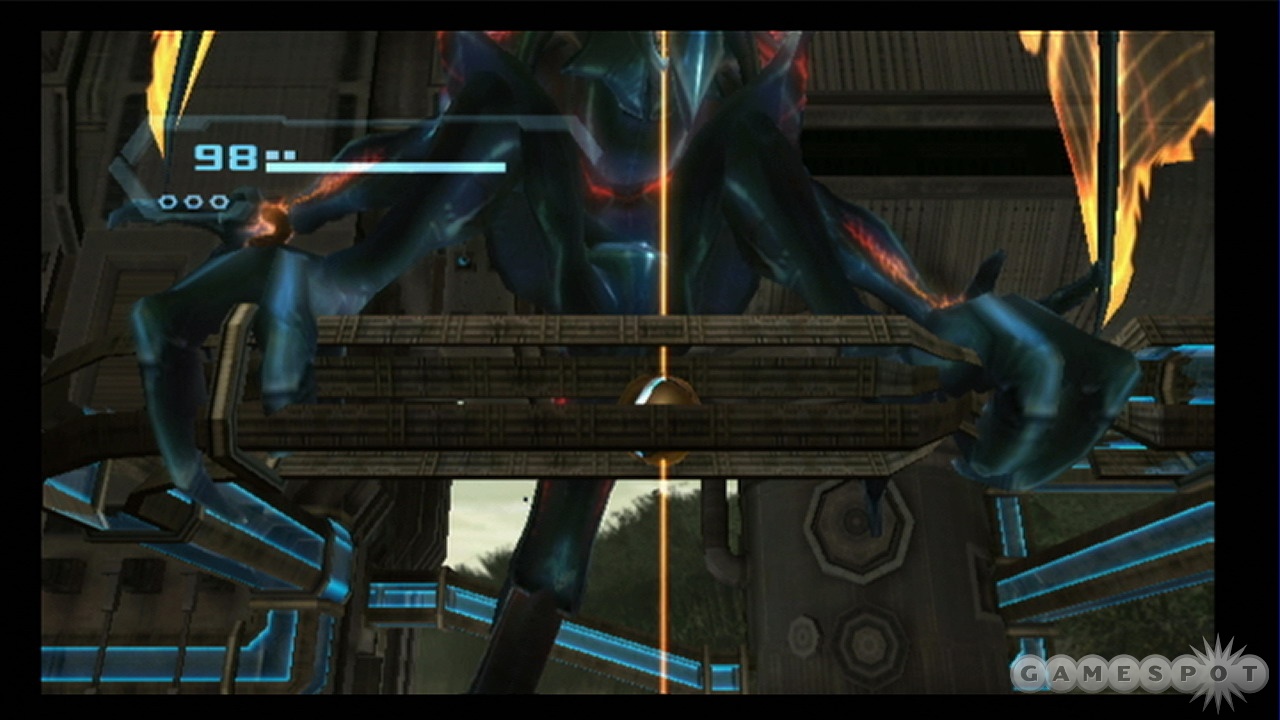
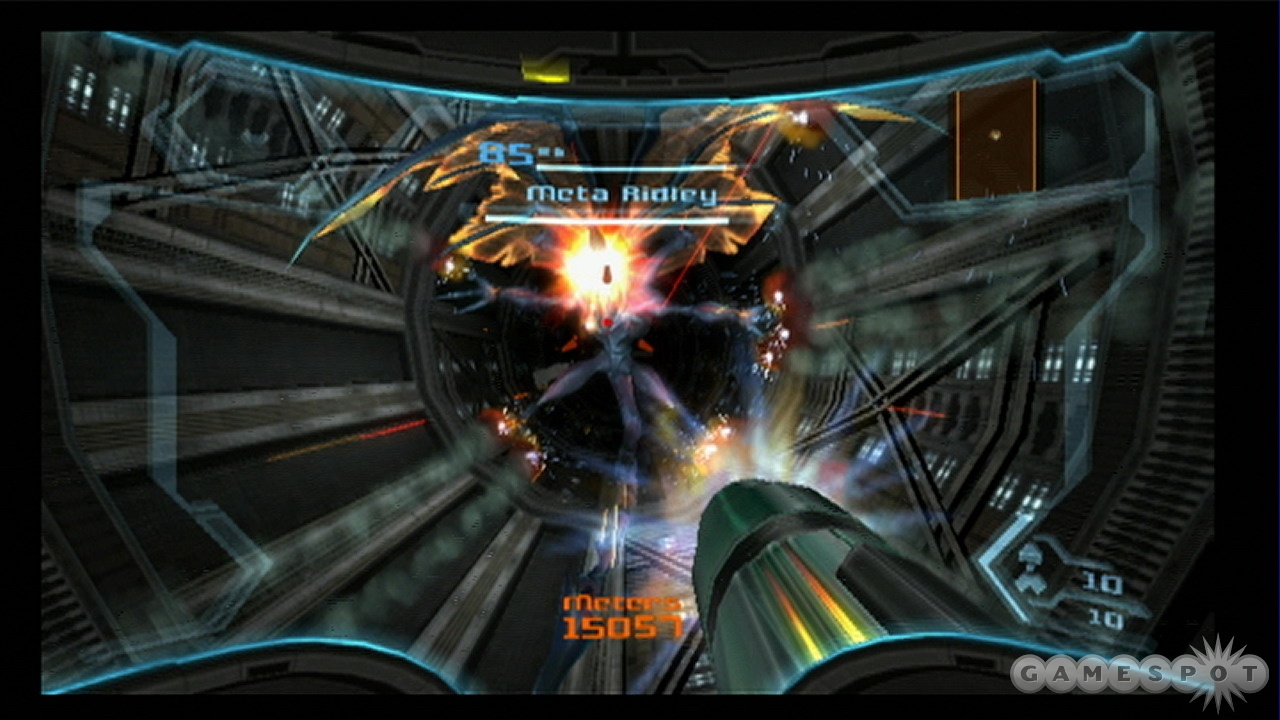
Boss Fight: Meta Ridley
Ridley here isn't too bad. You and he will be falling down a large shaft towards the planet's crust, giving you only a minute or two to defeat him before you die. It shouldn't be too difficult to do so, though, since you can damage him pretty regularly.
In the first phase, you'll be falling on top of Ridley, who'll be holding onto the shaft walls to slow his descent. That'll create some debris that'll cause light damage when it hits you; feel free to shoot the debris to prevent this. Beyond that, just shoot at Ridley's head for damage. He may attempt to hit you with a mouth laser, but you can use the nunchuk stick to avoid it.
In the second phase, Ridley will bring you down face to face. Nothing too crazy here; just hit the glowing parts of his body (mouth or wrist) a bunch of times to prevent any attacks from coming your way. Don't worry about charging up your weapon or using missiles; just pound away on the A button to fire as rapidly as possible.
Eventually Ridley will break off into the third phase, which will have you below him in the shaft. He'll try some breath attacks here, but you should be able to shoot them down so long as you move around to where you can actually see the projectiles. Keep shooting at his head at this point, and you'll eventually go back to phase two, and then finish him off in phase one. You should be able to beat him with plenty of time left.
Get To The Control Center
Now that all of the generators are activated (you'll have to flip the switch on Generator C after defeating Ridley), you have to get to the Control Center. There's a four-minute timer that you're on, so run past any enemies that you see until you get back to the Cargo Hub (you'll need to make a lengthy jump in one of the conduits on your way, but it's doable if you double-jump).
When you reach the triple-generator door in the Cargo Hub, pass through it to meet up with the other bounty hunters. Scan them while you ride the elevator up, then get ready for a somewhat jarring transition.
Bryyo
Return to Olympus
When you wake up on Olympus, you'll find that you have a new item: the PED Suit. If you press the plus key on your Wiimote, you'll enter into Hypermode, which will let you deal devastating shots at the cost of your internal health.
When you get the basics of PED firepower down, head to the AU chamber and speak with the ship's computer; she'll give you your next assignment: Head to Bryyo and try to find some way to shut down the meteor's effects on the planet, while also finding some sign of your hunter comrades.
You'll automatically leave Olympus after this and return to your ship.
Landing on Bryyo
Find Bryyo on your galactic map and select the only landing pad that's available to you. Move down the path in front of you until you find the Gateway section of the map. Jump off to the left from the door and follow the jumping path until you reach the orange dragon symbol on the ground. If you head through the archway there and find the doorway that's on the rise behind it, you can find the crashed ship that you're supposed to be heading towards, but it's currently unreachable; you'll need the grappling hook to get there.
Return to the Gateway and head over to the locked door with the green and orane dragon symbols on it. It's locked currently. Turn around and use your combat visor to pull down the shaky platform across the way; that'll give you a way to return after the broken platform falls away into the chasm.
Anyway, jump from the locked door to the upper platform nearby and from there onto the solar collector in the middle of the area. Enter ball form and drop into the hole here; that'll lead you to one of the two locks. Use a bomb to trip the lock, then drop down and jump back up to where the new platforms appeared. You can jump from those to the uppermost level of the solar collector, where you'll be able to access the second lock.
Through The Door
Now that the door is unlocked, head through it and scan the ball in the track. You'll need to pull it a few times to get it to unblock the track. When that's done, ball up and head to the right, towards where the ball was located. Nothing major here at the moment, but you will find an Energy Tank in a room here. 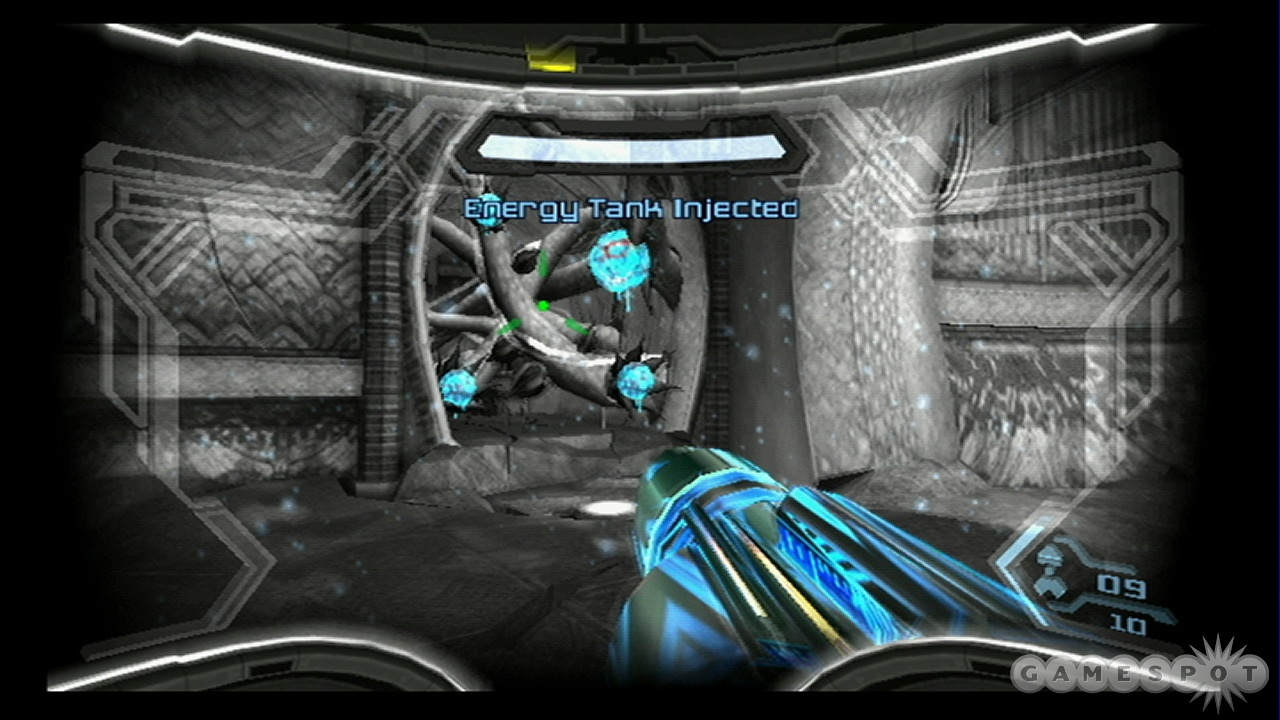
Head back to the track and proceed to the opposite direction. That'll lead you to the Grand Court Path. Use your PED Suit (press the plus key) to switch to Hypermode, then blast the vines blocking your path to move on. If you want the Missile Expansion here, turn around and scan upwards. There's a statue with fuel gel inside of it; use a charge blast to destroy it, then jump up to its platform and jump around to reach the missiles.
When you come out to the Grand Court, you'll have to fight a pair of Reptilicus Hunters. These guys can take a lot of damage, so use missiles or Hypermode to take them down quickly and unlock the path leading on. You may hear another powerup here, but it's apparently underneath the statue in the center of the room. Anyway, find the path leading on in the lower west corner of the room. There's a piece of lore locked away on the wall near the statue. Hit the button in the middle to hear a few chimes, then shoot the smaller buttons in the order that they pop out in order to unlock the painting. The tones here are a bit of a clue on how to proceed. Only three buttons at the moment, but we're sure there'll be more complicated paintings to unlock later on. This is only for your logbook, so if you just want to get on with the game, feel free to ignore these things.
Finding The Grapple
Head through to the Hillside Vista. After killing the enemies, roll up into a ball and blow the hole at the bottom of the jumping platforms open with a bomb. When you proceed through the rolling maze, you'll see a bunch of glowing worms coming out of a hole nearby. Stand in front of the hole until you start to float upward, then move off to the left, avoiding the enemy that tries to grab you, until you float up into the upper level of the maze; there'll be a Missile Expansion for you there.
With that done, head to the right to find a locked door. Grapple the covering off of it, then fire a missile at the yellow target to open it. You'll nab the Grapple Swing. Use it to return to the Grand Court, then swing across to the far side. (You can let go of the grapple in midair, then latch onto the next one, so long as you line up your jump correctly before grappling to the first target.) When you land, pull out the panels on the wall to reveal a rolling path, which you can take to return to the Gateway.
The Ship
When you reach the Gateway, try your best to scan the birds that fly around, if you wish, then head to the southeast to find the crash site. Swing across to reach it. (The Missile Expansion above the grappling point is currently inaccessible.) The blast door here is shut, so roll into a ball and destroy the covering to reach a ball track. Roll through to reach a satellite room. After scanning the area, use missiles on the latches that prevent the large blast door from opening. That will leave you with a puzzle: there are three power rods that need to be connected. Using your grapple, first do the top left, then top right, bottom left, and bottom right. That should connect them all and raise the satellite uplink station.
With the satellite link uploaded, you'll get a full map of the planet and two new objectives: energy signals that are supplying the power that shields the meteor. You'll need to take out the power generators to take down the shield to destroy the meteor. Cool.
Return to the Ship
Now that you have your new objectives, you can return to the ship. You can't proceed any farther in exploring this area without a freezing weapon. You can, however, obtain the Missile Expansion above the grappling point outside the ship now. Use the doorway to get outside (note the appearance of Hunter Rundas; could he have been responsible for all this icy destruction?), then return to the rolling path that you used to access the ship. One of the metal obstructions will now be out of your way, forcing you to dodge lightning. Another metal obstruction will move up and down. If you get beneath it and can successfully pull off a double bomb jump, you can reach the upper level of the ship and the Missile Expansion. It's difficult to do; you need to drop a bomb, wait a second, then drop Bomb 2 before Bomb 1 propels you into the air. At the apex of the jump from Bomb 1, drop Bomb 3 in midair; you should drop down to Bomb 2, which will detonate and send you up again, then get the midair explosion of Bomb 3 to send you up further. It's a tricky technique, and one that requires a bit of practice, so don't worry if you can't get it done. You should practice it, however, as a number of pickups can only be obtained by perfecting the technique.
When you return to the Gateway, you'll be accosted by pure Reptilicus's (Reptilici?). Use your hypermode to blast through them. Further along the path to the ship, Alpha Hoppers will appear; again, hypermode will make quick work of them.
Bryyo Fire
Your first goal here is to destroy the eastern energy signature.
When you land, note that Rundas' ship is positioned above you. Perhaps you'll encounter him at some point? When you head through the hallway nearby, use charged shots to recess the blocks in your path into the walls, that'll let you move on into the Gel Refinery Site. Move to the corner here and fire on the two gel streams to unlock a platform, which will then lead to another door. Head through and find the roller path beyond.
Again, get yourself covered in lift creatures and move up here. There are two exits from the roller path. Float up to the top of the area and avoid the grabber there and exit via the topmost path; that'll lead you to a Missile Expansion. Return to the path and exit via the lower exit to move on to the Main Lift.
Going Down
Head into the elevator here and grapple the lever to move down. You'll wind up in the Corrupted Pool area. Dip into the pool to recharge your energy, if needed, then use Hypermode to destroy the Phazon Vine. You'll be overwhelmed by energy in the middle of the process, so quickly expel as much of the Phazon from your body as you can to recover, then restore your energy and complete the destruction of the vine to move on.
In the Gel Processing Site, you'll come across Rundas again, but only temporarily. You'll have to fight three Warp Hounds here. They can take a lot of damage, but if you shift into Hypermode, they should go down relatively quickly; just keep in mind that you might get corrupted again and be forced to expel all of your energy tank to survive. Regardless, kill them, then take a look at the room around you.
Puzzling
With the Warp Hounds dead, head to the small control panel at the southern end of the room and use charged shots to ignite both of the gets there, then bomb the panel that glows to raise the central platform here. Jump up there and use the grapple to pull both of the targets here towards the central platform and lock it into place. With that done, jump to the platform that's within reach of you and activate the fuel regulator beyond. The jets here will start flowing, but you'll still have to shoot both of them to lock them into place. That will open a ball path that will lead to another control panel. Roll there, activate the panel, then roll back into the middle of the room when the central platform is raised again.
When you reach the top of the platform, kill the enemies, then grapple the small point on the southern end of the room to start the flow of fuel there. Igniting the two jets of fuel here will destroy the fuel container and reveal a ball path. Avoid the pillbugs, or destroy them, and make your way to another control panel. Activate it, then jump up from the central platform to the grab ledge to reach the doorway moving on.
Fuel!
In the Gel Hall, you have to aim a charged shot at the fuel spill in the center of the room. You'll see it rotate; when the head is aimed at the vine to the left, hit it with a shot, and it'll cut the vine, revealing a platform and a Missile Expansion. Don't be tempted to explore the fuel here, as you're almost at a save point. When you do move on and save your game, get ready for a fight.
Head into the Temple of Bryyo past the save point and start chopping through Space Pirates. Feel free to open the containers here: they'll disappear when the boss fight starts, and you'll want to have close to full health when it does.
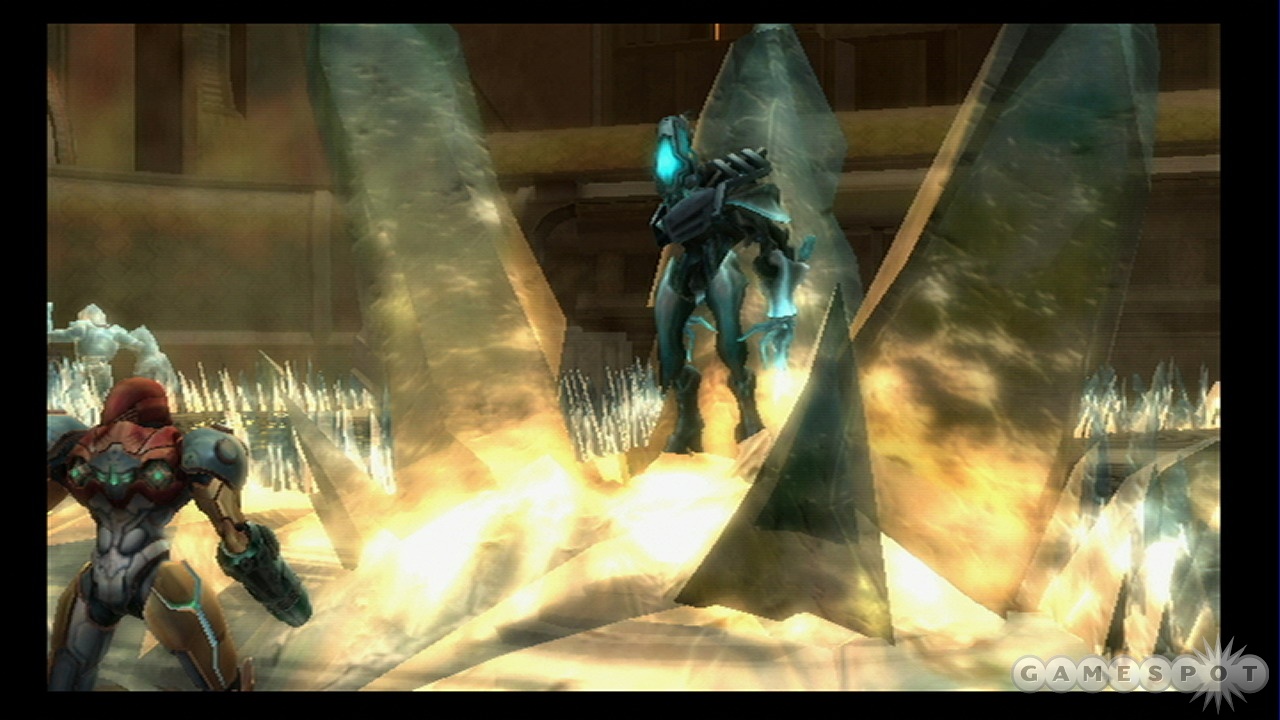
Boss Fight: Rundas
Rundas can be painful. Note that you can scan him both after he initially appears (you'll need to be quick) and during the boss fight itself.
Attacks
Rundas has numerous attacks that he'll throw your way. While he's on the ground, he'll usually resort to a straightforward freezing attack that you can dodge by locking onto him and holding the analog stick left or right while tapping B. If you get frozen, then quickly tap B to release yourself. He'll also periodically charge through the ice columns for a melee attack.
While he stands on the pillars, Rundas will typically jump around and send more freezing shots your way. He can also summon large balls of snow that will slowly come your way and smash through the pillars in the area to reach you. These are important because shooting them will sometimes leave behind missiles and energy; shoot them and charge your beam to suck in all the goodies. Lastly, towards the end of the fight, he'll summon a huge stick of ice, swing it around, and throw it your way. Stay well away from him at this point and dodge away from the stick as it comes towards you.
Rundas will also often take to the skies on his stream of ice. He usually won't attack here, although he will eventually start throwing lots of iceballs your way while doing this, but they're easily dodged. He's tough to hit here, so don't worry about attacking him.
Taking Him Down
Rundas has ice armor on his body that you'll need to remove in order to attack him. Although he flashes red when you hit him with weapons, most attacks do barely any damage. In order to take him down, you need to stun him, use the grapple to rip the armor off his body, then blast him before he can regenerate the armor.
It sounds more complicated than it is. What you need to do is wait for Rundas to land on the ground, then immediately get into Hypermode and start blasting him with phazon shots. It should only take a couple to stun him (although he may be immune to stuns if he's actively attacking you back). When he's stunned, use the grapple (you can use it while still in Hypermode), rip the armor off of his body, then unload the rest of your energy tank into him with phazon attacks as he runs away.
Yes, this will drain a whole energy bar from you, so you'll need to replenish yourself by firing on his snowballs. With a couple repetitions, though, you should be able to almost finish him off, at which point he'll shift into his own Hypermode and start using the aforementioned ice stick attack. Be careful not to get hit by the stick, wait for him to hit the ground, then finish him off with the same attack you've been using thus far. Easy.
Moving On
Grab the Ice Missile and return to the save point, if you wish. The Ice Missiles overwrite your ability to fire normal missiles, but will do the same damage and also be capable of freezing your foes and jets of fuel gel. When you're ready to move on, head into the elevator in the middle of the Temple and find the lava passage below. Fire Ice Missiles into the lava to create platforms for you to move on. In the Temple Hall, activate the gel fuel pumps with the handle, then freeze the flows of gel by firing ice missiles into the spigots. That'll let you jump across to the next door.
Unfortunately, after activating the display here and scanning everything in sight, it'll appear that this journey has been a bust: you have no weapons that can destroy the generator here. Still, you got the Ice Missiles, which can freeze lava and open white doors, so it wasn't entirely a wasted trip.

Head back to the Gel Cavern and fire missiles at the pouring lava from the ceiling to freeze the nodes up top. That'll open access to a ball tube that'll spit you back out near your ship. Before you do so, though, head to the Gel Hall near the save point. You can fire your missiles into the gel here to find another Missile Expansion on the southern side of the room as well as freeze your way to the Gel Purifaction Room to the north. In the Purification Room, shoot the red target above you, grapple and swing, then shoot the next target and repeat the process until you reach the Gel Refinery Site, where you've already been. You still can't access the ball tracks here, but you can pull down a barricade to reach another Missile Expansion.
Head back to your ship. By this point, you should've received a new objective: Find the Federation Landing Site. That's back at the first landing spot you came to, so return to the Cliffside Airdock.
Cliffside Airdock
After landing, head back to the Grand Hall where the large statue covered the ground. Use the grappling point and turn yourself so that you can jump onto the small ledge to your left with the white door. Destroy it to find a Missile Expansion.
With that done, return to the crash site and start heading through the ship. Use your missiles to freeze the flow of fuel and jump across. The labor golem there can be activated in bomb form, and will drop you down to the Hidden Court, where a war golem lies chained. Defeat the Warp Hounds to begin some puzzle solving.
Set My People Free
The war golem needs to be activated, but can only move when the four vines that bind him are severed. You can disconnect one of the hand vines by charge-blasting the jet of fuel that comes out of the wall here. The other hand can be disconnected by using a missile on the weakened wall that it protrudes from; jump to the hole that's created and use another missile on the base of the vine.
Roll up and fall into the small control light in front of the golem and use a bomb to feed him energy. That'll charge the panel off one of the foot vines, allowing you to missile that one as well. The last foot vine requires some trickery. See the pool of lava near the golem? And the lava flow that goes into it? Hit the flow with an ice missile to freeze it, then roll up into the ball passage nearby and move over the frozen lava. Navigate the path until you find another vine root and blow it with a bomb before returning to the main room here. With all of the vines uncovered, you can drop back into the power chamber and activate the war golem, which will open access to the Ruined Shrine.
The Ruined Shrine
First things first: drop to the bottom of this cylinder and blast the weak spot on the golem fragment to find an Energy Tank. Return to the middle platform and hit the crystals to your right with a missile to drop a grapple point. Swing across and start climbing the platforms that lead upward. Eventually you'll come to another stopping point: fire your missiles at the crystals on the platform across the way, and you'll start a chain reaction that will cause another platform to drop. Swing across and move around to where you can reach the platform. Destroy the barricade with missiles and move on into the Federation Landing Site.
Inside the site, you'll have to deal with an enemy ambush of Reptilizoids and Warp Hounds. Kill them, then start exploring.
Unlocking The Doors
In order to land your ship and upgrade it, you'll have to manually unlock the bay doors that float overhead. First, find the elevator in the corner and go up. There are a couple of ventings nearby. Roll up under the white one and lay a bomb in front of it in midair to unlock it, then bomb yourself up and through. You'll find an Energy Cell in the room beyond, so grab it and return down via the vents.
Next, use the access panel on the ground here to raise the platform back up from its retracted state. Hop up on the elevator again and use the grab ledge to jump to the top, then scan and use the grapple to pull out the nearby ledge. Jump from there to the uppermost part of the platform, then jump to the corner platform and roll up into a ball to access the control room here. Using the mechanism inside will open the bay doors.
Drop down to the ground floor here again and retract the platform at the control panel, then flip to the command visor and scan the landing icon to summon your ship. Pressing the control panel again when the ship is landed will upgrade it with missiles, allowing you to summon bombing runs on special targets. Nice! Now that you have that done, get into the ship and head to the Thorn Jungle.
Thorn Jungle
When you reach the ship, head to the Thorn Jungle landing pad. Proceed down the path in front of you and you'll find Space Pirates, but these guys can enter Hypermode themselves. Fight fire with fire and use Hypermode to kill the both of them. While in Hypermode, you can also destroy some of the growths on the ceiling and the walls. Destroy everything you see, and you'll unlock a small passage leading to a missile door. Go through to find an Energy Tank.
Return to the hallway. There should be another smashable panel in the ceiling. Destroy it, then jump up and roll through the passage there to find the power to the shield by the door. Shut it down, then return and head through the door here. The Pirates on the other side can apparently start a Phazon Overload in your suit, so be careful around them.
Bombing Run
When you reach the jamming signal near the Pirates, you'll have to scan it. If you do so, you'll find a switch on it that you can grapple. Grapple it and pull it to shut off the jamming transmission, then switch to your Command Visor and have your ship come down for a bombing run on the huge door here.
After that happens, a Berserker Knight will appear with Pirates to help him. The Pirates are annoyances here, so keep an eye on the Knight and fire at his Phazon balls that he'll throw at you. Eventually you'll crack his carapace and will be able to fire on his pink, exposed brains to finish him off.
Boss Fight: Korakk
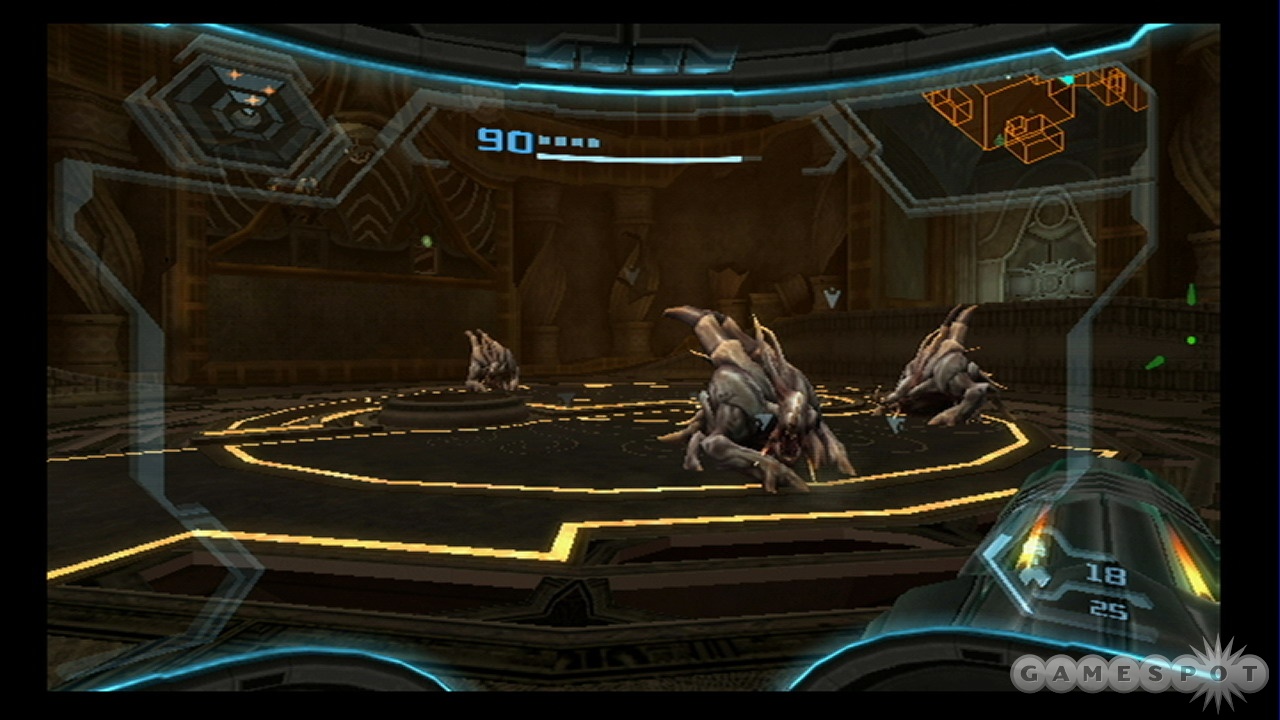
In the next little arena, you'll come up against a Korakk, a violent mount for a Space Pirate Hussar. The Hussar himself will need to be eliminated first here: just lock on to the Korakk and fire away at the Hussar in the rider's seat with your regular fire until he falls off.
The fight begins in earnest here. Luckily, once you get the pattern down, the Korakk is an easy kill. What you need to do is stand still and let the Korakk approach you. It'll eventually shoot its tongue out at you, so rapidly fire at its mouth, and you'll hit the tongue with your shots. That'll cause the Korakk to rear in pain and stand stunned for a few moments; there'll be swirling lights over its face and coming out of its belly at this point.
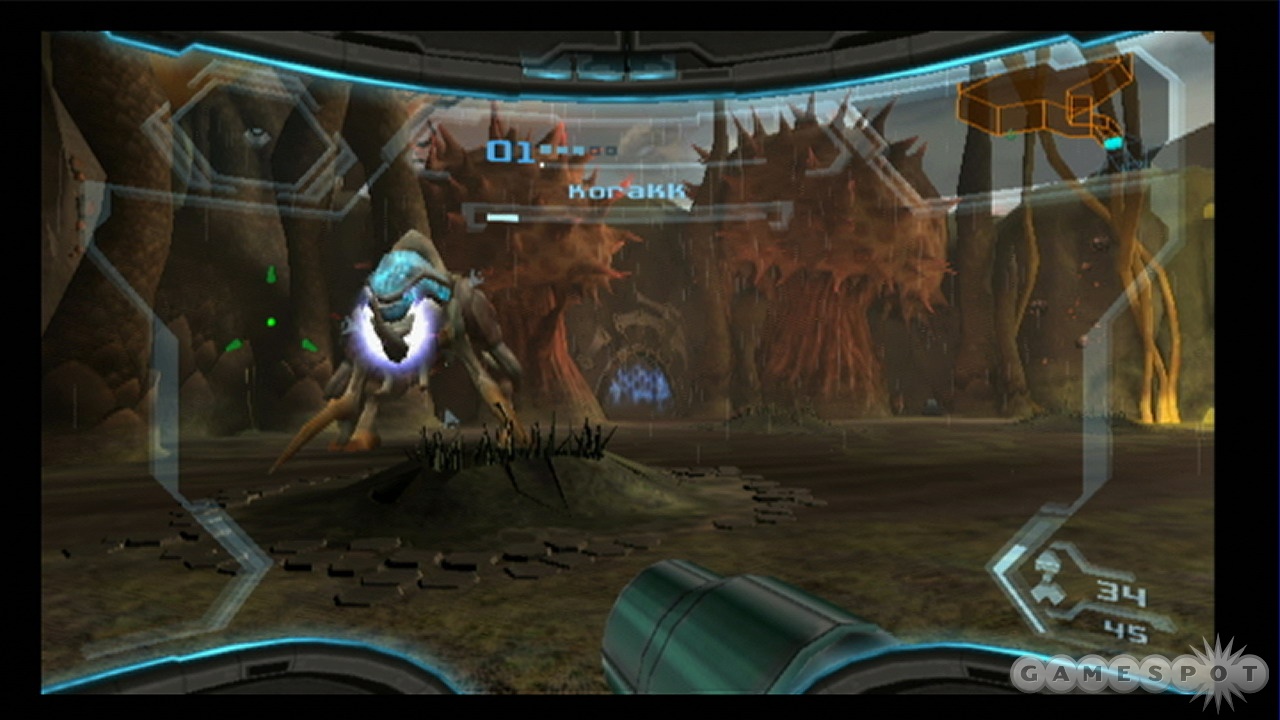
While the Korakk is stunned, roll up into a ball and get under it. Drop a few bombs underneath its belly, and you'll deal some small amounts of damage to it. Immediately return to your standing-up form here. If the Korakk is still standing, then repeat the process of shooting its tongue and dropping bombs. Otherwise, it will have fallen over on its side with its rear end in the air. Grab its tail with your grapple and pull. That'll cause the beast to stand up with its belly exposed to the air, giving you plenty of time to switch to Hypermode and blast away at the weak spot.
You'll need to repeat this a couple of times before you defeat the beast, but it'll go down eventually.
Moving On
There's a save point behind a white door near the Korakk, so go ahead and save your game. You'll come across a T-intersection hallway nearby; open the shutters over the painting in front of you (watch the order that the dots appear in and fire in that order) to find a Missile Expansion.
Now, you can see one of the field generators through the window here. However, there are two anti-air cannons nearby. If you flip over to your Command Visor, you can call for an airstrike on the generator, but your ship will be repelled by the cannons. If you attempt to leave the room, the shutters will open and let you move on to the cannons.
Dealing With First Cannon
One of the passages here is currently unusable, the one to the north of the room with the window on the generator. Head south, then, to Generator Hall South. There's a platform extending itself across the chasm above you; destroy it with a charged blast to the underside, then jump up to the grab ledge to move on up. Destroy the turrets in front of the doors with missiles to move on.
When you reach the first cannon, start scanning away at it. What you need to do here is scan the entire structure, then move underneath it and scan the access port on the center of its bottom side. That'll indicate that you can grapple it, so pull it down towards you. That'll open up the ammo ports on the three sides of the cannon itself. With that done, move out to the side of the cannon and destroy one of the ammo caches there. You'll have to repeat this process three times, while under heavy Space Pirate fire, before the cannon is completely destroyed. There'll be a brief cool-down period between each ammo cache getting destroyed, so take the time to destroy some pirates and some crates to recharge your health a bit.
Puzzle Solving
In the Auxiliary Dynamo, you can find one of your first free-standing ship upgrades. To do so, scan the room and move around to the small piston that you can grapple downwards. After pulling it to the floor, return to the door you entered from and roll into ball form. There's a small morphball opening near you, so roll in there and bomb yourself up. When you get on top of the piston, it'll raise you up to a Ship Missile Expansion, which will let your ship carry another missile.
The Second Generator
The second generator is a bit different than the first. Instead of having a singular grapple point to access in order to expose the ammunition, you'll have three clamp levers on the upper part of the area that you'll need to access in order to expose the weak spots of the cannon. You'll need to scan them, then grapple all three of them in order to expose the ammo.
The flying Pirates will make life difficult for you here, and will also reset the clamps after you pull the levers, so you'll need to be quick. Set yourself up next to one of the levers here (making sure that you can hit all of them in a row, i.e. don't start in the middle), then shoot down the Pirates. Quickly grapple the lever near you, then jump to the second and third and do the same thing, ignoring the Pirates while you do so. If you can grapple all three levers, then three modules of ammo will pop out from the cannon. If you're quick, you can destroy all three before they retract, destroying the cannon; otherwise you'll have to grapple the levers here.
You may notice that there's a door in the corner of the room here; you can't access it until you upgrade your grappling power for larger objects.
Destroying the Generator
Be sure to exit to Generator Hall North from the second anti-air cannon's location. That'll place you across from a locked platform. Destroy the ammo that cycles across atop the platform when it's directly overhead to lower it to you, then cycle the pump to reveal the location of another Missile Expansion.
With that done, return to the room with the big window that overlooks the generator and call down a bombing run. With the generator destroyed, the force field that protects the Seed will be weakened, but not eliminated.
Return To The Eastern Generator
Now, return to the Fiery Airdock and start making your way back to the generator you couldn't destroy before. The Pirates are in the process of setting up another Tiamat anti-air cannon above the Temple of Bryyo. Take out some of the flyers here, then quickly use your grapple on both jamming devices and call in a bombing run to destroy the Tiamat before it can be completed. With that done, head down to the generator window and destroy the generator itself, as well. When it's gone, return to your ship and fly to the Leviathan Seed platform.
Leviathan Seed
Land on the Leviathan Seed landing pad and jump up to the door nearby. Use Hypermode to destroy the Phazon vines and head through to the boss battle beyond.
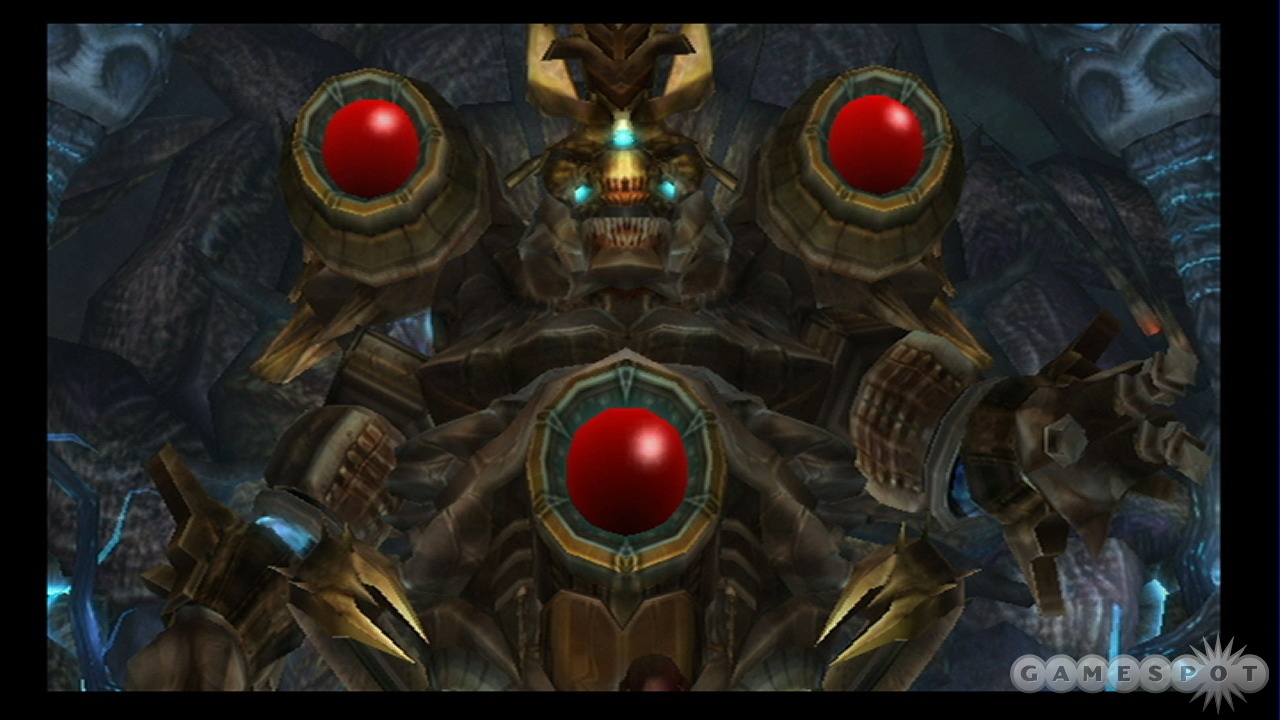
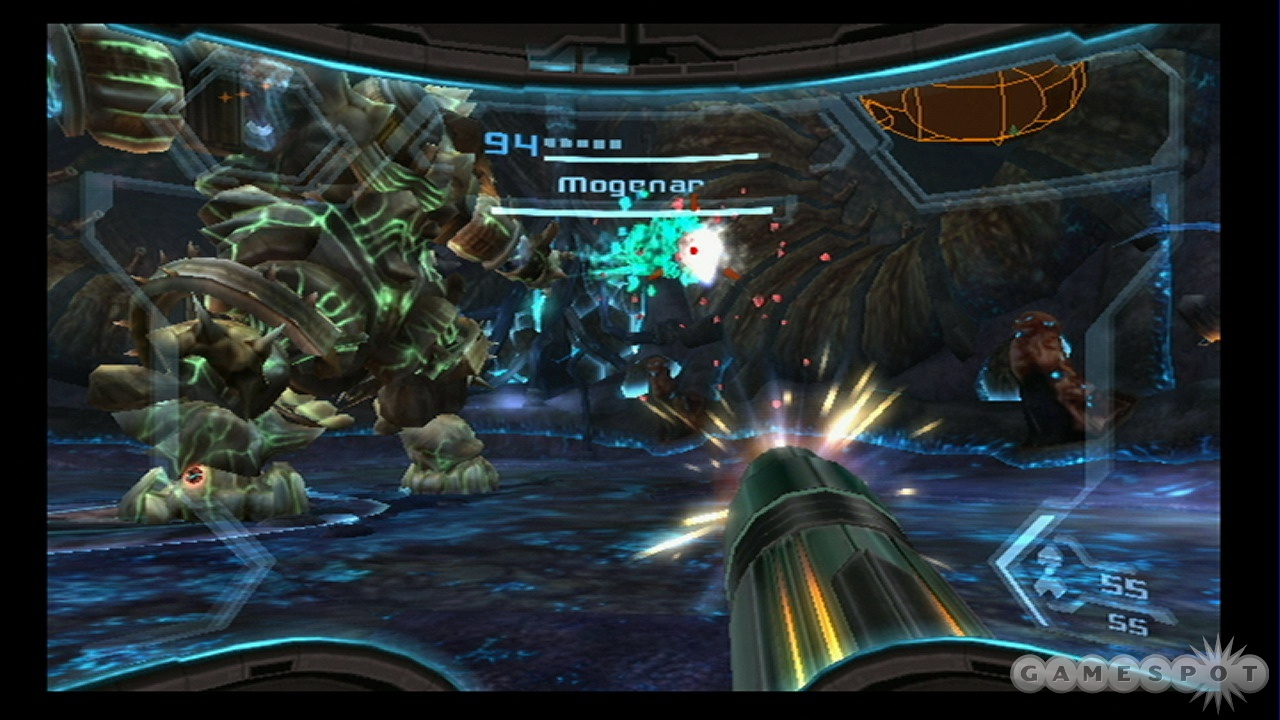
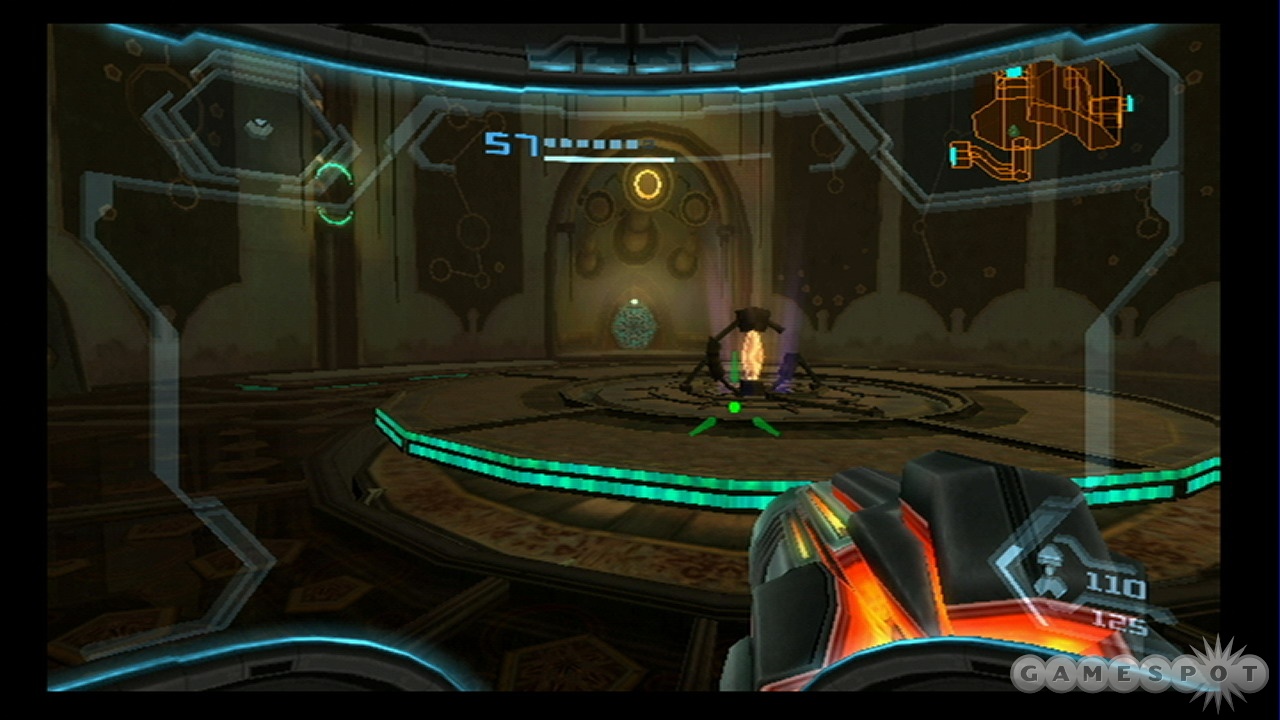
Boss Fight: Mogenar
Mogenar is an ancient war golem that looks intimidating. In reality, he's not terrifically terrible. His attacks aren't too difficult to dodge, but it can take a while to actually hurt him.
Mogenar's Attacks
Mogenar's primary attack is a jumping maneuver that will send a shockwave out from beneath him when he lands. You can double jump over this relatively easily. He'll also periodically shoot out a shockwave at you from his foot, but that also can be jumped over or dodged. He can also send ghost hands out at you, which travel slowly and home in on you. Shoot these for health pickups.
Apart from those, he'll sometimes bend over and shoot a laser beam at you from his mouth, but that can be jumped over, and also makes for a good opportunity to get behind him. He'll also periodically just charge at you and attempt to hit you with his body, which is difficult to get away from; just lock on and dodge laterally to avoid him when that happens.
Wearing Him Down
Mogenar has four Phazon generators, each of which has a big red ball inside of it. There are three on his front side and one on his back. What you have to do here is fire at the balls until they explode, exposing the generators, which can then be destroyed with Phazon blasts.
The tricky part here is that the generators open and shut fairly regularly, making them somewhat difficult to hit, which doesn't even factor in the fact that Mogenar is constantly moving. Mog will also periodically shift the red balls between his three frontal generators, so that you may wind up shooting at one that's already been destroyed if you don't pay attention to the green energy that floats around when he shifts the balls. What's more, he can replace destroyed balls with fresh ones from the dispensers in the room.
Here's what you have to do to proceed:
Step One: Shoot the balls with your standard attack. Stay away from him, jump over his attacks, and keep hitting the red balls when their shutters are open; you'll see fragments falling off of them and they will gradually turn a pinker color as they take damage. For simplicity's sake, we'll hit the ones on his front side first and worry about the one on his rear later, but you can proceed in any order that you like.
Eventually the balls (or one of them, anyway) will shatter and expose a blinding white generator behind it. At this point you can continue on to Step Three, or continue to shoot at the remaining balls until they're destroyed as well.
Step Two: Disrupt Mogenar's attempts at regeneration. If you destroy a ball and don't immediately destroy the generator behind it, Mog will eventually stop and send ghost hands to the dispensers in the room and grab two new red balls (even if you've only destroyed one of them). Stop attacking him here (the shutters will close anyway), and focus your fire on the red balls as they come in from the wall towards his body. Shoot both of them, or he'll suck one of them in to replace the red ball you've already destroyed.
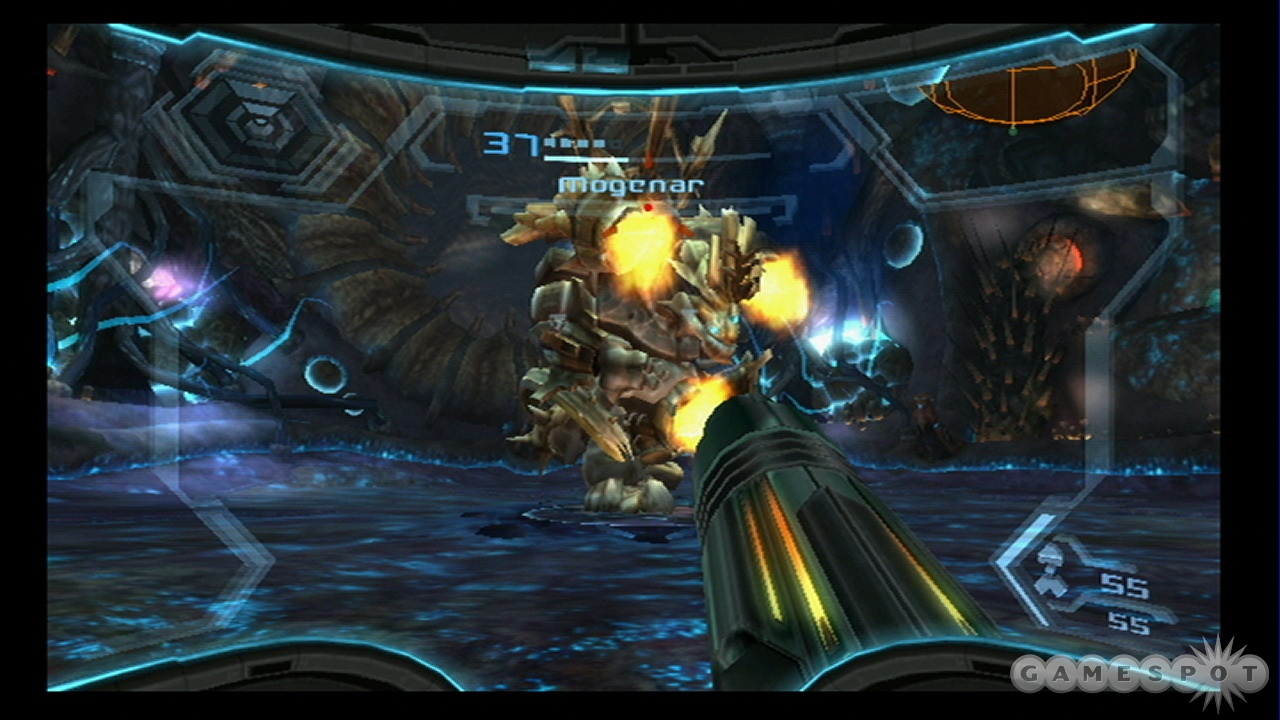
Step Three: Destroy the generator. After destroying a red ball, you can destroy the generator behind it (assuming Mogenar doesn't shift another red ball in place in front of it). You have to enter Hypermode and fire on the generator while its shutter is opened. After a few good shots, it'll blow up, scatter some health on the ground, and be permanently unable to contain a red ball.
Step Four: Eliminate Mogenar's energy shield. After you destroy a generator, Mogenar will encase himself in Phazon and will be unhittable. Roll yourself up into a ball, get close to his feet, and lay down three bombs near each foot. That'll eliminate the shield and spread some energy on the ground.
Tying It All Together
You have a couple of options here: you can destroy all of the red balls before destroying the generators, or you can destroy a red ball, then the generator, then another red ball, then another generator. If you don't want to have to deal with step two above (which isn't too difficult, honestly), the latter method might be best, but if you destroy all the red balls at once, or at least the three on his chest, and manage to prevent him from regenerating them, you'll have an easier time of delivering your Hypermode attacks to the generators, since he won't be able to shift the balls around to protect them.
Tip: Destroying parts of Mogenar will usually scatter health and missiles on the ground. If you're maneuvering around, use your charge beam to pick up anything you see; you'll want to grab any health modules that you can find.
The hardest generator to destroy will be the one on Mogenar's back, as it's difficult to get into a position to aim at it. You can attempt to lock onto him and dodge around him to get a good view, but he'll often jump away just as you start firing. Good times to get into position to fire on his back are when he fires his mouth laser at you, when he charges across the ring at you, or when he stands still and summons replacement red balls. If you really have a hard time hitting his back, destroy one of the balls on his front side, then wait for him to regenerate it and use that opportunity to deal extra damage to the back one.
Aftermath
When Mogenar falls, you'll obtain the Hyper Ball, which will let you deal direct damage to enemies around you if you enter ball mode while in Hypermode. Use it to destroy the small charges on the ground around you, then hit the Seed's core with Phazon energy when prompted to do so. Congrats, you've saved Bryyo!
Elysia
Skytown
Land on the only docking platform you have on Elysia, and you'll learn more about your mission: you have to find the AU unit that was responsible for network operations on Elysia. If you can uncorrupt it, it will tell you more about how to disable the Leviathan Seed on this planet.
Head into the control room here until you find a passage that's blocked by a Phazon vine. To destroy it, enter ball mode and bomb yourself up into the small hole here. When the protective shield goes down, enter Hypermode (while still in ball form) and use your hyperball power to destroy the roots of the vine. That'll let you move on to a grappling passage; use missiles to unblock your path.
When you reach the zipline, attach yourself with a grappling hook, then swing around on the zipline to reach the far platform. You'll have to shoot the shutters in your path if you don't want to get knocked off: a simple shot from your beam cannon will open them up.
Into The City
When you come across the Tinbot enemies, use missiles to knock them around. On the outside of the Arrival Station, you'll see the communications satellite off in the distance. You can use the grab ledge here to reach a cannon that can shoot you to the satellite, but it's currently without power.
Keep moving on until you reach the Transit Hub, where a powered cannon exists. Roll up into a ball and head across. The ball path here has a Missile Expansion in it, but you'll need to double bomb jump up to reach it. There isn't much you can do with the other stuff in this area, so hit the second zipline and scoot across to the Barracks Access. There's a Missile Expansion here, too; drop into ball mode underneath the lasers and move backwards to find it, towards the sound.
Steambot Barracks
There's a door and a balltrack here. The door is blocked, so follow the ball track until you reach the lower part of the room, where the Steamlord you've been seeing will attack you. It'll be accompanied by four other bots, and the Lord itself has the ability to revive them.
In order to lure the Steamlord out, continually hit the bots here with missiles and weapon fire. After a couple of them go down, the Steamlord will reappear to repair them. Hit him with missiles as well; after 8 or 10 good shots, he'll fall down and leave behind an Energy Tank. Nice!
After destroying the three pipes here with your grapple, you'll come out to the Barracks Lift. Use your hand to activate the elevator switch. Ride it up to Zipline Station Bravo and take the zipline across. You'll come out to the Aurora Lift; blast the white door to save your game, then head down to meet Aurora Unit 217. Unfortunately, the chamber its in is locked; you'll have to keep exploring to find out how to access the chamber.
Fork In The Road
Move on from here to reach Spire Dock and cannon yourself across. You can investigate Ghor's armor here, if you like. There are two ziplines leading on from here: one heads to the Security Station to the east, and the other leads to the Junction in the west. Since your next objective is to investigate the Chozo technology to the west, take that zipline (check your map for the marker with the big question mark over it if you don't know where to go) and find the room marked Junction.
Find the white door in the Junction room and head through to Skybridge Hera. You'll need to rip the gate off its hinges with your grapple to move on; perform the same grappling action on the Dragoon bots to kill them, as well. After you kill the first wave of Dragoon bots, listen for the power-up sound: one of the small pillars here has a hole in it. Bomb yourself up into it and bomb up again for a Missile Expansion. Keep ripping gates and proceeding across the bridge. After a Steamlord attacks you, run past the bots on the bridge and rip off the last gate to send the bridge falling into the ether.
Construction Bay
Move into the structure here and come to the Construction Bay. Jump across the platform and use a missile on the docking clamp door to release it. Hit the grab ledge and roll up into a ball inside the clamp corridor, using bombs to release the clamps below you. (Don't worry about the power-up sound; you can't reach it yet.)
Return to the platform and use the grapple points to swing along. When you reach the far side, roll into a ball and move onto the crane platform. When you reach the top, activate the crane to swing it around to the next doorway.
When you reach the doorway leading to the tech, you'll find that it's the Boost Ball. Scan it and pick it up. But oh noes!
Boss Fight: Defense Drone
The Defense Drone will prevent you from picking up the Boost Ball until it's destroyed, so get to work!
Attacks
As per many of the bosses so far, the DD's most common attack will occur when it jumps and lands on the ground, sending out a shockwave. Doublejump over it. It will also fire homing missiles at you when it's on the ground, so shoot them away. It can also fire bouncing homing mines that will gravitate towards you when it jumps up onto a platform. Shoot these for health and missiles.
Taking It Out
While the DD roams around on the ground, you need to pelt its three antennae with laser shots. After getting all three retracted into its head (they'll regrow if you don't nail all three of them relatively quickly), the beast will shut down, prompting you to grapple its data point (or something) and pull it. Doing so will expose the DD's memory core, allowing you to fire at it.
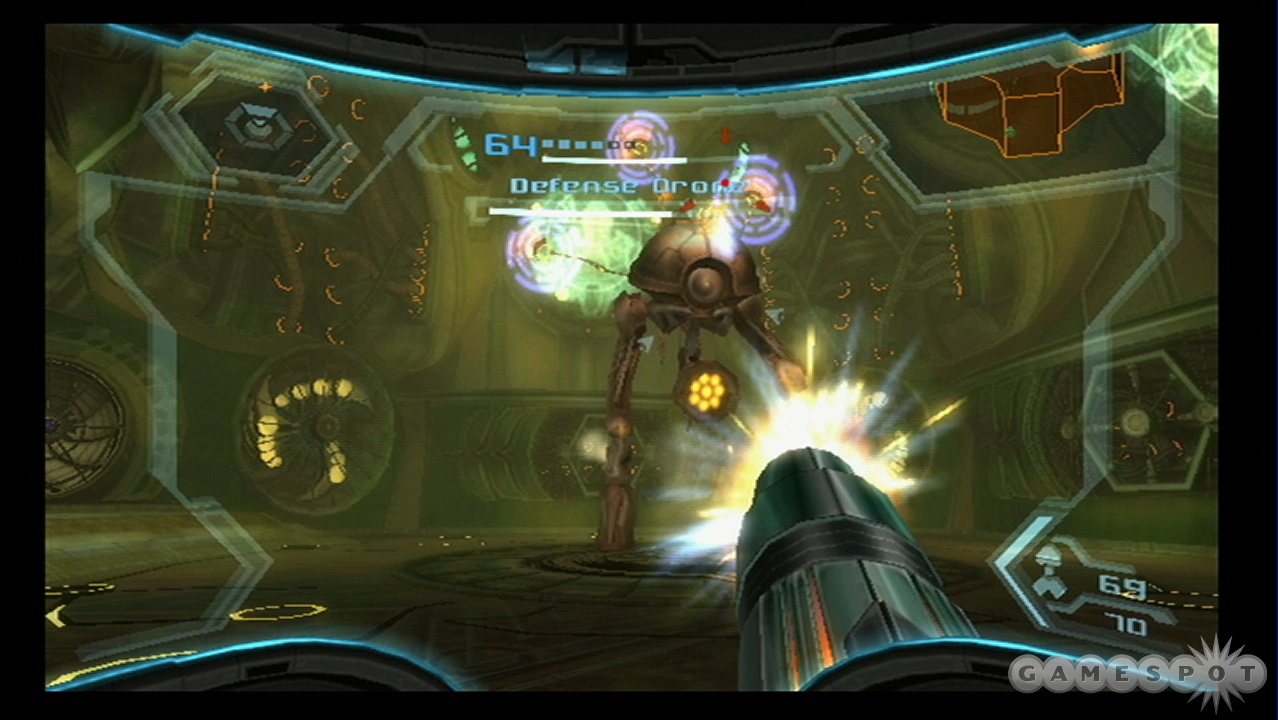
Unfortunately, when the core is exposed, the drone will jump up onto the platforms that ring the arena, making for a somewhat difficult shot. It'll stand relatively still while it dumps mines on you, though, so you should be able to either pelt it with Phazon shots or just regular shots. Repeat this process a few times and you'll defeat the beast. Near the end of the fight a white mist will appear, obscuring your view a bit, but not badly enough to prevent you from seeing the core. Fire away!
Moving Forward
With the Boost Ball in tow, you'll be able to…you know, boost, and stuff. Use it on the symbol in the floor here, then rapidly move around in the circle that appears to repower the elevator and return upward. You can head back to Skybridge Hera at this point, where you can repower a ball cannon to move you back to the Junction.
We're sure you want to explore, but for now, let's just get back to Aurora 217, shall we? If you return to its room, you'll be able to use the Boost Ball to unlock the door there. Do so, then use the console here. That'll open a hatch to the maintenance area. Head down, destroy the Tinbots, then use the pillar in one of the alcoves to upload the vaccine. Unfortunately for you, Ghor will appear and sever 217 from the network before you can speak to it. Nothing you can do at the moment. Return up to 217 via the balltrack and speak to it to learn what you need to do: hunt down Ghor, take his plasma beam, and use that to fix the network connection.
Hunting Ghor
Make your way back up to the save spot and start heading back to your ship; you should hear it whining about how Ghor is attacking it soon enough. Head back to the Steambot Barracks and use the mechanism there to raise up your first half-pipe. Get into the halfpipe and use Boost Ball to climb up to the upper platform, then use the door lock to move on through the previously locked door. (There's an item here, but you can't get it until you can stick to rails in ball form.) The door lock needs to be unlocked by twisting the lock and using A to insert it when the spikes on the outside of the rings are aligned with the ring below it.
Make your way back to your landing pad. If you get to the Arrival Station, between the Transit Hub and Zipline Station Alpha, where the communications satellite lies off in the distance, you can quickly jump up to the grab ledge there and power up the cannonball to net yourself an Energy Tank.
Boss Fight: Ghor
When you reach your ship, you'll find that Ghor has seriously damaged it. After ordering it to take off, you'll have to fight Ghor to the death. Luckily, Ghor drops a large amount of health during the fight as you destroy bits and pieces of him, so you have that working in your favor. If you find yourself running low on health at any point in the fight, just look around and start sucking stuff up.
Phase One
Ghor begins the match with an energy shield in front of him that'll protect him from attacks. You can't penetrate the shield, but you can shut it down.
The bulk of Ghor's attacks here will come from the now-familiar jump-and-energy-wave, along with a charging attack that's difficult but possible to dodge. He can also lay down fuel gel on the ground that'll cause damage if you touch it, and issue a laser from his mouth.
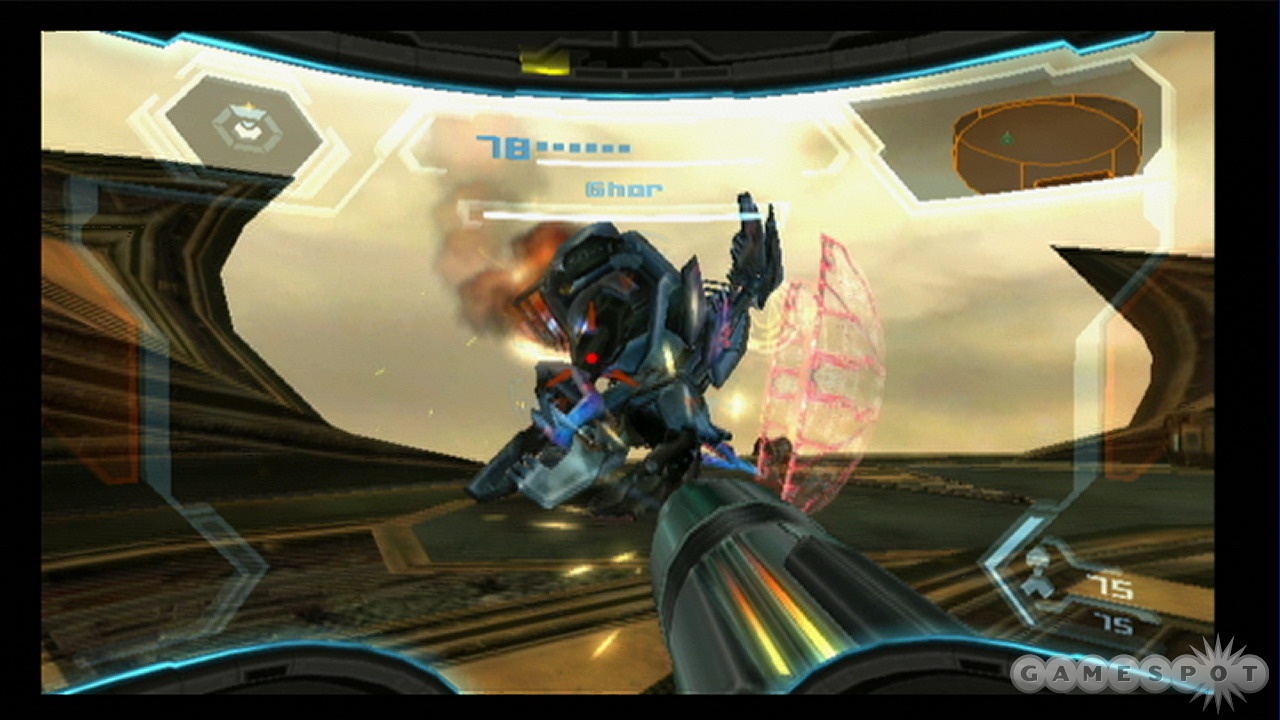
What you need to do here is get behind Ghor and fire on the weak spot in his back. It's easiest to do by locking onto him and dodging out of his way when he charges, then turning around and blasting the weak spot. It'll only take a few shots to drop the shield and reveal another weak spot on Ghor's head; flip to Hypermode and unload on him to move on to phase two.
Phase Two
Ghor's shield is gone, but he retains some of the attacks that he threw your way before, and adds some new ones. If he fires missiles at you, try to shoot them down as they come in. Otherwise, wait for him to start his circular laser attack, where he sits still and rotates a laser beam around the arena. When this pops up, roll into a ball and get near the dongle that pops down beneath him. Lay some bombs, and the weak spot on the head will be revealed again. Blast it with more Phazon to move on.
Phase Three
Ghor uses a beam attack on you that hits for a decent amount of health, and can now enter Hypermode for extra damage. He'll also periodically spin around like a top and attempt to ram you. However, the weak spot on his forehead is more or less permanently shootable, so flip on your own Hypermode and blast away at it until he goes down.
Back Through The City
Your reward for defeating Ghor is the Plasma Beam, which will replace your normal beam weapon. It'll allow you to unlock plenty of new stuff in the game; anything you've seen that needed a heat-based attack to melt or energize is now accessible to you. Unfortunately, your ship was damaged and can't fly for the moment, so all you can do is explore the city and attempt to destroy the Leviathan Seed here; no flying back to Bryyo for the moment.
So, start making your way back to AU 217. In the balcony overlooking the docking bay where your ship is at, you can find a Missile Expansion by melting the object that's flown through the window. If you didn't get the Energy Tank in the Arrival Station by jumping up to the grab ledge, you can do that now as well. In the Transit Hub, you'll find a cannon that can be unblocked by melting the scrap metal around it; that'll shoot you right back to 217.
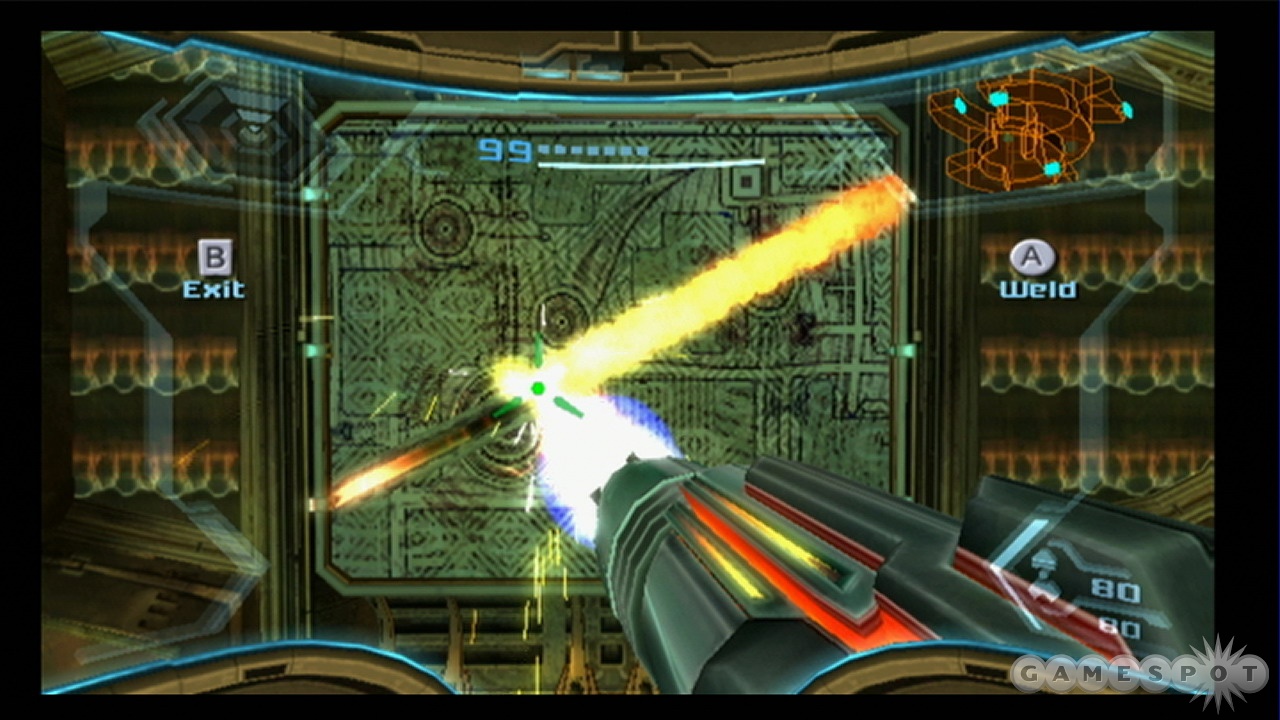
Repairing 217
Head back to 217 and talk to him. He wants you to repair the cables that Ghor severed earlier, so head back through the maintenance hatch and enter the area below him. There are three panels with severed cables, so walk up to them, hit A, then hold down A to trace a beam of plasma from one end of the severed line to the other. You'll know you're soldering correctly when a shower of sparks flies out from the point of impact. You'll need to start at one of the bright ends of the trails in order to get started.
With all three panels restored, return to 217 and talk to him. He'll tell you his plan: instead of destroying the generator, you're going to make a thermonuclear device and drop it directly on the shield. You'll need to find something to help you assemble the device, however, so he points you to a landing pad far to the east. Map data!
Now, your goal here is to get to the Federation area to the east, but you won't be able to reach it just yet. Instead, you have to leave the planet and explore Bryyo to find what will enable you to access the Federation area. However, you can find a new item and a new landing pad.
Ship Missile Expansion
Head to the Spire Dock and float across to the Security Station. If you jump onto the small platform here and roll up into a ball and go through the hole, you'll come out near a pair of doors and a twist-lock. Melt the metal that lies up against the corner of the wall and you'll also melt a section of pipe. Head in there to find the Ship Missile Expansion. If you return to where you melted the pipe and proceed through the lower door, you'll find the landing pad. Unlock it and call your ship before heading back to Bryyo.
The Return To Bryyo
As you might imagine, your fire beams and boost ball will have unlocked a few new goodies for you. Before we start exploring and finding what you need to move on on Elysia, why don't we run around and grab some stuff? Here's a list of stuff you can currently find on Bryyo with the tools you have available to you. You can wait until later on all of it, but if you're like us, you'll want to get it all now.
Cliffside Airdock
Missile Expansion: Head to the Gateway area. If you head back through the small ball tube where you had to grapple the obstacle out of the way to find an Energy Tank later on, you can return to the upper level of this area (near the Reliquary II), melt an ice obstacle in front of the ball tube there, and roll to pick up the missiles.
Missile Expansion: This one's kind of complicated. Head to the Hangar Bay where you initially had your ship outfitted with missiles (or just land there directly). There's a heat door in this room that you can jump to and head through. You'll eventually reach the Hall of the Golems. There are three golems here, with one on the upper platform being activated by ice missiles. Activate it, then jump up on the frozen fuel to reach the Burrow. You can bomb the yellow crystals here to destroy them. Fall down, move to the left, and start bombjumping back up to the top of the room. When you destroy the crystals near the top, move off to the left and find a few more crystals to destroy that will let you drop down. Do so, and eventually you'll be able to doublebombjump from the claw of a statue to the missiles above.
Note that if you head out of the Burrow towards the Hidden Court, there's a scannable lore panel above the end of the ball tunnel.
Missile Expansion: Head to the missile expansion listed above and proceed through the Burrow to the Hidden Court. You'll be able to drop the platform in front of you by shooting the locks out, then grapple across the Court to the fire door on the far side. When you reach the Fuel Gel Pool, freeze the jets of fuel from the walls and jump up to find the missiles.
Missile Expansion: Return to the Hidden Court from the Fuel Gel Pool and jump to the halfpipe. Boost yourself up to the right platform to find the missiles.
Thorn Jungle
Missile Expansion: Head to the Ancient Courtyard, where you used the airship to bomb the huge door. The door has left behind a halfpipe; boost up it to reach the missiles.
Moving On to Bryyo Fire
When you're ready to find your new tech, head to Bryyo Fire and start moving. First, find the Gel Refinery Site, where there are a number of ball paths around. You can break the ice here with your plasma beam and head into the tubes now. Use bombs to ignite the jets of flame and get you higher up on the path until you can blow a tube and make it drop. Return to the jet behind that and boost yourself up again to move on into the Refinery Access hallway. Move through there to the upper level of the Imperial Hall, where you can find another Missile Expansion if you roll into a ball and then use the grappling hook on the panels on the wall.
As you pass through the Main Lift area, you'll come across a ball tube that you can unfreeze and pass through if you want to reach the new tech. If you explore further, though, you can find a Red Phaazoid in the Gel Processing Site that drops a Gold Credit if you kill it by blasting it in Hypermode. But there isn't much more to see than that.
Anyway, in the Main Lift, destroy the ice and roll through the passage to reach the cylindrical room beyond. Use a charged shot on the ceiling to lower the ram, then activate the golem here to raise a boost ball charger. Use the boost ball charger to rotate the room 180 degrees, until the cracked wall is exposed in the gap of the bones, then escape by laying a bomb. Reactivate the golem, and you'll discover a teleporter.
Bryyo Ice
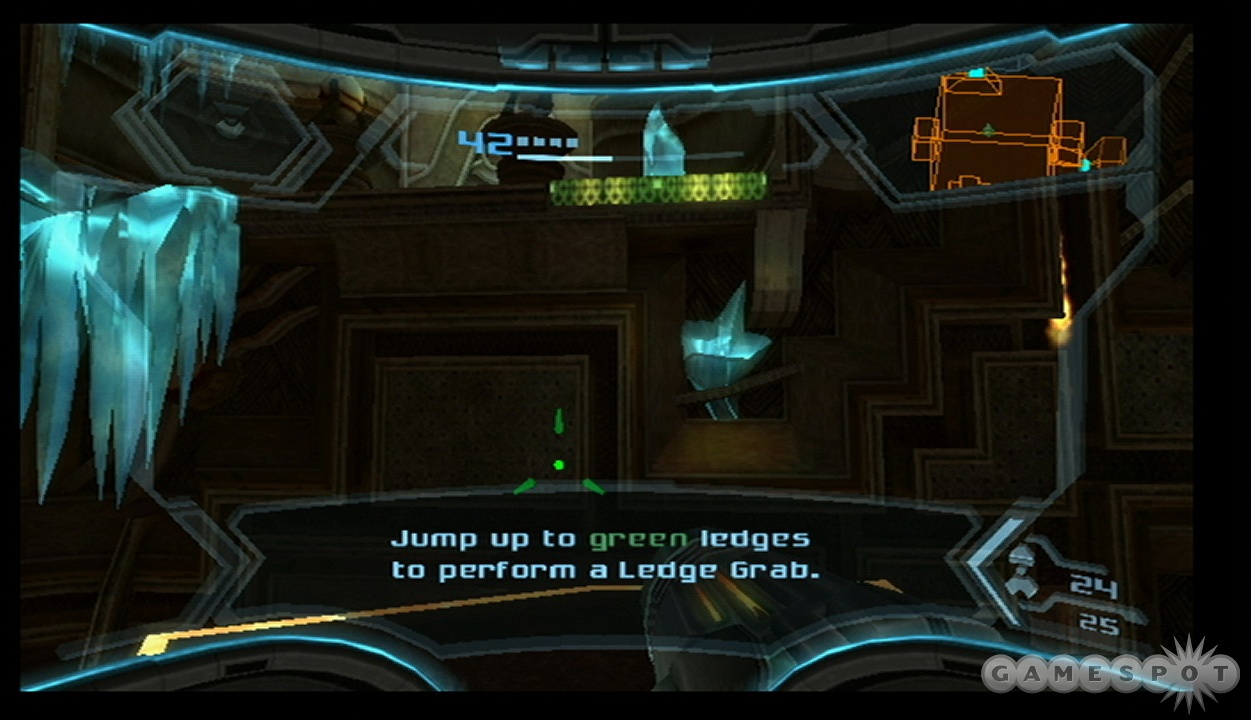
Head through the teleporter to find yourself in Bryyo Ice, a new zone. Smash the ice in front of you with your weapon and move down through the Imperial Caverns until you reach the Imperial Crypt. Smash the floor there and move along until you find the Screw Attack. Take it and jump across the chasm in front of you to reach the Tower, then screw attack up it to reach the top of the Hall of Remembrance. (Screw attacking off of the platforms consists of doublejumping into the greenish platform, then tapping B as you hit either side of the chasm itself.)
When you reach the upper section of the Hall, shoot the hand in front of you with a charged beam and screw attack across the chasm. There's a Ship Missile Expansion off to your left, so hop over there and nab it. To return to Bryyo Fire, you'll have to use the Screw Attack to jump out of the window in the next room and up along the screw panels along the walls.
Using the screw attack in this manner is kind of tricky to get used to. What you need to do is jump, then double jump, then press the B button to shift into screw attack mode, then press B again. That'll boost you forward. When you start to fall, hit B again for another forward boost. That'll let you cover much greater horizontal distances than you could before. When you hit a screw panel, you'll bounce off; hit B when you hit a screw panel and you'll start climbing upwards. Practice this a bit, because you'll need to do it to get out of this area.
Get back to your ship; on the way, you'll be told about the discover of the GFS Valhalla, a capital ship of the fleet that has been found in deep space. The Federation wants you to go and investigate. You can explore it, if you wish (we'll head there later in the game), but for now we'll head back to Elysia and see what our Screw Attack gets us.
Return To Elysia
You may have noticed that the Hoverplat Docking Platform area can be traversed with the Screw Attack earlier, but you'll also need the magnetic rail attachment for your morph ball to get the goodies there. You can, however, head to the top of the Construction Site area and jump on top of the structure with the grappling hooks there to find a Missile Expansion.
When you're ready to move on, head to the Security Station on your map (near the large arrows that are pointing off in the distance), proceed through the fire door there, and screw attack your way up to the top. Use your ball form's Hypermode attack to destroy the vines, then proceed on. You'll be able to use the tram here to visit…
Eastern Skytown
Move into the door here to avoid the Space Pirate's attacks. You'll come to the Concourse area, which will be a little hub for your travels here. Kill the Space Pirates, then move into one of the hallways and use charged beams to destroy the security shutters. Move up the elevator and find the path to the Concourse Ventilation area. Hop up into the bomb slot to release the grates below you.
Eventually you'll come to the Chozo Observatory, where you will find a satellite that's almost ready to launch. You'll need to find some way to lift the launcher, though. For now, there's not much you can do here but drop down and access the elevator underneath the area. Repair the next lift to move on.
Gearworks
When you reach the gearworks, destroy the swarmbots and jump to the middle platform here. There's no way to reach the Missile Expansion just yet, so keep on moving into the Turbine Chamber. When you reach it, destroy the glass blocking you from moving on, then use charged blasts on the two clamps to your left and right. That'll open the path in front of you.
Keep moving on through Maintenance Shaft TR and Skybridge Athene to reach the Federation Landing Site. Land your ship there, then use the panel nearby to upgrade it with the Ship Grapple Beam.
Assemble The Bomb
Now that you can grapple objects, it's time for you to start assembling the bomb to destroy the Leviathan Seed. Head back through Eastern Skytown. When you reach the Gearworks again, a Space Pirate ship will destroy the platform you passed over earlier, but will allow you to access the Missile Expansion there.
Return to the Chozo Observatory and use the Command Visor to command your ship to pick up the satellite launcher there. While it hovers above you, drop down and repair the circuitry that gets exposed, then use the bomb slot nearby to repair the structure itself before dropping the launcher back into position. When it's back down, use the bomb slot again to raise the entire structure up a few levels.
You can now jump up to reach the Botanica, where a save spot is waiting for you through the door to the left of the first open area. You can also nab a Missile Expansion here by heading to the white door at the end, turning around, screw attacking your way to the platform in front of you, then moving around and screw attacking to the missiles.
Boss Fight: Berserker Lord
You'll come to another Berserker Lord at the end of the path here, when you reach the top of the Turbine Generator. He's not substantially different than he was when you fought him back at the beginning of the game, but he does have a couple of new attacks. When his shoulders are blazing, his lasers move more quickly; when you destroy the shoulder weak spots, he'll periodically rear back and send a powerful energy ball your way. Also, his Phazon shots that float at you are sometimes red; these can't be shot back at him, only reflected.
Apart from that, the same tactics apply here: shoot the weak spots on the shoulders, then aim at the black Phazon shots that come towards you and shoot them to rebound them into the Berserker's head. It'll take a long time before his head explodes, but when it does, switch to Hypermode and blast the brain to finish the beast off for good.
Obtaining the Part
When the Berserker is dead, use the spinners in the floor to unlock all of the hatches, then use the device on the wall to open the floor all the way up. Then use the Ship Grapple to grab the turbine, which is the first part of the bomb that you need to obtain.
With that done, drop down through the ball tube that opens up and make your way into the Piston Hall. You need to jump into the rotating chamber across the way, but you'll have to time it so that you don't hit the mesh. If you start your jump while the mesh is facing you, then quickly screw attack across the gap, it should rotate by the time you reach it and let you in. Wait for it to rotate to let you move on.
You'll come out to a long hallway with a busted elevator in the middle. Repair the two circuit panels to restore power to the elevator, which returns you to the Concourse, if you want to go that way. For now, though, continue down the hallway and proceed through the fire door there. Jump up to the grab ledge above you and roll through the pipe to find Zipline Station Delta.
An Old Friend
Screw attack your way across to the first couple of platforms here, then time your jump so that you actually land on the third platform. From there, jump to the far side of the chasm to reach Transit Tube A. If you scan the bodies here, you should get an idea of what you're about to face. Blast the fire door here and save your game.
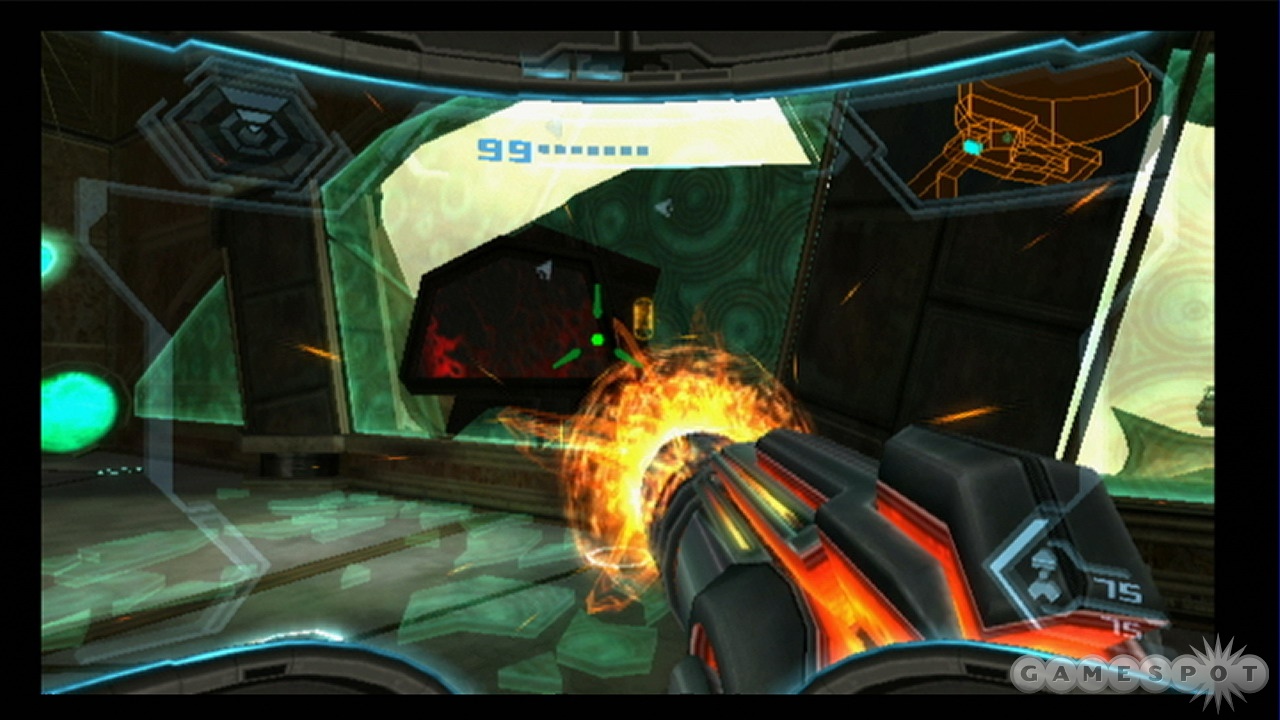
Head into the Research Pod Lift and travel from there to the Xenoresearch Lift and up into the Xenoresearch area. Find the room with the spinner and use it to lock the doors into place, then move on and find the lift up to Xenoresearch B. You'll need to ball up between the two Metroid containers to move past the locked door here. Smash the hole in the ground beyond there to drop down, then find another balltube that's covered with a smashable panel nearby. Roll through the hole there to find the chamber holding the Seeker Missiles. To grab them, rip the cover off the nearby energy conduit and take Energy Cell 5 from the wall.
Missiles Ho!
With the Seeker Missiles in hand, you can now unlock the multiple-target doors that you've seen throughout the game. Simply hold the down arrow on your D-Pad to launch a missile, but keep holding it until you start locking onto targets. It'll work on targetable door switches as well as enemies.
Use it to escape the room that you're in and return to the Xenoresearch areas, where Phazon Metroids are now roaming about. If one grabs a hold of you, break free by switching into ball form. You can kill them pretty easily in Hypermode, or by repeatedly hitting them with missiles and beam shots. If you don't want to attack them, though, most of them can be avoided by rolling underneath them.
Grab the Energy Tank in the last containment cell before the lift that leads you back down to the Research Pod Lift. Blast the door and make your way upwards to the zipline that'll lead you back to the Concourse.
Second Bomb Component
When you return to the Concourse via the upper zipline and Concourse Access B, roll into the tube to the left of the door and grab the Missile Expansion there. Then look out the window and hit the four targets on the docking clamp that holds the nuclear reactor in place to retract the clamp before rolling back through the tube and unlocking the elevator leading downwards. There are two more clamps that are visible from the main part of the area, so destroy both of them to open the ceiling. With that done, you can call for a pickup by switching to your Command Visor and aiming it at the yellow tendrils that connect the reactor to the floor below it.
Third Bomb Component
Return to Skytown west at this point and make your way to the last bomb component. Hitting the five switches below it can be tricky, even if you're totally locked on to all of them. Try holding down the Z button to remain locked into one of the five buttons after locking onto them.
Anyway, with the bomb completed, head to the Spire Pod (where Ghor's armor was parked way back when) and switch to your command visor to drop the bomb in the cargo bay. Then return to AU 217 and chat him up.
Delivering The Bomb
In order to get the bomb over the Seed, AU 217 will migrate the bulk of Skytown to get it into position, but the Spire Dock will have to be detached from Skytown and navigated manuall over the Seed, then shut down so that it drops directly onto it. Guess who gets the happy assignment of riding a thermonuclear device? No, it's not Slim Pickens, but Samus.
Return to the Spire Dock and it'll automatically be disconnected from Skytown. A serious Pirate attack will commence on the structure, forcing you to defend it while it moves. Numerous Pirates will descend on the platform, along with drone attackers and ATCs. What you really need to worry about, however, are the Skiffs: lightly armored attack vehicles that will attack the platform directly. Everything else will be firing at you, letting you avoid or ignore them as you like, but the Skiffs will attack the platform itself, and if the platform is destroyed, then it's game over.
So, deal with the Pirates and the bots as best you can, but keep an eye out for the Skiffs; if the platform's health starts going down, then you know that one is in the area. Ignore the fire from other attackers when you spot a Skiff. Just switch into Hypermode and fire away at the front panel and cannon to destroy it. You'll have a bit of time between Skiffs, letting you fend off your attackers and grab some health from their bodies.
Three Skiffs will appear in all; when they've all been destroyed, you can power down the engines and begin a five-minute timer for escaping the Spire. Unfortunately, the escape pod is malfunctioning. Roll into the maintenance hatch that opens on the front side of the pod and repair the three circuit boards there to fix the pod, then roll back out and escape.
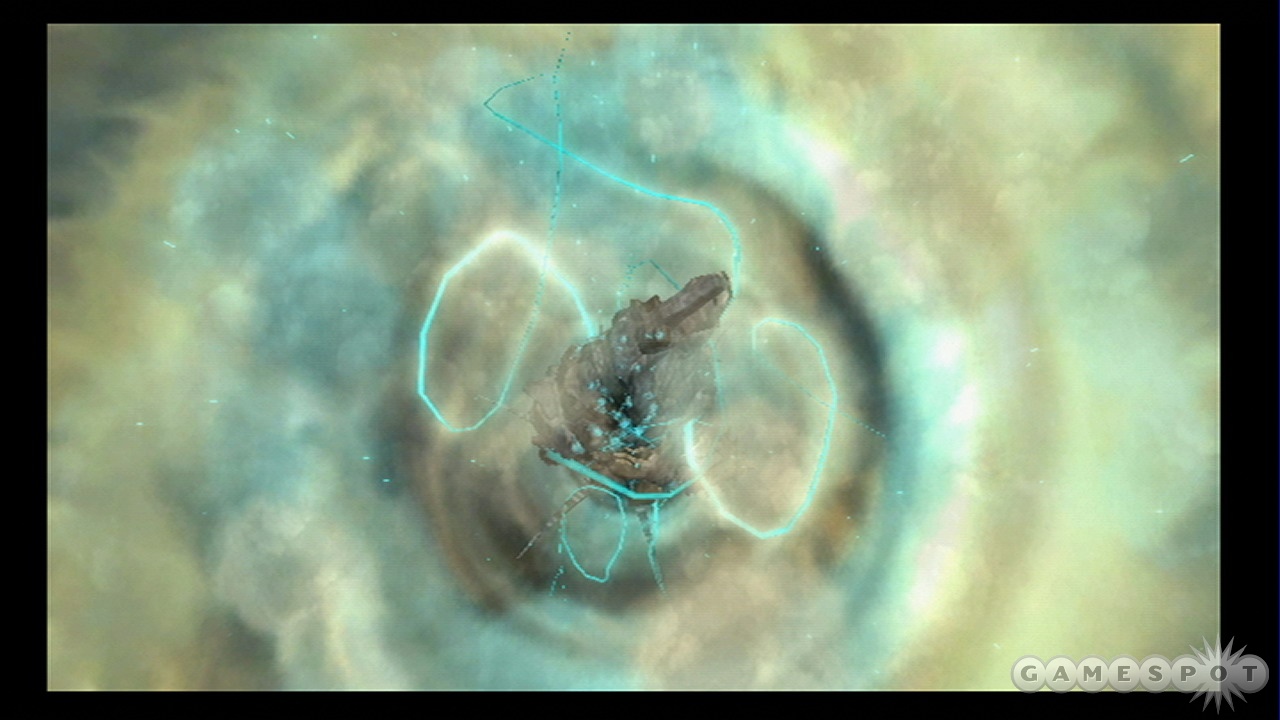
Gone To Seed
With the Seed's shield destroyed, you can now fly to it and attempt to destroy it. After bypassing the locks in the hallway, you'll come out to the center of the Seed, and the next boss fight.
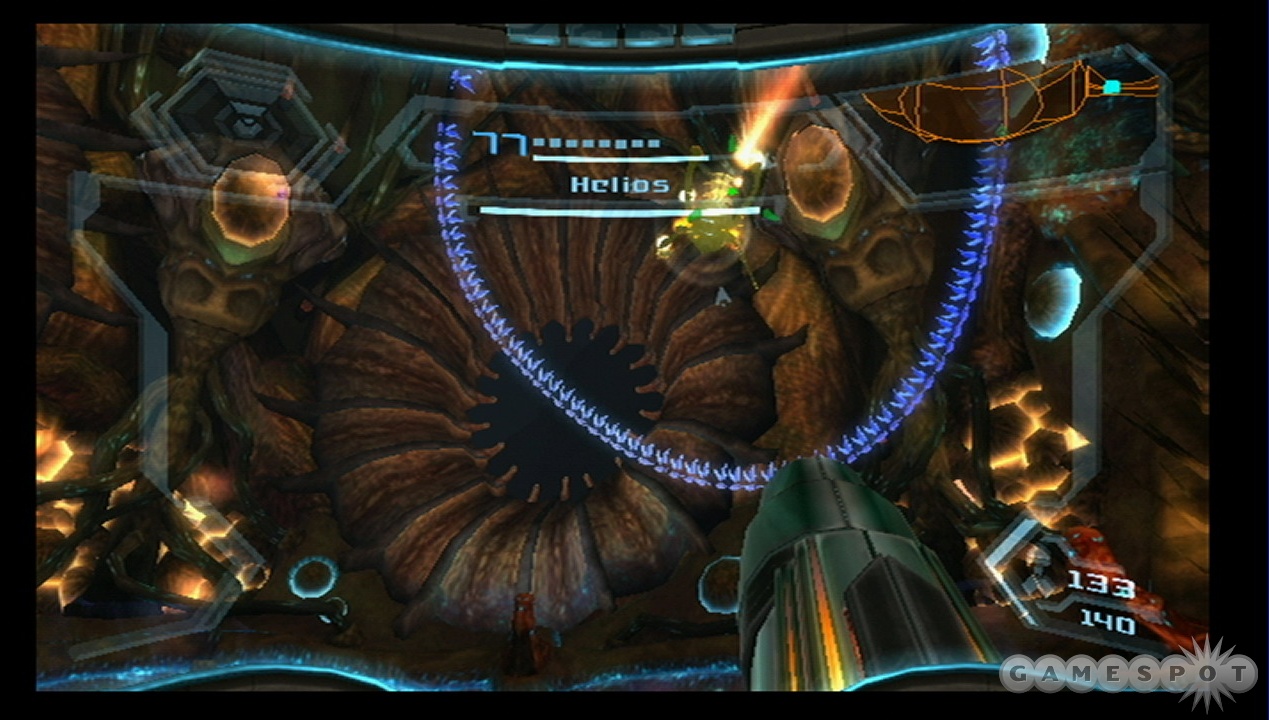
Boss Fight: Helios
Helios is a small robotic entity that's been corrupted by phazon and being used to guard the Leviathan seed. He uses swarmbots to protect himself, but with a little perserverance you can bust through his shield and take him out.
Helios has a lot of different phases that he'll use to bust you down. The only one in which you can really hurt him, however, is when he sheds all of his swarmbots and opens his chest and comes after you. Switch to Hypermode in this case and blast him; you'll need to do this at least three times to completely wipe him out.
(Note that thanks to the Wii's great three-slot save system, we accidentally saved after beating Helios but before recording a video of him. So no video! Sorry! Note also the phases listed below are in no particular order.)
Phase One: Swarmbot Ball
At the beginning of the fight, Helios will summon his swarmbots and make them into a protective sphere around him, then drop down to the ground and begin rolling around, attempting to smash you. Fire away at the shield here, aiming for Helios himself. If you hit the swarmbots, you'll periodically cause them to pop and drop some health, but your goal is to hit Helios and make him flash yellow. While it won't do any damage, you'll get him closer to the part of the fight where you really can hurt him.
Phase Two: Swarmbot Disc
This is a bit of a longer session. Helios will periodically move all of the swarmbots out to form a circle around him. If you give him time, he'll eventually turn into a sawblade of sorts, whizzing around the air and attempting to cut you with the swarmbots. Every so often he'll slow down and materialize five red engines in the air between him and the swarmbots; he'll charge them up and attempt to use them to fire on you. If you can, lock onto the engines with your swarm missiles and hit all of them at once (they'll periodically phase out of existance and be immune to missile fire, so you'll have to get lucky on the timing). If you manage to do so, the circle will bend out of shape and you'll be able to fire on Helios directly again.
Phase Three: Swarmbot Lasers
The swarmbots will detach from Helios and form small pods, like they do when you encounter them in the wild. They'll charge up slowly and will eventually begin firing on you. It's easiest to just avoid damage here by shifting to Hypermode and firing on the pods as they begin to turn white; that'll disperse them and prevent them from hitting you.
Phase Four: Tornado
Helios drops to the ground and sends the swarmbots above him to create gusts of air. Roll up into your ball form and use bombs on him when he pauses to cause damage and disrupt this form.
Phase Five: Robot
The swarmbots support Helios by forming two legs and arms for him. He'll periodically attack you by summoning huge balls of energy onto his "hands" and throwing them at you. You need to shoot the arm joints out here first; they're easiest to hit just before the balls are launched at you. After the arms are shot off, you can try to take off one of the legs by shooting through the swarmbots at the leg joints. If you can get one of the leg joints to fall off, then the form will dissipate, letting you shoot Helios himself for a few moments.
Finish The Fight
Helios' individual forms aren't too bad; just try to continue to hit him in the body with your normal shots. If he's flashing yellow, then you're making progress towards the point of the fight where his body breaks open and he's vulnerable; at those points, shift to Hypermode and unload on him. A few rounds of that and he'll perish, netting you the Hyper Missiles.
Pirate Homeworld
When you're ready, return to your ship and head to the Pirate Planet. Samus will stealthily land on an abandoned docking platform. Time to explore a bit.
Head out from your ship and down the hallway in front of you. Note that most of the enemies that you face will be Phazon-enhanced; time for some tough fights to come! Anyway, head into the Lift Hub and activate the lift by pressing the buttons on the panel within. You're on the bottom floor now, and the second floor won't be accessible for the moment, so head all the way up to the third floor. Find the fire-locked door and head through it.
Pre-Pirate Planet Plundering
Now that you've taken out the two Leviathan Seeds, the Federation is ready to launch an all-out assault on the Pirate homeworld.
You probably have noticed plenty of areas back on the other planets where you might be able to use the seeker missiles or the ship grapple (or, rarely, the Hyper Missiles) to solve puzzles. Most of these locations are involved in the GFS Valhalla sidequest, which you don't have to pursue if you don't want to. (We'll cover it in a separate chapter.) For now, you may want to just head to the Pirate Planet and get some more items before making a full sweep for the energy cells that you're still missing. Feel free to explore all you like (the map data from the Chozo Observatory will make most of the missing items on Bryyo and Norion pretty easy to find, although some may still be inaccessible until you find the magnetic rail attachment and some other items.
Here's a quick list of the stuff that you can find on Norion and Bryyo at this point, if you're interested. You may see dots on your map that we don't cover here; in that case, we've probably already mentioned them at some point previously.
Norion
Missile Expansion: Land at Docking Bay Alpha and turn around behind your ship. There's a grapple point there; swing across to find the missiles.
Missile Expansion: Head up into the main Cargo Hub here; you'll see a frayed circuit board from the previous fighting. Repair it and head into Substation West, where you can find another set of missiles by rolling up into a ball and avoiding the plates as they pop out of the walls. (Note that you can proceed along this unexplored path to find a boss fight; we'll cover it in the GFS Valhalla section of the guide.)
Bryyo
Missile Expansion: Land at the Cliffside docking site and head through the Crash Site until you reach the Falls of Fire. Use the statue to get down, then use the wall panels to Screw Attack to the missiles.
Ship Missile Expansion: Proceed down from the Falls of Fire to the Fuel Gel Pool. (If you can't figure out how to get there, return to the section of the walkthrough where we listed all of the expansions that you could obtain just before you obtained the Screw Attack; the method you need to follow is listed there.) Attach the large statue head in the pool to your ship's grappling point. Head from there to the Colossus Vista, which is found on the other side of the Hall of the Golems. Drop the head of the statue onto the statue in the distance, and the Ship Missiles will become available.
Energy Tank: If you put the head of the statue onto the statue in the Colossus Vista, then a new door should've opened to the Machineworks Bridge, which will connect this section of the map with the Thorn Jungle and the North Jungle Court. Go into that area, use the spinner device on the floor, then run out onto the ledge and jump onto the wall panels when they're close enough to reach. That'll let you jump up to the energy tank.
Onto The Pirate Homeworld
Command Courtyard
The Courtyard here has a gate that blocks your access to the Seed. You'll need to find a way around it, but first, you need to find a way to not die from the massive amounts of acid rain that are going to be falling on your head. Move down the path directly in front of you to avoid the rain, and move off to the right. Jump up to the grab ledge to turn into a ball and start rolling.
Eventually your path will fork; head to the left to find a Missile Expansion, then return and go to the right to find Energy Cell 6. Pull it from the wall to power down the fans below, then drop through the rollerball hole to move on.
Flux Control
Start descending through Flux Control, blasting the enemies as they approach you. When you reach the bottom of the path, use your grapple to pull the cover off of the ball panel in front of you and move on to the Command Station, which has your first green door in it. From where you land, move to the right to find a Missile Expansion, then return and find another elevator station that'll take you to the Command Vault. It's here that you'll obtain the X-Ray Visor. Use it on the lock nearby to match the symbols that you can only see with x-ray vision, then blast the phazon containers that roll through your room when they're atop the hardened phazite hatch below.
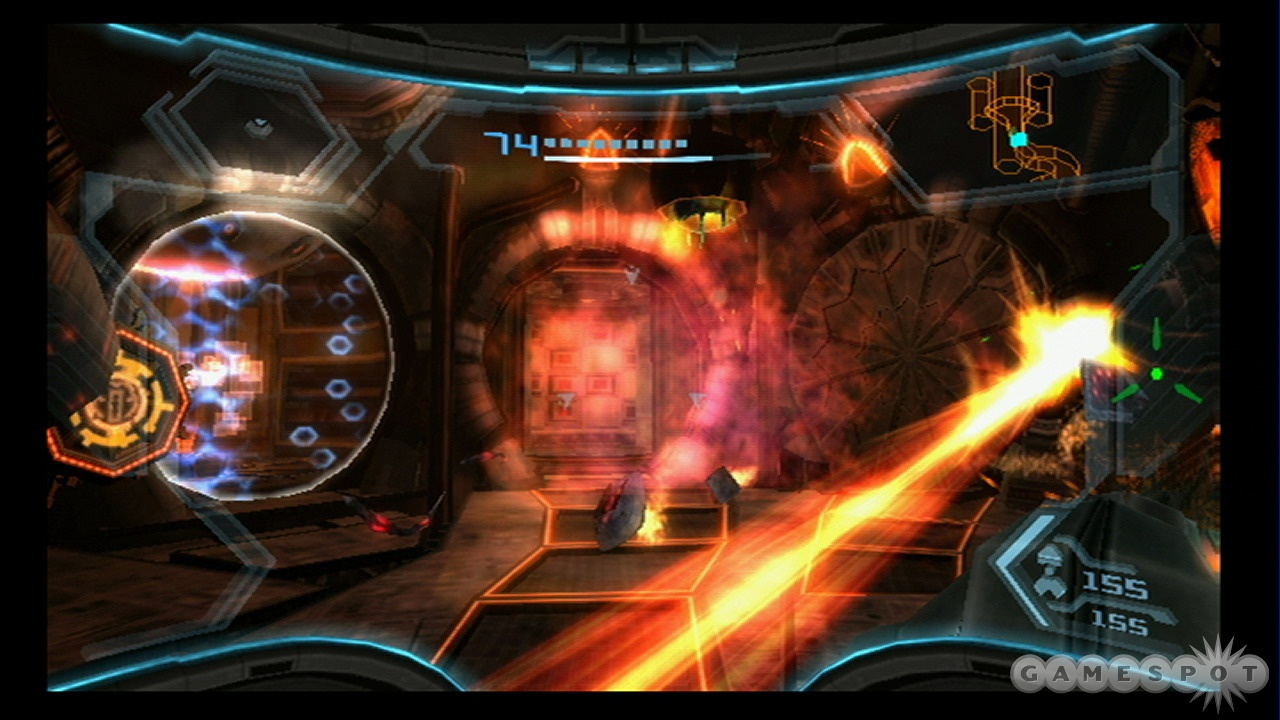
Roll through the hatch to reach Defense Access. You can open the door here with your x-ray visor to reach an upper viewport that oversees the planetary defense shield, but you won't be able to reach it yet. Instead, head back to the Security Airlock and grab the Missile Expansion there. In order to unlock the airlock, switch to the x-ray visor and hit the red dots as they appear on your hud, then roll up into a ball to return to the Lift Hub.
When you reach the Lift, return to the first floor and use the X-Ray visor to open up the Map Room there. Getting the Map will let you access the landing pad near the stranded GFS soldier who recently messaged you, so get back to your ship and fly that way.
Pirate Planet Research Facility
Head into the Scrapvault Lift nearby and start heading up. Blast the rollpipe hatch with a charged shot to unlock it, then roll through and shoot the target from the pillbox to unlock the door leading to the Scrapvault. Head through the lower level here, scanning as you go. Eventually you'll come to a series of platforms that will lead you to a rollpipe through which you can reach the Scrapworks. (You can screw attack your way from jump before the pipe to reach a platform that will let you reach a grab ledge that will lead to the Missile Expansion here.)
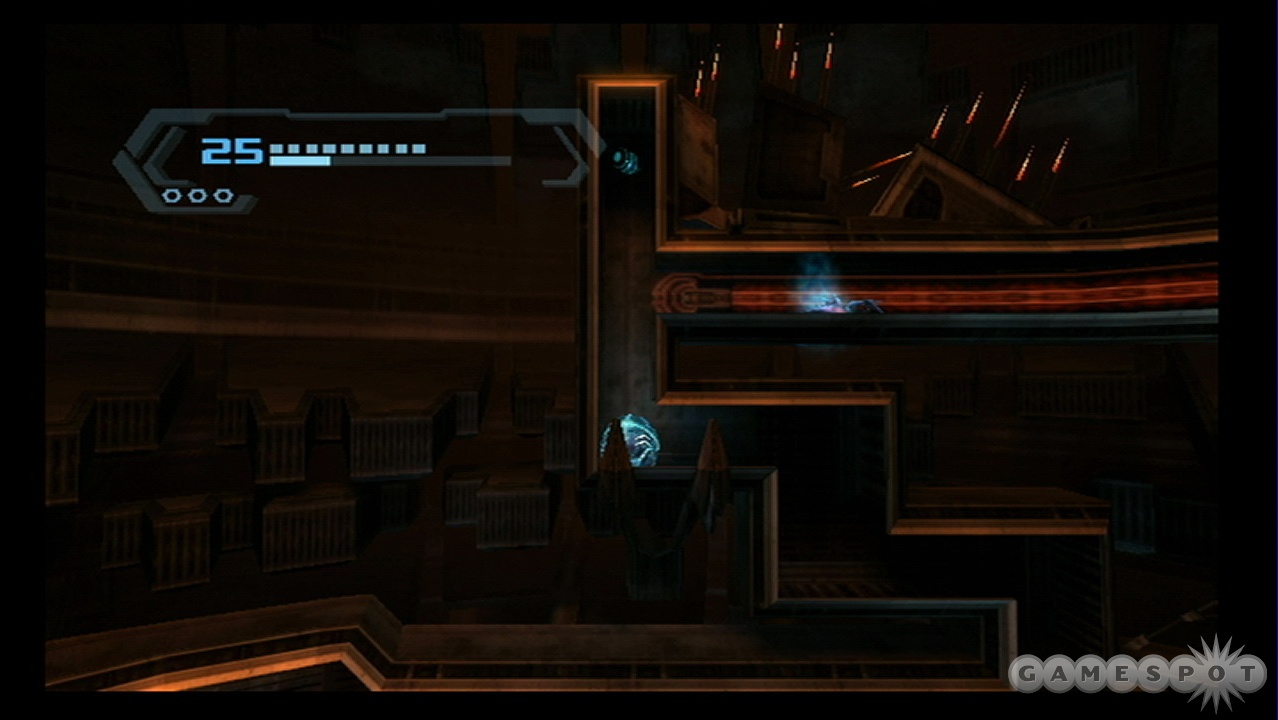
The Scrapworks is another all-rolling room, so drop down and begin heading to your left. You'll see a bomb slot near the beginning; activate it to open a hatch nearby. Then move off to the left and jump onto the elevators to move up to an upper section of the room. There's an Energy Tank up here that you can reach if you can double-jump a bit. Regardless, if you can move off to the right a bit, you'll come to another bomb slot. Activate it to open the path to the hatch you previously opened. That'll lead you back to the Scrapvault, where you can repair a circuitboard to open the doorway leading on. If you return to the Works, you can keep heading to the right to find another bombslot and hatch which will return you to the lower part of the Scrapvault. Use Hypermode to blast the pirates here and move on.
Processing Access
Use the x-ray visor to detect the security beams here and roll under them. You'll soon reach the Metroid Processing room. Again, Hypermode the pirates and start scanning around before unlocking the door with your x-ray visor to reach a lift leading to the basement of the room. Use the circuitboard to the right to reconnect power to the central lift here, allowing you to move on. If you're interested in exploring the Valhalla, or want another set of missiles, then nab Energy Cell 7 from the opposite wall. If you do, you can return to the upper level and kill the metroids to nab the Missile Expansion in one of the cells.
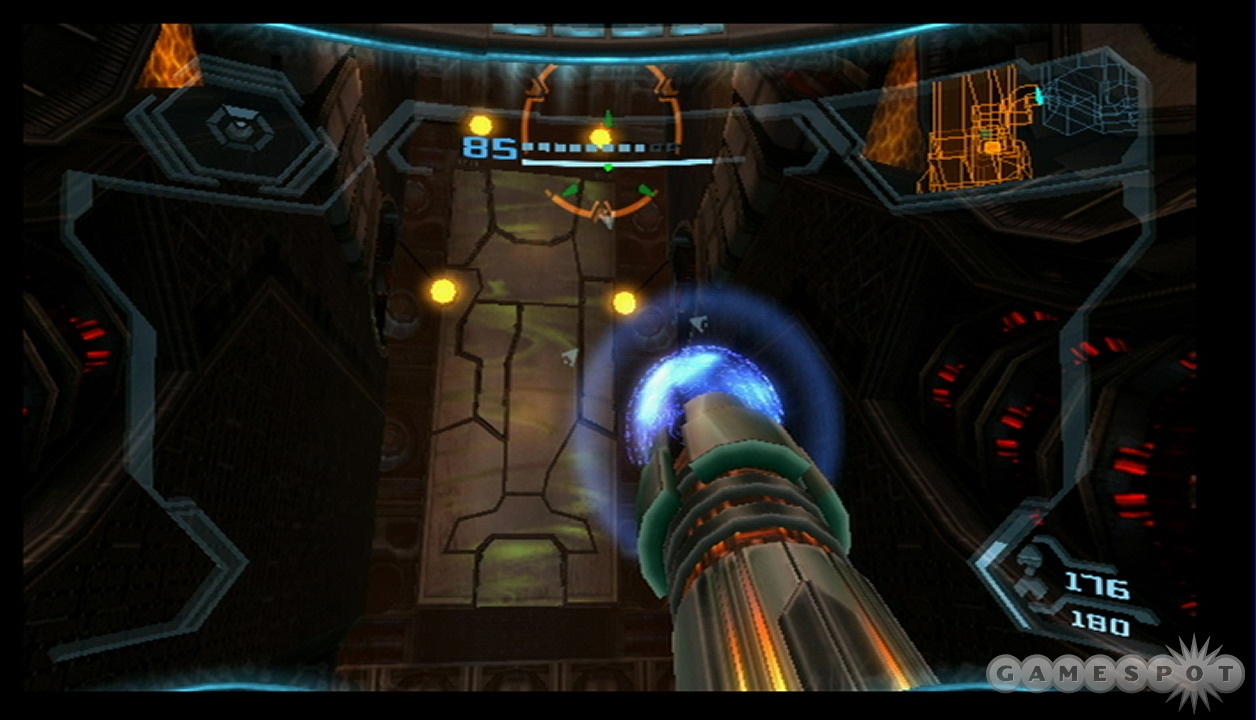
Lock yourself into the small hole that lifts up and down alongside the central core here; it'll act as an elevator bringing you up to the Airshaft. Hit the four targets here with the seeker missiles to unlock the second wall panel here, then jump up and above to the upper level of the room. (You can find a Missile Expansion by heading through the door with the icelock on it here.) That'll lead you to the Craneyard, which in turn will lead you to the room where the GFS Marine is holed up. Kill the Pirates here to talk to him, then move around and use the switch on the terminal in time with his instructions. That'll open up the passage to the Proving Grounds above you.
Boss Fight: Gandrayda
As you might have imagined, given the Proving Grounds' name and shape on your map, a boss fight will happen here. Gandrayda will reveal herself to have been thoroughly corrupted by the Phazon in her body, and will attack with all of her power.
Phase One
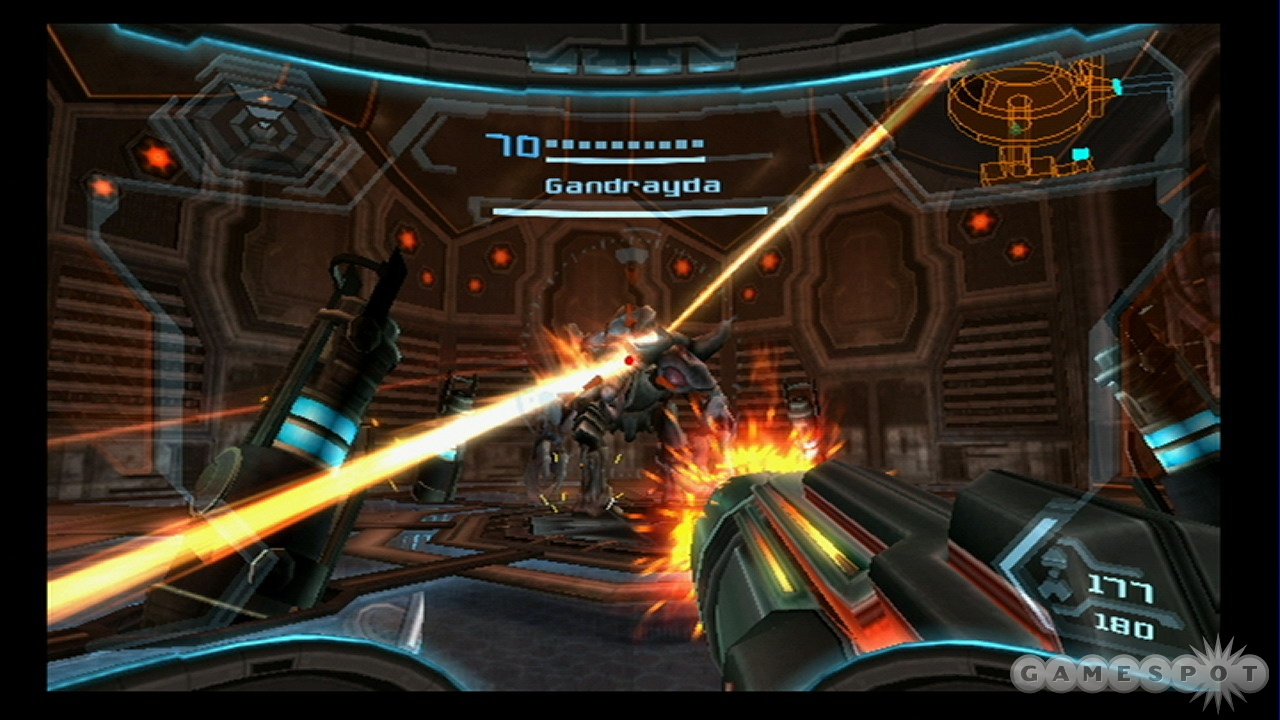
By default, in her own form, Gand isn't very powerful. She's agile, and will flip around a lot to prevent you from hitting her, but she doesn't have many attacks at first. Eventually she will begin to shoot purple discs that home in on you, but these do light damage and can be shot to reveal extra health. You can wear down Gand's health by firing on her while she flips, but she'll be difficult to hit unless you get up close. She can also jump onto you and drain you energy; shake your Wiimote and Nunchuk up and down to get her off of you.
Most of Gand's attacks will involve her taking the form of other, more powerful enemies. At first, it's the Berserker Lord, so stay away from her and shoot her phazon blasts back at her head, then finish it off when the carapace cracks. You'll also have to deal with an Aerotrooper in the first phase here, but that shouldn't be too problematic. Keep unloading on her and you'll move to phase two after a while.
Phase Two
Ghor and Rhundas return here. You should remember their patterns from when you first fought them, but if not…
Rhundas will fly around on his ice field and shoot projectiles at you. Shoot the projectiles for health and goodies, then wait until he hits the ground and pound him with shots and missiles. When he appears stunned, use your grappling hook to pull off his armor and repeat the process.
Ghor will mostly attempt to either fire missiles at you, which you can dodge, or fire some variation on his laser attack, or ram you. When the shimmering weak spot on his head is visible, hit that with beam shots; if he stands still with his lower-body weak spot available, roll into a ball and bomb it, then get out and fire at the weak spot on his head again.
Phase Three
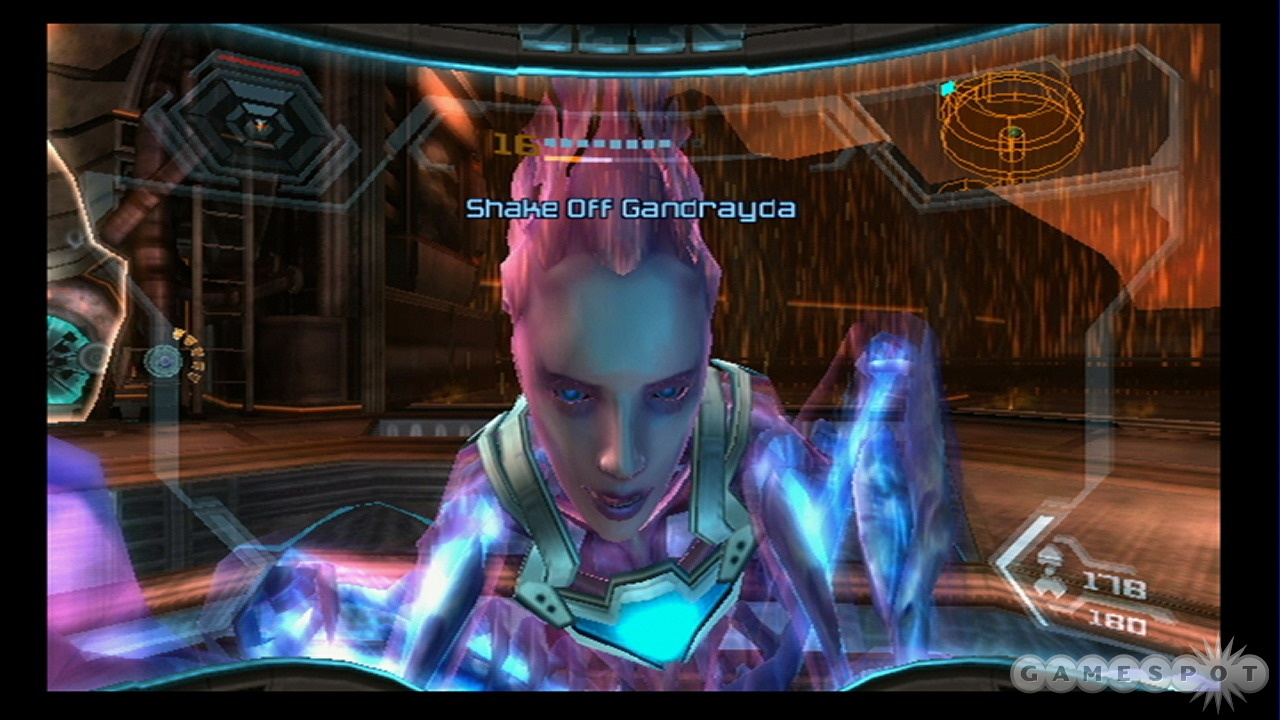
Gand begins to morph into you at this point. Gand/Samus can fire a powerful hyperbeam attack that sweeps across the arena. Beyond that, she'll roll into a ball and zip around in boost mode, attempting to hit you. Both of these attacks can be jumped over, but it'll be difficult to hit Gand/Samus with anything more than light beam shots here; she simply moves too quickly to really get a bead on. You can try to fire missiles at her as well, but you'll have to wear her down gradually to move on.
Phase Four
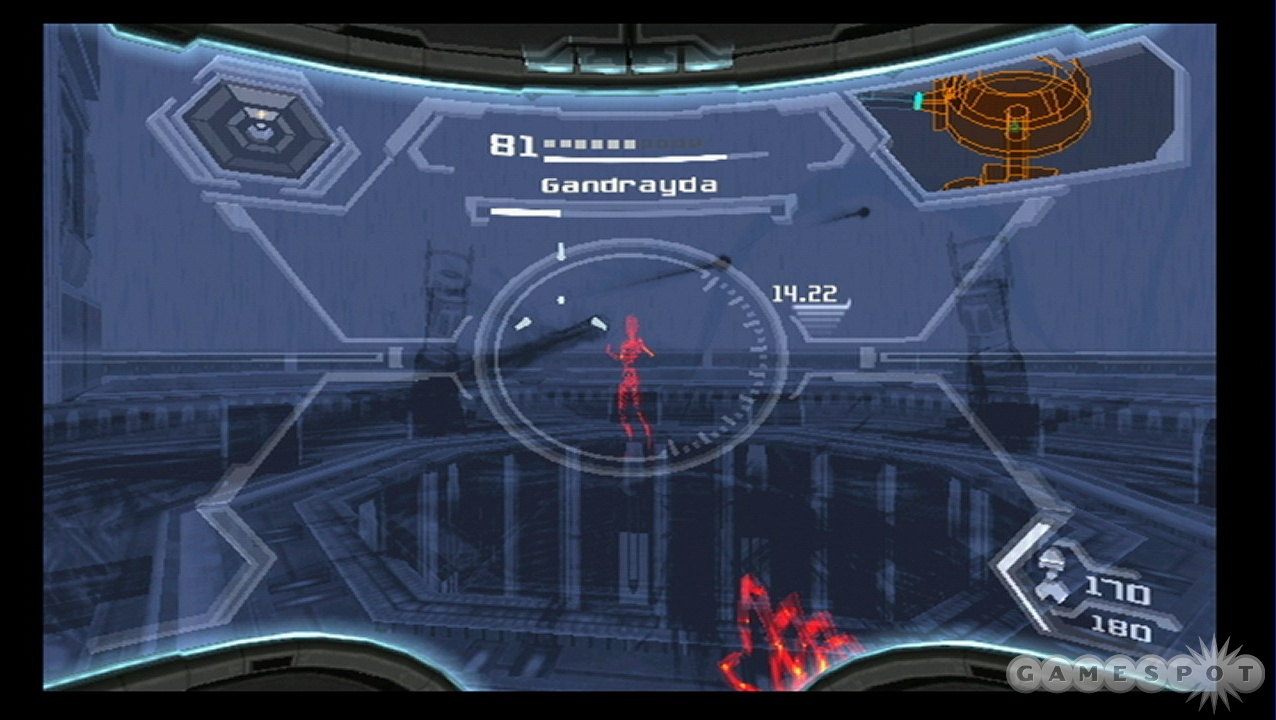
Lastly, Gand will shift between an invisible mode and a PED mode to take you out. The invisible mode is mostly the same as her normal mode, but you'll need to use the x-ray visor to see her and fire on her. The PED mode will obviously deal more damage to you, and has a couple of new attacks, such as a fist slam into the ground that causes energy to wend your way. If you can get a bead on her in her PED mode, you can enter Hypermode yourself and blast her to wear down a bunch of her energy, but you should only do this if you have a good health buffer, as she won't drop a lot of health during this final phase of the fight. At any rate, if you constantly wear her down with normal beam shots, you'll eventually finish her off.
Overall, Gandrayda is really annoying, and is definitely capable of taking you out if you don't play carefully, especially since she doesn't drop a huge amount of health at any point during the encounter. Do your best to keep your health up and choose your Hypermode uses carefully, though, and she'll eventually go down, leaving behind the Grapple Voltage device, which will let you charge up or uncharge special devices scattered around the world. Use it to access the transit station nearby, then scan the room and activate the hand scanner to ride the rails.
Return to Skytown
Well, go figure; Aurora 217 on Elysia has picked up signs of new Chozo technology. Will the madness ever end?
Head to Elysia and land at the Main Docking Bay, then make your way to Zipline Station Charlie, which was previously inaccessible to you thanks to the powered lock on it. Power it up (grapple it and hold up on your analog stick), then ride the zipline and screw attack your way to the far side.
When you reach the interior of the room here, use your seeker missiles to unlock the passage leading onward, then drop down to the room beyond. After scanning everything inside, jump up to the platform at the rear of the room and use your grapple on the fallen piece of machinery. This part's kind of tricky: you need to enter Hypermode, then grapple the cog up into the air, then hit it with a hypermissile while it's flipping through the air. Doing so will lodge it back onto the machine and let you access the Spider Ball.
The Spider Ball will let you cling to magnetic rails by holding the Z button while you're near one. You can propel yourself to lower and higher rails by using bombs or simply letting go of the button. (If you're trying to get yourself up to a higher rail, be sure to lay your bomb and then hold up on the analog stick to influence your movement.) You can also jump from one side of a chasm to another with the boost ball maneuver by holding down B and letting it go.
Returning Topside
After you get the powerup, there'll be a hole in the ground. Drop through it and start spiderballing your way around. You'll need to drop in a few spots to move on, but there's only one real way to go, so follow the path. Eventually you'll reach a platform you can stand on. There's another track leading up, but if you poke around, you'll find another, harder to see path near the edge of the platform. You can follow that one to reach a Missile Expansion.
Return to Zipline Charlie here. You can't use the zipline to get back across the chasm, but you can screw attack your way to a spiderball track, so do so. Start scaling the spiderball track until you reach the electrical generators that hover above the area. You need to boost yourself across the gaps that they create, being careful to avoid their electrical charges; if you get zapped, you won't be able to use your spiderball and you'll fall to the ground. There's an Energy Tank in between the first and second generators, but you'll need to doublejump your way up to it.
Make your way back to your ship. You can pick up Energy Cell 8 in the Ballista Storage room (where you originally got the boost ball), and you can also nab a Ship Missile Expansion in the Hoverplat Docking Site if you see the spiderball tracks as you screw attack your way around. There's also a Missile Expansion in the Steambot Barracks area. Use the halfpipe to get up to the upper level, then walk around the elevator and roll into the pipe there. Navigate through the tubes until you reach a spiderball track and head up.
Collections
Now would be a good time to travel between the worlds and collect any remaining items that you want to pick up. First off, you'll probably want to head back to the Chozo Observatory, where you can launch a satellite showing you all the item pickup locations on Elysia, in addition to the pickups you've unlocked on the other planets. Some of them will still require the final suit and beam weapon upgrades, so if you want to wait until you have those items before making a sweep, feel free to do so. Otherwise…
Elysia
Missile Expansion: Head to Concourse Ventilation, where some large wall panels are located, and head to the bottom of the room and find the magnetic rail track. Ride up there to reach the Missile Expansions.
Bryyo
Missile Expansion: Land at the Federation Hangar Bay and head towards the Hall of Golems. You probably have already activated two of the golems here in previous visits; if not, you can activate all of them now. Regardless, activate the grapple voltage on the golem to power up the spiderball track and follow it to the missiles. You'll have to doublejump from one track to a higher one at one point here; just keep your finger jammed on the Z button and you should do fine.
Energy Tank: Head to Bryyo Fire and proceed from there back to Bryyo Ice. Behind the Hall of Remembrance there's a room called Tower. At the bottom, you'll find a spiderball track. It can be a tricky track, but if you get to the end you'll find your tank.
Norion
Missile Expansion: Land your ship at Cargo Dock A. There's a spiderball track that almost reaches the ground near one of the doors here; find it and ride it up to the missiles.
Pirate Homeworld
Missile Expansion: Head to the Command Center landing pad and make your way through the Command Courtyard to reach Flux Control. Head all the way to the bottom of the path here and flip the grapple points over the ball paths until you reach the one that ends in a spiderball path. Follow it up a bit and you'll find the missiles.
Pirate Homeworld Redux
Land at the Research Facility here and start making your way towards the marker on your map. As you proceed, Admiral Dane will give you a new command: disable the planetary defense system so that the armada can launch its assault.
Anyway, your first goal is to find something to protect yourself from the acid rain. There are some goodies on the way, though. Head up into the Scrapvault here and climb up to reach the grab ledge that lets you roll into the Scrapworks. There's a Ship Missile Expansion floating in one section of this area, so use your spiderball to get under it, then bomb yourself up to it. It's a tricky bombing situation where you need to make a precision jump to a narrow ledge, then a doublejump up to the item, so it's not easy.
Eventually you'll reach the room that's marked on your map as being the location of the Hazard Shield. From the observation room, roll up into a ball and use the spidertrack to get up and into the acid-filled room itself; you'll be protected by the tubes.
Nabbing The Suit
You'll come to a small puzzle here involving two spinner devices and a ball rail. To begin with, enter the rightmost spinner and spin it around until you have a complete track of steamjets leading up to the right balltrack at the top of the central cylinder; that'll lead you to a Missile Expansion. Then return to the spinners and use the right one again until the topmost of the two rotating parts shows a spiderball track that lines up with the exit at the top of the screen. With that done, rotate the other spinner until the entire track lines up and go to the control room. Use the panel there to put on the Hazard Suit, which will protect you from lava and acid rain hazards.
After the aerotroopers bust through the windows, kill them, then drop down and flip the switch below you. That'll let you jump up to the platform you recently left. From there, return back to the Metroid Processing room. If you now head into the Creche Transit room, you can jump out into the acid rain and grab the grab ledge to boost yourself up. Smash the phazon plant with a hyper missile to move on.
Metroid Creche
In the Metroid Creche, enter the spinner on the floor and pop yourself up to the ceiling. Bomb the bombslot there to open another spinner. Repeat the process here to unlock…a boss fight?
Boss Fight: Metroid Hatcher
We're giving this one an extra-small header since it's arguably the easiest boss in the game. The Metroid Hatcher only has two phases and only one semi-harmful attack, although if you're not careful it will launch metroids at you. With care, though, that's easily avoidable.
Begin by shooting away at the four tentacles that dangle beneath the hatcher. They move around a lot and are difficult to hit, but spamming your shots will hit some of them eventually. During this phase of the fight, the Hatcher will continually attempt to spin around and ram you. It hurts, but not much, although it's somewhat difficult to dodge. (You might want to try rolling into morph ball form.)
When all of the tentacles are retracted, the Hatcher will float off and begin dispensing metroids. Just follow him to where he goes and shoot him in his big purple mouth. That'll cause him to be stunned, allowing you to grab onto his tentacles and pull them with your grapple beam. Repeat the process four times, and he'll die off.
Moving On Up
Return to the spinner here and use it to activate the wall panels that'll let you move on. There's also an Energy Tank here. To find it, use the last spinner again and find the hole in the last little bit of metal piping that leads to a spiderball track above you. Follow the trail to the tank, and move on to the save point. When you've saved, move into the transit station and take the train.
You'll come back to the original lift area that you were at when you first entered the Pirate Homeworld. Head all the way to the bottom floor and generate up the lock on the door here with your grapple energy. That'll lead you to another elevator shaft, but this one's busted. Fire a missile at the tether atop the elevator, then jump across for a Missile Expansion.
Who'll Stop The Rain?
Now, you have two objectives: getting past the rain on the third floor here, and also shutting down the defense network. We'll start with the former. Head back to the elevator and ride it up to the top, then take a left and head back out into the exposed area where acid rain is pouring down. Kill the Pirates, then de-power the terminal to shut down the shield generator.
Head on through to reach the Skyway Access room. Kill all of the enemies here, then roll up into a ball and enter the rolltube that opened on the right side of the room. That'll deposit you back into Defense Access, where you were previously. Power down the shield here, but instead of moving into the hallway, head up the spiderball trail to reach the transit station that'll lead you to the Mining Facility.
Pirate Mines
There's a save point directly across from the exit from the tram, so go ahead and save, then move around to the mining facility. After killing the pirates, use the terminal behind the shielding to call for a huge drillbit to come into the area. If you click on the two green spots on the terminal after it arrives, you can reveal a Missile Expansion in addition to a halfpipe.
Ride the halfpipe up to another door, then grapple the cover off of the lift. Head out and use the spiderball track to reach the two spinners here; spinning them both will drop the lift down and let you move on.
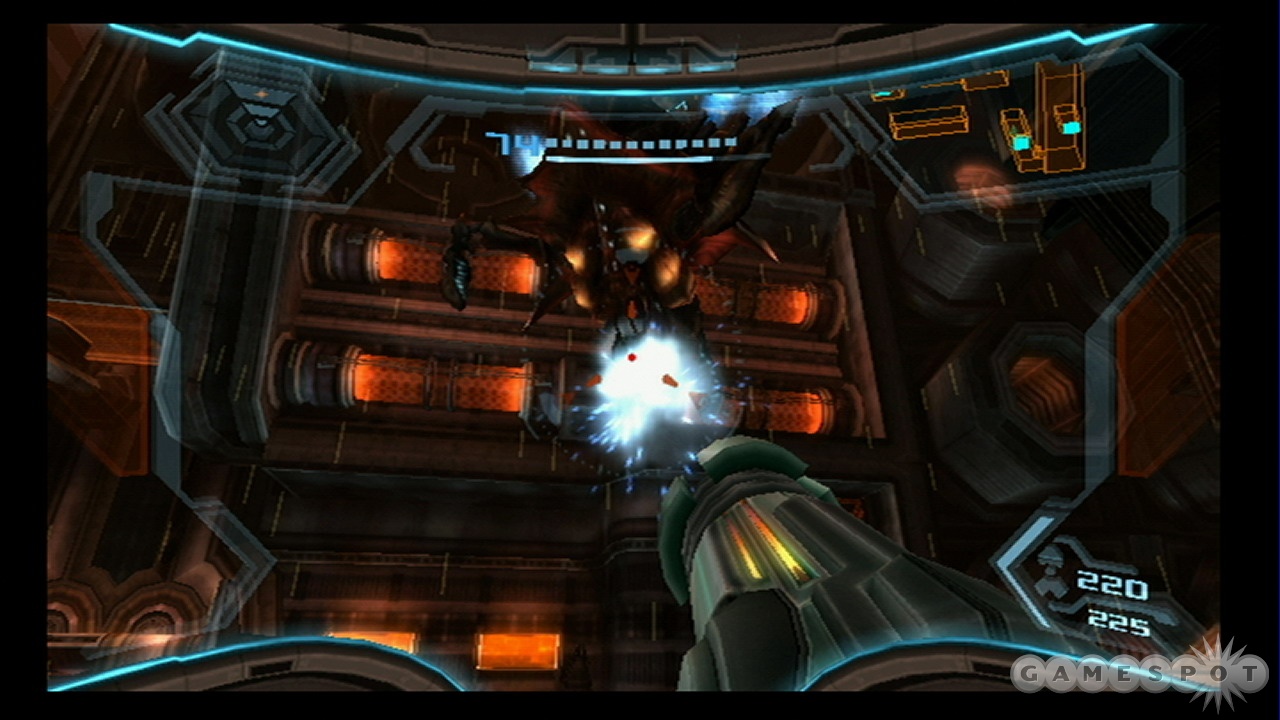
In the Phazon Harvesting section, lock onto the bottom of the anti-air unit and fire missiles at it to stun it. You can't kill it, but if you keep it stunned it won't be able to fire on you. Jump up and through this area to reach Drill Shaft 1. Time your jumps here to avoid the green jets of flame.
The Ultimate Weapon
In the Main Cavern, you'll spot the Nova Beam for the first time. You'll obviously need to jump through some hoops in order to reach it. Activate and head down on the elevator here to reach the underside of the laser here; it alternates between firing into the Phazon and sucking up what it loosens.
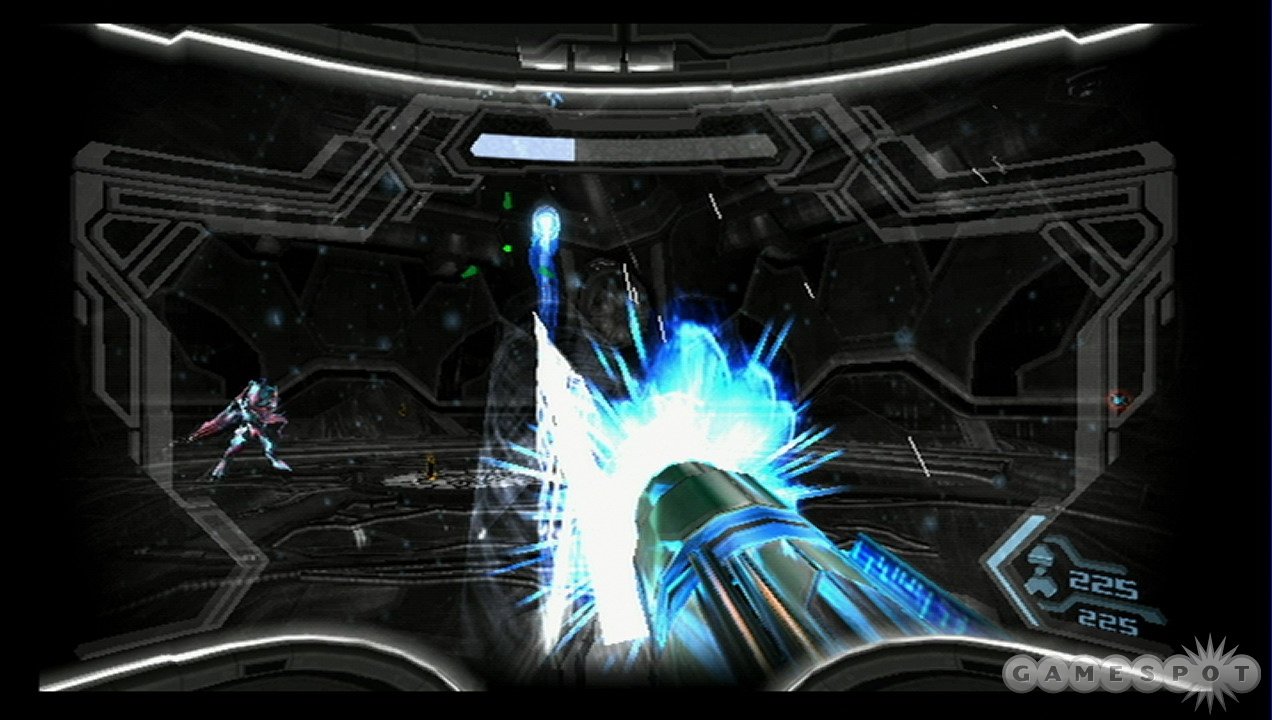
In order to obtain the Nova Beam here, you'll have to wait out the laser beam firing. It'll default to its firing mode, where four large pillars will extend up out of the ground and you'll take a lot of damage if you wander into the laser; three pirates will appear each time this occurs. What you have to do here is take out two of the pirates and leave one standing. Eventually, the pillars will retract, causing the beam to become a suction device. At this point, shoot the remaining enemy, who should fly up into the beam and short it out. Four large horn-like devices will appear on the bottom side of the drill; shoot one of them to destroy it. Repeat the process four times to obtain the Nova Beam. (Note that if you're having problems here, you may have to keep alive the pirates that are in hypermode instead of the normal pirates.)
Traveling Man
The nova beam will let you blast through green doors; phazon-covered windows can also be bypassed by using your x-ray visor to see the door switches. For instance, the door that you need to bypass to get up to the top of the area is locked on the inside. Use your x-ray visor to see the switches and shoot them with the nova beam, then use the door lock with the visor still on to unlock the elevator.
Head back upstairs and find the green door on your minimap, then head through. Unlock the phazite door in the next room, the Phazite Mine Entry, to find a Missile Expansion. Then head through to Landing Site Charlie and clear the landing pad with your laser to call down your ship and save. Before taking off, though, head back to to the Main Cavern. There's another phazite door here that you can unlock by shooting through it. If you do, you'll be led to Drill Shaft 2. Switch your x-ray visor on and shoot the small red ball in the middle of the drill to unlock it, then hop down and return to the upper side of the Phazon Quarry to find Energy Cell 9.
Last Acquisitions
Now that you have the Nova Beam and the Hazard Suit, you can now track down the last remaining pickups on the main three planets of the game, should you wish to do so. Now might be a good time to do it; you can also investigate the GFS Valhalla in a more thorough manner than you probably could've previously, since you now also have access to the bulk of the energy cells in the game. We'll cover that section just after we shut down the pirate defense network.
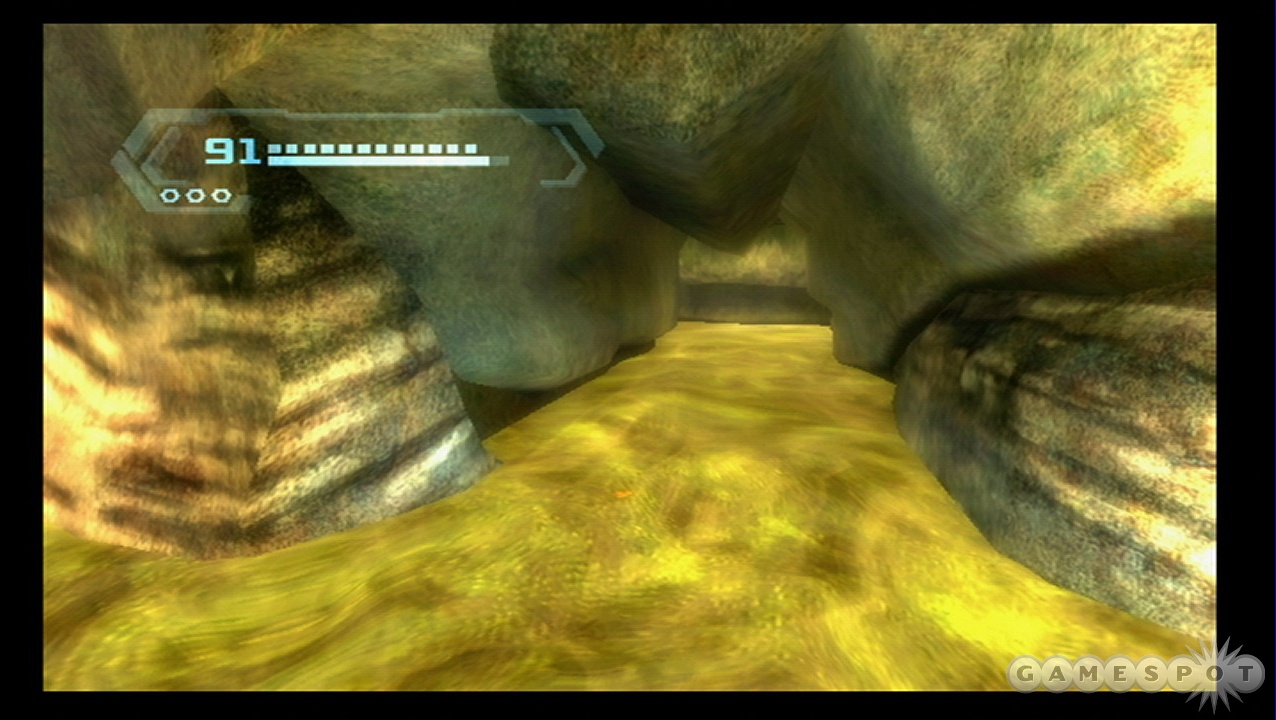
Bryyo
Missile Expansion: Head to the Fuel Gel Pool and roll up into a ball. With the hazard suit, you can roll through the fuel gel, so roll into the pipe here to find the missiles.
Missile Expansion: Return to the Temple of Bryyo in the Bryyo Fire area. Zap the targets behind the phazite window to open the hole in the ground, then drop down and roll about until you find the missiles.
Elysia
Pirate Homeworld Expansion Map: Head back to the Chozo Observatory and fire through the phazite window on the bottom floor. That'll open up a panel that will let you send one last satellite to scan the Pirate Homeworld and reveal the remaining suit goodies.
Pirate Homeworld
Ship Missile Expansion: Land at the Research Facility and head up through the Scrapvault into Processing Access. There are two Phazite panels on the walls here; shoot through them with your nova beam to unlock a wall panel above you. Jump up to the upper levels of the room and use missiles on the container to obtain the expansion.
To Shut Down A Defense Network
Land at the Pirate Homeworld's Command Center landing pad. Take the elevator up to the middle floor here; you should've disabled the lock here that'll let you move on. (If not you'll have to go through the Command Courtyard and Flux Control to get back here.)
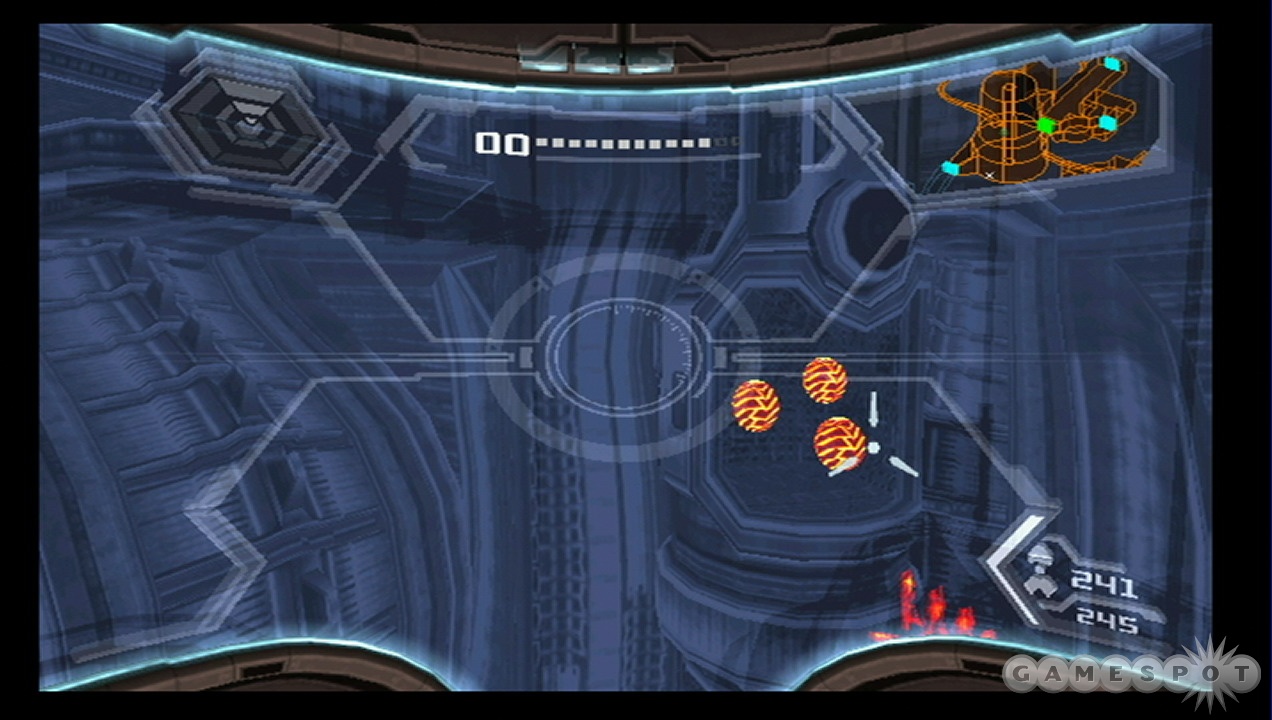
To shut down the defense system, climb all the way to the top of the room here and use the switch up there with your x-ray visor. That'll unlock three phazite panels on the system itself. Drop down to each one and look through it with the x-ray visor and blast the little balls there with your nova beam. After all of those balls are destroyed, return to the top of the room and activate the bombslot to let the Galactic Federation forces land.
Dane is going to show up now at a location on the planet. Before you meet up with him, though, this would be a good time to go and explore the GFS Valhalla. Completing the Valhalla isn't entirely needed to complete the game, but it may influence your final ending. You can also pick up some extra pickups on the Valhalla, so if you're looking for the 100% pickup ending, you'll definitely need to explore it thoroughly.
Meet With Dane
If you do want to go ahead and meet with Dane now, you can do so. He's in the Skyway Access point in the Command portion of the Pirate Homeworld. Speak to him, and he'll give you your task: reach the access node for the Leviathan Seed here on the Homeworld while escorting Demolition Troopers that will be needed to blast the final door away from its hinges.
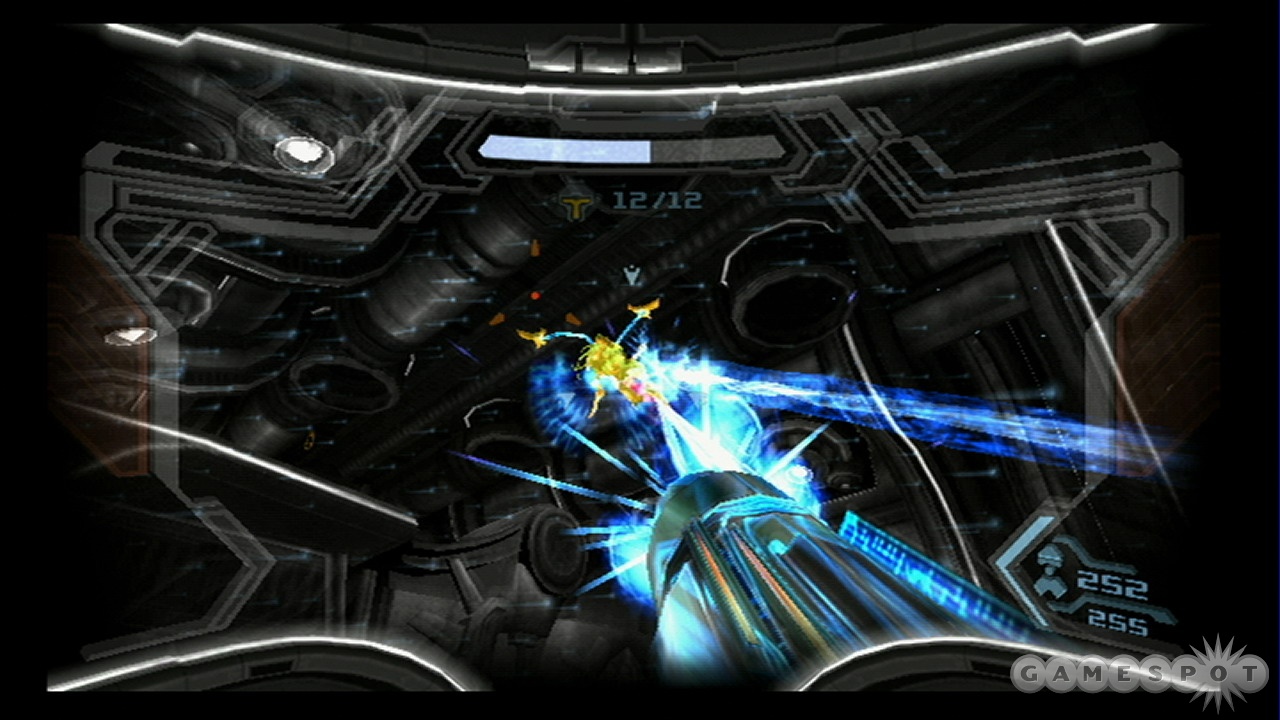
Wait until the first demo trooper opens the door to the Transit Station, then follow through and use the grapple energy to charge up the doorways leading on. Transit Station 0203 will be the first place you have to protect them in, as multiple pirates will appear and focus on firing on the troopers instead of you. It's relatively easy to protect them all if you use hypermode to quickly blast away at the pirates as they appear; there'll be a few containers where you can restore your health if need be.
You'll need to repeat this process in a couple more rooms before you reach the end. Again, just use hypermode to blast your foes and ensure the troopers survive. You don't need to keep them all alive; only four out of the twelve actually have to live. In the third room, you'll face off against a Berserker Knight. Kill the regular Pirates here first, as they'll be targeting your friends, then start reflecting the bomb shots back to the Knight's head and finish him off after it pops off.
Who's Running This Show?
When you get past the large door, you'll reach Transit Tunnel P70. Drop down into the phazon here and absorb it to rehealthify yourself; you'll want a full health bar before using the access terminal above the phazon that'll lead you into Transit Station Leviathan.
Why? Because, when you jump up to the upper level of the transit station and attempt to use the grab ledge, you'll be accosted by the Pirate Commander. This guy isn't anything severely threatening--he doesn't even get a boss fight life meter--but he can be quite an annoyance, thanks to the fact that he has several commandos accompanying him. The commandos will phase in and out of view and generally be a huge annoyance to you, but you will probably want to deal with the Commander first, since he'll often hit you with hypermode shots that will quickly drain your energy.
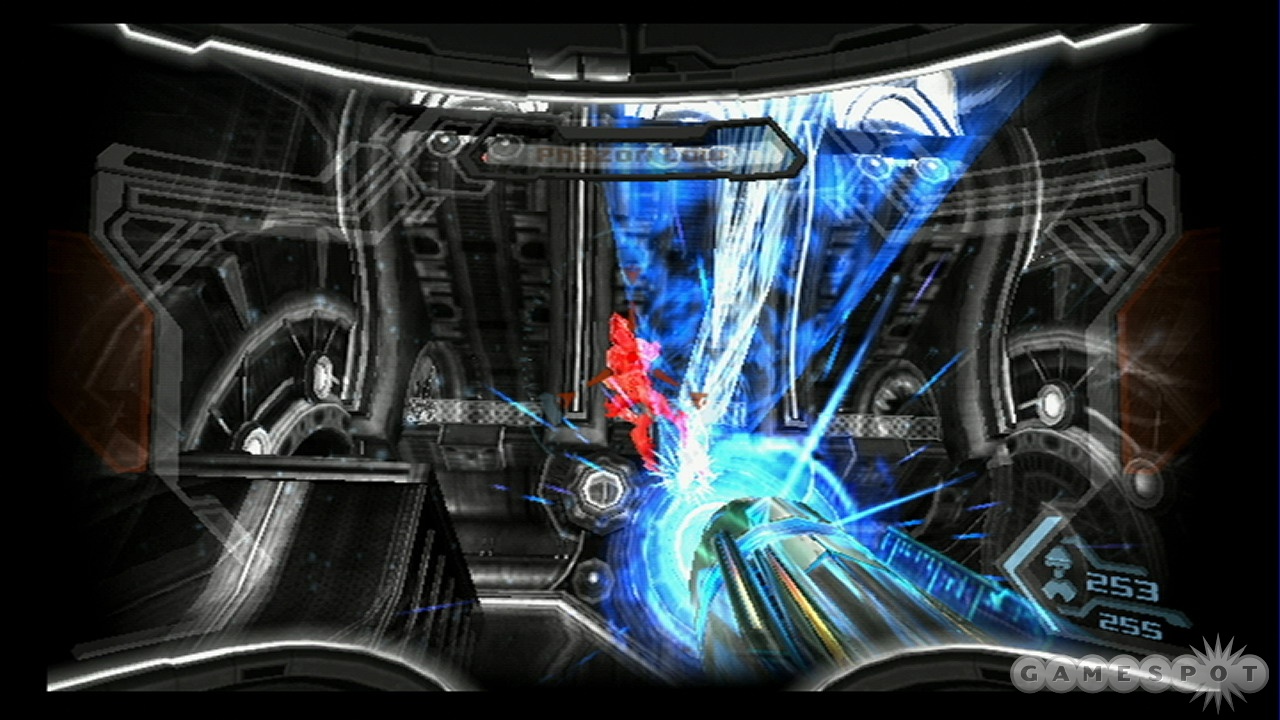
Counter this strategy by flipping into hypermode yourself. If you can get a bead on the guy, then hyper missiles or regular hypermode fire will eventually destroy his armor and let you finish him off. With that done, switch on your x-ray visor to follow the commandos as they shift around and repeat the process with your Nova Beam.
When the Commander has been decommissioned, flip back up to the grab ledge and use the machine there. That'll let you use the command visor to call down your ship and have it attack the barrier leading on. With that done, you can enter the ship and select the Seed as your next destination. But first, now would be an opportune time to explore and conquer the GFS Valhalla, assuming you've managed to find all of the energy cells.
GFS Valhalla
The GFS Valhalla will require a lot of running around before you can explore it fully. The sections of the ship that you can explore will feature unpowered generators which need to be powered before you can move on; you need to power them by finding Energy Cells that are scattered around the galaxy. Terminals here will give you very vague hints about the locations of the cells if you scan them. (You can find this information in your Inventory section if you press the 1 button.) You don't need all of the energy cells to fully explore the ship, but getting them all is the only way to access all of the pickups in the ship, which is the only way to get the 100% complete ending.
Energy Cell 1: Lying on the ground by the ship that's crashed on the Valhalla's docking bay. Just walk over it to pick it up.
Energy Cell 2: Obtained automatically when you first load up your ship with missiles on Bryyo. Apparently impossible not to obtain.
Energy Cell 3: Generator B, Norion. This one will require you to have progressed at least up to where you've obtained the Seeker Missiles. Use the plasma beam to fuse together the circuit board in the cargo hub, then head down to the Cargo Dock B. Destroy the Hopping Metroids there with cold missiles and your beam fire, then use seeker missiles on the door that's revealed. Head through to defeat the Metroid Hatcher, which you may have already seen on the Pirate Homeworld. If you haven't, then the process involves shooting the ends of the tentacles, then shooting the mouth before it can spit out metroids, then grappling the tentacles and pulling them away from the body. When the Hatcher is dead, roll through the ball tube to nab the energy cell.
Energy Cell 4: Hidden Court, Bryyo. In order to obtain this energy cell, you have to have extended the bridge in the Machineworks Bridge section of the area that connects the Thorn Jungle to the Federation Hangar Bay areas. To do so, first you need to use your Ship Grapple to grab the head of the statue in the Fuel Gel Pool and drop it on the statue in the Colossus Vista area. That'll open one side of the bridge area; use your boost ball in the spinner to extend that side of the bridge.
Next, land your ship at the Thorn Jungle landing side and head to the North Jungle Court, where you can use your Ship Grapple on a large structure in one of the alcoves. Do so, then follow the path that's revealed under it to reach the other side of the bridge. Extend it and walk back across. Head through the Hall of the Golems and get to the Hidden Court. Drop the battery onto the fuel gel pump here to extend the energy cell. Jump to the top of the room and use the halfpipe to access the energy cell.
Energy Cell 5: Connected to research station in Skytown Xenoresearch system. Required to get the Swarm Missiles.
Energy Cell 6: Command Courtyard, Pirate Command. Required to move on.
Energy Cell 7: Metroid Processing, Pirate Homeworld. Optional, but easy to spot under the floor when you charge up the core generator.
Energy Cell 8: Ballista Storage, Elysia. Where you originally found the boost ball. Drop down, defeat the Steamlord, charge the turbines, and remove the Energy Cell. Requires Energy Grapple.
Energy Cell 9: Phazon Quarry, Pirate Homeworld. After obtaining the Nova Beam, unlock the phazite door in the Main Cavern and follow it through to Drill Site 2. Use x-ray vision and blast the drill's interior red ball, then head back to the quarry and find the energy cell.
First Trip
If you want to explore the Valhalla early in the game, we'll tell you roughly what to expect. (You can skip it now and simply come back when you have all of the energy cells that you need.) The door in front of you is out of power. Luckily for you, you should still have an energy cell from when you loaded your ship up with missiles in the docking bay on Bryyo way back when. Insert it into the receptacle and power up the door, then open it and move on. You can also pick up Energy Cell 1 from the ground by the ship that's crashed on the floor of the docking bay.

In the Hangar A Access corridor, scan the terminal on your right to gain access about an energy cell, then swing across the gap to reach the next door. (You'll want to scan any of these terminals that you see, as finding all of the energy cells will be the only way to fully explore the Valhalla.) You'll have to melt the bodies of the troopers here to open it. You'll enter the Repair Bay. There's a door hidden behind a crate here; feel free to head through to the Stairwell, but you won't be able to get far. Instead, jump up atop the crashed vehicle here and avoid the electrical arcs as you jump.
Head through the security station, using charged blasts to fracture the shattered glass. When you reach the far hallway, take a right and enter MedLab Alpha. Missile away the detritus here, destroy the phazon hoppers, then grapple the covering on the ball tube and head in. You'll pick up a Missile Expansion.
You can move a bit further in by using Energy Cell 1, but it's not really necessary to do so now. We'll come back later when we have more tools to use and all the energy cells needed to explore the ship.
Second Trip
To thoroughly explore the Valhalla, you'll need energy cells two through nine; the first cell is on the Valhalla itself, as well as the nova beam weapon. We'll write this walkthrough based on the assumption that you've found all of the cells and don't need to leave the Valhalla after entering. (Check the beginning of this chapter for a list of energy cell locations.)
Head into the Valhalla and proceed to the Repair Bay, which should be swarming with metroids. Find the door behind the large crate at the northwestern corner of the room. That'll lead you to the Stairwell. Power up the two energy cell locations here to move on up to the Weapons Cache, where you can find a Missile Expansion. You can also scan for the location of the first energy cell here; it's apparently near a docking bay somewhere. Hmm…
Go back to the Repair Bay and jump up to the top to move on. Find the Auxiliary Lift to the left in the next hallway and power it up. There's another Missile Expansion here. Ride the lift to the top and find the balltrack between the cracks of the lift's wall. If you ride one of the ball lifts downwards, it'll come to the missiles.
The Upper Level
Head out of the lift and use your ball form to reach the Port Observation Deck. Power up the door here directly to your right as you enter. That'll lead to Junction A. The blue door here will lead to the Munitions Locker, where you can find an Energy Tank. Ignore the green door here for now.
Return to the Observation Deck and unlock the door here with seeker missiles. That'll lead you to the Xenoresearch Lab, where there's scanning a-plenty to be done. Blast through the research shutter with a missile, then drop down to the floor and rip the two coverings off the lower energy generator with your grapple. Power both of them up to recharge the generator, which will pop out of the ground and reveal a Ship Missile Expansion. Drop into the hole behind it and follow it directly through until you grab the ship missiles.
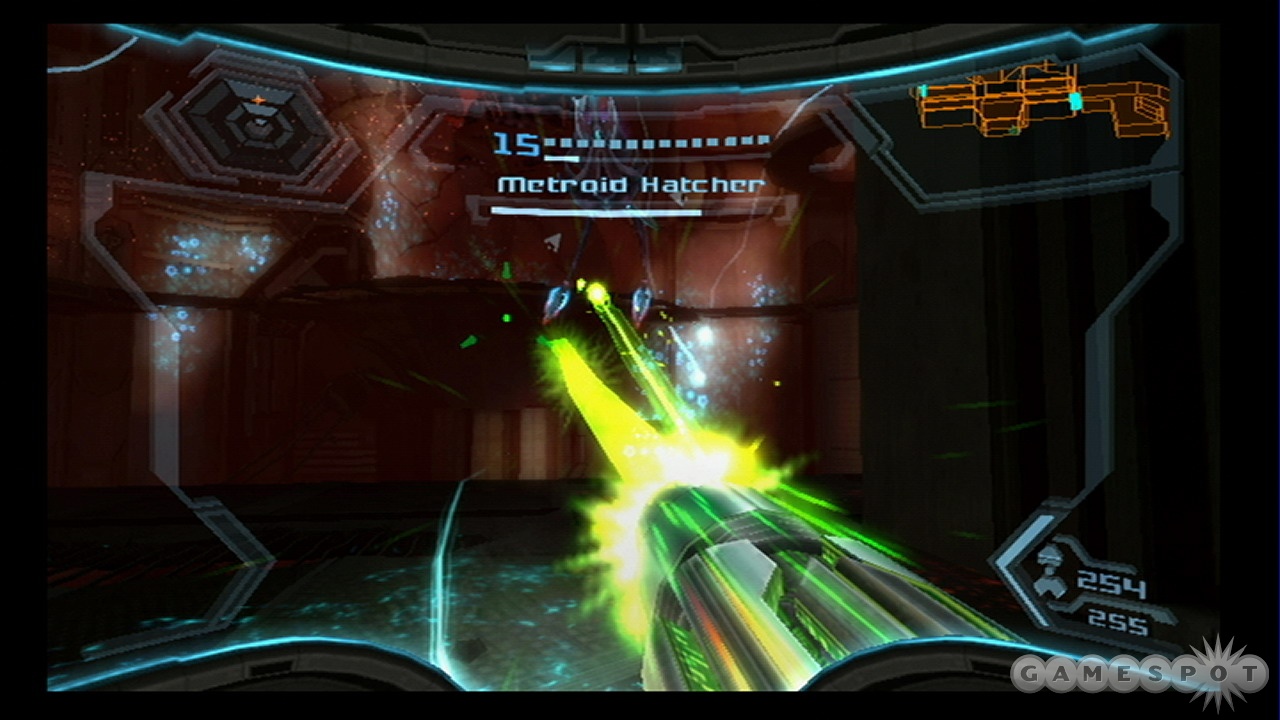
Now, return to the green door near the energy tank and head through. You'll eventually come to the Aurora Chamber. If you've collected all the energy tanks, then you should have at least two available to you. You'll need to climb the first ramp here, turn around, and fire a missile into the wall where the clamp is. That'll free up the last two energy cell receptacles. Insert the cells, fight the Metroid Hatcher (if you want to; you can apparently just move up and leave the room if you want), and move on.
Control Room
When you reach the control room, scan around until you find a soldier's PDA with a code on it: 78356. That'll be what you need to enter into the security terminal here. That'll net you the AU unit's last transmission. You can then power up the grapple point across the room to obtain the Pirate Code. It'll come in handy pretty soon.
Pirate Homeworld Seed
When you land, save your game and hop across to the seed entrance. Use the x-ray visor on the roots in front of you to unblock your access.
Boss Fight: Ultra Ridley
Ridley's back for more! His weak spot is on his chest, but in order to hit it, you'll have to ensure that no armor blocks it. He has three basic phases here.
Phase One

In the first phase, Ridley will mostly deal with fire attacks at you. He has the by-now-commonplace jump and slam attack to cause a circle of energy to shoot out, but he'll also use a few plasma attacks from his mouth. One of them involves a solid wall of flame that'll sweep across the area, which can be jumped over. Another one will see him flare his eyes for a second, then shoot a quick ball of plasma at you, which can be dodged. The last involves him shooting numerous smaller, slower balls of plasma into the air which home in on you. Shoot these down for health and powerups.
Anyway, your first target here will be Ridley's mouth. You won't always be able to hit it, but when he roars or starts powering up an attack, it'll glow a bit, allowing you to fire on it, forcing him to flash yellow. If you can dodge his attacks (which don't deal very much damage) and fire on his mouth, eventually he'll rear back on his hind legs. At that point, use your grapple to expose his beating heart, and fire on it with hypermode blasts and hyper missiles. It may take you a couple rounds of this, but eventually you'll move on to phase two.
Phase Two
Ridley grows a hardened phazite armor piece to protect his weak spot here. You'll have to blast this one off of his body.
A few new attacks here. First off, he'll absorb energy into two large balls on his hands and slam them into the ground, which causes pillars to move around the arena which are semi-difficult to dodge. If you can shoot both of the balls of energy and detonate them, though, you'll automatically stagger Ridley. In addition, he will sometimes flare his wings and charge forward, but this is easily dodgeable if you keep rotating around him. Lastly, he'll periodically shoot the wall of flame around himself, along with extending his tail. Doublejump over both of these attacks.
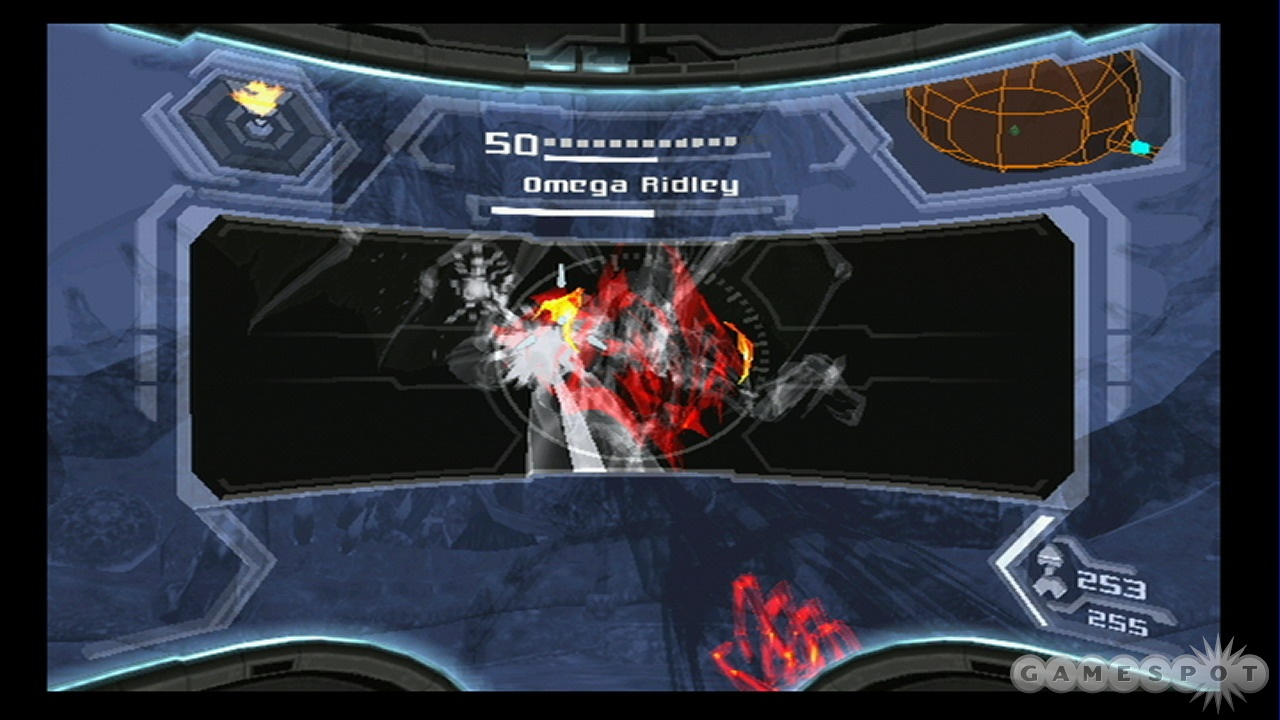
At any rate, you again have to aim for Ridley's mouth here, except when he's summoning the blue balls of energy; you can shoot those to have him rear back on his legs. When he does expose his weak spot, flip over to your x-ray visor and shoot at the shoulder-looking things inside of his body. If you pound him enough during one of these staggers, you should blow off one side of the armor. Repeat the process of shooting his mouth, then go for the other side.
Phase Three
When you blow off the hardened phazite armor, Ridley's heart will be exposed to firing, but before you can finish him off, he'll take to the air and attempt to bomb you. These bombs can be difficult to avoid, but you can track Ridley's movements on your radar. If you know the exit that he'll be approaching from, you can try to dodge or jump out of the way laterally, or just boost ball yourself around the arena too quickly for him to adjust to.
Wait for these bombing runs to end. Ridley will come down to the ground eventually. His weak spot is permanently exposed here, so shift over to hypermode, wait for him to stand up, and blast his heart with hyper missiles and phazon until the dude dies.
Finish Him!
Ridley will drop the Hyper Grapple for you. This basically lets you use the energy grapple functionality while in your hypersuit mode to overload objects that are weak to phazon. Such as the two dangling tentacles that will appear in front of you. You'll already be in hypermode, so use your grapple and press up on your analog stick to overload the tentacles. That'll let you overload the seed and destroy it.
Creating The Wormhole
In order to complete your mission (or the game, at least), you now have to open a wormhole to Phaaze, the planet made of pure phazon that Dark Samus has established her dominion over. To do so, you'll need to return to the Pirate Homeworld and force one of the ships in orbit to open the hole in space. Sounds like fun.
Land on the Command Center's Landing Site Bravo and return to the Command Station room. There's an overgrowth of phazon plant here. Enter hypermode and grapple it, then overload it with energy to destroy it. That'll lead to a transit station.
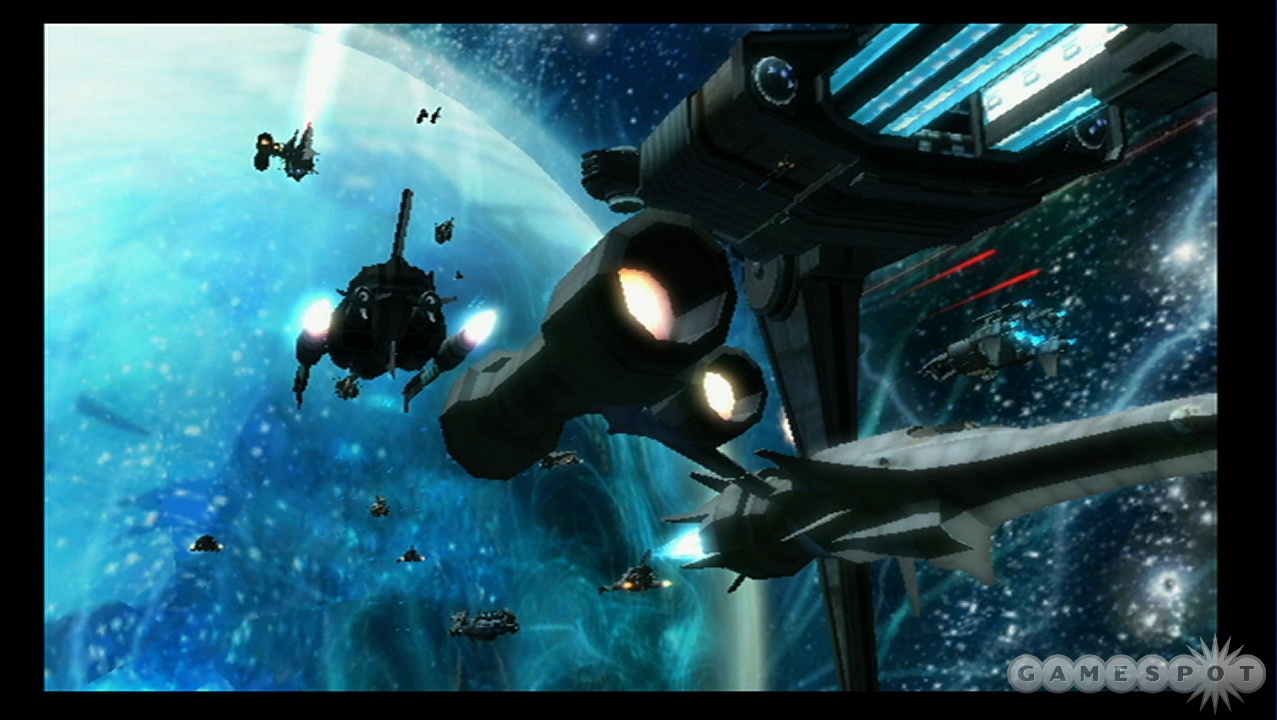
When you reach Pirate Command, head into the teleport room and find the ballpipe on the upper level. Smash the covering and roll down to the switch below you to depower the shield leading to the teleport, then move on up to the Leviathan. All you need to do is use the terminal here to take control of the Leviathan, which will then allow the GSF fleet to warp to Phaaze.
Return to your ship via the warp portal and save your game. Again, if you want the best ending, go ahead and track down the remaining pickups that you have left.
Phaaze
When you land on Phaaze, you'll find that the phazon inside of you has become dangerously unstable. You'll have to vent your energy tanks as soon as you land, which will result in a new bar on your screen. You'll permanently be in hypermode while you're here, but you'll need to hurry and find Dark Samus: if you don't manage to reach her before your countdown bar fills with yellow, you'll die. The countdown bar will fill from contact with the atmosphere, and from damage that you take, but you can reduce it by picking up health containers and unloading energy into hyper grapple targets.
Begin by heading into the Entry Canyon. Hopper Metroids will attack you here, but you'll easily be able to defeat them with your hypermode beam fire. Kill them, then overload the phazon plant with your hyper grapple and drop down to Cavern Alpha. You'll need to roll through the next hallway to avoid getting trapped. Use a missile on the growth on the wall here and hop up and through the hole that's created.
Down, Down, Down
Roll up into a morph ball in Cavern Beta Access and start using your hyperball attack on the small plant buds along the pipe. You'll need to destroy all of the small red roots to take out the larger plants that are blocking your progress. When you've destroyed both of them, drop down and let the phazoid puffer here drain some of your excess phazon and reduce your countdown meter before blowing it away.
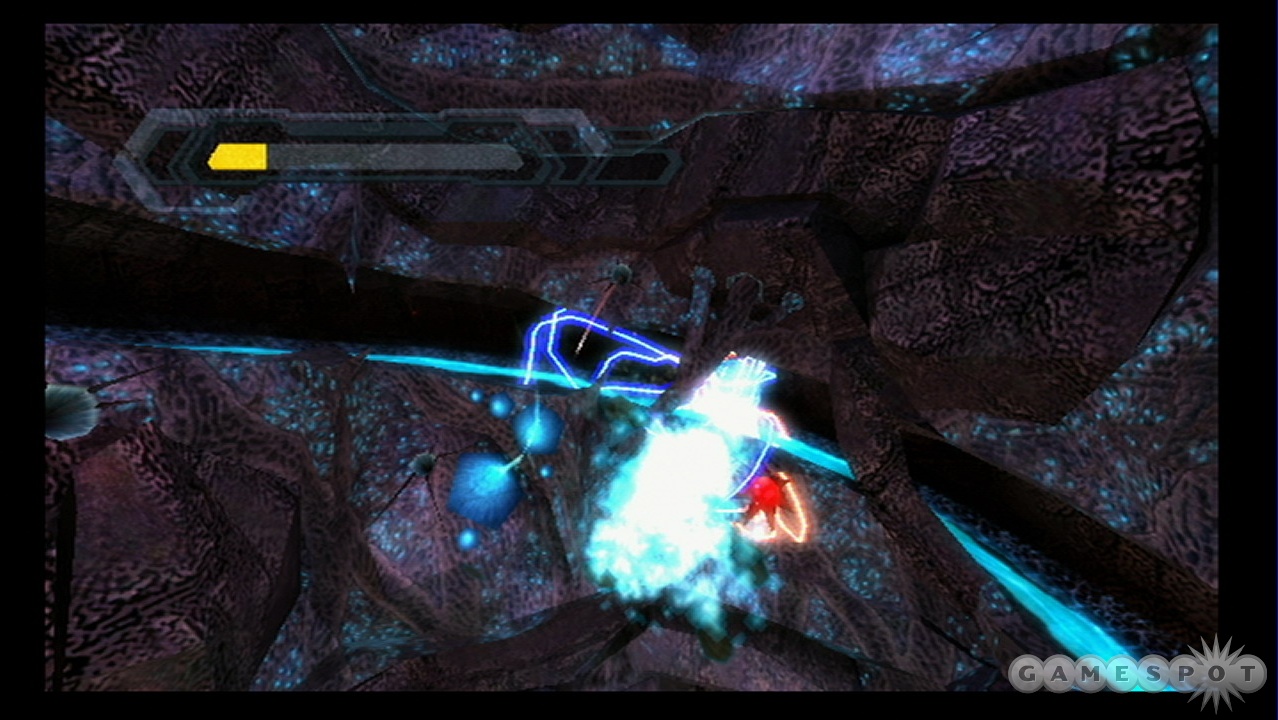
In Cavern Beta, do your best to avoid the metroids and jump across to where you can missile the phazon growth. Jump across and blast another growth to reach the door leading to the Drop Shaft. Roll up into a ball here and use your hyper bomb attack to destroy the red growths around the corners of the room. Repeat this process until the center growth dies, then go down and do it again. In the third room, another puffer will be floating around. Let it drain your meter, then destroy it and the growths to move on. When you reach the bottom of the chasm, use the hyperball attack to destroy the monster you fall into.
Metroid Cavern
Roll up into a ball here and drop to the floor. There's a strange organic door at the bottom of the chasm here. If you roll up next to it and hold down the button for the ball attack, you'll eventually overload the door and destroy it and its antennae, allowing you to move on. Next up is another set of metroid hoppers. Kill them until they stop dropping from the ceiling and you'll be able to move on.
When you fall down into the next chasm, you'll be caught by a creature halfway down. Missile or blast it in the mouth to weaken its grip and continue your journey.
Genesis Chamber
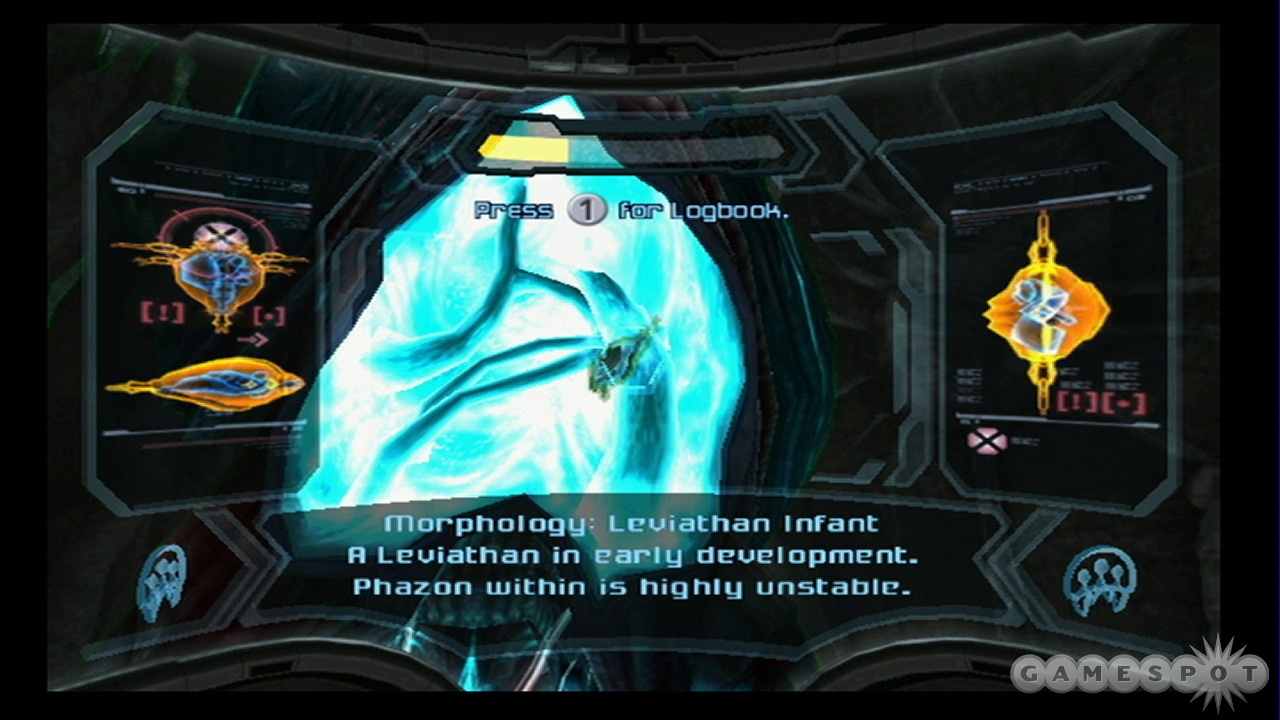
When you reach the Genesis Chamber, start scanning everything. The Leviathan Hatcher in front of you has two weak spots on its sides. Grapple them off with your grappling hook to tear it open and have a look at its insides. The Leviathan Hatchling within is tiny, but laden with phazon; if you destroy it, you can destroy the Hatcher itself. While fending off the metroid attacks, keep blasting at the Hatchling; it'll take a while to kill, and will move from one side of the Hatcher to the other, so you'll need some time to completely destroy it.
When it does blow, though, it'll drop a lot of health for you and reveal the passage downward. Suck everything up and drop down to the final boss fight.
Endgame
Anyone with memories of the epic Emperor Ing / Dark Samus boss fight at the end of Metroid Prime 2: Echoes will be pleased to know that this boss fight is actually fairly easy, at least on the default difficulty setting. You will need to be careful, but if you are, you should be able to win in less than ten minutes.
Boss Fight: Dark Samus
There's little you really have to do to specially attack Dark Samus; she'll take damage from your normal attacks here, so the fight winds up being just a challenge to avoid her attacks and not get overwhelmed by damage before defeating her. Luckily, this isn't too difficult to do. There's a rough set of phases that you'll proceed through here, although the lines between them are somewhat blurry.
Phase One
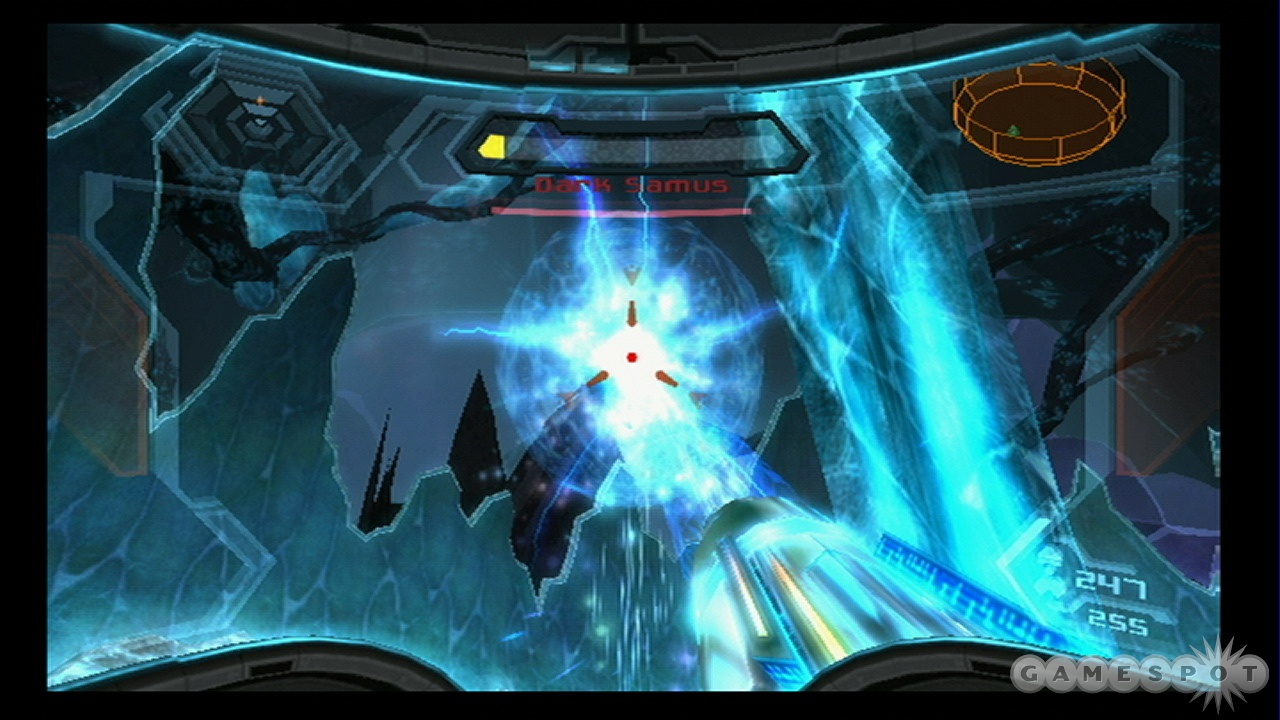
At the beginning of the fight, simply unload on Dark Samus with your weapon. Get your lockon and blast away! She'll send rapid-fire white balls of energy at you. Keep strafing around her to dodge these. If you get too close, she'll surround herself with energy to knock you away and damage you. Periodically she'll also--guess what?--jump into the air and slam into the ground to send out a shockwave. Jump over it. Most of her attacks here can be dodged or avoided by hiding behind one of the pillars.
When you deal enough damage to Samus, she'll float up into the air and start absorbing phazon from the ground, thus restoring her health bar. Knock her back to the ground either by charging up your beam and unloading on her or by pelting her with hyper missiles.
Phase Two: Splitsville
Samus will eventually split into two versions of herself. Scanning them will reveal one to be a Dark Echo, a creature that can deal damage and be killed. However, dealing damage to it doesn't hurt Dark Samus herself. She can summon as many of these as she wants, so don't expend too much energy hunting them down.
While there are multiple Samus's on the battlefield, switch over to your x-ray visor: Dark Samus herself will appear in red, while her copies will be all black. Focus your fire on Dark Samus here, obviously. If she reincorporates her clones back into herself, she'll temporarily render your x-ray visor blind, so switch it off when she's solo and flip it back on when the dark echoes come into play.
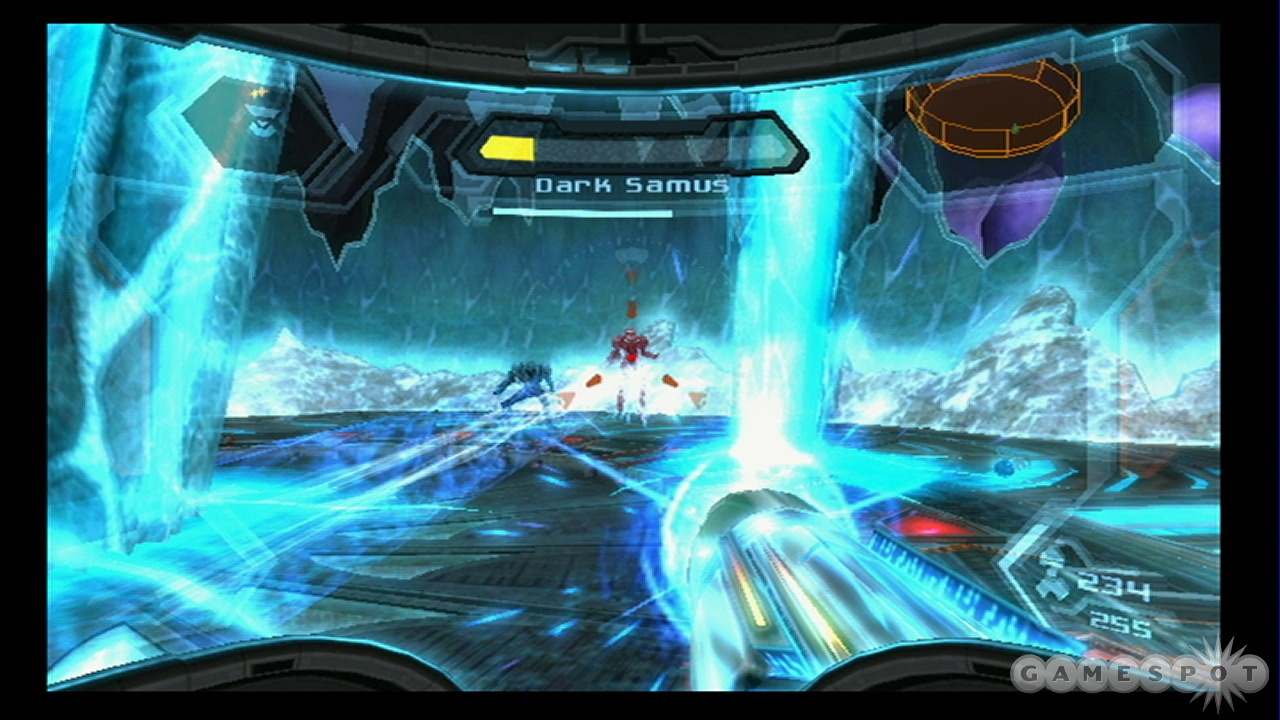
Some new attacks appear here. Samus can summon white energy into her fist and slam it into the ground; it'll then track you down and explode. She can also dash forward with little warning and slam into you. When she begins to summon two Dark Echoes at the same time, she'll spin with her clones around the battlefield and try to knock you around. Charge up your blaster and sweep the beam across her and her copies to get some cheap damage. She can also very annoying jump into the air and use her copies to send down large bolts of energy at you. If possible, hide behind pillars to avoid these attacks, or shoot the balls before they hit you.
Just be sure to knock Dark Samus down when she tries to regenerate here, using the x-ray visor to be sure you're hitting the correct one, and she'll eventually fall backwards, only to summon…
Aurora Unit 313
This is the Aurora Unit that was inside the GFS Valhalla. Looks like Dark Samus wanted her own organic supercomputer, and got what she hoped for. Unfortunately, you'll have to put it down in order to destroy Phaaze.
Phase One: Stalking
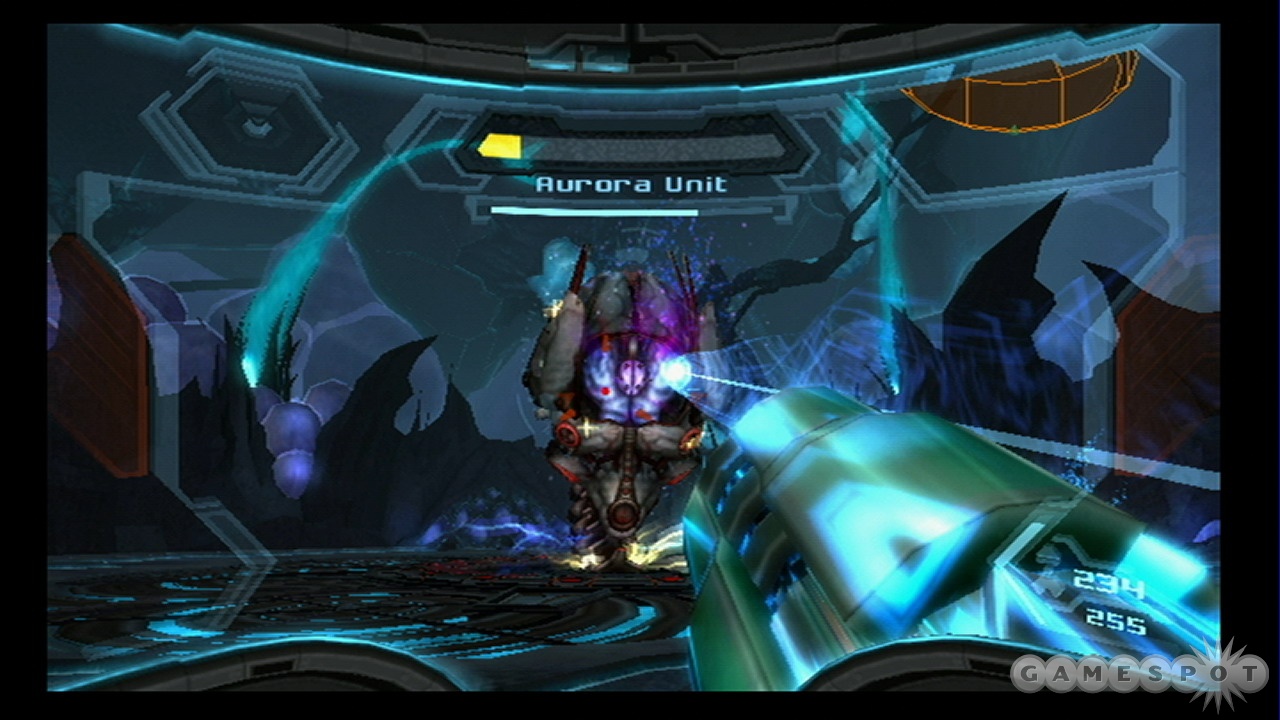
AU 313 will initially appear as a huge head on a giant stalk. Quickly scan it here, then wait for it to start probing you. It'll move around a bit, and emit antennae from the sides of its head. If you can hit the end of the antennae, they'll retract back into the head and leave a circle of yellow light behind momentarily. Fire at this yellow circle to momentarily stun the head and drop it to the ground. (This is all a lot harder than it sounds: the antennae are difficult to hit, as is the yellow circle. Blast away quickly!)
When the head hits the ground, quickly run over to it and grapple the armor on it, then rip it open. When the weak spot is exposed, blast it with a few hyper missiles to deal massive damage. That will eventually finish it off and move you on to the next phase.
There are a few attacks here worth noting. The most commonplace one is a purple laser beam that issues from the head of the beast. You can easily avoid this by consistently double jumping over it and sticking near the wall. Secondly, a trio of ghost Dark Samus's will sometimes be issued forth from the mouth. Lock onto these and blast them into oblivion to get some health back. Lastly, the head will sometimes retract into the ground and pop up a number of small missile launchers. Shoot the missiles to avoid taking damage.
Phase Two: Heading It Off
In phase two, AU 313's head will completely detach from its stalk, exposing a permanent weak spot on its underside. If you can fire on this weak spot, you'll eventually finish it off.
The attacks here can be annoying. The first one the head will probably try on you is a very damaging laser attack which will see it floating high up in the air and shooting laserbeams all around you on the ground. Get underneath it when this starts to occur to avoid the lasers, or you'll take a big hurting. If you can, just lock onto it, look up, stay underneath it, and fire away at the purple weak spot.
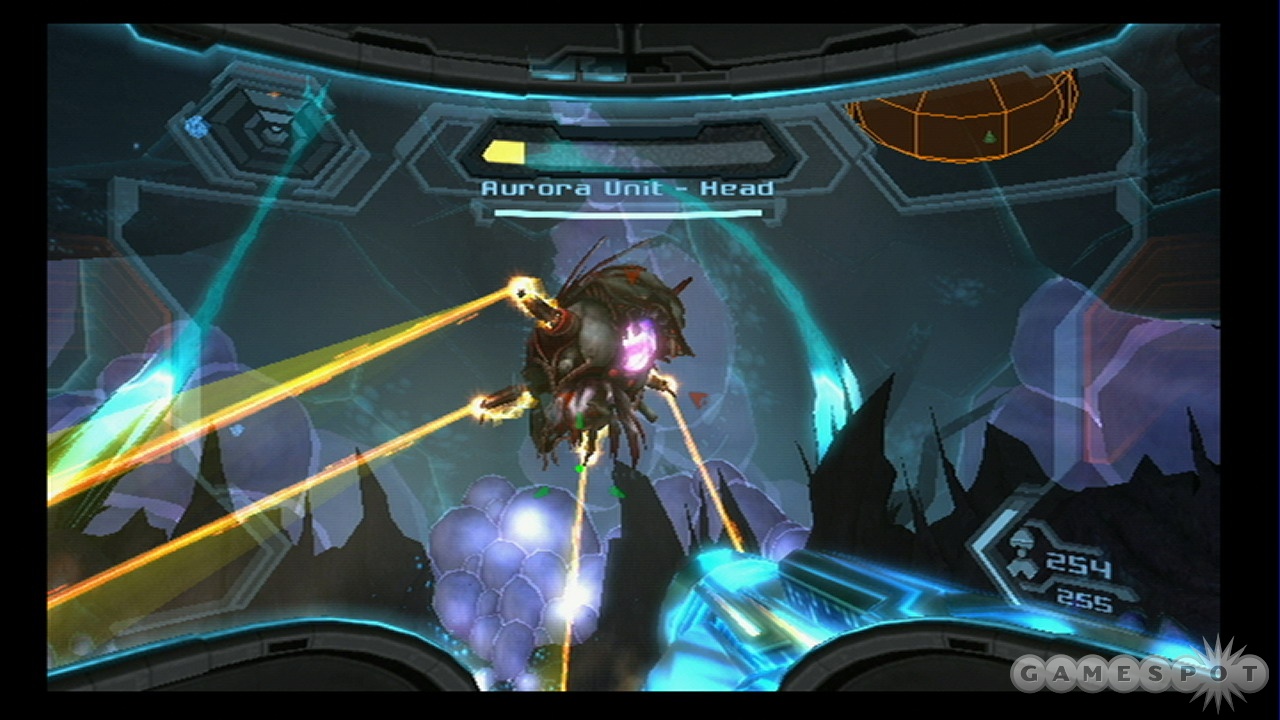
Secondly, the head will sometimes crash into the ground and start spinning around, not unlike Ghor way back when. It's difficult to hit the weak spot while it's spinning, but if you charge up your beam fully and turn it into a constant stream of fire, you'll get some damage in. If the head crashes into a wall, unload on the weak spot.
Lastly, the head will periodically drop an antennae from its front center side while it's floating above you. This little guy will do serious damage to you if you let it lock on, but if you quickly fire away at it, you'll be able to stagger the head and get some free shots on the weak spot.
The End
The AU 313 head isn't too bad if you can stagger it and get the weak spot hit consistently. When it does die, you'll see…the end of the game! That's all folks! If you got 75 pickups or more, you'll have a special ending immediately after the first one. If you got all 100 pickups, then you'll have an even more special ending that plays after the credits are done rolling. Enjoy!
Missiles and Energy Tanks
If you want the best ending in Metroid Prime: Corruption, then you'll have to obtain every single pickup that the game has to offer you. There are 100 in all, including missiles, energy tanks, and various suit upgrades. If you don't particularly care about the endings, then you don't really need to track down every single upgrade; missile expansions in particular are kind of pointless after you have 50 missiles or so. Still, here's a list for the completionists out there.
Missile Locations
This list is in a very rough order of when you can obtain the missiles throughout the game, so it'll bounce around a bit. We're not claiming that this is the precise best way to obtain these missiles, but that's kind of irrelevant anyway, since obtaining 10 of these pickups will probably give you more missiles than you'll know what to do with.
| Missile | Planet | Location |
|---|---|---|
| 1 (this is actually the Missile Launcher) | GFS Olympus | Munitions Storage |
| 2 | Norion | Cargo Hub |
| 3 | Bryyo Cliffside | Grand Court Path |
| 4 | Bryyo Cliffside | Hillside Vista |
| 5 | Bryyo Cliffside | Crash Site, above the grappling hook. |
| 6 | Bryyo Fire | Main Lift |
| 7 | Bryyo Fire | Gel Hall |
| 8 | Bryyo Fire | Gel Hall (after obtaining ice missiles) |
| 9 | Bryyo Fire | Gel Refinery Site |
| 10 | Norion | Maintenance Station (behind locked ice door) |
| 11 | Bryyo Cliffside | Grand Hall |
| 12 | Bryyo Thorn Jungle | Jungle Generator |
| 13 | Bryyo Thorn Jungle | Generator Hall North |
| 14 | Elysia Skytown West | Transit Hub |
| 15 | Elysia Skytown West | Barracks Access |
| 16 | Elysia Skytown West | Skybridge Hera |
| 17 | Elysia Skytown West | Main Docking Bay |
| 18 | Bryyo Cliffside | Gateway |
| 19 | Bryyo Cliffside | Burrow |
| 20 | Bryyo Cliffside | Fuel Gel Pool |
| 21 | Bryyo Cliffside | Hidden Court |
| 22 | Bryyo Thorn Jungle | Ancient Courtyard |
| 23 | Bryyo Fire | Imperial Hall |
| 24 | Elysia Skytown West | Construction Site |
| 25 | Elysia Skytown East | Gearworks |
| 26 | Elysia Skytown East | Botanica |
| 27 | Elysia Skytown East | Concourse |
| 28 | Norion | Docking Bay Alpha |
| 29 | Norion | Substation West |
| 30 | Bryyo Cliffside | Falls of Fire |
| 31 | Pirate Homeworld Command Center | Command Courtyard |
| 32 | Pirate Homeworld Command Center | Command Station |
| 33 | Pirate Homeworld Command Center | Security Airlock |
| 34 | Pirate Homeworld Research Facility | Scrapvault |
| 35 | Pirate Homeworld Research Facility | Metroid Processing |
| 36 | Pirate Homeworld Research Facility | Creche Transit |
| 37 | Elysia Skytown West | Powerworks |
| 38 | Elysia Skytown West | Steambot Barracks |
| 39 | Elysia Skytown East | Concourse Ventilation |
| 40 | Bryyo Cliffside | Hall of Golems |
| 41 | Norion | Cargo Dock A |
| 42 | Pirate Homeworld Command Center | Flux Control |
| 43 | Pirate Homeworld Research Facility | Craneyard |
| 44 | Pirate Homeworld Command Center | Lift Hub |
| 45 | Pirate Mines | Phazon Quarry |
| 46 | Pirate Mines | Phazon Mine Entrance |
| 47 | Bryyo Cliffside | Fuel Gel Pool |
| 48 | Bryyo Fire | Temple of Bryyo |
| 49 | GFS Valhalla | Medlab Alpha |
| 50 | GFS Valhalla | Weapons Cache |
| 51 | GFS Valhalla | Auxiliary Lift |
Energy Tanks
| Energy Tank | Planet | Location |
|---|---|---|
| 1 | GFS Olympus | Ventilation Shaft |
| 2 | Norion | Substation East |
| 3 | Bryyo Cliffside | Reliquary II |
| 4 | Bryyo Thorn Jungle | Vault |
| 5 | Bryyo Cliffside | Ruined Shrine |
| 6 | Elysia Skytown West | Steambot Barracks |
| 7 | Elysia Skytown West | Arrival Station |
| 8 | Elysia Skytown East | Xenoresearch A Lift |
| 9 | Bryyo (between Cliffside and Thorn Jungle) | Machineworks Bridge |
| 10 | Pirate Homeworld Research Facility | Scrapworks |
| 11 | Elysia Skytown West | Zipline Station Charlie |
| 12 | Bryyo Ice | Tower |
| 13 | Pirate Homeworld Research Facility | Metroid Creche |
| 14 | GFS Valhalla | Munitions Locker |
Ship Missile Expansions
Ship Missile Expansions increase the number of missiles that your ship drops. You can call it in for bombing runs in open areas where the ship can reach; just flip to your command visor and press Z while aiming at the ground. This is of limited use, thanks to the fact that most areas are enclosed and that your Hypermode should be able to deal out plenty of damage to anything that you have trouble with.
| Ship Missile Expansion | Planet | Location |
|---|---|---|
| 1 | Bryyo Cliffside | Federation Landing Site |
| 2 | Bryyo Thorn Jungle | Auxiliary Dynamo |
| 3 | Elysia Skytown West | Security Station |
| 4 | Bryyo Ice | Hall of Remembrance |
| 5 | Bryyo Cliffside | Colossus Vista |
| 6 | Elysia Skytown West | Hoverplat Docking Platform |
| 7 | Pirate Homeworld Research Facility | Scrapworks |
| 8 | Pirate Homeworld Research Facility | Processing Access |
| 9 | GFS Valhalla | Xenoresearch Lab |
Got a news tip or want to contact us directly? Email news@gamespot.com
Join the conversation