Metroid Prime 2: Echoes Walkthrough
This walkthrough gives you everything you need to know to help Samus Aran complete her latest galactic scavenger hunt. The guide includes a walkthrough, video segments for boss fights and tricky parts, and a full checklist for every item and powerup in the game.
Design by Marty Smith
Two years after the original Metroid Prime hit the shelves, Retro Studios and Nintendo have put out a sequel, entitled Metroid Prime 2: Echoes. In the gallant Nintendo tradition of not reinventing the wheel, Echoes sticks pretty close to the gameplay laid down in the first Metroid Prime, which itself stuck pretty close to the tried-and-true adventure gameplay of the old-school Metroid titles. In addition to the stock find-all-of-the-items-that-unlock-differently-colored-doors mechanic, though, Retro has dug even deeper into the Nintendo songbook to unveil a game world with overlapping dark and light worlds; predictably enough, good old Samus will find herself having to flip between these worlds in an attempt to right wrongs and fight evil.
Luckily for her, she won't be alone in this fight! With GameSpot's guide to Metroid Prime 2: Echoes, you'll find an item checklist that'll help you obtain both of the game's secret supplementary endings, an item rundown letting you know what does what, and, of course, a complete walk-through for the game's lengthy singleplayer game, including boss tips!
Table of Contents
Weapons and SystemsWalk-through
Missile Launcher and Morphball Bomb
Boss Fight: Alpha Splinter
Boss Fight: Alpha Sandigger/Bomb Guardian
Space Jump
Boss Fight: Jump Guardian
Boss Fight: Dark Samus
Light Beam
Dark Suit
Boss Fight: Amorbis
Super Missiles
Boost Ball
Boss Fight: Boost Guardian
Seeker Missile Launcher and Gravity Boost
Boss Fight: Alpha Blogg
Grapple Beam
Boss Fight: Grapple Guardian
Dark Visor
Boss Fight: Chykka
Darkburst
Spider Ball
Boss Fight: Spider Guardian
Power Bombs
Boss Fight: Power Bomb Guardian
Sunburst
Boss Fight: Dark Samus
Screw Attack
Annihilator Beam
Boss Fight: Quadraxis
Sonic Boom
Sky Temple Keys
Sky Temple
Boss Fight: Ing Emperor
More Emperor
Boss Fight: Dark Samus
Weapons and Systems
Visors
Your visors are controlled by your d-pad; if you wish to shift from one visor to another, just tap a new direction and you'll automatically shift over.
Combat Visor
The combat visor will probably be used more often than any other visor, as it gives you an unobstructed view of the surrounding area, allowing you to easily see enemies that are within your field of view.
Scan Visor
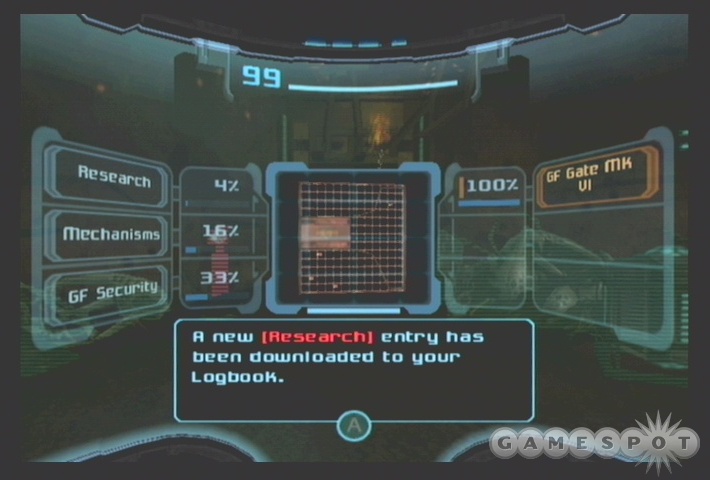
The scan visor is very useful for gaining information about the game world. When activated, scannable items will display in one of the three colors, either green, blue, or red. Green items are items that you've scanned before, blue items may contain useful information, and red items are usually going to be required scans, or things that you will want to scan if you're attempting to fill up your logbook with entries. You can earn extra screenshot and concept art galleries by scanning set percentages of the items in the game, for what it's worth; in most cases, the scan visor is best used for finding the weak spots of enemies and bosses.
Dark Visor
The dark visor is somewhat more marginal than the first two visors, but it will still come in quite handy in certain situations. When used, you can see items hidden in the dark dimension or creatures that have shifted themselves dimensionally to confuse you. There aren't a whole lot of these, but one of the most annoying creatures in the game, the Dark Commando, can easily see its advantages rendered neutral with judicious use of the Dark Visor.
Besides that, there are a few dimensionally-shifted platforms that can only be seen with the dark visor, but it's mostly useful as a kind of night-vision, since it highlights all of the contrasts in your surrounding environment.
Echo Visor
The last visor you'll receive is the echo visor. You won't be using this one very often, as there are precious few enemies that utilize sound waves to hide themselves; it's more often used to locate the source of a sonic lock.
There are two kinds of sonically locked doors. The first is held shut by antennas; when you activate the echo visor and find the location of the antennas, you can lock onto them and shoot them with any given weapon to destroy them; when they're all destroyed, the door opens. The second sort of door features no antennas; rather, there will be three lock panels in various positions around the room. When you encounter a door like this, shoot it with your annihilator beam to discover the tones required to unlock the door, then shoot the lock panels to produce the correct order of tones. These usually require a bit of trial and error to get the right order, but with only three tones to produce, you shouldn't have too much trouble with them.
Suits
There are three suits in the game. You can't flip back and forth between these; new suits are total upgrades over your previous suits, and as such will retain all previous benefits while adding a few new ones.
Varia Suit
Samus' standard combat suit gives her a good amount of protection from environmental threats, such as by letting her breath underwater and negating all falling damage. It isn't suited for the harsh environment of Dark Aether, though, and will constantly corrode while exposed to that world's atmosphere.
Dark Suit
The first suit upgrade will substantially decrease the amount of damage you take while exposed to Dark Aether's atmosphere. You will still take full damage from Dark Aether's various other environmental corrosives, such as the water and Ingstorms.
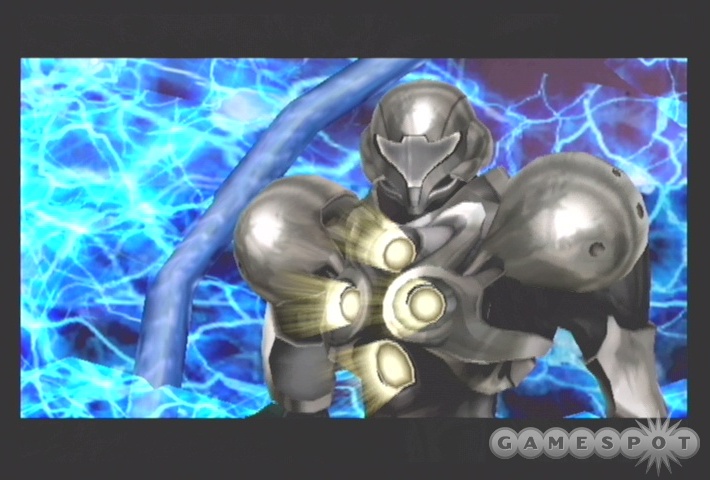
Light Suit
The final suit that Samus obtains will give her near-complete protection from Dark Aether's environment, allowing you to take no damage whatsoever from the water, Ingstorms, or the atmosphere. It will also allow you to access various teleports scattered around the Sanctuary Fortress. And it looks snazzy to boot!
Movement Systems
Space Jump
The age-old space jump is about as simple as simple gets; after jumping, hit the jump button again to get an extra boost of air. When you obtain this, numerous areas of the game that were previously unreachable will become passable.
Gravity Boost
The gravity boost will make your underwater travel that much more easy, as it will let you forcefully propel you past the resistance of the water, making your underwater movement as quick and easy as that on the surface. In addition, you can tap the B button three times while underwater, with the third tap giving you a short burst of propellant that'll let you make jumps that would normally be impossible to manage.
Grapple Beam
Again, a fairly simple concept: when you see a grappling point (which appear in your HUD as large claws), you can attach to it with your grapple beam by holding down the left trigger. (Just make sure you're not actually trying to lock onto an enemy!) While you're grappled, you can adjust your movement by tilting left or right on the analog stick, or release yourself by letting go of the left trigger.
Screw Attack
Although ostensibly an attack system, you're going to be using the Screw Attack to move around much more often than you'll be using it to kill things. It's essentially a supplement to your space jump, in that you activate it by hitting B after space jumping; when you do, Samus will roll up into a ball of energy and propel herself across great distances. You can keep tapping B for extra distance, but only up to a maximum of five times; if you're not where you need to be by then, you're going to have a long drop ahead of you. Or below you, as the case may be.
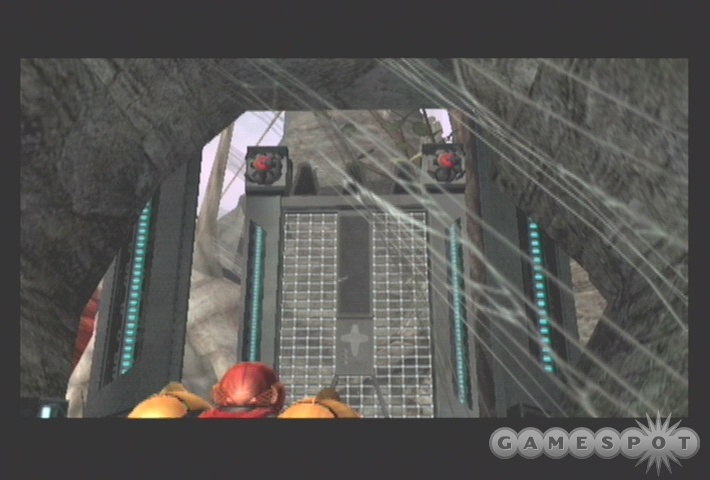
Of course, the Screw Attack can used as an attack, but is difficult to aim or use against enemies at close range, making it more of a defensive measure - in that it protects you from damage while screw attacking - than an offensive one. In addition to covering large horizontal distances, though, you can also use it to ascend when you find special wall panels. When you see a cratered wall like the one in our screenshot, bust out your Screw Attack and jump from wall to wall until you reach the top.

Boost Ball
While rolled up into a morph ball, Samus can hold down B to charge herself for a boost, which will increase her speed for a short time. Although this can be ostensibly used as an offensive weapon against troublesome ground-based enemies, it does only light damage, and is best used as a transportation aid. In addition to activating spinner devices, the boost ball will make it possible for Samus to propel herself up the side of half-pipes to reach ledges set into walls above. We found it best to release your boost just before you start to head up one side of the half-pipe to get the highest distance, but most half-pipes are fairly small affairs, which will let you get good height without much effort.
Spider Ball
In addition to the boost ball, Samus also has the spiderball move available to her. When you spot a spiderball track (which are generally one ball-width wide with moving arrows on their surfaces), you can hold down the right trigger to attach yourself to it. If the track is a simple path from one place to another, you can hold on until you reach your destination, then release the right trigger to drop to the ground; otherwise, you'll need to use some of the supplementary maneuvers available to you.
When you're apparently required to fly from one track to another, your usual mode of transportation will involve the boost ball. While you're attached to the spider track, you can charge up your boost and then release it for a sudden boost of acceleration directly away from the face of the track; this will let you cover short distances between tracks that are facing one another. If a track is above you, though, you're likely supposed to use a morphball bomb to reach the upper one. You don't need to let go of your spiderball mode while laying a bomb; you can hold down the trigger and automatically be detached and reattached to the upper track after you reach it.
Weapons
Power Beam
The default weapon, the power beam will likely be the most often-used weapon in the game, thanks to the new ammo system that's in place in Echoes. Although the individual shots aren't very powerful, they have the virtue of being free, firing rapidly, and moving quickly towards your target, allowing you to spam out numerous pellets and hope that a few of them hit.
When charged (which you can accomplish by holding down the A button), the power beam turns into the charge beam, which will fire a single powerful shot at a foe. After you obtain the super missiles, you'll be able to combine the charge beam with a missile to fire a super missile, which will track down your opponent and dish out the damage of five missiles all at once, although it will, of course, require five missiles to fire.
Light Beam
The light beam is going to be your trusty sidekick throughout most of the game, due to the fact that it deals extra damage to most of the inhabitants of Dark Aether. When fired, it will send out a beam of concentrated light energy towards a foe, which can then set them on fire and/or pass through them to damage enemies behind the first. The light beam can also supercharge Light Crystals or Beacons in Dark Aether, and let them damage any foe that attempts to come within the radius of the light bubble.
When charged, the light beam sends out a Lightblast, which is something like a shotgun blast, in that it's devestating at close range, but will quickly spread out over medium range, rendering it less effective. After you obtain the Sunburst, you can combine the Lightblast with missiles to send out a supercharged bit of light energy, albeit one that travels very slowly indeed, making it likewise only useable at short range.
Dark Beam
The dark beam is somewhat less useful than the light beam, if only because the toughest enemies in the game are found on Dark Aether, and are thus less likely to be susceptible to its damage. Its default firing mode also travels quite slowly, making it difficult to connect with it.
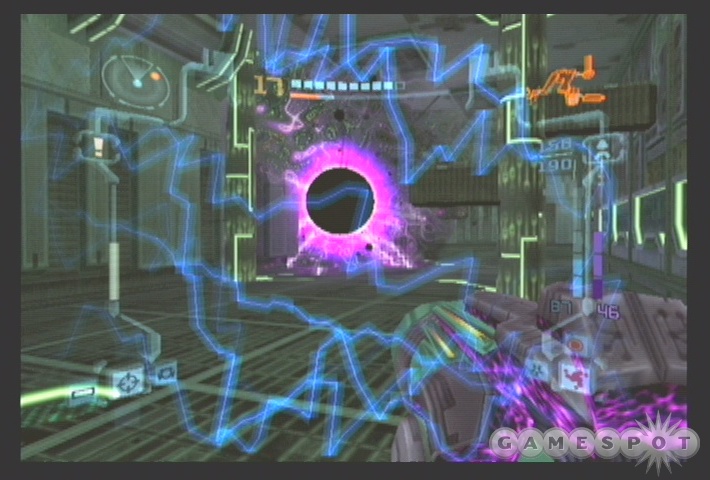
The charged version of the dark beam, though, the Entangler, will come in quite handy on foes that move rapidly, like the Dark Commandos, as it will freeze them in place and often let you finish them off with missiles before they break free. The super-charge mode, the Darkburst, will let you create a miniature black hole when fired, which will suck any nearby enemies in and almost always kill them.
Annihilator Beam
What do you get when you cross light and dark? The annihilator beam, of course! Although this beam takes ammo from both your light and dark pools, it's generally going to be worth it, as it deals a lot of damage and actually homes in on your targets, thus perhaps making it more efficient than your other beam weapons, since you'll miss less often. The annihilator beam is also the only weapon which can open the musical sonically-locked doors in the game.
When charged, the annihilator beam will turn into the Disruptor, which can stun your enemies for a short while. After you obtain the Sonic Boom, you can combine the Disruptor with missiles to unleash the most damaging attack in the game, albeit one that will greatly tax your ammo reserves.
Seeker Missiles

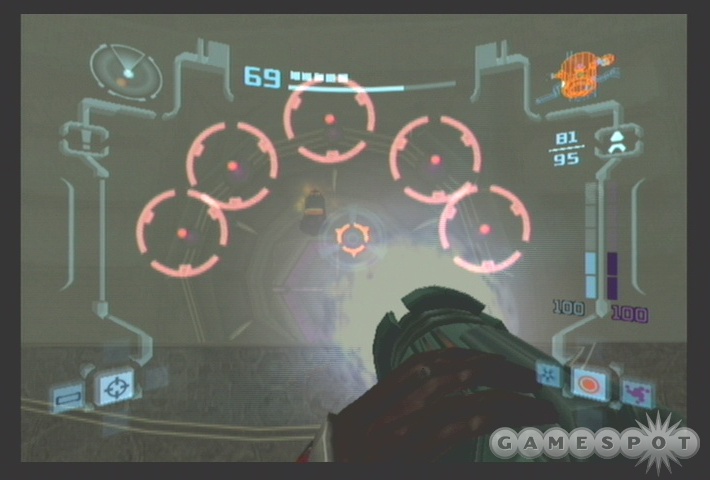
Seeker missiles are a fantastic way to concentrate firepower on a group of enemies without dipping into your beam ammo reserves. After firing a missile, hold down the Y button to bring up a targeting reticule; if you move this over a group of enemies, you'll be able to individually target up to five of them (or target one of them fives times), then let loose missiles that will home in on each of your five targets. This is obviously great for dense clusters of enemies or for when you have one powerful target in clear view. You can also use these on purple doors to flip all five switches simultaneously.
Bombs and Power Bombs
While you're in the morphball mode, you have the option to use either bombs or power bombs (after you obtain them) in order to damage enemies or destroy environmental barriers.
Bombs are the simpler offensive option, and will be found much earlier than the power bombs. While in morphball mode, simply hit A to lay down a bomb. If there's something destructible or damageable nearby, then it'll be damaged; otherwise not much will happen. You have an infinite number of bombs, but can only lay down three at a time max. Bombs will often be used to boost yourself up to an inaccessible ledge or to activate bomb slots.
Power bombs are another thing entirely; these small nukes are much, much more powerful than the ordinary bombs, obviously enough. Objects made of Denzium can only be destroyed with a power bomb. Power bombs are also great for cracking through the defenses of the toughest enemies in the game, such as the Ingsmasher, which can be killed with a single power bomb blast.
Walk-through
Before you begin, keep in mind that there are things you can do in the game that will affect your out-of-game experiences. The two stats that will unlock extra "features" are scans and items.
Scans are the harder of the two stats to complete. You earn scan completion percentage points by scanning, things, obviously, but only logbook entries will help you here. On the plus side, this means that you don't have to scan everything in sight to get 100% scans (as many objects are simply there for informational scanning and won't be recorded into your logbook), but on the down side, you have a chance to ruin your chances to obtain 100% completion after each scripted event, especially boss fights, since you need to scan each boss to get all of the scans, and they're obviously not scannable again if you forget to do it while you're in the fight. All the scans do are unlock extra art galleries in the main menu, which are hardly worthwhile goals, in our opinion, but so long as you scan all of the bosses (and make sure you re-scan them if they change form), you should be able to find most of the other scans without a problem, so long as you take a long look around each room you enter with your scan visor.
The second stat is items. If you obtain 75% or more of the items in the game, you'll be treated to a supplementary ending after you beat the game featuring Samus. If you manage to get 100% of the items in the game, another ending will play after the final credit scroll. We'll point out all of the items in the walk-through, but it may be easier for you to print out our item checklist later in the guide and mark it off as you go along, as it's quite easy to miss one early on and be quite confused later in the game; take our word on that. Depending on how hardcore you are, you might not want to bother tracking down every single item in the game, as it's definitely not required for you to get all of the missile expansions, and the 100% bonus ending is incredibly underwhelming.
One last note about items: we're operating on the principle that it's best to get as many items as you can as early as possible. For this reason, after you obtain new equipment or gear, we'll often take a little time to track down nearby missile expansions and energy tanks and whatnot; these digressions are almost always optional, but will definitely help you out in the future, especially when they precede boss fights. If you just want to get on with the story, then feel free to skip these little scavenger hunts, but you might want to use the item checklist in this instance if you're planning on getting 100% item completion.
Prelude
In The Beginning... After you wander through the opening cutscenes, you'll find yourself on yet another seemingly barren planet. Your ship's been damaged, naturally, preventing you from escaping, but at least you have all of your equipment intact. Given that this is a Metroid game, you probably shouldn't expect that to last for too long, but for the moment, enjoy your space jump, missiles, power bombs, and the like.
The first thing you're going to want to do after you gain control of Samus is get a feel for the controls. If you're coming into Metroid Prime: Echoes expecting for it to be just like all the other FPS' you've played around with, you're in for a big surprise, as it's really more of an adventure game with a first-person viewpoint. The opening segments of the game will give you a few tutorials explaining how to look around, how to shoot, and so forth, so pay attention to any of the pop-up tips if you're new to the series!
For now, though, what's important to learn is how to scan. You can activate your scanning visor by pressing left on the D-Pad; you can then hold down your left trigger button to scan objects. Objects that are scannable will either appear as blue, green, or red. Green indicates that you've already scanned the object, or another object like it, so you don't need to worry about scanning it again. Blue objects are non-game critical things like alien technologies or environmental features, while red objects will often need to be scanned before you can pass through an area or unlock a door, or something like that. You don't need to scan everything you see, but as you increase your percentage of scanned items (which compares the number of objects you've scanned to the total number of scannable objects in the game), you'll unlock extra picture galleries, accessible from the main menu. We know you're all very excited about that....
First Blood
Anyway, scan everything you can in the first room and then blast through the web-like covering that blocks your exit from the Landing Site. Your only path here is a large drop, which takes you down into Hive Chamber A. One thing that you'll want to be sure to scan are the gate and the locked receptacles on either side of it; after you scan the red lock here, these receptacles will open up, allowing you to smash them with rockets to force your way through, but this will open up a different scanning entry for them, so be sure to scan them while they're locked. You can also destroy the boxes in the area by either charging up your main gun or by firing missiles at them.
After you've scanned the gate controls and destroyed the locks, scan the door beyond, then find another set of gate controls that're recessed into the wall to bypass it. This will open up into a control chamber, where the Galactic troops apparently set up their headquarters. You can also find a Map Station here, which will give you a map for the area. Move on into the Hive Tunnel, shoot the Worker Splinters, then proceed into the Command Center, where you'll find more dead bodies to scan, as well as an unpowered door control pad. In order to activate it, you'll need to use your Morph Ball mode (X button), then roll into the crack in the wall, destroy the gate that blocks your passage (A button to use bombs), then use a bomb to launch yourself into the Bomb Slot, and then use yet another bomb while locked into the Bomb Slot to activate the power. Be sure to scan the Bomb Slot both before and after you use it.
After you turn the power back on, you'll get your first taste of real combat, as dark energy will animate the bodies of the dead troopers, turning them into Dark Troopers. Fight your way through them - missiles kill them in one shot - and return to the previous part of the area, where you can scan the doorpad again to unlock it.
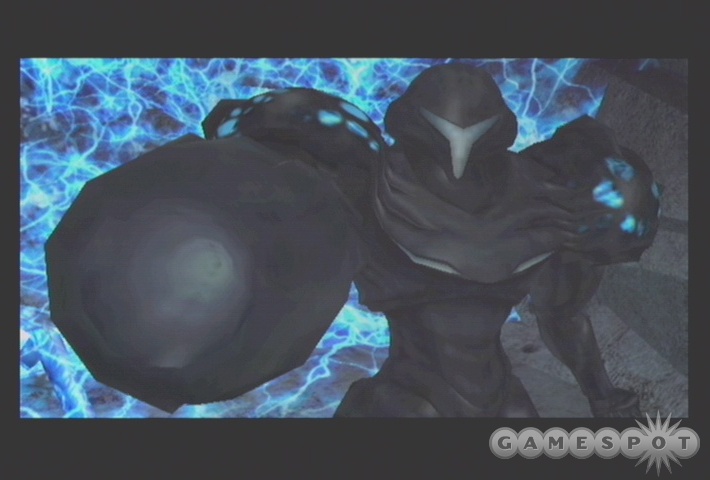
Make your way to Hive Chamber B, where you'll have the first of many encounters with Dark Samus. Her appearance is unexplained - for the moment and, well, throughout the entire game - but all you need to know is that she's pretty much like Samus, save for the whole "twisted and evil" part. Follow her into the Dark Portal, get your weapons and gear stolen (sob), then return to the Light world and let the games begin! You've lost pretty much everything you had, save your charge beam and the ability to turn into a ball. You can either take this as an opportunity to follow the advice of Thoreau, build a small cabin, and lead a simple life, or you can start wandering around looking for replacement parts for your suit. The designers unfortunately forgot to implement the former option, so wander it is.
Missile Launcher
The first piece of gear you're going to need is the missile launcher. Before you can reach it, though, you'll need to blast through the small pods near the end of the hallway here, find the exposed ball path, and head through to Hive Chamber C. You can find a save point in one of the rooms here, so save up before moving on.
When you reach the Industrial Site, scan the small panel near the crate (after scanning the crate itself) to move it along, then jump up onto the walkway nearby and unlock the bridge that blocks your path. Move on to the Temple Assembly Site. Your goal here is to drop the crate onto the ground, but you'll want to scan both it and the winch it's attached to before activating the panel (found near the large alien door). Activate the winch, then shoot the cable that holds it above the ground to let it drop.
You can jump across the crate now to reach the far door. (You can also scan the Missile Upgrade hidden in the wall nearby, but you can't get it yet.) The Dynamo Chamber features a gate lock; after scanning the controls, you'll notice that the gate behind you locks, forcing you to move forward. You won't be able to pass through this chamber again until you obtain the Space Jump. Move on to the Communication Area, activate the satellite dish there, then head into the Trooper Security Station, where you can morphball yourself into a small room where the gate controls reside, then continue along as a ball underneath the gate, which opens and closes of its own accord.
After reaching the GFMC Compound, scan everything in sight, then use your charge beam (hold down on the A button) on the Personal Ordnance crate to find your first (and only) Missile Launcher. After you nab it, take out the Dark Splinters that attack you, then make your way up into the ship. You'll need to jump from the hole in its side to the ledge beyond, where you can activate a morphball cannon; enter the hologram in morphball mode to be shot over to the other side of the room, where you'll find a door protected by a Blast Shield. Hit this with a missile to move through.
Morphball Bomb
Inside the Sacred Bridge, you'll have to drop down into the middle area as a morphball, then scan the control panel on the upper level to activate another cannon. This is a one-way trip, obviously, but no worries; you'll unlock the path back to your initial locations when it's appropriate to do so. The Sacred Path has another cannon puzzle; if you scan around, you'll notice that there's a large segment of wall that's structurally unsound. If you weaken it with a missile, you can pass right through it when you use the cannon at the bottom of the area, which will take you to the far side of the room. There's a Dark Portal here, but you can't enter it yet; for now, just use the elevator, which will take you to the Great Temple. Be sure to save your game before heading into the Temple Sanctuary.
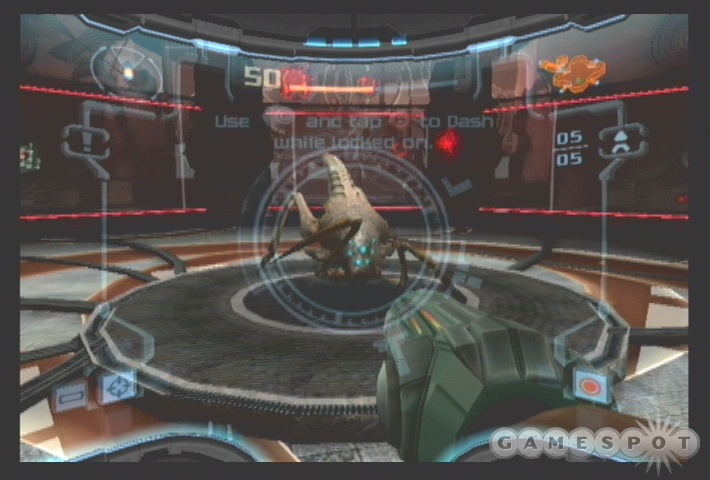
When you do reach the Sanctuary, you're going to be launched into a boss fight when you step into the middle of the room; before you do so, scan the cocoon on the ceiling. The initial fight is against a few Dark Splinters, so strafe around their attacks and use your charge beam attack to destroy them; you don't want to use any missiles here if you can help it.
Boss Fight: Alpha Splinter / Dark Alpha Splinter
The first part of this fight, against the Alpha Splinter, is actually a little bit more difficult than that against the Dark Alpha Splinter, so don't feel too down if you get quickly killed. The Alpha will sit in the middle of the small ring, and will periodically dart out to ram into you. You can bait it into ramming into the wall if you strafe around it, then quickly dash in the opposite direction just as it's about to charge, but it's difficult to get the timing down since the Alpha sits so closely to your character. With a bit of practice - and perhaps a reload or two - you should get an idea of when to the side.
The second form, as mentioned, is easier than the first. The Dark Alpha doesn't camp in the center of the ring; it'll hang out on the far side, allowing you plenty of time to dodge its charges. It'll also incorporate a projectile attack into the routine, which will immediately precede its charge, giving you even more time to dodge it. Don't forget that you can dash-dodge by locking onto a target with the left trigger, then hitting the B button; this will let you easily get clear of the charge attacks. You'll have a life meter reading for the Dark Alpha, so keep wailing on it until the meter falls to zero, then scan and pick up the Unknown Alien Technology.
Isn't U-Mos a Basketball Player's Nickname?
There's only one exit available after you defeat the Dark Alpha Splinter, so ride the elevator up to the Main Energy Controller, where you'll meet U-Mos, one of the few survivors of the Luminoth race, which has been fighting a war against the forces of Dark Aether for decades, and losing. Anyway, U-Mos will give you a bit of the backstory - our entire world is in peril, you're the only one who can save us, blah blah blah - and then update your translation modules, allowing you to bypass alien doors with violet holograms on them. After you've gotten all the info from him, return to the lower level of the temple and take the elevator down to the Temple Assembly Site. The door with the Blast Shield on it can now be bypassed; enter the room beyond to find your first Energy Tank! After you nab it, you can make your way back to the Industrial Site, from which you can access the Transport to Agon Wastes. In this zone, you'll be able to find your first Missile Expansion, as well as some more Luminoth lore, so grab both of those before jetting down to the Wastes.
The first large area here is the Mining Plaza. Watch out as you're walking around; Sandiggers will pop up from underneath the ground and attack you as you do so. You can blast through one of the doors here to unlock the Save Station A, which obviously enough stores a save point; don't bother exploring further beyond the save station, though, as all it leads to is a locked door. Instead, return to the Mining Plaza, jump onto one of the ledges that rings the area, and blast the base of the large pillars with rockets; this will open the path to the Mining Station Access. You'll notice that there's a cannon at the bottom of this area, but you can't use it yet, you'll need the morphball bombs before you can access it.
Instead, head on into Mining Station A and deal with your first Space Pirates. The Pirate Troopers here are lightly armored and won't pack much of a punch in battle, and there are plenty of crates around, so feel free to use your missiles to kill them. Your goal here is to reach the temple nearby, but before you do so, duck into Portal Access A, ride the cannons around to the second half of the room, then maneuver your way around the fallen Luminoth to find another Missile Expansion. You can explore the Portal Terminal nearby, if you wish, but you can't actually do anything there yet.
Head back to Mining Station A, jump across the platforms in the middle of the room, then fell the pillar to open up the path to the Agon Temple. The open structure of the Temple is pretty much a dead giveaway for a boss fight, and indeed, as soon as you step through the gates you'll be launched into one.
Boss Fight: Alpha Sandigger/Bomb Guardian

You won't have much time to fight the Alpha Sandigger here, so you may want to just scan it right off the bat. After a few seconds of sparring, it'll be morphed into the Bomb Guardian, a slightly tougher foe. The Bomb Guardian's main attack is to simply move around and lay bombs behind it; these aren't difficult to avoid, but it can be problematic to actually damage it at the same time, since you'll have to fire at its rear end to do so. Your best bet here is to just stay clear of the rear while attempting to get in a bit of damage by rapidly tapping your main attack button. The Guardian will occasionally shoot out multiple bombs from his mouth, though, so be prepared for anything!
Your primary method of damage will be to wait for the Guardian to charge up a mouth attack; you'll notice a distinctive glow when he does so. (He also has minor mouth-charging phases which aren't attackable, so don't fret if you can't lock on all the time.) This is your opportunity to do big damage, so lock on here and blast him with a couple of missiles. After a few cycles of this, the Guardian will die, allowing you to grab the Morph Ball Bomb.
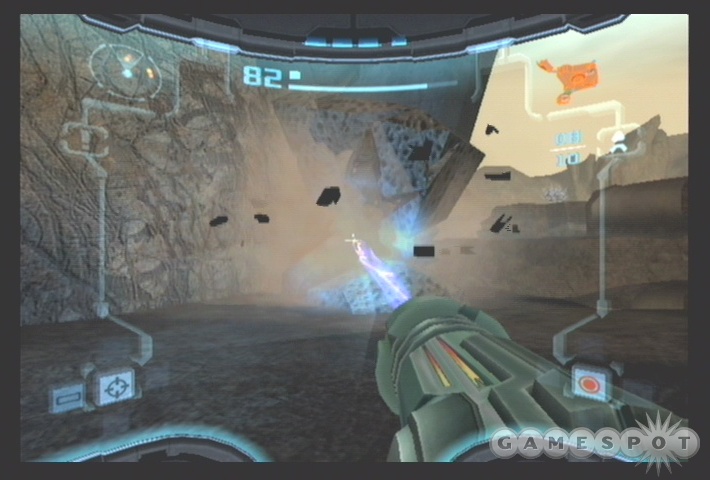
Space Jump
Now that you have the bombs, you can use them to destroy the doors leading out of the arena. Your way back has been blocked, forcing you to travel through the Controller Access into the Agon Energy Controller area. Here you'll gain the ability to access the amber-colored alien holograms.
With your new hologram permission, you can access a couple of goodies. There's a Missile Expansion in a room off Mining Station A, an Energy Tank available in the Mining Station Access, and the Agon Wastes map available off of the Mining Plaza. When you have everything you need, head back through the Mining Station A and use the cannons to lift you into the Portal Site. Kill off the Pirate Troopers and the Dark Pirate Troopers, then use the Bomb Slot to activate something of a lift inside the nearby morphball track.
You now have to make your way through the morphball track, destroying the obstacles as they appear with your bombs. This will shift the lens blockers and allow you to proceed across the platforms until all three lenses are clear to fire, as it were; when the whole apparatus is unlocked, the portal to Dark Aether will be usable, after you scan the lock nearby.
Click Your Heels Together Three Times...
Alright, so now you're in Dark Aether; congratulations! Prepare to be annoyed to death. There are a few ground rules that you need to remember:
- Exposure to Dark Aether's atmosphere is harmful to you; you'll quickly take damage while unprotected.
- There are, however, plenty of bubbles of light energy scattered around. There are two kinds of these.
- Crystals: Crystals are permanent bubbles. When you get the light beam, you can shoot these to super charge their light energy, producing a field that's harmful to Dark Aether creatures.
- Beacons: Beacons are like crystals, save for the fact that they float in the environment and are off by default. You can activate them by shooting them with the power beam or the light beam.
- While you stay within a bubble, you will slowly regain health at the rate of about one point per second. If you have to leave the Gamecube, then, find a safe bubble and leave your game unpaused, and you should return to a clean bill of health!
Make your way through the room here, activating the Bomb Slot to reach the next room. Continue on until you reach the Save point in the Save Station 2. In the Duelling Range beyond that, you'll come across your first Warrior Ing. So long as you stay inside the bubble, you shouldn't have much of a problem with it; they're annoying because they have a lot of health rather than being overt offensive threats. It will attempt to shoot little lasers at you, but if you can keep the crystal at the center of the bubble between you and it, it'll completely protect you, allowing you to charge up for a fully-powered beam shot.
After the Ing is dead, work your way up to the top of the Duelling Range and pass into the Junction Site, from which you can reach the ominously named Judgment Pit.
Boss Fight: Jump Guardian
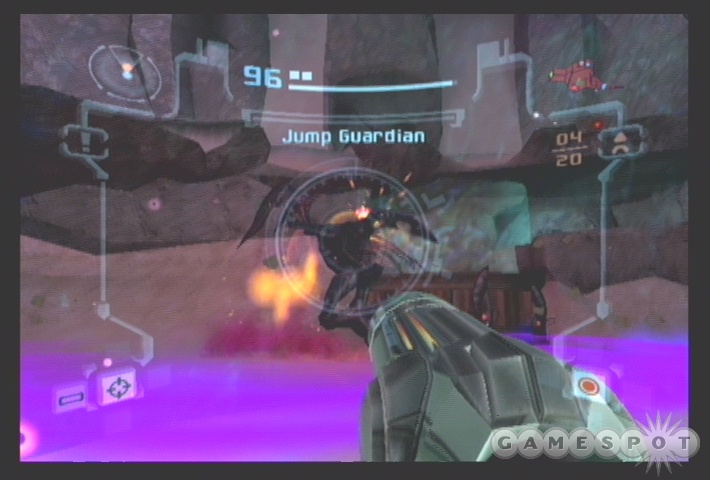
Since you're in Dark Aether, and fighting Dark creatures, you at least don't have to worry about this guy morphing into a more difficult form in the middle of the fight. And the Jump Guardian only has two attacks anyway: a laserbeam barrage a la the Warrior Ing (which can be blocked in the same manner, by standing behind the crystal in the middle of the light bubble) and a super jump shockwave thingamabob, which only affects a small radius around the Jump Guardian's landing spot. You should be able to stay out of the way of both of these attacks without too much trouble, making the battle itself merely a matter of dishing out damage. The Guardian can't be hit while he's in the air or gearing up for a jump, so you may need to dash in while he repositions himself and get him with a missile or two to wear him down, especially towards the end of his life bar, when he'll start running around quite quickly. Eventually, though, you'll kill him off and grab the Space Jump Boots. Be sure to scan them before you grab them!
Everybody Jump! Jump!
Now that you have the jump boots, you can head up to the top of this room, blast through the red door with a missile, and head into the Dark Agon Temple. There isn't much to see here - yet - but you can grab the first Dark Temple Key in a small room off to the left of the entrance. When you have it, head back to the Portal Site and return to the other side, scanning the pad on the side of the portal to open it. When you come out into the Portal Terminal, you'll note that the formerly locked path leading into the Transport Center has opened, which contains another Missile Expansion for you to grab.
Next up for you is a return to Mining Station A, which has a platform you can finally space jump to; do so and scan both the Luminoth lore entry and the switch nearby, which will unlock the path leading to the Central Station Access. You'll need to fight your way through a bunch of Space Pirates here, including a couple in turrets - use four missiles apiece on these, or your charge beams - before the lasers guarding the next area will unlock.
Unfortunately, the door at the end of the Command Center Access is impassable, but you can bust through the floorboards with a morphball bomb and make your into the Command Center via the tube there. There's a Missile Expansion in this room; if you take a right after you bypass the second little electrical trap, you can find it. You can then proceed through the rest of the tubes until you find an area that'll let you convert back to your normal size. Kill off the Space Pirates, scan everything in the room, then activate the elevator that'll take you to the second floor.
When you reach Security Station B, Dark Samus will appear again, apparently having mastered the ability of moving between dimensions without needing a portal. She'll block off your passage through the room, so you'll have to take the long way around. Begin by ducking through the blast door nearby and opening the large security gate by scanning the red panel nearby. This will open the gate that'll lead you to the Biostorage Station, and to your first up-close encounter with the Metroids. Don't worry, they're not going to attack you yet; you can scan them all while they cook in their little cages.
You'll eventually wind up in Bioenergy Production, where you'll have your first encounter with the Space Pirate Aerotroopers. These guys are a bit tougher than the normal troopers, and can fly, so missile them to death and start scanning. After you activate the platforms, you can maneuver them up and down via the red panels in the three workstations here. If you make a jumpable path, you can lift yourself up to the exit from the area, but first, check around for an energy tank and make the path towards its ledge, then go back and reconstruct the path to the door and move on. You'll need to bomb your way through Ventilation Area B, while being careful of the laser beams, which can damage you rather severely if you don't time your movements right, but you'll hit a save point immediately afterwards, which will let you completely heal yourself up.
Boss Fight: Dark Samus
All things considered, your fight with Dark Samus in the Main Reactor isn't going to be too monstrously difficult. The main sticking point here is that your missiles will generally be worthless, as your alter ego will erect a Phazon shield just before they impact her, causing them to deflect harmlessly away. She also moves quickly enough to avoid your charge beam, except at close range, meaning that you'll probably do most of the damage here with your good old power beam. Just tap away at the A button while she moves around, and you'll wear her down eventually.

Dark Samus' first form is pretty easy to deal with; she'll dash around the small little area in which you spar, firing missiles or fusillades of energy beams at you, but there's plenty of objects to hide behind, so you should be able to avoid most of the damage without a problem. After you whittle away around half of her health, though, she'll fly into the air and get a good boost of power, Dragonball Z-style. After this occurs, she'll supercharge her attacks. One of the new attacks is a comet-style charge where she'll jump into the air and attempt to ram you, while the other is some kind of super-beam weapon, also initiated from the air. Both of these are mildly damaging, but they have incredibly long warmup times, allowing you to hide behind the central pillar and avoid all damage.
The central pillar is going to be the only real hiding spot here, too, as Dark Samus will be able to destroy the four exterior pillars with either of these attacks and hit you if you're hiding behind them. You'll be completely immune to damage if you hide behind the reactor, though, so stick close to it and wait for one of your foe's attacks to end before unloading on her. She'll still be immune to most of your missile fire here, and will sometimes be just plain unhittable. She's weakest just after landing from the comet charge; you'll notice a blue shroud around her as she's standing up from this, but if you wait until she stands up, she'll be vulnerable for a split-second, letting you land a full chargebeam shot on her. Lather, rinse, repeat until dead, then head upstairs to grab the Dark Beam.
Light Beam
Now that you have the Dark Beam, you'll be able to move through black-sealed doors, and the security doors with the small crystals in them. Head back through Security Station B, and check your map for the small room off of the Biostorage Station. You can fight your way back there to get another Missile Expansion, but beware; the Metroids in the room adjacent to it will break out of their cages and attack you if you do so. There are only two of them, though, and their charge attack can be easily dashed around, so missile them to death and grab the expansion.
When you're ready to get back to Dark Aether, return to the Command Center and shoot the inactive portal with your Dark Beam. (Note that portals appear on your map with a large P symbol.)
The room you find yourself in, the Dark Entry, holds the second Dark Temple Key. In order to reach it, though, you'll need to lower one of the platforms, which you can do by scanning their bases until you notice an object made of Brinstone inset into one of them. Destroy this with a missile, then shoot the crystal within with your Dark Beam to cause the platform to recess into the floor, giving you a jumping path to the Dark Temple Key. The door nearby can be opened, but it doesn't lead anywhere, so jump back across the platforms and head through the other dark door.
There's only path to follow here, which will lead you to the Hall of Stairs. The central pillar here has another crystal on its upper end, so locate it and hit it with your Dark Beam to lower it a bit, allowing you to pass up to a save station.
In the Phazon Site, you'll have to pass through a security gate, which can only be unlocked if you scan three security terminals scattered around the room. The only one that's mildly difficult to find is hidden behind a stack of crates on the lower level here, but the other two are easily spotted, so scan them all; you can actually scan each of them twice, including once after you use them to break down the lock. You'll eventually wind up in the Feeding Pit, where you'll need to locate some more crystals on pillars to knock them down before jumping up, but be careful of the muck at the bottom of the room, which will prevent you from space jumping. In the Ing Cache 1, you'll finally be able to nab your Light Beam.
Dark Suit
Now that you have both of your main beam weapons, you'll be able to access both the light and dark doors. Make your way back to the Doomed Entry, using your light beam to cut through any webbing in your way, then take a left into the Double Path and move on. (If you're curious, the light door off of the Dark Oasis leads to an Ammo Cache, which will refill your dark and light ammo completely, but you probably don't need to head that way just now.)

The Double Path leads out to the Battleground, and the final Dark Temple Key. Of course, nothing as temptingly obvious to reach will ever be obtained without a fight, and indeed, you'll have to power through four Warrior Ings in order to get it. (If you're low on health, sit up in the light bubble above the key and wait around until you're replenished before moving on.) The easiest way to deal with these guys may be to move back towards the door that's been blocked off by Ing Webbing, and just continually hitting the light bubble there; the Ings will attempt to bypass it and will constantly run into it and take damage if you hit it with your light beam. You'll be a bit more exposed than you would if you stayed near the central crystal, but if you enter the fight with most of your health, you're probably not going to have to worry overmuch about dying. You'll be able to duck into the little foyer near the door if you have to avoid the Ing lasers.
After the Ing are dead, grab the temple key. Make your way back to the Dark Oasis and activate the portal there to return to Aether. You'll wind up in the Main Reactor, and since you haven't had a chance to save in a while, you'll probably want to backtrack to the save point nearby before moving on.
Entering the Temple
If you make your way through to the Central Mining Station via the light doors on the upper level of the Command Center, you'll be able to unlock a hidden goodie. If you destroy everything in sight with your turret, including the Space Pirate Generator near the forcefield on the far side of the room, you'll be able to space jump up to the platforms, then roll into the hole behind the generator and find your first Beam Ammo Expansion, which will let you hold 50 more Dark and Light Beam ammo.
Your goal now lies back in Dark Aether, but before you head out, we recommend that you pick up another Energy Tank. You can find it by heading to the Agon Temple and blasting through the dark door there; this will lead you to the Mining Shaft. Although the door on the other side of the shaft is impassible, you can maneuver through the morph ball tracks to grab the energy tank, if you're decent at controlling the morph ball. To begin with, find the first vertical shaft to the left of the entrance and use your power bombs to boost yourself up to the gap. After you reach the top of the shaft, just hold down the analog stick to move yourself to the left until you can't move any farther, but be careful of the disappearing blocks, which will sometimes drop you back down to the bottom of the room. If you keep moving to the left, you'll eventually pass behind a cracked piece of foreground; although it's difficult to see, there's a power bomb jump here that will take you to the energy tank. Check the video on this page for a more succinct explanation of what to do.
Now that you're juiced up, return to the Portal Terminal and pass through to Dark Aether. Before you move on to the boss here, you'll likely want to save your game, so take a left and proceed to the save point. From there, you can move from the Duelling Range into the Ing Cache 4 (through the dark door), where another Missile Expansion is hidden in a small passage at the bottom of the room. Make your way back to the Judgment Pit, where a save station can be found behind another dark door; save your game and enter the Dark Agon Temple, where your keys will allow you access to the temple grounds. In case you missed any, here are the key locations again:
- Trial Tunnel. A small room off of the Dark Agon Temple.
- Dark Entry. (Not to be confused with the Doomed Entry.)
- Battleground.
Before you jump into the pit, rest for a bit in the light bubble near the door to recharge your health, because you're about to face your first tough boss fight.
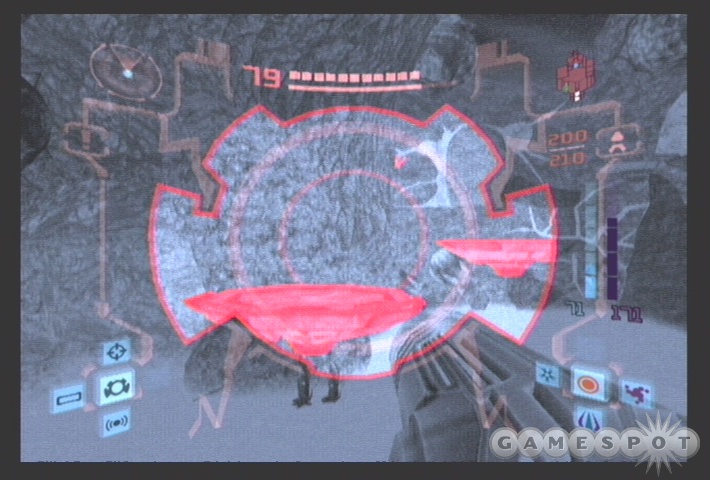
Boss Fight: Amorbis
The Amorbis, although intimidating in size, follows a strict pattern of movement and action, and will constantly drop health pickups; as such, it isn't terrifically difficult to defeat.

In its first form, it will run around as a detached worm, burrowing underground and attempting to land on you when it jumps. It doesn't have particularly good aim, though, and moves fairly slowly while its in the air, so you should be able to note whether or not it's going to hit you and dodge it with plenty of time to spare. When it's not going to hit you, though, blast it with charge beam shots to weaken its shell.
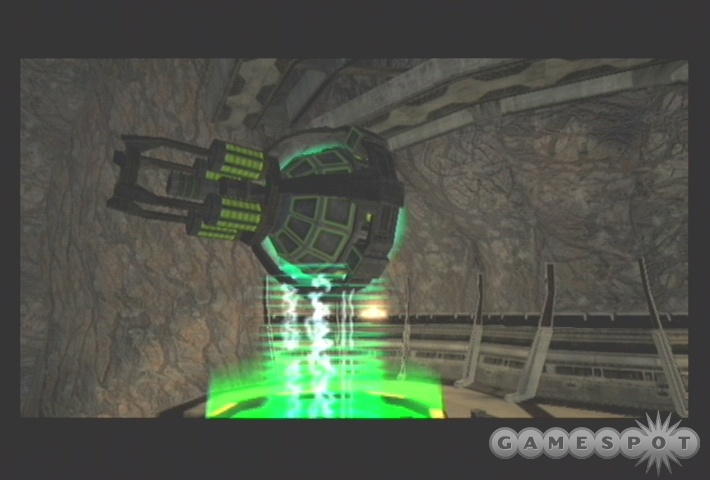
Eventually, it will abandon its underground adventures and attach itself to the large sphere in the middle of the arena. At this point it won't be able to hurt you too much, although it may attempt to spit darkness onto the light crystals in the area (hit them with your light beam to reactivate them), or slam you with its nose. While it's upright, though, go crazy with your missiles; four or five should be enough to blow off its face, which will cause the worm to flop down and start sucking in air. When this occurs, roll up into a ball and let it suck you in, then lay down bombs and blow it to pieces.

After the first worm is destroyed, you'll have to take on two worms at a time, following the same pattern to kill them, then finally destroy three of them simultaneously until you win the fight. Multiple worms aren't that much more dangerous than a single worm, although they do have an extra attack while they're attached to the ball, in which they'll shoot out Phazon in a wave-like pattern onto the ground in an attempt to knock you out of your light bubble. This doesn't damage you overmuch, but you'll still be better off stepping back towards the edge of the ring when you think you might be about to get hit. You can't hit the worms while they're shooting the Phazon, so wait for them to stop, then concentrate your missiles on one of the heads and repeat the steps outlined above until the monster is destroyed, at which point you'll be able to grab the Dark Suit.
Super Missiles
Now that you've bypassed the Amorbis, you'll find that the path to the Dark Agon Energy Controller is open, so head there and grab the energy from it, then make your way back to the Portal Site and head back to Aether. After you return to the Agon Energy Controller and restore it to its proper state, you can grab another Missile Expansion by unlocking the light door in the Agon Temple, passing through the Sandcanyon, and using your morph ball to bombjump up into one of the small passageways on the right side of Ventilation Area A. After grabbing that, return to the Temple Grounds via the elevator elsewhere in the elevator.
Before you head up to the Main Energy Controller, there are a few pickups to obtain.
1: The first is in the Temple Assembly Site, where your space jump will allow you access to one of the ledges, from which you can morphball to a Missile Expansion.
2: At the rear of the Temple Assembly Site, there's a crystal inset into a wall. Shoot it with your light beam to open up a portal opening, then activate it and head through to the Plain of Dark Worship, where there's another Missile Expansion. Grab it and get back to light Aether.
3: There's another Missile Expansion in the Communication Area nearby; space jump up to the lower platform and use your bombs to bust through the small glass panel set into the floor. (You may notice that the Storage Cavern A is here as well, and hasn't been visited, but there isn't anything of interest here yet save a logbook entry.)
4: After grabbing those two, take the Temple Transport B elevator, then find the small morphball slot in the middle of Transport B Access. After bombjumping, it's a clear roll to yet another Missile Expansion.
5: This one's a bit out of the way, but if you're willing to return to Hive Chamber A, you can grab a Missile Expansion from the Dark Missile Trooper there. He's something of a mini-bossfight, in that he has a life bar and everything, but you can kill him with a few full-power blasts from your light beam.
6: After you get the last one, continue around to Hive Chamber B and blast through the busted morphball tube there for yet more missiles.
Phew!
Back to U-Mos
When you speak to U-Mos at the Main Energy Controller, he'll point you towards the Torvus Bog as the location of the next temple. You can unlock another of the amber-coded alien doors in the room below, so head through, blast the lock with a light beam, and enter the next area.
Your path here is relatively direct, although you'll need to enter a dark portal in the Hall of Eyes. In the dark world, you'll eventually wind up in the Abandoned Base, which has another portal in it, which you can't initially access. In order to reach it, you'll need to maneuver the platform at the rear of the base so that you can jump to the portal. To do so, though, you'll need to maneuver through the small morphball slots and energize the bomb slots until all four of the pincers are locked onto the platform. The trick is that the pincers' extension will prevent you from freely moving through the groove, meaning that you'll have to trip them in a certain order.
If you stand at the rear of the room, near the mutated ingworms, and face the platform, then your first destination will be the morphball elevator on your left. Ride it to the top, then skip the first bombslot, instead activating slots two, three, and four, in the order that you come to them. After the fourth one, you can ride the other elevator down, take the first elevator back up, and use the bomb slot to energize the platform. Jump up onto the platform, ride it to the portal, then flip back over to Aether. The Path of Eyes will now be maneuverable; just look for crystal pedestals and hit them with your light beam to keep moving on. Near the end of the Path, there's a shortcut back to the beginning in the form of a almost invisible morphball path by the door, but you won't be able to proceed backwards anyway due to the green door, so suck it up and head down into the Bog.
The Bog
When you reach the Torvus Lagoon, bust through the blast door on your left to find the area's first save station. The Lagoon doesn't have any obvious mode of egress beyond that, at least not yet, so drop down into the water and make your way towards the dark door there. (The sound of the Missile Expansions may drive you mad, and there are actually a couple of them around, but neither of them are accessible just yet.)
You'll come to the Great Bridge soon enough. The Shriekers here are incredibly annoying, but can be killed with your regular beam weapon if you tap it fast enough. Although they'll turn invisible every so often, you can still hit them while they're phased out if you just keep tapping the button; the auto-aim will still bend your shots towards the target.
Your only path from here will take you through the Portal Chamber and back to the Lagoon, where you can activate the bridge path to the Ruined Alcove, which in turn will take you to the Ruined Bridge, where a pair of Grenchlers await you. These guys are incredibly deadly at close range, so don't let them close in! Their electrical attack is less powerful, and is easier to dash-dodge around to boot. Unfortunately, the Grenchlers can only be damaged on their rear sides, so you'll need to quickly dash around them and unload missiles on their butts. The plus side of this is that you get to literally blow their butts off; even that won't kill them, though, so keep laying on the damage until they're both dead. If you run out of missiles, you can use your charge beam, but it's much more difficult to land shots with it.
There isn't much you can do in the bridge, so make your way through the dark portal here into the Dark Forgotten Bridge area and use the bomb slot to rotate the bridge, then shift back to Aether. You'll be assailed by a pair of Dark Pirate Commandos here; these guys are able to shift themselves dimensionally, and are thus difficult to hit consistently. It can help to get up close to their locations, then blast them with a charge beam as soon as they phase in, but beware their dark beam fire, which can cling to your armor and burn you over time.
After passing over the newly-moved bridge, use your scan visor to check around for the Sporb, which should be barely visible to you if you stand by the ball path. You'll need to move quickly along the ball path in order to escape its jaw attack.
Continue along the ball paths until you reach the Great Bridge again, where you'll be able to activate a Kinetic Cannon that will propel you to the upper edge of the room. You'll be able to enter the Temple Access area now; in the middle of the hallway, you'll be able to scan a half-broken port in the floor, which, if you bust through with a morph bomb, will let you grab another energy tank. Although you may be anticipating a boss fight in the temple, there isn't one; just go in, missile away all the Space Pirates, and grab your Super Missiles.
Boost Ball
When you have your prize, ride the elevator up to the Torvus Energy Controller, where another dead Luminoth will increase your security clearance, allowing you to bypass the green alien doors. Your first destination should be the Great Bridge, where you can scan a door and grab the map for the Torvus Bog.
When you're ready to move on (might want to save your game first, but beware of the Grenchlers in your path), return to the Torvus Temple and unlock the emerald alien door in its basement. Maneuver your way through the Underground Tunnel (it's best to just jump past the Grenchler here, as there isn't enough room to get behind it). There's also a Missile Expansion underneath the initial door here; just roll up into the morphball and slide underneath the platform to find it.
In the Torvus Grove, you'll be ambushed by two Space Pirate Commandos. Although they ostensibly have a shield that protects them from damage, they'll rarely use it, so you can safely strafe around and toast them with weapons of your choosing. When they're dead, head into the next room and use the portal there to flip over to Dark Aether. When you reach the Polluted Mire, you'll be taken on by a pair of Hunter Ing. Charge up the bubble in the middle of the room with your light beam, and use the same weapon on them while they're phased in, and they'll be taken out relatively quickly. If they happen to get too close to the bubble, shoot it again, and it may pulse strongly enough to kill them.
After climbing to the top of the room, head into the Dark Falls and save your game, then proceed along the path until you reach the Dark Torvus Arena, where you'll fight for the boost ball.
Boss Fight: Boost Guardian
The Boost Guardian is going to be knocking down large chunks of your life, so try to charge yourself up completely in the bubble in the first half of the arena before charging back to meet him. There aren't any bubbles in the Guardian's lair, which will make gaining life difficult.
In the Guardian's initial form, he'll appear to be a Warrior Ing, with the same charge and laser attacks and everything. Your job here is pretty simple; just wail on him until you convince him to change into another form. Your charged light beam is your best bet for big damage.

After you deal enough damage to the guardian, it'll morph into ball mode and will start boosting its way around the small room you're in. It's tough to avoid damage here, because of how quickly and randomly the Guardian moves; you may want to just morph yourself and rub yourself up against the wall of the arena to minimize the chance that he'll hit you. Note that Inglets will appear each time the Guardians go into boost mode; you can either kill them yourself with morphball bombs, or wait for the Guardian to run them down, and then grab the health that they drop to charge yourself up. The pillars in the room will also drop health when the Guardian runs into them.
There isn't much you can do to the Guardian while it's running around all willy-nilly, but if you wait long enough, it'll eventually morph into its shadow form and start creeping around on the floor, probably with more Inglets who'll have joined in the fun. To convince it to change back to its solid form, drop bombs onto its path; after it takes enough damage, it'll convert back to Warrior form and you can repeat the process. In all, it's not a difficult battle, but there is a high potential for damage thanks to the erratic movements of the Guardian and the lack of bubbles in the room.
Seeker Missile Launcher
Now that you have the boost ball, use it in the first half of the Arena to grab the Dark Torvus Temple Key from the ledge in the halfpipe. There isn't anything else you can do in Dark Aether at the moment, so return to the portal after saving your game.
When you reach the Torvus Grove again, use the halfpipe near the light door to get up to the upper level of the room and the Grove Access room. You'll come out in the Forgotten Bridge, but before you use the Spinner here to rotate the platforms, move on into the Plaza Access and use your morph bombs to maneuver through the puzzle here to gain a new Missile Expansion. You'll need to drop down to the bomb slots, which will rotate the dividers, which will construct new paths, one of which will lead you to a room where you can boost yourself up to the Expansion. (Don't bother with the Torvus Plaza yet, there's nothing you can do here until you get the spiderball.)
Now that you have your missiles, return to the Spinner and enter it. You can use your boost here to cycle open a nearby gate, but don't pass through it yet. Instead, leave the Bog and use your Super Missiles to return back to the Temple Grounds. You don't have to, but if you wish to return to the Temple Sanctuary, you'll notice that there's an emerald door here; you passed through it a long, long time ago, and can now retrace your steps. There's a save point in Transport Access A; bust the broken wall near it with a morphball bomb to find another Missile Expansion. This is a side-trip, though; your real goal is back through the C access in the Meeting Grounds, where you can boost your way up a halfpipe. There's another ball track at the top of it, so roll down there, boost across the disappearing blocks, and keep going until you reach the Hall of Honored Dead.
You've got four Spinners here: red, turqouise, yellow, and purple. Each of them corresponds to a pair of rings around the Seeker Missiles, which need to be changed from grey to beige before you can access the missiles. You can either go from outside to in or inside to out. We went from red to yellow to turquoise to purple in order to get the rings to align from the inside out; just keep spinning them until the rings are all beige. Sometimes an outside ring will turn beige before an inside one; you can usually keep rolling until the next one in turns beige, then switch spinners until you unlock the missiles.
The Seeker Missiles will let you bypass doors that are locked with five switches; these are pretty rare, but they do pop up from time to time, such as at the exit from the Hall. You need to hold down Y to bring up a targeting reticule, pass it over each of the five switches, then let go of the button to hit them all simultaneously.
Gravity Boost
Your next goal lies back in the Torvus Bog, so find the small ball slot in the Service Access and make your way back there through the Path of Eyes. You can feel free to run around to find new expansions at the like at this point, since you've gotten a couple of new weapons, but almost everything that's accessible now is well out of your way.
When you return to the Bog, save your game and start making your way to the Torvus Temple. (If you're really particular about getting more items, you can use the portal in the Forgotten Bridge, then make your way back to Cache A (which corresponds to the Aether save station, and is locked by a seeker lock) for another ammo upgrade for your light and dark beams, but it's a bit out of the way.) After you take the elevator at the bottom of the temple, roll yourself up into the Underground Transport and ride down to the Hydrodynamo Station.
Underwater Adventures
In order to jump around underwater, you'll need to find the Gravity Boost, but in order to get the Gravity Boost, you'll need to go underwater. It's a vicious cycle, and you're going to have to put up with some awfully slow movement until you grab what you came here for. If you wish, you can save your game behind the missile door at the top of the chamber, but you'll eventually have to drop down to the bottom. There are Bloggs here, and if you don't take them out quickly, they're liable to bore you to death with crappy poetry and stories about their boyfriends, so shoot them in the mouth with a missile when they charge you.
If you seem to get stuck at the very bottom of the chamber, roll up into a ball and look for the two small air passages that'll lift you up a bit. You need to scan a lock down here, which will extend a path from one of the three small platforms further up the shaft. After that's done, return to the top of the chamber with the kinetic cannon and drop down to the intermediate ring of platforms (by jumping into the middle of the water), then find the purple door and bust through with your Seeker Missiles, earning another Missile Expansion on the way.
In the Training Chamber, kill off the Bloggs to unlock the bomb slot, the use the spinner to align the red grooves on the floor. This will let you morph ball through the slot after dropping into the red circle, and pass through the dark door on the far side. In the Catacombs, you'll run across what's likely to be your first Annihilator Beam door (these show up on your map as grey), which you obviously can't bypass just yet. Instead, head through the dark door back to the Hydrodynamo Station and unlock the second lock, then return to the Training Chamber and rotate the floor again so that the blue grooves align.
In the Gathering Hall, drop into the water and shoot the bottoms of the platforms with your dark beam to flip them over, then use the bomb slot across the room to open a portal. When you pass through, you'll wind up in the Crypt, where ever-annoying Dark Commandos will attack you. If you have enough dark beam ammo, try to hit them with charged shots, which should prevent them from phasing out long enough for you to use a light beam or super missile to kill them. When they're dead, use the spinner underneath the Luminoth laser to align the laser on the far wall; this will let you use a Kinetic Cannon back in the light world to access another door, which will lead you to the third lock of the Hydrodynamo Station. After you flip it, you'll be able to drop down to the bottom of the chamber and finally open the path to the Gravity Boost, but you'll probably want to return to the top of the chamber and save your game before you do so.
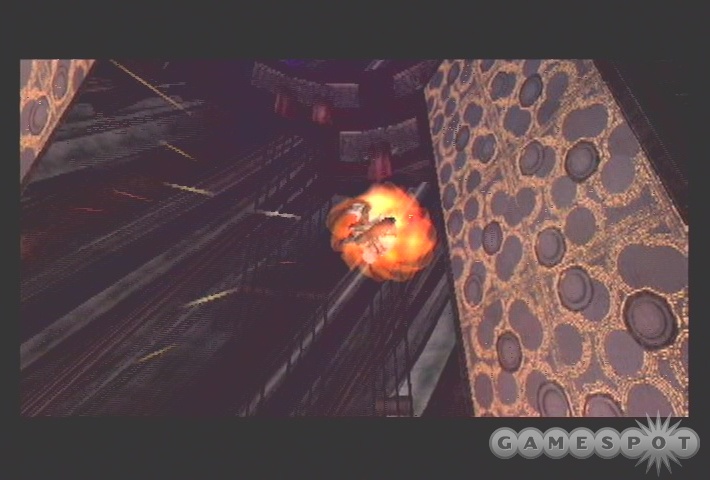
Boss Fight: Alpha Blogg
The Alpha Blogg can be difficult to combat, especially if you enter the fight with low life, because it can deal a pretty decent amount of damage. It's essentially just a bit Blogg, though, with the addition of a projectile attack, so you should be able to grasp how to damage it. Just sit as far away from it as possible, charge up your beam attack, then dash out of the way of its little spit attack. It'll almost always charge you after spitting, meaning that you can get a clean shot at its mouth. Missiles deal damage, but only a little; it's better to go for the whole ball of wax and try and land a super missile in there for a big damage boost. Having to hold down the A button all this time makes it a little more difficult to dash out of the way of the Blogg's charge, so you'll probably take a bit more damage than you would otherwise, but you should have enough to survive the fight regardless.
When the Blogg's dead, you'll need to start making your way back up to the Hydrodynamo again. Although the jumps might appear impossible, you'll recall that the gravity boost now gives you an approximation of flight while you're underwater; just space jump by hitting the B button twice, then tap it again to get a brief upwards surge of momentum. Using this technique you should be able to return all the way to the top of the Hydrodynamo.
Although your next destination lies beyond the portal in the Catacombs, you'll want to make a sidetrip back to Transit Tunnel East, where you can pick up another Energy Tank. When you reach it, you'll notice that there's a series of pipes with air moving up and down inside of them. You couldn't do much here before, due to the lack of the gravity boost, but you can now use your bombs to access the first shaft's bombslot, which will increase the flow of air a bit. If you then move to the fourth pipe, you can bomb your way up to another bomb slot; you'll be traveling much further up in the pipe than you normally do, though, so you'll need to practice a bit to get the timing down. Your second bomb should be planted just before you reach the apex of your first boost; if you repeat the process, then you'll reach the bomb slot. Activating it will switch the direction of airflow in the second pipe, where, if you bomb your way up to the top, you can find the Energy Tank. You only have a few seconds before the airflow reverses again and pushes you down, though, so be quick about it.
Grapple Beam
When you have the energy tank, return to the Catacombs and use your gravity boost to get you to the bomb slot under the water. Activating it will let you through the portal above. Your only exit from the Dungeon will take you through a few rooms until you reach Undertransit One, where there's a hidden Missile Expansion. It's on the left side of the central bubble here; you'll need to use your burst to get past one of the gaps in the pipe and jump from there to reach the missiles.
In the Crypt, use your dark beam on the first crystal you see, then jump across the shifting platforms to reach the tunnel beyond the light door, which will take you to the Undertemple Shaft. Your first stop here will likely be the save point at the top of the room; it's in the same position as it is on Light Aether. When you load up on your health there, drop down to the bottom of the room and use the bomb slot to rotate the corridor one turn, so that it lines up with the blue door, then head through to reach the Sacrificial Chamber again.
Boss Fight: Grapple Guardian
The Grapple Guardian is one of the easier boss fights you're likely to encounter in the game, if only because it doesn't move very quickly and follows a pretty strict pattern of attack. The Guardian is essentially an overgrown Grenchler, with an added weakness (the glowing eye) and the ability to grapple you.
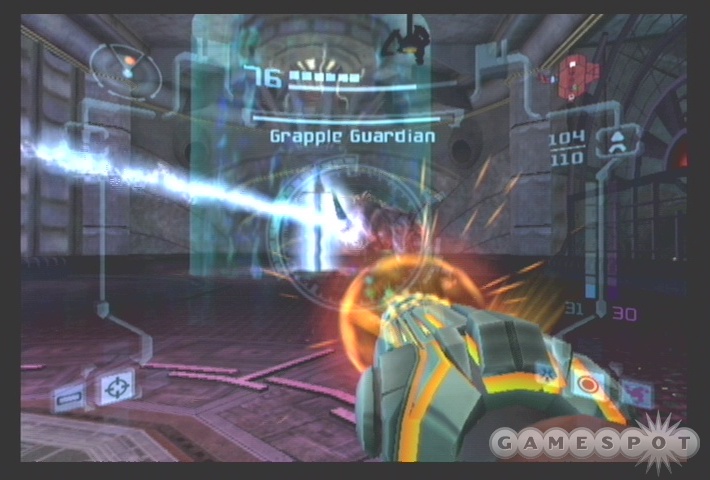
The first form is pretty simple to defeat; just use your charge beam to hit the Guardian's eye over and over again. Eventually, you'll anger it enough to force it to use its grapple beam on you. If you're near one of the large crystal pillars, though, you can strafe behind it, which will cause the grapple to lock onto the pillar instead, letting you get behind the Grenchler and unload a super missile on its butt. Repeat the process until you blow the butt off, at which point the Guardian will change its pattern a bit.
The grapple will no longer lock onto the pillars at this point, so you'll just need to avoid it. It shouldn't be much of an issue, though, as you can easily finish off the beast by aiming charge beams down its maw; one or two blasts will be enough to drop its Phazon shield, after which you should have enough time to use another charge beam on it, doing a good amount of damage. Keep this up until the beast is dead, and you'll grab your grapple. You can then make your way back to the Crypt afterwards and warp back to Aether.
Dark Visor
When you reach Torvus Bog again, you'll have some running around to do.
1: Grab another Missile Expansion in the Path Of Roots, thanks to your new Grappling Hook.
2: There's another Missile Expansion underwater in the Torvus Lagoon that's accessible now that you have your Gravity Boost.
3: Head to the Abandoned Worksite and grab another Missile Expansion that's now accessible with your Grapple.
4: Head over to the Forgotten Bridge and use the portal there. From the Dark Forgotten Bridge, head south (check your compass on the map screen) until you reach the Venemous Pond, where the last Dark Torvus Temple Key is located.
5: You'll want to grab the Beam Ammo Expansion in Cache A (which is in the same location as Aether's Save Station A.
6: Then head through the portal in the Portal Chamber (you can find a jumping path near the door leading from the Poisoned Bog if you look around) to grab another Missile Expansion.
Now that you have your dark superweapon, it's time to use it on the boss of the Dark Torvus Temple. Make your way back to the Torvus Bog via the elevator near the Portal Terminal. Proceed from there to the portal in the Forgotten Bridge, save your game, and head into the temple for the big boss. Before you use your keys in the center of the Dark Torvus Temple area, though, check out the two offshoot corridors around the keystands, where you'll find an ammo resupply and another energy tank, which should indicate the kind of fun you're about to have.
After you enter the temple, you'll spot a huge cocoon. After scanning it, destroy the four pedestals holding it up with missiles; this will launch you into the first part of the boss fight. This guy can be pretty rough, so if you wish, you can skip down to the next section and follow our instructions to grab the Darkburst before heading in. It's unlocked at this point, but is a lengthy detour, and isn't absolutely necessary for this fight, so we recommend you give the boss a shot before grabbing it.
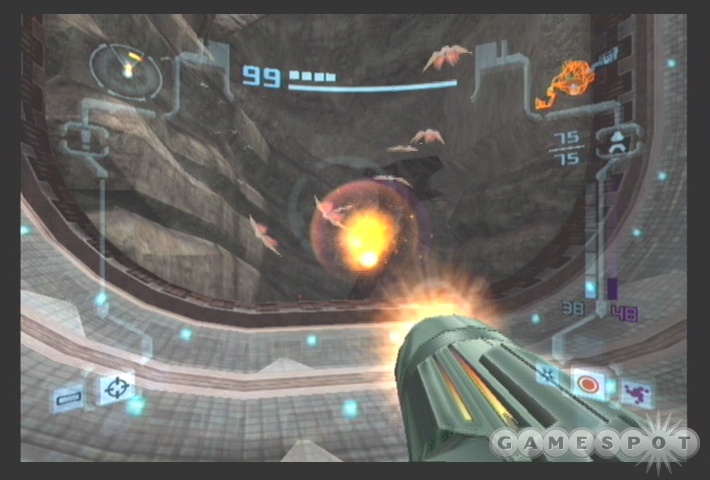
Boss Fight: Chykka
The Chykka fight is separated into a few different forms, many of which involve creatures other than the Chykka, so if it moves, scan it! You can easily miss some of your logbook entries here if you become too harried by the Chykka, so just be sure to scan anything and everything, especially after the Chykka morphs.
Chykka Larva

The first form of the Chykka is a water-based worm...thing. It only has two forms of attack. The first involves it splashing up from underneath the water and making a big splash, which will cascade across your platform, causing light damage. While it's in midair, you can target its chest (if you've scanned it) and hit it with a super missile, but you'll want to anticipate its location so that you can get an easier lock. Its location before the jump will appear on your radar, though, so it shouldn't be too difficult to get right next to it and get a quick lock; if you're too far away, you either won't have enough time to fire your super missile before the splash, or it won't impact before the Chykka is safely underwater.
The second attack is where you can do most of your damage. Every so often, the Chykka will splash up onto the platform, tilting it, and attempt to grapple you with its tongue. Just use regular charge beams on it while it's on the platform, unless you get grappled, in which case you should switch over to the light beam and hit it until it lets go. When it recoils in pain and starts to slide back into the water, hit it with another super missile on the chest. After a few repetitions of this, you'll wear out its life meter and it'll evolve into its second form.
(The Larva will also just swim around the platform occasionally, during which times multiple Shredders will pop up from the water. You can destroy these for missile or health refills.)
Chykka Adult
This is where you'll start to come down with a sudden case of pain. The Adult form of the Chykka can fly, and is quite lithe; it'll shake off locks quite often, and can seemingly deflect missiles before they hit. It's also impervious to damage from its front side, meaning that you'll have to get behind it to hurt it.
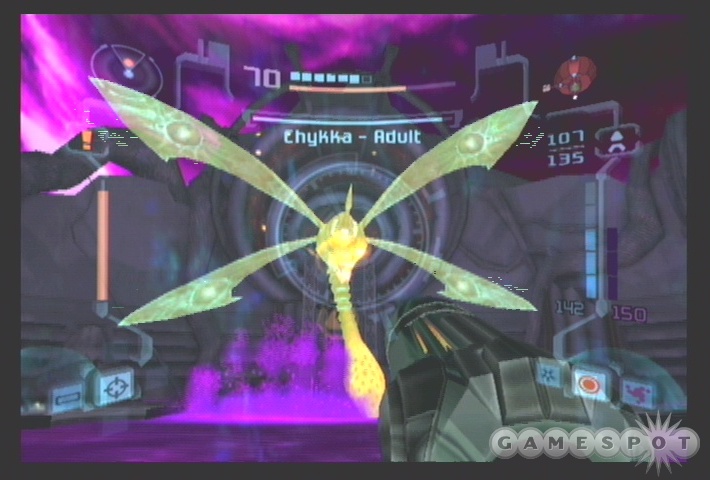
Luckily, it only has one attack, where it'll suck up the acidic water and spit it out at you. The three platforms here are just wide enough to let you sidestep one of these volleys, provided you start out on one edge and strafe to the other. You'll definitely want to do your best to avoid getting hit, as the spit will do a fair amount of damage to you, and will also usually knock you into the water, where you'll take even more damage. There aren't any helpful Shredders here to help you regain health, either.
In order to get behind the Chykka, then, you'll need to stun it, as your scan indicates. Since it can dodge most of your attacks, it's best to just spam power beam shots at it until it's stunned, then use your grapple to shift platforms until you're behind it. You'll note the large red circles over its wing connectors; each of these is independently targetable for shooting now. The best way to handle it, though, is to use a seeker missile salvo that targets all four of them at once, as you don't have a lot of time before the Chykka becomes unstunned.
Dark Chykka
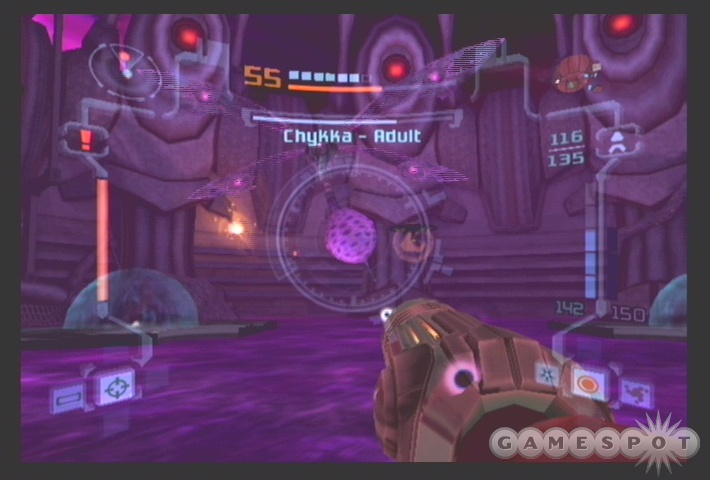
After you deal enough damage to the wings, the Chykka will fall down into the bog, only to rise again with a sac full of little baby Chykkas. Its attacks will now consist of a vicious wing buffet and a little spawn of babies, in addition to the normal spitting attack. The babies can be easily killed for health and missile pickups, and don't forget to scan them!. In this form, the Chykka is only vulnerable when you shoot her in the eggsac; unfortunately, it's really difficult to hit from long range, so you'll want to get right up close and use your charge beam on it, or a charged attack from one of your other weapons.
The Adult will vary these forms until you kill it off, at which point you can grab the Dark Visor. Use it to make the jumps up to the Dark Torvus Energy Controller and suck the energy out of it. That's the second temple you've depowered; now you have to get back to the light variant of it and recharge that, so head to the Dark Forgotten Bridge, use the portal there to return to Aether, and proceed back to the Torvus Energy Controller to recharge it.
Darkburst
Now that you have your Dark Visor, you can leave Torvus Bog and return to U-Mos. Instead of taking the elevator in the basement of the temple, though, head back to the Torvus Lagoon and take the Transport to Temple Grounds up. When you reach the Path of Eyes, you'll notice a green door on your map; bust it open and use your grapple hook within to grab a new Energy Tank. After that, you can return to U-Mos. You may get accosted by Dark Pirate Commandos on the way; note that the Dark Visor essentially eliminates their phasing abilities.
After meeting up with U-Mos, he'll tell you to head out to a Luminoth Fortress, but first, you should take a little detour to grab the Darkburst, a powerful weapon that will synthesize your dark beam and missiles to create a miniature black hole. First, head back to the Agon Wastes and make your way to the Transport Center, which is near the Portal Terminal. There are a bunch of goodies on the way to the Darkburst, so we'll assume that you want them as well.
1: In the Transport Center, you can use the halfpipe to grab some more missiles. If you hold the boost button down while descending a ramp, then release it just as your ball is about to start going up the other side, you should be able to reach the dark portal at the top of the room, which leads directly to a Missile Expansion.
2: Stay on Dark Aether for now and head to the Judgment Pit, where you can break through the green door leading to the Warrior's Walk, where another Missile Expansion awaits near a bunch of phazon trapped beneath bombable floorboards. You'll take a lot of damage getting to it, but they're missiles!
3: From there, continue east and take the one-way portal in the Dark Oasis. From the Main Reactor, make your way to Sand Processing nearby; you'll be able to boost your way up the halfpipe to a small tunnel near the unbreakable window here. Activating the bombslot in the small room will drain the sand, letting you grab another Missile Expansion.
You might notice an empty room off the Bioenergy Production room, but you can't access it just yet. (You can grab some more Creature entries for your logbook in Biostorage Station, though, where some baby Metroids are flying around.) When you're ready to proceed, head back to the Agon Temple and find the purple door at the bottom of the Mine Shaft. This will let you out into Mining Station B.
If you look closely, you should be able to spot the Darkburst on a platform high above the drill at the bottom of the shaft here. Note the bomb slot near the dead Luminoth here; it activates the drill. There's also a halfpipe nearby, where you can scan a platform to open up another kinetic cannon. The sequence of events is like so: use the bomb slot near the Luminoth to turn the drill on, use the kinetic cannon in the halfpipe to burst yourself up to another small corridor, then use the bomb slot there to move the drill so that it busts open a dark portal. You have a limited amount of time to move the drill after activating it, so hop to it doubletime!
After the portal is unlocked, you can ride the halfpipe up to a tube that'll lead you to the top of the drill, from which you can flip over to Dark Aether. From the Trial Grounds, you can make your way to the Duelling Range, where you'll be able to pass back through a portal to Aether, which will finally let you access the Darkburst. If you have the requisite ammo (five missiles and 30 dark ammo), you can try it out on the Space Pirates that come down to hassle you.
Spider Ball
The Spider Ball is your next target. Return to the Great Temple and head through Transport A. You'll come out at the Great Bridge, which is seemingly impassible. Seemingly, that is, because you can manage to drop the bridge if you use your dark visor to show the targets for your seeker missiles - pretty devious, that. Pass through the GFMC Compound and unlock the alien door that leads to the Sanctuary Fortress.
At the bottom of the elevator, you'll need to fight your way through the Temple Transport Access room. As intimated by U-Mos and the Luminoth body scans, most of the danger here comes in the form of automated turrets and other mechanized enemies, so be on the lookout for foes on the ceiling in addition to those on the ground. It's the ground forces that'll give you trouble in the Sanctuary Entrance, though, as you'll have to kill off around half a dozen Commandos to gain access to the fortress. If you can get a few of them close together, try using your Darkburst to kill them all in one go.
Inside the Fortress
In the Reactor Access room, you'll need to use your dark visor to see the seeker missile targets again, then fight off a Rezbit to leave the room. These guys are tremendously annoying due to the way that they can infect your suit with a virus; in a rather Eternal Darkness-ish spin, you'll need to hold down the L+R+B buttons to "reboot the system" and restore your view to normal. The drones are only damageable for a short time; try to hit them with a super missile while their shields are down.
In the Reactor Core, you're going to face off against another drone, albeit one with a decidedly different form than the previous one. The Quads are actually split into two parts, with a lower arachnid unit being attached to a control unit on top. The top units can be instantly destroyed with a super missile, leaving only the bottom portion. It's seemingly invulnerable, but if you roll up into a morphball, you'll notice that it will occasionally turn into a top and attempt to slam into you with electrical legs. While it's in this mode, hit it with a boost charge to activate its venting, then slam into the red bladder below its belly with another boost to kill it.
After saving your game through the red door, jump up to the top of the reactor and move on. In the Minigyro Chamber, you can gain the codekey for disabling the gyroscopic system: amber, cobalt, crimson, emerald, or, in layman's terms, yellow, blue, red, green. If you roll into the tunnel near the panel, you'll find four bomb slots corresponding to these colors; hit them in the order listed to shut down the gyro and unlock the passage across the room. You'll wind up in the Hall of Combat Mastery, and indeed, you'll need a lot of skill to get past the mechs here unharmed. Rather than waste your energy fighting them, it's best to just enter morphball mode and roll through the room until you reach the portal at the end. Activate it and step through.
The Ing Hive
You'll find yourself in the Culling Chamber. Your first order of business here is to step through the blue door near the portal, enter the Hazing Cliffs, use your light beam's charge fire to destroy the beasties in the corridor at the end, and grab the Missile Expansion. When that's done, return to the portal room. There's an elevator through a dark door here, so step on up into the Hive Dynamo Works.
Destroying the Nightbarbs here is a great way to restore your health and missile ammo before the upcoming boss fight, so clear them out and suck up the goodies before using your grapple to get across the gap. In order to unlock the portal on the other side, in fact, you'll need to get rid of all of the Nightbarbs, as they'll mess up your seeker missile targetting after you switch over to the dark visor to find the switches. Regardless, you'll need to take out the seeker missile targets to unlock another portal, after which point you can warp back over to the light side of the world.
When you come out in the Dynamo Works, head through the dark door into the Dynamo Access. The only path through this room, for the moment, lies underneath the floorboard, so roll up into a morph ball and maneuver your way past the Mechlops, who will spit you back towards the entrance if you don't give them a wide berth.
It's Pronounced "Yee-Ro"
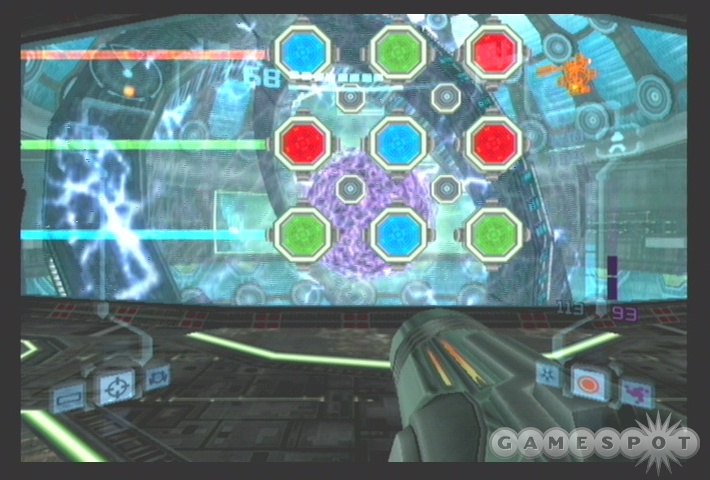
The Main Gyro Chamber, as impressive as it is, doesn't have much you can do yet, so roll up into a ball and find the tunnel near the window on the upper floor and roll until you reach a large control chamber.. The bomb slot in the control room will activate an unlocking sequence for the gyro's outer ring; your goal is to line up the nine colored icons with their respectively colored lasers on the left side. There are four control nodes in the middle of the icons; shooting one of them with your power beam will rotate the four icons around it, in a kind of two-dimensional Rubik's Cube.
To begin with, align the red icons by shooting the upper left node, then the upper right. The nodes will then disappear, leaving only the bottom two to go. With R standing for right and L standing for left, one convoluted solution is: R, L, L, R, R, L, L, R, L, R, L, L, R, R, R. In truth, you should be able to solve it with much fewer shots, after you get used to how it works, but that's what we used. After you solve the laser puzzle, another bomb slot will pop up, letting you shut down the outer ring of the gyro, which in turn will let you walk onto it across the main chamber there, where you'll find another platform on the far side. Use the tunnel here to reach the second half of the room you were in previously and then spinnerize the door to allow you free access before taking the elevator up to Temple Access.
Defeat the mech inside Temple Access. You can't access the Missile Expansion under the floor here - yet - but you can turn on the kinetic cannon, if you wish, by using your dark visor and the seeker missiles on the ceiling above the far door. You'll come out to the Sanctuary Temple, where you'll have to fight some Dark Quads; they're just tougher variants on the normal quads, though, and don't possess any special defenses or attacks. After they're dead, use your grapple to reach the top of the platforms here to reach the Sanctuary Energy Controller, where you'll gain the ability to bypass the cobalt alien doors.
For example, the cobalt door in the Sanctuary Temple will lead you to the Worker's Path. This seems to be a dead end, but if you jump down the platforms and turn around, you'll be able to scan a panel and unlock a new kinetic cannon, which will shoot you across the gap towards the Dynamo Works, where you'll be able to obtain the Spider Ball, but not before...
Boss Fight: Spider Guardian
The Spider Guardian is a fairly unique boss fight, in that you're locked into morphball mode for the duration. The guardian itself will stick to the blue energy grids on the rear of the wall, making it not too difficult to avoid him, which is good, as he has an energy shield on his body that will greatly damage you if you come into contact with it.
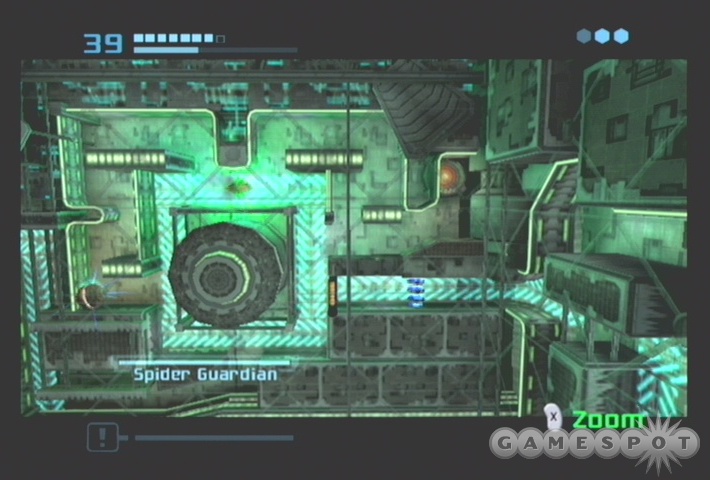
Unfortunately, you'll probably have to hit the Guardian more than a few times during your battle, since you'll need to lay bombs in front of it to force it to change its form. It has three forms in total: a blue one with average speed, a red one with high speed, and a green one with low speed. These will be cycled through as you lay bombs along the Guardian's path; it's the green one that's the most critical, as while the Guardian's green, the bomb slots in each little section of the maze will become powered, and the platforms that allow you to access the bomb slots will extend from the wall. Thus, your goal is to force the Guardian to shift to its green form by bombing it, then quickly making your way through the room to the bomb slot and activating it. The bomb slots will trigger small dividers to cut off the Guardian's pathway, forcing it into small electrical pillars, which is your only method of really damaging it. The Guardian doesn't stay green forever, though, so you'll need to get to the bomb slot within 30 seconds or so of the phase shift in order to actually activate it.
The only really difficult room here is the fourth, where there are no fewer than three different energy pillars that you're going to need to maneuver the Guardian into. The Guardian will, by default, pace back and forth on the lowest level of the room, leading to some sticky situations where it can corner you; in order to ensure that this doesn't happen, get used to boosting through it after you hit it with a bomb, while it's changing form; its energy field will drop at this point, letting you by without taking damage.

The first pillar is easy enough to hit; just turn the Guardian green, bomb jump up to the first bomb slot and activate it. After the Guardian impacts the pillar, you'll need to turn it green again, hit the first bomb slot, then bomb jump up to the second bomb slot and activate that one as well. The same formula applies for the third bomb slot, as well, but for the last two, you're unlikely to have enough time to hit them all before the Guardian changes from green to blue, which will erase your progress. The key here is that you can actually bomb the Guardian while he's in the green form to reset its decay timer, giving you more time in which to complete the sequence. You'll also need to be careful to activate the bomb slots while the Guardian is on the correct side of the panel; if he can push it back to its normal position, then he will.
Power Bombs
After you activate all three bomb slots and finish off the Guardian, bombjump up to the passageway that opens up and grab the Spider Ball. Now that you can attach yourself to walls, a number of new paths have opened up to you around the Sanctuary. To begin with, head back through the fourth room of the Guardian's lair until you come to a gap where you can bomb jump up; you should be able to hear a Missile Expansion nearby, so grab it and follow the tunnel beyond it to reach the other side of the Dynamo Works. You can now spider your way up to the upper ledge here to the Central Area Transport East. Take the elevator here down to the Hall of Combat Mastery, where you can use your spider ball to grab another Missile Expansion. This one's on the borderline of being worthwhile, though, as you'll have to maneuver through a series of tricky little rooms in order to reach it. Most of them are simple enough to figure out, albeit difficult to properly execute your way through; the only one that's obfuscated is the phazon room, where you'll need to use your morphball bomb to boost yourself up to the spider magnet that'll take you across the danger zone. When you reach the missiles, bust through the block beneath them to grab them, then exit the little habitrail to return back to your starting point.
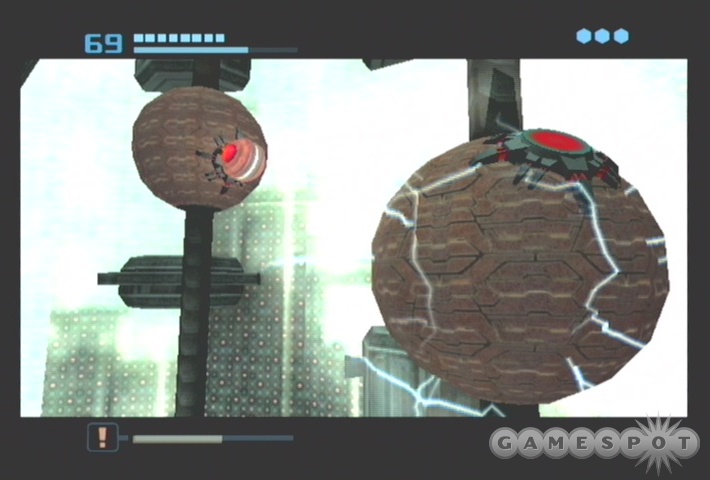
Make your way to the Reactor Core, where you can pick up your ninth energy tank by maneuvering through the little puzzle around the core itself. First, hit the kinetic cannon and stick to the reactor with your spider grip. Make your way up the reactor in between electric pulses, then jump off of the second ball with your boost; when you activate the boost, you'll essentially jump off of whatever you're sticking to, allowing you to make your way across the balls by jumping from ball to ball. Be careful, though, as every other ball will intermittently electrify and drop you off, so be sure to wait for the pulses to dissipate before jumping. If you stick to the trail, you'll eventually reach the energy tank.
After you make your way back to the Sanctuary Entrance, Dark Samus will appear and destroy the bridge; now you know why it never appeared on your map. No worries, though, as you can use the spiderball track to pass back to the Agon Wastes and. From there, you'll need to work your way back to the Torvus Bog. You'll probably get a hint as to the location of your next item on the way, if you haven't already, but when you reach the Bog, you'll definitely want to make a little side trip to get another Energy Tank, which is located in the Torvus Plaza, located near the Forgotten Bridge.
When you reach the Plaza, use your dark visor to kill off the Dark Commandos, then use the boost to get yourself up the halfpipe to a point where you can attack to the spider track. You'll notice a Sporb in position to knock you off the track eventually; if it bothers you, drop down and kill it from below, then resume your passage. The tricky part to this track is that it's disjointed in many parts, forcing you to use bombs to get from path to path. Keep in mind that you don't need to release the R trigger to get your boost, though, and you should be able to stick to it. When you reach the cannon at the end, blast off to find your tank, then blast off to the bottom of the Main Hydrochamber (after saving your game in the Hydrodynamo Station), where you received the Gravity Boost not so long ago. There's a portal at the rear of this room that you can spider your way to.
Boss Fight: Power Bomb Guardian
The Power Bomb Guardian is, all things considered, easier than most of the bosses you've faced thus far, due to the predictability of its attacks and its complete immobility. As with many of the slow-moving bosses, you'll need to use the environment to destroy it; you can't hurt it with direct fire.
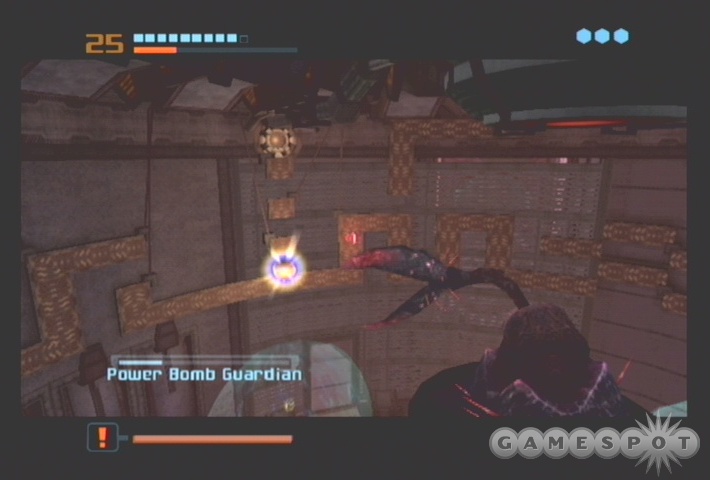
Instead, you'll need to use your spider ball to make your way along the spider track that rings the room; the four bomb slots are your ultimate goal here, as activating all four of them will kill the Guardian. The only difficulty here is that taking damage while attacked to the track will knock you off, and you'll have to dodge both the fire from the Ings in the room and the Guardian itself. The Guardian will shoot out power bombs, appropriately enough, and will attempt to anticipate your movement by leading you a bit. The solution is to just pause when it's about to fire one, then move while it's in midair, which should cause it to detonate harmlessly behind you. Occasionally it will spit out two at once, which can make things tricky, but after you get used to their large detonation radius, you should be more able to judge where to wait before moving on.
Sunburst
After the beast is dead, grab the Power Bombs and blast your way through the yellow door above. Use the portal in the Undertemple Access to get back to Aether, then work your way up into the Hydrodynamo Station again. Before you return to Sanctuary, though, it's time for the ever-fun item collection stampede! A whole hoary host of pickups have opened up as a result of your getting the Power Bombs, and we're not going to list every single one here, but if you want to grab a few more missile expansions, now's as good a time as any.
Itemage
1: Go through the light door to the Gathering Hall, where you can use your newfound power bombs to bust open the floor and the drain beneath it, creating a halfpipe. If you use this to boost yourself up to the two spider tracks at the top of the room, you'll be able to activate two bomb slots, opening access to a Missile Expansion.
2: There's a Power Bomb expansion in the Great Bridge of Torvus Bog. Ride the kinetic cannon to the upper walkway, scan around for a Denzium deposit near the wall, and bust through it.
3: If you flip over to Dark Aether, you'll note that there's a yellow door in the Dark Forgotten Bridge. Bust through it and bust through the wall next to the Phlogus to obtain another Power Bomb expansion.
4: Return to Aether and walk to the Torvus Grove. The legs on the tree here can be cracked with a Power Bomb, which will in turn reveal a Missile Expansion.
5: Return to Aether and use the elevator to Agon Wastes underneath the temple. The first Missile Expansion here is in Mining Station A, where you can bust through a cracked wall on the lowest level and ride the cannon up to a spiderball track.
6: If you return to Mining Station B, where you got the Darkburst, another destroyable wall will lead you to another Missile Expansion.
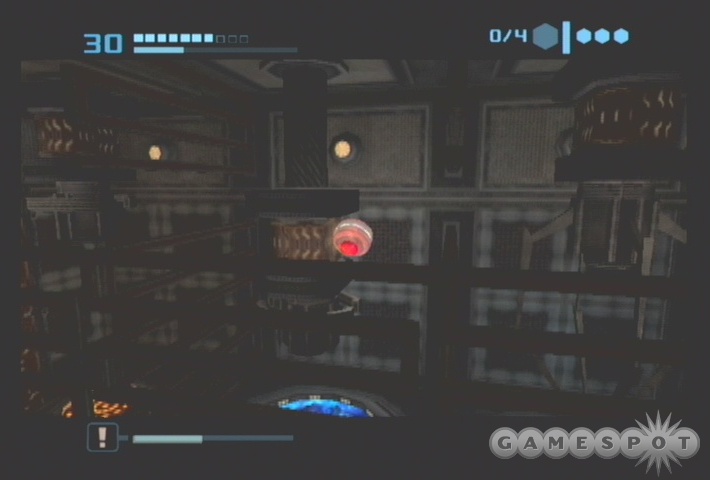
7: From there, head across the Sandcanyon into the Main Reactor (ignoring the yellow door on your map for the moment). Another Missile Expansion can be found here if you drop down to the lower level and look around for spider tracks. Be careful, though, as you can take a lot of damage if you don't make your boostjumps here correctly. If you get caught in the bottom of the phazon pits, you'll need to do a triple bombjump in order to get yourself back on the track. When you reach the end, use a missile to destroy the glass in the floor and grab your expansion.
8: Another Missile Expansion awaits you in Bioenergy Production. To reach it, first extend the racks to the ceiling, as you would if you were planning to jump them, then find the spiderball track behind the monitor stations on the other side of the room. By jumping from track to track, you should eventually be able to reach the green door.
Now that you have all of those, return to Ventilation Area A (you can use your spiderball to get you to the white door in the Main Reactor; don't forget to scan the Luminoth by it) and bust through the yellow door here. This leads to an elevator back to Sanctuary Fortress.
Back In the Fortress
Back in the Hall of Combat Mastery, you'll now have to deal with the dreaded Ingsmashers. If possible, ignore them and be on your way; if not, bust through their shields by using your opposite-color beam, then slam them with super missiles, the Darkburst, or power bombs, if you have any; these last are especially effective if you can lay them down while your foe is unshielded.
Now, you're going to be using power bombs a fair amount in the next section of the fortress, so it'll be worth your while to find another expansion for them before you move on. There's one available at the Sanctuary Entrance; you'll first need to use a power bomb to access the elevator around the corner from the door, then cannon yourself over to a turret. The turret needs to be used to destroy three areas of the environment, only one of which is very obvious; you might want to use your scan visor to check around for weak spots. After all three of the walls have been destroyed, you'll be able to jump your way up to a spiderball track that will lead to another cannon; use it to access the power bomb expansion.
Didn't the Care Bears Use a Sunburst Attack?
You may have already received another hint as to the location of your next critical objective, but you should ignore it for now, as the Sunburst is not too far away. Instead of heading back into the Fortress, make your way back to the elevator leading to the Temple Grounds; you'll find yourself back in the GFMC Compound. If you make a short trip down to the Dynamo Chamber, you can find a Power Bomb Expansion hidden inside a wall there, so grab it, then go back to the Compound. There is a yellow door here, but it leads to a dead end at the moment. Instead, head back up to the Great Temple via the elevator nearby and take the C Access back down; this will let you out near the Path of Eyes, from which you can access the Windchamber Gateway and, hence, the Grand Windchamber.
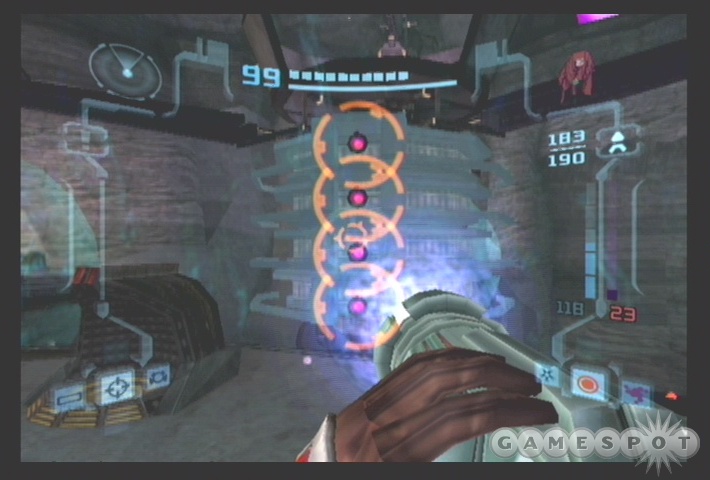
The puzzle here isn't too difficult to figure out. You can't do much on the Aether side of it, though, so warp over to Dark Aether with the portal, then start using the spinners. There are four spinners, each with its own kinetic cannon; you'll need to use them to line up the central cogs so that they're lined up top to bottom and also lit up. They can be rotated around between four positions, but only two of the positions will actually light up. When you have the four platforms lined up in one of the lit-up positions, you can jump to that platform and use your seeker missiles to hit all four of the purple targets simultaneously. You'll need to do this twice before you unlock all four of the platforms, at which point you can return to Aether and use the grapples to reach the sole cannon there, which will give you access to the Sunburst. Now that you've got it, you can return to the Sanctuary Fortress via the elevator near the GFMC Compound.
When you return to the Fortress, proceed back to the Hall of Combat Mastery and use the elevator nearby to reach the Main Gyro Chamber. Your goal is located beyond the yellow door here. (You'll note that there's a yellow door at the end of the Spider Guardian's lair; if you wish to go through and retrieve one of the Sky Temple keys, you can do so, but you won't need it until later in the game.) If you take the elevator near the door up to the upper observing platform, you can destroy the debris there with a power bomb to reveal another two-dimensional lock for the inner ring of the gyro. It can be difficult to spot, but this ring has a spider track attached to it, so get onto that, then boost your way through the cracked glass on the far side. Before you do so, though, be certain to save your game in the room below, as there's a boss fight coming up.
Boss Fight: Dark Samus
Dark Samus 2 is much tougher than she was earlier, but you should have plenty of health at this point in the game, and her attacks aren't too much tougher to dodge. Her main new features are a boost ball attack, which you can either try and hit her or just jump around to avoid it; an ice beam attack, which is easily escaped by quickly tapping B; and an invisibility mode, which can be neutered with your dark visor.
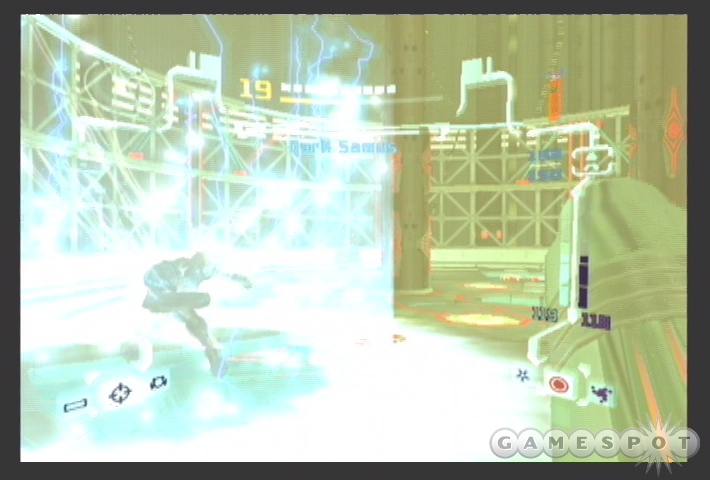
Your best bet for damage here will be super missiles, we find. They will sometimes miss or bounce away harmlessly due to her phazon shield, but they'll connect often enough to do serious damage to your foe. As before one of the best times to hit her is just after she lands one of her comet charges; your lock will probably dissolve as she stands up, but you should be able to just anticipate her position and fire it manually into her back just after the phazon shield drops. Another good time to use it is while she's invisible, so switch to your dark visor and go to town. Eventually she'll die - again - and, of course, trouble you no more for the rest of the game. We're serious, this time.
Afterwards, drop down onto the small platform nearby and walk along the ledge until you reach the dark portal. Head through and spiderball over to the main platform, then use the spinner to rotate the spidertracks in the middle of the area until they lock into place. Follow the tracks, boostjump to the far platform, then leap over to the portal and jet back to Aether to obtain the Echo Visor. You can use it to track down the three sonic generators that are restricting access to the elevator leading downwards; shoot them to unlock it and return to the Gyrochamber.
Screw Attack
The next piece of technological derring-do that's available to you is the screw attack. To begin with, return to the Reactor Core and blast the yellow door to achieve access to the Transit Station. If you smash the window leading to the dark portal here, you can make your way through a series of portals in both dimensions to net yourself a Power Bomb Expansion, as well as the logbook entry for the Dark Ingsmasher (like its Aether counterpart, easily killed by a Power Bomb). Another expansion awaits inside Main Research, albeit of a different sort. If you make your way along the spiderball tracks on the northern side of the room, you'll come to a missile expansion.
When that's done, use your echo visor to shut down the locks preventing you from access the lower door here. Through it, you'll find a dark portal; head through and repeat the process in the Staging Area, while avoiding the Ing Hunters that will try to sap your health. After the door in Dark Aether is unlocked, scan the panel beyond to open up a lower level, then head through the portal there.
We Died Here!
After you make your way up the spidertrack, you'll have to make a blind boost jump into the bottom chamber of the analysis machine in the center of the room; if you tilt your analog stick up before you let go of your boost, you should make it without a problem. The problems actually begin when you're in the chamber itself, as you can quickly take a lot of damage if you don't know what you're doing. You'll need to quickly bombjump yourself onto the spidertrack around the interior of the cylinder to avoid the electrified floor, and boost from one side of the track to the other to avoid the manipulators that will try to scrape you off. While doing this, you'll have to keep an eye out for red orbs that will periodically descend from the main portion of the machine; these you'll have to destroy with your boost jumps. After three or four of the orbs are destroyed, you'll be able to smash the central core, but it only appears for a second, so be quick about it!
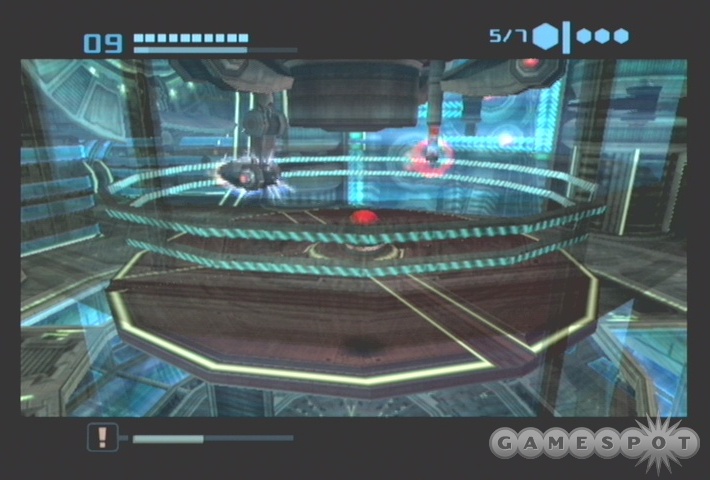
After the first ring of fire is bypassed, you'll have to maneuver through two more, each of which feature a disjointed outer ring, forcing you to boostjump even more often to stay away from the scrapers. The basic sequence of targets is the same as on the first ring, though, so try to keep your cool and hit the dangling things when possible, and be certain to avoid as much damage as you can.
When you get to the top of the structure, you'll be allowed to drop into the Central Area Transport West, so use your echo visor to unlock the kinetic cannon there to reach the Watch Station. The first thing you'll want to do here is head through the white door and grab the Energy Tank in the Watch Station Access. Return back to the Watch Station and find the spiderball track on the side of the room and start maneuvering through. You'll eventually come to a flat panel of spiderball tracks. The lower right here will lead you to a bomb slot that opens up a dark portal, which you'll need to hit before you can proceed, but first, drop off the lower left to find an extension of the spiderball track. This will lead you to a tube that contains another Beam Ammo Expansion - yay!
Anyway, you will need to hit that bomb slot and unlock the dark portal. Head through, then make your way up to the blue door on the western side of the Aerial Training Site. You'll need to grapple your way across the next room, then drop down onto the platform next to the far side of the room and head through the one-way portal there. This will let you finally access the Vault.
The Vault of Riches
The Vault is where you're finally going to obtain the Screw Attack, but not until you maneuver your way through a lengthy puzzle. To begin with, drop down behind the Screw Attack's little prison and use the bomb slot; this will turn on a series of lasers that you'll need to reorient with spinners. Secondly, scan the panel at the bottom of the vault to lower a bridge that'll lead to a dark portal, then head on through to the Vault Attack Portal, where you'll need to grapple across the chasm, turn around to scan the Dark War Wasps, then activate the second portal here that'll take you back to Aether.
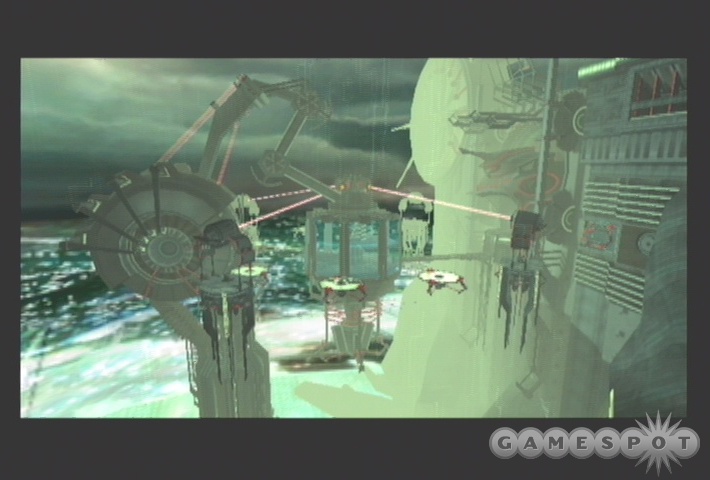
Back in the Vault, you'll find that you have access to the four laser stations now, so kill the Rezbits and use the spinners until each of them locks into place. When that's done, return to the portal, grapple back to the other portal, and return to the bomb slot and use it again. This will unlock the vault, giving you access to the Screw Attack.
Although the Screw Attack can be used to hurt things, in the context of the game, you're mostly going to be using it as a movement aid. To begin with, you can use it to reach the door of the Vault; by continually hitting the B button after you jump, you can greatly extend the distance of your leaps. The trick is to not tap it too rapidly, though; just hit it, then glide for a bit until you start to fall down, then hit it again, and so forth. You can only hit it five times, so you'll need to time it right to get across some of the gaps, especially the one in the Grand Abyss.
Annihilator Beam
Now that you've looted the Sanctuary Fortress, it's time to find the keys to the Dark Sanctuary Temple and finish off the beast that lies in wait there. To begin with, though, let's grab some more expansions in the area. First off, return to the Watch Station and use the portal. The Missile Expansion immediately next to the dark side of the portal requires a new technique; if you scan the wall here, you'll note that you need to use the Screw Attack to bounce off the walls to reach it. The timing for this can be difficult; you need to actually be in a Screw Attack before hitting the first wall, then hold down your jump button after you make the two jumps to reach the missiles.
After you obtain those, head to the Central Area Transport West. Another set of Missile Expansions await you here. If you drop down from the upper level to the one beneath it, you'll notice a series of three ball tubes nearby. Drop down the leftmost one, then head right twice to find a Missile Expansion.
At the bottom of Transport West, you'll find yourself back in Main Research, where you'll need to step through the portal and find the blue door on the dark side to reach Central Hive West Transport. You'll need to wall jump up the entire vertical length of this passage with your Screw Attack to reach the first Dark Sanctuary Temple Key.
The second temple key is accessible via the portal in the Hall of Combat Mastery. Head there to wind up in the Culling Chamber, where the key is held at the end of a spiderball track.
Lastly, the third key can be found off of the Hive Dynamo Access, accessible via the elevator just off the Culling Chamber. You'll need to blast your way through another sonically-locked door to reach the Hive Gyro Chamber. You'll need to spiderball your way from the bottom of the chamber to the very top to reach the key, being careful to avoid the Darkling Tentacles on the way.
The Ing Hive is very close to you; it's located past the blue door on the southern side of the Gyro Chamber here, in fact. Before you head in, though, blast through the northern blue door to find an ammo station, then missile the red door to save your game.
Boss Fight: Quadraxis
Quadraxis
The World's Biggest Quad will, obviously enough, have a few different forms that it'll cycle through, each with its own peculiar attacks. The first is essentially a replica of an ordinary Quad, albeit much bigger. Its primary attacks are a ground-centered shockwave which deals medium damage, and a laser that originates from the head. When the laser begins to lock onto you, use your boost in morphball mode to escape before it fires.
In order to damage the first form, you'll have to target both its knees and its feet, but only one area at a time. If the red balls underneath the feet are active, then you should concentrate on these; they can be easily destroyed by simply rolling through them with your boost. You'll probably take shockwave damage during this process, but the feet will constantly be dropping ultra energy spheres which restore 100 energy apiece, so you shouldn't be worrying about dying just yet.
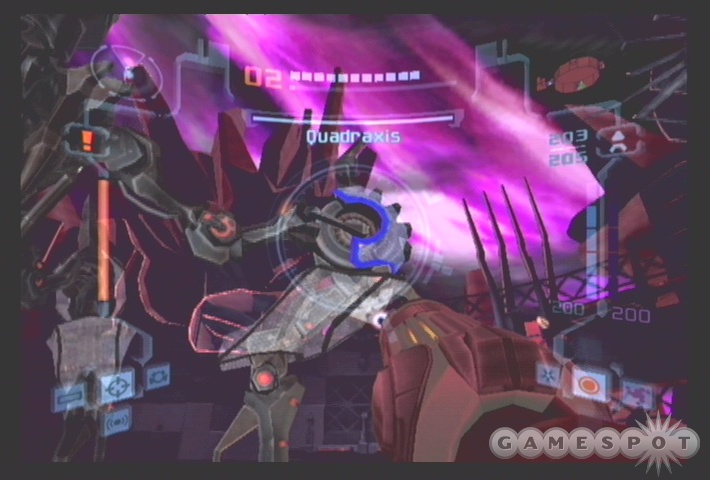
The knees are a bit trickier, if only because the damn thing's big enough to make it difficult to get around it. Only the knees that are currently flashing blue can be damaged, so try hitting them with super missiles when they're close enough to you that you think you have a chance of actually impacting it.
Every once in a while, the Quad will go into a super-spin mode during which it'll try to suck you into its blades of death. There's no easy way to avoid this, but if you can shoot the large red ball which appears underneath the Quad during this attack, you may be able to deal significant damage.
Damaged Quadraxis / Shielded Head Module
Eventually, you'll damage the Quad enough to disable its lower section, at which point it'll disengage its head and exclusively use that to attack you. The head is completely shielded from your attacks initially, so switch over to your echo visor and use super missiles to destroy the antenna atop the damaged lower half of the mech in order to lower the head's defenses. After the antenna's down, the head will attempt to drop regular Quads to defend it. Ignore them as best you can and focus on taking out the three antennas attached to the head; you'll need to keep your echo visor activated in order to spot them. Don't forget to scan both the shielded head and the stunned head, as well as the lower half of the unit, if you're aiming for the 100% logbook entries.
Final Head Module
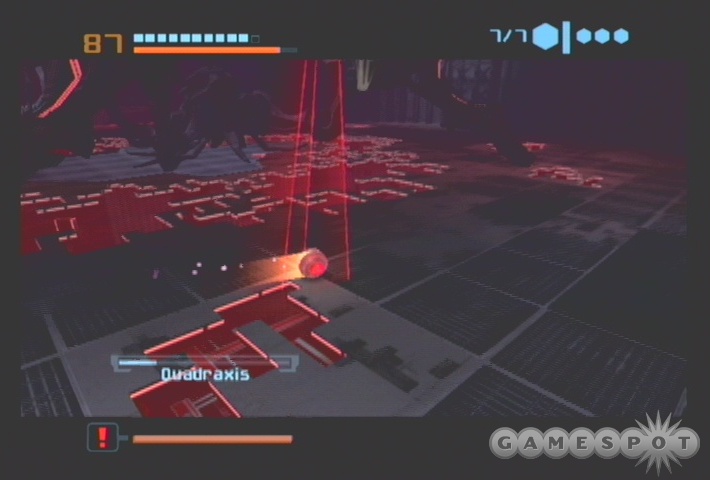
Now that the head's unshielded, you'll finally be able to deal the killing blow. After scanning it, hit it with a few Super Missiles until it becomes stunned, then wait for it to start drifting. When you know what direction it's heading in, get in front of it and use the spidertracks on the legs of the lower module to get into position for a boost jump. You'll need to jump from the leg onto the head as it floats, then find the two small slots and lay bombs inside them. Bomb both of the slots and you're done!
With the Annihilator Beam and your Screw Attack, you can access the Hive Energy Controller and grab the energy from it. After you have it, make your way back to the a portal, flip over to Aether, and drop it off back at the Sanctuary Fortress Energy Controller. Before you head back to U-Mos, though, there is still one goodie in the Fortress to obtain. The first is in the Temple Access, where you'll have to look around with your dark visor to find a set of seeker missile targets; hitting these will unlock a kinetic cannon. If you've already done that, then use the cannon to return to the front of the room, then find the sonic lock and blast it. This will extend the cannon target, so quickly run to the cannon and use it again to drop down to a Missile Expansion, then use the spinner nearby to open up an egress point. From there, return to U-Mos in any way you see fit. If you wish to grab items that have become accessible to you on the way back, feel free to do so, but we'll save those for after you grab the last two items.
The first of these items is the Light Suit, which you can obtain just by talking to U-Mos. Old U-Mos will also tell you about the need to find the ten keys of the Sky Temple, which is the Dark Aether equivalent of the Great Temple, and which is where you'll finish up the game. If you wish, you can use the portals in the Temple Grounds to flip over and visit the Ing equivalent of the Hall of Honored Dead to get clues as to the locations of each of the keys, but then again, we'll be giving you a simplified list here pretty soon, so no need to worry about these just yet. The clues are logbook entries, though, so if you're looking for that 100% scan completion, then you might want to pick them up ASAP. He'll also open up a teleporter for you; when you use it, you'll be able to instantly warp to any of the three Aether temples. Go ahead and warp yourself to the Agon Temple.
Sonic Boom
From the Agon Temple, head east into the Sandcanyon. Screw Attack over to the platform in the middle, then Power Bomb the base of the structure to reveal another Power Bomb expansion. You won't be able to actually make the jump leading to the far side of the canyon, but if you try it, you should wind up on the far platform after you fall down.
You'll be near the the former Space Pirate stronghold; work your way towards the Command Center, where there's a one-way portal to Dark Aether. Head through, then blast the dark door and work your way around until you reach the Dark Oasis. There's a Denzium wall here, so Power Bomb your way through and look around...there doesn't seem to be anything here! Of course there is, though, but you'll have to dip yourself into the cool, refreshing Dark Aether waters to find it. Don't worry; your Light Suit will completely protect you from the acidic properties of the bog. Take a dive, then, and switch over to your dark visor to find the Ing chest. Blast it to reveal your first Sky Temple Key!
From there, work your way around to the Phazon Site. If you jump up onto the platforms, you'll be able to Screw Attack your way to the grey door at the rear of the room, wherein you'll find the Sonic Boom.
Sky Temple Keys
Now that you have all of your critical equipment, it's time to track down all of the Sky Temple keys, as well as all the miscellaneous itemage that you've had to bypass thus far. Since you're already in the Dark Agon Wastes, let's start here.

The one thing you need to know about the Sky Temple Keys is that they're all located in Ing Flying Caches. These living treasure chests can only be seen with the dark visor, but after one shot from any of your weapons, they'll flip over to the normal visible spectrum and will be scannable and shootable as usual.
Dark Agon Wastes: Keys and Items
Sky Temple Key 1: Agon Wastes: Dark Oasis. Bust through the Denzium wall and fall into the water, stich to Dark Visor to locate the living key chest.
Power Bomb Expansion: Work your way around to the Feeding Pit and drop down into the water. The Power Bomb Expansion is in a cavern underneath.
Sky Temple Key 2: Battleground. Reach this room from the upper exit of the Doomed Entry, then make your way across the platforms (which are only visible with the dark visor) until you reach the living chest.
Missile Expansion: Head west from the Battleground until you reach the Junction Site, where you can spiderball your way up to a bomb slot. Hitting this will give you access to the missiles; hit it again to move on.
From there, head to the Portal Site and flip back over to Aether.
Agon Wastes: Items
Energy Tank: Mining Plaza. Use your echo visor to find all of the antennas, then destroy them to unlock the Energy Tank. You'll need to use your Screw Attack to reach it. That should be just about the only item left here if you went along with our item digressions earlier in the guide; if not, check our checklist and see what you're missing.
Temple Grounds: Items
Again, you should've mostly cleared this place out. There are a couple of goodies still left, though.
Missile Expansion: Head to the GFMC Compound and Screw Attack your way onto the top of the ship to find this.
Energy Tank: In the Fortress Transport Access hallway, you'll notice a huge yellow beam of light. Apparently the Light Suit will turn these into quasi-elevators; this one will take you to an Energy Tank.
Sky Temple Grounds: Items and Keys From the last Energy Tank, double back to the Sacred Path and flip through the portal there to reach the Sky Temple Grounds. These are more difficult to maneuver through than most of Dark Aether, because of their disjointedness; you're going to have to flip from Aether to Dark Aether and back numerous times to get all of the stuff here.
Beam Ammo Expansion: In the Profane Path, you'll notice a sonically-locked door when you flip over to your Echo Visor. With your Annihilator Beam, shoot the door to get the order of the tones, then shoot the switches in that order to find the Ammo Expansion.
Missile Expansion: You can find this by Screw Attacking to the far ledge in the Phazon Grounds.
Sky Temple Key 3: Work your way around to the Ing Reliquary and destroy the Ing Flying Cache to grab the key.
Now, return to Aether and get over to the Temple Assembly Site, where another portal awaits. Head through to find yourself in the Plain of Dark Worship. If you didn't get the missile expansion here earlier, do so now.
Sky Temple Key 4: You'll find this one in the Accursed Lake nearby, beyond the door locked by seeker missile switches.
After grabbing that, get back to Aether and head to the Hall of Eyes. The portal here is your next destination.
Missile Expansion: In the War Ritual Grounds, use your dark visor to expose the seeker targets around the door of the cache here, then bust through for your missiles.
Sky Temple Key 5: Located in the Defiled Shrine, just off of the Shrine Access. Corresponds to Aether's Landing Site.
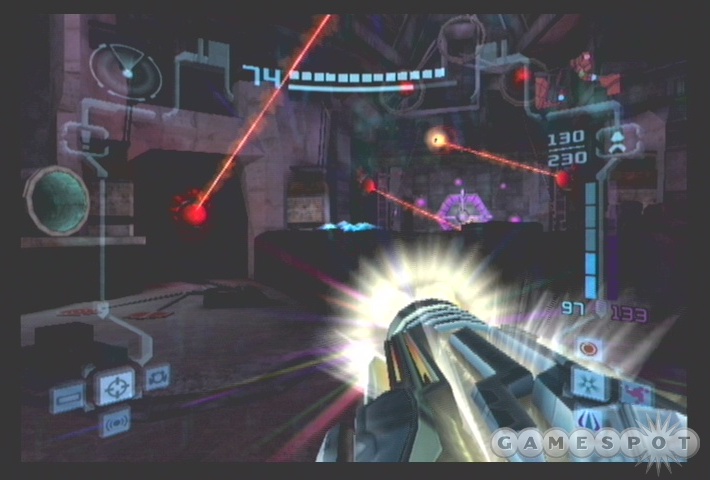
Before you head back to Aether, get past the seeker missile door guarded by the laser creatures and scan the corpse and the various locks for a substantial boost to your Lore scans. If you wish, you can step into the middle of the arena and drop off the keys that you've found so far. Note also that one of the keys was already in place, giving you just four more to find, instead of five. You can do all of this just before you enter the Sky Temple later on, though, if you wish to wait.
Torvus Bog Items
Head through the Path Of Eyes and get down to the Torvus Bog for our next round of exciting scavenger hunt action. As per usual, almost everything should be taken care of down here, but there are some exciting goodies, such as:
Energy Tank: In order to reach the Energy Tank here, head to the Torvus Grove and wander into the Meditation Vista. You'll need to Screw Attack your way onto the moving platform here and use that to grab the tank.
When you have that, return to the underwater area of the temple and head from the Hydrodynamo Station to the Training Chamber.
Missile Expansion: In the Training Chamber, use the spiderball track to get above the small platform attached to the statue, then drop down and activate the bomb slot to find the missiles.
Missile Expansion: Around the outer ring of the lower section here, you should notice a tunnel blocked off on either side by grey doors. Blast through either of them to access the Transit Tunnel South. This features another bomb slot/airjet puzzle, but the bomb slots here will permanently switch the jets of air, giving you plenty of time to maneuver the maze and grab your expansion.
Dark Torvus Bog Items and Keys
While you're in the bottom section of the area, go ahead and find a portal to flip through and head to the Undertemple, where you fought the Power Bomb Guardian.
Missile Expansion: In the Undertemple, find the sticky walls near the portal and wall jump with your screw attack up to the top to find your missiles.
Sky Temple Key 6: This is located in the Dungeon, which is actually inaccessible from the dark side of Aether. You'll need to flip back to Aether in the Crypt, walk around to the Catacombs, and use the portal there to get to the Dungeon. Drop down into the water here, scan the Watchdrone to get its logbook entry, then shoot the beacon above it to force it out of the way. Repeat the process until you come to the cache which contains your Key.
Sky Temple Key 7: You'll need to hop back over to Aether and ascend to the upper section of the Bog to retrieve this one. It's in the Poisoned Bog, underneath the water. Use your dark visor to spot the Cache, and blow it to grab the key.
Sanctuary Fortress Items
Missile Expansion: Head to the Sanctuary Map Station and ride the beam of light there up to a little room where the missiles await.
Missile Expansion: Head to the Sentinal's Path and use your Annihilator Beam and echo visor to open the sonic door here.
Power Bomb Expansion: There's a sonic door at the bottom of the Main Gyro Chamber, so unlock it and use the kinetic cannon to find the expansion.
Ing Hive Keys and Items
You should actually have all of the items from this section of the game (and should be at 100% by now), so now all you need are the Sky Temple Keys!
Sanctuary Key 8: To get this one, retrace your steps to the Spider Guardian's lair (in Sanctuary Fortress), then head to the locked door where you picked up the spiderball and bust through. The portal within will lead you to the Hive Dynamo Works, wherein you'll need to pass through a little spiderball course to find the Ing cache.
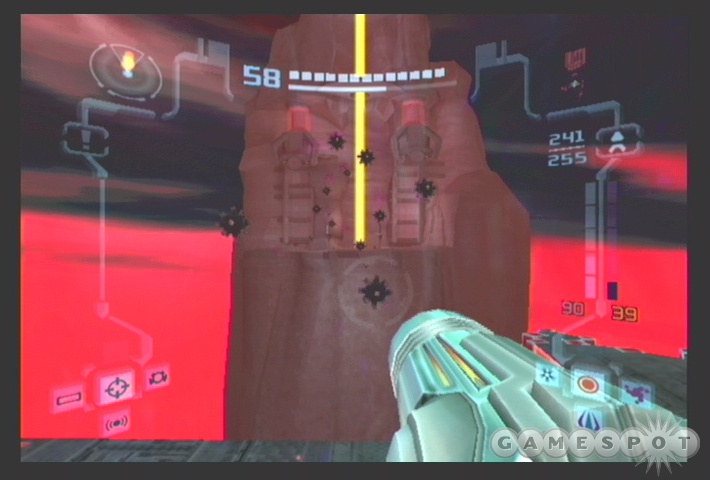
Sanctuary Key 9: This one's located in the Hive Entrance, which is the Dark Aether counterpart to Aether's Sanctuary Entrance. You'll need to Screw Attack your way across to the beam of yellow light, ride up, the Screw Attack back to the far side and grab the key from the cache there.
Now you're ready for the end game!
Sky Temple
When you've gotten all of the items that you want, and are ready to return the keys to the Sky Temple, head for the Hall of Eyes in the Temple Grounds and use the portal there. You might want to hit up an ammo station before you do this, as there isn't one before the final fights.
Before you deposit the keys into the center of the Sky Temple Gateway, be sure to scan anything in the room, if you haven't been here before, as using the keys will retract the pillars and make them unscannable. It'll also open up the path to the Sky Temple Energy Controller, though, so you'll want to do it and head on up. There's a save point in the Controller, so use it before moving on up to the Sanctum.
Boss Fight: Ing Emperor
Alright, time for the big hurt. As you might surmise, this guy's going to be tough, and by tough, we mean tough. He's deals a lot of damage, is difficult to hurt, and it's a long fight with few opportunities for recharges. If you didn't get all of the energy tanks and beam ammo expansions, you're going to be sorry!
As a note, if you're going for 100% logbook scans, be sure to rescan the Emperor's various forms after you die. You're going to die, almost assuredly, so remember that this requires you to rescan him!
Tentacle-Head
In the Emperor's first form, well...he's just ugly. He's got two parts for you to scan, so be sure to grab them both. The bottom form doesn't attack or anything, so ignore it; it's the upper part of the body that'll annoy you, as it has a bunch of tentacles that will use a variety of maneuvers to deal heavy damage to you. The worst are the attacks where the tentacles just flutter around and rotate around the main body; it's difficult to avoid them, but you might be able to if you're coordinated enough; try using your morphball while the tentacles are high, and space jump while they're low. Beyond that, their main attack comes when they charge up with dark energy and attempt to drop it on you; you should be able to see this coming from a mile away, though, so change into ball mode and boost away from the zone of impact before they hit you.

In order to actually damage the Emperor, you're going to have to encourage the tentacles to retract into the main part of the body. The best way to do this is to just spam seeker missiles at them. These have a chance to miss due to the way that the tentacles move around, but you should be able to get three or four tentacles in a go. You can also use the Annihilator Beam to effect the same...effect (or something like that), but you're going to find your beam ammo in slightly shorter supply later in the fight, so you might want to hold onto it.
Either way you go, eventually all of the tentacles will withdraw into the head, which will itself withdraw into the body and reveal the Eye. Scan this, if you wish, then focus on getting your weapon fire into the small slot between the two fields that guard most of the eye; these are impervious to damage, so you'll need to aim for the slot to deal damage! It's best if you have a super missile or Sonic Boom ready to go before the eye appears, then quickly shuffle around to the gap and bust it through as soon as you know where to aim at, as the eye will shoot a beam weapon at you that'll disrupt your charging and will prevent you from firing anything for a second or two. It'll shoot at you three times before reverting back to the Ol' Tentacle Head form, so you'll need to as much damage as you can before this occurs, but it's difficult because that beam is so damn hard to dodge! If you get really close to the base of the Emperor, sometimes the beam will impact the lower edge of the Eye's pedestal and won't hit you; if you do this, try to use the Annihilator beam and just tap the button as rapidly as you can to dish out plentiful hurt.
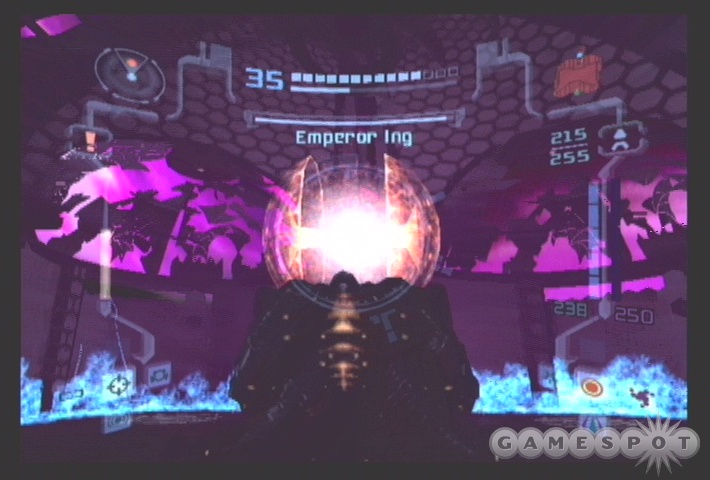
As mentioned, you only have a limited amount of time with the Eye before the Emperor reverts back to his previous form. As you lower its life, the Emperor will start to sprout more tentacles; as the number starts to become ridiculously large, you're probably want to just use the Annihilator Beam to blow them away with a minimum of muss and fuss. If you've taken a lot of damage at this point, you may want to just load up your last save and give it another shot - your ability to survive the onslaught of the Emperor's final form is directly related to surviving the first portion with a large chunk of health left.
Chrysalis
The Chrysalis form of the Emperor is your chance to get a little breather before the real hard part of the fight begins. All you need to do here is attach to the Chrysalis with your spiderball form and go to town on the eleven little portholes that appear on the exterior of its surface. You'll need to destroy each of them, but they'll be impervious to your attacks most of the time; you'll need to wait until you see black bubbles issuing forth from them, which will herald the appearance of a tentacle. If you're atop a porthole when the bubbles begin to come out, you can lay down three bombs to clear out the infestation, but we found it easiest just to pick a spot on the hide of the Chrysalis near a few different holes and lay down power bombs. You'll often be able to get a few different portholes at one go.
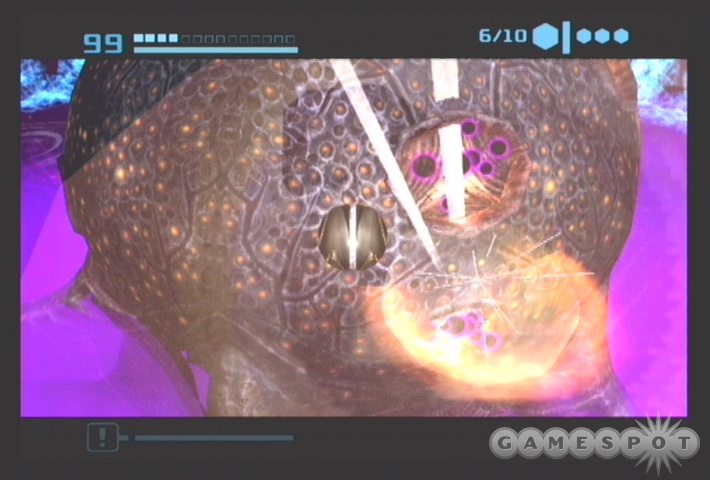
Note that Inglets will appear on the surface of the Chrysalis and attempt to knock you off. You can take advantage of these guys by continually bombing them for items and health. There isn't a time limit on this portion of the battle, so feel free to knock out eight or nine of the portholes, then just stick around atop the Chrysalis and bomb away all of the Ings that come around to bother you; you should get plenty of missiles and such from them. The only issue here is the acidic gas; if you start taking damage even while you're on top of the sphere, you'll probably need to hit the last portholes as quickly as possible to move on to the next form.
Emperor
The Ing Emperor's third and final form is somewhat like that of a really, really, really big Ing Warrior, save for all of the unique attacks that he'll use. This guy is going to absolutely chew through your health, so play cautiously, based on the amount of life you have remaining - it's going to be rare for you to see any health pickups during this form.
The Emperor has a number of attacks, as mentioned. The most vicious are his charge attack, in which he'll, well, charge and attempt to trample you (this is very difficult to dodge when he starts it at close range), and his earthquake attack, in which he'll jump up into the air and send out a shockwave of dark energy when he lands, much like the Jump Guardian did lo those many powerups ago. Unfortunately, the latter attack will often land directly on your head, making any kind of space jump strategy fairly useless.
In addition to these attacks, the Emperor will also use a few beam attacks, which are almost identical to those of the Ing Warrior, save for coming seven or eight at a time. Still, these are easy to avoid by jumping or dashing from side to side.
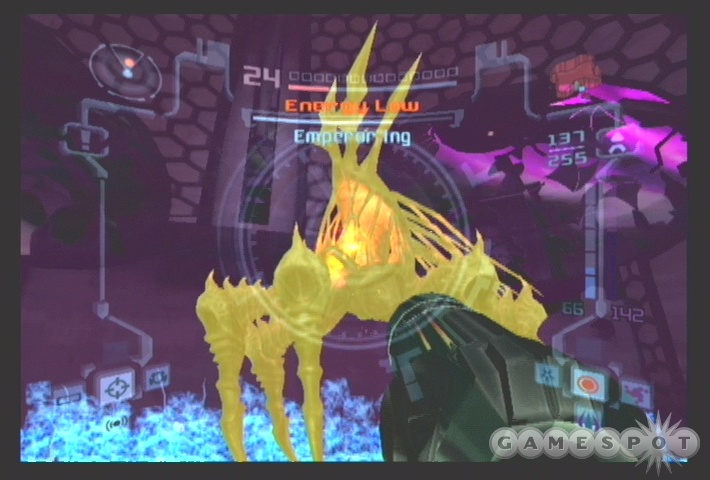
Actually damaging the Ing Emperor is going to be one of the more frustrating tasks in the game, as he can only be wounded by hitting the big ball of energy that glows from within his jaw. Seems like it would be a big target, but he moves erratically, and very quickly, meaning that most of your weapon fire will hit him on the jaw rather than penetrating to the interior of his mouth. On the plus side, you can repeatedly yell "Negative! It didn't go in! It just impacted on the surface!" over and over again, which is always fun, but eventually you'll need to actually start whittling away at the guy's health if you want to win the fight.
In order to actually hurt the Emperor, you will need to hit the damn energy ball; the best way to do this is to either use a super missile from a long way out, or the Annihilator Beam, or the Sonic Boom if you think you can spare the ammo. After taking a certain amount of damage, the energy ball will change color, to either black or white; after it does, you'll need to use the opposite-color beam weapon to actually lower the Emperor's health. (The Annihilator Beam and Sonic Boom can hurt him whatever color the ball is, making them useful to use to deal the killing blow.)
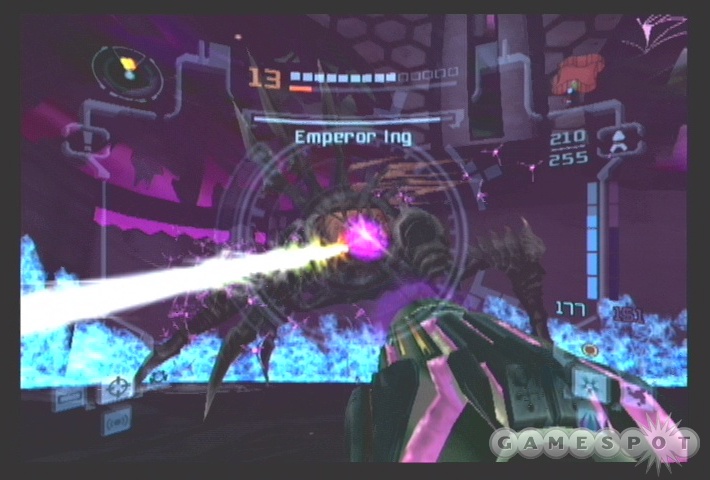
When the ball is dark, you should be able to do plenty of damage with your light beam, due to the speed of that beam; it helps if you get up close to the mouth. The dark-energy Emperor will also periodically claw at the ground and dig up a herd of Nightbarbs that will rotate around his head. When that happens, switch over to your dark beam and land a Darkburst on the Emperor's head; the resulting ball of energy will usually kill off all of the Nightbarbs, which should result in a shower of missile and ammo pickups, as well as some health, if you're lucky. You'll have to do this quickly, though, as the Nightbarbs will disappear when the energy ball returns to its purplish color.
If the ball turns white after taking damage, then you'll have to resort to your Annihilator Beam to deal damage. Theoretically, the dark beam can hurt the guy, but its projectiles travel so painfully slowly that you're unlikely to land more than one out of ten shots, so stick with the Annihilator or Sonic Boom if at all possible. The white-ball Emperor will periodically spit out a bunch of little white...things that'll zoom about in the air. These can theoretically give you a bunch of pickups, like the Nightbarbs, but they're tougher to destroy, so you might want to try just manually aiming at them and blasting away with your power beam to see what drops. In all, the white-ball Emperor is much less preferable than the dark-ball Emperor, but there's no way to encourage him to pick one form over the other, so you'll have to rely on pure luck.
After you deal enough damage to the energy ball in the Emperor's mouth, he'll keel over and die, allowing you to absorb the ball with your energy converter. This, however, triggers a timer, which indicates how long Dark Aether can survive without its last source of energy; when the timer runs down, the whole shebang comes apart, so you'll need to escape before your eight minutes or so are up. Piece of cake, right?
Boss Fight: Dark Samus
Not so fast, my friend! You've got one last baddie to deal with. You weren't able to save your game in between the Emperor and this fight, so it'll be a shame if you lose now! At the very least, you got all of your health back, but you will have to win this fight before the timer runs out if you want to beat the game.
Not to worry, though, as Dark Samus is substantially easier to beat than the Emperor. She has two forms to defeat; in the first, she'll mostly stick to using a large phazon beam to damage you, so dash side to side or jump over it when she whips it out. Every once in a while, she'll turn invisible, at which point you'll only be able to "see" her with your echo visor, so flip over to that and start pummeling away. She'll move really quickly, which will make it difficult for most of your weapons to hit her, so try and get close before unleashing a charged light beam or power beam shot on her.
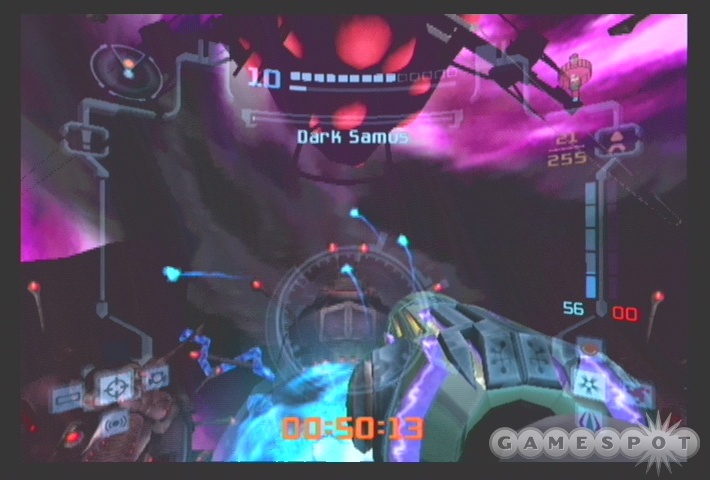
Dark Samus' second form is mostly invulnerable to your fire, thanks to her rapid skipping about the arena and her Phazon Shield. The only way to consistently hurt her here is by using her own energy against her; every so often, she'll head to the center of the pit and float above the surface, using her Phazon Shield to protect herself. She has two forms of attack here; one large burst of phazon energy that'll strike at your feet (easily sidestepped), and an assortment of smaller phazon particles that issue forth just after the Shield has a large increase in its radius. The only way to actually damage her is to use your charge beam to suck in these smaller bits of phazon and then shoot them back at Dark Samus; you should notice your autolock drift upwards as they come out of her Shield, then drift back down after they've been absorbed. The tricky thing here is that the smaller bits of phazon will usually still be coming at you while Dark Samus is launching her next big-phazon attack, meaning that you'll have to suck up the smaller phazon, then immediately sidestep the next attack before letting loose with your charge beam on her.
If you got some of the phazon in your charge beam ("No, you got your charge beam in my phazon!"), then your charge beam should penetrate the shield and deal a bit of damage. She'll be vulnerable to other damage for a few seconds, so shoot her with whatever you can during this period, then repeat the process. Eventually she'll die, ending your adventures in a Metroid game that had barely any Metroids in it.
There are two supplementary endings to the game. If you got more than 75% of the items in the game, then you'll be treated to an unorthodox view of Samus before she jets off of Aether in her ship. If you got 100% of the items, then another very brief little cinematic will play after the credits have rolled. Neither of these are particularly revelatory, so don't feel compelled to get the items just for their sake. (It's tough to imagine anyone beating the Ing Emperor without getting more than 75% of the items, though.)
Item Checklist
There are dozens of items in Metroid Prime, and if you want to access both supplementary endings to the game, you'll need to get all of them! Heck, if you even want to beat the last boss, you'll probably want to grab as many of them as you can. Many of them will, of course, be locked off to you until you access some of the more advanced equipment; even if you spot a missile expansion early on, it might not be accessible until you grab the power bombs later on, for instance.
It's highly recommended that you print out this checklist and mark off the items as you go through the game, as it'll make it much, much easier to figure out which ones you're missing when you're trying to get to 100%. Also note that most of these pickups will give off a very distinctive pulsing sound; if you're having trouble finding one within a room, jump around and listen for the sound and see where you wind up. Also also note that sometimes the pickups are located in out-of-the-way places, such as behind a destroyable wall; our notes on what equipment is required to access them should help you figure these puzzles out. If worst comes to worst, flip out your scan visor and check around to see what's destroyable.
Temple Grounds
Energy Tanks
[ ] Fortress Transport Access Req: Light Suit
[ ] Wind Chamber Gateway Req: Grapple
[ ] Storage Cavern B Req: Missiles
Missile Expansions
[ ] Temple Assembly Site Req: Space Jump
[ ] Communication Area Req: Space Jump
[ ] GFMC Compound Req: Screw Attack
[ ] Hive Chamber A Req: Kill the Missile Trooper when he appears
[ ] Transport To Agon Wastes Req: Nothing
[ ] Hive Chamber B Req: Morphball bombs
Power Bomb Expansions
[ ] Dynamo Chamber Req: Power Bombs
Sky Temple Grounds
Missile Expansions
[ ] Plain of Dark Worship
[ ] War Ritual Grounds Req: Dark Visor
[ ] Phazon Grounds Req: Screw Attack
Beam Ammo Expansions
[ ] Profane Path Req: Annihilator Beam
Great Temple
Missile Expansions
[ ] Transport A Access Req: Morphball bombs
[ ] Transport B Access Req: Morphball bombs
Agon Wastes
Energy Tanks
[ ] Mining Plaza Req: Screw Attack
[ ] Bioenergy Production Req: Space Jump
[ ] Mineshaft Req: Morphball Bombs
[ ] Mining Station Access Req: Morphball Bombs
Missile Expansions
[ ] Storage A Req: Power Bombs
[ ] Storage B Req: Dark Beam
[ ] Storage C Req: Spider Ball
[ ] Transport Center Req:
[ ] Portal Access A Req: Dark Visor
[ ] Main Reactor Req: Spiderball
[ ] Ventilation Area A Req:
[ ] Sand Processing Req: Boost Ball
[ ] Sand Cache Req: Luminoth Translation
[ ] Mining Station A Req: Power Bombs and Spiderball
[ ] Command Center Req:
Power Bomb Expansions
[ ] Sand Canyon Req: Screw Attack
Beam Ammo Expansions
[ ] Profane Path Req: Annihilator Beam
Dark Agon Wastes
Missile Expansions
[ ] Junction Site Req: Spider Ball
[ ] Warrior's Walk Req: Super Missiles
[ ] Crossroads Req: Boost
[ ] Ing Cache 4 Req: Dark Beam
Power Bomb Expansions
[ ] Feeding Pit Req: Light Suit
Torvus Bog
Energy Tanks
[ ] Torvus Plaza Req: Spiderball
[ ] Meditation Vista Req: Screw Attack
[ ] Transit Tunnel East Req: Gravity Boost
[ ] Temple Access Req:
Missile Expansions
[ ] Path of Roots Req: Grapple
[ ] Forgotten Bridge Req: Will open up after you enter the room from the Dark Aether side
[ ] Training Chamber Req: Spider Ball
[ ] Transit Tunnel South Req: Annihilator Beam
[ ] Portal Chamber Req:
[ ] Torvus Grove Req: Power Bombs
[ ] Gathering Hall Req: Power Bombs
[ ] Torvus Lagoon Req: Gravity Boost
[ ] Abandoned Work Site Req: Grapple
[ ] Plaza Access Req:
[ ] Hydrodynamo Station Req:
[ ] Underground Chamber Req:
Power Bomb Expansions
[ ] Great Bridge Req: Power Bombs
Dark Torvus Bog
Energy Tanks
[ ] Cache B Req:
Missile Expansions
[ ] Undertemple Req: Screw Attack
[ ] Undertransit One Req:
Power Bomb Expansions
[ ] Putrid Alcove Req: Power Bombs
Beam Ammo Expansions
[ ] Cache A Req: Seeker Missiles
Sanctuary Fortress
Energy Tanks
[ ] Reactor Core Req: Spiderball
[ ] Watch Station Access Req:
Missile Expansions
[ ] Main Reactor Req:
[ ] Hall of Combat Req: Spiderball
[ ] Dynamo Works Req: Spiderball
[ ] Sanctuary Map Station Req: Light Suit
[ ] Sentinal's Path Req: Annihilator Beam
[ ] Temple Access Req: Echo Visor
[ ] Central Area Transport West Req:
Power Bomb Expansions
[ ] Main Gyro Station Req: Annihilator Beam
[ ] Sanctuary Entrance Req: Power Bombs
[ ] Transit Station Req:
Beam Ammo Expansions
[ ] Watch Station Req:
Ing Hive
Missile Expansions
[ ] Hazing Cliff Req:
[ ] Aerial Training Site Req: Screw Attack
Got a news tip or want to contact us directly? Email news@gamespot.com
Join the conversation