Madden NFL 06 Walkthrough
The perennial favorite returns in Madden NFL 06. If you're struggling to master the vision cones, truck sticks, or any of the other new additions to the game, then check out GameSpot's Walkthrough for all the tips you need to win.
Design by Randall Montanari
It’s the year of the quarterback! Philadelphia Eagles’ quarterback Donovan McNabb is the Madden 06 cover man and the game’s most important new feature adds a challenging element to the passing game. This game guide offers team and player breakdowns and stats, strategies for offense (with focus on the new quarterback vision control) and defense, and tips for NFL superstar mode.
This Gamespot Madden 06 game guide includes:
- Team Stats: Statistical breakdown of the current and historical NFL teams.
- Team Overviews: This section offers tips on all 32 NFL teams and provides stats for each team’s key players.
- NFL Superstar: Check here for tips on the new NFL Superstar mode.
- Offense: Strategies for the passing and running game, including tips on the new quarterback vision control.
- Defense: Tips on defensive formations, adjustments, shifts, and stopping the run and the pass.
- Online Strategies: Provides strategies specific to online play.
Chapter 1 - Team Stats
This section reveals the primary statistics revealed on the team selection screen. You’ll also find statistics for the historical teams available in Madden 06. These statistics include a relative overall, offense, and defense rating.
Current NFL Teams
The following table reveals the team statistics for the current 2005 National Football League teams.
| TEAM | CONFERENCE AND DIVISION | RECORD | OVERALL | OFFENSE | DEFENSE |
| Arizona Cardinals | NFC West | 6-10 | 76 | 78 | 79 |
| Atlanta Falcons | NFC South | 11-5 | 85 | 80 | 82 |
| Baltimore Ravens | AFC North | 9-7 | 88 | 68 | 90 |
| Buffalo Bills | AFC East | 9-7 | 78 | 77 | 94 |
| Carolina Panthers | NFC South | 7-9 | 85 | 87 | 87 |
| Chicago Bears | NFC North | 5-11 | 73 | 66 | 76 |
| Cincinnati Bengals | AFC North | 8-8 | 85 | 84 | 76 |
| Cleveland Browns | AFC North | 4-12 | 68 | 68 | 70 |
| Dallas Cowboys | NFC East | 6-10 | 73 | 78 | 79 |
| Denver Broncos | AFC West | 10-6 | 74 | 90 | 80 |
| Detroit Lions | NFC North | 6-10 | 78 | 80 | 74 |
| Green Bay Packers | NFC North | 10-6 | 80 | 94 | 70 |
| Houston Texans | AFC South | 7-9 | 83 | 81 | 79 |
| Indianapolis Colts | AFC South | 12-4 | 90 | 99 | 69 |
| Jacksonville Jaguars | AFC South | 9-7 | 84 | 79 | 85 |
| Kansas City Chiefs | AFC West | 7-9 | 85 | 97 | 71 |
| Miami Dolphins | AFC East | 4-12 | 70 | 67 | 79 |
| Minnesota Vikings | NFC North | 8-8 | 90 | 92 | 80 |
| New England Patriots | AFC East | 14-2 | 97 | 93 | 96 |
| New Orleans Saints | NFC South | 8-8 | 72 | 83 | 65 |
| New York Giants | NFC East | 6-10 | 72 | 74 | 78 |
| New York Jets | AFC East | 10-6 | 81 | 86 | 86 |
| Oakland Raiders | AFC West | 5-11 | 81 | 88 | 67 |
| Philadelphia Eagles | NFC East | 13-3 | 96 | 91 | 93 |
| Pittsburgh Steelers | AFC North | 15-1 | 91 | 89 | 95 |
| San Diego Chargers | AFC West | 12-4 | 86 | 88 | 77 |
| San Francisco 49ers | NFC West | 2-14 | 67 | 71 | 69 |
| Seattle Seahawks | NFC West | 9-7 | 86 | 89 | 76 |
| St. Louis Rams | NFC West | 8-8 | 82 | 90 | 73 |
| Tampa Bay Buccaneers | NFC South | 5-11 | 75 | 76 | 88 |
| Tennessee Titans | AFC South | 5-11 | 69 | 80 | 68 |
| Washington Redskins | NFC East | 6-10 | 77 | 69 | 87 |
Historic Teams
This table reveals relative statistics for the historical teams offered in Madden 06.
| TEAM | RECORD | OVERALL | OFFENSE | DEFENSE |
| All Chicago Bears | N/A | 95 | 92 | 97 |
| 88 Chicago Bears | 12-4 | 92 | 92 | 93 |
| 85 Chicago Bears | 15-1 | 95 | 95 | 95 |
| 77 Chicago Bears | 9-5 | 90 | 88 | 91 |
| 63 Chicago Bears | 11-1-2 | 90 | 90 | 89 |
| All Cincinnati Bengals | N/A | 94 | 95 | 92 |
| 88 Cincinnati Bengals | 12-4 | 91 | 93 | 88 |
| 81 Cincinnati Bengals | 12-4 | 92 | 93 | 91 |
| 73 Cincinnati Bengals | 10-4 | 91 | 90 | 93 |
| All Buffalo Bills | N/A | 95 | 95 | 94 |
| 93 Buffalo Bills | 12-4 | 94 | 94 | 94 |
| 92 Buffalo Bills | 11-5 | 94 | 95 | 92 |
| 91 Buffalo Bills | 13-3 | 93 | 94 | 92 |
| 90 Buffalo Bills | 13-3 | 93 | 93 | 93 |
| All Denver Broncos | N/A | 94 | 96 | 92 |
| 98 Denver Broncos | 14-2 | 94 | 94 | 93 |
| 97 Denver Broncos | 12-4 | 94 | 95 | 93 |
| 96 Denver Broncos | 13-3 | 94 | 95 | 93 |
| 91 Denver Broncos | 12-4 | 92 | 91 | 93 |
| 89 Denver Broncos | 11-5 | 92 | 91 | 94 |
| 87 Denver Broncos | 10-4-1 | 92 | 93 | 91 |
| 96 Denver Broncos | 11-5 | 91 | 92 | 91 |
| 77 Denver Broncos | 12-2 | 92 | 90 | 94 |
| All Cleveland Browns | N/A | 92 | 92 | 92 |
| 87 Cleveland Browns | 10-5 | 91 | 90 | 92 |
| 86 Cleveland Browns | 12-4 | 92 | 93 | 91 |
| 70 Cleveland Browns | 7-7 | 95 | 96 | 96 |
| 65 Cleveland Browns | 11-3 | 91 | 92 | 89 |
| All Tampa Bay Buccaneers | N/A | 91 | 90 | 92 |
| 02 Tampa Bay Buccaneers | 12-4 | 86 | 83 | 90 |
| 79 Tampa Bay Buccaneers | 10-6 | 91 | 88 | 93 |
| All Arizona Cardinals | N/A | 91 | 92 | 90 |
| 75 Arizona Cardinals | 11-3 | 89 | 92 | 86 |
| All San Diego Chargers | N/A | 94 | 95 | 94 |
| 94 San Diego Chargers | 11-5 | 91 | 90 | 92 |
| 81 San Diego Chargers | 10-6 | 91 | 93 | 89 |
| All Kansas City Chiefs | N/A | 92 | 94 | 89 |
| 90 Kansas City Chiefs | 10-6 | 94 | 93 | 95 |
| 71 Kansas City Chiefs | 10-3-1 | 96 | 95 | 97 |
| 69 Kansas City Chiefs | 11-3 | 93 | 93 | 92 |
| 66 Kansas City Chiefs | 11-2-1 | 91 | 90 | 91 |
| 62 Kansas City Texans | 11-3 | 89 | 87 | 91 |
| All Indianapolis Colts | N/A | 95 | 96 | 94 |
| 77 Baltimore Colts | 10-4 | 93 | 91 | 94 |
| 70 Baltimore Colts | 11-2-1 | 92 | 91 | 92 |
| 68 Baltimore Colts | 13-1 | 92 | 93 | 89 |
| 58 Baltimore Colts | 9-3 | 88 | 86 | 90 |
| All Dallas Cowboys | N/A | 95 | 97 | 94 |
| 95 Dallas Cowboys | 12-4 | 95 | 94 | 94 |
| 94 Dallas Cowboys | 12-4 | 93 | 94 | 92 |
| 93 Dallas Cowboys | 12-4 | 94 | 95 | 92 |
| 92 Dallas Cowboys | 13-3 | 94 | 94 | 93 |
| 85 Dallas Cowboys | 10-6 | 92 | 91 | 91 |
| 81 Dallas Cowboys | 12-4 | 93 | 94 | 91 |
| 79 Dallas Cowboys | 11-5 | 95 | 96 | 94 |
| 78 Dallas Cowboys | 12-4 | 93 | 94 | 92 |
| 77 Dallas Cowboys | 12-2 | 93 | 94 | 92 |
| 75 Dallas Cowboys | 10-4 | 92 | 93 | 90 |
| 71 Dallas Cowboys | 11-3 | 92 | 95 | 89 |
| 70 Dallas Cowboys | 10-4 | 91 | 92 | 90 |
| 67 Dallas Cowboys | 9-5 | 88 | 85 | 92 |
| 66 Dallas Cowboys | 10-3-1 | 87 | 82 | 93 |
| All Miami Dolphins | N/A | 94 | 95 | 93 |
| 85 Miami Dolphins | 12-4 | 92 | 93 | 92 |
| 84 Miami Dolphins | 14-2 | 94 | 94 | 92 |
| 82 Miami Dolphins | 7-2 | 91 | 92 | 90 |
| 81 Miami Dolphins | 11-4-1 | 93 | 92 | 93 |
| 78 Miami Dolphins | 11-5 | 92 | 88 | 95 |
| 74 Miami Dolphins | 11-3 | 91 | 91 | 91 |
| 73 Miami Dolphins | 12-2 | 92 | 92 | 92 |
| 72 Miami Dolphins | 14-0 | 93 | 93 | 93 |
| 71 Miami Dolphins | 10-3-1 | 93 | 93 | 94 |
| All Philadelphia Eagles | N/A | 93 | 93 | 92 |
| 90 Philadelphia Eagles | 10-6 | 91 | 90 | 91 |
| 80 Philadelphia Eagles | 12-4 | 94 | 94 | 94 |
| 60 Philadelphia Eagles | 10-2 | 91 | 92 | 91 |
| All Atlanta Falcons | N/A | 93 | 95 | 92 |
| 98 Atlanta Falcons | 14-2 | 92 | 91 | 92 |
| 91 Atlanta Falcons | 10-6 | 91 | 92 | 90 |
| 80 Atlanta Falcons | 12-4 | 92 | 93 | 91 |
| All San Francisco 49ers | N/A | 93 | 96 | 91 |
| 98 San Francisco 49ers | 12-4 | 95 | 96 | 95 |
| 94 San Francisco 49ers | 13-3 | 94 | 95 | 93 |
| 92 San Francisco 49ers | 14-2 | 93 | 93 | 93 |
| 90 San Francisco 49ers | 14-2 | 94 | 94 | 93 |
| 89 San Francisco 49ers | 14-2 | 95 | 96 | 93 |
| 88 San Francisco 49ers | 10-6 | 95 | 96 | 94 |
| 84 San Francisco 49ers | 15-1 | 93 | 93 | 93 |
| 81 San Francisco 49ers | 13-3 | 93 | 92 | 94 |
| 57 San Francisco 49ers | 8-4 | 89 | 88 | 91 |
| All New York Giants | N/A | 92 | 92 | 93 |
| 90 New York Giants | 13-3 | 93 | 91 | 94 |
| 86 New York Giants | 14-2 | 94 | 92 | 95 |
| 58 New York Giants | 9-3 | 89 | 86 | 91 |
| All Jacksonville Jaguars | N/A | 89 | 92 | 86 |
| 96 Jacksonville Jaguars | 9-7 | 89 | 91 | 85 |
| All New York Jets | N/A | 93 | 95 | 91 |
| 85 New York Jets | 11-5 | 93 | 93 | 92 |
| 82 New York Jets | 6-3 | 92 | 92 | 92 |
| 68 New York Jets | 11-3 | 90 | 92 | 87 |
| All Detroit Lions | N/A | 92 | 92 | 91 |
| 91 Detroit Lions | 12-4 | 92 | 92 | 91 |
| 80 Detroit Lions | 9-7 | 91 | 93 | 90 |
| 57 Detroit Lions | 8-4 | 88 | 86 | 90 |
| All Green Bay Packers | N/A | 97 | 98 | 97 |
| 98 Green Bay Packers | 11-5 | 95 | 95 | 94 |
| 97 Green Bay Packers | 13-3 | 93 | 94 | 93 |
| 96 Green Bay Packers | 13-3 | 94 | 95 | 94 |
| 92 Green Bay Packers | 9-7 | 94 | 94 | 94 |
| 67 Green Bay Packers | 9-4-1 | 89 | 90 | 87 |
| 66 Green Bay Packers | 12-2 | 90 | 92 | 87 |
| All Carolina Panthers | N/A | 90 | 90 | 89 |
| 96 Carolina Panthers | 12-4 | 88 | 89 | 87 |
| All New England Patriots | N/A | 93 | 94 | 92 |
| 01 New England Patriots | 11-5 | 88 | 87 | 88 |
| 96 New England Patriots | 11-5 | 93 | 94 | 93 |
| 85 New England Patriots | 11-4 | 94 | 94 | 93 |
| 76 New England Patriots | 11-3 | 93 | 94 | 92 |
| All Oakland Raiders | N/A | 94 | 95 | 92 |
| 02 Oakland Raiders | 11-5 | 85 | 88 | 82 |
| 90 Los Angeles Raiders | 12-4 | 92 | 92 | 92 |
| 85 Los Angeles Raiders | 12-4 | 92 | 91 | 93 |
| 83 Los Angeles Raiders | 12-4 | 93 | 94 | 91 |
| 80 Oakland Raiders | 11-5 | 93 | 93 | 93 |
| 77 Oakland Raiders | 11-3 | 92 | 93 | 91 |
| 76 Oakland Raiders | 13-1 | 92 | 94 | 91 |
| 75 Oakland Raiders | 11-3 | 93 | 94 | 92 |
| 74 Oakland Raiders | 12-2 | 97 | 96 | 97 |
| 72 Oakland Raiders | 10-3-1 | 92 | 93 | 91 |
| 71 Oakland Raiders | 8-4-2 | 88 | 86 | 90 |
| 70 Oakland Raiders | 8-4-2 | 90 | 92 | 88 |
| 69 Oakland Raiders | 12-1-1 | 90 | 93 | 89 |
| 68 Oakland Raiders | 12-2 | 90 | 93 | 88 |
| 67 Oakland Raiders | 13-1 | 90 | 92 | 89 |
| All St. Louis Rams | N/A | 95 | 96 | 94 |
| 01 St. Louis Rams | 14-2 | 86 | 92 | 81 |
| 99 St. Louis Rams | 13-3 | 89 | 94 | 84 |
| 84 Los Angeles Rams | 10-6 | 92 | 92 | 92 |
| 79 Los Angeles Rams | 9-7 | 91 | 90 | 92 |
| 75 Los Angeles Rams | 12-2 | 93 | 92 | 94 |
| 67 Los Angeles Rams | 11-1-2 | 92 | 88 | 96 |
| All Baltimore Ravens | N/A | 92 | 91 | 93 |
| 00 Baltimore Ravens | 12-4 | 85 | 79 | 91 |
| All Washington Redskins | N/A | 95 | 96 | 93 |
| 91 Washington Redskins | 14-2 | 94 | 94 | 94 |
| 87 Washington Redskins | 11-4 | 94 | 95 | 94 |
| 83 Washington Redskins | 14-2 | 95 | 96 | 93 |
| 82 Washington Redskins | 8-1 | 94 | 95 | 93 |
| 79 Washington Redskins | 10-6 | 91 | 88 | 94 |
| 72 Washington Redskins | 11-3 | 92 | 93 | 91 |
| All New Orleans Saints | N/A | 92 | 94 | 90 |
| 92 New Orleans Saints | 12-4 | 91 | 89 | 92 |
| 87 New Orleans Saints | 12-3 | 90 | 91 | 89 |
| All Seattle Seahawks | N/A | 93 | 94 | 92 |
| 84 Seattle Seahawks | 12-4 | 92 | 92 | 91 |
| All Pittsburgh Steelers | N/A | 96 | 96 | 95 |
| 95 Pittsburgh Steelers | 11-5 | 93 | 93 | 92 |
| 79 Pittsburgh Steelers | 12-4 | 94 | 94 | 93 |
| 78 Pittsburgh Steelers | 14-2 | 93 | 93 | 93 |
| 75 Pittsburgh Steelers | 12-2 | 94 | 93 | 95 |
| 74 Pittsburgh Steelers | 10-3-1 | 94 | 95 | 93 |
| 72 Pittsburgh Steelers | 11-3 | 93 | 92 | 92 |
| All Tennessee Titans | N/A | 93 | 96 | 90 |
| 99 Tennessee Titans | 13-3 | 93 | 93 | 93 |
| 92 Houston Oilers | 10-6 | 95 | 94 | 95 |
| 88 Houston Oilers | 10-6 | 93 | 93 | 92 |
| 80 Houston Oilers | 11-5 | 93 | 92 | 92 |
| 78 Houston Oilers | 10-6 | 93 | 93 | 92 |
| 62 Houston Oilers | 11-3 | 88 | 89 | 89 |
| All Minnesota Vikings | N/A | 94 | 95 | 92 |
| 98 Minnesota Vikings | 15-1 | 95 | 95 | 96 |
| 76 Minnesota Vikings | 11-2-1 | 92 | 93 | 91 |
| 75 Minnesota Vikings | 12-2 | 97 | 95 | 98 |
| 74 Minnesota Vikings | 10-4 | 92 | 93 | 91 |
| 73 Minnesota Vikings | 12-2 | 92 | 93 | 91 |
| 70 Minnesota Vikings | 12-2 | 93 | 92 | 94 |
| 69 Minnesota Vikings | 12-2 | 94 | 94 | 94 |
Chapter 2 - Team Overviews
This chapter provides in-depth analysis on your favorite National Football League teams. You’ll find key player stats and commentary on the team’s strengths and weaknesses. Note that these rosters and statistics are current as of the updated online rosters as of 8/10.
- OVR - The overall rating for the player.
- SPD - How fast the player can run.
- STR - The player’s strength, which affects his ability to break tackles or make blocks.
- AWR - A player’s ability to react and adjust. Affects a player’s ability to run routes for instance.
- AGI - The player’s agility, enhancing his ability to switch directions--important statistic for special maneuvers.
- ACC - How fast a player reaches full speed. Great for sprinting through open holes in your line or outrunning tacklers around a corner.
- CTH - How well the player can catch. A higher rating means fewer drops.
- CAR - How well the player holds onto the football. A higher rating means the less chance of a fumble.
- JMP - The player’s ability to jump, such as for grabbing high passes or blocking high passes.
- BTK - The player’s ability to break tackles.
- THP - How far a player can throw the ball.
- THA - How accurate a player throws.
- PBK - How well a player pass blocks.
- RBK - How well a player run blocks.
- TAK - A player’s ability to tackle.
- INJ - The likelihood of an injury. The higher the rating, the less likely a player will get injured.
Arizona Cardinals
The Arizona Cardinals didn’t make the expected strides during the 2004 season. Quarterback Josh McCown couldn’t develop a consistent rhythm. The season started shaky with Marcel Shipp and Anquan Boldin out significant time due to injury. Veteran running back Emmitt Smith, now retired, showed his Hall of Fame form in several games but certainly wasn’t the back he once was.
The expectation to improve is once again extremely high. The Cardinals even boast new and improved uniforms (with a meaner looking logo!) to kick off the season. Veteran and former league MVP Kurt Warner was added to provide leadership at the quarterback position. He boasts high awareness and a wide field of vision, despite lackluster performances over the past few seasons. He’s practically made of glass, however; Kurt’s injury rating of 49 means Josh McCown will likely see some action. Also, don’t expect much scrambling ability; Kurt is one of the slowest quarterbacks at a speed rating of just 44.
J.J. Arrington is an exciting new rookie at running back and should compete against the returning Marcel Shipp for ball carrying duties. J.J. boasts the speed while Marcel features more power. The Cardinals’ top two receivers are excellent, though young (lowering awareness). Focus on a high-percentage passing game. Warner lacks the throwing power for consistent deep balls and the Cardinals’ primary receivers aren’t fast enough to expose an opponent’s top corners.
Arizona Cardinals Key Players
| PLAYER | POSITION | OVR | THP | THA | AWR | SPD | CAR | INJ |
| Kurt Warner | QB | 83 | 89 | 90 | 90 | 44 | 31 | 49 |
| PLAYER | POSITION | OVR | SPD | ACC | AGI | CTH | BTK | CAR |
| J.J. Arrington | RB | 77 | 92 | 94 | 89 | 67 | 75 | 73 |
| PLAYER | POSITION | OVR | SPD | ACC | AGI | CTH | JMP | AWR |
| Anquan Boldin | WR | 88 | 88 | 91 | 90 | 90 | 90 | 82 |
| PLAYER | POSITION | OVR | SPD | ACC | AGI | CTH | JMP | AWR |
| Larry Fitzgerald | WR | 87 | 88 | 90 | 89 | 89 | 94 | 78 |
Atlanta Falcons
The Atlanta Falcons were one win away from a Super Bowl appearance, even with Michael Vick’s well-published struggles adjusting to the West Coast offense. The team returns basically intact for another run at a championship. Michael Vick is still dangerous with his legs (94 speed, more than many running backs) but not as much with his arm. In Madden 06, Vick’s awareness is just 78, one of the lowest among starting quarterbacks--Vick’s field of vision is extremely limited.
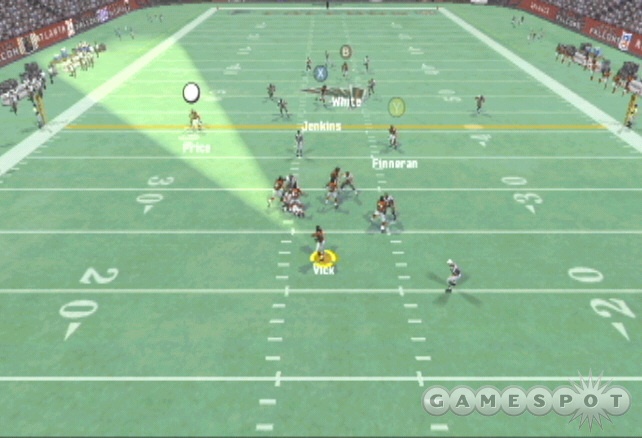
The Falcons’ utilize an excellent one-two punch backfield. Warrick Dunn is the speedster and T.J. Duckett is the bruiser. Use Dunn out of the backfield on screens to help open up routes for the Falcons’ weak group of wide receivers--Dunn is arguably the best receiving running back in the game. Switch to T.J. Duckett for short-yardage and goal line situations and work the truck stick to capitalize on his 93 break tackle rating.
Alge Crumpler is one of the best tight ends in the game and should be a major focus on your offensive gameplan. Mix up your running plays between speed and power, call high-percentage pass plays with Dunn out of the backfield and Crumpler on hooks, outs, and ins, quarterback scrambles for Vick’s speed, and the occasional deep ball (Vick boasts 97 throw power) to help stretch the defense and open up more shorter pass plays for Dunn and Crumpler.
Atlanta Falcons Key Players
| PLAYER | POSITION | OVR | THP | THA | AWR | SPD | CAR | INJ |
| Michael Vick | QB | 92 | 97 | 80 | 78 | 94 | 40 | 76 |
| PLAYER | POSITION | OVR | SPD | ACC | AGI | CTH | BTK | CAR |
| Warrick Dunn | RB | 89 | 95 | 96 | 96 | 79 | 71 | 88 |
| PLAYER | POSITION | OVR | SPD | ACC | AGI | CTH | BTK | CAR |
| T.J. Duckett | RB | 85 | 86 | 89 | 82 | 60 | 93 | 88 |
| PLAYER | POSITION | OVR | SPD | PBK | RBK | CTH | BTK | CAR |
| Alge Crumpler | TE | 93 | 86 | 54 | 59 | 85 | 65 | 70 |
| PLAYER | POSITION | OVR | SPD | ACC | AGI | TAK | STR | AWR |
| Patrick Kerney | LE | 95 | 75 | 80 | 74 | 88 | 83 | 89 |
| PLAYER | POSITION | OVR | SPD | ACC | AGI | TAK | CTH | AWR |
| Keith Brooking | ROLB | 94 | 80 | 87 | 79 | 92 | 55 | 89 |
Baltimore Ravens
The Baltimore Ravens remain focused on defense and a power running game. Jamal Lewis is one of the best backs in the game; combine the new truck stick with his leading 99 break tackle rating and run over would-be tacklers. Run behind left tackle Jonathan Ogden, the best offensive linemen in the game. Lewis has the power to run inside and the speed to run outside. Mix up the play calls.
Establish a strong running game to take the pressure off Kyle Boller, the Ravens’ young inexperienced quarterback--one of the lowest rated starters in the game. Kyle’s 74 awareness rating provides a very small field of vision. The Ravens’ added all-pro wide receiver Derrick Mason to give Kyle another downfield target. Focus the passing game between Mason and Todd Heap, the Ravens’ highly ranked tight end.
Defense is still the Ravens’ strong suit. The trio of Ray Lewis, Chris McAllister, and Ed Reed are basically the highest rated at their position. McAllister is rated high enough to cover anyone in man-to-man single coverage allowing you to maintain aggressive defensive playcalling. Keep Ray Lewis in coverage and blitz outside linebackers or defensive backs to pressure the offense into sacks or bad throws--the perfect opportunity for Ed Reed’s 83 catch rating to snag interceptions.
Baltimore Ravens Key Players
| PLAYER | POSITION | OVR | THP | THA | AWR | SPD | CAR | INJ |
| Kyle Boller | QB | 80 | 92 | 79 | 74 | 69 | 47 | 88 |
| PLAYER | POSITION | OVR | SPD | ACC | AGI | CTH | BTK | CAR |
| Jamal Lewis | RB | 94 | 89 | 95 | 88 | 68 | 99 | 84 |
| PLAYER | POSITION | OVR | SPD | ACC | AGI | CTH | JMP | AWR |
| Derrick Mason | WR | 92 | 91 | 94 | 94 | 95 | 84 | 95 |
| PLAYER | POSITION | OVR | SPD | PBK | RBK | CTH | BTK | CAR |
| Todd Heap | TE | 94 | 79 | 55 | 60 | 88 | 65 | 72 |
| PLAYER | POSITION | OVR | STR | PBK | RBK | ACC | AGI | AWR |
| Jonathan Ogden | LT | 99 | 98 | 94 | 99 | 90 | 57 | 95 |
| PLAYER | POSITION | OVR | SPD | ACC | AGI | TAK | CTH | AWR |
| Ray Lewis | MLB | 99 | 85 | 91 | 86 | 99 | 55 | 99 |
| PLAYER | POSITION | OVR | SPD | ACC | JMP | TAK | CTH | AWR |
| Chris McAlister | CB | 97 | 95 | 98 | 97 | 68 | 68 | 94 |
| PLAYER | POSITION | OVR | SPD | ACC | JMP | TAK | CTH | AWR |
| Ed Reed | SS | 99 | 93 | 93 | 91 | 70 | 83 | 95 |
Buffalo Bills
The Buffalo Bills begin the year with a few new faces on offense, at least from the beginning of the previous season. Veteran quarterback Drew Bledsoe has moved on to lead the Dallas Cowboys and Travis Henry, the Bills’ starting running back at the start of last season was traded to the Tennessee Titans. Explosive running back Willis McGahee started most games last season and is now the undisputed feature back.
The future is now as the Bills have handed over the quarterback job to young J.P. Losman. His inexperience shows in his ratings--his 67 awareness is the lowest amongst the game’s starters. Backup quarterbacks Kelly Holcomb and Shane Matthews offer slightly better awareness but similar overall statistics. Losman does have a speed advantage allowing for rollouts and scrambles. Moulds is one of the best receivers in the game. Stretch the field with the Bills’ secondary receiver, Lee Evans (96 speed rating).
The Bills’ defense is one of the strongest in the league with high ratings at nearly every position. The Bills strong secondary provides a lot of coaching options. Pressure the quarterback with blitzes or remain in coverage and force your opponent into poor decisions. Takeo Spikes and London Fletcher lead the formidable linebackers and Nate Clements and Lawyer Milloy command the secondary.
Buffalo Bills Key Players
| PLAYER | POSITION | OVR | THP | THA | AWR | SPD | CAR | INJ |
| J.P. Losman | QB | 79 | 92 | 82 | 67 | 70 | 48 | 78 |
| PLAYER | POSITION | OVR | SPD | ACC | AGI | CTH | BTK | CAR |
| Willis McGahee | RB | 91 | 92 | 95 | 91 | 68 | 92 | 87 |
| PLAYER | POSITION | OVR | SPD | ACC | AGI | CTH | JMP | AWR |
| Eric Moulds | WR | 90 | 93 | 94 | 90 | 87 | 91 | 90 |
| PLAYER | POSITION | OVR | SPD | ACC | AGI | TAK | CTH | AWR |
| Takeo Spikes | ROLB | 97 | 82 | 85 | 83 | 93 | 51 | 93 |
| PLAYER | POSITION | OVR | SPD | ACC | JMP | TAK | CTH | AWR |
| Nate Clements | CB | 95 | 92 | 94 | 96 | 71 | 76 | 88 |
| PLAYER | POSITION | OVR | SPD | ACC | JMP | TAK | CTH | AWR |
| Lawyer Milloy | SS | 96 | 85 | 88 | 72 | 88 | 64 | 93 |
Carolina Panthers
What a difference a year makes! Two seasons ago, the Carolina Panthers were an Adam Vinateri field goal away from possibly winning a Super Bowl then last year the injury bug decimated the team. Steve Smith was lost for the season during the first game and Stephen Davis and DeShaun Foster both missed time. The Panthers certainly hope to avoid a repeat and instead return to their Super Bowl form of two seasons ago.
Despite the loss of Mushin Muhammad to the Bears, the Panthers have a strong group of receivers. Steve Smith is back and one of the fastest in the game. The Panthers also added Rod Gardner (slower, more possession receiver) and retain second year player Keary Colbert and veteran Ricky Proehl. Jake Delhomme is a solid, though not exceptional (at least statistics wise) quarterback.
A trio of strong running backs--all saw playing time last year--provides a durable running game. Stephen Davis and Nick Goings offer the power and DeShaun Foster provides the speed. The line anchors the defense; Julius Peppers and Kris Jenkins are some of the best in the game.
Carolina Panthers Key Players
| PLAYER | POSITION | OVR | THP | THA | AWR | SPD | CAR | INJ |
| Jake Delhomme | QB | 88 | 89 | 89 | 86 | 65 | 56 | 85 |
| PLAYER | POSITION | OVR | SPD | ACC | AGI | CTH | BTK | CAR |
| Stephen Davis | RB | 85 | 84 | 88 | 80 | 64 | 90 | 88 |
| PLAYER | POSITION | OVR | SPD | ACC | AGI | CTH | BTK | CAR |
| DeShaun Foster | RB | 84 | 90 | 91 | 90 | 70 | 84 | 74 |
| PLAYER | POSITION | OVR | SPD | ACC | AGI | CTH | JMP | AWR |
| Steve Smith | WR | 89 | 96 | 96 | 95 | 89 | 85 | 80 |
| PLAYER | POSITION | OVR | SPD | ACC | AGI | TAK | STR | AWR |
| Julius Peppers | LE | 97 | 86 | 93 | 89 | 78 | 79 | 75 |
| PLAYER | POSITION | OVR | SPD | ACC | AGI | TAK | STR | AWR |
| Kris Jenkins | DT | 97 | 66 | 87 | 67 | 90 | 93 | 80 |
Chicago Bears
The Chicago Bears are a young team. Rex Grossman has yet to complete a season; his only two have ended in injuries. At the time of this writing, Rex was injured again, this time in the preseason (breaking his ankle and out for three to four months). Rex’s awareness is one of the lowest in the league providing a tight field of vision.
And the Bears drafted highly touted running back Cedric Benson to backup (or share carries with) starter Thomas Jones. Both offer nearly identical statistics, though Thomas Jones’ veteran status provides a much higher awareness rating.
The Bears added all-pro receiver Mushin Muhammad from the Carolina Panthers. He leads a weak receiving group; he’s by far the primary target so expect opponents to double him and leave the weaker receivers in single coverage. Look for Jones or Benson out of the backfield as well as Desmond Clark, the Bears’ tight end. On running plays, run behind center Olin Kreutz, one of the best in the game, and the left side of the offensive line.
Chicago Bears Key Players
| PLAYER | POSITION | OVR | THP | THA | AWR | SPD | CAR | INJ |
| Rex Grossman | QB | 82 | 90 | 88 | 76 | 59 | 42 | 74 |
| PLAYER | POSITION | OVR | SPD | ACC | AGI | CTH | BTK | CAR |
| Thomas Jones | RB | 85 | 89 | 93 | 88 | 70 | 83 | 84 |
| PLAYER | POSITION | OVR | SPD | ACC | AGI | CTH | BTK | CAR |
| Cedric Benson | RB | 83 | 88 | 90 | 87 | 65 | 86 | 85 |
| PLAYER | POSITION | OVR | SPD | ACC | AGI | CTH | JMP | AWR |
| Mushin Muhammad | WR | 91 | 90 | 87 | 89 | 94 | 86 | 94 |
| PLAYER | POSITION | OVR | STR | PBK | RBK | ACC | AGI | AWR |
| Olin Kreutz | C | 98 | 91 | 94 | 92 | 88 | 60 | 90 |
| PLAYER | POSITION | OVR | SPD | ACC | AGI | TAK | CTH | AWR |
| Brian Urlacher | MLB | 95 | 87 | 92 | 88 | 93 | 62 | 87 |
Cincinnati Bengals
The Bengals finished last year’s campaign at 8-8...the second year in a row without a losing record or a winning record for that matter! But the team continues to improve. Carson Palmer struggled early last season but his second half performance showed why he was the team’s first round pick a couple seasons ago. Carson’s low awareness limits his field of vision. Jon Kitna is more than a capable backup and his veteran status grants higher field of vision (though lacks the throw power of Carson).
Powerful running back Rudi Johnson and star receiver Chad Johnson are your primary targets on offense. Establish the power run (behind highly rated right tackle Willie Anderson) and utilize play action to hit Chad Johnson, one of the best in the game.
Cincinnati Bengals Key Players
| PLAYER | POSITION | OVR | THP | THA | AWR | SPD | CAR | INJ |
| Carson Palmer | QB | 84 | 95 | 86 | 77 | 58 | 39 | 88 |
| PLAYER | POSITION | OVR | SPD | ACC | AGI | CTH | BTK | CAR |
| Rudi Johnson | RB | 90 | 88 | 92 | 85 | 67 | 94 | 91 |
| PLAYER | POSITION | OVR | SPD | ACC | AGI | CTH | JMP | AWR |
| Chad Johnson | WR | 95 | 94 | 95 | 95 | 94 | 93 | 88 |
| PLAYER | POSITION | OVR | STR | PBK | RBK | ACC | AGI | AWR |
| Willie Anderson | RT | 94 | 97 | 90 | 98 | 62 | 47 | 96 |
Cleveland Browns
The Cleveland Browns remain in rebuilding mode. Signing former 49ers quarterback Jeff Garcia didn’t work out--he’s now with the Detroit Lions--and former starter Kelly Holcomb now plays for the Buffalo Bills. The Browns brought up a Super Bowl winner, former Buccaneer, Raven, and Seahawk Trent Dilfer. He stats are fairly meager (he’s slow and prone to injury) but his veteran status provides high awareness and decent field of vision.
The Browns offer two capable running backs (Reuben Droughns came from Denver) and can be used in dual HB sets or interchanged through substitutions. Suggs offers more speed while Droughns features more power. Rookie Braylon Edwards leads the receivers; it’s a relatively fast group and Andre Davis should be used to stretch defenses deep.
Cleveland Browns Key Players
| PLAYER | POSITION | OVR | THP | THA | AWR | SPD | CAR | INJ |
| Trent Dilfer | QB | 83 | 89 | 87 | 88 | 47 | 55 | 60 |
| PLAYER | POSITION | OVR | SPD | ACC | AGI | CTH | BTK | CAR |
| Reuben Droughns | RB | 86 | 86 | 90 | 86 | 68 | 87 | 82 |
| PLAYER | POSITION | OVR | SPD | ACC | AGI | CTH | BTK | CAR |
| Lee Suggs | RB | 82 | 91 | 93 | 88 | 62 | 80 | 80 |
| PLAYER | POSITION | OVR | SPD | ACC | AGI | CTH | JMP | AWR |
| Braylon Edwards | WR | 84 | 91 | 92 | 91 | 86 | 95 | 68 |
| PLAYER | POSITION | OVR | SPD | ACC | AGI | TAK | CTH | AWR |
| Andra Davis | MLB | 90 | 77 | 84 | 76 | 93 | 66 | 86 |
Dallas Cowboys
The Cowboys added veteran quarterback Drew Bledsoe to lead the offense. He offers excellent throw power, awareness, and field of vision but is one of the slowest quarterbacks in the game--even Cowboys’ left guard Larry Allen is faster than Bledsoe! Don’t expect much scrambling or rollout ability; Bledsoe is a pocket passer. Julius Jones is an excellent up-and-coming running back; decent speed, agility, and acceleration and a threat in the passing game.

Jason Witten, a highly ranked tight end, is a primary passing target alongside outspoken wide receiver Keyshawn Johnson. The Cowboys’ defense is solid, but not exceptional like the Bills or Ravens. Roy Williams is one of the best safeties in the game and a strong defensive line helps keep the pressure on opposing quarterbacks.
Dallas Cowboys Key Players
| PLAYER | POSITION | OVR | THP | THA | AWR | SPD | CAR | INJ |
| Drew Bledsoe | QB | 84 | 95 | 85 | 88 | 45 | 39 | 65 |
| PLAYER | POSITION | OVR | SPD | ACC | AGI | CTH | BTK | CAR |
| Julius Jones | RB | 86 | 91 | 93 | 92 | 70 | 84 | 81 |
| PLAYER | POSITION | OVR | SPD | ACC | AGI | CTH | JMP | AWR |
| Keyshawn Jonhson | WR | 87 | 86 | 85 | 86 | 92 | 87 | 90 |
| PLAYER | POSITION | OVR | SPD | PBK | RBK | CTH | BTK | CAR |
| Jason Witten | TE | 92 | 81 | 53 | 61 | 85 | 69 | 69 |
| PLAYER | POSITION | OVR | STR | PBK | RBK | ACC | AGI | AWR |
| Larry Allen | LG | 94 | 98 | 86 | 95 | 67 | 42 | 96 |
| PLAYER | POSITION | OVR | STR | PBK | RBK | ACC | AGI | AWR |
| Marco Rivera | RG | 95 | 93 | 93 | 94 | 75 | 46 | 94 |
| PLAYER | POSITION | OVR | SPD | ACC | AGI | TAK | STR | AWR |
| La’Roi Glover | DT | 96 | 64 | 76 | 64 | 91 | 87 | 95 |
| PLAYER | POSITION | OVR | SPD | ACC | JMP | TAK | CTH | AWR |
| Roy Williams | FS | 96 | 85 | 92 | 80 | 90 | 68 | 85 |
Denver Broncos
A new running back starts for the Denver Broncos for the third year in a row. How does Mike Shananan do it? Tatum Bell is an extremely fast running back; run Tatum outside to capitalize on his acceleration and speed. A low break tackle speed limits his ability inside. Switch to Mike Anderson for inside runs and move behind highly rated center Tom Nalen. Third stringer Quentin Griffith is also a capable runner!
Rod Smith leads a solid group of receivers that includes the all-time greatest, Jerry Rice. He isn’t quite his former 49er self but his high awareness makes him valuable on option routes--Jerry can get open! Jake Plummer excels in high-percentage, rollout passes. His throwing power and accuracy are both rather low compared to more skilled starters. Also Jake’s awareness is on the lower end of the starting quarterbacks.
Champ Bailey, the former Redskin, is the best cornerback in the game. Keep him in one-on-one coverage on your opponent’s best receiver. This can free up other defenders for blitzing or double teams.
Denver Broncos Key Players
| PLAYER | POSITION | OVR | THP | THA | AWR | SPD | CAR | INJ |
| Jake Plummer | QB | 87 | 89 | 86 | 83 | 70 | 47 | 92 |
| PLAYER | POSITION | OVR | SPD | ACC | AGI | CTH | BTK | CAR |
| Tatum Bell | RB | 84 | 96 | 97 | 92 | 66 | 77 | 75 |
| PLAYER | POSITION | OVR | SPD | ACC | AGI | CTH | JMP | AWR |
| Rod Smith | WR | 89 | 90 | 88 | 87 | 92 | 82 | 96 |
| PLAYER | POSITION | OVR | SPD | ACC | AGI | CTH | JMP | AWR |
| Jerry Rice | WR | 83 | 84 | 80 | 83 | 92 | 75 | 99 |
| PLAYER | POSITION | OVR | STR | PBK | RBK | ACC | AGI | AWR |
| Tom Nalen | C | 95 | 87 | 87 | 94 | 80 | 55 | 96 |
| PLAYER | POSITION | OVR | SPD | ACC | AGI | TAK | CTH | AWR |
| Al Wilson | MLB | 96 | 87 | 89 | 83 | 94 | 60 | 90 |
| PLAYER | POSITION | OVR | SPD | ACC | JMP | TAK | CTH | AWR |
| Champ Bailey | CB | 98 | 98 | 98 | 92 | 65 | 77 | 92 |
Detroit Lions
This could be Joey Harrington’s last chance to prove he belongs in the NFL as a starting quarterback. The Detroit Lions have an enormous amount of young talent. Running back Kevin Jones exploded during the second half of last season. His ratings provide a solid balance of speed and power. Roy Williams is developing into a stellar receiver alongside Charles Rodgers (can he last a season without injury) and rookie Mike Williams.
Joey Harrington’s awareness is one of the worst among starters; his field of vision is quite low. Establish a strong running game and mix up a short passing game with the deep ball to both Williams. Jeff Garcia was brought from Cleveland as a potential replacement for Harrington; he offers better awareness (and field of vision) but his throwing power is low and he’s extremely susceptible to injury.
Detroit Lions Key Players
| PLAYER | POSITION | OVR | THP | THA | AWR | SPD | CAR | INJ |
| Joey Harrington | QB | 82 | 91 | 85 | 77 | 60 | 37 | 88 |
| PLAYER | POSITION | OVR | THP | THA | AWR | SPD | CAR | INJ |
| Jeff Garcia | QB | 81 | 81 | 87 | 83 | 65 | 49 | 35 |
| PLAYER | POSITION | OVR | SPD | ACC | AGI | CTH | BTK | CAR |
| Kevin Jones | RB | 87 | 93 | 94 | 93 | 67 | 84 | 79 |
| PLAYER | POSITION | OVR | SPD | ACC | AGI | CTH | JMP | AWR |
| Roy Williams | WR | 87 | 93 | 91 | 92 | 89 | 94 | 74 |
| PLAYER | POSITION | OVR | SPD | ACC | AGI | TAK | STR | AWR |
| Shaun Rogers | DT | 95 | 63 | 74 | 63 | 92 | 95 | 81 |
| PLAYER | POSITION | OVR | SPD | ACC | JMP | TAK | CTH | AWR |
| Dre' Bly | CB | 90 | 93 | 96 | 89 | 49 | 82 | 84 |
Green Bay Packers
Future Hall of Famer Brett Favre returns for another run at a championship. Offensively the Green Bay Packers are strong. Ahman Green remains one of the best backs in the NFL; he boasts high speed, break tackle, and catch rating. He’s a huge weapon as a receiver.
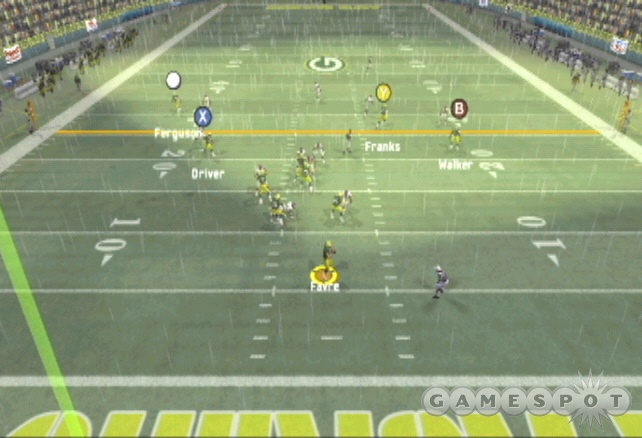
Javon Walker emerged last year as one of the league’s premiere wide outs. Stretch defenses utilizing Walker’s speed. Favre is one of the best quarterbacks in the game. His awareness provides a huge field of vision and he’s built like a rock--a 99 injury rating.
The defense lacks playmakers, however. You’ll likely have to excel in shootouts to win consistently--and the gunslinger Favre certainly fits that bill. Spread the ball around with liberal use of the screen play, flat passes, the tight end, and the deep ball. Establish a running game in the full house formation then use play action passing to catch defenses out of position.
Green Bay Packers Key Players
| PLAYER | POSITION | OVR | THP | THA | AWR | SPD | CAR | INJ |
| Brett Favre | QB | 93 | 97 | 88 | 97 | 53 | 62 | 99 |
| PLAYER | POSITION | OVR | SPD | ACC | AGI | CTH | BTK | CAR |
| Ahman Green | RB | 92 | 96 | 96 | 90 | 77 | 88 | 75 |
| PLAYER | POSITION | OVR | SPD | ACC | AGI | CTH | JMP | AWR |
| Javon Walker | WR | 91 | 92 | 93 | 93 | 90 | 93 | 85 |
| PLAYER | POSITION | OVR | STR | PBK | RBK | ACC | AGI | AWR |
| Chad Clifton | LT | 93 | 95 | 96 | 91 | 75 | 50 | 89 |
| PLAYER | POSITION | OVR | SPD | ACC | AGI | TAK | STR | AWR |
| Kabeer Gbaja-Biamilla | RE | 91 | 83 | 92 | 79 | 75 | 75 | 75 |
Houston Texans
The Houston Texans continue to show improvement since their expansion inception but it’s nearing the point where the team should begin to emerge as a serious playoff contender. On offense, the pieces are falling into place. David Carr has matured and has a strong arm for the deep pass. His inexperience keeps his awareness down, which limits his field of vision.
Dominick Davis is the team’s featured back; he strikes a balance between speed and power and should also be utilized in the passing game. Wide receiver Andre Johnson boasts high speed and jump ability; he can exploit single-coverage and smaller corners.
Defensively the Houston Texans lie in the middle of the pack. Position by position, the defense is good but not great. Young Dunta Robinson is one of the stronger position players, but lacks the experience to blanket an opposing offense’s primary receiver.
Houston Texans Key Players
| PLAYER | POSITION | OVR | THP | THA | AWR | SPD | CAR | INJ |
| David Carr | QB | 87 | 95 | 85 | 83 | 65 | 36 | 95 |
| PLAYER | POSITION | OVR | SPD | ACC | AGI | CTH | BTK | CAR |
| Dominick Davis | RB | 88 | 91 | 93 | 92 | 77 | 84 | 85 |
| PLAYER | POSITION | OVR | SPD | ACC | AGI | CTH | JMP | AWR |
| Andre Johnson | WR | 91 | 95 | 95 | 92 | 88 | 94 | 81 |
| PLAYER | POSITION | OVR | SPD | ACC | JMP | TAK | CTH | AWR |
| Dunta Robinson CB 88 96 97 85 66 72 76 |
Indianapolis Colts
There is no doubt: the Indianapolis Colts are the best offense in football. That couldn’t be more of an understatement. Peyton Manning broke the NFL record for passing touchdowns in a season and three receivers caught 10 or more touchdowns. Yet the Colts couldn’t complete the dream season and were beaten, once again, by the eventual Super Bowl Champions, the New England Patriots.
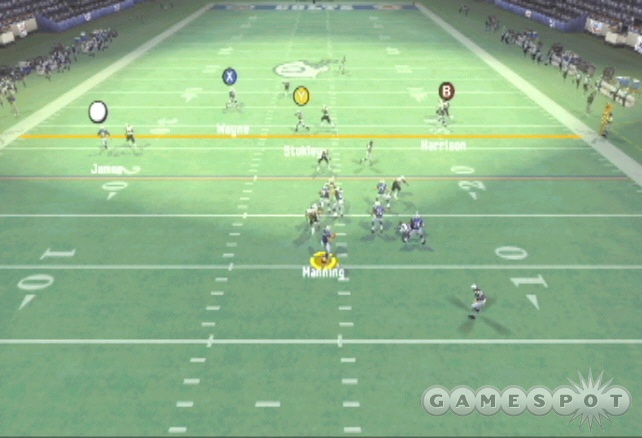
The team is completely stacked: Edgerrin James is a fast, powerful running (92 speed and 93 break tackle) and Marvin Harrison and Reggie Wayne are one of the best duos in the league.
But it’s all about Peyton--rated 99 in important passing categories, including his overall rating. Peyton’s 99 awareness rating essentially gives Peyton the "entire" field of vision. The field illuminates like a light bulb. He’s extremely accurate and durable against injury. He’s the best pocket passer in the game (though you could certainly make an argument for New England’s Tom Brady). The Colts’ weakness is defense but the explosive offense means no lead is ever insurmountable.
Indianapolis Colts Key Players
| PLAYER | POSITION | OVR | THP | THA | AWR | SPD | CAR | INJ |
| Peyton Manning | QB | 99 | 95 | 99 | 99 | 57 | 61 | 98 |
| PLAYER | POSITION | OVR | SPD | ACC | AGI | CTH | BTK | CAR |
| Edgerrin James | RB | 96 | 92 | 94 | 91 | 78 | 93 | 91 |
| PLAYER | POSITION | OVR | SPD | ACC | AGI | CTH | JMP | AWR |
| Marvin Harrison | WR | 98 | 96 | 98 | 97 | 99 | 87 | 99 |
| PLAYER | POSITION | OVR | SPD | ACC | AGI | CTH | JMP | AWR |
| Reggie Wayne | WR | 90 | 88 | 92 | 91 | 94 | 86 | 90 |
| PLAYER | POSITION | OVR | STR | PBK | RBK | ACC | AGI | AWR |
| Tarik Glenn | LT | 94 | 96 | 97 | 94 | 70 | 47 | 90 |
| PLAYER | POSITION | OVR | SPD | ACC | AGI | TAK | STR | AWR |
| Dwight Freeney | RE | 98 | 87 | 97 | 87 | 78 | 76 | 80 |
Jacksonville Jaguars
The Jacksonville Jaguars were on the cusp of a playoff birth last season and hope to improve on that success. But the team will have to improve on offense; last year’s squad scored less than 17 points a game and the team hasn’t eclipsed 30 points in a game in a number of years. The weapons are there on offense; expect the Jags to open up the passing game to put more points on the scoreboard and take pressure off the defense.
Byron Leftwich boasts a powerful arm but his inexperience shows in his low awareness rating and small field of vision. He’s also one of the slowest quarterbacks in the league; don’t expect to scramble or use rollouts effectively. Fred Taylor features an excellent balance of speed and power and Jimmy Smith is one of the best veteran receivers in the league.
Defensive strength lies inside; Stroud and Henderson are dominant tackles and can stuff the inside run. Protect the outside run with linebacker blitzes and movement and allow Stroud and Henderson to protect the gut.
Jacksonville Jaguars Key Players
| PLAYER | POSITION | OVR | THP | THA | AWR | SPD | CAR | INJ |
| Byron Leftwich | QB | 86 | 97 | 88 | 82 | 48 | 47 | 84 |
| PLAYER | POSITION | OVR | SPD | ACC | AGI | CTH | BTK | CAR |
| Fred Taylor | RB | 90 | 92 | 94 | 90 | 67 | 88 | 87 |
| PLAYER | POSITION | OVR | SPD | ACC | AGI | CTH | JMP | AWR |
| Jimmy Smith | WR | 90 | 88 | 89 | 89 | 94 | 85 | 96 |
| PLAYER | POSITION | OVR | SPD | ACC | AGI | TAK | STR | AWR |
| Marcus Stroud | DT | 96 | 64 | 80 | 66 | 90 | 94 | 82 |
| PLAYER | POSITION | OVR | SPD | ACC | AGI | TAK | STR | AWR |
| John Henderson | DT | 92 | 62 | 71 | 64 | 90 | 95 | 78 |
| PLAYER | POSITION | OVR | SPD | ACC | AGI | TAK | CTH | AWR |
| Mike Peterson | MLB | 92 | 85 | 88 | 87 | 92 | 65 | 88 |
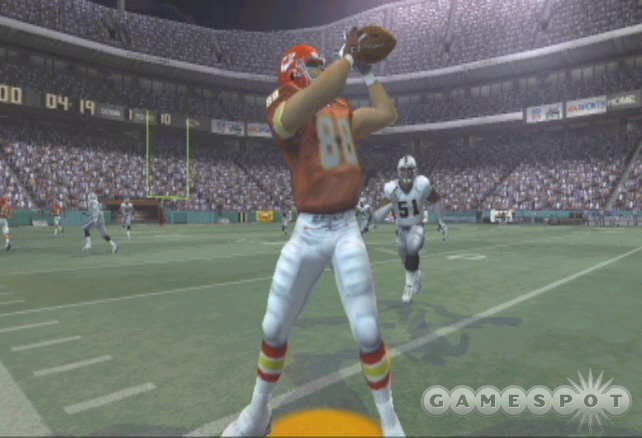
Kansas City Chiefs
The Kansas City Chief’s regressed last season. The Chief’s porous defense finally caught up with them--scoring over 31 points wasn’t always enough to guarantee a win. The Chief’s still have one of the strongest offenses in the league. Trent Green is a top QB; only a few quarterbacks boast higher awareness and a wider field of vision. Trent is extremely accurate but doesn’t have the strongest arm. Focus on high-percentage, short-to-medium passing game using Priest Holmes and Tony Gonzalez.
Priest Holmes remains one of the best running backs in the game--excellent speed, acceleration, catch, and break tackle abilities and plus he rarely fumbles. A strong offensive line lead by Willie Roaf and Will Shields should open ample holes. Tony Gonzalez is essentially the Chief’s primary downfield receiver, though Eddie Kennison has shown improvement and Dante Hall, primarily a kick return specialize, has explosive speed and should be used to test defenses deep.
Kansas City Key Players
| PLAYER | POSITION | OVR | THP | THA | AWR | SPD | CAR | INJ |
| Trent Green | QB | 91 | 88 | 94 | 95 | 52 | 43 | 83 |
| PLAYER | POSITION | OVR | SPD | ACC | AGI | CTH | BTK | CAR |
| Priest Holmes | RB | 95 | 92 | 95 | 92 | 79 | 85 | 96 |
| PLAYER | POSITION | OVR | SPD | PBK | RBK | CTH | BTK | CAR |
| Tony Richardson | FB | 97 | 77 | 52 | 68 | 72 | 78 | 78 |
| PLAYER | POSITION | OVR | SPD | PBK | RBK | CTH | BTK | CAR |
| Tony Gonzalez | TE | 98 | 86 | 52 | 57 | 91 | 70 | 76 |
| PLAYER | POSITION | OVR | SPD | ACC | AGI | CTH | JMP | AWR | KR |
| Dante Hall | WR/KR | 80 | 97 | 99 | 99 | 74 | 70 | 72 | 99 |
| PLAYER | POSITION | OVR | STR | PBK | RBK | ACC | AGI | AWR |
| Willie Roaf | LT | 95 | 96 | 92 | 96 | 83 | 46 | 95 |
| PLAYER | POSITION | OVR | STR | PBK | RBK | ACC | AGI | AWR |
| Will Shields | RG | 98 | 92 | 95 | 93 | 85 | 50 | 95 |
| PLAYER | POSITION | OVR | SPD | ACC | JMP | TAK | CTH | AWR |
| Patrick Surtain | CB | 94 | 93 | 93 | 90 | 64 | 79 | 93 |
Miami Dolphins
The 2005 season sees the return of Ricky Williams, who announced his retirement last year to essentially avoid suspension. Ricky’s ratings reflect a year off: speed is down but his break tackle rating is one of the best in the league. The Dolphins drafted Auburn standout Ronnie Brown; the rookie’s stats are solid and he’s worth working into the ground game mix often.
The Dolphins are extremely weak at quarterback--the roster certainly includes no Dan Marino. Both A.J. Feely and Gus Frerotte feature similar meager ratings. Gus provides slightly better awareness but the two are almost interchangeable. Chris Chambers is a fast primary receiver with excellent jump ability to abuse single coverage. Also, Randy McMichael is one of the best tight ends available. On defense Jason Taylor and Zach Thomas are the standouts.
Miami Dolphins Key Players
| PLAYER | POSITION | OVR | THP | THA | AWR | SPD | CAR | INJ |
| A.J. Feeley | QB | 78 | 87 | 84 | 76 | 54 | 40 | 87 |
| PLAYER | POSITION | OVR | THP | THA | AWR | SPD | CAR | INJ |
| Gus Frerotte | QB | 78 | 87 | 85 | 81 | 52 | 39 | 69 |
| PLAYER | POSITION | OVR | SPD | ACC | AGI | CTH | BTK | CAR |
| Ricky Williams | RB | 87 | 89 | 92 | 84 | 70 | 89 | 75 |
| PLAYER | POSITION | OVR | SPD | ACC | AGI | CTH | BTK | CAR |
| Ronnie Brown | RB | 84 | 93 | 92 | 88 | 75 | 82 | 82 |
| PLAYER | POSITION | OVR | SPD | ACC | AGI | CTH | JMP | AWR |
| Chris Chambers | WR | 88 | 94 | 93 | 91 | 86 | 97 | 80 |
| PLAYER | POSITION | OVR | SPD | PBK | RBK | CTH | BTK | CAR |
| Randy McMichael | TE | 90 | 82 | 55 | 57 | 82 | 75 | 73 |
| PLAYER | POSITION | OVR | SPD | ACC | AGI | TAK | STR | AWR |
| Jason Taylor | RE | 95 | 81 | 88 | 78 | 82 | 74 | 90 |
| PLAYER | POSITION | OVR | SPD | ACC | AGI | TAK | CTH | AWR |
| Zach Thomas | MLB | 96 | 73 | 80 | 74 | 97 | 45 | 98 |
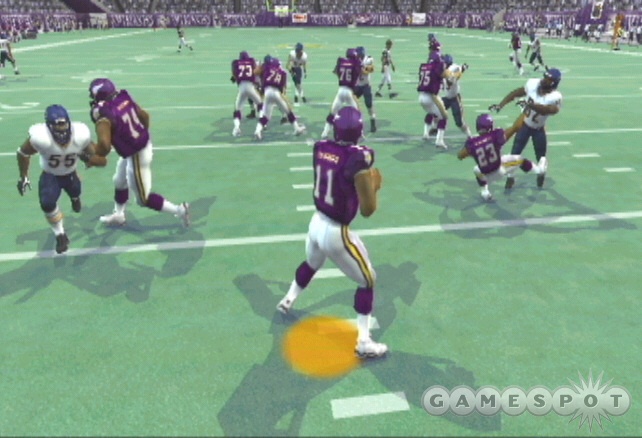
Minnesota Vikings
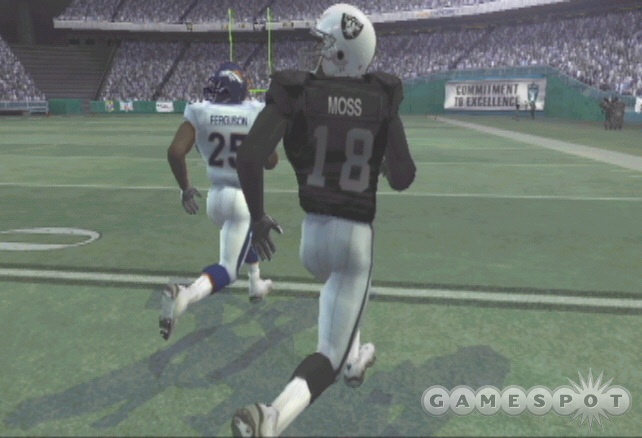
The biggest offseason move saw controversial Vikings wide receiver Randy Moss shipped to the Oakland Raiders. The distractions are gone but with them arguably the best wide receiver in the league. Nate Burleson and Marcus Robinson, both capable but not explosive, receivers will have to cover the slack.
The Vikings feature two similarly rated running backs: Bennett is the speedster while Williams is the power back. Use Williams in goal line and short yardage situations.
Daunte Culpepper is one of the best quarterbacks in the league as well as in Madden 06. Awesome throw power, great accuracy, high awareness and field of vision, and excellent speed for scrambles and roll outs. He’s basically the total package and can be a threat on the ground as well as through the air. On defense, the Vikings added all-pro free safety Darren Sharper, formerly of the division rival Packers. The Vikings defense is much improved.
Minnesota Vikings Key Players
| PLAYER | POSITION | OVR | THP | THA | AWR | SPD | CAR | INJ |
| Daunte Culpepper | QB | 98 | 98 | 90 | 87 | 80 | 40 | 87 |
| PLAYER | POSITION | OVR | SPD | ACC | AGI | CTH | BTK | CAR |
| Michael Bennett | RB | 82 | 97 | 97 | 88 | 64 | 72 | 78 |
| PLAYER | POSITION | OVR | SPD | ACC | AGI | CTH | BTK | CAR |
| Moe Williams | RB | 82 | 85 | 86 | 80 | 65 | 85 | 85 |
| PLAYER | POSITION | OVR | SPD | ACC | AGI | CTH | JMP | AWR |
| Nate Burleson | WR | 86 | 91 | 92 | 91 | 89 | 88 | 81 |
| PLAYER | POSITION | OVR | STR | PBK | RBK | ACC | AGI | AWR |
| Matt Birk | C | 96 | 91 | 93 | 90 | 85 | 55 | 95 |
| PLAYER | POSITION | OVR | SPD | ACC | AGI | TAK | STR | AWR |
| Kevin Williams | DT | 94 | 70 | 88 | 67 | 87 | 70 | 79 |
| PLAYER | POSITION | OVR | SPD | ACC | JMP | TAK | CTH | AWR |
| Darren Sharper | FS | 95 | 86 | 89 | 86 | 74 | 75 | 90 |
New England Patriots
The Patriots are a dynasty...and they kept getting better! Tom Brady may end up being one of the greatest quarterbacks of all time. He’s this era’s Joe Montana. Not especially flashy, not the strongest arm, but he has the winning edge. He’s clutch and one of the smartest in the game. In Madden 06, his awareness is second only to Peyton Manning. The entire field is his vision. And it may not be the strongest arm, but 92 throw power will get the job done.
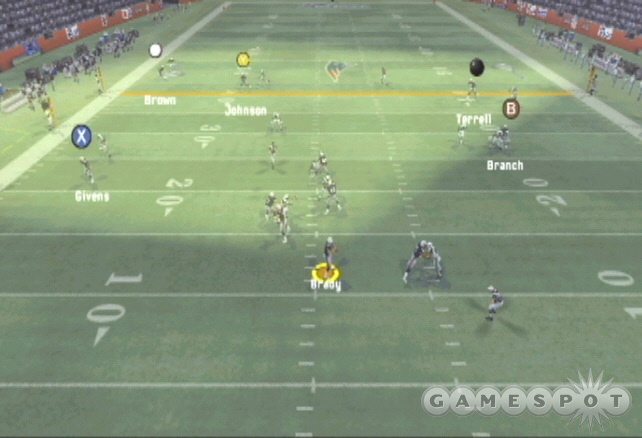
The addition of Corey Dillon last season added another dimension to the team. He had a great season and is one of the best rated running backs in Madden: especially his 92 catch rating and 93 break tackle rating. Deion Branch has emerged as the primary receiver. He’s the team’s downfield threat with 94 speed and 96 acceleration.
The Patriots’ defense is led by veterans at each rank, including Richard Seymour, Willie McGinest, and Rodney Harrison: each one of the best at their positions. Finally, kicker Adam Vinatieri is a sure thing.
New England Patriots Key Players
| PLAYER | POSITION | OVR | THP | THA | AWR | SPD | CAR | INJ |
| Tom Brady | QB | 97 | 92 | 96 | 98 | 58 | 51 | 96 |
| PLAYER | POSITION | OVR | SPD | ACC | AGI | CTH | BTK | CAR |
| Corey Dillon | RB | 93 | 90 | 94 | 88 | 92 | 93 | 92 |
| PLAYER | POSITION | OVR | SPD | ACC | AGI | CTH | JMP | AWR |
| Deion Branch | WR | 88 | 94 | 96 | 95 | 88 | 84 | 84 |
| PLAYER | POSITION | OVR | SPD | ACC | AGI | TAK | STR | AWR |
| Richard Seymour | RE | 97 | 70 | 85 | 71 | 88 | 90 | 88 |
| PLAYER | POSITION | OVR | SPD | ACC | AGI | TAK | CTH | AWR |
| Willie McGinest | LOLB | 93 | 77 | 84 | 78 | 92 | 50 | 96 |
| PLAYER | POSITION | OVR | SPD | ACC | JMP | TAK | CTH | AWR |
| Rodney Harrison | SS | 97 | 82 | 90 | 70 | 93 | 61 | 95 |
| PLAYER | POSITION | OVR | KPW | KAC | AWR |
| Adam Vinatieri | K | 99 | 94 | 94 | 94 |
New Orleans Saints
The New Orleans Saints can’t seem to get over the hump of mediocrity. It seems every season the team ends just out of the playoffs with another near .500 record. The Saints hope to lean more on star running back Deuce McAllister. Establish a strong inside and outside running game (Deuce boasts speed and power) to open up the passing lanes for Aaron Brooks, a mobile quarterback but one that lacks the awareness of more skilled signal callers. His lower awareness provides a narrow field of vision.
Joe Horn’s solid ratings lead the Saints’ receivers. Use secondary receiver Donte Stallworth to stretch defenses deep. The Saints’ defense is average with a couple above average defensive backs, including former Packer Mike Mckenzie.
New Orleans Key Players
| PLAYER | POSITION | OVR | THP | THA | AWR | SPD | CAR | INJ |
| Aaron Brooks | QB | 87 | 93 | 86 | 75 | 73 | 34 | 93 |
| PLAYER | POSITION | OVR | SPD | ACC | AGI | CTH | BTK | CAR |
| Deuce McAllister | RB | 92 | 92 | 95 | 87 | 74 | 92 | 84 |
| PLAYER | POSITION | OVR | SPD | ACC | AGI | CTH | JMP | AWR |
| Joe Horn | WR | 93 | 90 | 93 | 92 | 95 | 86 | 94 |
| PLAYER | POSITION | OVR | SPD | ACC | JMP | TAK | CTH | AWR |
| Mike Mckenzie | CB | 88 | 89 | 90 | 88 | 70 | 63 | 90 |
| PLAYER | POSITION | OVR | SPD | ACC | JMP | TAK | CTH | AWR |
| Dwight Smith | FS | 90 | 91 | 92 | 91 | 66 | 71 | 77 |
New York Giants
The Eli Manning era "officially" kicks off as Peyton’s little brother begins the season as the undisputed starting quarterback. The talent is there but it’s still raw, which is reflected by his Madden 06 stats. Eli’s statistics aren’t particularly impressive and his low awareness is on the bottom edge of the league’s starting quarterbacks.
His supporting cast should help. Tiki Barber had a comeback year last season and is one of the best receiving backs in the game. The Giants’ added Pittsburgh’s Plaxico Burress to provide an additional weapon for young Eli. Plaxico excels in single-coverage with his 98 jump ability. Jeremy Shockey is one of the best tight ends in the game and should be a focus of your gameplan. Michael Strahan remains the Giants’ premiere defensive players.
New York Giants Key Players
| PLAYER | POSITION | OVR | THP | THA | AWR | SPD | CAR | INJ |
| Eli Manning | QB | 82 | 92 | 88 | 76 | 58 | 50 | 95 |
| PLAYER | POSITION | OVR | SPD | ACC | AGI | CTH | BTK | CAR |
| Tiki Barber | RB | 92 | 93 | 94 | 93 | 85 | 80 | 82 |
| PLAYER | POSITION | OVR | SPD | ACC | AGI | CTH | JMP | AWR |
| Plaxico Burress | WR | 87 | 92 | 93 | 92 | 82 | 98 | 77 |
| PLAYER | POSITION | OVR | SPD | ACC | AGI | CTH | JMP | AWR |
| Amani Toomer | WR | 85 | 90 | 89 | 86 | 86 | 87 | 87 |
| PLAYER | POSITION | OVR | SPD | PBK | RBK | CTH | BTK | CAR |
| Jeremy Shockey | TE | 93 | 84 | 50 | 54 | 86 | 82 | 67 |
| PLAYER | POSITION | OVR | SPD | ACC | AGI | TAK | STR | AWR |
| Michael Strahan | RE | 96 | 72 | 84 | 70 | 85 | 87 | 96 |
New York Jets
Last season’s New York Jets can be summed up with the following: the rebirth of Curtis Martin. He’s always been one of the best running backs in the NFL but he had some down years which seemed to indicate he was losing a step. Then comes last season where Curtis Martin has one of his best years. In Madden 06, he’s a good blend of speed and power as well as a threat as a pass receiver. Plus, he doesn’t fumble much with a 98 carry rating! Don’t hesitate to run inside behind highly rated center Kevin Mawae.
Chad Pennington is one of the most accurate quarterbacks in the league and excels in a high-percentage short-to-medium passing game (his throw power isn’t spectacular). He also boasts high awareness, which provides a wide field of vision.
Laveraneus Coles rejoins the team after a brief stint with the Redskins; his blazing speed does offer the chance to stretch defenses deep as well as burn defenders on crossing routes. On defense, the Jets added free agent cornerback Ty Law, formerly of the New England Patriots. He’s one of the best in the league.
New York Jets Key Players
| PLAYER | POSITION | OVR | THP | THA | AWR | SPD | CAR | INJ |
| Chad Pennington | QB | 89 | 86 | 96 | 89 | 55 | 44 | 65 |
| PLAYER | POSITION | OVR | SPD | ACC | AGI | CTH | BTK | CAR |
| Curtis Martin | RB | 95 | 89 | 92 | 89 | 79 | 88 | 98 |
| PLAYER | POSITION | OVR | SPD | ACC | AGI | CTH | JMP | AWR |
| Laveraneus Coles | WR | 89 | 98 | 96 | 94 | 89 | 82 | 85 |
| PLAYER | POSITION | OVR | STR | PBK | RBK | ACC | AGI | AWR |
| Kevin Mawae | C | 98 | 92 | 94 | 92 | 87 | 53 | 95 |
| PLAYER | POSITION | OVR | SPD | ACC | AGI | TAK | STR | AWR |
| John Abraham | RE | 95 | 80 | 87 | 78 | 84 | 78 | 82 |
| PLAYER | POSITION | OVR | SPD | ACC | JMP | TAK | CTH | AWR |
| Ty Law | CB | 96 | 95 | 93 | 89 | 65 | 76 | 96 |
Oakland Raiders
The biggest offseason move involved the Oakland Raiders: they added the explosive, and often controversial, wide receiver Randy Moss to their roster. He might be a perfect fit for the bad boys of the Silver & Black. Randy Moss’ ratings are almost unbelievable: 99 speed, 99 acceleration, 97 catch, 99 jump, 90 awareness, and 90 agility. He’s the best receiver in the game. Jerry Porter offers a solid complement to Moss’ deep ball potential.
Kerry Collins has the arm to get him the ball deep and decent awareness to see the field. LaMont Jordan was added from the New York Jets to try and stabilize an inconsistent running game. Jordan isn’t fast but does offer decent power with an 89 break tackle rating. On defense, Charles Woodson is a standout player and a solid cornerback to line up against an opposing team’s primary receiver.
Oakland Raiders Key Players
| PLAYER | POSITION | OVR | THP | THA | AWR | SPD | CAR | INJ |
| Kerry Collins | QB | 84 | 95 | 86 | 84 | 50 | 30 | 96 |
| PLAYER | POSITION | OVR | SPD | ACC | AGI | CTH | BTK | CAR |
| Lamont Jordan | RB | 86 | 89 | 91 | 86 | 70 | 89 | 86 |
| PLAYER | POSITION | OVR | SPD | ACC | AGI | CTH | JMP | AWR |
| Randy Moss | WR | 99 | 99 | 99 | 90 | 97 | 99 | 90 |
| PLAYER | POSITION | OVR | SPD | ACC | AGI | CTH | JMP | AWR |
| Jerry Porter | WR | 87 | 91 | 93 | 90 | 86 | 91 | 82 |
| PLAYER | POSITION | OVR | SPD | ACC | JMP | TAK | CTH | AWR |
| Charles Woodson | CB | 91 | 92 | 93 | 92 | 58 | 74 | 87 |
Philadelphia Eagles
After three consecutive losses in the NFC Championship game, the Philadelphia Eagles finally got over the hump and made a Super Bowl appearance. But the season didn’t end with a victory; the Eagles lost to the New England Patriots. The team remains mostly intact and should be the favorite in the NFC. The Madden 06 team may be better than the real life Eagles, though; perennial football brat Terrell Owens continues to cause distractions in training camp but he’s one of the best receivers in Madden.
Brian Westbrook is an elusive running back and an equal threat as a pass receiver. Run behind excellent left tackle Tra Thomas. Defensively, the Eagles remain strong. Jevon Kearse and Corey Simon anchor a strong line and free safety Brian Dawkins is one of the best defensive backs in the Madden. And if you need a game winning field goal, you can’t do much better than David Akers.
Philadelphia Eagles Key Players
| PLAYER | POSITION | OVR | THP | THA | AWR | SPD | CAR | INJ |
| Donovan McNabb | QB | 97 | 96 | 88 | 88 | 81 | 48 | 87 |
| PLAYER | POSITION | OVR | SPD | ACC | AGI | CTH | BTK | CAR |
| Brian Westbrook | RB | 89 | 94 | 98 | 94 | 82 | 77 | 85 |
| PLAYER | POSITION | OVR | SPD | ACC | AGI | CTH | JMP | AWR |
| Terrell Owens | WR | 98 | 94 | 97 | 93 | 95 | 95 | 94 |
| PLAYER | POSITION | OVR | STR | PBK | RBK | ACC | AGI | AWR |
| Tra Thomas | LT | 95 | 94 | 97 | 96 | 82 | 48 | 90 |
| PLAYER | POSITION | OVR | SPD | ACC | AGI | TAK | STR | AWR |
| Jevon Kearse | LE | 94 | 85 | 93 | 88 | 75 | 74 | 80 |
| PLAYER | POSITION | OVR | SPD | ACC | AGI | TAK | STR | AWR |
| Corey Simon | DT | 94 | 65 | 86 | 63 | 87 | 88 | 84 |
| PLAYER | POSITION | OVR | SPD | ACC | JMP | TAK | CTH | AWR |
| Brian Dawkins | FS | 98 | 90 | 94 | 83 | 84 | 65 | 92 |
| PLAYER | POSITION | OVR | KPW | KAC | AWR |
| David Akers | K | 99 | 93 | 94 | 86 |
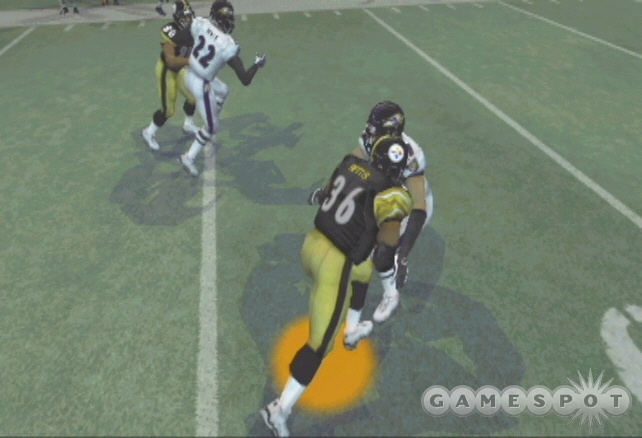
Pittsburgh Steelers
The Pittsburgh Steelers had an incredible season last year. The team was led by poised rookie Ben Roethlisberger; his stats reflect his excellent skills but also his inexperience. Throw power and accuracy are good but awareness is low, which limits his field of vision. An above-average speed provides the opportunity for roll out and scrambles.
The Steelers have the quintessential one-two punch backfield. Duce Staley is the faster back and the threat as a receiver; veteran Jerome Bettis is the power back with a 95 break tackle rating. Hines Ward remains one of the best receivers in the game. Control the clock with a running game (running behind left guard Alan Faneca) and open up a high-percentage passes with Hines Ward. On defense, defensive tackle Casey Hampton and linebacker Joey Porter are the stars.
Pittsburgh Steelers Key Players
| PLAYER | POSITION | OVR | THP | THA | AWR | SPD | CAR | INJ |
| Ben Roethlisberger | QB | 88 | 93 | 87 | 80 | 70 | 60 | 94 |
| PLAYER | POSITION | OVR | SPD | ACC | AGI | CTH | BTK | CAR |
| Duce Staley | RB | 87 | 87 | 87 | 87 | 76 | 84 | 86 |
| PLAYER | POSITION | OVR | SPD | ACC | AGI | CTH | BTK | CAR |
| Jerome Bettis | RB | 87 | 82 | 85 | 79 | 53 | 95 | 96 |
| PLAYER | POSITION | OVR | SPD | ACC | AGI | CTH | JMP | AWR |
| Hines Ward | WR | 94 | 89 | 91 | 93 | 95 | 86 | 93 |
| PLAYER | POSITION | OVR | STR | PBK | RBK | ACC | AGI | AWR |
| Alan Faneca | LG | 98 | 97 | 91 | 98 | 79 | 45 | 92 |
| PLAYER | POSITION | OVR | SPD | ACC | AGI | TAK | STR | AWR |
| Casey Hampton | DT | 95 | 57 | 68 | 61 | 95 | 97 | 82 |
| PLAYER | POSITION | OVR | SPD | ACC | AGI | TAK | CTH | AWR |
| Joey Porter | ROLB | 95 | 85 | 91 | 82 | 91 | 65 | 84 |
San Diego Chargers
The San Diego Chargers had a fantastic season last year but the hard work ended in disappointment with a first round playoff loss to the New York Jets. Drew Brees returned to form and even earned the comeback player of the year honors. He’s solidly rated with good accuracy and awareness (for field of vision). LaDainian Tomlinson is arguably the best running back in the NFL--and in Madden 06. Explosive speed, acceleration, and a powerful break tackle rating. He’s also an awesome receiver out of the backfield.
Antonio Gates is a primary target in the passing game; he has emerged as one of the best tight ends in the game. Keenan McCardell was also added last year to improve the wide receiver position. He’s not especially fast but high awareness makes him especially useful in option routes.
San Diego Chargers Key Players
| PLAYER | POSITION | OVR | THP | THA | AWR | SPD | CAR | INJ |
| Drew Brees | QB | 89 | 88 | 94 | 88 | 58 | 54 | 90 |
| PLAYER | POSITION | OVR | SPD | ACC | AGI | CTH | BTK | CAR |
| LaDainian Tomlinson | RB | 98 | 95 | 97 | 95 | 85 | 93 | 87 |
| PLAYER | POSITION | OVR | SPD | ACC | AGI | CTH | JMP | AWR |
| Keenan McCardell | WR | 87 | 87 | 85 | 87 | 94 | 82 | 94 |
| PLAYER | POSITION | OVR | SPD | PBK | RBK | CTH | BTK | CAR |
| Antonio Gates | TE | 96 | 87 | 54 | 58 | 87 | 66 | 70 |
| PLAYER | POSITION | OVR | SPD | ACC | AGI | TAK | CTH | AWR |
| Donnie Edwards | MLB | 93 | 85 | 89 | 88 | 91 | 70 | 94 |
| PLAYER | POSITION | OVR | SPD | ACC | JMP | TAK | CTH | AWR |
| Quentin Jammer | CB | 87 | 93 | 94 | 93 | 67 | 72 | 73 |
San Francisco 49ers
It’s hard to believe this is the same franchise that won five Super Bowl trophies in the 80s and early 90s. The same team led by Hall of Famers Joe Montana and Steve Young and future Hall of Famer Jerry Rice. Now the 49ers are one of the worst teams in the league. The organization hopes the future is brighter with the addition of first round pick quarterback Alex Smith. He has talent but his stats reflect his rookie status: a very poor awareness limiting his field of vision.
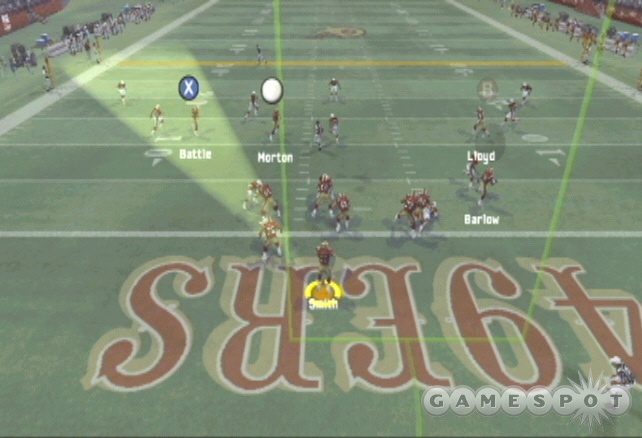
Eric Johnson is a primary target on offense and has emerged as an excellent tight end. Kevan Barlow wasn’t particularly impressive in his first year as full time starter; his stats don’t place him among the league’s elite runners. Use two-back sets and include excellent fullback Fred Beasley into the mix as both a runner and pass catcher.
San Francisco 49ers Key Players
| PLAYER | POSITION | OVR | THP | THA | AWR | SPD | CAR | INJ |
| Alex Smith | QB | 82 | 86 | 87 | 72 | 73 | 60 | 93 |
| PLAYER | POSITION | OVR | SPD | ACC | AGI | CTH | BTK | CAR |
| Kevan Barlow | RB | 84 | 87 | 93 | 84 | 65 | 87 | 82 |
| PLAYER | POSITION | OVR | SPD | PBK | RBK | CTH | BTK | CAR |
| Fred Beasley | FB | 96 | 72 | 52 | 64 | 75 | 72 | 77 |
| PLAYER | POSITION | OVR | SPD | PBK | RBK | CTH | BTK | CAR |
| Eric Johnson | TE | 88 | 74 | 54 | 58 | 87 | 60 | 70 |
| PLAYER | POSITION | OVR | SPD | ACC | AGI | TAK | CTH | AWR |
| Julian Peterson | LOLB | 97 | 88 | 90 | 88 | 91 | 57 | 88 |
| PLAYER | POSITION | OVR | SPD | ACC | JMP | TAK | CTH | AWR |
| Tony Parrish | SS | 92 | 85 | 84 | 84 | 75 | 78 | 85 |
Seattle Seahawks
The Seattle Seahawks were expected to contend for the NFC title last season but never achieved much consistency. Matt Hasselbeck didn’t repeat his spectacular season from the year before. He’s rated well but not exceptional: decent power, accuracy, and awareness for decent field of vision. Darrell Jackson is the primary receiver. Like Hasselbeck, he’s certainly solid but not a superstar in any of the important ratings.
Shaun Alexander is one of the best backs in the game: good speed, excellent acceleration, and a strong break tackle rating. A strong running game should be your primary focus. Run behind highly rated left tackle Walter Jones. On defense, former Texan Jaime Sharper was added to strengthen what was also an inconsistent squad.
Seattle Seahawks Key Players
| PLAYER | POSITION | OVR | THP | THA | AWR | SPD | CAR | INJ |
| Matt Hasselbeck | QB | 89 | 92 | 90 | 87 | 61 | 52 | 84 |
| PLAYER | POSITION | OVR | SPD | ACC | AGI | CTH | BTK | CAR |
| Shaun Alexander | RB | 96 | 92 | 98 | 88 | 72 | 94 | 95 |
| PLAYER | POSITION | OVR | SPD | PBK | RBK | CTH | BTK | CAR |
| Matt Strong | FB | 95 | 83 | 60 | 70 | 68 | 67 | 68 |
| PLAYER | POSITION | OVR | SPD | ACC | AGI | CTH | JMP | AWR |
| Darrell Jackson | WR | 89 | 88 | 91 | 91 | 92 | 88 | 90 |
| PLAYER | POSITION | OVR | STR | PBK | RBK | ACC | AGI | AWR |
| Walter Jones | LT | 98 | 95 | 98 | 96 | 88 | 51 | 94 |
| PLAYER | POSITION | OVR | STR | PBK | RBK | ACC | AGI | AWR |
| Walter Jones | LG | 95 | 95 | 90 | 94 | 86 | 55 | 86 |
| PLAYER | POSITION | OVR | SPD | ACC | AGI | TAK | CTH | AWR |
| Jaime Sharper | LOLB | 94 | 79 | 82 | 79 | 95 | 57 | 89 |
St. Louis Rams
The Rams may not be "the Greatest Show on Turf" as they were in their recent Super Bowl seasons, but the offense is still one of the most potent in the NFL. Marc Bulger hasn’t quite achieved the greatness of former NFL MVP Kurt Warner’s best seasons but he offers decent power and accuracy as well as good awareness for a wide field of vision. Torry Holt and Issac Bruce are the best receiving duo in the game. Both are extremely fast with high veteran awareness.

Marshall Faulk isn’t the back he used to be and is no longer the team’s undisputed number one. His stats remain fairly solid, however, but it’s worth mixing in Steven Jackson for his power. Don’t hesitate to include both in several offensive sets, particularly putting Faulk outside as a receiver to capitalize on his 83 catch rating. On the line, left tackle Orlando Pace is the standout.
St Louis Rams Key Players
| PLAYER | POSITION | OVR | THP | THA | AWR | SPD | CAR | INJ |
| Marc Bulger | QB | 88 | 91 | 91 | 87 | 59 | 49 | 66 |
| PLAYER | POSITION | OVR | SPD | ACC | AGI | CTH | BTK | CAR |
| Marshall Faulk | RB | 87 | 90 | 91 | 92 | 83 | 74 | 82 |
| PLAYER | POSITION | OVR | SPD | ACC | AGI | CTH | BTK | CAR |
| Steven Jackson | RB | 86 | 88 | 87 | 85 | 75 | 90 | 83 |
| PLAYER | POSITION | OVR | SPD | ACC | AGI | CTH | JMP | AWR |
| Torry Holt | WR | 96 | 95 | 96 | 93 | 97 | 87 | 95 |
| PLAYER | POSITION | OVR | SPD | ACC | AGI | CTH | JMP | AWR |
| Issac Bruce | WR | 92 | 93 | 94 | 96 | 95 | 84 | 95 |
| PLAYER | POSITION | OVR | STR | PBK | RBK | ACC | AGI | AWR |
| Orlando Pace | LT | 97 | 96 | 97 | 92 | 90 | 54 | 95 |
| PLAYER | POSITION | OVR | SPD | ACC | AGI | TAK | STR | AWR |
| Leonard Little | LE | 93 | 85 | 92 | 81 | 78 | 73 | 74 |
Tampa Bay Buccaneers
The Tampa Bay Buccaneers have been essentially in rebuilding mode since their Super Bowl season of a few years back. Last year they added rookie Michael Clayton to the wide receiver ranks; he put up great numbers and had one of the best years for a rookie wide out. Carnell Williams was drafted this season as the future running back. Currently the Bucs have several decent running backs, including Michael Pittman and Charlie Garner. Use packages to mix up your ball carriers and use dual RB sets as well as in receiver slots. Mike Alstott is also a decent change of pace.
Brian Griese has returned to more "Denver Bronco" era than "Miami Dolphin" era of his career. He boasts decent but not exceptional ratings. His awareness is average as is his field of vision.
The Bucs defense is still intimidating and feature stars at each position. Simeon Rice and Anthony McFarland carry the defensive line; Derrick Brooks is one of the league’s best linebackers; and Ronde Barber is a top cornerback, though not as fast as the league’s best.
Tampa Bay Buccaneers Key Players
| PLAYER | POSITION | OVR | THP | THA | AWR | SPD | CAR | INJ |
| Brian Griese | QB | 85 | 88 | 90 | 83 | 58 | 37 | 65 |
| PLAYER | POSITION | OVR | SPD | ACC | AGI | CTH | BTK | CAR |
| Michael Pittman | RB | 83 | 88 | 90 | 85 | 76 | 84 | 75 |
| PLAYER | POSITION | OVR | SPD | ACC | AGI | CTH | BTK | CAR |
| Carnell Williams | RB | 83 | 92 | 95 | 93 | 73 | 80 | 78 |
| PLAYER | POSITION | OVR | SPD | PBK | RBK | CTH | BTK | CAR |
| Mike Alstott | FB | 90 | 82 | 47 | 53 | 61 | 91 | 72 |
| PLAYER | POSITION | OVR | SPD | ACC | AGI | CTH | JMP | AWR |
| Michael Clayton | WR | 87 | 88 | 91 | 88 | 89 | 92 | 82 |
| PLAYER | POSITION | OVR | SPD | ACC | AGI | TAK | STR | AWR |
| Simeon Rice | LE | 95 | 84 | 94 | 78 | 76 | 74 | 94 |
| PLAYER | POSITION | OVR | SPD | ACC | AGI | TAK | CTH | AWR |
| Derrick Brooks | ROLB | 97 | 83 | 88 | 84 | 90 | 65 | 95 |
| PLAYER | POSITION | OVR | SPD | ACC | JMP | TAK | CTH | AWR |
| Ronde Barber | CB | 92 | 88 | 96 | 91 | 68 | 72 | 91 |
Tennessee Titans
The Tennessee Titans are no longer the class of the AFC or their division. The Indianapolis Colts should once again run away with the AFC South and both the Jaguars and Texans should show improvement. The Titans are an aging team that lack playmakers.Steve McNair is a former co-league MFP and a decent Madden 06 quarterback, but lacking in accuracy as well as durability (a low 69 injury rating). His above-average awareness provides a wide field of vision and above-average speed offers the opportunity for roll outs and scrambles--just don’t get roughed up by defenders.
The Titans added Travis Henry (former Buffalo Bill) in the offseason to share the load with oft-injured starter Chris Brown. Both running backs feature almost identical ratings. Drew Bennett is now the primary receiver after all-pro Derrick Mason left for the Baltimore Ravens.
Tennessee Titans Key Players
| PLAYER | POSITION | OVR | THP | THA | AWR | SPD | CAR | INJ |
| Steve McNair | QB | 91 | 94 | 84 | 87 | 74 | 55 | 69 |
| PLAYER | POSITION | OVR | SPD | ACC | AGI | CTH | BTK | CAR |
| Chris Brown | RB | 88 | 90 | 94 | 87 | 63 | 93 | 82 |
| PLAYER | POSITION | OVR | SPD | ACC | AGI | CTH | BTK | CAR |
| Travis Henry | RB | 87 | 88 | 91 | 85 | 67 | 92 | 77 |
| PLAYER | POSITION | OVR | SPD | ACC | AGI | CTH | JMP | AWR |
| Drew Bennett | WR | 88 | 89 | 87 | 87 | 90 | 90 | 88 |
| PLAYER | POSITION | OVR | STR | PBK | RBK | ACC | AGI | AWR |
| Brad Hopkins | LT | 93 | 93 | 94 | 95 | 74 | 52 | 91 |
| PLAYER | POSITION | OVR | SPD | ACC | AGI | TAK | CTH | AWR |
| Keith Bulluck | ROLB | 95 | 87 | 90 | 87 | 89 | 65 | 90 |
| PLAYER | POSITION | OVR | SPD | ACC | JMP | TAK | CTH | AWR |
| Tank Williams | SS | 88 | 88 | 90 | 83 | 84 | 61 | 77 |
Washington Redskins
The return of coach Joe Gibbs hasn’t produced results...yet. Patrick Ramsey enters the season as the expected starting quarterback. The former first round draft pick hasn’t developed the consistency required to be a premiere NFL quarterback. Former Jaguar Mark Brunell is a capable backup and actually features higher awareness (representing his experience) and a wider field of vision.
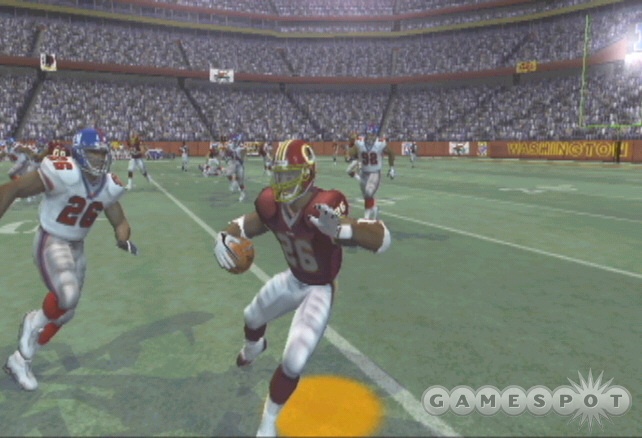
Running back Clinton Portis had a down year but remains one of the fastest and most elusive backs in the league. The Redskins traded for speedy Jets receiver Santana Moss (sending Laveraneus Coles in exchange) and also lost secondary receiver Rod Gardner to the Panthers. Use Santana Moss’ speed on deep balls and crossing routes to capitalize on his blazing acceleration and speed.
Washington Redskins Key Players
| PLAYER | POSITION | OVR | THP | THA | AWR | SPD | CAR | INJ |
| Patrick Ramsey | QB | 83 | 94 | 86 | 77 | 56 | 40 | 88 |
| PLAYER | POSITION | OVR | SPD | ACC | AGI | CTH | BTK | CAR |
| Clinton Portis | RB | 92 | 96 | 98 | 96 | 68 | 86 | 84 |
| PLAYER | POSITION | OVR | SPD | ACC | AGI | CTH | JMP | AWR |
| Santana Moss | WR | 87 | 97 | 98 | 96 | 86 | 82 | 80 |
| PLAYER | POSITION | OVR | STR | PBK | RBK | ACC | AGI | AWR |
| Randy Thomas | RG | 92 | 91 | 97 | 87 | 80 | 54 | 85 |
| PLAYER | POSITION | OVR | SPD | ACC | AGI | TAK | CTH | AWR |
| LaVar Arrington | ROLB | 95 | 88 | 94 | 87 | 88 | 54 | 82 |
Chapter 3 - NFL Superstar
This section provides tips on Madden 06’s new NFL Superstar mode. You select your parents, appearance, agent, take an IQ test, get drafted, participate in training camp, and hopefully become your new team’s most important asset.
Imagine if you could select your parents and your parents’ skills had a direct impact on your own abilities. That’s how NFL Superstar mode begins. In the "DNA" selection, you can cycle through various sets of fathers and mothers to find the best pairing possible. There’s not really an exact science to this but there are definitely some attributes to pay attention for.
Selecting a father that played a certain position will certainly make your superstar geared toward that same position. Then the better your father was at that position, the better your career begins. For instance, you may have a father who was a High School Defensive Back or a Hall of Fame Defensive Back. Obviously the stronger DNA comes from the NFL Hall of Fame star.
Also consider your parents’ other attributes and how they could affect player stats. Intelligence can increase your superstar’s awareness rating (especially important for quarterbacks since it determines the size of your vision cone). Parents with abilities affecting speed (such as a track star mom) will likely increase your player’s speed. Other parent attributes could affect your superstar’s other attributes that aren’t necessarily reflected on the field. There doesn’t seem to be a penalty to randomize your parents’ abilities over and over again until you find a desired match. Think of it as the character roll element of a role-playing game.
Next it’s time to groom your appearance, which you can continue to do after joining a team (by looking in the mirror) and adjusting your equipment. A bar at the bottom tracks your appearance. It seems higher appearance leads to things like movie offers. Then it’s time to hit the interview circuit and complete the IQ test before the NFL draft.
Before the NFL draft you must select an agent. Not every agent will be willing to work with you (the agents in red aren’t interested). As you play superstar mode and your player gets higher exposure, popularity, etc., the better agents will be willing to take you on as their client. It also seems to help if you import your player from NCAA 06 or NFL Street 2.
The agents are rated in a number of factors. For instance, if you’re looking to get exposure, consider an agent with good endorsements rating; also, certain agents have access to the Performance Institute, which can be used to improve player stats. The table below reveals agent stats.
| AGENT | NEGOTIATION | INFLUENCE | INTERVIEW | ENDORSEMENTS | PERFORMANCE INSTITUTE |
| P.A.R. | Excellent | Average | Good | Average | Yes |
| Joshua Culkin | Excellent | Average | Good | Good | Yes |
| Mike Molinari | Good | Average | Average | Average | No |
| Larry Carlisle | Good | Average | Average | Average | No |
| Lamar Peters | Good | Good | Average | Average | Yes |
| Andrew Michaels | Good | Excellent | Good | Good | Yes |
| Alexander Keith | Good | Average | Average | Average | No |
| Danny Castorani | Good | Average | Average | Good | No |
| Jerry Streussel | Good | Average | Average | Good | No |
| Jason Morales | Average | Average | Good | Average | No |
| A.J. Hernandez | Average | Average | Average | Good | No |
| Dan Baker | Average | Good | Average | Average | Yes |
| Timmy Cowan | Average | Good | Average | Average | No |
| Jay Feeney | Average | Average | Good | Average | No |
| Eli Cummings | Average | Good | Good | Average | No |
| Erik Rock | Average | Good | Average | Average | No |
| Aubrey DeLong | Average | Average | Good | Average | No |
| Billy Bailey | Average | Average | Good | Average | No |
| Ace Frazier | Average | Good | Average | Average | No |
| IMA Inc. | Average | Average | Average | Good | No |
| Jay Owe | Average | Good | Good | Average | Yes |
| James K.K. Wolf | Poor | Average | Average | Average | Yes |
| Jake Huyck | Poor | Average | Average | Average | No |
| Graham Cash | Poor | Average | Average | Average | No |
| Stubbs Northcoate | Poor | Average | Average | Average | No |
| Sal Toki | Poor | Average | Average | Average | No |
| Armando Eubanks | Poor | Average | Average | Average | No |
| Matthew Frederico | Poor | Average | Average | Average | No |
| Ted Sed | Poor | Average | Average | Average | No |
| Don Moore | Poor | Average | Average | Average | No |
The draft soon follows. Don’t fret much if you aren’t picked early on. It’s just time to prove those teams that passed on you that they made a big mistake!
The training camp sessions can affect your player’s initial rating. Poor practices can reduce key statistics while solid practices can raise key statistics. Playing offense or defense depends on your superstar. In training camp you can select the same play and even put the defense in something like field goal block so your offense shines. It seems the goal is to have a solid "points per play" average. The higher the average, the better the practice and the better the chance you receive attribute bonuses. You need to have at least 10 reps to complete a practice.
During the season you can continue your superstar role-play with various endorsements, movie offers, and other situations. You may start working on a movie and will be required to memorize lines!
Check the city map and visit the barber shop or tattoo parlor to customize your player’s appearance. Realize that these elements do affect your popularity and can in turn affect your player’s exposure. Work on increasing your appearance rating as high as possible to make your superstar as marketable as possible (who doesn’t like an attractive sports star?).
Visit the Performance Institute (if your agent has access) to play mini-game drills that can increase your player’s statistics. As your superstar gains notoriety, better agents become interested. You can fire and hire as needed and gain access to the institute to improve your superstar in the mini-camp mini-game drills.
Chapter 4 - Offense
Last year’s Madden focused on defense (Baltimore Ravens’ linebacker Ray Lewis donned the cover) but Madden 06 shifts the focus to the quarterback. It’s the year of the quarterback with Super Bowl runner-up Donovan McNabb on the cover. The primary addition to Madden 06 is quarterback vision control and precision placement. It adds an entire new dimension to the passing game. Some will argue vision control makes passing unnecessarily difficult while others may find the new feature extremely rewarding and realistic.
This section provides tips on managing your favorite team’s offensive gameplan covering both the passing and running games. You’ll find specific strategies for the new quarterback vision and precision passing, a compilation of Madden 06’s best offenses and offensive stars, and general tips on playcalling, passing, and rushing.
Top Ranked Offenses
This chart reveals the top ranked offenses based on overall rating in Madden 06.
| TEAM | CONFERENCE AND DIVISION | OFFENSE RATING |
| Indianapolis Colts | AFC South | 99 |
| Kansas City Chiefs | AFC West | 97 |
| Green Bay Packers | NFC North | 94 |
| New England Patriots | AFC East | 93 |
| Minnesota Vikings | NFC North | 92 |
| Philadelphia Eagles | NFC East | 91 |
| St. Louis Rams | NFC West | 90 |
| Denver Broncos | AFC West | 90 |
| Seattle Seahawks | NFC West | 89 |
| Pittsburgh Steelers | AFC North | 89 |
Worst Ranked Offenses
This chart reveals the worst offenses based on overall rating in Madden 06.
| TEAM | CONFERENCE AND DIVISION | OFFENSE RATING |
| Chicago Bears | NFC North | 66 |
| Miami Dolphins | AFC East | 67 |
| Cleveland Browns | AFC North | 68 |
| Baltimore Ravens | AFC North | 68 |
| Washington Redskins | NFC East | 69 |
| San Francisco 49ers | NFC West | 71 |
| New York Giants | NFC East | 74 |
| Tampa Bay Buccaneers | NFC South | 76 |
| Buffalo Bills | AFC East | 77 |
| Arizona Cardinals | NFC West | 78 |
Offensive Formations and Packages
The following list covers the basics of each formation, their strengths and weaknesses, and appropriate usage. Certain sub formations of each formation are also covered. Use this section as a guide during your offensive play selection.
- Goal Line: The aptly named goal line formation would be used most often in very short yardage (three yards or less) or goal line situations. It’s a compact formation with big linemen blocking for a fullback and running back lining up behind the quarterback. Use playmaker control to switch the direction of your running play depending on how the defense stacks the line. Use package substitution to insert a jumbo backfield for, possibly, better break tackle ability (depending on your team). Switch to the Miami package to exchange the receiver for a better blocking tight end. Mix up your play with a pass out of goal line, which can be very effective. Use a hot route to ensure one of your receivers is running a quick pattern in case the defense has called a heavy blitz. If it’s "inches" to go, a QB sneak is usually a "money" play and rarely fails to deliver. Use playmaker control to flip the play so your QB can sneak away from any stacked defenders.
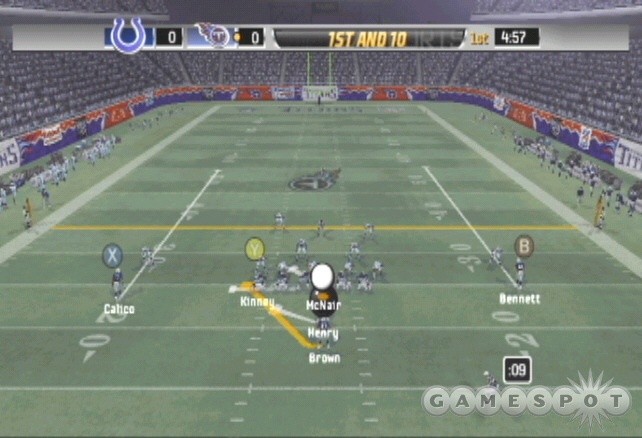
- I Form: The I Form formation features a fullback then a running back lined up directly behind the quarterback. The formation’s name is derived from the backfields resemblance to an "I". It’s usually a run formation--the fullback provides a lead block for the running back. But it can be a powerful pass formation as well, especially against aggressive opponents thinking run. For instance, the I Form-Big formation inserts two tight ends and just one receiver. Certainly a good running formation with all that blocking but also a surprising pass formation. In any I Form formation, utilize the running back and fullback (or two running backs if you use the Dual HB package) as options in the flat. If your opponent aggressively blitzes, one of those options is likely to be wide open.
- Strong I, Weak I: These formations are similar to I-Form, but the fullback is offset either to the strong side (the side of the offensive line with the tight end) or the weak side (the side of the offensive line without the tight end). The uses are similar to the I Form. It’s an expected run formation but does offer some pass option sub formations and hitting the two backs in the flat or across the middle can be dangerous against an aggressive defense expecting run.
- Far, Near: These formations are similar to Strong and Weak, but the fullback and running back are positioned close to one other behind the quarterback. Look for these formations in Detroit’s and Seattle’s playbook among others (including the West Coast playbook).
- Split Backs: This is another two-back set but the two backs are lined up along the same line in a split formation. Both backs are just offset from the quarterback. It holds similar advantages and disadvantages to the other two back sets. It’s a decent run formation (though the I Form, Strong, and Weak seem to be consistently better in Madden for running the ball) and is a solid pass formation when you work the backs into the patterns (particularly for strong receiving running backs, such as San Diego or Kansas City).
- Full House: The full house formation includes three backs in the backfield: one full back and two running backs. The position of the backs resembles a cross between the I Form and the Strong or Weak formation. It’s another strong run formation that provides several options. You can hand off to the primary back, the secondary back, the full back, or use it as a passing formation and send three backs into the pattern. The dual HB package moves the secondary running back behind the quarterback; the spell HB package moves the secondary running back to the primary’s position and uses a tight end in the full back’s spot.
- Jumbo-T: The "run heavy" playbook includes the Jumbo-T, which resembles the full house formation with multiple backs (two running backs, one fullback) behind the quarterback. Like full house, it allows for several run options and can be effective in passing plays with effective back and tight end routes.
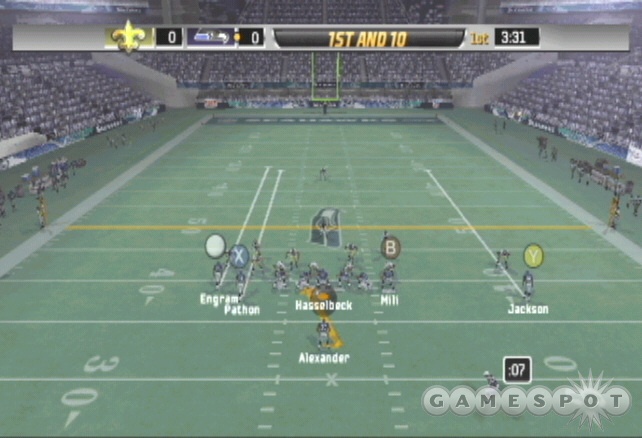
- Singleback: The singleback formation is extremely varied. In fact, some of the sub formations don’t even include a back behind the quarterback. Most, though, feature a single running back and a set of receivers, tight ends, or a mixture of both. Using the sets with a running back, three receivers, and a tight end can be unpredictable and pose match-up problems. If the defense calls nickel, then you have the advantage in the running game. If the defense calls 4-3 or 3-4, then you could have an advantage in the passing game.
- Shotgun: The shotgun formation is a typical passing formation because it allows extra time for the quarterback to read the defense and hit the open receiver before the rush closes in. It’s certainly possible and often effective to run out of the shotgun formation as well.
The following table covers each Madden 06 NFL team’s playbook and the included offensive formations and sub formations.
| TEAM PLAYBOOK | MADDEN 06 OFFENSIVE FORMATIONS |
| Arizona Cardinals | I-Form-Big, I-Form-Normal, I-Form-Twin-WR, Shotgun-2RB 3WR, Shotgun-4WR, Shotgun-Normal Offset Wk, Shotgun-Slot Strg HB Wk, Shotgun-Slot Strong, Singleback-4WR, Singleback-Big, Singleback-Big 3TE, Singleback-Big Twin WR, Singleback-Normal, Singleback- Normal Slot, Singleback-Slot Strong, Singleback-Trips Bunch, Singleback-Twin TE WR, Strong I-Normal, Strong I-Normal Flex |
| Atlanta Falcons | I-Form-Normal, I-Form-Tight Twins, I-Form-Twin WR, Shotgun-5WR, Shotgun-Normal, Shotgun-Slot Strong, Singleback-4WR Falcon, Singleback-Big, Singleback-Big Twin WR, Singleback-Normal, Singleback-Slot Strong, Singleback-Trips TE, Singleback-Twin TE WR, Strong I-Big Tight, Strong I-Normal, Strong I-Twin TE, Strong I-Twin WR, Weak I-Normal, Weak I-Twin WR |
| Baltimore Ravens | I-Form-3WR, I-Form-Big, I-Form-Normal, I-Form-Twin TE, I-Form-Twin WR, Shotgun-4WR, Shotgun-Normal, Shotgun-Slot Strong, Singleback-4WR Spread, Singleback-Big, Singleback-Big 3TE, Singleback-Normal, Singleback-Slot Strong, Singleback-Trips Bunch, Singleback-Twin TE, Singleback-Twin TE WR, Strong I-Normal, Strong I-Twin TE, Strong I-Twin WR, Weak I-Normal, Weak I-Twin TE |
| Buffalo Bills | I-Form-Big, I-Form-Close, I-Form-Normal, Shotgun-2RB 3WR, Shotgun-4WR, Shotgun-5WR, Shotgun-Trips, Shotgun-Trips Bunch, Singleback-Big, Singleback-Big 3TE, Singleback-Big Twin WR, Singleback-Normal Slot, Singleback-Slot Strong, Singleback-Trips Bunch, Singleback-Twin TE, Strong I-3WR, Strong I-Jumbo, Strong I-Normal, Weak I-Normal, Weak I-Twin WR |
| Carolina Panthers | Full House-Philly, Shotgun-4WR Spread, Shotgun-5WR Tight, Shotgun-Empty TE Flip, Shotgun-Empty Trey Stack, Singleback-4WR, Singleback-Big, Singleback-Big Wing, Singleback-Empty 5WR, Singleback-Normal Slot, Singleback-Panther Trips, Singleback-Slot Strong, Singleback-Trips WR, Singleback-Twin TE WR, Split Backs-3WR, Split Backs-Big, Strong I-H Pro, Strong I-H TE Flip, Strong I-H Twin TE, Strong I-H Twins, Weak I-H Pro, Weak I-H Twin TE, Weak I-H Twins, Weak I-H Wing TE |
| Chicago Bears | I-Form-3WR, I-Form-Big, I-Form-Normal, I-Form-Twin WR, Shotgun-2RB 3WR, Shotgun-4WR, Shotgun-Normal, Singleback-4WR Spread, Singleback-Big, Singleback-Empty 5WR, Singleback-Normal Slot, Singleback-Trey Option, Singleback-Trips Bunch, Singleback-Twin TE, Split Backs-3WR, Split Backs-Normal, Strong I-3WR, Strong I-Jumbo, Strong I-Normal, Weak I-Normal, Weak I-Twin WR |
| Cincinnati Bengals | I-Form-Normal, I-Form-Twin WR, Shotgun-2RB 3WR, Shotgun-Normal, Shotgun-Trips, Singleback-4WR Flex, Singleback-Big Wing, Singleback-Normal, Singleback-Slot Strong, Singleback-Tight Slots, Singleback-Trips Bunch, Singleback-Trips WR, Singleback-Twin TE, Split Backs-3WR, Split Backs-Normal, Strong I-3WR, Strong I-Normal, Strong I-Twin WR, Weak I-Close, Weak I-Twin WR |
| Cleveland Browns | Full House-Normal Wide, I-Form-Close, I-Form-Normal, I-Form-Twin WR, Shotgun-2RB 4WR, Shotgun-4WR, Singleback-4WR Flex, Singleback-Big Twin WR, Singleback-Empty 5WR, Singleback-Normal Slot, Singleback-Slot Strong, Singleback-Trey Open, Singleback-Trips Bunch, Singleback-Twin TE WR, Split Backs-3WR, Strong I-Normal, Strong I-Twin TE, Weak I-3WR, Weak I-Normal |
| Dallas Cowboys | Full House-Normal Wide, I-Form-Big, I-Form-Close, I-Form-Normal, I-Form-Twin WR, Shotgun-2RB 3WR, Shotgun-4WR, Singleback-4WR, Singleback-Empty 5 WR, Singleback-Normal Slot, Singleback-Slot Strong, Singleback-Trey Open, Singleback-Trips Bunch, Singleback-Twin TE, Split Backs-3WR, Strong I-Normal, Strong I-Twin TE, Weak I-Normal, Weak I-Twin WR |
| Denver Broncos | I-Form-Big, I-Form-Close, I-Form-Normal, I-Form-Twin WR, Shotgun-5WR, Shotgun-Empty Trey, Shotgun-Normal Slot, Singleback-Base Flex, Singleback-Big, Singleback-Big Twin WR, Singleback-Empty Trey, Singleback-Normal, Singleback-Normal Slot, Singleback-Twin TE WR, Strong I-Big Tight, Strong I-Normal, Strong I-Twin WR, Weak I-Close, Weak I-Normal, Weak I-Tight Twins, Weak I-Twin WR |
| Detroit Lions | Far-Tight Twins, I-Form-Big, I-Form-Close, I-Form-Normal, I-Form-Twins WR, Near-Tight Twins, Shotgun-Normal Offset Wk, Shotgun-Slot Strg HB Wk, Singleback-4WR Flex, Singleback-Big, Singleback-Big Twin WR, Singleback-Normal, Singleback-Normal Slot, Singleback-Tight Slots, Singleback-Trips Bunch, Singleback-Twin TE WR, Split Backs-Twin WR, Strong I-Normal, Weak I-Normal, Weak I-Twin WR |
| Green Bay Packers | Full House-Strong, Full House-Weak, Full House-Wide, I-Form-Big, I-Form-Normal, I-Form-Twin TE, I-Form-Twin WR, Shotgun-2RB 3WR, Shotgun-4WR, Shotgun-Normal, Singleback-4WR Flex, Singleback-Big 3TE, Singleback-Big Wing, Singleback-Empty Bunch, Singleback-Normal Slot, Singleback-Slot Strong, Singleback-Trips Bunch, Singelback-Twin TE WR, Strong I-Normal, Strong I-Twin TE, Weak I-Normal, Weak I-Twin WR |
| Houston Texans | I-Form-Big, I-Form-Close, I-Form-Normal, I-Form-Twin WR, Shotgun-4WR, Shotgun-Normal, Shotgun-Slot Strg HB Wk, Shotgun-Trey Open, Shotgun-Wing Trips, Singleback-4WR, Singleback-Big, Singleback-Big 3TE, Singleback-Big TE Flip, Singleback-Normal Slot, Singleback-Slot Strg HB Wk, Singleback-Slot Strong, Strong I-Normal, Strong I-Twin TE, Weak I-Normal, Weak I-Twins WR |
| Indianapolis Colts | I-Form-Big, I-Form-Normal, Shotgun-2RB 3WR, Shotgun-4WR, Shotgun-Normal, Shotgun-Slot Strong, Singleback-4WR, Singleback-4WR Stack, Singleback-Big Twin WR, Singleback-Deuce, Singleback-Dice, Singleback-Slot Strong, Split Backs-3WR, Split Backs-Twin WR, Strong I-3WR, Strong I-Jumbo, Strong I-Normal |
| Jacksonville Jaguars | I-Form-Normal, I-Form-Twin TE, I-Form-Twin WR, Shotgun-2RB 3WR, Shotgun-4WR, Shotgun-5WR, Shotgun-Trips Bunch, Singleback-4WR Spread, Singleback-Big, Singleback-Big 3TE, Singleback-Empty 4WR, Singleback-Normal Slot, Singleback-Twin TE WR, Split Backs-3WR, Split Backs-Normal, Strong I-3WR, Strong I-Jumbo, Strong I-Normal, Weak I-Normal, Weak I-Twin WR |
| Kansas City Chiefs | I-Form-Big, I-Form-Normal, I-Form-Twin TE, I-Form-Twin WR, Shotgun-2RB Flex, Shotgun-4WR, Shotgun-5WR, Singleback-4WR, Singleback-Big, Singleback-Big Twin WR, Singleback-Flip Trips, Singleback-Normal Slot, Singleback-Slot Strong, Singleback-Trips Bunch, Singleback-Trips TE, Singleback-Twin TE, Singleback-Twin TE WR, Strong I-Normal Flex, Strong I-Twin WR, Weak I-Normal, Weak I-Twin WR |
| Miami Dolphins | I-Form-3WR, I-Form-Normal, I-Form-Twin TE, I-Form-Twin WR, Shotgun-2RB 3WR, Shotgun-4WR, Shotgun-5WR, Shotgun-Normal Slot, Shotgun-Slot Strong, Shotgun-Wing Trips, Singleback-Big, Singleback-Big Twin WR, Singleback-Big Wing, Singleback-Normal, Singleback-Normal Slot, Singleback-Slot Strong, Singleback-Trips Bunch, Singleback-Twin TE, Singleback-Twin TE WR, Weak I-Normal |
| Minnesota Vikings | I-Form-3WR, I-Form-Normal, I-Form-Twin TE, I-Form-Twin WR, Shotgun-2RB 3WR, Shotgun-2RB Flex, Shotgun-4WR, Shotgun-Empty Trips, Shotgun-Normal Slot, Shotgun-Slot Strong, Shotgun-Tight, Singleback-Big, Singleback-Big Twin WR, Singleback-Big Wing, Singleback-Normal, Singleback-Normal Slot, Singleback-Slot Strong, Singleback-Trips Bunch, Singleback-Twin TE, Singleback-Twin TE WR, Weak I-3WR |
| New England Patriots | I-Form-Big, I-Form-Normal, I-Form-Twin TE, Shotgun-4WR, Shotgun-5WR, Shotgun-Normal, Shotgun-Slot Strong TE Flip, Singleback-4WR Spread, Singleback-Big, Singleback-Big 3TE, Singleback-Big Twin WR, Singleback-Empty 4WR, Singleback-Empty 5WR, Singleback-Normal Slot, Singleback-Twin TE, Singleback-Twin TE WR, Strong I-Jumbo, Strong I-Normal, Weak I-Normal, Weak I-Twin TE |
| New Orleans Saints | I-Form-Big, I-Form-Normal, I-Form-Twin TE, Shotgun-4WR, Shotgun-5WR Bunch, Shotgun-Empty 4WR, Shotgun-Normal, Shotgun-Slot Strong, Singleback-4WR, Singleback-Big, Singleback-Empty Trey, Singleback-Normal, Singleback-Slot Strong, Singleback-Tight Doubles, Singleback-Twin TE, Singleback-Twin TE WR, Split Backs-Normal, Strong I-Normal, Strong I-Twin TE, Strong I-Twin WR, Weak I-Normal, Weak I-Twin TE, Weak I-Twin WR |
| New York Giants | Full House-Normal Wide, I-Form-Close, I-Form-Normal, I-Form-Twin TE, I-Form-Twin WR, Shotgun-Normal Offset Wk, Shotgun-Slot Strong TE Flip, Shotgun-Trips Bunch, Singleback-4WR Flex, Singleback-Big, Singleback-Big Wing, Singleback-Empty 4 WR, Singleback-Flip Trips, Singleback-Normal Slot, Singleback-Slot Strong, Singleback-Twin TE, Strong I-Normal, Strong I-Twin WR, Weak I-Normal, Weak I-Twin TE |
| New York Jets | I Form-Big, I Form-Normal, I Form-Twin WR, Shotgun-4WR, Shotgun-Normal Offset Wk, Shotgun-Slot Strong, Singleback-4WR, Singleback-Big, Singleback-Big Twin WR, Singleback-Big Wing, Singleback-Empty 4WR, Singleback-Normal, Singleback-Slot Strong, Singleback-Tight Flex, Singleback-Trips Bunch, Strong I-H Pro, Strong I-H Twins, Weak I-H Pro, Weak I-H Twins |
| Oakland Raiders | I-Form-3WR, I-Form-Normal, I-Form-Twin TE, I-Form-Twin WR, Shotgun-2RB 3WR, Singleback-Big, Singleback-Big Wing, Singleback-Empty 4WR, Singleback-Normal Slot, Singleback-Offset Strong, Singleback-Slot Strong, Singleback-Tight, Singleback-Trips Bunch, Singleback-Twin TE, Split Backs-Flex Close, Strong I-Normal, Strong I-Twin WR, Weak I-Close, Weak I-Normal, Weak I-Tight Twins, Weak I-Twin TE, Weak I-Twin WR |
| Philadelphia Eagles | I-Form-3WR, I-Form-Normal, I-Form-Twin TE, Near-3WR, Near-Normal, Singleback-4WR Flex, Singleback-Big, Singleback-Empty 5WR, Singleback-Normal, Singleback-Slot Strong, Singleback-Trips Bunch, Singleback-Trips WR, Split Backs-3WR, Split Backs-Normal, Split Backs-Twin WR, Strong I-3WR, Strong I-Jumbo, Strong I-Normal, Weak I-Normal, Weak I-Twin TE, Weak I-Twins WR |
| Pittsburgh Steelers | I-Form-Big, I-Form-Normal, I-Form-Twin WR, Shotgun-2RB 3WR, Shotgun-4WR, Shotgun-Normal, Shotgun-Trips, Shotgun-Trips Bunch, Singleback-Big, Singleback-Big Twin WR, Singleback-Flip Trips, Singleback-Normal Slot, Singleback-Trips Bunch, Singleback-Twin TE, Strong I-Jumbo, Strong I-Normal, Strong I-Twin WR, Weak I-Normal, Weak I-Twin TE, Weak I-Twin WR |
| San Diego Chargers | I-Form-Normal, I-Form-Twin TE, I-Form-Twin WR, Shotgun-2RB 3WR, Shotgun-2RB Flex, Shotgun-4WR, Singleback-4WR Spread, Singleback-Base Flex, Singleback-Big, Singleback-Flip Trips, Singleback-Normal Slot, Singleback-Slot Strong, Singleback-Trey Open, Singleback-Twin TE, Singleback-Twin TE WR, Split Backs-3WR, Strong I-Normal, Strong I-Normal Flex, Strong I-Twin TE, Strong I-Twin WR, Weak I-Close, Weak I-Normal |
| Seattle Seahawks | Far-3WR, Far-Pro, I-Form-3WR, I-Form-Big, I-Form-Normal, I-Form-Twin WR, Near-Close, Near-Jumbo, Near-Pro, Singleback-4WR Flex, Singleback-4WR Spread, Singleback-Big, Singleback-Bunch Swap, Singleback-Empty Trey, Singleback-Normal, Singleback-Slot Strong, Singleback-Tight Doubles, Singleback-Trey Open, Split Backs-3WR, Split Backs-Pro, Strong I-Normal, Weak I-Twin WR |
| San Francisco 49ers | I-Form-3WR, I-Form-Big, I-Form-Normal, I-Form-Twin WR, Shotgun-4WR, Shotgun-Normal, Shotgun-Slot Strong, Shotgun-Trips Bunch, Singleback-4WR, Singleback-Big, Singleback-Big Twin WR, Singleback-Empty Trey, Singleback-Normal, Singleback-Slot Strong, Singleback-Twin TE WR, Split Backs-Normal, Strong I-Normal, Strong I-Twin WR, Weak I-Normal, Weak I-Twin TE, Weak I-Twin WR |
| St. Louis Rams | I-Form-3WR, I-Form-Normal, I-Form-Twin TE, I-Form-Twin WR, Shotgun-4WR, Singleback-4WR Spread, Singleback-Base Flex, Singleback-Big, Singleback-Empty 5WR, Singleback-Normal, Singleback-Normal Slot, Singleback-Trips Bunch, Singleback-Trips WR, Singleback-Twin TE, Split Backs-3WR, Split Backs-Normal, Strong I-3WR, Strong I-H Pro, Strong I-Normal, Weak I-3WR, Weak I-Big, Weak I-H Twins |
| Tampa Bay Buccaneers | Full House-Normal Wide, I-Form-Big, I-Form-Normal, I-Form Tight Twins, Singleback-Big, Singleback-Bunch TE, Singleback-Empty 4WR, Singleback-Empty 5WR, Singleback-Empty Bunch, Singleback-Normal, Singleback-Slot Strong, Singleback-Tight, Singleback-Trips Bunch, Singleback-Twin TE WR, Split Backs-3WR, Split Backs-Normal, Strong I-3WR, Strong I-Normal, Strong I-Twin TE, Weak I-Normal, Weak I-Twins WR |
| Tennessee Titans | I-Form-Big, I-Form-Normal, Shotgun-4WR, Shotgun-Normal Offset Wk, Shotgun-Slot Strong, Shotgun-Trips TE, Singleback-4WR Spread, Singleback-Big, Singleback-Big Twin WR, Singleback-Big Wing, Singleback-Empty 5WR, Singleback-Normal Slot, Singleback-Slot Strong, Singleback-Tight Flex, Singleback-Trips Bunch, Strong I-H Pro, Strong I-H Twins, Weak I-H Pro, Weak I-H Twins |
| Washington Redskins | Full House-Normal Wide, I-Form-3WR, I-Form-Close, I-Form-Twin TE, Singleback-4WR Spread, Singleback-4WR Stack, Singleback-Big, Singleback-Big Jumbo Wing, Singleback-Big TE Flip, Singleback-Big Twin WR, Singleback-Deuce Wing, Singleback-Normal TE Flip, Singleback-Stack Doubles Wk, Singleback-Strg TE Flip, Singleback-Trips Bunch, Singleback-Trips WR, Singleback-Twin TE, Singleback-Twin TE WR, Split Backs-3WR, Strong I-H Twin TE, Weak I-H Twin TE, Weak I-H Wing TE |
Alter the personnel in a specific formation with package substitutions. Using packages you can easy insert two running backs instead of using a fullback, swap wide receiver positions, or move a running back to the wide out slot. The following list details some of the package substitutions and how to use them effectively.
- Dual HB: In formations with two running backs (including Form, Strong, Weak, and Shotgun-2RB 3WR), this package switches the fullback for the team’s secondary running back. This can be an effective substitution for teams with two decent running backs (for instance, Atlanta, Tennessee, Denver, Arizona, Miami, etc) for pass plays to the backs. Also if you want a quick way to utilize the secondary running back on plays designed for the fullback.
- Jumbo Backfield: Substitutes your running back for the fullback for dual fullbacks. Good for short yardage situations and for teams with good fullbacks (San Francisco, San Diego, for instance) for use in runs designed for running backs.
- WR Swap: Swap the primary and secondary receiver positions to alter their assigned pass routes. Could create mismatches against a defense that hasn’t made defensive assignments for man coverage.
- WR Swap Strong: Places your best two receivers on the strong side then swaps their position (essentially placing your top receiver in the slot position).
- Spell HB: If your primary running back is fatigued, use this package to quickly swap in your secondary back for some fresh legs. Return to normal package after a play or two once your primary back has rested.
- HB Slot: Substitution your running back into the slot position in a three or more receiver set. A great way to get a stellar pass receiving running back into the passing game. For instance, pass a ball deep to the Minnesota’s speedy Michael Bennett.
- Strong Slot: Substitutes your best receiver into the slot position. Excellent for helping get your best receiver open and up against new defenders, possibly a mismatch against a safety or even a linebacker.
- HB Wideout: Substitutes your running back into the wideout position. Much like HB Slot, useful if your favorite team has a running back with great hands.
- TE Slot: Substitutes your tight end into the slot position. Use this package if your team has a good receiving tight end (Kansas City, San Diego, Baltimore, New York Giants) or plan to run in the formation toward the tight end--the tight end is usually a better blocker.
- TE Swap: Switch tight end positions in formations with two tight ends. Also could be strong and weak.
- TE Backfield: Switched the tight end into the backfield. Useful for a good blocking tight end.
- WR Strong: Places your top receivers on the strong side of the formation.
- WR Strong Weak: Places your best two receivers on the same side in a multiple receiver set--for instance in a five receiver set.
- WR Bunch: Positions the top receivers into the "bunch" area of the formation.
- Big: Substitutes wide receivers for tight ends and fullbacks for a "big" formation. This could turn a bunch formation passing play into a solid running play with the increased blocking abilities of the tight ends and fullbacks.
- Strong Solo: In formations with multiple receivers on one side and one receiver on another, places your top receiver in the solo position.
- Heavy: A linemen subs for a tight end, optimum for extra blocking.
- Miami: On goal line, substitutes your receiver for a tight end and a defensive lineman for your tight end.
The Passing Game
Madden 06 has shifted focus to the quarterback with the addition of "Quarterback Vision Control" and "Precision Passing". Reading defenses and throwing to the appropriate receiver has never been more important. The vision control effectively eliminates a favorite online play of year’s past: the Michael Vick run behind the line of scrimmage crazily and toss up a bomb to a random receiver play. To be most accurate, you must throw to a receiver within your quarterback’s vision. If you throw to a quarterback outside your vision, deductions are made to accuracy and you’re much more likely to be intercepted.
Top Ranked Quarterbacks
The following chart reveals the top rated quarterbacks in Madden 06. The chart is sorted by the Awareness statistic, which determines the span of the quarterback’s vision cone, and lists only a team’s listed (or expected) starter. Some back-up quarterbacks have high awareness, including Brad Johnson on the Vikings and Mark Brunell on the Redskins. Some backups have higher awareness than the starter!
| PLAYER | TEAM | AWR | THP | THA | SPD | CAR | INJ |
| Peyton Manning | Indianapolis Colts | 99 | 95 | 99 | 57 | 61 | 98 |
| Tom Brady | New England Patriots | 98 | 92 | 96 | 58 | 51 | 96 |
| Brett Favre | Green Bay Packers | 97 | 97 | 88 | 53 | 62 | 99 |
| Trent Green | Kansas City Chiefs | 95 | 88 | 94 | 52 | 43 | 83 |
| Kurt Warner | Arizona Cardinals | 90 | 89 | 90 | 44 | 31 | 49 |
| Chad Pennington | New York Jets | 89 | 86 | 96 | 55 | 44 | 65 |
| Donovan McNabb | Philadelphia Eagles | 88 | 96 | 88 | 81 | 48 | 87 |
| Drew Bledsoe | Dallas Cowboys | 88 | 95 | 85 | 45 | 39 | 65 |
| Drew Brees | San Diego Chargers | 88 | 88 | 94 | 58 | 54 | 90 |
| Trent Dilfer | Cleveland Browns | 88 | 89 | 87 | 47 | 55 | 60 |
| Daunte Culpepper | Minnesota Vikings | 87 | 98 | 90 | 80 | 40 | 87 |
| Steve McNair | Tennessee Titans | 87 | 94 | 84 | 74 | 55 | 69 |
| Matt Hasselbeck | Seattle Seahawks | 87 | 92 | 90 | 61 | 52 | 84 |
| Marc Bulger | St. Louis Rams | 87 | 91 | 91 | 59 | 61 | 66 |
| Jake Delhomme | Carolina Panthers | 86 | 89 | 89 | 65 | 56 | 85 |
| Kerry Collins | Oakland Raiders | 84 | 95 | 86 | 50 | 30 | 96 |
| David Carr | Houston Texas | 83 | 95 | 85 | 65 | 36 | 95 |
| Brian Griese | Tampa Bay Buccaneers | 83 | 88 | 90 | 65 | 37 | 65 |
| Jake Plummer | Denver Broncos | 83 | 89 | 86 | 70 | 47 | 92 |
| Byron Leftwich | Jacksonville Jaguars | 82 | 97 | 88 | 48 | 47 | 84 |
| Ben Roethlisberger | Pittsburgh Steelers | 80 | 93 | 87 | 70 | 60 | 94 |
| Michael Vick | Atlanta Falcons | 78 | 97 | 80 | 94 | 40 | 76 |
| Patrick Ramsey | Washington Redskins | 77 | 94 | 86 | 56 | 40 | 88 |
| Joey Harrington | Detroit Lions | 77 | 91 | 85 | 60 | 37 | 88 |
| Carson Palmer | Cincinnati Bengals | 77 | 95 | 86 | 58 | 39 | 88 |
| Eli Manning | New York Giants | 76 | 92 | 88 | 58 | 50 | 95 |
| A.J. Feeley | Miami Dolphins | 76 | 87 | 84 | 54 | 40 | 87 |
| Rex Grossman | Chicago Bears | 76 | 90 | 88 | 59 | 42 | 74 |
| Aaron Brooks | New Orleans Saints | 75 | 93 | 86 | 73 | 34 | 93 |
| Kyle Boller | Baltimore Ravens | 74 | 92 | 79 | 69 | 47 | 88 |
| Alex Smith | San Francisco 49ers | 72 | 86 | 87 | 73 | 60 | 93 |
| J.P. Losman | Buffalo Bills | 67 | 92 | 82 | 70 | 48 | 78 |
Quarterback Vision Control and Precision Passing
The basics of Madden 06’s new quarterback vision control are simple. Your quarterback features a unique "cone" that lights up a segment of the field. This lit vision cone tracks a designated receiver. Throwing to a receiver within the cone grants accuracy bonuses; throwing to a receiver outside the cone adds accuracy penalties.
Now it’s certainly possible to complete a pass to a receiver outside your cone, but not only are successful catch chances decreased but a poorly thrown pass outside the cone could hang in the air and provide an easy interception chance. A completely open receiver would be the best time to test the accuracy penalty.
In general you should try to throw within your cone, though realize that you don’t necessarily have to switch to another receiver to still throw in the cone. Perhaps you’re locked onto a receiver going deep and a second receiver is on a crossing pattern through the cone. You can hit the second receiver accurately within the cone.
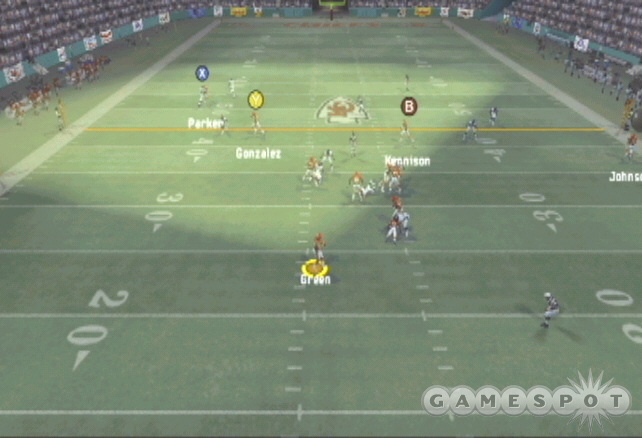
The system adds a complexity to the passing game but it’s also extremely rewarding to switch the cone off a covered receiver onto the open man. Before the snap, check the defense and adjust your primary receiver as needed. Your primary receiver will be the one your quarterback looks to first--the cone will be locked onto that receiver. If that receiver isn’t open, it’s time to adjust your cone (either switching directly to a new receiver or by going from receiver to receiver) to an open target.
To help get used to the new vision cone, start by calling passing plays with a "check down" receiver, such as a running back out in the flat or a quick out pattern that may have a high percentage chance of being open. That way if your primary receiver is covered, you can quickly change to the "check down". Note that it seems as if you don’t have to change the vision cone to a running back in the flat--the pass is still accurate. Be careful, though, and avoid tossing a flat pass late if the defense is in a zone. Could be an easy defensive touchdown!
Practice using the "right-analog" stick method of switching the cone to a new receiver. Having to press a shoulder button to adjust the cone can get cumbersome and cause mistakes when you’re trying to throw the ball instead of switch the cone. Move the right-analog stick in the direction you want the quarterback to start looking. When the cone reaches the new receiver (or covers the new receiver), throw the ball. But if you have the cross the entire field or a quarterback with an especially small field of vision, use the shoulder button and receiver button method to switch quickly, especially when under pressure.
Like a real quarterback, you can stare down a particular receiver using the cone then switch to an open man and fire a quick pass. Commentators refer to this as "looking off a defender" as you’re disguising the fact you’re intention is to throw elsewhere.
Precision passing isn’t technically a new feature but it’s a focus in Madden 06. Precision passing allows you to place the ball ahead of a receiver or behind a receiver when he’s under tight coverage from a defender. Use the left-analog stick or the D-pad to place the ball. On a fly pattern (the receiver goes deep essentially in a straight line), press the stick or pad up to lead the receiver. On a crossing pattern or out pattern, press the stick or pad in the direction away from the defender and toward the pattern. It’s best used in man-to-man coverage. If a defender is waiting in a zone defense, your precision pass may end up in the defender’s hands. Use precision pass to keep the ball away from pursuing defenders.
From the Playcall to the Catch
The following tips provide passing strategy from the playcall to the presnap read to throwing the ball and finally the catch.
- Mix up your play-calling, especially up against human opponents. Don’t always pass from shotgun, multi-receiver formations. Call an expected run formation (such as a multi-tight end set or one with a couple running backs) then call a passing play. It’s much tougher to complete passes when the defense expects a pass. Use play-action passes (indicated by PA in the play-call screen) to simulate a run play. This can catch computer defenders off guard and open up the passing lanes for your receivers.
- As you approach the line of scrimmage, take note of how the defenders adjust to the play. If a safety moves up against one of your wide receivers then he’s in double-coverage. If a safety moves up to the defensive line, then he’s on a blitz. Adjust your primary receiver at this point or even call an audible or hot route to take advantage of the defense’s movements. You can also use motion to detect if the defense is in man-to-man or zone. If the defender follows the receiver, it’s man-to-man. Good routes against man coverage are hooks, crosses, and outs; good routes against zone are deep fades.
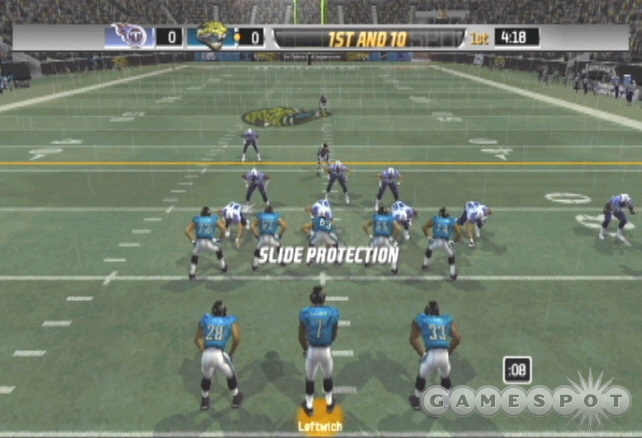
- Use slide protection to shift the linemen in a particular direction or even to spread out or pinch the middle of the line. You can use slide protection to help stuff blitzing defenders or to aid in your quarterback’s rollout.
- At the snap of the ball, watch how the defenders react to your receivers. If the safeties retreat, they’re in zone coverage. If linebackers move toward a receiver or running back, they’re in man; if the linebackers back off or go side to side they’re in zone. Your goal is to find a free passing lane; this means finding an open lane for you to throw the ball without a defender’s obstruction. Any defender in the lane could leap and intercept the ball. This isn’t always the case but it’s best to throw through empty lanes for the highest chance of success.
- Single-coverage is always your best option. The likelihood of a catch is always greater when there’s only one defender on the ball. This is especially true if you’re trying to test the defense deep. Other success factors include the position of your receiver in relation to the defender. If your receiver is closer to the quarterback than the defender, the likelihood of a catch is greater.
- Try to exploit match-ups. Cornerbacks are the best defenders against wide receivers. But if you can get a safety or, better, a linebacker lined up against a wide receiver then you have the advantage. Take note of how the defenders are lined up against your formation and look to hit the receiver that offers the greatest advantage in the match-up.
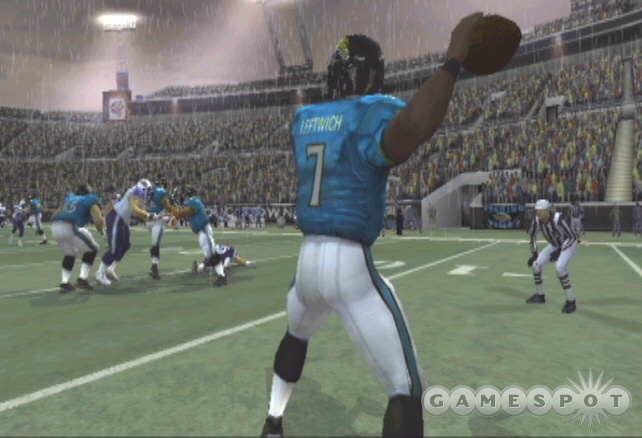
- Your quarterback can fire a bullet pass, lob, or "standard" pass depending on how hard and long you press the receiver’s button. Use a bullet pass when you’re trying to get the ball to the receiver quickly (perhaps the receiver is approaching a defender’s zone) or when throwing to a hook pattern. The downside is the bullet flies low, making it easier for defenders in the passing lane to snag. Use a lob when you want your receiver to run under the ball. Use it when there are no defenders in the passes direction. For instance, don’t lob the ball when your receiver is approaching a group of defenders or it becomes an easy pick. Use a lob when trying to get the ball over a defender’s head.
Top Ranked Wide Receivers
The following chart reveals the top rated wide receivers in Madden 06.
| PLAYER | TEAM | OVR | SPD | ACC | AGI | CTH | JMP | AWR |
| Randy Moss | Oakland Raiders | 99 | 99 | 99 | 97 | 97 | 99 | 90 |
| Terrell Owens | Philadelphia Eagles | 98 | 94 | 97 | 93 | 95 | 95 | 94 |
| Marvin Harrison | Indianapolis Colts | 98 | 96 | 98 | 97 | 99 | 87 | 99 |
| Torry Holt | St. Louis Rams | 96 | 96 | 96 | 93 | 97 | 87 | 95 |
| Chad Johnson | Cincinnati Bengals | 95 | 94 | 95 | 95 | 94 | 93 | 88 |
| Hines Ward | Pittsburgh Steelers | 94 | 89 | 91 | 94 | 95 | 86 | 93 |
| Joe Horn | New Orleans Saints | 93 | 90 | 93 | 92 | 95 | 86 | 94 |
| Derrick Mason | Baltimore Ravens | 92 | 91 | 94 | 94 | 95 | 84 | 95 |
| Issac Bruce | St. Louis Rams | 92 | 93 | 94 | 96 | 95 | 84 | 95 |
| Andre Johnson | Houston Texans | 91 | 95 | 95 | 92 | 88 | 94 | 81 |
| Javon Walker | Green Bay Packers | 91 | 92 | 93 | 93 | 90 | 93 | 85 |
| Mushin Muhammad | Chicago Bears | 91 | 90 | 87 | 89 | 94 | 86 | 94 |
Top Ranked Tight Ends
The following chart reveals the top rated tight ends in Madden 06.
| PLAYER | TEAM | OVR | SPD | PBK | RBK | CTH | BTK | CAR |
| Tony Gonzalez | Kansas City Chiefs | 98 | 86 | 55 | 57 | 90 | 75 | 86 |
| Antonio Gates | San Diego Chargers | 96 | 87 | 54 | 58 | 87 | 66 | 70 |
| Todd Heap | Baltimore Ravens | 94 | 79 | 55 | 60 | 88 | 65 | 72 |
| Jeremy Shockey | New York Giants | 93 | 84 | 50 | 54 | 86 | 82 | 67 |
| Alge Crumpler | Atlanta Falcons | 93 | 86 | 54 | 59 | 85 | 65 | 70 |
| Jason Whitten | Dallas Cowboys | 92 | 81 | 53 | 61 | 85 | 69 | 69 |
| Randy McMichael | Miami Dolphins | 90 | 82 | 55 | 57 | 82 | 75 | 73 |
| Eric Johnson | San Francisco 49ers | 88 | 74 | 54 | 58 | 87 | 60 | 70 |
The Running Game
A consistent running attack can be about patience. You aren’t going to bust off 20-yard runs every play. In fact, there will be many times when you gain just a single yard, no yards, or even lose yardage. Like managing the passing game, success in the running game depends on astute play calls, reading the defense, and play execution.
Before the Snap
Predictable play-calling is the quickest way to hinder your running game. Don’t always run out of expected run formations. For instance, your formation contains 2 TE, 1 WR, and 2 RB. The tight-ends are usually in to provide extra blocking and just one receiver limits the passing game. This is an expected run formation and while it might be effective given the added blocking, the defense may focus on stopping the run and still gain the advantage.
Practice the running game out of 3 WR sets or shotgun formations. The defense must adjust to the possibility of the pass, which limits the number of defenders around the line of scrimmage. This in turn can open up the running game. Fewer linebackers could mean the inside run becomes extremely lethal. Also consider the situation when choosing a play. 2nd down and 10 isn’t a typical run situation: so call a run play! Combine it with a passing formation to catch your opponent in a Nickel or Dime defense. Those defensive backs are much easier to run over!
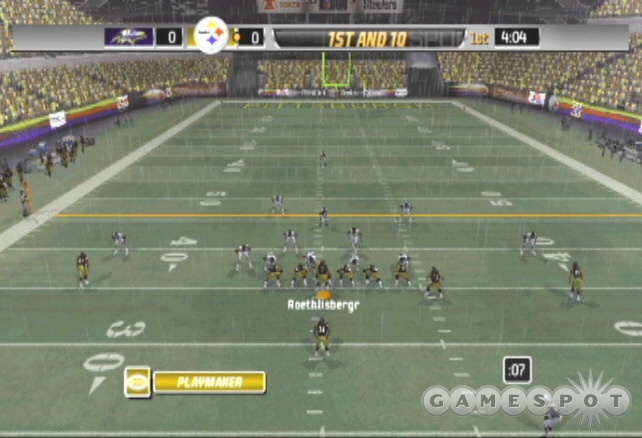
At the line of scrimmage, observe how the defenders are adjusting at the line. Have the linebackers shifted left or right or pinched the middle? Has a safety crept up to the line of scrimmage and preparing to blitz? Use the playmaker control to switch the direction of the called run play if the other side has opened up. Keep in mind, though, that sometimes it’s useful to run at defenders such as a blitzing safety. If you can get around him, the gain could be huge.
You can also use motion to shift defenders to another side of the field or to even add another blocker to your inside run play. Call a receiver in motion then hike the ball when the receiver reaches your running lane.
After the Snap
At the snap of the ball, don’t immediately jam on the sprint button and press into the line. It’s often best to follow the running play as designed. Your blockers are opening a specific hole for your running back; your goal is to hit that hole and sprint through into the linebackers or secondary. Naturally the play could break down. Observe how the blocking is holding up and adjust to another direction if necessary. Keep your back moving north and south rather than east and west so you’re gaining positive yardage.
Practice the special move buttons, such as spin, stiff arm, and juke. All of these should be used to pick up an extra couple yards or even create a big gain. The spin isn’t as über-powerful as it is in NCAA 06. Utilize stiff arm for running over defenders, particularly weak tackling defenders like cornerbacks. Perform a juke move to dodge an incoming defender. You should also use juke to pop through a hole. For instance, you sprint toward a hole in the line and it’s collapsing along the left side. As you enter the hole, perform a juke to the right to squeeze through the hole.
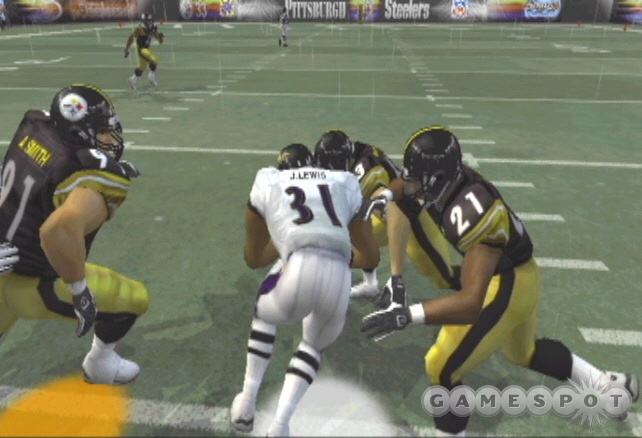
Madden 06 adds the "truck stick," primarily used for the running back position. Use the right-analog stick to administer a "big hit" on offense. When effective, the truck stick can pancake a would-be tackler. Obviously this is most potent for running backs with a high break tackle rating. Time the truck stick just as you hit the approaching defender. Careful, however, because it seems the truck stick makes your ball carrier more susceptible to a fumble.
Top Ranked Running Backs
The following chart reveals the top rated running backs in Madden 06.
| PLAYER | TEAM | OVR | SPD | ACC | AGI | CTH | BTK | CAR |
| LaDainian Tomlinson | San Diego Chargers | 98 | 95 | 97 | 95 | 85 | 93 | 87 |
| Shaun Alexander | Seattle Seahawks | 96 | 92 | 98 | 88 | 72 | 94 | 95 |
| Edgerrin James | Indianapolis Colts | 96 | 92 | 94 | 91 | 78 | 93 | 91 |
| Curtis Martin | New York Jets | 95 | 89 | 92 | 89 | 79 | 88 | 98 |
| Priest Holmes | Kansas City Chiefs | 95 | 92 | 95 | 92 | 79 | 85 | 96 |
| Jamal Lewis | Baltimore Ravens | 94 | 89 | 95 | 88 | 68 | 99 | 84 |
| Corey Dillon | New England Patriots | 93 | 90 | 94 | 88 | 65 | 93 | 92 |
| Deuce McAllister | New Orleans Saints | 92 | 92 | 95 | 87 | 74 | 92 | 84 |
| Clinton Portis | Washington Redskins | 92 | 96 | 98 | 96 | 68 | 86 | 84 |
| Ahman Green | Green Bay Packers | 92 | 96 | 96 | 90 | 77 | 88 | 75 |
| Tiki Barber | New York Giants | 92 | 93 | 94 | 93 | 85 | 80 | 82 |
| Willis McGahee | Buffalo Bills | 91 | 92 | 95 | 91 | 68 | 92 | 87 |
Top Ranked Fullbacks
The following chart reveals the top rated fullbacks in Madden 06.
| PLAYER | TEAM | OVR | SPD | PBK | RBK | BTK | CTH | CAR |
| Tony Richardson | Kansas City Chiefs | 97 | 77 | 52 | 68 | 78 | 72 | 78 |
| Fred Beasley | San Francisco 49ers | 96 | 72 | 52 | 64 | 72 | 75 | 77 |
| Matt Strong | Seattle Seahawks | 95 | 83 | 60 | 70 | 67 | 68 | 68 |
| Jim Kleinsasser | Minnesota Vikings | 92 | 74 | 54 | 68 | 66 | 74 | 68 |
| Lorenzo Neal | San Diego Chargers | 92 | 55 | 66 | 85 | 68 | 54 | 70 |
| Mike Alstott | Tampa Bay Bucs | 93 | 82 | 47 | 53 | 95 | 65 | 74 |
Top Ranked Offensive Linemen
The following chart reveals the top rated offensive linemen in Madden 06.
| PLAYER | TEAM | POSITION | OVR | ACC | AGI | PBK | RBK | STR | AWR |
| Jonathan Ogden | Baltimore Ravens | LT | 99 | 90 | 57 | 94 | 99 | 98 | 95 |
| Walter Jones | Seattle Seahawks | LT | 98 | 88 | 51 | 98 | 96 | 95 | 94 |
| Alan Faneca | Pittsburgh Steelers | LG | 98 | 79 | 45 | 91 | 98 | 97 | 92 |
| Kevin Mawae | New York Jets | C | 98 | 87 | 53 | 94 | 92 | 92 | 95 |
| Olin Kreutz | Chicago Bears | C | 98 | 88 | 60 | 94 | 92 | 91 | 90 |
| Will Shields | Kansas City Chiefs | RG | 98 | 85 | 50 | 95 | 93 | 92 | 95 |
| Orlando Pace | St. Louis Rams | LT | 97 | 90 | 54 | 97 | 92 | 96 | 95 |
| Matt Birk | Minnesota Vikings | C | 96 | 85 | 55 | 93 | 90 | 91 | 95 |
| Tra Thomas | Philadelphia Eagles | LT | 95 | 82 | 48 | 97 | 96 | 94 | 90 |
| Willie Roaf | Kansas City Chiefs | LT | 95 | 83 | 46 | 92 | 96 | 96 | 95 |
| Steve Hutchinson | Seattle Seahawks | LG | 95 | 86 | 55 | 90 | 94 | 95 | 86 |
| Tom Nalen | Denver Broncos | C | 95 | 80 | 55 | 97 | 94 | 87 | 96 |
| Marco Rivera | Dallas Cowboys | RG | 95 | 75 | 46 | 93 | 94 | 93 | 94 |
| Willie Anderson | Cincinnati Bengals | RT | 94 | 62 | 47 | 90 | 98 | 97 | 96 |
Chapter 5 - Defense
Last year’s Madden focused on defense and naturally many of the awesome new features have been carried over into Madden 06. This section provides statistics on the best team defenses and star players, covers new formations and packages, provides an overview of various shifts and adjustments, and offers tips on coaching a stifling defense.
Top Ranked Defenses
The following chart reveals the top rated defenses based on overall rating in Madden 06.
| TEAM | CONFERENCE AND DIVISION | DEFENSE RATING |
| New England Patriots | AFC East | 96 |
| Pittsburgh Steelers | AFC North | 95 |
| Buffalo Bills | AFC East | 94 |
| Philadelphia Eagles | NFC East | 93 |
| Baltimore Ravens | AFC North | 90 |
| Tampa Bay Buccaneers | NFC South | 88 |
| Carolina Panthers | NFC South | 87 |
| Washington Redskins | NFC East | 87 |
| New York Jets | AFC East | 86 |
| Jacksonville Jaguars | AFC South | 85 |
Worst Ranked Defenses
This chart reveals the worst ranked defenses based on overall rating in Madden 06.
| TEAM | CONFERENCE AND DIVISION | DEFENSE RATING |
| New Orleans Saints | NFC South | 65 |
| Oakland Raiders | AFC West | 67 |
| Tennessee Titans | AFC South | 68 |
| Indianapolis Colts | AFC South | 69 |
| San Francisco 49ers | NFC West | 69 |
| Cleveland Browns | AFC North | 70 |
| Green Bay Packers | NFC North | 70 |
| Kansas City Chiefs | AFC West | 71 |
| St. Louis Rams | NFC West | 73 |
| Detroit Lions | NFC North | 74 |
Defensive Formations and Packages
Each Madden 06 team features a specific playbook. This table reveals the available defenses within each defensive playbook. All playbooks feature Goal Line.
| PLAYBOOK | 4-3 DEFENSES | 3-4 DEFENSES | 46 DEFENSES | NICKEL DEFENSES | DIME DEFENSES | QUARTER DEFENSES |
| 4-3 | Normal, Over, Under | None | None | Normal, Strong, 3-3-5 | Normal, 3-2-6, Flat | Normal, 3-Deep |
| 3-4 | None | Normal, Over, Under, Solid | None | 1-5-5, 1-5-5 Prowl, 2-4-5, 3-3-5 | Normal, 3-2-6 | Normal, 3 Deep |
| Cover 2 | Normal, Under | Normal, Over | None | Normal, 1-5-5 Prowl, 2-4-5, 3-3-5 | Normal, 3-2-6, Flat | Normal |
| 46 | Normal | None | Normal, Bear | Normal, Strong, 3-3-5 | Normal, 3-2-6, Flat | Normal |
| Balanced D | Normal, Under | Normal, Over, Solid | Normal, Bear | Normal, 1-5-5 Prowl, 3-3-5 | Normal, 3-2-6, Flat | Normal, 3 Deep |
| QB Contain | Normal, Over, Under | Normal, Under | None | Normal, 2-4-5, 3-3-5, Strong | Normal, 3-2-6, Flat | Normal, 3 Deep |
The table below reveals the default defensive playbook for each NFL team.
| TEAM | DEFAULT DEFENSIVE PLAYBOOK |
| Arizona Cardinals | 4-3 |
| Atlanta Falcons | 4-3 |
| Baltimore Ravens | 4-3 |
| Buffalo Bills | 4-3 |
| Carolina Panthers | 4-3 |
| Chicago Bears | Cover 2 |
| Cincinnati Bengals | 4-3 |
| Cleveland Browns | 3-4 |
| Dallas Cowboys | 3-4 |
| Denver Broncos | 4-3 |
| Detroit Lions | 4-3 |
| Green Bay Packers | 4-3 |
| Houston Texans | 3-4 |
| Indianapolis Colts | Cover 2 |
| Jacksonville Jaguars | 4-3 |
| Kansas City Chiefs | 4-3 |
| Miami Dolphins | 4-3 |
| Minnesota Vikings | 4-3 |
| New England Patriots | 3-4 |
| New Orleans Saints | 4-3 |
| New York Giants | 4-3 |
| New York Jets | Cover 2 |
| Oakland Raiders | 3-4 |
| Philadelphia Eagles | 4-3 |
| Pittsburgh Steelers | 3-4 |
| San Diego Chargers | 3-4 |
| San Francisco 49ers | 3-4 |
| Seattle Seahawks | 4-3 |
| St. Louis Rams | Cover 2 |
| Tampa Bay Buccaneers | Cover 2 |
| Tennessee Titans | 4-3 |
| Washington Redskins | 4-3 |
The following table covers each defense, provides a description, lists available packages, and provides commentary on advantages and disadvantages.
| FORMATION | DESCRIPTION | PACKAGES | ADVANTAGES | DISADVANTAGES |
| Goal Line | Tight formation for short-yardage situations. | Safety Swap, Jumbo, 3 DT, Strong, LB Ends | Excellent in short yardage situations (three yards or less) when you can expect a run play. Adjust the line and linebackers to pinch the expected run route. | Vulnerable to pass plays, especially if you blitz the linebackers and it’s blocked. Be ready to switch out of goal line if the offense calls an audible and you now expect a pass. |
| 4-3 Normal | Four defensive linemen, three linebackers, four defensive backs. | CB Swap, Safety Swap, Coverage Flip, LB Flip | This is the base defense for more NFL teams. A solid all-around defense, particularly against inside runs and short to medium passes. | Vulnerable to multiple wide out sets, especially if you’re in man coverage. Can be susceptible to the outside run if you blitz linebackers. |
| 4-3 Over | Moves an outer linebacker to the line for five defensive linemen, two linebackers, and four defensive backs. | CB Swap, Safety Swap, Coverage Flip, LB Flip | Strong against the run and outside run as linebackers move up on the line. Can be an effective blitz package. | Beware of the inside run if the back gets through the line. There are only two linebackers there now. Like 4-3 Normal, very open to the passing game, including crossing routes over the middle. |
| 4-3 Under | Moves an outer linebacker to the line for five defensive linemen, two linebackers, and four defensive backs. | CB Swap, Safety Swap, Coverage Flip, LB Flip | Strong against the run and outside run as linebackers move up on the line. Can be an effective blitz package. | Beware of the inside run if the back gets through the line. There are only two linebackers there now. Like 4-3 Normal, very open to the passing game, including crossing routes over the middle. |
| 3-4 | Three defensive linemen, four linebackers, and four defensive backs. | CB Swap, Safety Swap, Coverage Flip, OLB Flip, MLB Flip, DE Flip | Several NFL teams now use the 3-4 defense. Better against outside runs and in middle coverage pass coverage. | Weaker pass rush unless you blitz linebackers or defensive backs. Can be vulnerable against multiple receiver sets, especially four or more. |
| 3-4 Over | Three defensive linemen, four linebackers, and four defensive backs. An outside linebacker tightens up the edge of the line. | CB Swap, Safety Swap, Coverage Flip, OLB Flip, MLB Flip, DE Flip | Keeps the four linebackers but shifts an outside linebacker to the edge of the line. Helps stuff inside run and adds pass rush if the linebacker blitzes. | Watch the outside run to that side if the outside linebacker is blocked. Vulnerable against multiple receiver sets. |
| 3-4 Under | Three defensive linemen, four linebackers, and four defensive backs. An outside linebacker tightens up the edge of the line. | CB Swap, Safety Swap, Coverage Flip, OLB Flip, MLB Flip, DE Flip | Keeps the four linebackers but shifts an outside linebacker to the edge of the line. Helps stuff inside run and adds pass rush if the linebacker blitzes. | Watch the outside run to that side if the outside linebacker is blocked. Vulnerable against multiple receiver sets. |
| 3-4 Solid | Three defensive linemen, four linebackers, and four defensive backs. Outside linebackers crowd the line for essentially five defensive linemen. | CB Swap, Safety Swap, Coverage Flip, OLB Flip, MLB Flip, DE Flip | Keeps four linebackers but both outside linebackers crowd the line. Can stuff middle run and adds pass rush. | Watch the outside run. Vulnerable to multiple receiver sets. |
| 46 Normal | Four defensive linemen, three linebackers, four defensive backs but shifts one safety up to the linebacker position leaving one safety deep. | Speed, OLB Swap | Similar to the 4-3 but one safety plays closer to the line of scrimmage for increased run stopping. Strong blitz defense. | Beware of deep passes, especially if the closer safety is forced into man coverage against a faster receiver. |
| 46 Bear | Six defensive linemen (some are linebackers on the line), one linebacker, three defensive backs with one safety playing in a linebacker spot leaving one deep safety. | 46 Swap, LB/DE Swap, LB Coverage | Combines the 46 Normal and 4-3 Over defenses. Increased pressure along the line for stronger run defense. | Stronger run defense often means weaker pass defense. The inside run is also more vulnerable with only two players in a linebacker position and one safety deep. |
| Nickel Normal | Four defensive linemen, two linebackers, five defensive backs. | Strong Nickel, Strong Shift, CB Swap, Safety Swap, LOLB Right, LOLB Left, LB Swap | An additional defensive back helps protect against the pass. Be sure the "nickel back" is lined up against the slot receiver. Optimum against 3 WR sets. | More susceptible to running plays. Also beware of the offense moving their best receiver around. Your "nickel back" isn’t as skilled as your best corner and might be unable to cover the opposing team’s best WR one-on-one. |
| Nickel Strong | Same as nickel but shifts the safety toward the strong side. | Strong Nickel, Strong Shift, CB Swap, Safety Swap, MLB or LOLB Right, MLB or LOLB Left | Increased safety help on the strong side. Helps provide additional coverage on a stacked formation (where more receivers and/or tight ends are on one side). | Similar to the standard nickel. Also the safety shifted over could leave the other side open, especially if there are backs on pass patterns. |
| Nickel 1-5-5 | One defensive lineman, five linebackers, five defensive backs. Crowded line of scrimmage with basically one MLB. | DE Pass Rush, MLB Swap, OLB Swap, CB Swap, Safety Swap, SS Nickel, FS Nickel | Five linebackers help defend against a run and five defensive backs help defend the pass. Good for teams with a solid group of linebackers. | Little pass rush if you keep the linebackers in coverage. A weaker defense if your line is the strongest defensive element. |
| Nickel 1-5-5 Prowl | One defensive lineman, five linebackers, five defensive backs. Spread line of scrimmage with essentially two MLBs. | DE Pass Rush, MLB 2, OLB Swap, CB Swap, Safety Swap, SS Nickel, FS Nickel | Five linebackers help defend against a run and five defensive backs help defend the pass. Good for teams with a solid group of linebackers. | Little pass rush if you keep the linebackers in coverage. A weaker defense if your line is the strongest defensive element. |
| Nickel 2-4-5 | Two defensive linemen, four linebackers, five defensive backs. | DE Pass Rush, MLB Swap, OLB Swap, CB Swap, Safety Swap, SS Nickel, FS Nickel | Four linebackers help defend the run. Good for teams with a solid group of linebackers (such as 3-4 defense teams). | Little pass rush from two linemen so need to use linebackers or more. A weaker defense if the line is the strongest element of your defense. |
| Nickel 3-3-5 | Three defensive linemen, three linebackers, and five defensive backs. | 4th CB, OLB Flip | Five defensive backs cover the pass in standard nickel formation and the three linebackers help protect against the run and medium pass. | Not much pass rush from the three man line without additional blitzing. |
| Dime Normal | Four defensive linemen, one linebacker, six defensive backs. | ROLB, LOLB, CB Swap, LB Pass Rush | The addition of six defensive backs is strongest against the pass, particularly four or five receiver sets. Call in certain passing situations. | Being a heavily pass-oriented defense, it’s weaker against an unexpected run. Also beware of quarterback scrambles, especially if you’re in man-to-man. |
| Dime 3-2-6 | Three defensive linemen, two linebackers, six defensive backs. | 4th CB, MLB/ROLB Swap, MLB/LOLB Swap, Safety Flip, CB Strong Rt, CB Strong Lt | The addition of six defensive backs is strongest against the pass, particularly four or five receiver sets. An extra linebacker can help defend against an unexpected run. | Being a heavily pass-oriented defense, it’s weaker against an unexpected run. Also beware of quarterback scrambles, especially if you’re in man-to-man. |
| Dime Flat | Same as dime but closes safeties in and backs off corners. It’s a tighter coverage. | ROLB, LOLB, CB Swap | Similar personnel to dime so it’s still strong against the pass but it’s tighter so not as weak against the run. | Can be vulnerable to deep pass routes. |
| Quarters Normal | Three defensive linemen, one linebacker, seven defensive backs. | Linebackers, LB Pass Rush, LOLB, ROLB | Seven defensive backs to flood the defensive zone with pass protectors. | Use it certain pass situations since it’s easy to run against. |
| Quarters 3 Deep | Same as quarters but shifts a defensive back into a deep safety position for three deep safeties. | ROLB Swap, CB Swap, Safety Swap, Coverage Swap, Slot Swap, LB Pass Rush, LOLB Swap | Shifts three safeties deep. Useful on very long yardage situations. | Don’t call when the offense might run! |
Defensive Shifts
The following table reveals defensive adjustments that can be made before the ball is snapped.
| POSITION | SHIFTS | COMMENTARY |
| Defensive Line | Shift outside tackles, shift tight between tackles, shift line left, shift line right | Against an expected inside run, shift line tighter; against an expected outside run, spread line out. Shift line toward a left or right run or toward a tight end to bump him at the line. |
| Linebackers | Spread linebackers out, shift linebackers in tight, shift linebackers left, shift linebackers right | Against an expected inside run, shift linebackers tighter; against an expected outside run, spread linebackers out. Shift linebackers left or right against corresponding run or to help free up blitzing linebackers. |
| Coverage | Put defensive backs into bump and run (tighter coverage at line), put defensive backs in loose coverage, shift safeties and linebackers into better position to cover assignment | Play tight coverage when your defensive backs have an advantage over opponent’s receivers; play looser against expected deep passes. Shift coverage into better position for tighter coverage against expected shorter routes. |
Defensive Adjustments
The following table covers pre-snap defensive adjustment with analysis.
| POSITION | ADJUSTMENT | COMMENTARY |
| Defensive Line | Make line crash in, make line rush outside, make line crash left, make line crash right | These adjustments cause the defensive line to rush at angles. Crashing in angles toward the center (use against inside runs), crushing out angles toward line’s edge (use against outside runs), and crashing left or right angles toward that direction. |
| Linebackers | Blitz all linebackers, call off all linebacker blitzes, blitz outside left linebacker, blitz outside right linebacker | Audible to a full linebacker blitz if you don’t think your opponent has appropriate protection, call off a blitz if you need linebackers in coverage (any linebacker that was blitzing goes to QB spy so you may want to further adjust his coverage with playmaker), or order a blitz for the left or right linebacker (effective if you expect the play to move in that direction). |
| Secondary | Shift safeties zone coverage to the left, right, up, or down | Use these adjustments to aid a stronger side of the field. For instance, if the offense has multiple receivers on one side and just one on the other. Best used when the corner you’re leaving alone is skilled enough to play man-on-man. |
| Individual Match-Ups | Bump receiver, play off receiver, double team receiver | Instead of forcing all corners into bump and run, you can use these adjustments to cause a specific defender to bump his receiver or play off his receiver. Use double teams against your opponent’s strongest receiver (there must be a safety in zone coverage already to use double team). Be careful though, shifting a safety over to one receiver could leave the middle open for another one. |
Defensive Playmaker
Madden 2005 added playmaker abilities to the defense and they’re included here. Like the shifts and adjustments, the playmaker controls are used before the ball has been snapped.
| PLAYMAKER ABILITY | CONTROL | COMMENTARY |
| Linebacker Hook Zone or Defensive Back Deep Zone | Highlight player then move right analog stick up. | Send a specific defensive back into deep zone coverage to protect against a deep ball. If defensive back is in a deep zone already, it becomes a short zone. Highlight a linebacker to put him in zone coverage in a specific area of the field. |
| Blitz | Highlight player then move right analog stick down. | Adjust a defensive player to blitz. Realize this may leave an offensive player open either initially or late in the play. Use with caution. |
| Quarterback Contain | Highlight player then move right analog stick down twice. | For example instruct outside linebackers to contain the quarterback. Most important against fast quarterbacks such as Vick or Culpepper. |
| Quarterback Spy Coverage | Highlight player then move right analog stick left. | A player in QB Spy coverage follows the quarterback’s movements along the line of scrimmage. It’s another means of defending against the quarterback scramble. |
| Flat Zone | Highlight player then move right analog stick right. | Order a defender into a wider, but flatter zone in a specific area. Useful against an offense abusing crossing or out routes. Press twice for curl zone. |
Managing your Defense
The following list provides some general strategies for managing an effective defense.
- Interception returns for touchdowns are rather easy to accomplish given a couple factors, primarily if a defensive back makes the interception rather than a slower linebacker. If you intercept a pass on defense, head straight for the out of bounds line but obviously don’t go out of bounds. Going straight to the outside will help you avoid the tacklers hanging around the middle of the field. Once you’re to the outside, head straight for the end zone. The computer controlled offensive players aren’t adept at taking the best angle to cut off your interception return. Once you’re past the faster offensive players, it’s likely a touchdown.

- Don’t call your defense immediately. Wait until you read the offensive personnel so you can decide best how to counter what the offense is going to put onto the field. If you call defenses quickly, an opponent can exploit this by sending out 5 WRs against your 3-4 defense that you keep calling immediately.
- Obviously even if you attempt to call the perfect counter defense, an unpredictable offense can still keep you on your toes by running out of expected pass formations and passing out of expected run formations. Simply try and make your play calls based on your opponent’s tendencies. If he runs predominantly up the middle with the occasional pass, call a zone defense with a linebacker blitz to the inside to help plug up your opponent’s expected running lanes.
- Know your defensive personnel. Star cornerbacks like Champ Bailey on the Denver Broncos or Ty Law on the New York Jets have the speed and awareness to play man-to-man coverage against the game’s better receivers. Weaker defenders can be used in zone because there are other defenders in the area to provide assistance.
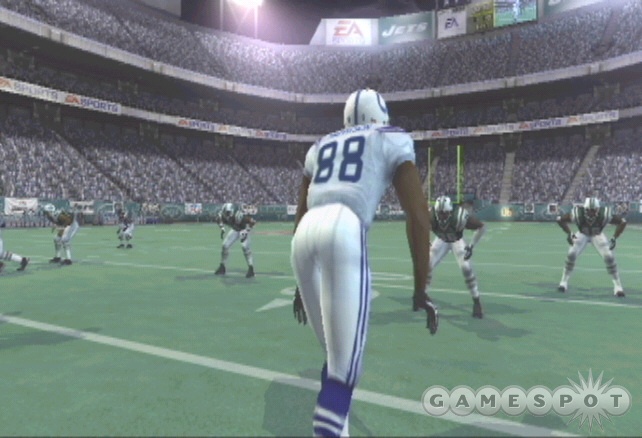
- If an opponent’s receiver is giving you trouble or he’s simply a star receiver (such as Randy Moss or Marvin Harrison), call double team defensive plays. Find plays with "Double X" or "Double Z" or "Double Wide". The "Z" receiver is usually the primary receiver. A safety will creep up and provide additional coverage against that receiver.
- If you’re having trouble stopping an outside run, call a corner blitz with other defenders in zone. The blitzing corner can disrupt the ball carrier and the zone defenders maintain their position without following receivers too far downfield. Against the inside run call an inside linebacker blitz with zone defenders along the edges.
- Choose the defender you wish to control carefully. If you fail to follow the defender’s assignment, your opponent can get a big play. If you want to adjust your defender’s assignment depending on how the play develops then select a "spy" defense where a linebacker is assigned to spy on the quarterback. Instead of spying, you can cover a particular area of the field or follow a receiver in man-to-man to help protect against an opponent’s tendency.
Top Ranked Defensive Linemen
The following chart reveals the top rated defensive linemen in Madden 06.
| PLAYER | TEAM | POSITION | OVR | SPD | ACC | AGI | STR | TAK | AWR |
| Dwight Freeney | Indianapolis Colts | RE | 98 | 87 | 97 | 87 | 76 | 78 | 80 |
| Julius Peppers | Carolina Panthers | LE | 97 | 86 | 93 | 89 | 79 | 78 | 75 |
| Kris Jenkins | Carolina Panthers | DT | 97 | 66 | 87 | 67 | 93 | 90 | 80 |
| Richard Seymour | New England Patriots | RE | 97 | 70 | 85 | 71 | 90 | 88 | 88 |
| Michael Strahan | New York Giants | LE | 96 | 72 | 84 | 70 | 87 | 85 | 96 |
| La’Roi Glover | Dallas Cowboys | DT | 96 | 64 | 76 | 64 | 87 | 91 | 95 |
| Patrick Kerney | Atlanta Falcons | LE | 95 | 75 | 80 | 74 | 83 | 88 | 89 |
| John Abraham | New York Jets | RE | 95 | 80 | 87 | 78 | 78 | 84 | 82 |
| Jason Taylor | Miami Dolphins | RE | 95 | 81 | 88 | 78 | 74 | 82 | 90 |
| Simeon Rice | Tampa Bay Buccaneers | RE | 95 | 84 | 94 | 78 | 74 | 76 | 93 |
| Casey Hampton | Pittsburgh Steelers | DT | 95 | 57 | 68 | 61 | 97 | 95 | 82 |
| Shaun Rogers | Detroit Lions | DT | 95 | 63 | 74 | 63 | 95 | 92 | 81 |
Top Ranked Linebackers
The following chart reveals the top rated linebackers in Madden 06.
| PLAYER | TEAM | POSITION | OVR | SPD | ACC | AGI | CTH | TAK | AWR |
| Ray Lewis | Baltimore Ravens | MLB | 99 | 85 | 91 | 86 | 55 | 99 | 99 |
| Julian Peterson | San Francisco 49ers | LOLB | 97 | 88 | 90 | 88 | 57 | 91 | 88 |
| Derrick Brooks | Tampa Bay Buccaneers | ROLB | 97 | 83 | 88 | 84 | 65 | 90 | 95 |
| Takeo Spikes | Buffalo Bills | ROLB | 97 | 82 | 85 | 83 | 51 | 93 | 93 |
| Zach Thomas | Miami Dolphins | MLB | 96 | 73 | 80 | 74 | 45 | 97 | 98 |
| Al Wilson | Denver Broncos | MLB | 96 | 87 | 89 | 83 | 60 | 94 | 90 |
| Keith Bullick | Tennessee Titans | ROLB | 95 | 87 | 90 | 87 | 65 | 89 | 84 |
| Joey Porter | Pittsburgh Steelers | ROLB | 95 | 85 | 91 | 82 | 65 | 91 | 84 |
| LaVar Arrington | Washington Redskins | ROLB | 95 | 88 | 94 | 87 | 54 | 88 | 82 |
| Brian Urlacher | Chicago Bears | MLB | 95 | 87 | 92 | 88 | 62 | 93 | 87 |
| Jamie Sharper | Seattle Seahawks | LOLB | 94 | 79 | 82 | 79 | 57 | 95 | 89 |
| Keith Brooking | Atlanta Falcons | ROLB | 94 | 80 | 87 | 79 | 55 | 92 | 89 |
Top Ranked Defensive Backs
The following chart reveals the top rated defensive backs in Madden 06.
| PLAYER | TEAM | POSITION | OVR | SPD | ACC | JMP | CTH | TAK | AWR |
| Ed Reed | Baltimore Ravens | SS | 99 | 93 | 93 | 91 | 83 | 70 | 95 |
| Champ Bailey | Denver Broncos | CB | 98 | 98 | 98 | 92 | 77 | 65 | 92 |
| Brian Dawkins | Philadelphia Eagles | FS | 98 | 90 | 94 | 83 | 65 | 84 | 92 |
| Chris McAlister | Baltimore Ravens | CB | 97 | 95 | 98 | 97 | 68 | 68 | 94 |
| Rodney Harrison | New England Patriots | SS | 97 | 82 | 90 | 70 | 61 | 93 | 95 |
| Ty Law | New York Jets | CB | 96 | 95 | 93 | 89 | 76 | 65 | 96 |
| Roy Williams | Dallas Cowboys | SS | 96 | 85 | 92 | 80 | 68 | 90 | 85 |
| Lawyer Milloy | Buffalo Bills | SS | 96 | 85 | 88 | 72 | 64 | 88 | 93 |
| Darren Sharper | Minnesota Vikings | FS | 95 | 86 | 89 | 86 | 75 | 74 | 90 |
| Nate Clements | Buffalo Bills | CB | 95 | 92 | 94 | 96 | 76 | 71 | 88 |
Chapter 6 - Online Strategies
A human opponent can be much more unpredictable than a computer-controlled challenger...or actually a human opponent could be much more predictable cycling through two or three perceived "money" plays that may have abused previous competition. This section offers some general strategies for playing Madden 06 online against human opponents.
- The era of seeing every opponent select the Falcons is over...mostly. The quarterback vision control essentially nerfed the popular tactic of controlling Vick, running around behind the line of scrimmage (sometimes dropping 20 yards back) and either heaving up a Hail Mary prayer or scrambling once the defense is far enough from the line of scrimmage. Rinse, repeat.
- Vick is still incredibly fast but has one of the lowest awareness ratings for starting quarterbacks, which makes his vision cone very small. If you are up against Vick, select QB Contain defenses with linebackers or defensive ends in spy mode. Don’t blitz too heavily or Vick could scramble past the blitzes and have fewer defenders to avoid.
- Even with the increased focus on the quarterback, defense seems to play an even greater role in game success. The quarterback vision control can be unforgiving. Throwing outside the vision cone creates accuracy penalties. A throw could hang in the air allowing defenders to quickly reach the ball. Expect increased interceptions...and interception returns for touchdowns. After a pick, get outside and down the sideline as quickly as possible.
- Mix up your game to keep your opponent off guard. Pass out of expected run formations and run out of expected pass formations. Run the no huddle offense for a drive. Establish the running game then call a play action pass. Stretch the defense with deep passes after a series of passes to the running back in the flat. A lot of players fall back on the same play over and over again. Learn these formations and your opponent’s tendency and you may score a turnover or a three and out stop.
- A common online strategy is to elect to kick at the beginning of the game. The thought is you can field your defense, apply some pressure to the offense, and hopefully keep them out of the scoring column. More importantly, though, you can score before halftime then get the ball back on the second half kickoff and apply more pressure with another scoring drive.
- Obviously it’s important to know the strengths of your chosen team but it’s equally important to know the strengths of your opponent’s team. You may want to double your opponent’s strong receiver or abuse your opponent’s weaker defender. Get the ball to your team’s playmakers and keep the ball out of the hands of your opponent’s playmakers.
Got a news tip or want to contact us directly? Email news@gamespot.com
Join the conversation