Left 4 Dead 2 Primer Guide
Make the undead dead again with our Primer Guide for Left 4 Dead 2.
You're one of four left. Think about that for a second…one of four humans left after the viral outbreak turned the rest of the city into zombies. It's up to you and three others to work your way through the dangerous streets to a series of safe houses, and finally to a point of extraction…five times over. It's not easy.
Here's what you'll find in GameSpot's Left 4 Dead 2 Game Guide:
- General Tips: Check out our tips for venturing through the zombie-infested city.
- Infected Types: Find out more about the various zombie types you'll be encountering.
- Achievements: Check out the achievement list!
General Strategies
Objective
You: Human. The three others? Friends. Them? Zombies--shoot them.
That's Left 4 Dead in a nutshell. More specifically, your group of four will have to work your way through the zombie-infested streets broken up into 5 campaigns. Each campaign is sub-divided into areas with the goal generally being to make it to the safe house at the end of each one.
Upon reaching a safe house, close the door once everyone's safely inside to complete the level and move onto the next. It's important to note that everything carries over between areas, such as your health, weapons, and ammo. Thankfully, safe houses generally contains a variety of items, including health packs, weapons, and ammo caches allowing you to stock up before venturing back outside.
Surviving
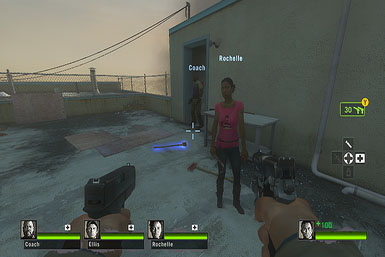
You'll find your health bar conveniently located in the bottom-right corner of the screen, with your teammates' displayed just left. While the meter obviously correlates to how much health you have remaining, it also changes colors, from green, to yellow, to red, signifying how close to death you are, making it easy to spot who's in trouble at a glance. Even worse, as if being close to death wasn't bad enough, your running speed decreases as you take damage, making it increasingly difficult to avoid attacks and keep pace with your teammates.
If you run out of health, you'll wind up incapacitated. In this state, your only hope for survival is to have a teammate revive you before you bleed out and die. If revived, you'll temporarily regain 30 Health Points, but this too will slowly tick its way back down to one unless you can find a First Aid Kit--and fast. Assuming you're incapacitated again, you can be revived up to twice more, but you will die if you fail to be healed by the third incapacitation. Thankfully, the use of a First Aid Kit resets this counter, allowing you to be revived up to three times more.
If a survivor does wind up dying, they can come back in one of a few ways:
- Defibrillator Units: Defibrillator units enable you to revive a fallen teammate right then and there, but you can only use each one once.
- Rescue Closets: Dead teammates will respawn in "rescue closets" throughout the campaign--look for their glowing silhouette and free them, as they can't do it themselves.
- New Chapter: Any fallen survivors will rejoin you at the start of a new chapter.
Items
First Aid Kits
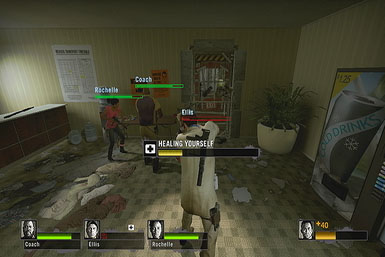
First aid kits are the primary means for healing yourself. Now here's the thing: First Aid Kits only restore 80% of the health you have lost and not 80% of your total health bar. In other words, the closer to death you are, the more health you'll regain by using it. Because of this, it's a constant balancing act of deciding when to use it. On the one hand, the closer to death you are, the more effective it is. On the other hand, you may die before being able to use it! In general, we found it's best to use it as soon as your health bar turns red--this enables you to regain a large percentage of your health, while giving you enough of a buffer to withstand a few more attacks while you heal yourself.
Pain Pills
Pain pills work a bit differently than the first aid kit. Instead of restoring a percentage of your health, they grant an immediate boost of 50 health points. Unfortunately, their effect is temporary, and your health will slowly begin to drop to its pre-boost level at a rate of one health point every three seconds or so (the total effect lasts for about 2.5 minutes). In effect, their only purpose is to keep you alive long enough until you can get healed properly, via a first aid kit. As such, save it until you're up against a significant threat, or are near death.
Adrenaline Shots
Adrenaline Shots have two benefits:
- You will run faster and perform actions significantly faster for 15 seconds, such as healing yourself or others, reviving teammates, and pouring gas when playing Scavenger.
- Adrenaline Shots also provide a temporary health boost of 25 health points, similar to the Pain Pills. And like the pain pills, their effect will slowly deplete at a rate of one health point every three seconds (or a minute and 15 seconds total).
Defibrillator Units
The Defibrillator Unit is a one-use item that allows you to fully revive any fallen comrades.
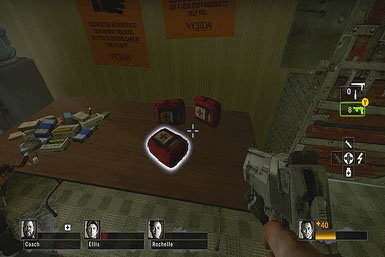
Pipe Bomb
The pipe bomb's incessant beeping actually lures the nearby infected to it before exploding, clearing them out. Use it to distract large groups of enemies enabling you to skate by unharmed.
Boomer Bile
These glass containers house a small sample of the Boomer's Bile. Why would you want such a thing? Because you can use it to draw out the horde wherever you toss it, including at other infected (such as the Special Types), making for easy pickings.
Combat
You can hold two weapons at any given time. One's your primary, the other is your secondary, which can either be a pistol or melee weapon. Pistols have unlimited ammo, and thus it's best to use them when facing weak or small groups of enemies.
Melee Attacks
Regardless of what weapon you have equipped, using a melee attack is always an option. Though weak, they'll briefly push back and stun any normal infected, giving you a chance to either escape, reload, or follow-up with another melee attack. Keep it in mind for when you're surrounded, or if you run out of ammo. However, if you attempt to melee too quickly without resting, the game will force a delay between each attack, as indicated by the timer that appears around your reticule.
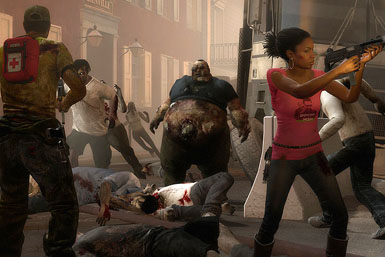
Infected Types
There are many types of zombies in Left 4 Dead 2. Most of them consist of the "horde" type, but you'll also frequently encounter one of the seven "special" infected types.
The Horde
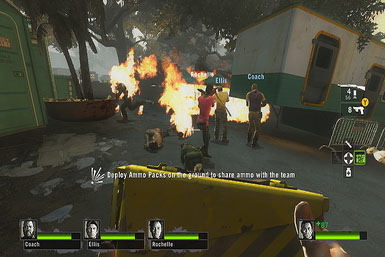
The horde consists largely of your usual, run of the mill zombie. They're weak, they're dumb, but they make up for this with their numbers. If you encounter one by himself, it's a safe bet there's more--lots more--nearby. Tackling them doesn't take require any special skills, so long as the survivors stick together.
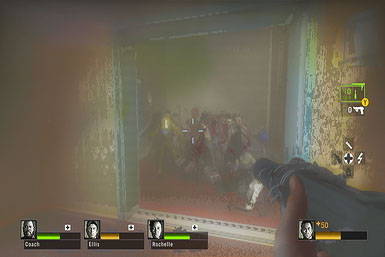
- Surrounded? Try spinning around in a circle while firing repeatedly to get them off your back. This works best with machine guns.
- Explosives, such as the scattered gas canisters, work great for thinning the herd. If you find a gas cannister, toss it into the herd and shoot it to take down the nearby brain-eaters.
- If you come across a member of the horde all by himself who hasn't yet taken notice of you, try running past him to conserve ammo.
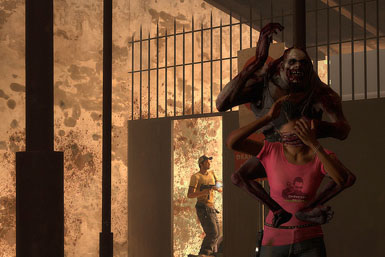
Special Infected
The Boomer
Boomers are the zombies that look like they've hit up the drive through a few too many times. These lumbering giants are slow, and can be identified by the belches they let loose. However, their bulging bellies house a dangerous bile that summon massive amounts of the horde if it gets on you. There are two ways the bile can get on you: by being vomited on, or standing anywhere close to the Boomer upon their destruction.
- Attack from a distance to avoid bit vomited on, or being covered in bile when they explode.
- Avoid tackling him head-on to avoid his vomit stream.
- If one gets too close for comfort, melee him to knock him back and stun him briefly, giving you a chance to back away!
The Charger
Chargers are the big nasty guys with the single huge arm. As their name implies, they charge toward their victims to unleash the pain. These guys are quick, so it's important to keep your distance.
- If a charger is coming your way, strafe to the side to evade their attack!
- Try and lure them into walls, briefly stunning them, giving you a prime opportunity to attack!
The Hunter
Hunters are pretty much the opposite of the Boomer: small and fast. You'll recognize them by the hoodie they wear over their head at all times. They'll attempt to pounce on you from a distance, making them tricky to keep tabs on.
- Keep on the move to avoid being pounced on!
- If you can, melee them mid-pounce, knocking them to the ground for a moment.
- They're incredibly vulnerable after pouncing and pinned a teammate--you can do them in and save your teammate in one fell swoop.
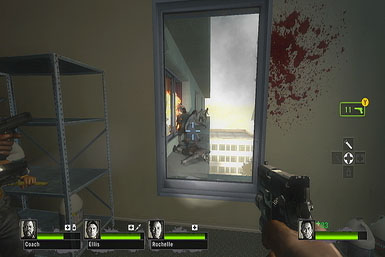
The Smoker
Like many real-life smokers, you'll hear this guy coughing and hacking from a ways away. Their core attack is to grab the survivors from afar with their long tongue, then pull them towards him to inflict even more damage, rendering the victim helpless. If this happens to one of your teammates, either shoot the tongue, or follow it to the smoker itself and do him in before he can inflict further damage. As their final act, this enemy leaves behind a cloud of smoke upon defeat, making it difficult to see.
- Shoot the tongue! If a teammate's incapacitated by it, shooting the tongue itself is the fastest way to save them.
- Although Smokers can launch their tongue from quite a distance and through various openings (such as windows) it requires a clear line-of-sight, so try to avoid needlessly standing in front of doors, windows, or long corridors.
- Keep on the move to avoid being tongue-grabbed! If you're close, circle-strafe him while attacking.
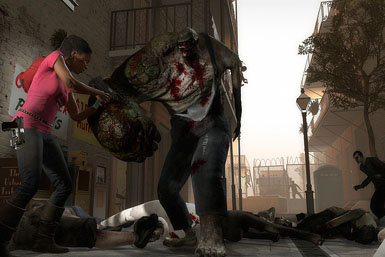
The Tank
You'll know this roided-up baddie's nearby if you notice the screen shaking. As you may have guessed from their appearance, these guys are very strong and very deadly. It's important to keep your distance, as their punch attack not only deals heavy damage, but will also knock you to kingdom come. However, their long-range rock-hurling attack is nothing to be sneezed at either, as it causes a damage to a wide-area near where it lands.
- Stay away! The tank's punch attack can be deadly, so keep your distance and back up while shooting.
- When you see him pick up a large chunk from the ground, run to the side to avoid its landing zone.
- The tank is extremely vulnerable to Molotov Cocktails, so use 'em if you have 'em.
The Witch
If you hear a girl crying (and it's not you), you know a witch is nearby. These girls are actually harmless as long as they remain unaware of your presense. However, if you do catch their attention by making a loud noise, shining your flashlight at them, or shooting them, you'd better get ready to counter! If alerted, the witch will make a mad dash for whoever disturbed them and knock them down repeatedly, inflicting massive damage. While the victim isn't totally incapacitated, the three other survivors should try and take down the witch quickly to minimize damage.
- Avoid them! If you know a witch is nearby (as indicated by the sound of sobbing), turn off your flashlights, and try to sneak past her without making a sound, saving you ammo and a headache!
- Though we recommend sneaking by, witches can also be taken out with a single head shot--if you can get close enough without alerting them.
- If you do need to take on a witch, try and get to high ground first before attacking, increasing the amount of time it'll take for her to get to you.
The Spitter
The spitters are very similar to the boomer, except smaller, weaker, and full of poison instead of bile. The poison, which she spits, as well as releases upon death, harms anyone that comes into contact with it, so wait for is to dissipate first before proceeding.
- Attack from a distance to avoid bit spat, or being covered in poison when they explode.
- Avoid tackling her head-on to avoid the spit stream.

The Jockey
This freaky-looking dude attacks by jumping onto your back and steering you into trouble, all the while pummeling you with his other fist. You do have some very loose control while he's riding you, but it's not much. The only way to get him off is for the other survivors to shoot him off.
- Stay away--seriously. If you see one, back away while gunning for him!
- If he grabs onto a teammate, shoot him off fast! Otherwise he'll continue to ride him until he's dead.
Left 4 Dead 2 Achievements
Note that there are Spoilers on this list.
| Trophy Name | How To Earn | Reward |
|---|---|---|
| A RIDE DENIED | Kill a Jockey within 2 seconds of it jumping on a Survivor. | 15 |
| A SPITTLE HELP FROM MY FRIENDS | As the Spitter, spit on a Survivor being choked by a Smoker. | 15 |
| ACID REFLEX | Kill a Spitter before she is able to spit. | 15 |
| ARMORY OF ONE | Deploy an ammo upgrade and have your team use it. | 15 |
| BACK IN THE SADDLE | As the Jockey, ride the Survivors twice in a single life. | 15 |
| BEAT THE RUSH | In a Survival round, get a medal only using melee weapons. | 15 |
| BRIDGE BURNER | Survive the Parish campaign. | 20 |
| BRIDGE OVER TREBLED SLAUGHTER | Cross the bridge finale in less than three minutes. | 30 |
| BURNING SENSATION | Ignite 50 Common Infected with incendiary ammo. | 15 |
| CACHE AND CARRY | Collect 15 gas cans in a single Scavenge round. | 20 |
| CHAIN OF COMMAND | Kill 100 Common Infected with the chainsaw. | 15 |
| CL0WND | Honk the noses of 10 Clowns. | 15 |
| CLUB DEAD | Use every melee weapon to kill Common Infected. | 15 |
| CONFEDERACY OF CRUNCHES | Finish a campaign using only melee weapons. | 30 |
| CRASS MENAGERIE | Kill one of each Uncommon Infected. | 20 |
| DEAD IN THE WATER | Kill 10 swampy Mudmen while they are in the water. | 20 |
| DISMEMBERMENT PLAN | Kill 15 Infected with a single grenade launcher blast. | 20 |
| FRIED PIPER | Using a Molotov, burn a Clown leading at least 10 Common Infected. | 15 |
| FUEL CRISIS | Make a Survivor drop a gas can during overtime. | 15 |
| GAS GUZZLER | Collect 100 gas cans in Scavenge. | 20 |
| GAS SHORTAGE | Cause 25 gas can drops as a Special Infected. | 20 |
| GONG SHOW | Prove you are stronger than Moustachio. | 15 |
| GREAT EXPECTORATIONS | As the Spitter, hit every Survivor with a single acid patch. | 15 |
| GUARDIN' GNOME | Rescue Gnome Chompski from the Carnival. | 30 |
| HEAD HONCHO | Decapitate 200 Infected with a melee weapon. | 15 |
| HEARTWARMER | In a Versus round, leave the saferoom to defibrillate a dead teammate. | 20 |
| HUNTING PARTY | Win a game of Scavenge. | 15 |
| LEVEL A CHARGE | Kill a Charger with a melee weapon while they are charging. | 15 |
| LONG DISTANCE CARRIER | As the Charger, grab a Survivor and carry them over 80 feet. | 15 |
| MEAT TENDERIZER | As the Charger, grab a Survivor and smash them into the ground for a solid 15 seconds. | 20 |
| MIDNIGHT RIDER | Survive the Dark Carnival campaign. | 20 |
| PRICE CHOPPER | Survive the Dead Center campaign. | 20 |
| QUALIFIED RIDE | As the Jockey, ride a Survivor for more than 12 seconds. | 15 |
| RAGIN' CAJUN | Survive the Swamp Fever campaign. | 20 |
| ROBBED ZOMBIE | Collect 10 vials of Boomer vomit from infected CEDA agents you have killed. | 15 |
| RODE HARD, PUT AWAY WET | As the Jockey, ride a Survivor and steer them into a Spitter's acid patch. | 20 |
| SCATTERING RAM | As the Charger, bowl through the entire enemy team in a single charge. | 20 |
| SCAVENGE HUNT | Stop the enemy team from collecting any gas cans during a Scavenge round. | 15 |
| SEPTIC TANK | Use a bile bomb on a Tank. | 15 |
| SHOCK JOCK | Revive 10 dead Survivors with the defibrillator. | 30 |
| SOB STORY | Navigate the sugar mill and reach the safe room without killing any Witches | 30 |
| STACHE WHACKER | Prove you are faster than Moustachio. | 15 |
| STILL SOMETHING TO PROVE | Survive all campaigns on Expert. | 35 |
| STRENGTH IN NUMBERS | Form a team and beat an enemy team in 4v4 Versus or Scavenge. | 15 |
| TANK BURGER | Kill a Tank with melee weapons. | 30 |
| THE QUICK AND THE DEAD | Revive 10 incapacitated Survivors while under the speed-boosting effects of adrenaline. | 30 |
| THE REAL DEAL | Survive a campaign on Expert skill with Realism mode enabled. | 35 |
| VIOLENCE IN SILENCE | Navigate the impound lot and reach the cemetary safe room without tripping any alarms. | 30 |
| WEATHERMAN | Survive the Hard Rain campaign. | 20 |
| WING AND A PRAYER | Defend yourself at the crashed airliner without taking damage. | 30 |
Got a news tip or want to contact us directly? Email news@gamespot.com
Join the conversation