Far Cry 3 Game Guide
GameSpot's Far Cry 3 game guide helps you learn the most efficient ways to tame the jungle. Or... ways to set the world on fire.

Introduction
Be honest: have you ever seen any media that begins with a bunch of crazy twentysomethings having a crazy twentysomething lifestyle, doing shots of motor oil and jumping out of planes, screaming about Mountain Dew while punching a dolphin square in the solar plexus, etc., that doesn't end with some kind of horrible misadventure? People shooting at them, cannibals, alien marauders, a Dane Cook performance?
Well, Far Cry 3 certainly isn't going to break with that tradition, as you'll find yourself squarely in over your head as soon as the game begins. Luckily, GameSpot's Game Guide will help guide you through all the ups and downs of the game's main storyline, and will offer plenty of tips for the side missions, as well. Curious about the easiest way to silently take out an enemy outpost? Want to figure out how to unlock most of the game's weapons before you even begin the story? Ever wanted to kill a shark, but weren’t sure how? We've got you covered. Read on!
General Tips
Hunting/Crafting Tips
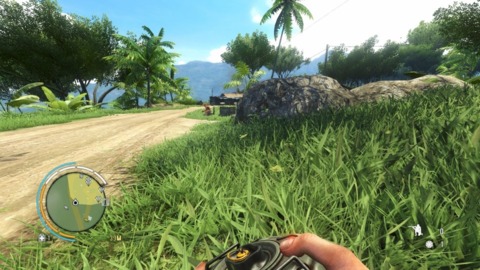
Ready to get up close and personal with Rook Island's meanest denizens?
When the game starts, you're going to be grossly limited in the number of items that you can carry. In order to load up with more goodies, you'll need to hunt animals and use their skins to make more bags for yourself. Luckily, the process isn't all that difficult, as the early tutorials will explain most of the basics: go to an area that has the kind of animals that you need to hunt, hop out of your car, wander around for a bit, find your targets, and shoot them. If you're quiet while you move, you shouldn't have too many problems bagging your prey.
Of course, finding that prey might be a different matter. Luckily, almost every animal you need to hunt will be marked on your map, assuming you've revealed it. If you want to get a jump start on crafting at the beginning of the game, it's worth taking your time to travel the map and climb to the top of all the radio towers that you can access. (You'll be doing this regardless, so you might as well get it out of the way; as a benefit you'll unlock a lot of free weapons in stores.) After doing that, attack as many outposts as you can to both eliminate enemy patrols and unlock new Path of the Hunter missions. From there, you just need to concentrate on locating the animals that you need to hunt and track them down. You should concentrate on bigger rucksacks, weapon holsters, and wallets first, but if you skin everything you see, you should be able to make all of the bags before you dive into the story missions, should you wish to do so.

Like shooting fish in a…in an ocean. With a rocket launcher.
Here are a few tips to get you started.
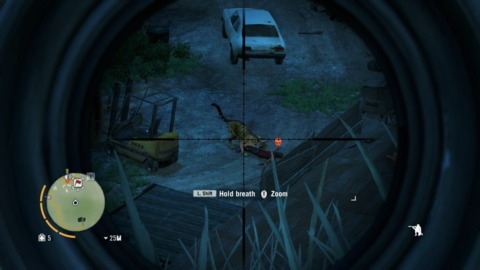
- Sharks can be one of the toughest enemies to hunt, as they're underwater and said water will make them somewhat resistant to bullets. It's easiest to take them down after you unlock the RPG; hitting a shark with a rocket-propelled grenade will kill it in one shot, allowing you to swim out, skin it, and return to shore to nab the next one. The best spot to do this is north of the Welshore Wrecker's House outpost, on the northwestern corner of the first island. You'll be near an ammo store, so you can restock if need be, and there are plenty of sharks just off the coast.
- Crafting the last upgrade in each category requires you to find a rare, unique animal. These are all found as the result of Path of the Hunter quests, so do as many of those as you find as you travel the island. This is a good idea regardless of hitting the unique enemies, as all of these quests will point you towards normal animals with skins you probably will need.
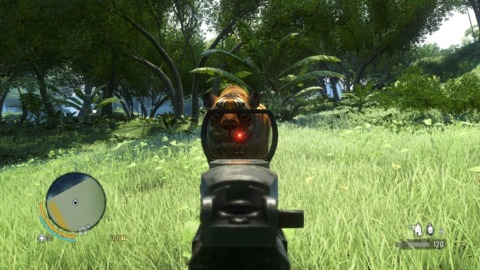
- Animals come as either predators or herbivores. Predators will usually attack you when they spot you, and since none of them have any ranged attacks, using a shotgun on them as they approach is usually the best bet to take them out. Herbivores will often run when spooked, so bring an assault rifle or other high-powered, rapid-fire weapon to take them down from a distance. Most animals, even the tough ones like bears, will usually die when set on fire, so a molotov or flare gun might also be nice to have in your back pocket.
- You can't damage animal pelts, no matter how you kill their wearer, so if you're having trouble killing your prey, don't hesitate to bring along an explosive arrow or RPG to settle the job once and for all.
- If you’re attempting a Path of the Hunter quest, keep in mind that you have to use the type of weapon that the mission requests, not necessarily the weapon you’re given. If a mission says that you have to pick up an SMG after accepting it, you can usually bring your tricked-out SMG from the nearest weapon store rather than the low-quality one that the mission provides. Bring your best gear for the best chance at a kill!
Relic/Letter Hunting Tips
As with any open-world game, Far Cry 3 has a number of collectibles that you can seek out around the game world, with dozens of lost letters and relics being scattered about. Even if you're not normally a collectible-hunting type, you'll want to track down some of these, since they will unlock new syringe recipes and signature weapons for you. (Check your Handbook in-game for specific landmarks.) Here are a few tips.
Look for this symbol to know when a wall can be destroyed.
- Relics and letters will appear on your map after you get within a couple dozen meters of them. If you want to know where they are from farther away, though, you can buy maps at any store to reveal their locations. These will be expensive, however, but can be worthwhile if you have nothing else to spend your money on.
- If you get to a relic spot and can't find anything, consider the possibility that the item is underground, as many of these items are. In this case, flip to your world map and look for a cave entrance nearby. These appear as small blotches of dark pixels on your map, often near water. Find one and go spelunking to get your reward.
- Relics and letters both give you an experience reward for finding them. This reward stays the same throughout the game, while the amount of experience you need to gain new skills increases (up to a maximum of 4,000 XP per skill late in the game). Thus, it's best to do your relic-hunting early on in the game, when you can get more skill levels for finding them, and since you'll be able to unlock the signature weapons for doing so earlier, as well.
- If you truly can't find a path to a relic, try looking for a weak wall or overgrown weeds in front of an open space. Walls like this are normally marked with a circular symbol, and can be destroyed with strong weapon fire (like a shotgun blast) or a grenade. Weeds can be slashed away with your knife to reveal a new passage.
- Lastly, there are a few relics that can only be obtained by riding a hangglider to them. If you spot a relic that seems truly unobtainable, look around for a tall hill nearby and see if there's a hangglider on it.
Notes On Weapons
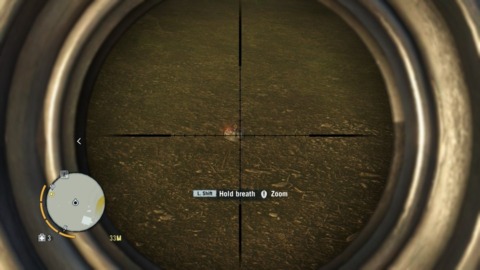
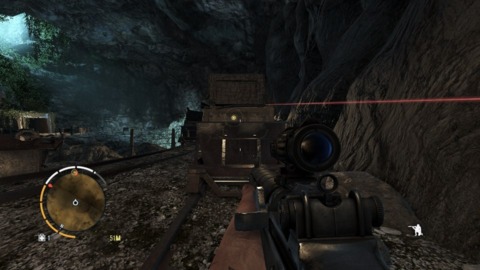
A silenced sniper rifle may wind up being your most-used weapon, so get one early.
Far Cry 3 has dozens of weapons available to you for use. At first you'll only be able to carry one weapon at a time, but as you craft more holsters, you'll eventually be able to net four guns at a time. In general, one of those slots should always be an assault rifle, as that's what most of your enemies will carry, allowing you to easily restock on ammo out in the field by running over their weapons when they die. The other three slots are your choice, but we'd always recommend bringing a silenced sniper rifle along for attacking strongholds. A rapid-fire shotgun is often a good friend when trudging through the forest, as it's usually the quickest way to take down a predator animal that gets your scent. Later in the game, when money isn't so much of an issue, a good LMG will be an excellent choice, as they can be fired for long periods of time without reloading and are pretty accurate even at long ranges. Restocking ammo for an LMG can cost 800 or a thousand dollars for a full load, though, so you'll either want to be wealthy before whipping it out, or have a good ammo box available to you.
Also, be sure to periodically check your in-game handbook to note when you can unlock new Signature Weapons. Signature weapons are extra-strong versions of the most advanced weapons in the game, and are usually outfitted with more weapon attachments than the base weapons can normally handle. You can unlock almost all of these weapons early on in the game, with the exception of the Signature Assault Rifle, which can only be unlocked after you reach the south island. Still, unlocking the Ripper LMG will make most firefights a cinch. Note that the Signature sniper rifle does not come with a suppressor, and since you can't choose which attachments these weapons come with, you may want to stick with a regular sniper rifle instead of using it.
You get new signature weapons for collecting 10 relics, another at 20 relics, for collecting 10 memory cards (these seem to always be in the safehouses in cleared outposts), for attempting (not necessarily winning) six Trials of the Rakyat, clearing out half of the outposts in the game, and for clearing all of the radio towers in the game. Again, all of these objectives save for the radio towers are completable almost as soon as you start the game, if you're willing to avoid pursuing the main quest and instead focus on exploring the north island. Signature weapons will be expensive, but they're worth it.

Need to set something on fire? A flare gun's not a bad choice.
Here are a few more notes to keep in mind when selecting weapons.
- Most of the weapons available to you are very expensive at the beginning of the game, with some costing more than you can fit in your starter wallet. You can get more weapons for free in stores either by climbing to the top of radio towers and switching off the scramblers there, or by killing enemies, picking up their weapons, and bringing them back to a gun vendor. That'll let you get them anytime you wish in the future, at no cost.
- Restocking on ammo in shops can be expensive. Luckily, there are a few ammo boxes in the game world that'll let you top off for free. Many of these only appear during missions, but some continue to exist even while you explore the world. For instance, there's one in a hut near the radio tower northwest of the Dry Palm Storage Depot on the south island. Knowing that you can restock ammo for free will let you be much more loose with LMG ammo while fighting enemies. Just be aware that you don't restock grenades or explosives from ammo boxes.
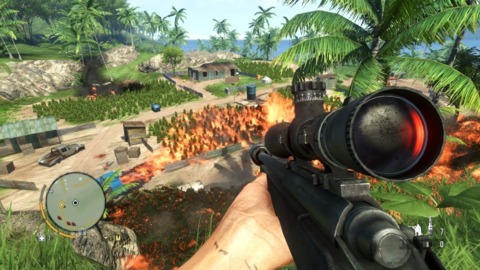
- Setting the fields aflame with a flare gun was mindless fun in Far Cry 2, but it's less useful in Far Cry 3. Most of the enemies you encounter will be found either in outposts or on the road, the dirt of which is not very conducive to being set alight. If you can force enemies to pursue you into a field, you can use a flare gun to quickly overwhelm them with fire, but that's nothing that a few cheap molotovs won't do, and they don't take up a weapons slot. HItting an enemy square-on with a flaregun is almost always a kill, though, even if you hit a heavy gunner. Likewise, while the flamethrower is technically fun, its range is so limited that you'll almost always be better off with a shotgun.
- Using grenades is great fun, but keep in mind that C4 is more powerful and can be triggered manually, making it a great tool against slow-moving enemies like heavies, or parked cars with gunners. C4 is awfully expensive, but it can be the most devastating tool in your inventory when used properly.
- Likewise, mines are pretty fun to use when you can be sure that an enemy will be passing through a chokepoint to get to you, but enemy gunfire can set them off from a distance, so if you lay down a mine, be sure you move far away from it before you expect your foes to trip it.
- The bow is a fun weapon, and one that offers a bit of flexibility when you unlock the ability to craft explosive and fire arrows. Its range is very poor when compared to a silenced sniper rifle, though, and the drop of your projectiles will make it difficult to hit anything that's not fairly close to you. Some missions and Path of the Hunter sidequests will require you to use the bow, however, so it's worth putting some points in the bow-enhancing skills.
Taking Down Outposts
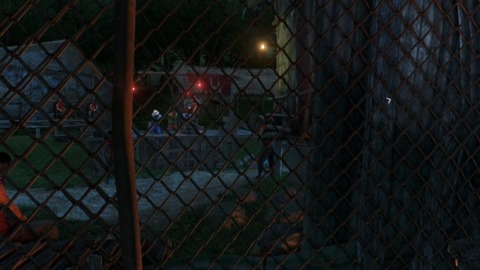
Scoping out an outpost from a distance will make it much easier to tell what kind of forces you're facing.
One of the most recurrant complaints about Far Cry 2 was the respawning checkpoints that you'd constantly have to pass through. In Far Cry 3, Ubisoft listened, and now makes many of these checkpoints both out of the way of normal travel paths and conquerable, so that you can take them over and not have to worry about enemies patrolling in that zone again. Enemy outposts show up on your map as red flags, and you'll be able to spot the area of influence that they extend as a red heatmap. Inside this area, you'll come across numerous enemies performing car patrols, and hunting animals will be likely to draw the attention of nearby guards. In general, an enemy stronghold is going to make it more complicated for you to move and explore in a given area, so it's worth taking the time to take them over for your cause. Doing so will eliminate all randomly-spawning enemies in the area, and will also unlock new Path of the Hunter missions, which in turn will allow you to craft the biggest bags available to you. You don't need to take down a stronghold as soon as you spot it, though, and in practice you'll probably want to wait until you have access to a silenced sniper rifle before you make your assault.
If you wish, you can simply run into an outpost and kill everyone inside to take it over; there are generally five to seven foes inside the walls. When so alarmed, enemies will call for reinforcements, which will add to the forces lining up against you and make your job a bit tougher. However, going loud greatly reduces the rewards you get for taking over strongholds; killing everyone within without being spotted and without tripping an alarm will net you almost triple the experience that'd your earn otherwise, so it's always worth at least attempting a stealthy approach before simply murdering everyone. Here are a few tips to help you proceed.
So, Mr. Bad Guy, you wanted to cage up a tiger in your little outpost? How's that working out for you?
- When approaching a stronghold, get out of your car a couple hundred meters away and scout using your camera. You'll want to try and scout from a couple of different vantage points, preferably elevated ones, to ensure that you spot as many enemies within the stronghold as possible. While you're at it, scout the nearby wilderness to tag animals nearby; predators like tigers and bears may force you to whip out a loud weapon, which in turn might alert the guards of your presence.
- Find a spot between 100 and 200 meters from the camp that offers a clear line of sight and enough tall bushes to hide in. Stay crouched at all times, and if an enemy's awareness meter starts to rise up on your HUD, turn around and try to move away as quickly as possible.
- After tagging as many of the enemies as you can, start drawing up a plan of attack. If you're sniping, you'll want to try and take down enemies that are out of sight of everyone else first, to avoid alerting the remaining foes. Snipers and other enemies on rooftops are a good first choice, since no one will spot their body when they fall.
- When you first start hearing shouts of alarm from the guards, stop firing. The guards will now be aware that someone's out in the hills, will vary their movement patterns, and will probably come out to look for you. Now would be a good time to move around the perimeter of the camp and find another sniping spot. Shooting rapidly, even with a silenced rifle and from cover, will often lead to the guards making a beeline for your position. If you avoid detection long enough, the guards should head back to camp and resume their normal behavior.
- Many, but not all, of the strongholds will have caged animals inside the walls. Why? No particular reason aside from the fact that they'll make it easier for you to create a diversion. You can shoot the front wall of an animal cage to blast it apart, causing the animals within to go crazy and attack any nearby guards. You'll usually want to try and snipe a guard or two with a headshot, then break apart the animal cage as soon as the remaining guards start becoming alarmed. If you can take out a few guards before unleashing the animals, there'll be fewer of them to attack the beasts, and they'll be more likely to kill a guard or two before being killed themselves. Not all animals are created equal, though: a trapped bear or tiger will be a lot more effective at killing enemies than will trapped dogs or cassowarys. With luck, the animals will kill all the remaining guards, but if not, they'll at least weaken and confuse them enough for you to take out the remainders. It's a good idea to reposition while the animal attack comme
- If everything goes poorly, you can run 300 meters away from the outpost to reset all of the enemies. This doesn't seem to eliminate any alarms that have been set off, though, so you may simply wish to exit and reload if you're dedicated to getting the fully silent reward.
- It's difficult, but you can sometimes force predators into outposts by setting fields aflame or by shepherding them with gunfire. This will almost always alarm the outpost to your presence, though, so it's often not worth the effort. It's fun, though!
- The outposts on the south island will often have one or two headshot-immune heavies. Get ready to get up close and personal with these guys and take them out with takedowns.
Note that taking out outposts will, again, cause all enemies in that part of the map to stop spawning. If you eliminate all outposts, the game world can feel a bit empty while you’re exploring, aside from random wild animal attacks. That’s a shame, but there’s no real way around it!
WALKTHROUGH
MAKE A BREAK FOR IT
After the weird encounter with your captor at the beginning of the game, follow Grant through the small camp you find yourself in. He'll eventually lead you to a map, phone, lighter, and camera, all items that will come in handy during your time on Lord of the Flies Island. Grant is by far the more competent member of your little duo, so of course it seems likely that he isn't long for this world.
Keep in mind that when Grant prompts you to throw stones as a distraction, you'll need to place them pretty close to where he's indicating. With the second group of two guards, try to throw your stone so that it bounces down the little hallway to the right of them; that'll get them to move long enough for you to sneak by, even though you have to wait for Grant to move as well.
Vass is a bad, bad man, but luckily he's pretty bad at killing you.
And so it is. After Grant's untimely departure from this mortal coil, you'll have to escape through the jungle from your captors. This is a tutorial level, so you won't have to worry overmuch about actually being shot, but you will be winged once or twice. Use the contextual button to heal yourself – quickly! - and resume your course.
DOWN IN AMANAKI TOWN
You will eventually find yourself speaking with Dennis, a savior of sorts, who'll fix you up and kindly give you money for weapons. You'll have just enough to buy a 1911 .45 pistol, which, coincidentally, is the only weapon unlocked for purchase at this point.
After nabbing your pistol, follow Dennis out of town, where he points you toward a nearby radio tower. Disabling this tower is going to be the first of many, many tasks you'll accomplish on the island. Look around for lootable chests on the path; they'll contain cash and items you can sell to vendors for more money.

RED WIRE! BLUE WIRE! YOU HAVE THREE SECONDS!
Shoot the snake at the base of the tower before heading up. When you reach the top, interact with the scrambler to unlock some more of the map, then hit the zipline to return to Dennis.
HARVEST THE JUNGLE
Dennis sends you off with a rather vague impetus to “master the jungle.” This entails hunting down wild animals, finding usable plants, and generally gaining some knowledge of how you can put the jungle you're in to work for you.
First, though, head back to the general store and check out the weapons you've unlocked via your radio tower incursion. You'll have access to a new handgun, the 6P9, and a new assault rifle, the STG-90. You can purchase new modifications for any of the weapons that you own, should you like, and you can also sell all of the vendor trash that you've picked up so far.
From there, head towards the marker on your minimap where the boars live. It's a bit of a hike, so you'll want to nab the car near Dennis and use that for transportation. There are going to be plenty of icons on your minimap as you drive that might draw your attention, so feel free to get out of the car and cut down some plants or check for loot boxes, and so on! Some loot boxes will appear on your minimap but not in the game world; we're assuming these are underground, so don't worry about them yet.
When you get to the boar area, sneak up on the farmer's field where the boars are snorking around. The boars don't appear to be aggressive, but they will run away from you if you get too close. Shoot at one of them to witness this flight in action; said boar will be marked on your HUD with a big set of chompers, allowing you to track them down. Luckily, they won't run far. Kill two of them (use grenades if you have to, or head back to the general shop for more ammo), and skin their bodies.

Boars will normally run from you, but if you get too close, they may attack. Be careful!
The plants you need to track down are scattered around the area. If you can't find blue leaves, head towards a river and look for them underwater.
With all of the ingredients in hand, fast travel back to Amanaki via your map, and hook up with Dennis. He'll instruct you to use the game's crafting system to make yourself some much-needed extra inventory slots, and also net you your first two skills: a takedown for silently dispatching your enemies from behind, and a slide move that can get you behind cover quickly.
Up next is an assault on a stronghold where you suspect one of your friends is being held. Dennis will drive you there with a couple more soldiers, but they'll wait for you to make the first move. Sneak up to the stronghold from one of the sides, and scout out the soldiers within. This would be a great time to execute your first takedown from behind, since many of the soldiers are looking in towards the courtyard. Just be aware that other soldiers will become alerted when they spot a body; you can run and hide, but all the attention will probably cause Dennis to bring his troops up to start the firefight. Grab one of the AK-47s that the soldiers drop, if you can, and use it to clean out the stronghold with your allies.
Your friend isn't being held here, unfortunately, but you will now be able to explore relatively freely. Check your crafting menu first, as you'll find it advantageous to make as many items there as you can. There are plenty of animals in the area to take down with your pistol or assault rifle, with goats and boars leading to a number of recipes that you'll probably want to make right away. You can also find tapirs to the south of Amanaki Town, across the bridge, which will let you make a bigger rucksack, but be wary of tigers.
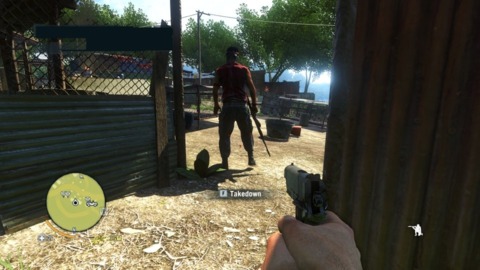
Practice your takedown skills against these enemies.
Note that there are hostiles in the area, and that they'll also sometimes be heard engaging animals. Sneak up on them, take them out, then skin the animals that they've killed! If you haven’t done so yet, now might be a good time to explore the rest of the island and unlock all the radio towers that you can find.
MUSHROOMS IN THE DEEP
Your next task is to find the villa of one Dr. Earnhardt. It's far to the west of you, so grab a car and head out. Make a waypoint on your map for the radio tower in between you and Earnhardt, then scale it and deactivate the scrambler. You can't get to the base of the tower by running; you'll have to scale some rocks nearby that are covered with vines.
When you reach Earnhardt, you'll find Daisy, but she's been poisoned, and you'll be the one who has to heal her. You need the titular mushrooms from a cave to the north of Earnhardt's house, so clear some room in your bags and set forth. As you approach the cliffs, you'll note some boars rooting around. Perfect opportunity to skin a couple and make a Simple Ammo Pouch if you haven't already.
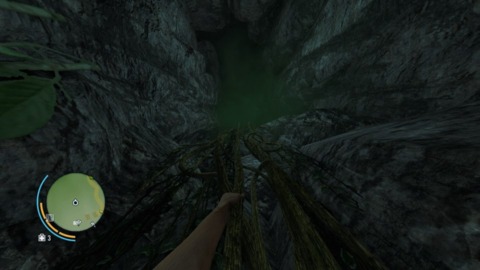
WHOOOAAAAAAHHHH DUUUUUUUUDDDDE
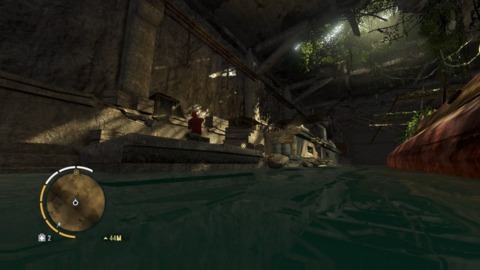
After reaching the entrance to the cave, dive under the water and swim through the tunnel to reach the subterranean part of the island. There's only one path here, and it's an…interesting one, to say the least. Follow it, find the mushrooms, and then escape along the cliffs to return to Earnhardt to complete your mission.
TIP: As a bit of a side quest here, it's a good idea to go ahead and complete the Valsa Docks stronghold in between Amanaki Town and Earnhardt's Mansion. Doing so stealthily will net you a bunch of money, and it'll also unlock a hunting mission that'll have you using a sniper rifle on nearby deer. That sniper rifle is the expensive M-700, and the kicker is that you get to keep it when you're done with the mission. Spend your money on a good scope and a suppressor, and you have one of the deadliest weapons in the game relatively early on.
THE MEDUSA'S CALL
The Medusa is some ways away from Earnhardt's mansion, so feel free to fast travel back to Amanaki Town if you like. First, though, take the road to the southeast of Earnhardt's house, and find the small hut near where there's a three-way meeting of roads. There'll be plenty of deer here for you to hunt, as well as a leopard or two if you're lucky. The deer hides will be used in many of the recipes you already know, so stock up.
You can drive most of the way to the Medusa, but the last few hundred feet will have to be done on foot. You'll be asked to use your camera to detect a few groups of soldier/radio operative pairings, preferably taking them out quietly. A silenced handgun or sniper rifle might come in handy here, but for the most part you can simply use takedowns. If you do alert the guards to your presence, they'll destroy intel and you'll have to start over, but that doesn't necessarily mean that you have to stay quiet. If the guards go into search mode (such as when you might use a grenade to blow up a couple of them), that's not an automatic fail so long as they don't spot you.
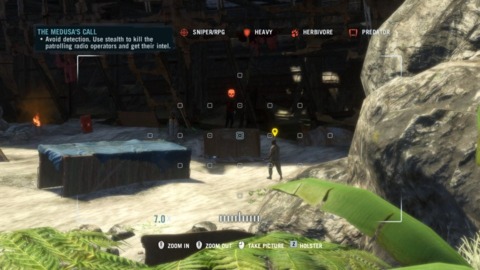
Marking your enemies will let you know when they're far enough apart to silently kill.
Kill the first lookout with a takedown, then start moving up towards the second pair of guards nearby. The intel man will wander away from the welder, letting you perform another takedown. (So long as you stay crouched, these guys' range of vision is astoundingly poor, even in full daylight.) The other two groups of enemies will follow a similar pattern, leaving you with plenty of options to take them down. Again, if you get bored of sneaking around, you can chuck a grenade (preferably cooked), kill a pair of them, and wait for the other group to come investigate before taking them down as well.
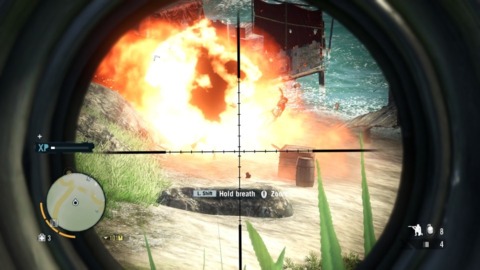
Once you reach the control room, an alarm will be triggered, leading to more opponents coming to the beach. There's a zipline around the corner from the exit from the control room that'll put you near where you entered the area if you want to put the ship in between you and your foes and re-stealth a bit. There are also plenty of explosives in the area for you to shoot. Regardless, kill all of the enemies and move along.
PLAYING THE SPOILER
Note that this is the first main mission you don't automatically pick up upon completion of the previous one, so you won't have to worry about the constant reminders to head to your objective. A perfect time to run around and explore a bit, should the desire hit you.
Talk to Dennis in the village to get your objective: you're tasked with heading to a remote logging camp, disabling the alarm, and sabotaging the weapons stockpiled there before they can be used against Amanaki Town in an upcoming attack. This is going to be a stealth mission, so you may want to bring a stealth pistol or sniper rifle along with you if you don't trust your sneaking and takedown skills; you can do missions and challenges in the area to earn some cash for these. Check your map and look to the southeast of Amanaki to get a bead on the camp, but set your waypoint to the nearby radio tower and prioritize that.

Again, mark your enemies with your camera to know their locations. And watch out for that tiger!
When you get to the vantage point overlooking the logging camp, pull out your camera and tag everyone that you can spot. There are a lot of them, and earning their attention will cause the mission to restart, so you'll want to proceed silently. We found it easiest to skirt the camp to the east and sneak around to the south (giving a wiiiide berth to the Sumatran tiger that lurks nearby), where a single guard is facing away from you. We did a takedown on him, sniped the soldier on the docks from afar, then snuck to the alarm and disabled it. With that done, you can sneak behind the soldier sitting in the chair, round the corner to his left, and take him down without the nearby guard spotting you. Or you can shoot him in the head, if your weapon is silenced.
With the alarm disabled, you can probably take out the rest of the guards here, but it isn't really necessary. Enter the nearby weapons cache and restock any ammo or grenades you may have expended, then plant your explosives. Use the 15 seconds you're given to run to the nearby river and swim across it, finding cover if needed. Getting far enough away from the camp will end the mission, at which point you can double back, kill the soldiers, and loot the many containers in the area for a bunch of cash and items.
This mission takes place to the southwest of Amanaki, and there's another radio tower near it. You can find a water vehicle along the coast and use that to get down there, if you like. There are gunships patrolling near the harbor, though, so be wary. It's easier to warp to Earnhardt's and take the handglider to the rear of his house; it'll be a straight shot to the south from there. Take down the radio tower before heading to the prison.
Use explosive barrels to easily kill enemies here. Insert your own Wilhelm screams as accompaniment.
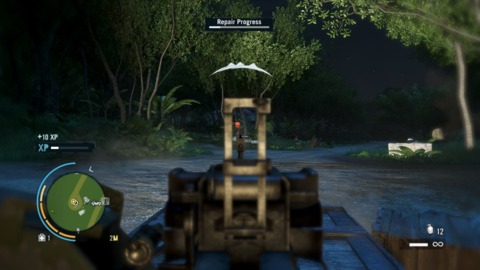
Note that the first marker here isn't a vantage point; it goes straight to the alarm that you're supposed to disable. You may wish to zipline from the tower to the rusted artillery piece nearby and scout the area from there; there's also a relic in the bunker below that's an easy 250 XP. Move to one of the sniper roosts at the camp, kill the guard there stealthily, and disable the alarms.
With that done, there's no need for subtlety; you can start chucking grenades or firing machineguns at the remaining guards, and there'll be nothing they can do except fire back. Kill everyone (and keep in mind to look out for explosive barrels when they take cover), and grab the key from the commander's body.
INTO THE PRISON
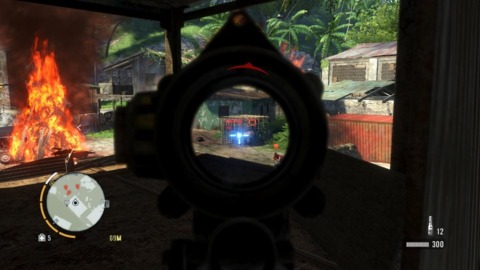
The prison is located in a nearby cave, but it's heavily defended. If you don't have an SMG or a shotgun handy, you'll probably want to switch out your sniper rifle or pistol for one of the guards' shotguns, as ammo will be plentiful for it and it'll be useful in the close quarters that follow.
Make your way into the prison, liberally chucking grenades at groups of enemies, until you reach that old trope of FPS games, the instant knock-out by an unseen enemy. When that occurs, you'll have to fight your way back up through the burning building. You can charge through fires in your path, but it's best to take a second and shoot out the water valves above them to put them out. You have three minutes get back to Liza, but if you're speedy (there's really only one way to go), you should be able to clear it in half that.
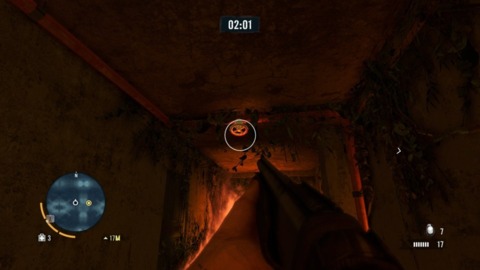
Look for these valves and shoot them to diminish some of the fire.
When you get to Liza and the driving section, feel free to liberally sprinkle your grenades at your attackers; you get full XP for your multi-kills, so there's no sense holding back. After switching to the front seat and getting a few more kills (be sure to hit the explosive barrel when the soldiers get near it), you'll be done with the mission.
KEEPING BUSY
This is just a short mission that'll see you retrieving a power head for Daisy and then talking to the girls for a bit. The power head's underwater near one of the corners of the zone you're checking, behind a yellow barrel. Nab it, then complete the mission and leave the cave for the Fire Arrows recipe.
Now would be a great time to explore the island, as the game so helpfully tells you, except for the fact that it also apparently thinks you're an idiot and tells you to head to Citra's place every two minutes. I mean, it's not like you should know from every other open world game ever made that you can head to a mission to actually proceed with the storyline, should you? You need to prodded towards the mission path every two minutes, lest you forget that there's actually a story to the game and perhaps get lost and wander the island forever. It appears that you can disable these pop-ups by setting a manual waypoint on the map, so do that if you want to truck around a bit!
A warm welcome.
MEET CITRA
Another brief experience with drugs. As with the hallucinogens in the cave earlier, there's little to do here but walk in a straight path forward. When you complete the mission by walking out of Citra's temple, you'll unlock 26 new skills, so if you've been saving skill points, now would be a good time to explore the skill trees a bit and pick up some new combat moves. Next: Kicking A Hornet’s Nest
BAD SIDE OF TOWN
You can either follow the roads to Badtown and take down some more radio towers, or just warp there immediately. Up to you!
Head into the bar, win your poker game with suspicious ease, then follow the man in the white suit through town. This is one of the slowest following missions you'll probably ever play, even making the casual pedestrians from some of the earlier Assassin's Creed games look like Usain Bolt. The man will occasionally glance behind him, but if you stay crouched and far enough away from him, he shouldn't spot you even if you're in the open.
KICK THE HORNET'S NEST
A brief conversation with Willis will result in him handing you a flamethrower and asking you to torch some stuff. That…actually sounds like it might be fun. You don't technically have to bring the flamethrower - molotovs will do just as well - but it's a cool weapon, so do what you like.
The weed fields will burn with a little coaxing. You don't have to set the entire thing ablaze; flaming a small section of each field will cause the fire to spread throughout, and there are also fire-starting barrels near many of the fields.
Legalize this!
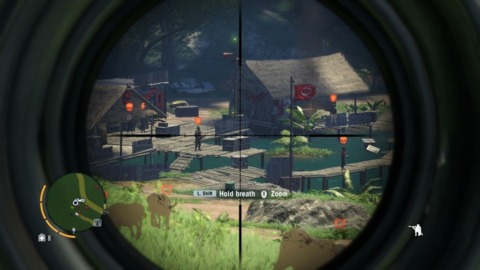
The last leg of the mission, when you assault the fishing village, is likely to be the most difficult, as you're tasked with killing far more enemies than you've encountered thus far. Stock up on explosives in the huts and sheds leading up to the village, and scout it from afar with your camera if you can. You'll come across what is most likely your first heavy enemy here; these guys can take a lot of damage to most regions of their bodies, and wield light machine guns or other deadly weapons. Try to get a headshot if you can, as it's worth 200 XP!
When you've cleared the path to the boat, run to the dock, switch any of your weapons for the RPG there, and take out the ship before it gets too far off the coast to complete the mission.
A MAN NAMED HOYT
Head northwest of the delightfully named Camp Murder, or northeast of the more generic AM 12. If you haven't taken over either of these strongholds, you may wish to do so before attempting this mission, just to put yourself in an easy-to-revive-and-reload position. You'll also want to enter this mission with as much ammo, grenades, and health packs as you can carry. It might be a good idea to purchase some armor from a weapons vendor as well, if you have the scratch for it. You should have at least three weapon slots available to you at this point; try to bring along an assault rifle, a sniper rifle, and an SMG/shotgun for close-range work. You'll also probably want at least five medical syringes. If you have offensive syringes in your kit, use them all up, find some green plants, and make your medkits before proceeding.
You can shoot mines if you spot them, or simply chuck grenades at them from a distance to blow them up.
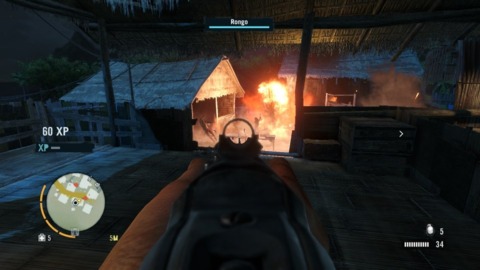
The reason why should be clear when you enter. The contact, Rongo, that you need to question, is being shot at and run through a minefield in a scene straight out of the last Rambo movie. He'll live for a few minutes, but you'll want to save him as quickly as you can. If you have a sniper rifle, use it to kill the two soldiers that are firing on him. If you don't, run forward with whatever the longest-range weapon you have is and use that to kill them. If you have no weapons, use a bandaid on yourself before you get murdered.
Crossing the rice paddies to Rongo is difficult because of all the mines, but you have all the time in the world, so move slowly and look at the ground at all times. There are plenty of mines between you and Rongo, but you'll be able to hear them as well as see them if you move slowly. The mines are small, round little potatoes in the fields, and they'll emit a clicking sound and turn red as you get nearer them. Again, move slowly, and you shouldn't have a problem detecting them and avoiding them. If you're really having troubles not dying here, chuck grenades into the paddies to destroy the mines before heading through, or simply shoot the mines that you can spot while you're out of detonation range.
When you release Rongo from his bindings, arguably the most difficult sequence of the game thus far will commence. He'll move across the rest of the paddie (which is thankfully mine-free), into a large group of enemies (which is unfortunately not gun-free). Use a rapid-fire weapon to take down any enemies which threaten you and Rongo, and be liberal with the grenades and molotovs while you move forward. Rongo should have plenty of health (at least on Survivor difficulty) to spare, but he won't survive too much gunfire, so mow down anyone you see.
This would be a great time to lay down mines or throw your remaining grenades.
Eventually Rongo will head towards a building and duck down, looking for records. You'll have to defend him for a minute or two while he does so. Most of the enemies in the area will appear on your minimap when they fire their weapons; use your assault rifle or grenades on them at medium range, and if they come up the stairs, switch to your SMG or shotgun. If you get down to two health bars or less, immediately heal yourself. Again, you hopefully entered this mission with maximum health vials, which at this point in the game should entail having at least seven syringes' worth of healing. If you use your grenades liberally, you should be able to survive the onslaught.
SAVING OLIVER
The initial phase of this quest will see you taking a car and making your way towards an overlook. Said overlook is protected by two soldiers, though, so ram one of them with your car, kill the other, and head towards your waypoint.
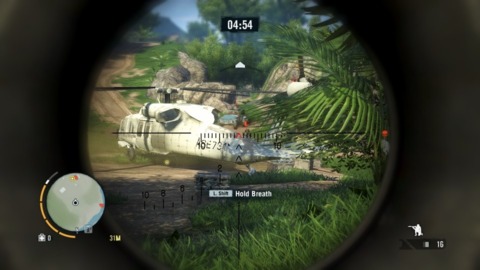
Oliver will be arriving shortly via a convoy, and the soldiers that guard him are going to try and load him onto a helicopter which will no doubt take him away to a special life where he'll play football and snowboard and drink tequila sunrises for the rest of his existance. It's your job to make sure that doesn't happen, by killing all of the nice people that are escorting him.
You'll flip from camera to sniper rifle just before Oliver is thrown on the helicopter. You don't get to pick your weapon here, and for some reason, the rifle you get is only half-loaded, so immediately reload it before you fire. That'll net you ten total shots before you have to reload.
You won't be able to get any immediate two-for-one shots via the explosive barrels here, so try to take a potshot either at the soldier immediately closest to Oliver, or at one in the group near the cars. Ideally, you'll want them to start firing at you instead of Oliver, because Oliver's fairly fragile, and he will die if he takes too many bullets, but it can be tough to make them aware of your exact location.
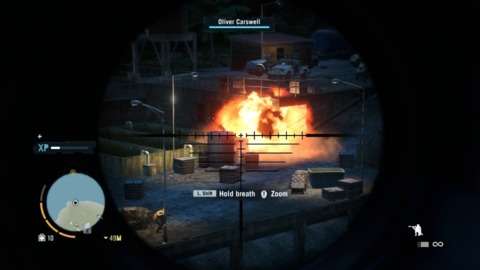
Again, the explosives here will be a big help to you.
When the shooting starts, start picking off the remaining soldiers in the initial group of five. Oliver will run down the ramp to the water side of the docks, where he'll be relatively covered from gunfire, except from the direction of the ramp, so keep an eye out for soldiers that are firing on him from the right side of your screen! If a soldier takes cover near a red barrel, shoot it to get an easy kill.
The first five guards will go down in short order, causing another group of three or four to spawn. Two of them will exit via the doorway on the lower side of the docks, but the one you want to worry about will spawn up the ramp to the right, near where the helicopter was. He'll have a good angle to fire on Oliver, so kill him first! Reload after he's dead, if need be, then finish off the rest of the gang.
The task gets easier from here, as Oliver will stick near the water and the soldiers will largely spawn from the building on the upper level, which means he'll have good cover from their gunfire. You'll also be more likely to start having the soldiers actually firing at you instead of Oliver at this point. They're too far away to connect with many of their shots, so this is a good thing, and will increase Oliver's survivability considerably. You may want to consider zooming out on your scope here, if you can still manage to make your shots, as it'll give you a much wider view of the docks, which will be handy since the enemies will spread out a bit.
A few more jumps to the left and Oliver will make it to the boat. The last major obstacle will be an RPG-wielding enemy who'll hopefully take a shot at you instead of your friend; listen and look for the rocket, take him down, then jump into the water to meet up with Oliver. Be sure to heal yourself before you take the leap, just in case you land on rocks. It would be a shame to die now!
The boat ride here is an easier task than the sniper section, as your awareness indicators will give most of your enemy's positions away. Fire at them before they take down your boat, and kill the helicopter when it appears to escape. When you're done, talk with Oliver. It turns out that he's one of those dudes who keeps the sticker on their hat's brim. Kill him and dump the body overboard. Some things can't be excused
PIECE OF THE PAST
Buck offers to trade Keith back to you, but for a price: you have to track down and find the ceremonial knife that you saw in your previous vision and hand it over. Citra probably won't be pleased, but we'll burn that bridge when we come to it.
The boat that you need to hit, the Nostalgia, is well off the eastern coast of Rook, but there's a jetski docked at a small jetty nearby, to the westsouthwest of the ship, near the bridge in the coastal road. You may be able to stand on it when you get near the Nostalgia and use it as a sniping platform, but a bigger boat would be better for this task. Either way, you'll have to kill a lot of soldiers on the ship to get inside. If you want to try a sneak attack, the ladder on the ship nearest the shore is your best bet for getting up top undetected, but there are so many soldiers that you'll probably have to engage in a firefight no matter how stealthy you are. There's a heavy on board, near the bow of the ship, so kill off as many of the soldiers from long range as you can before carefully moving forward and entering the ship.
Now's the time to start getting some takedowns. Immediately move forward and kill the soldier in front of you, then sneak forward until you overhear a couple more guards talking. Tag them by aiming a weapon at them, if you can, then wait for the patrolling guard to turn and walk away from the corridor you're in. Sneak up, take him down, then do the same for the guard that's looting the body. Disable the alarm on the wall before proceding. The next room will have two more easy takedowns in it, but the one after that will have three standing guards. Go hot here and take everyone out.
There's one more guard in front of the laptop that you need to hack, and it's a heavy. Luckily for you, he'll not think the gunfire in the room behind him is any big deal, and will be standing facing away from you when you open the door. You can't take him down (yet), so send a shotgun round into the back of the head, then hack the laptop. Hmm…mysterious ritual knife…ancient compass…sinking ship that you have to escape from…we're in an Uncharted game all of a sudden!
Escaping from the ship will be easy if you have either of the swimming skills, so you may want to invest in them now if you have unallocated skill points. If not, go slow, follow the waypoints, use the oxygen tanks when you spot one, and you'll do fine. It is rather dark in the ship, so you may want to turn up the game's brightness if you're having a hard time seeing.
When you do get out of the ship, you'll have a brief talk with Buck, which is followed by him asking you to go south for…another brief talk with Buck. Why not just combine these little talks? It is a mystery.
DOWN IN THE DOCKS
Before you begin, note that the Endorphin Boost syringe that you just unlocked is a crazy-good healing tool. It'll not only grant you a full heal, but it'll also give you four extra health slots. These health slots don't regenerate, but they also don't have any time limit to them. Now would be a good time to go hunting for some blue and green plants and make a bunch of them.
You can't assign the Endorphin Boost to be used when you hit the Heal button, but you can (at least on the PC) reassign the Q button to simply point to "Use Craft Item A," so that hitting Q will use an Endorphin Boost instead of a Medical Syringe. Worth considering since the Endorphin Boost effectively renders the Medical syringe obsolete. You can always just hit the Endorphin Boost shortcut when you get wounded, of course, but retraining yourself to do so after ten hours of hitting the Medical button when you get wounded can be tough. If you want to use up all of your syringes to replace them with Endorphin Boosts, throw a molotov on some grass and tap away at your heal key while you burn. The only drawback to all this is that you won't be able to see how many EB's you have on your UI, but it's a small price to pay for such an effective drug.
Meet up with Buck, who wants you to spelunk into a Japanese sub shelter to find the knife. There aren't any enemies in the first section, but there are snakes, so listen for hissing and shoot before you're bitten.
A great place to get a railing kill if you haven't yet.
When you reach the actual sub shelter itself, you'll note that Vass has somehow managed to sneak his own men into the base without being spotted by either yourself or Buck. Swim to your left through the broken submarine, and you'll come up behind a soldier crouched by the ledge here. If you haven't managed to get a Death From Below takedown yet, this is a perfect opportunity to do so, assuming you've unlocked that skill. Clear out the rest of the room and the next one to reveal an explosive-laced door. Blow it and move on.
You'll shortly be asked to drop into some water, but be warned: there's a crocodile underneath the surface. It's tough to spot, but if you move your cursor around a bit, it'll turn red when you're aiming at him, so take him out before diving in. The next room will feature an ornate door leading to the Chinese ruins, so head on through. (There's also a pool of water that leads to a blue leaf, should you need one.) You'll soon come across a well-lit walkway leading to a temple, but guess what? The path will fall out from under you as you leap across it, sending you into the drink below.
Move forward to find two doors to your left and right. Head through the right door first, shoot out the rotten logs, then repeat the process through the left door to raise the water level to a height that's sufficient for you to scale the wall here. That'll lead you to another piece of the compass, and the exit from the facility.
THE MOTHERLODE
Head to Buck's quest marker and follow the path next to him to enter a mine that theoretically holds another piece of the mysterious compass. There'll be less exploring and more killing inside the mine than there was in the submarine harbor, so come equipped. You'll want to bring a sniper rifle of some sort if you don't normally carry one.
Many of the early enemies can be dispatched with takedowns, but don't hesitate to get loud if you need to. There are plenty of opportunities to bank grenades off the mine walls to get some cheap multi-kills, as well. You'll eventually run into a larger, open area that's overwatched by snipers. They'll spot you quickly, even if you're crouching, but hey: that's why you brought that sniper rifle, right? You can push the minecarts forward here to get closer to the snipers, but that'll expose you to flanking fire from the enemies across the gap. Better to just snipe everyone from long range. There's a heavy in the area, so be ready with grenades.
The next room features a number of rotten wood posts affixed to the ceiling; you can shoot these to cause rocks to tumble down on the heads of any nearby enemies. Or you can shoot them in the head. That works too.
When you reach the supposed dead end, activate the floor mechanism to unlock the passage heading further into the mines. (The doors that open up above you lead to some loot chests, but nothing of interest beyond that.) You'll eventually come to the third piece of the compass, after which you can simply follow the yellow objective markers to make your escape. The game will helpfully remind you which button lets you sprint, in case you've been casually strolling through your 10 hours of gameplay time thus far.
LIN KONG I PRESUME
Dive into the pit here, being sure to find an overhang that'll actually let you hit the water and not crack your legs into a million pieces as you fall. The entrance to the tomb is found up the cliff face nearby; you can also nab a relic in the cave just beyond the door if you poke your head inside. Before you head in, be aware that a sniper rifle will be pretty handy here.
Man, Vass's men sure do have a knack for getting themselves into impregnable areas despite not having the key! There are plenty of enemies to kill here, including a heavy in the second chamber. Plop some C4 into his path and detonate it as he walks over it for an easy kill.
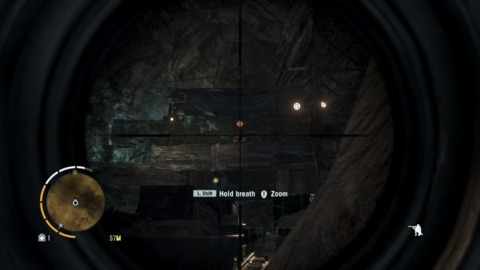
You might be able to get a few sniper shots through the slats here if you're lucky.
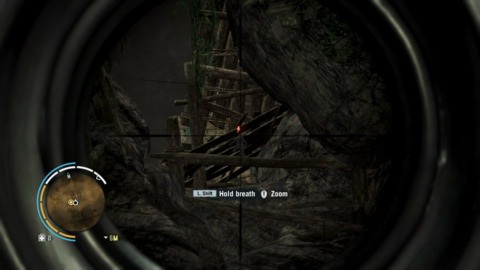
You'll come to a zipline shortly, but be warned that there's eight or nine soldiers down at the end of it; be sure to nab the body armor in the room near the zipline's beginning to make things a bit easier on yourself. It is possible, but fairly difficult, to get some sniper kills on the enemies below by zooming in from below the zipwire and seeing if you can tag anyone. The wood obscures most of your foes, but if you fire a round or two to alert them, they may vary their routes enough to expose a head or an arm and let you take two or three of them out before zipping down.
When you do zip down, quickly kill anyone near where you land and start following the gunshots back to their source below. You may get some molotovs thrown your way, so be mobile, and return the favor by chucking grenades or cocktails down below. Clear everyone out, then resume ziplining down. From here, it's mostly a clear shot to the next locked door; you'll have to cross some boiling acid and deal with a few enemies along the way, but it's all in a day's work for you.
After reaching the door, head through and drop down to the path that leads you through the boiling water there. Keep in mind that the water will hurt you, surprisingly rapidly, so sprint through it to reach Lin Kong's tomb. When you nab the knife, be ready to run, and crawl, to escape before you get burned alive.
UNHAPPY REUNION
Ah, Buck, curse your sudden but inevitable betrayal! This mission is short, but it'll see you finally freeing poor Keith and ending your Buck problem. Enjoy!
THIS KNIFE'S FOR YOU/AMBUSH
It's almost time to head off to the southern island, but Citra still has some tasks she needs you to perform, such as freeing a group of her warriors that have been taken by Vaas' men. Head to the meetup point, and bring some body armor. If you have an LMG that you like (or if you've unlocked the signature weapon called The Ripper), it'd be handy to bring it along, as well.

Get in the truck and don't stop for anything!
When you nab the C4, plant it on the explosives truck, then head up to the water tower. You'll be given a sniper rifle here, but we found a scoped LMG to be much more effective at taking down the enemies. If you stay standing up, the enemy awareness indicators will let you know the general direction where the enemy soldiers are located, and will also inform you of more humvees that come up the road. If you're quick with your LMG, you can often unleash enough bullets on these humvees to kill all their occupants before they manage to disembark.
When the APC takes off, quickly slide down the ladder, head towards the highlighted cargo truck, and give chase. The APC has only gone a couple hundred meters into the forest, so follow it, avoid roadblocks and other soldiers, then kill the soldiers near where it's parked to unload its occupants. These soldiers are armored, and are much tougher than normal opponents, but will also give you double the XP.
WARRIOR RESCUE SERVICE
Ruh-oh; Vass is getting mad now! That doesn't seem to make him any better at tying knots, though. Escape from your watery grave and head out into the sunlight to find a pair of soldiers. You'll need to kill them to nab their weapons here. There are three of them in your immediate vicinity, and they'll all handily be facing away from the cave from which you emerge. Creep up on each of them, take them down, and reload whatever weapons you find, if possible. If they do become aware of your presence, you may trip a five-minute countdown before the prisoners you're after are going to be escorted away via helicopter, so…avoid that.
After killing the last of the three sentries, follow the path that branches off to the right to find a vantage point. Use your camera to scope out the nearby base, making note of the two snipers, who will be able to spot you from a long way away. The closest sniper, near the road that leads into the base, will walk a short patrol path on his rooftop, so you can wait for him to turn his back, quickly slide down the rocks below you, then cross the road to get up next to his building. If you can manage to do a ledge takedown on him, he'll drop a sniper rifle and an SMG, which should complete your weapons loadout. There's an ammo dump on one side of the building, underneath where he was standing, which should top off most of your ammunition.
Be mindful of the heavy guarding the helicopter.
Now would be a good time to go loud and start killing everyone, using your sniper rifle to engage them from long range. It's a semi-automatic, so you can fire as rapidly as you like, but you'll have to reload often, and the guards with body armor will take more than one body shot to go down. Regardless, kill everyone, then move closer to the chopper. At some point around this time you'll trip that five-minute alarm, but that'll be a few minutes more than you need to clear the place out (watching out for more snipers near the chopper). The heavy here will be the toughest opponent, obviously; if you've looted any grenades, now would be a good time to put them down. Otherwise you can skirt him around the helicopter or try to shoot his legs from the other side of it if you can get an angle.
After yet another run-in with Vass (how many times can you escape death in one day?), dig yourself out of your little hole to find Dennis looking over you. Kindly Dennis will run away and leave you to fend for yourself without any weapons at all. You don't even have your camera! All of your gear has been stolen by nearby pirates, so you'll have to retrieve it before you can hope to survive on the island. Just surviving this little encounter will be tough enough, though. Start by crouching and making your way towards the pirate camp. There's a shack a bit outside of the objective zone that'll hold a mine and some body armor. Grab that, then return to the nearby road to the west (on the left side of the camp). Creep along the trees and rocks here until you spot a guard sitting in a chair. If you can keep an eye on the other maniacs nearby, you can sneak up and take him down before continuing along, still sticking by the road.
Sneak up on this guy for a quick takedown while his buddies aren't looking.
There's a larger building beyond the central camp, but it's guarded by a heavy and two dogs, so you'll want to save it for last. Stay on the other side of the road (closer to the camp), and circle around to its northern side, keeping the corrugated metal wall in between you and the berserkers. When you spot a chance to slip inside, do so, then poke around for more goodies inside the shacks, as well as opportunities to take down the remaining berserkers. You should find another mine, some C4, and a flare gun in the huts. You're not exactly Arnold at the end of Commando, but it'll do.
The last challenge is to take down that heavy. He's directly inside the door of the last house here, so get him in your sites and either hit him with your C4, or just nail him with a flare. That'll set him alight and kill him shortly thereafter. If the dogs get your scent, melee them quickly before they kill you, then head into the building to nab your gear.
NEW RITE OF PASSAGE
On this crazy, mixed-up island, could a rite of passage have to do with anything other than a boatload of hallucinogenic drugs? Of course not. Your fight against the Ink Monster is succinctly summed up with one command: shoot the mask. You have infinite explosive arrows here, but the monster will fight back with breath and balls of dark fire. If you have trouble here, abandon the mission, make as many endorphin boosts as you can, and come back to it. You may not be able to use your guns here, but you can at least use your medicine.
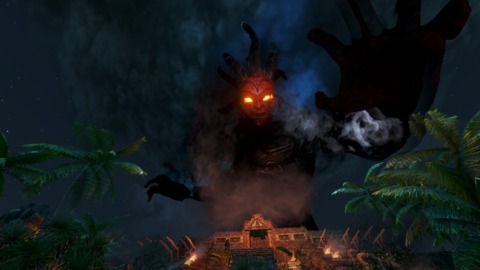
Can't say we expected this to happen.
The first phase is simple, since the monster moves slowly and it's not difficult to hit his head. In the second phase, warriors will charge at you from the darkness behind you. They're easily killed, but detonating an explosive arrow at close range will significantly hurt you, as well, so be careful and switch to normal arrows if need be. It's easiest to just monitor their awareness meters to get an idea of where they're coming from, then fire your arrows into the darkness where you expect them to be. The explosions have a wide enough radius that you should be able to take plenty of them down this way.
The last phase will see you attacking the monster's mask again, but it'll be more difficult this time due to the speed with which it moves its head. You'll have an easy shot in between volleys of hellfire, so wait for those moments, get close, and put your damage in.
PAYBACK
Time to pay Vaas a little visit. As with all dystopian megalomaniacal leaders, he has an extensive walled compound; it's in the union contract. Have we discovered why he has an army of hundreds at his beck and call? Why he's on this island? Does ransoming skydivers really make for steady paychecks? Keep in mind that you've unlocked all remaining skills at this point, so invest any of your saved points wisely.
Anyway, swim across to his island and do a ledge takedown on the enemy on the docks. From here, you can move forward through the little canyon, or you can skirt to your left along the beach. There's a small section of hill that you can climb up, near where the road sections between to be displayed on your map, that'll lead you into the hills overlooking the compound. It doesn't provide you any real access, but it will give you some vantage points of the compound's guards, including a sniper in a tower overlooking the path leading into it. Take them out, then drop down to head on inside after you find the spot that allows you to climb the wall.
Open the animal cages to cause a bit of confusion amongst your foes.
Upon reaching the interior…surprise! It's a trap. Quickly escape from the burning building via the roof, which will lead to one of the biggest firefights of the game thus far. You're going to be up against a dozen or so soldiers, and will quickly die if you stay exposed. Head to your left and leap off of the building onto the walkway near the second building below you. Head inside and catch your bearings for a moment.
As with any large group of foes, you'll go far by chucking grenades at them, or throwing C4 and detonating it in their midst. There are also animal cages that you can shoot here to cause extra chaos. Keep killin', and eventually a heavy will come out to let you know that the final wave is approaching. Kill them all, then loot the bodies if necessary. There are a few medkits and some body armor here for you to loot if you poke around a bit.
Not that it really matters, as Vaas will - of course! - perform a surprise attack on you as you enter his little warehouse, causing you to enter yet another little psychedelic wonderland. Nothing too complicated here: move forward, and shoot the Vaas shadows as they rush you. They'll spawn two at a time, so let them get close, spray them with your SMG, then reload and repeat as you move forward.
FLY SOUTH
After an interlude with your friends, you'll have three minutes to get to Willis before his plane leaves. (You may want to bring along an LMG if you have one unlocked, especially the Ripper if you've managed to buy it; don't worry about buying ammo.) As with many of the timed missions in this game, you should be able to do it in half that if you're willing to cut off road a bit.
Keep an eye on awareness indicators to know where your enemies are.
When you arrive, clear out the pirates with your LMG and reload. There's a free ammo dump here, so you can top off your supply of expensive LMG ammo on the house. The first wave of reinforcements will come from the direction in which Willis' mounted MG is facing, so fire it in short bursts to take them out. The next will come from the right side of the plane. Eventually some cars will approach, so liberally sprinkle them with grenades. The mayhem will end with a few heavies sneaking up on the plane, but at least two will be within view of the MG, so go crazy.
After diving out of the plane, open your wingsuit immediately and start coasting towards your landing zone. The wingsuit's a bit unwieldy, but if you can get yourself anywhere near the landing zone, you'll find that the parachute will allow you to be much more precise in your movements.
THREE BLIND MICE
Kill the pirates by sniping a couple of them (one of the pirates with a sniper icon is actually wielding an RPG, so he's a good choice), then letting the tiger nearby free from its cage and taking advantage of the ensuing chaos.
When you get to Thurston Town, find the bartender, play a hand of poker, and meet Sam in the alleyway to finish the mission. You'll unlock a bunch of new maps and weapons in the shop as a reward for reaching the south island here. You probably already have a number of the signature weapon variants of the guns you just unlocked, but you'll find some intriguing new assault rifles here. You should be able to find some of the lower-powered of the new weapons on any privateers that you encounter in the jungle, should you not want to buy them.
It's difficult, but not impossible, to fly a hang glider directly into a radio tower.
You can also, of course, travel around the island and release some radio towers if you want to save yourself a few thousand bucks on weapon purchases; you'll earn all of the remaining weapons after you take down four or five towers. There's a lot of high mountains on this island, so take advantage of your new wingsuit or hang gliders to get around if you can. If you're lucky (or really good), you can even try to jump off a glider directly on the top level of a radio tower and bypass all the climbing entirely.
DOPPELGANGER
Ooo, a doppelganger! Just be sure to pronounce it as a German like Sam would: dahp - pull - gaaang - er. Or at least that's how we assume Germans pronounce it. We've never talked to a German person about this.
Your goal, at any rate, is to find a privateer uniform and put it on, so as to infiltrate Hoyt's band of thugs while also preventing them from detecting your tattoos. This will be complicated, as his gang is located at the bottom of a cenote, and you won't be able to kill any of them until you reach the raw recruit you'll want to steal a uniform from. Unfortunately he's at the very bottom of a pit full of bad guys. You guessed it: stealth mission! This mission's going to be somewhat easier if you have the skill that lets you move more quickly while crouching, but we're guessing you picked that one up long ago.
Head to the cenote and scope it out. There's only one dude watching the entrance (brilliant!), so hide behind the nearby stones, throw a rock to make him move backwards, then creep by and start moving down the scaffolding. The next soldier in front of you will be taking a whiz, so wait for him to start moving and follow him. While you're waiting, you might want to take your camera out and tag some of the enemies below you in the cenote; this will come in handy later on.
The peeing man will eventually sit down in a chair, causing another soldier to start moving away. Stick to your right here and hug the cave wall behind the sitting guard, then drop down and wait for the other soldier to stand and peer out into the cenote. Another stone thrown behind his head will move him and let you pass.
The next chamber should be largely empty, so move through it and tag the two soldiers you can see past the next set of flourescent lighting. You can hide in the underbrush near the lights and throw a rock into the room to distract the first guard, then move on past another sitting guard by sticking behind the waterfall behind him. He will sometimes be standing and looking your way, though, so you may have to adapt and throw a rock behind him to get into the waterfall, then repeat the trick so that he's looking away from you to move on.
The last room here is going to be the most difficult, with five or six soldiers inside, including a heavy. Photograph the two near the entrance to get them tagged, then head to your right towards the underbrush so that you can tag the rest of the soldiers in the lower part of the room. Giving you an exact path through the room is difficult since the soldiers move, but in general, you'll want to sneak backwards behind the first two soldiers to find a path on the left side of the room, make sure those soldiers aren't looking at the lower part of the room, then creep along through the middle of the area, underneath the walkway, and into the cenote's main chamber, using rocks as necessary to distract guards.
When you reach the cenote, move to the lowest level of the docks and gently fall into the water. From there, you can creep up to the nearby ship, takedown a soldier to steal his uniform, and finish the mission after meeting Hoyt.
Your uniform will prevent patrolling privateers from attacking you, but you'll still be shot if you head into a stronghold. You can kill as many roaming privateers as you like without compromising your cover, though, so now might be a good time to have some fun by destroying cars and anyone on patrol. Up to you!
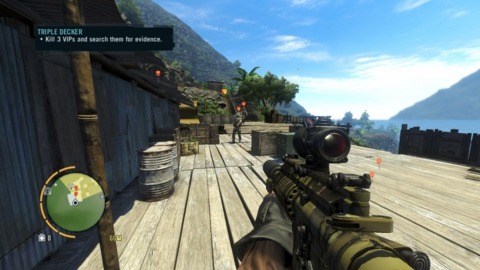
TRIPLE DECKER
This is a fun one. Your task is to kill three VIPs at a mining site, preferably without having their guards riddle you with holes. Your uniform will allow you to roam the site as you please, but if you're spotted killing anyone, you'll start a firefight. That doesn't seem to end the mission, necessarily, but it's best to avoid this eventuality and get as many takedowns as possible, if only because you get so much more XP from them than normal kills.
Start with the heavies for a big XP boost from their takedowns.
Head to the dig site, then start tagging enemies with your camera. If anyone finds it curious that one of their fellow soldiers is using an SLR to note their weaponry from a few feet away, they're polite enough not to mention it. Try to get as many soldiers tagged as you can before you start the killing.
You'll likely want to begin with the heavies up near the top of the area, just because they give boatloads of XP for takedowns. From there, clear out the rest of the upper area, starting with the mines. Don't forget to drag bodies around corners to where enemies can't see them. If a soldier spots a body, they won't go hostile to you, but they will vary their patrols a bit. This can sometimes work in your favor by splitting up enemy groups or setting them up for chained takedowns, though.
Anyway, if you move from the top of the area to the bottom, and throw stones to lure individual enemies out of sight of their friends, you should be able to take down almost everyone in the area without too many problems.
DEFUSING THE SITUATION This one's relatively simple compared to the last two missions you've gone on. Sam is trying to ingragiate you with Hoyt by helping his master defend some drug fields from raiding pirates. Apparently not only the natives are restless: Vass' men have turned on their benefactors in the absence of a strong leader.
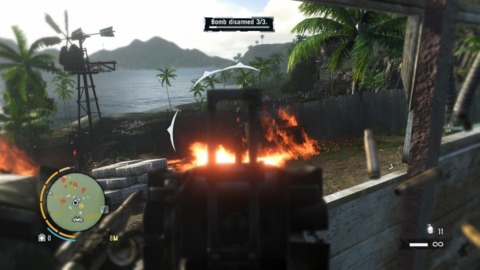
It can be tough seeing enemies through the fire here, so watch for their awareness indicators.
Again, this is relatively uncomplicated. Sam has to defuse three bombs, and asks that you defend him as he does so. Bring along an LMG for crowd control, as well as whatever other weapons you choose. This is a fairly traditional point-defense mission, with Sam bending over his bomb and asking you to watch his rear while he defuses it. You'll be indoors in each instance (you can ignore Sam's advice to get on the roof at the second bomb). Only the third bomb should be difficult, as the pirates swarm to overwhelm you. Use the mounted machinegun to clear out the bulk of the crowd, and don't hesitate to pop up with the RPG on the table nearby to finish the job if necessary.
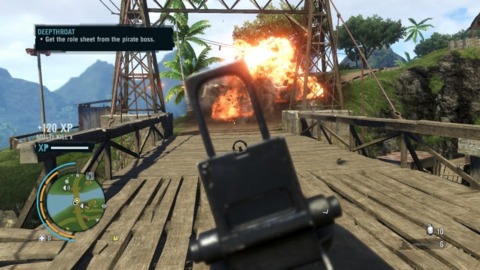
DEEPTHROAT
Reach the camp and take the first two ziplines without killing anyone; doing so will trip an alarm and end your mission right quick. At the top of the sniper tower after the second zipline, pause for a second and look at the bridge off in the distance. You'll see two trucks pulling up next to each other. Snap a picture (press the fire button with your camera pulled out) to…do something. I guess you'll just take a pretty picture. It's not like you're going to make any faces out at this distance.
Regardless, with the conspirators now emblazoned onto an SD card, it's time to retrieve the "role sheet" from the bad guy on the bridge. Quickly slide down the zipwire nearest you, make a break for the RPG on the walkway nearby, and fire at the marked truck on the bridge. That'll destroy it, and eliminate the timer that you've been fighting against. You now have as much time as you need to reach the bridge.
Doing so is a bit like climbing a radio tower, only with more ziplines. You'll have to move back and forth across each side of the canyon here, following whatever path is available to you. There are a lot of mine entrances along your route, so duck into each of them in search of ammo and other goodies.
Blow up this jeep before you loot the body, just to make things easier for yourself.
When you reach the last zipwire, be ready for a tougher fight, as there'll be four soldiers at the top of the hill. More will appear when you reach the captain's body, so save an RPG round to destroy their car before looting him. With that done, jump off the small ramp on the bridge into the water below. DON'T use your wingsuit here, as you'll likely be shot down, which will quickly end your mission. Once you land in the water, swim forward a bit, get to the cliffside, and THEN wingsuit down to your escape mobile. By this point, you'll be well beyond the range of your foes and can end the mission safely.
ALL IN
Boy, Dennis has gotten a bit creepy since you left the main island. He was awfully obsessed with Citra. Will there be another sudden but inevitable betrayal in the future? Only time will tell.
Make your way to the northern gate of Hoyt's compound and head inside to speak to the man himself. Hoyt seems crazy, if not in the exceedingly charismatic style of Vaas. There isn't a whole lot of action in this mission, so follow the instructions given to you and move on.
PAINT IT BLACK
Sam wants you to disable Hoyt's communications before the pair of you can deliver the killing blow. The entire communications area is restricted, but you'll still be able to get up close to the line and tag most of the enemies there before beginning your assault. There's no particular reason to stay stealthy here (unless you want to), so have some fun. We found it amusing to lure the faster soldiers into the field to the south of the base and set the whole place on fire with a flare gun, but your mileage may vary. The two heavies will hang back and guard the door, so if you're having trouble with them, lure them away with gunfire and set a mine or C4 in their path as they follow you.
You'll be trapped inside the bunker after you enter it, and there are dozens of enemies inside, including a number of flamethrower-wielding heavies. In close quarters like these, you can use their lack of speed to your advantage by, again, throwing C4 at them and detonating it, or by laying down mines in their path and hanging back to wait for the explosion. You can pick up a flamethrower for your own use here, but the heavies themselves are immune to its effects.
Claw your way to the ladder leading to the satellite dish, kill everyone (being mindful of the sniper behind you and the attack dog in the area), then head to the dish. After planting the explosives, you'll have to defend this area for a bit from a few waves of enemies, so do yourself a favor beforehand and plant a bunch of mines all over the place. When the enemies do come, hunker down behind a sandbag. You can pick them off as they approach your position, or just sit down and let them come to you, but be aware that there will be one or two MG-wielding heavies here, and they're…unpleasant to deal with at close range.
BLACK GOLD
Another fun one, as you and Sam continue your mission to cause Hoyt as many problems as possible. Here, your task is to take out Hoyt's fuel depot, which, in turn, is going to cause some fun explosions.
Sam will man the machinegun in your truck, allowing you to get to the four targets on your map and set some explosives. Before heading in, though, be sure that you have a full load of ammo, grenades, medkits, and body armor. You're gonna get shot at here, rather a lot.
The four strongpoints are situated such that you'll have to enter a building or enclosed space to reach them. Sam never leaves the turret here, but that's fine; he'll fire away at anyone who comes near you, which allows you to move into buildings, spawn its defenders, then retreat back to the car where Sam can help you bring them down. Sam does have a health bar, but you shouldn't need to worry much about keeping him alive, as he regenerates health pretty quickly. He certainly can die, but it's tough to make that happen. (We had an enemy truck run into our own and then explode, which did the trick, but that's a rare occurrence.) Make sure you park him far enough away so that he's not caught in the explosion that you set off.
So, the basic theme is to drive near a waypoint, get out of the car, kill anyone you see, then make your way to the pipe and destroy it before moving on. You'll usually have to deal with a half-dozen soldiers that appear when you first arrive, as well as a few more that'll come after you when the C4 is planted. Many of the waypoints will have heavies guarding them, to boot. You'll want to spawn these, retreat back to where Sam is located, and let him and the heavy duke it out, allowing you to get in position behind them that'll let you perform a takedown for extra XP. You get no experience at all if Sam performs a kill, mind you.
You're not on a time limit here, so move slowly and kill anyone that pops up. You might want to take a drive around the area once just to spawn in as many enemies as you can before mowing them down from a distance with your LMG or assault rifle, then closing in on the waypoints to clear them out.
When all of the pipes are burst, drive Sam up to the rear of the facility and get out and into the MG. This is probably going to be as close as you've come to dying in a while, since you're going to be mobbed by enemies, and it'll be tough to spot them with all the smoke that'll rise when the explosions start going off. Remember that you can use medicine while on a gun, so pop off an Endorphin Boost when needed to stay alive. Sam will only be inside for 30 seconds or so, at which point he'll drive you out of the facility.
ACED IN THE HOLE
You didn't think that walking into Hoyt's compound to play a poker game would really be that good of an idea, did you? This is a mission that largely plays on rails, ending with an extended QTE session with Hoyt. Enjoy yourself.
BETTING AGAINST THE HOUSE
Crouch down the stairs, and you might be able to sneak up behind the heavy approaching you and get a takedown. You can shoot your way out of the area if you like, or you can try to sneak all the way to the gates. If you want to do so, simply stay crouched, leave through the front door of the building you start in, and immediately turn left rather than going down the stairs. If you can avoid being spotted by the gentlemen at the bottom of the steps here, you should be able to avoid any other prying eyes by hugging the wall and making your way to the gate nearby. There are a couple of cars guarding it, as well as a heavy, so try to chuck some C4 their way and blow everyone up at once.
There'll be a car or two just outside the gates, so hop into one and make your way to the airport nearby. Although your timer started at 12 minutes, that's almost absurdly generous for the distance you have to travel. There are, however, many soldiers in your way, so blast past them as quickly as you can and pop a heal whenever needed.
Shoot everything that moves!
When you do reach the airfield, the timer will stop, giving you as much time as you need to kill everyone nearby and find Riley. The game is scripted with the expectation that you'll run down the middle of the airstrip, but you have some degree of freedom here, so if you simply wish to move outside the airfield's walls and move relatively unmolested, feel free to do so.
Riley's in one of the buildings on the left side of the airstrip, but he's guarded by a heavy. Kill him, find Riley, and bring him out to the helicopter outside. A short gun-on-rails section of the mission will ensue, so keep firing that gun of yours! There are going to be plenty of RPG-wielding enemies here, and they won't always pop up on your awareness HUD thing, so you'll need to be quick on the trigger to take them down after they fire at you. The game will cheat a bit and occasionally put these guys outside of your field of fire, which isn't nice, but if you're liberal with the bullets, you should survive intact.
And, in point of fact, that's all you need to do! The next two missions end the game, but there's little for us to tell you about them that wouldn't involve spoilers. Play them, make your choices, and return to the empty island to run around and…not do much of anything, probably, if you've cleared out the strongholds. Have fun with that.
Got a news tip or want to contact us directly? Email news@gamespot.com
Join the conversation