Far Cry 2 Walkthrough
Check out our Far Cry 2 walkthrough for the skinny on how to complete every mission and where to find those pesky Jackal Tapes and Golden AKs.
We’ve got everything you need to conquer Far Cry 2’s expansive game world. You’ll find general strategies for combat, weapons, and stealth tips, a complete walk-through of the story missions (including alternate objectives), a rundown of the optional arms dealer and assassination missions, locations of Jackal Tapes and Golden AK-47s, and XBox 360 Achievements and PlayStation 3 Trophies.
This GameSpot Far Cry 2 game guide includes:
- General Strategies: Check here for some vital strategies before exploring the Far Cry 2 world. We’ve included combat and weapon tips, stealth strategies, and how to improve your weapons and vehicles.
- Story Walk-through: We’ve compiled a complete walk-through of the Far Cry 2 story mode. You’ll find tips on how to approach and assault certain mission encounters.
- Underground Missions:As your malaria sickness grows, complete the underground missions to get medicine.
- Arms Dealer Missions: Complete the optional arms dealer missions to unlock more powerful weapons.
- Assassination Missions: This section provides tips on completing all of the optional assassination missions.
- Jackal Tapes and Golden AK-47s: Get locations for Jackal Tapes and Golden AK-47s located in both the northern and southern districts.
- Multiplayer Tips: Look here for tips on each multiplayer class and tips for effective combat, team organization, and offensive and defensive strategy.
- XBox 360 Achievements: Increase your gamer score by unlocking these XBox 360 achievements.
- PlayStation 3 Trophies: This table reveals the Far Cry 2 trophies on the PlayStation 3.
Chapter 1 - General Strategies
This section provides some general strategies for surviving Far Cry 2’s challenging single-player story mode. The world of Far Cry 2 is vast and there are dangers on nearly every road. Effective balance of weaponry, tactics, and driving ability can elevate mission success.
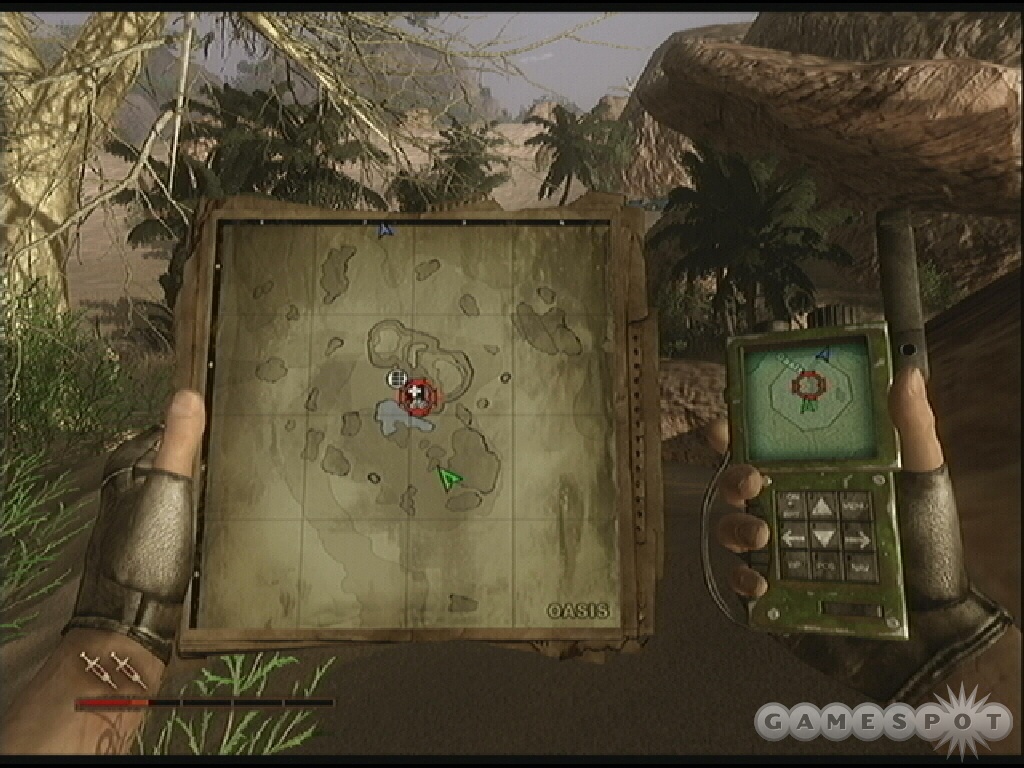
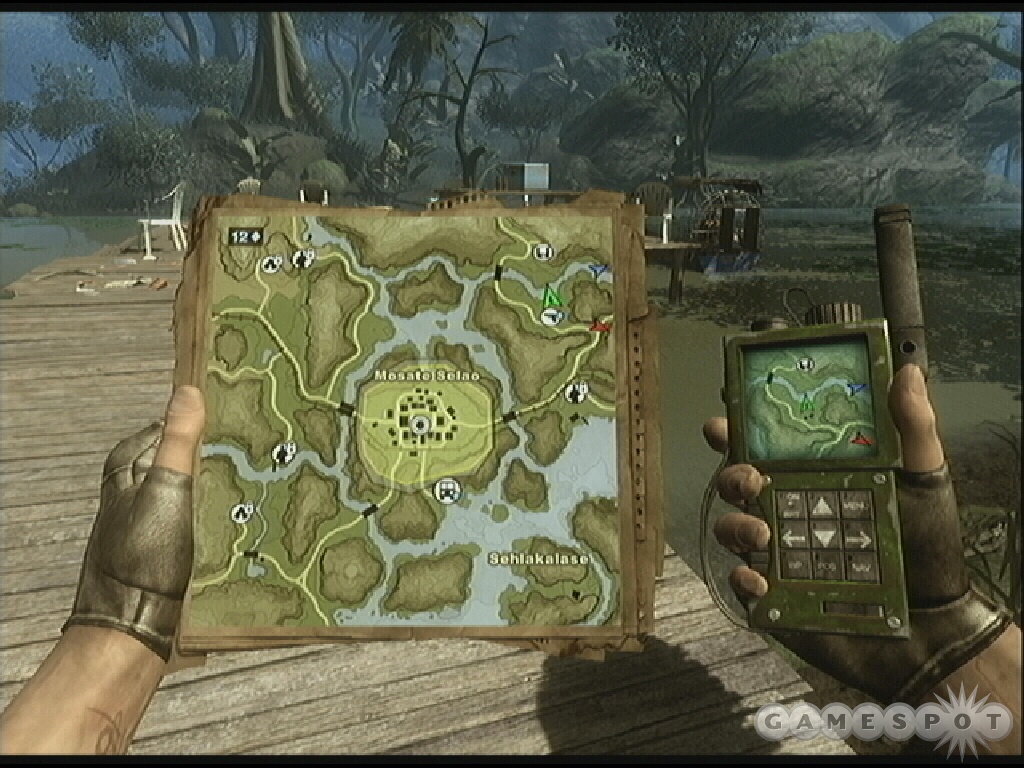
- As you learn during the tutorial mission, there are diamond briefcases spread all over the world. In fact, when you open up the map, the number of diamond briefcases on the current map section appears on the upper left corner of the screen. Follow our story walk-through and you’ll find a bunch of them. You’ll need to find a lot in order to recover enough diamonds to purchase all the weapons and their respective upgrades and manuals. Take the time to search for the briefcases, especially when you have the GPS open and the diamond locator is blinking-there’s one nearby!
- If you’re having trouble with combat then make life easier by unlocking more powerful weapons. You can do this by visiting the weapon shop whenever you do not have another mission active. When you do, you’ll find the arms dealer inside the shop. He can offer you a mission; complete it and you unlock a set of weapons for purchase. If you want to play Far Cry 2 using stealth tactics then completing the convoy missions is a must-a stealth player can’t leave home without the Silent MP5 or the dart rifle! Check the Arms Dealer Missions section of this guide for tips on completing each one as well as list of the weapons unlocked.
- When engaged in combat, there are a couple of first-person shooter staples to keep in mind (if you’re a veteran then these will sound familiar). First, aim for the head! Enemies go down much faster when they are shot in the head. Second, fire your assault rifles or sub machine guns in short, controlled bursts. Don’t simply let loose with wild ammunition spray. Aim for the head and fire in bursts for maximum accuracy. And finally one specifically to Far Cry 2: purchase the accuracy and reliability upgrades for your favorite weapons as soon as possible.
- The Far Cry 2 world is huge. Driving a vehicle from mission to mission can be exhausting not to mention dangerous-there are enemy patrols everywhere! Unless you are eager to wage war, take advantage of the bus system. Many of the mission objective locations (as well as side mission locations) are near the bus stations. When you do take the roads, look for opportunities to bypass guard stations so you avoid fights. If you do enjoy driving on the open road then take advantage of the vehicle repair upgrades in the weapon shop. Purchase the manuals for your favorite vehicles (the weapon mounted jeep is a good choice). It will improve the speed of vehicle repair and increased reliability.
- There are safe houses scattered all over the game world and you don’t need to capture them all but it’s certainly a wise idea to take control of the safe houses outside mission areas-if only to safe your game before you engage in a tough battle. There’s little more frustrating than getting rammed by an enemy jeep and instantly killed when you haven’t saved for a long time. Don’t let that happen to you! But that brings up another point: when you hear the roar of an enemy vehicle engine, get behind something. Like your own car or a rock-those enemy drivers go straight for you and it’s a one hit kill.
- One of the upgrades available on the weapons shop computer are the primary, secondary, and special weapon crates. Purchase these and you will be able to store one weapon of each type in its respective crate. You can grab a weapon from the armory and place it into a crate and then recover that weapon at a safe house. This allows you to return to a safe house instead of the armory to acquire a fresh weapon. You can mix up tactics from stealth-using a sniper or silenced weapon-to more power-using assault rifles or rocket launchers-by just returning to the safe house outside the mission zone to grab a new weapon. Note that the weapon’s condition when you place it in a crate will be the same as when you take it out of a crate.
- Speaking of weapon condition, it’s a real problem in Far Cry 2! As you use a weapon, it degrades. You can detect its deterioration by how the weapon looks-if it begins to rust, change color, or otherwise look dirty then it has started to degrade. Another surefire way to tell-the weapon starts to jam! Never a good thing in a frantic firefight! Return to safe houses and the armory often to replace your weapon with a fresh one so you avoid problems. If you keep using a flawed weapon, it eventually breaks apart.
- Most of the story missions assigned by factions have alternate objectives assigned by your buddy. If you complete these objectives, you can unlock upgrades for your safe house. These upgrades include the addition of small or large medical kits at the safe house, the addition of ammo, fuel, or explosive piles at the safe house, and the addition of a vehicle at the safe house. You can also receive upgrades to your vehicle’s mounted weapon that’s parked at the safe house.
- One of the upgrades available on the weapon shop computer increases the amount of ammo you can carry. Each type of weapon features a different ammo upgrade. For example, the "Assault Webbing" upgrade benefits the ammo quantity for weapons such as the AK-47, AR-16, FAL, and Silent MP-5. The "Light Assault" Webbing benefits the MAC-10 and Uzi. Several are fairly obvious: the shotguns, the pistols, and the racketeers. Sniper players should grab the "Marksman Bandolier" to upgrade the ammo quantity for the AS50, Dragunov SVD, MI903, and the Dart Rifle. Getting the Grenadier upgrade not only improves the capacity for the grenade launchers but also the number of grenades you can hold. Likewise, the Pyrotechnic Satchel improves the flamethrower and flare pistol but also the Molotov cocktails.
- Employing a stealth strategy for missions is certainly a viable tactic. Here are some basics. First, complete the convoy missions to unlock the silent weapons, the Silent MP-5 (primary weapon), the Silent Makarov 6P9 (secondary weapon) and the Dart Rifle (special weapon). Second, purchase the "camo" upgrade using the weapon shop computer. It makes you harder to detect. Third, conduct missions at night! Just sleep at a safe house and adjust your watch to wake up at night.
- A stealth player should also approach each mission area carefully. When you approach mission areas, don’t drive too close. The sound of the car could alert enemies. Take cover in high grass or behind rocks or trees and use the monocular to recon the area. Look for sniper towers and scan for the location of patrolling guards. Use the dart rifle to eliminate as many guards as possible. After a successful snipe, move positions. Continue to scope for guards. Exhaust your dart rifle ammo before moving toward the mission location. While inside the base, take cover behind objects and attempt to sneak up on guards so you can eliminate them with the machete. Otherwise go for head shots using the silent pistol or MP-5.
- For some reason there are a lot of explosive barrels scattered around the mission area-perhaps it’s fuel for enemy vehicles! Whatever it is in there, put those barrels to good use by shooting them from long-range. Take advantage of this if you’re a stealth player because the explosion causes fires and fire causes general chaos. Enemies will run for cover or, if you’re lucky, just get burned up in the process. Take out your sniper and look for enemies taking cover from the fires and eliminate them with headshots.
Chapter 2 - Story Walk-through
This section provides a complete walk-through for Far Cry 2’s story mode. Note that the mission structure in Far Cry 2 is unique in that you work for two different factions, the APR and UFLL, and how you complete their missions will affect future missions. You may be commissioned to perform a mission for the APR or the UFLL depending on your actions; although the objectives remain nearly the same, the names can change from those seen in this walk-through. We’ve mentioned these missions when applicable.
Objective: Find the Jackal and kill him.
Mission Details: The target’s presence in the state continues to be a destabilizing influence. He is largely responsible for the recent influx of weapons into the country, in clear violation of the Join Signatory Framework. His reputation as a dangerous arms dealer is well-deserved. Orders are to terminate.
Enjoy the ride toward the hotel in Pala and learn about what’s happening with the locals via your talkative driver. The tension seems to increase the closer you get to Pala-brush fires, security checkpoints, vehicles with mounted machine guns. As you near the hotel, a dizzy spell strikes and you pass out in the back of the jeep. You wake up in the hotel and the Jackal greets you with the business end of his pistol-he leaves you to die with your malaria. With the sounds of explosions and gunfire outside, you get up and gather the Jackal’s leftovers to survive.
Objective: Get out of the town.
Remain on the upper floor of the hotel and search the roofs for a better weapon. The rooms on the hotel’s upper floor should have open windows. Jump through one of the open windows and into the alley below. You aren’t in the condition to fight-don’t bother getting into a battle with the warring factions. Instead, head to the right and go along the road north. Start over the bridge-at this point you will likely succumb to the malaria and pass out.
Act 1 - Tutorial Mission
Far Cry 2 features a unique set of tutorial missions because things differ slightly depending on which direction you escaped from Pala. Note that although the names and people change, the basics of the tutorial mission remain the same: to guide you through how to heal, fix cars, gather diamond briefcases, etc. Which faction offers you the first faction mission also changes. Consider the walk-through of this section as general tips through this section of the game. So again, note that Carbonell may not be your guide; your tutorial advisor may be someone else depending on how you escaped Pala.
Objective: Heal myself.
Take Carbonell’s advice and administer some first aid.
Objective: Pick up the gun and take syrettes from the kit on the wall.
Walk over to the health kit on the wall and open it. Grab the syrettes from the health kit. Walk over to the table next to Carbonell and snag the weapons. Wait for Carbonell to issue your next mission objective.
Objective: Pop the hood and fix the car.
Walk left down the road and find the car. Press the action button to open the hood and fix the car. Moments later your phone rings-sounds like new mission orders.
Objective: Kill the scouts at the safe house to unlock it.
Get inside the car and start driving along the road toward the marked safe house. Note the GPS inside the car-the red marked designated the objective target. Follow the roads toward the objective. As you get close to the safe house, stop the car and get outside so you can make the remainder of the trip quieter on foot. Search the small hut across the road for ammo boxes and additional first aid.
Crawl through the tall grass on the approach toward the safe house. Locate the two patrolling guards and eliminate them with your rifle. Gather up the discarded weapons and ammo and receive a call from Carbonell.
Objective: Use the bed-roll in the safe house.
Search the safe house for supplies and then use the bed-roll to save your game and advance time as you wish. Walk outside after taking a short nap and receive another order from Carbonell.
Objective: Reach the observation point and scout the camp.
Return to your car and start driving toward the marked objective. As you get close, get out of the car. As the onscreen tip suggests, taking a small side path to scout may be better than marking directly into camp. Walk on the left side of the road through the tall grass to the top of the hill. Once there, open your map and monocular. Scout the area and press the right trigger when you’re over a patrol or other important item (the targeting reticule turns green). You’ll receive a call from Carbonell.
Objective: Free the captive from the bricked-up building at the lumber camp.
Scouting the camp pays off. Use the intel to spot the locations of various items. Eliminate the guards protecting the prisoner. Stay crouched in tall grass and take them out from long-range or sneak past them and get to the captive’s building if you are attempting this mission at night. You could also create a racket by shooting the yellow barrels to create some explosive chaos.
Get inside the captive’s building. Gather health items as needed and open the storage room door to find your new buddy inside. Your new friend suggests a meeting at Mike’s Bar later.
you can meet the buddy there and partake in optional "buddy" missions. Exit the structure and receive another call from Carbonell.
Objective: Return to the fishing camp and meet Carbonell.
Get back to the car and drive back to the fishing camp. It’s marked on your map. Walk inside and meet with Carbonell.
Objective: Locate the diamonds using the flashing light on my GPS.
Open your map and GPS and search the grounds. Follow the onscreen instructions and find the case in an adjacent building.
Objective: Use the weapon shop’s computer to buy new weapons.
Drive the car through Pala toward Mike’s Bar. The weapon shop is across the street from Mike’s Bar. Enter the shop and use the computer to purchase a new weapon.
Objective: Go to the armory to pick up your new weapons.
Exit the weapon shop and enter the adjacent building. It’s an armory-expect to return to this location frequently during the game. Here you’ll be able to replenish your weapon ammo, grenades, Molotov cocktails, and switch out any purchased weapons. Grab your new purchase inside the armory.
Objective: Find someone at Mike’s bar who can provide medicine.
This objective appears as an "underground" objective. You’ll soon after to complete tasks for the underground to acquire medicine for your malaria. Speak with your buddy at the bar. She suggests speaking with a bar patron who may have medicine for you. Walk over to the guy at the desk. Pick up the audio cassette tape off of the table. After the conversation, approach the guy to the left-you made a new friend. This is now your second best buddy.
Objective: Go to the church and give the tape to Father Maliya.
Take the jeep with the mounted machine gun toward Pala. Walk over to the marked church in Pala. Approach the priest at the far end of the church. Interact with the priest to receive medicine in exchange for the audio cassette tape. This concludes the tutorial missions.
Act 1 - Destroy Commando Gear (UFLL Mission)
Visit the UFLL headquarters on the western side of Pala. Check in with the doorman and then ascend the stairs to the second floor and meet your contact.
Mission Details: A team of foreign commandos are hiding in an oasis to the southeast preparing to kidnap some "person of interest" in APR territory. Afraid of taking the blame the UFLL hired me to destroy their gear, forcing them to abort their mission.
Objective: Destroy the foreign commandos’ gear.
Just as you are about to leave the UFLL headquarters, your buddy phones with possibly a better deal. You receive an updated objective where you can meet your buddy. You’ll discover these during each of the faction missions. You can choose to assist your buddy in different mission tasks or continue with the assigned faction task. For tips on completing these "subverted" tasks, check the end of each faction mission walk-through for the "Alternate Mission" walk-through.
Go to the Pala bus stop, just south of the UFLL headquarters. Choose the southeastern bus station. When you reach the bus station, pull out your diamond locator. There’s a diamond briefcase behind the station. Pick it up before continuing on with your mission.
Approach the oasis area cautiously. Use the monocular to recon the area; there’s a sniper on the western side of the oasis. Take note of the mounted guns on the northwestern and eastern sides of the objective.
Make your advance from southern rocks. Take cover behind rocks and spot the enemy patrols. If you look closely near the marked objective there’s an explosive barrel-it’s essentially on the southeastern side of the objective. If you shoot that barrel, the resulting explosion will destroy the commandos’ gear. This completes the mission. While the guards run around frantically, you can make a safe escape. Return to the bus station and avoid a fight with the aggravated guards if you want. Ride the bus back to Pala.
Alternate Mission
Take the bus to the southeastern bus station. Drive north past the guard post and weapon shop and meet your buddy inside the safe house.
Objective: Intimidate the informant at the villa into sending the false coordinates.
Drive northwest from the safe house toward the area marked "Private Property" on the same map. Bypass the first guard station by moving north from the safe house and going west through the rock formations.
The term "Private Property" is applicable because there are plenty of enemies around that don’t appreciate trespassing. Eliminate the guards and go upstairs in the main building and find the informant inside. Approach him and use the action button to "intimidate" with your machete.
Objective: Head to Mokuba and destroy the commandos’ gear.
Drive south toward Mokuba. Infiltrate the town and eliminate the guards inside. There’s plenty of cover to remain stealthy
Locate the marked location; it’s a flatbed truck underneath a bridge. Toss a grenade next to it and destroy the gear.
Objective: Help your buddy fight the APR troops.
Go south to the guard station and eliminate the troops to complete the mission.
Act 1 - Tag the Gold (UFLL Mission)
Mission Details: The exiled King has returned with a mountain of gold he hopes will buy peace between the factions. How naïve. The goal’s being guarded by the APR in an oasis somewhere to the northeast. The UFLL’s hired me to find that location.
Objective: Go to the oasis and tag the gold for the UFLL.
Pay a visit to the weapon shop or armory and grab a sniper rifle, which will prove extremely useful in picking off the gold defenders from long-range safety. Get over to the bus station in Pala and take the bus that drives to the northeastern area of the map; this bus station is close to the mission objective. Take the car just outside the bus station and use it to drive toward the gold objective at the oasis.
Watch out for the guard station along the road north. You can drive away from the road on the eastern side to avoid the guard station. There’s a safe house just up ahead, which can be used to save your game before making the assault on the oasis.
Drive to the northwestern side of the oasis. Stay far enough away so you aren’t spotted by the enemy patrols close to the gold. Get out of your car and recon the oasis with your monocular. Take note of the location of the patrols, vehicles, and explosive yellow barrels. If you brought a sniper rifle along with you, remain hidden among the rock formations and begin picking off the enemy targets defending the gold.
Once you have cleared the area of guards, maneuver into the center of the oasis and find the ladder. Descend a couple of ladders toward the objective. Approach the gold and "tag" it to complete the mission successfully.
Alternate Mission
Objective: Meet your buddy who might have a better deal.
Proceed to the northeast bus station. Drive south to avoid one of the guard posts. Go to the marked safe house and rendezvous with your buddy. Expect heavy resistance at the guard post just outside the safe house. Check the ground to find a sniper rifle in questionable condition-better to bring your own.
Objective: Kill the King and pick up his ring.
Return north and drive to the marked location in the Fort. As you near the entrance, get out of your vehicle and advance on foot. Recon the Fort with your monocular and locate a couple of snipers-one on the middle building and another on the right building if you’re facing the Fort from the road. Be patient and eliminate as many guards as possible from long-range. Work your way into the fort and get up on one of the towers and use it to snipe at guards below-or toss a couple grenades.
Ascend to the second floor of the marked building and find the King inside. Eliminate him at close-range. Use the action button to steal the ring.
Objective: Meet Prince Oeduard and give him the ring.
Return to the Lakeside safe house and meet Prince Oeduard inside. Use the action button on Oeduard to give him the ring.
Objective: Go to the Oasis and tag the gold for the UFLL.
Drive to the northwestern side of the oasis. Locate your buddy at the Oasis. There are no guards around.
Maneuver into the center of the oasis and find the ladder. Descend a couple of ladders toward the objective. Approach the gold and "tag" it to complete the task.
Objective: Help your buddy fight off the APR in the Oasis.
Climb the ladder and assist your buddy in a huge firefight. Eliminate all attackers. You may need to retreat and use the rocks surrounding the oasis as cover against the assault. If your buddy falls, perform a rescue and healing after the conflict.
Act 1 - Attack the Greenhouse (UFLL Mission)
Mission Details: The APR is providing security for some European agribusiness. They’re protecting some greenhouses in the foothills to the east. The UFLL wants me to shut down the operation. I gotta reach the farm and destroy the greenhouse irrigation system.
Objective: Destroy the red pumps in the greenhouse.
Visit the weapon shop and armory and take along some IED, improvised explosive devices, to use against the red pumps in the greenhouse. Take a sniper or your favorite assault rifle. As mentioned, the greenhouses are to the east. If you want to attempt this mission using stealth, wait until night. Go to the Pala bus station and ride a bus to the northeast station.
It’s a close drive from there to the objective. Stay off the road and instead turn around and head south along the eastern edge of the map. Continue south until you reach the point where the road meets the river. Get out of the car and into the river. Stick to the shoreline on the eastern side and begin your approach toward the greenhouse.
Use the monocular to scout the area. Snipers overlook the northern and southern parts of the greenhouse so stay away from those locations. Stick to the eastern side and find the opening in the fence. Go right and then left following the fence to the next opening. Spot the greenhouse west through the orchard. Stick inside the tall grass and the thick orchard to stay hidden from the patrols. Check to make sure there are no guards nearby before moving carefully toward the greenhouse. Head south along the edge of the greenhouse.
Watch the sniper on the southern perch and wait for him to look away. Sneak into the greenhouse. Get along the western side and go to the northern end to find the pumps. Drop a trio of IED devices next to the pump and retrace your steps out of the greenhouse. Once you’re clear, detonate! Stay in the high grass and go back to the eastern side and around north to the river. There’s a boat conveniently located here for a getaway vehicle.
Alternate Mission
Objective: Meet your buddy who might have a better deal.
Drive south out of Pala toward your buddy’s location. When you reach the map with the safe house, avoid the guard post and instead go off road to the south and rendezvous with your buddy at the safe house. Get inside and speak with your buddy; there’s a heavy machine gun available should you want to take it along.
Objective: Pick up the defoliant canister from the chemical dump shed.
Instead of driving to the chemical dump through the guard station, follow the road toward the train tracks. You can use the train tracks to move north toward the chemical dump and avoid the guard station.
Park close to the dump and assault the area on foot. Use a sniper to eliminate guards from long-range. Get inside the large building and find the defoliant canister inside the bottom floor.
Objective: Deliver the defoliant canister to your buddy.
Drive down to the marked location at the airfield and find your buddy inside the building. Interact with your buddy to deliver the canister.
Objective: Destroy the red pumps at the greenhouse.
Leave the airstrip to the east and make the long trip to the greenhouse. It’s on the eastern side of the map. Approach the location from the east. Go on foot and spot the sniper north of the marked location; recon the area and then eliminate the sniper. Or if you can avoid him, remain stealthy. Cut through the gap in the fence.
Spot the greenhouse west through the orchard. Stick inside the tall grass and the thick orchard to stay hidden from the patrols. Check to make sure there are no guards nearby before moving carefully toward the greenhouse. Head south along the edge of the greenhouse.
Watch the sniper on the southern perch and wait for him to look away. Sneak into the greenhouse. Get along the western side and go to the northern end to find the pumps. Drop a trio of IED devices next to the pump and retrace your steps out of the greenhouse. Once you’re clear, detonate! You can also just toss a couple grenades at the pump. Your buddy’s plane arrives shortly after.
Objective: Reach your buddy’s crash site before it’s too late.
Quickly drive to the crash site south of the area and find your buddy under attack. Eliminate the attackers and complete the mission.
Act 1 - Assassinate Police Chief (AFR Mission)
Mission Details: The UFLL-friendly police chief is riding around in a convoy. The APR has paid me to kill him.
Objective: Ambush the convoy and kill the police chief.
Head over to your armory and grab some IEDs. The mission objective requires you to destroy a convoy of vehicles-one of the best methods is planting IED explosives and detonating them from safe range.
Exit Pala along the northwest road. Continue toward the guard station. Head north and then west past the Slaughter House. You may have riled up some local guards around here so you may have to deal with them before continuing to the west.
When you reach the next quadrant, pull over. There should be an elevated train track on your left and the road on the other side. The convoy that includes the police chief makes a large sweep around the police station (located to the far west) and then back along the road you’re currently standing near. The convoy actually moves directly underneath the railroad overpass-a perfect ambush point!
Make sure there are no enemies in the area-it’s best not to deal with them while you’re trying to set up the trap for the convoy. Plant a trio of IEDs along the road as it dips underneath the railroad overpass. Take cover in some tall grass nearby and patiently wait for the convoy to appear. The police chief is inside the middle vehicle-make sure that middle vehicle is over the explosives before you detonate. The explosion may not eliminate the armed escorts. Escape without being seen or deal with them before you escape. Or just run really fast!
Alternate Mission
Objective: Meet your buddy who might have a better deal.
Drive north out of Pala and rendezvous with your buddy at the safe house near the Slaughter House. You’ll also find a nice rocket launcher inside the safe house.
Objective: Intimidate the Chief’s brother into handing over the ledger.
Drive toward the target located in the fishing village of Shwasana. You can approach from a variety of directions. If you take the northern road, which would be by the main road, then eliminate the guards at the first dock. Use your sniper to pick off targets in the village to the south. Once you’ve cleared some targets, swim or use a boat to get toward the target building. Eliminate remaining guards and gather supplies. Go to the upper floor inside the target building to find the chief’s brother. Grab the ledge off of the table.
Objective: Kill the Police Chief while your buddy destroys the UFLL convoy.
There are several ways out of the fishing village. In deciding your escape route, consider stopping at the weapon shop that’s north of the police station. There you can grab supplies, heal, save your game, and switch out weapons. Take a sniper with you to the police station to help eliminate the perimeter guards. Approach the police station from the southwest side near the tracks. Take out the perimeter guards from long-range. Once the area is secure, get inside to the marked location and eliminate the chief.
Objective: Meet your buddy and help destroy the UFLL convoy.
Leave the police station and drive toward the marked location. Buddy under attack. Fight off the enemies and save your buddy if possible.
Act 1 - Free Buddy (AFR Mission)
Mission Details: It’ll be a coup for the APR if I manage to free this prisoner held by the UFLL at the Slaughter House.
Objective: Free the captive from the back room at the Slaughter House.
During the course of the story during both Act 1 and Act 2, the guard standing outside a faction building may block entrance; instead of letting you inside to talk with the contact, he may commission you for a different mission. These missions involve rescuing a potential buddy. You may receive a different rescue mission during your play-through but the object remains the same: drive to the marked location, eliminate the defenders, and rescue the buddy from the marked structure. We aren’t sure if these locations are random or fixed but we present a walk-through for this assigned task.
Drive out of Pala through the northwest exit. You have to drive past a guard station on the way to the Slaughter House so be prepared for a fight. You can just drive quickly through the guard station but expect pursuers. Deal with the enemy pursuers before you reach the Slaughter House to avoid additional enemies. You could avoid the guard station by exiting Pala on boat and following the river north toward the safe house.
Approach the Slaughter House carefully and begin taking out the enemies, either with a sniper rifle from long-range, silently with a weapon like the Silent MP5, or Rambo-style with an assault rifle. Search the grounds; you’ll find some ammo and other items nearby. Go into the main structure and open the door. You’ll hear someone talking inside the next room. Open the next door and find the captive inside. Speak with the captive to end the mission (note that the captive is added to your buddy list).
Act 1 - Destroy the Tanker (AFR Mission)
Mission Details: The APR hired me to destroy a tanker car containing natural gas. The UFLL is using it to pay for food, arms, and medicine.
Objective: Head to the rail yard and destroy the tanker.
Pay a visit to the armory and grab your IEDs. A sniper rifle or a silenced weapon will also be useful for stealthier tactics. The railyard is located on the western side of the map. Take the bus from Pala to the northwest station. Grab the dune buggy at the bus station. Follow the railroad along the northern edge of the map, and proceed west into the northwest corner. Turn south toward the railyard and drive the long distance toward the objective.
Approach from the north and get out of your vehicle as you near the outskirts of the railyard. The hill to the north and northeast of the railyard makes a suitable recon point. Use the monocular to scout enemy positions and equip a sniper rifle to start taking them out.
Alternatively you can sneak your way into the rail station-this is much easier at night, obviously. There’s plenty of cover available. Stick close to the rail cars and watch patrol patterns. You can actually move toward the target through open rail cars, which become very viable hiding spots. It’s possible to get close to the target by entering a nearby rail car east of the objective. From this point you can toss a couple grenades toward the target to complete the task. Otherwise you could get closer and drop IEDs below the target and detonate the devices as you flee.
Obviously the explosion alerts the railyard enemies to your presence. Fight them off or flee toward your getaway buggy. Retrace your path back north and around to the northeast toward the bus station. Hitch a ride to Pala!
Alternate Mission
Objective: Meet your buddy who might have a better deal.
Head to the northwest bus station. Drive south to the safe house near the North Railyard. Find your buddy inside. There’s also an assault rifle inside if you want a used weapon.
Objective: Kill the UFLL official at the ranch.
Take a vehicle west toward the Cattle Xing. You can avoid the eastern guard station by driving between the mountains found west of the Cattle Xing. Approach from the east. Get out of your car and make the attack on foot. Eliminate guards from long-range if possible. Using a sniper from long-range means dealing with fewer close-range attackers as you get close to your target. Check your map and get to the marked location and eliminate the UFLL official to complete the objective.
Objective: Destroy the tanker car at the rail yard.
Exit the Cattle Xing going west. Avoid the guard station by moving between the mountains. Continue on a northwest route to avoid the roads and hit the train tracks that run north from the rail yard. Rendezvous with the tracks and turn south toward the target.
Approach from the north and get out of your vehicle as you near the outskirts of the railyard. The hill to the north and northeast of the railyard makes a suitable recon point. Use the monocular to scout enemy positions and equip a sniper rifle to start taking them out.
Alternatively you can sneak your way into the rail station-this is much easier at night, obviously. There’s plenty of cover available. Stick close to the rail cars and watch patrol patterns. You can actually move toward the target through open rail cars, which become very viable hiding spots. It’s possible to get close to the target by entering a nearby rail car east of the objective. From this point you can toss a couple grenades toward the target to complete the task. Otherwise you could get closer and drop IEDs below the target and detonate the devices as you flee.
Objective: Proceed to the ambush point and help your buddy eliminate all UFLL troops.
Exit the rail yard to the north and find a parked jeep. Drive north along the tracks and avoid the town and roads. Watch the explosion as you get close; the action is on the southern side of the tracks. Approach from the north and you can move through the train cars and attack the troops on the southern side. Aid your buddy and complete the task.
Act 1 - Destroy Compressor (AFR Mission)
Mission Details: The APR wants me to sabotage the UFLL motor pool at the junkyard. They have a compressor for equipment repairs. I gotta go in and destroy the compressor in the garage.
Objective: Destroy the compressor in the junkyard garage.
Drive down to the armory and snag some IEDs. You’ll want to drop the IEDs near the compressor to destroy the objective target. Alternatively, tossing a few grenades in the compressor’s vicinity will work too. Grab the car that spawns near Pala’s southwestern exit. Drive out of the southwestern exit and cross the bridge. Follow the route toward the guard post.
Drive up toward the entrance to Scrap Salvage and pull off on the side of the road. There’s a single guard at the crossroads ahead-take him out from long-range before he spots you. You can use the thick brush for cover as you move around the junkyard avoiding contact with enemy forces or proceed straight toward the target.
One of the best routes to take is through the brush south of the junkyard. The thick grass provides ample cover from patrolling guards and the route takes you close to the objective. Maneuver through the brush until you are just south of the marked objective. Observe the junkyard and look for any guards patrolling the junkyard grounds.
Sneak north toward the objective. Get inside the small building containing the compressor. Drop a few IEDs at the base of the compressor. Return to the brush south of the junkyard. If you were spotted fleeing the compressor, then just keep running through the brush back east toward the junkyard entrance. Detonate the IEDs to complete the task. You can also fight off the pursuers but it’s likely better to return toward the junkyard entrance and escape.
Alternate Mission
Objective: Meet your buddy who might have a better deal.
Take the bus to the northwest station. Take the dune buggy and drive short distance to the west to find the safe house containing your buddy. There’s also a shotgun inside if you need a weapon.
Objective: Steal the map from the fuel depot.
It’s located just northwest from your buddy’s safe house. Go east then north to the train tracks. Take the tracks west toward the fuel depot so you avoid the guard station nearby.
Maintain distance from the location so you can scout. Use the monocular and discover a sniper on the eastern tank. This area is quite open and the approach lacks cover so it can be difficult to make an assault-there will be a lot of enemy guards targeting you! Take out the sniper with your own and then start working on the other depot guards. Take advantage of the explosive barrels around the depot and shoot them when guards are near-or just blow them up to start lots of fires. Locate the map inside the eastern building.
Objective: Destroy the compressor in the junkyard garage.
Return to Pala via the bus. Drive down to the armory and snag some IEDs. You’ll want to drop the IEDs near the compressor to destroy the objective target. Grab the car that spawns near Pala’s southwestern exit. Drive out of the southwestern exit and cross the bridge. Follow the route toward the guard post.
Drive up toward the entrance to Scrap Salvage and pull off on the side of the road. There’s a single guard at the crossroads ahead-take him out from long-range before he spots you. You can use the thick brush for cover as you move around the junkyard avoiding contact with enemy forces or proceed straight toward the target.
One of the best routes to take is through the brush south of the junkyard. The thick grass provides ample cover from patrolling guards and the route takes you close to the objective. Maneuver through the brush until you are just south of the marked objective. Observe the junkyard and look for any guards patrolling the junkyard grounds.
Sneak north toward the objective. Get inside the small building containing the compressor. Drop a few IEDs at the base of the compressor. Return to the brush south of the junkyard. If you were spotted fleeing the compressor, then just keep running through the brush back east toward the junkyard entrance. Detonate the IEDs to complete the task. You can also fight off the pursuers but it’s likely better to return toward the junkyard entrance and escape.
Objective: Head to the ambush point and help your buddy eliminate all UFLL troops.
Run out of the junkyard and proceed north to the marked location on the map. Aid your buddy by shooting all guards at the ambush point to complete the mission.
Act 1 - Kill Faction Leader
Mission Details: Kouassi has ordered me up to the Goka falls retreat-north side of Mt. Thabamolaetsa. I’m to kill Leon Gakumba.
Objective: Head to Goka Falls and kill Gakumba.
This mission will appear after you have completed all six faction missions (three for UFLL and three for APR, plus a possible free buddy mission). This mission will appear at either the APR or the UFLL contact in Pala. Although the locations and objectives of this mission remain the same, some details may differ depending on your play through. What you did in those missions affects whether this mission is a UFLL target or an AFR target. For the purposes of this walkthrough, we were assigned the mission by an AFR and ordered to eliminate the UFLL leader.
Visit the armory and grab a sniper rifle, which could prove useful in taking out the guards surrounding the faction leader target. Get over to the Pala bus station. Grab a bus ride to the northeast station, which is closest to the target location at Goka Falls. Drive north and through the desert sticking between the road and the oasis to the north. Move through the desert so you are bypassing road patrols as well as the guard station and safe house (if you haven’t unlocked the location already).
Continue to drive along the northern edge of the map to avoid patrols. Hit the train tracks and keep west avoiding the nearby guard station. Once you are north of Goka Falls, veer south and start off road toward the target location.
Approach Goka Falls from the north. Park the car well away so you can sneak up. Stay in the thick grass along the western edge. You’ll approach another cabin before the target; expect a couple of patrolling guards out front. You can sneak past or eliminate them from long-range or with a silenced weapon.
Get into the water and swim directly across-the road leading up to the target’s location is here. Emerge onto land and advance along the path up the hill. The path winds up the hill-you can check the map to gauge the route. As you near the suspension bridge leading to the target, expect to see a guard (likely relieving himself over the waterfall). Take him out from long-range or use stealthier tactics.
Pull out a sniper rifle and take out the guards near the target. Or you could try to sneak across the bridge to the other side, locate the target inside and eliminate him. Toss a grenade in his room, fire a rocket, or just shoot him. If you have angered the local guards, be prepared for a vicious counter attack. Escape across the bridge quickly or eliminate the guards at close-range (snag a dropped assault rifle to replace the sniper).
Objective: Escape the Goka Falls Lodge.
Battle your way across the bridge and back down the hill. Leap into the water and swim to the other side (there’s a ladder on the dock). Return inside the brush. In case you misplaced your vehicle, there should be a jeep parked close to that lower cabin.
Act 1 - Defend the Church or Bar
Mission Details: Reuben has some vital info for me. He’s hiding out at that deserted lumber camp southeast of the town. He’ll be waiting there inside a building.
Objective: Talk to Reuben at the lumber camp.
Grab a vehicle and exit Pala on the southeastern road. Drive toward Mike’s Bar and the weapons shop. Before you reach them, veer to the left and proceed toward the Lumber Camp. Search the camp for health and ammo before entering the building containing Reuben. When you’re done, go to the building marked by the objective and enter. Find Reuben inside-he has some bad news. The faction you’re currently working for has turned on you and your friends.
The faction has begun wiping out all opponents including hired guns and civilian dissenters. The faction plans to assault Mike’s Bar and the church in Pala. You’ll have to make a choice-which one do you help?
Objective: Meet your buddy at Mike’s or meet Father Maliya at the town church.
Let’s head back to the church. Get back into your car and drive from the Lumber Camp back to Pala. Park at the town and notice that the residents have left.

When you’re ready, approach the church entrance and go inside. Approach Father Maliya and speak with him. He’s helping others escape the church and asks you to move the cabinet in front of the escape passage. Walk over to the other side of the cabinet on the right side. Use the action button to move it.
Objective: Defend the church.
Seconds after you’ve moved the cabinet to protect Father Maliya, enemies break into the church, mostly through the windows. You can make a valiant effort and attempt to fight off the attackers but the same result happens every time: you eventually are overwhelmed and your health bar depletes to zero.
If you decide to go to the bar, drive down to the marked location at Mike’s Bar. Eliminate any guards outside. Get inside. When prompted, help your buddy push the fridge in front of the door.
Objective: Defend Mike’s Place.
The windows break open and enemies completely surround the bar. You’re in no-win situation. You fight off the horde as long as you want but eventually all of your buddies and you will fall to the assault.
Act 1 - Counter Attack
Mission Details: Leboa-Sako fell and me with it. They’re hauling the dead out to some mass grave in the desert...looks like I’m the only one in this truck with a pulse... they must have thought I was dead...
Objective: Get to shelter.
The truck hits a rock and you roll out of the back-you’re in a blinding sandstorm. Pick a direction and start moving. Eventually you will pass out. When you wake up, the Jackal stands over you and fills you in on what’s going on. Soon after, another man enters. Apparently your dealings with the faction aren’t over yet. Your next orders depend on which faction you were attacked by in the previous mission but the concept remains the same: terminate a faction leader at a troop rally. So note while the names and factions may differ on your play-through, the objective is identical.
Objective: Terminate faction leader at his troop rally.
Take a drink of water and you’ll stand up. Heal your wounds and then replenish your syrette supply using the cabinet on the left side of the room. Gather the weapons here-there’s an assault rifle, pistol, and mortar.
As you follow the road to the north, expect to encounter an enemy patrol. Switch to the jeep’s machine gun and eliminate the attackers. Repair your car or just take the other one and continue along the road.
You’ll enter the next map, which is basically the southwestern side of Leboa-Sako. Note the weapon shop to the west. You can use it to switch out any of your gathered weapons from the shelter for your personal favorites. For instance, a sniper rifle can be particularly handy in eliminating the faction leader the troop rally. Just stay back and long-range and terminate in a single headshot.
When approaching the troop rally, drive in the grassland between the two guard posts to avoid confrontation. Approach the troop rally from the western side. Park the car far away-you should be able to hear the rally as you get close. Get into the hill on the west side of the rally; it has a great vantage point on the rally below. Plus there’s plenty of brush for cover. You will spot the faction leader easily: he’s standing on a vehicle with a megaphone in hand. Take him out with a sniper ideally. If you prefer to get dirty, then get closer and use an assault rifle. If you prefer to get creative, try the mortar recovered at the safe house.
Act 2 - Defend the Barge
Objective: Meet Voorhees in Sefapane.
Note that your contact may change depending on which faction you ended up working for in the previous mission. Return to your getaway jeep and drive south toward the bus station. Go between the marked guard posts to avoid a fight. Get on the southern road and drive to the bus station and then turn south. You’re back in the desert. Follow the road toward the marked location. Expect to encounter an enemy patrol. Eliminate them and follow the road to the checkpoint and into the southern region.
Continue south into the northwest section of Bowa-Seko. There’s a weapon shop just south on your current road-a convenient stop in case you need to switch weapons or resupply ammo. Continue past the weapon shop and avoid the guard station. Drive south of the guard station and then east toward Sefapane.
Drive into Sefapane and approach the marked building. Replenish your ammo and health at the marked locations. Speak with the contact inside.
Objective: Meet the barge skipper at The Jackal’s island in Lake Segolo.
Exit the room and check the main mission map. You’ll see the objective location to the southeast-there’s a bus station nearby. Leave Sefapane and proceed to the nearest bus station, which is found north of town. Exit the town to the west and find the car just outside of Sefapane. Drive west but then cut through the passage to the north toward the bus station. Once at the bus station, board the bus that drives to the center of the map-closest to the Lake Segolo objective.

Get onto the airboat and pilot it southeast toward the objective. Park the boat at the dock or on the edge of the barge. Get off and onto the barge and search the grounds for ammunition and health (inside the lower room). Ascend the staircase and grab the rocket launcher to the left. Open the door on the right and speak with the barge skipper.
Objective: Defend the barge until you dock at Port Selao. If the barge breaks down, repair the engine.
Exit the bridge and proceed to the front of the barge. The barge wields some pretty formidable armaments: the front and side weapons are mounted grenade launchers! Grab the front grenade launcher and prepare for action. The first enemies to appear should be on land to either side of the barge; aim the grenade launcher and eliminate them. Next you should encounter a far guard using a rocket launcher; eliminate him as quickly as possible. It won’t take long before enemy boats appear; just fire a grenade close to the boat and the resulting explosion should capsize it.
The barge will likely suffer enough damage to require repair. You’ll know if the barge comes to a complete stop. If this happens, you need to turn around and find the open hatch on the barge floor-spot the smoke. Repair the barge to continue onward. Expect to move back and forth between the barge’s weapons and the repair location. The greatest threats to the barge are the mortars, locate them and fire the barge’s grenade launcher in their direction. If an enemy boat gets too close, consider using an assault rifle to eliminate the boat’s occupants.
Objective: Go to the clinic and talk to Doctor Ouba.
Mission Details: Now that the barge is docked, the barge skipper needs me to run ahead to the clinic in Port Selao. I have to warn some civilian doctor named Obua that the cease-fire is about to come unstuck.
You’re back at the bus station near the center of the map. Search the area around the station for ammo and health items. Get inside the nearby vehicle and head north toward Mosate Seleo. Park the vehicle at the southwestern side of the city and walk toward the marked objective on the northern side of town. Enter the building to find the doctor inside the back room. During the conversation you’ll hear the cease-fire ending outside.
Objective: Escape Port Selao.
As you start out the front, a helpful buddy suggests taking the safer back exit. Grab any medical supplies needed before leaving. Exit the back door. Go left into the market area. Turn left and look to the south-you should see plenty of fighting. There are a lot of enemies-angry enemies-here and it’s not really worth the effort in fighting everyone. Instead, run for it. Continue running south until you reach your vehicle, which will be where you left it. Get in and drive back to the bus station. You may have pursuers-deal with them if necessary.
Back at the bus station, search the grounds for health and ammo before moving toward the barge, which ends the mission.
Act 2 - Rescue the Barge
Mission Details: Got a frantic call from the barge skipper. Someone was sharp enough to track the barge after all the cargo was offloaded, and now they’ve chased it across Lake Segolo. If either side figures out what we pulled, things could get bad. I better intercept them and make sure no one talks.
Objective: Rendezvous with the barge and eliminate all attackers.
Run over to the airboat parked at this dock. Get inside and start driving toward the marked objective to the southeast. When your phone rings, answer the call. Continue piloting the boat toward the objective. As you get close, the map switches and you see that the boat is parked at the Marina. Drive into the narrow waterway and approach the Marina.
The Marina and barge are under heavy assault. In fact, some enemies are even using the barge’s grenade launchers. If you brought a sniper rifle with you this far then this part of the game is a piece of cake. Slow down the airboat and maintain a decent distance from the Marina. Use the sniper rifle to eliminate all or most of the attackers. There are some on the boat and another group at the Marina.
If you lack a sniper rifle then you can board the barge on the left or right side about halfway down. Move toward the back of the barge and use it for cover against the approaching attackers. If you can get to the front grenade launcher you can use it against the Marina enemies, otherwise just finish off the enemies while using the barge as cover.
Objective: Go talk to the barge skipper on the stranded bridge.
Ascend the barge staircase and enter the bridge. Approach and speak with the skipper to conclude the mission. The Marina includes a weapon shop, armory, and bar. Enjoy the amenities!
Act 2 - Destroy the Kiln (UFLL Mission)

Mission Details: The UFLL wants to destroy the APR’s source of malaria remedy. My job is to reach the top of the Dogon cliff-village and demolish the big kiln they use to dry the artemisia plant into medicinal powder.
Objective: Destroy the kiln at the Dogon Village.
Take a silenced weapon, such as the Silent MP5 or the silenced pistol. The dart rifle is also a good counterpart so you can snipe from long-range but maintain stealth. The Dogon Village is on the northern side of the map. There are a number of ways to get there, of course, but let’s take the bus. Drive to the bus station south of town and use it to get to the northwestern bus station.
Get inside the car parked at the station and drive toward Sefapane. Bypass the guard stations unless you’re itching for a fight. Drive into Sefapane and then exit the town along the northern road. Take this winding road into the next map; you’ll emerge just south of the Dogon Village. Approach the village and get out of the car.
Enter from the south and take cover in thick grass and behind the village buildings. Work your way along the western edge toward the northwest corner. You’re looking for stairs up the mountainside. The village is cluttered with enemies and using stealth to get to the village rear is challenging and requires patience. You can also use silent weapons to eliminate roaming guards to remain as quiet as possible as you move through the village.
Alternate Mission
Objective: Meet your buddy who might have a better deal.
Exit Sefapane to the north and follow the road east. Instead of going north into Dogon Village, go off road and east toward the safe house. You can jump into the river and swim to the bank adjacent to the location. Meet your buddy inside.
Objective: Eliminate the APR truck driver at the outpost.
Drive northeast toward the marked location at the outpost. Instead of hitting the guard station to the north, go off road and take a direct route toward the outpost. Approach from the southwest and use the rocks as cover. Recon the area with your monocular and spot the sniper in the southeastern tower. Eliminate him with the dart rifle. Take out other guards before you make your approach. Find health on the building to the southwest.
Locate the target in the marked hut. Take him out as he speaks on his cell phone. Receive a call from your buddy.
Objective: Destroy the kiln at the Dogon Village.
Exit the outpost and approach Dogon Village. Drive so you emerge just east of the Dogon Village. Approach the village and get out of the car.
Take cover in thick grass and behind the village buildings. Work your way along toward the northwest corner. You’re looking for stairs up the mountainside. The village is cluttered with enemies and using stealth to get to the village rear is challenging and requires patience. You can also use silent weapons to eliminate roaming guards to remain as quiet as possible as you move through the village.
Objective: Back up your buddy at the medicine storehouse.
Exit the kiln area and locate the hang glider on the cliff side to the right of the kiln passage. Keep to the right and you’ll spot the path below. Fly as far as you can. Land and continue east toward the marked location. Clear out the enemies attacking your buddy and complete the task.
Act 2 - Terminate Polytechnic Instructor (UFLL Mission)
Mission Details: Seth Uniya-a former shop teacher at the Polytechnic-is training the APR in bomb assembly and disposal. I’ve been hired by the UFLL to terminate the instructor.
Objective: Go to the Polytechnic and kill Seth Uniya in his office.
Grab a car and drive east out of Mosate Selao. Follow the railroad tracks until it meets the road. Continue past the guard station and northeast into the next map. As you approach Polytechnic, you’ll have to come face-to-face with a guard station. Drive past and deal with pursuers or eliminate the guards before you approach.
If you’re planning to run and gun your way through Polytechnic then the strategy is simple: just shoot every guard in sight as you make your way back to the marked office. If you brought along silent weapons to assault Polytechnic using stealth, then exit your car before reaching the location. Take cover in thick grass and use a dart rifle to eliminate the patrolling guards. Switch locations if the guards are alerted to their friends falling to the ground.
Either way you should work your way through Polytechnic to the marked office in the rear. Seth Uniya is inside and sitting at his desk; he doesn’t appear to ever move no matter how loud the fighting becomes outside. Shoot Seth Uniya to complete the mission.
Alternate Mission
Objective: Meet your buddy who might have a better deal.
Exit Mosate Selao to the east and follow the road toward the rendezvous with your buddy at the safe house.
Objective: Go to the Afreqa Telecom office at Sepoko and pick up the map.
Return to Mosate Selao and drive south to the port to the bus station. Take the bus to the northeastern station. Grab a vehicle and drive east toward Sepoko. Park outside the northwestern side of town and make your approach on foot.
Use the monocular to locate the snipers in the towers (northeast tower and southwest tower). Take them out with a dart rifle. Eliminate as many of the ground forces as you can from long-range before entering Sepoko. Take advantage of the plentiful cover and tight quarters to eliminate the remaining guards from closer range. Find the map inside the marked building. Scout Sepoko for health to the southeast and ammo near the center.
Objective: Go to the Polytechnic and intimidate Seth Uniya into sending the new coordinates. Then kill him.
Return to the northwest bus station. Visit the nearby weapon shop and armory if you need to switch out weapons or gather more ammo. Take the bus to the port south of Mosate Selao. Drive north through the town and then east toward the marked location at Polytechnic.
Follow the railroad tracks until it meets the road. Continue past the guard station and northeast into the next map. As you approach Polytechnic, you’ll have to come face-to-face with a guard station. Drive past and deal with pursuers or eliminate the guards before you approach.
If you’re planning to run and gun your way through Polytechnic then the strategy is simple: just shoot every guard in sight as you make your way back to the marked office. If you brought along silent weapons to assault Polytechnic using stealth, then exit your car before reaching the location. Take cover in thick grass and use a dart rifle to eliminate the patrolling guards. Switch locations if the guards are alerted to their friends falling to the ground. You can also work your way around the perimeter along the southwestern side and get to Seth Uniya undetected.
Either way you should work your way through Polytechnic to the marked office in the rear. Seth Uniya is inside and sitting at his desk; he doesn’t appear to ever move no matter how loud the fighting becomes outside. Don’t shoot him! You must interact with him first to "intimidate" him and force him to send the new coordinates. When he’s accomplished that task, then you can kill him.
Objective: Go to the airstrip and help your buddy wipe out the APR troops surrounding the supply drop.
Drive back toward Mosate Selao. But before you continue west toward town, bend south to the guard station and back east to the airfield. Once there, drive down the runway toward the marked location. You can ram the enemies with your car and complete the mission-or just get out and do it the old fashioned way, with big guns.
Act 2 - Buddy Rescue (UFLL Mission)
Mission Details: The guy guarding the door at Mbantuwe’s clubhouse told me about another foreigner the APR has locked up at the Dogon Sediko. Guess I better stage a rescue...
Objective: Free the captive from the locked structure in the Dogon Sediko.
This is another buddy rescue mission, similar to one you may have been assigned in the first act. The faction doorman assigns this mission. We’re not sure if the locations for these rescues or random or if there are different versions you may get with each different play-through. Consider this walk-through an example if the locations don’t match your game.
Drive east out of Mosate Selao. Continue along the road past the guard station. There’s weapon shop up ahead; take the left turn at the fork in the road and visit the shop if needed.
Expect to encounter enemies inside Dogon Sediko. Hide behind buildings and make your way to the marked building. Try not to attract too much attention; use stealth kills to keep the guards from getting in an uproar.
When you reach the marked building, get inside and climb the ladder. Find the buddy at the top. Interact with the buddy to complete the rescue.
Act 2 - Terminate Arms Broker (UFLL Mission)
Mission Details: The UFLL has hired me to kill an arms broker named Yabek. He sells exclusively to the APR from an old barge deep inside APR territory on the Noga River, just under the big rail span.
Objective: Go to the weapons barge and kill Yabek.
Take a bus to the southeast station. Get into a vehicle here and drive north to the underground cell. Go behind the cell toward the river and find the airboat. Get inside and start driving the airboat. Proceed northwest and follow the river north along the eastern side of Mosate Selao.
There’s an alternate, faster route if you don’t want to go find those diamond briefcases. Drive to the weapon shop north of Mosate Selao and find a boat docked behind it. Continue to follow the river east. You’ll move south of Polytechnic; the objective is now on the map. Expect to encounter enemy boat patrols. Disengage the boat and eliminate the enemy boat occupants with your assault rifle.
Because the trip is long, consider visiting the safe house to the northeast and using it to save your game before assaulting the barge. It’s a long way back to the previous save if you happen to perish at the barge! That boat ride is a long one.
As you near the guard station on the map, expect to be attacked. You can retaliate or continue on. As you approach the barge on the map, park the boat and get into the thick jungle on the river’s right side. Use your monocular to recon the area. Find an enemy wielding a rocket launcher on a hill just east of the barge’s rooftop.
Approach the dock area and locate some ammo and health if necessary. Eliminate any remaining enemies on and around the barge. Search the barge’s lower room to find the irritable target inside. Shoot him to complete the task.
Alternate Mission
Objective: Meet your buddy who might have a better deal.
Take the bus to the northeast station. Grab a car and drive off road south toward the safe house. Speak with your buddy inside.
Objective: Get the bomb fuze from the salvage site.
Check the map and spot the location of the bomb fuze at the area labeled "Crash Site" just west of the safe house. Grab your vehicle and drive to the marked location. Park your vehicle outside the site so you can snipe the guards surrounding the crash area. Upon clearing the area, grab the bomb fuze from the crash site.
Objective: Go to the rail bridge and deliver the fuze to your buddy.
Exit the crash site south and go to the next map to the south. Follow the roads toward the airfield and cut along the tracks toward the Rail Xing in the southeast corner. Expect to face resistance at each of the guard posts. Be prepared to repel the attacks before continuing on to meet your buddy. Make your way onto the rail bridge and find your buddy waiting. Interact with your buddy to hand over the fuze.
Objective: Move to the safe cover point and wait for the detonation.
Follow your buddy off the rail bridge. When you reach the end, turn around and enjoy your handiwork.
Objective: Help your buddy destroy the responding APR troops.
Eliminate the guards approaching the rail bridge. Assist your buddy and complete the task.
Act 2 - Destroy Nitrous (APR Mission)
Mission Details: The UFLL has a truckload of nitrous oxide parked outside an old dental clinic. The stuff’s a valuable anesthetic with so many wounded troops in the field. The APR’s hired me to destroy that nitrous by any means... One grenade ought to do it.
Objective: Go to the village dental clinic and destroy the nitrous tanks on the flatbed.
Take a vehicle and exit the town along the western road. Follow this road as it winds to the northwest along the railroad tracks. It’s a good idea to take a dart rifle for this mission; sniping the clinic defenders while remaining quiet will prove quite effective. Couple the dart rifle with a good handgun or assault rifle. You won’t need IEDs to complete the task; like the mission details say, a single grenade will destroy the flatbed.
Follow the train tracks onto map containing the dental clinic. Instead of following the tracks, turn left and find an alley between rock formations as a short cut toward the dental clinic. As you get close, pull out your map and monocular to recon the area. Spot the sniper in the tower on the right side. Eliminate him from long-range if you brought a dart rifle or sniper.

The flatbed is inside a covered garage marked on the map. Take cover in the tall grass and use stealth as you approach the objective location. Eliminate as many guards as possible while maintaining stealth so you aren’t attacked by a large number of enemy aggressors-unless you just want to run and gun your way through the clinic.
As you get close to the flatbed, toss a grenade inside the covered garage. The explosion destroys the flatbed and the nitrous oxide-even if there are enemies still around. Once the target is destroyed, you can escape the area and avoid remaining fights.
Alternate Mission
Objective: Meet your buddy who might have a better deal.
Exit Mosate Selao to the southwest and follow the road to the next map to the west. Proceed north and reach the marked safe house just east of the post office.
Objective: Retrieve the parcel containing the truck part from the Post Office.
Approach the post office from the east. Get out of your vehicle as you get close and use a dart rifle to eliminate as many guards as possible from long-range. Scout the post office area and discover health on the eastern side and ammo on the western and eastern sides. Once you make your way into the buildings, use the interior as cover against the remaining guards’ assaults. Grab the parcel from the marked location; it’s on the shelf inside the eastern structure.
Objective: Go to the village dental clinic and repair the truck.
Exit the post office to the east and then head north toward the dental clinic. Instead of hitting the guard posts, use the hidden route near the underground cell on the southwestern side. There’s a passage through the mountain rock that leads to the clinic. Approach on foot and start sniping guards. Look at the tower just ahead of you; look high cause there’s a sniper. Remain on this southwestern path; if the guards are alerted, they’ll charge there and you can use the area as a chokepoint. Locate health on the building next to the truck.
Eliminate all of the guards so you aren’t disturbed repairing the truck. When ready, walk to the front of the flatbed truck and repair. Get inside the truck.
Objective: Drive the truck into the garage up at Sefapane.
Exit the clinic to the west. As you near the guard station get out and eliminate all defenders so you don’t jeopardize the truck. Proceed north and into Sefapane. As you move across the northern side of Sefapane, turn south and go into the garage as it opens. Your buddy meets you inside.
Objective: Climb onto the back of the flatbed and open the valve on one of the nitrous tanks.
Go to the back of the flatbed and interact to open a valve.
Objective: Move to the safe cover point and wait for the explosion.
Follow your buddy away from the garage. Enjoy the explosion.
Objective: Help your buddy eliminate the UFLL troops.
You are surrounded by enemy troops. Look for cover-basically the closest building-and repel the counter attack. Help your buddy and finish the task.
Act 2 - Destroy Radio Transmitter (APR Mission)
Mission Details: The APR wants to silence the UFLL’s radio station. It’s run by a populist DJ pumping out propaganda and raising mobs of gunmen against targets of opportunity. I need to destroy the mobile broadcast rig near the dried-up fishing village of Weelegol, in the southwest.
Objective: Destroy the generator powering the transmitter in Weelegol village.
Bring a dart rifle along for the mission if you hope to clear out the village defenders using long-range stealth. You won’t need to bring IEDs; there are some at the scene.
Take a vehicle to the bus station south of Mosate Selao. Board the bus and take it to the southwest station-it’s close to the Weelegol village. Drive the dune buggy west along the road and then north toward the village. Park well outside the village then enter the location on foot; there’s plenty of grass cover so move cautiously.
Use the map and monocular to scope out the village’s guards. You’ll spot several guards on the elevated village area. You may discover a guard wielding a rocket launcher on the right side. Note that there’s also a vehicle patrol that enters and leaves the area. If you’re quiet and hidden it won’t find you; wait for it to leave before resuming the attack. Listen for the sound of the arriving vehicle and take cover.
The transmitter is located far in the back of the area; you can quietly make your way along the edge of the village and get back toward the rear area that leads to the objective. As you near the objective, you’ll encounter a small structure that contains health as well as IEDs for use against the transmitter. Drop the IEDs next to the transmitter and move away before detonating. Destroying the transmitter completes the mission. Grab the nearby vehicle and use it for your getaway.
Alternate Mission
Objective: Meet your buddy who might have a better deal.
Exit Mosate Selao to the west. As you drive northwest, take the first left turn so you enter the next map on the southern road. Get through the guard station and when you reach the intersection, go off road toward the river. You’ll encounter a narrow road leading to the marked safe house. Get inside and rendezvous with your buddy.
Objective: Go to the tourist resort and kill the UFLL minister.
Drive away from the safe house back to the northern road. Move west along this northern road so you approach the area marked "Ranger Station" from the north. Use the monocular to scan the tourist resort and locate the sniper on the left side; take him out with your dart rifle. Check the far right side for a guard wielding a rocket launcher. Eliminate as many guards as possible from long-range.
After exhausting your dart rifle ammunition, swim across the river and eliminate the remaining guards. You’ll find the target on the upper floor in the marked room; he’s just lounging on a couch. Take him out from close-range. Find more ammo just outside the target’s hut; health is located on the far western side of the resort.
Objective: Intimidate DJ Lord Haw-Haw into reading the message.
Return across the river to your vehicle. Follow the road south and get through the guard stations. When you reach the next map to the south, drive along the western edge of the map to avoid the guard stations. Turn east toward Weelegol Village.
Take advantage of the tall grass and sneak your way into the village. Use the monocular to spot the patrols on the upper walkways. Stick to the right side and work your way toward the southeast corner of the village. Attempt to keep silent; take out guards with the dart rifle and avoid a heavy conflict unless you’re itching for a fight. If you move down the right side, zoom in on the far towers to take out a rocket launcher guard before he spots you.
Follow the path in the back corner of the village to the small hut containing DJ Lord Haw-Haw. Approach him and then use the action button to force him to read the message.
Objective: Destroy the generator powering the transmitter in Weelegol Village.
Grab the IEDs from inside the DJ’s hut. There’s also health here. Take the IEDs to the generator powering the transmitter; it’s further up the hill. Drop the IEDs nearby and then get into the vehicle near the DJ’s hut. Drive off and detonate.
Objective: Head to the ambush point and help your buddy wipe out the UFLL troops.
Drive north out of the Weelegol Village. Move through the mountains toward the marked guard post to the north. Eliminate the forces at the ambush point to complete the mission.
Act 2 - Rupture Pipeline (APR Mission)
Mission Details: The UFLL is using a pipeline to pump fresh water out of Lake Segolo and sell it out-of-country for hefty profits. The APR wants me to rupture the pipeline. I’ll need proper demolitions to do it. The kind I can only get from the TaeMoCo diamond mine.
Objective: Go to the diamond mine and steal the TNT.
Take along a dart rifle if you’re hoping to remain quiet-there are plenty of opportunities for long-range eliminations. Board the bus to the southwest station. Drive the dune buggy along the western road and then turn north. Avoid guard stations and vehicle patrols if you can.
If you need health, the guard station nearby has it. You can eliminate the defenders and scout the guard station. If you decide to drive through, expect to be pursued and have to retaliate against the attackers.
Turn toward the mine and get out of your vehicle. Approach the mine on foot. Hug the southern side and take advantage of the heavy brush cover to remain hidden from the mine guards. Use the monocular to recon the location. Find a sniper in a tower just northwest of the objective location.
Eliminate the sniper from long-range if you brought a dart rifle or sniper. If you move toward the mine and need health, search the building to the northwest. Continue to use stealth for as long as possible and eliminate the mine guards using a long-range weapon. Locate the TNT on a crate in the southern storage area; it’s marked on the map. Recover the TNT to receive the next objective.

You can also enter the mine from the south entrance. Deal with the guard station located south of the mine. As you approach the mine, take cover in the thick brush on the left side of the road. Follow the fence to the left and spot the sniper tower in the distance-it’ll come into view as the fence comes to a stop. Terminate the sniper with a dart rifle. The TNT is close. Drop down to the left and hide behind the building. Move around to the front of the marked building and get the explosive inside.
Objective: Rupture the pipe at the construction site with the TNT.
Exit the mine area to the southeast. It’s a narrow passage through the thick brush. Keep going east and you will finally reach the road. Beware of enemy vehicle patrols moving along this area.
Proceed to the north along the road. Take a right at the fork and enter the next map. Go around the safe house and then down south toward the pipeline.
As you move south toward the pipeline, huge the western side and keep low in the brush. Spot the bend in the road ahead and use your monocular to discover a sniper in the small hut. Take out your dart rifle and eliminate the sniper. Search the structures here for ammo. Look below the sniper hut for a mounted weapon and another guard. Eliminate the guard using stealth. Use the sniper scope to search across the pipeline to a far tower-there’s another sniper. Eliminate him using the dart rifle.
Take control of the mounted weapon-it’s a grenade launcher! Reign terror on the pipeline below. There are a handful of guards and the grenade launcher will make quick work of them. Just keep using the grenade launcher until you can no longer spot any guards inside the pipeline complex. It’s basically target practice!
Look along the cliff near the structures nearby; there’s a hang glider. You can use it to get down to the pipeline complex-just be careful you don’t clip the cliff as you turn to the left toward the pipeline. Otherwise you can take the long way by just following the map back north and around south toward the pipeline.
Approach the pipeline objective. Press the action button when prompted and you will automatically place the dynamite onto the target. Grab a nearby vehicle and drive away from the area; the detonation goes off automatically and completes the mission.
Alternate Mission
The alternate mission begins just like the standard mission-you must first go steal the TNT. You won’t hear from your buddy until you have acquired the explosive.
Objective: Go to the diamond mine and steal the TNT.
Take along a dart rifle if you’re hoping to remain quiet-there are plenty of opportunities for long-range eliminations. Board the bus to the southwest station. Drive the dune buggy along the western road and then turn north. Avoid guard stations and vehicle patrols if you can.
If you need health, the guard station nearby has it. You can eliminate the defenders and scout the guard station. If you decide to drive through, expect to be pursued and have to retaliate against the attackers.
Turn toward the mine and get out of your vehicle. Approach the mine on foot. Hug the southern side and take advantage of the heavy brush cover to remain hidden from the mine guards. Use the monocular to recon the location. Find a sniper in a tower just northwest of the objective location.
Eliminate the sniper from long-range if you brought a dart rifle or sniper. If you move toward the mine and need health, search the building to the northwest. Continue to use stealth for as long as possible and eliminate the mine guards using a long-range weapon. Locate the TNT on a crate in the southern storage area; it’s marked on the map. Recover the TNT to receive the next objective.
You can also enter the mine from the south entrance. Deal with the guard station located south of the mine. As you approach the mine, take cover in the thick brush on the left side of the road. Follow the fence to the left and spot the sniper tower in the distance-it’ll come into view as the fence comes to a stop. Terminate the sniper with a dart rifle. The TNT is close. Drop down to the left and hide behind the building. Move around to the front of the marked building and get the explosive inside. You’ll receive a call from your buddy.
Objective: Go meet your buddy who might have a better idea.
Exit the mine by leaving the hut with the TNT to the right. Duck under the tower ahead and take out the guard patrolling near the stairs. Turn right and run up the stairs to the vehicle. Drive back toward the guard station south of the mine. Eliminate the guards there then take a car east. Go up the eastern side and then onto the next map. Follow this road a short distance to the safe house.
Objective: Destroy the safety cutoff system at the pump house.
After speaking with your buddy, grab supplies and save your game. Drive east from the safe house and then south by the guard station. Eliminate the guards or pursuers so you don’t have to deal with a larger group toward your objective.
Head east toward the guard station in front of the Mertens-Segolo Pipeline Company area. Get out of your vehicle and go on foot. Hide in the thick jungle on the right side of the road and eliminate the guards at the station using a dart rifle. Search the station for supplies. Head north along the road.
Approach the pump house on foot. Eliminate the enemy guards surrounding the pump house using a dart rifle or other silent weapon. With the defenses down, enter the pump house and use IEDs to destroy the safety cutoff-basically the valve system in the middle of the pump house. You can also toss a couple grenades to do the trick.
Objective: Rupture the pipe at the construction site with the TNT.
Take the vehicle from the nearby garage and drive toward the marked location at the construction site. Tons of enemies, sniper towers, use dart rifle.
Objective: Go to the diamond mine and help your buddy.
Take a vehicle and return toward the TaeMoCo mine. Expect to encounter patrols and guard stations along the way; deal with the enemies as necessary. Find your buddy under attack at the mine. Eliminate all the attackers and save your buddy, if possible, to complete the task.
Act 2 - Ending the Conflict
Mission Details: Tambossa is sending me to deliver a note to Mbantuwe agreeing to the terms of a peace deal. I’ve been instructed to bring back a "good-faith" tribute of diamonds from Mbantuwe. Who knows? This could actually mean peace-in spite of what Greaves may think...
Objective: Deliver Tambossa’s letter to Mbantuwe at the Brewery and collect the diamonds.
This mission appears after you have completed all six faction missions during the second act (three for UFLL, three for APR, and perhaps a buddy rescue mission). This mission may differ depending on what you did during the faction missions. This mission could be assigned by the APR or by the UFLL. For the sake of this walkthrough, we will assume the APR assigned this mission. Also note that names may change depending on your game actions but the tactics for the APR-assigned mission remain the same.
Descend the steps out of the office and find your best buddy waiting by the exit door. There’s an alternate plan afoot. Get the diamonds then get out with your buddies. Drive south out of Mosate Selao and get to the port. Enter the docked boat and begin to pilot it south toward the Brewery. Expect to encounter boat patrols around the Brewery; be prepared to engage or avoid.

Note the dead bodies all over the place. Search the marked building; go upstairs and find Mbantuwe dead on the floor.
Objective: Pick up the case of diamonds and rendezvous with your buddy.
Go into the office and pick up the attaché case-and the Jackal ambushes you. The Jackal takes the case and kicks you in the face leaving you knocked out and surrounded by the massacre. You awake in the prison and hear your buddy in the adjacent room.
Objective: Escape the prison.
Get to the weak wall on the right side of the prison cell. Interact with the wall and you’ll kick a hole through. You gather a machete on the other side; you can also save the game here.
Exit the cell and go left to the stairs. Climb the stairs to the top. There are guards on the left so be cautious. Cross to the shadows ahead and look left; find a medical pack as well as a couple weapons on the left side, a pistol and an assault rifle. You can leave the prison or rescue your buddy. Stick in the area where you found the weapons, it’s shadowed and plenty of cover against the guards in the middle. Find the stairs down on the right side. Note the bloody drag marks on the floor.
Kill the guards in the way. Follow the drag marks to a cell door. Open it and find your buddy inside. Also a save game marker inside. If the upper guards are alerted, wait at the chokepoint by the stairs and for them to come down to their doom. Proceed up the stairs, to the left, and out the gate on the left side.
Get into the car and drive away. Expect to face some enemies as you approach the marked location to the north. Continue driving north to the marker and the mission concludes.
Act 2 - Eliminate Faction Leader
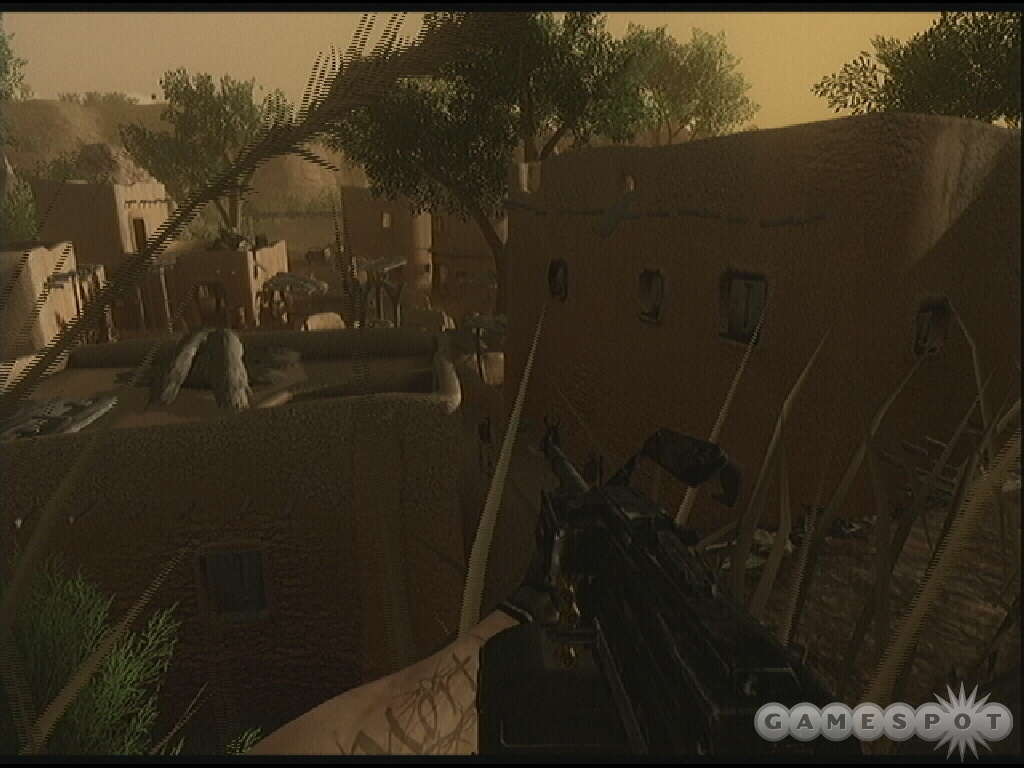
Mission Details: I’m in the clear for now, but with Mbantuwe dead both sides are on alert. It’s tense, but no one wants to make the first move. Hector Voorhees called me from Sefapane, so it’s clearly not business as usual around here. He wants to meet I can’t imagine what about...
Objective: Meet Voorhees in Sefapane.
Take the bus to the northwestern bus station. Grab a vehicle and cut south toward Sefapane or go west to the weapon shop to rearm. Once inside Sefapane, go to the marked building and speak with Voorhees.
Objective: Go to Dogon Sediko and kill Oliver Tambossa.
Exit Sefapane to the north and follow the road east onto the next map. Check the map and spot the objective location-it’s in Sediko to the east. Instead of going north into Dogon Village, head east. Get into the river and go to the safe house. Save your game and gather supplies. Drive north and then south across the bridge. Cut over to Sediko and approach from the southwest.
Stick to the left side of the entrance, plenty of tall grass cover. The target building is just ahead. Ensure no enemies are nearby and sneak into the bottom level of the building. Climb the ladder. Shoot the guy at the top. If you have alerted guards then you can still get into the building quickly and eliminate the target. Get out and start running back to your vehicle. Sediko has a lot of guards so it’s to your advantage to keep as silent as possible and get out before engaging too many enemies.
Act 2 - Eliminate Leadership
Mission Details: Found my old boss keeping Mbantuwe’s seat warm...Haven’t seen him since Leboa-Sako. My reputation for regime change precedes me, because he’s decided to clean house. He wants me to kill Voorhees and the rest of the leadership, down at the TaeMoCo mine. With those two out of the way my old boss becomes UFLL warlord.
Objective: Go to the TaeMoCo mine and kill Voorhees and his aide.
Go to bus station at the port south of Mosate Selao. Take the bus to the southwest station. Get in the dune buggy and drive. Instead of taking the long way west, just go north. Go under the bridge that’s west of the guard station and proceed north toward the mine location. Get out of the buggy and take cover in the thick jungle as you move north.
Approach the fence; you can get in on the left side. Eliminate the patrolling guards either silently or with as much action as you desire. Scan the camp for ammo and health. Proceed to the marked building and find Voorhees and his aide inside. You can choose whom to shoot-for the sake of the walkthrough, take out Voorhees first. As soon as you do, the aide tells you that you can take a shot at your old boss.
Objective: Either eliminate both UFLL officers tat the TaeMoCo mine, or return to Port Selao and kill your old boss from outside the UFLL headquarters.
You can simply shoot the aide to complete the mission. If you don’t then just leave him alone and drive back to Port Selao (or take the bus) and eliminate the target offered by the aide, which also completes the mission.
Act 2 - Eliminate Leadership, Part 2
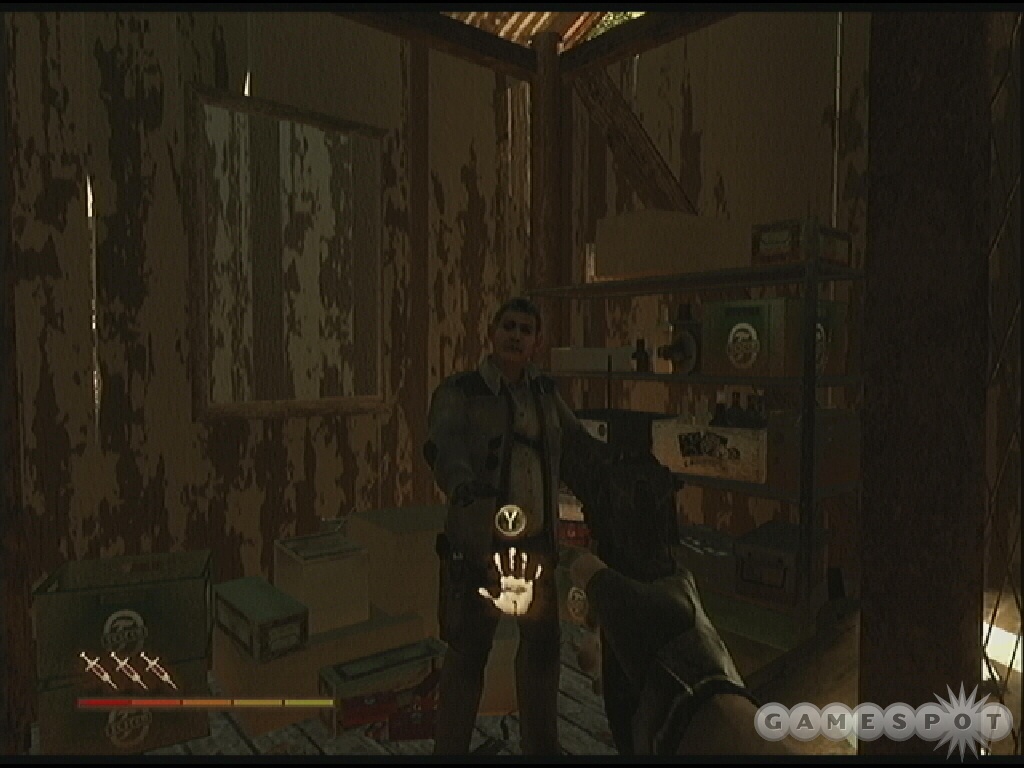
Mission Details: I got a call from Reuben Oluwagembi. He wants to meet me at the Marina bar. He says there’s been some kind of development in his story. That means the Jackal could be involved. Reuben also warned me that we might have visitors...
Objective: Meet Reuben at the Marina bar.
Take the bus to the southeast station. Grab a nearby vehicle and drive it southwest to the Marina. Enter Mike’s Bar to find Reuben waiting inside. Walk to the back of the bar and speak with Reuben; as you pass the guy in the front, he suggests a meeting. Talk to Reuben and then approach the other guy to receive a new objective. Visit the weapon shop and pick up a dart rifle and your other preferred weaponry.
Objective: Go to Sepoko and kill Greaves and his aide.
Return to your vehicle and to the nearby bus station. Take the bus to the northeast station and drive over to Sepoko. Approach on foot and use the monocular to recon the area. Spot the sniper on the tower on the left side; there’s also a guy with a rocket launcher inside. Use the dart rifle to eliminate the sniper and as many other guards as quietly as possible. If you need health, search the southeast corner of the base.
Locate the marked building and go inside. You’ll find Greaves inside as well as his aide. This situation feels familiar. For the sake of this walkthrough, let’s shoot Greaves.
Objective: Either eliminate both APR officers at Sepoko or return to Port Selao and kill Walton Purefoy inside the APR headquarters.
Once again you get a counter offer. You can simply kill the aide and enter the mission or you can leave and follow the map to the marked location and eliminate Walton Purefoy. Either way the mission ends.
Act 3 - Help Reuben
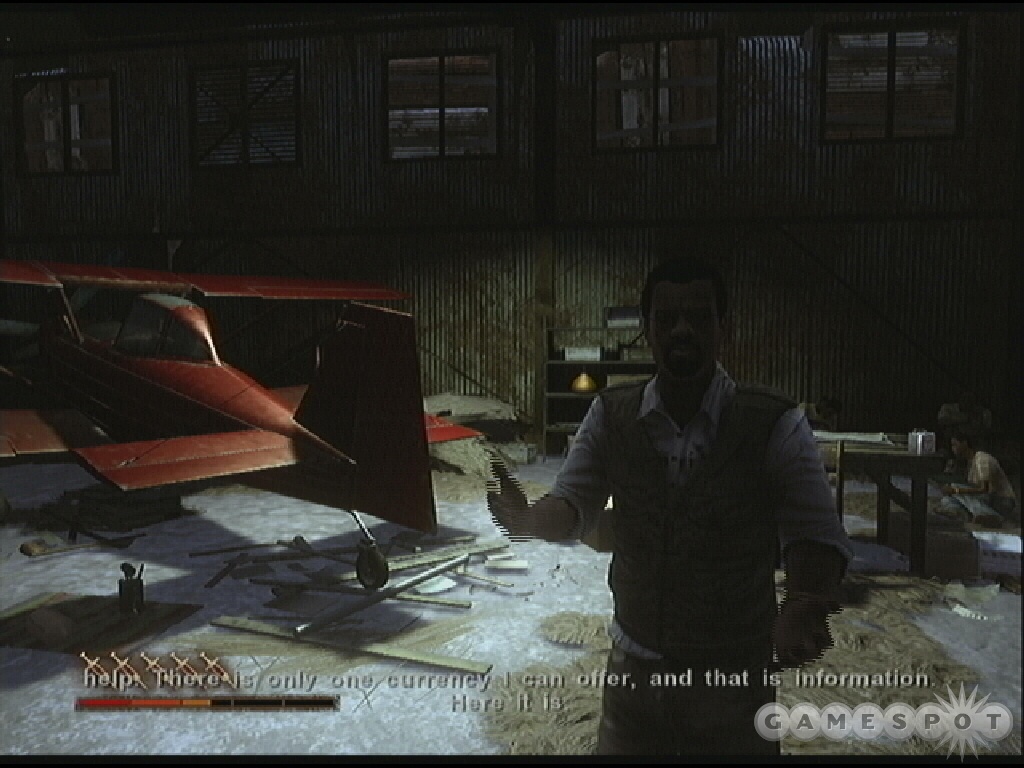
Mission Details: Just got off the phone with Reuben. He’s been detained by militia at the airport along with a bunch of other foreigners. He’s facing deportation... if he’s lucky. Guess they don’t like his reporting. He’s been saying too much about the factions’ attempts to stop the civilian exodus. I need to rescue him.
Objective: Find Reuben in the airport hanger.
Take along a dart rifle and your favorite assault rifle. Return to Mosate Selao and exit the town to the east. Follow the road through the guard station and proceed to the next map. Continue toward the airfield.
Stop your vehicle short and approach on foot. Recon the airfield with your monocular and spot a couple rocket launcher guards, one on the southern tower and another hanging around the main buildings. There’s also a guy with a mortar in the area; scan the mountains and locate him or just avoid the bombardment. Use the dart rifle to eliminate as many guards as possible from long-range before moving in. Locate Reuben inside the marked hanger; search the other hanger for health and ammunition.
Objective: Go to the prison to meet The Jackal.
Proceed to the southeast bus station. Drive over to the Marina and the weapon shop there to restock health, weapons, and ammunition as needed. Drive west from the Marina.
Continue west past the guard station. Check the map and spot the prison to the south. Follow the roads toward the marked location. Enter the prison gate and approach the Jackal; he’s alone in the middle of the prison courtyard. Follow the Jackal through the open gate. Pick up the health and ammo if you need any. Take the opportunity to save your game.
Act 3 - The Endgame

Mission Details: The Jackal plans to lead a civilian exodus out of the country. The UFLL and the APR have joined forces to stop him. He wants me to take out the leaders, and to kill the Arms Dealer and get his diamonds so we can bribe the border guards. He’s insane...but he’s right. I’ll help him first...and maybe kill him later.
Objective: Go to the jungle bivouac and kill both factions’ commanders. Go to the LZ and recover the diamonds stolen by the Arms Vendor.
Exit the prison to the east-there’s no turning back, as indicated by the onscreen warning. Approach the "Heart of Darkness" on the map. Go to the cliff overlooking the area and use the monocular to recon. Note the there’s health on the southern side and a mounted gun on the northern side. Use the dart rifle to eliminate the patrols. Adjust your location to avoid detection and stay crouched within the jungle cover.
Once you have cleared some of the guards, go down the left side and use the mounted gun-it’s a grenade launcher! Terrorize the remaining guards. Continue east out of the Heart of Darkness. Get to the safe house and save your game. Gather health and ammo before leaving. Proceed toward the swamp. Expect to face a few guards along the way; the shadows can make them tough to spot so be prepared.
Remain in cover as you approach the swamp. You’ll spot plenty of enemies patrolling the area. Stay crouched and use the dart rifle to patiently eliminate as many guards as you can. Watch the enemies scramble for cover. They’ll likely move to a hiding spot that you can still snipe. Be patient and use all of your ammunition. Note that the mounted gun on the far side is a grenade launcher; intercept any enemies attempting to use it.
Move through the swamp and toward the chasm. Go north and then into the chasm. Eliminate the enemies patrolling the recessed path. Go to the crashed plane and gather the supplies nearby. Turn right and spot the path. Cross the makeshift bridge to the safe house to save your game, get health and ammo, and exchange weapons from the crates if you desire.
Continue west from safe house and follow road north toward the marked location at the bivouac. Enter the location, cross the bridge toward the target. They’re both in the building talking. Instead of shooting here, retreat back to the area entrance to the west. You can see inside the building from long-range. Dart rifle or rocket launcher works well, run away! If you attack the targets at close-range, expect heavy retaliation. Return to the safe house and continue east toward the last safe house on the map. Continue the routine: get ammo, health, weapons from crates, and save your game.
Get to the marked location in the landing zone; you’ll meet your buddy. After a brief conversation, another old friend appears...one that should be dead. It’s an ambush!
Objective: Go to the Jackal’s hut and deliver the diamonds.
Instead of waiting for the ambush, it’s best just to grab the diamonds and immediately turn around and run back to the river. Shoot your former friends from long-range. While they moan on the ground, go over and administer a mercy kill for an achievement or trophy. Return to the safe house and save the game.
Go north and encounter a couple enemies along the way. Enter the Jackal’s marked hut. Once inside, give him the briefcase of diamonds.

Objective: Either pick up the battery or the briefcase.
You have a choice on how to conclude the endgame: you can grab the battery and use it to detonate the explosives or you can take the briefcase and bribe the border patrol. Let’s grab the battery.
Objective: Go to the canyon overhang and detonate the dynamite with the battery.
Check the map and spot the path that runs west behind the Jackal’s hut. Exit and go behind it. Spot the path up the mountainside. Get to the overhang; expect to encounter some enemies along the way. Locate the dynamite at the end of the path just before the overhang. Use the action button on the dynamite twice to conclude your mission and the game!
The objective changes if you decide to select the diamond briefcase instead of the dynamite.
Objective: Go to the Border Patrol camp and give the briefcase to the Commandant.
Exit the Jackal’s hut and start moving north toward the marked location. You’ll face three different enemy groups. Move slowly and eliminate each small squad before continuing to the next. Walk up to the Border Patrol station and go inside. Speak with the man inside. When prompted, press the action button to hand over the diamond briefcase and conclude the game.
Chapter 3 - Underground Missions
During the course of the single-player game, an underground mission notification will appear in your objectives-this means it’s time to get some medicine for your malaria. Each of the game’s two main areas contains an underground contact. When the notification appears, visit that contact and speak with him; he’ll assign a mission. All of the objectives remain the same: eliminate the guards around an underground cell and then speak with the man inside. Once you’re inside, exchange documents inside the cell and receive malaria medicine in return. We’ve included some of the underground mission assignments in this section.
Act 1 Underground Missions
When an underground mission appears in your objectives then it’s time to get some medicine for your malaria. Visit the church in Pala and speak with Father Maliya. He’ll hand you papers and tell you to deliver them to one of the underground cells. The location of the cell may differ but the primary task remains the same.
Objective: Reach the underground cell.
One cell may be found to the south. Take a bus near the location. Watch out for road patrols. Kill the enemies surrounding the underground cell. Wait until you are notified that you have unlocked the underground location. Walk inside the cell and speak with the man inside to trade the papers for malaria medication.
Another cell will be found in the southwest corner of the map. Take the bus to the southwest station. Drive north toward the marked underground cell. Take out the guards defending the area. You will be notified that you have unlocked an underground location.
A third cell will be found to the northwest. Take the bus to the station in the northwest to get close. Grab the dune buggy and follow the road southwest from the bus station. Go off road past the safe house. Continue toward the large rock formation and go west. Turn south before you hit the guard post and pick up the road. Continue south to the fork and then head east to find the underground cell.
Stop at the road marked "Veterinarian". You can use the rocks on the right side of the main road to overlook the underground cell below. You’ll have a great shot on the hostiles below. Eliminate all of the guards around the underground cell. Once you are notified that the location has been unlocked, drop down the rocks-carefully because it’s a long way down-and get inside the building. Speak with the man inside, hand over the papers, and receive your medicine.
Act 2 Underground Missions
Speak with the doctor in Mosate Selao to receive your missions to gather additional medicine for your malaria.
The eastern cell is close to the southeastern bus station. Park close to the underground cell and use a sniper to eliminate the guards patrolling outside the building. Use nearby cover in case the guards approach and engage. Take them out with your favorite firearm. When you’re told that the underground cell has been unlocked, go inside the structure and speak with the man inside. Go to the back room and exchange the documents for the medicine.
To reach the northern cell, drive west out of Mosate Selao. Take the first right heading north toward the guard station. Continue through the guard station or attack the location. Expect pursuers when you drive through. Pull over as you near the cell and get into the brush on the western side of the road. Eliminate the guards around the cell as you approach. Get inside and speak with the man. Exchange the documents for the medicine.
To reach the northwest cell, take a bus to the southwest station. Take the dune buggy and drive along the long stretch or road to the west then north avoiding the guard stations. When you reach the weapon shop, turn east. Take a stop there and rearm if necessary-and save your game-continue toward the marked location. Eliminate the guards outside the cell. Go inside and speak with the man. Exchange the documents for the medicine to complete the task.
Chapter 4 - Arms Dealer Missions
Visit a weapon shop without an active mission and the arms dealer will be standing inside. He can offer missions; complete the mission and you will unlock valuable weaponry for purchase. The arms dealer missions involve destroying convoys marked on the map. Purchase the IEDs as a means of eliminating the convoys, although it’s certainly possible to use grenades, grenade launchers, or rocket launchers. Using IEDs planted on the road in the convoy’s path is much easier, though.
Act 1 Arms Dealer Missions
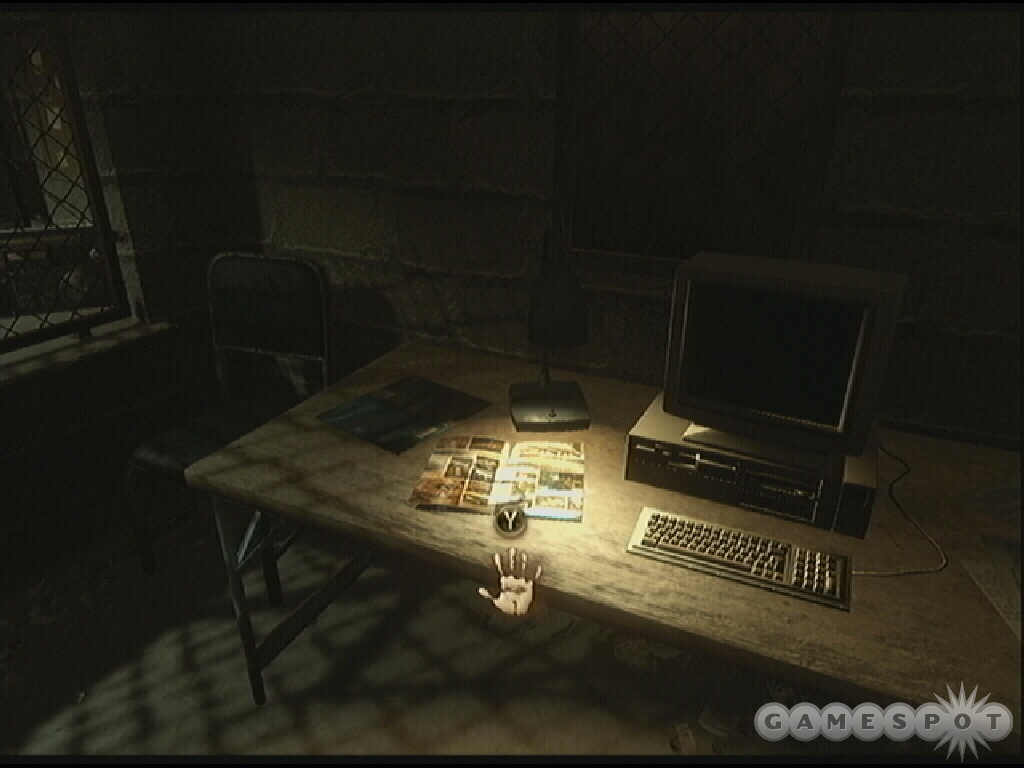
Visit the weapons shop near Mike’s Bar when you don’t have a mission active. The arms dealer will be there and can offer side missions to unlock a variety of new weapons. There are four missions available in Act 1. Each mission objective requires you to destroy an enemy convoy; there are four locations and they appear in random order but the weapons unlock in the same order each time.
First Arms Dealer Mission Star .45, Flare Pistol, Silent Makarov 6P9 Second Arms Dealer Mission AK-47, MAC-10, RPG-7 Rocket Launcher Third Arms Dealer Mission SPAS-12, Silent MP-5, LPO-50 Flamethrower Fourth Arms Dealer Mission Dragunov SVD, M-79 Grenade Launcher, Dart Rifle
Act 1 North Convoy
Take some IEDs and get on the bus in Pala. Take the bus to the northwest bus station. Watch the convoy pattern. Plant the IEDs along the convoy path while the convoy is positioned away from your current location. Also, plant the IEDs away from hostile locations, such as nearby guard stations and safe houses so the explosion doesn’t trigger the arrival of more enemies. Every vehicle in the convoy must be destroyed. Space out the IEDs so the explosion is wide enough to destroy all vehicles-should anything survive, use grenades to finish off the leftovers.
Act 1 Northwest Convoy
Pick up some IEDs from the armory then board the bus in Pala. Take the bus to the northwest bus station. Move to the stretch between the two guard outposts. While convoy has moved away, plant the IEDs along the stretch of road here. Hide in the tall brush along the eastern side of the road and wait for the convoy to arrive. Detonate the explosives to complete the task.
Act 1 Southwest Convoy
Take some IEDs from the armory and then board the bus in Pala. Ride the bus to the southwest bus station. Hide somewhere near the bus station because the convoy passes close by. You can bring a rocket launcher and use it to destroy the convoy when it gets close or use the IEDs to plant along the convoy’s route.
Act 1 East Convoy
Pick up some IEDs and get on a bus in Pala. Take a ride on the bus to the southeast bus station. Grab a vehicle and drive north. Avoid the guard outposts. Drive far to the east and avoid the guard stations. Head north into the next quadrant. Look for the long stretch of road on the eastern side or between the weapon shop and the guard outpost to the west.
Plant the IEDs on one of these locations as the convoy moves through each spot. Hide off the road and wait for the convoy to move over the explosives. Detonate the bombs and complete the mission.
Act 2 Arms Dealer Missions
Visit a weapons shop in the second area of the game when you don’t have a mission active. The arms dealer will be there and can offer side missions to unlock a variety of new weapons. There are four missions available in Act 2. Each mission objective requires you to destroy an enemy convoy; there are four locations and they appear in random order but the weapons unlock in the same order each time.
First Arms Dealer Mission AS50, M-249 SAW Second Arms Dealer Mission AR-16, Type 63 Mortar Third Arms Dealer Mission USAS-12, Carl G Rocket Launcher Fourth Arms Dealer Mission MGL-140
Act 2 Southwest Convoy
Grab some IEDs at the armory and take the bus station to the southwest bus station. Leave the bus station to the northeast and avoid the roads. Instead, drive through the grasslands north toward the road that encircles the TaeMoCo Mine. That’s where the convoy moves.
Continue north by veer to the east to avoid the guard station just south of the mine. It’s possible to get onto the road, but it’s dangerously close to the guard station. Consider stopping short and going up the hill on foot. Then proceed east along the road and use the stretch of road east of the mine to destroy the convoy. That keeps the guard station from responding to the explosion.
While on the stretch of road east of TaeMoCo mine, plant the IEDs along the road. Hide in the brush alongside the road and wait for the convoy to appear. When the lead vehicle reaches the lead IED, detonate. A sufficient spread should eliminate all vehicles.
Act 2 North Convoy
Take a bus to the northeast station. The convoy moves along a course through the northern section of the map; although both northern bus stations are close, the northeastern station provides the more direct route. Plus there’s a weapon shop nearby!
Continue down the road west past the weapon shop and into the northern section. There’s a safe house just to the northeast. Avoid it by driving toward the area marked Outpost to the south. Park your vehicle off road between the safe house and Outpost. Drop the IEDs along this stretch of road. Hid in the brush along the rock formations and wait for the convoy to arrive. Detonate the IEDs and destroy the convoy to complete the task.
Act 2 West Convoy
Unfortunately the western convoy is pretty far from most of the bus stations. You can approach from the southwestern bus station or just use the one in the map’s center. Either way you’ll have to perform some creative driving to avoid guard stations and enemy patrols as you move toward the western edge of the map toward the convoy. Let’s take the southwest bus station. Grab the dune buggy there and drive west along the road.
Avoid the roads as you approach the safe house ahead. Stick along the western edge of the map. When you reach the next map, you’ll spot the convoy-it makes a long loop through the Ranger Station and Post Office. Get on the stretch of road between the two but avoid the near by safe house (or just claim it).
Plant the IEDs along the stretch of road between the two locations. Hide in the brush alongside the road and detonate the charges when the convoy moves over. You could also just bring along a rocket launcher and make the task pretty easy: just shoot the convoy!
Act 2 East Convoy
The convoy appears on the east, which means it isn’t near any bus stations. Let’s take the bus to the northeast station. Take the nearby vehicle and start driving south through the grasslands so you bypass the nearby guard station.
Continue south as you connect with the road. You’ll have to come dangerously close to a guard station on the southern side of this map; be prepared to fight your way through or to repel the attacks of pursuers as you enter the next section. When you enter the next map, the convoy is just to the south. Reach the fork in the road and proceed east. The convoy moves along this stretch of road so it’s a good place to set up the trap. Place the IEDs and wait. Blast the convoy to complete the task.
Chapter 5 - Assassination Missions
Visit one of the four cellular towers located in Leboa-Sako or Bowa-Seko to initiate an assassination mission. Walk up to the base of the tower and use the action button. Answer your phone to receive the mission. There are six missions in each area; twelve missions total and they pay diamonds. Certainly worth the effort if you’re hoping to purchase every weapon in the game!
Act 1 Assassination Missions
Locate one of the cellular towers in the area (four of them total, basically one in each compass direction). For example, leave Pala to the east and drive toward the guard station. Eliminate the guards at the station and continue east. You’ll find the cell tower a bit further down the road.
At least regarding the eastern cellular tower, there’s a lot of road patrols. Likely because of the nearby guard stations! Be careful when moving toward the cell tower as you may encounter a mobile patrol up ahead of you; plus, there could be pursuing enemies from the guard station you bypassed.
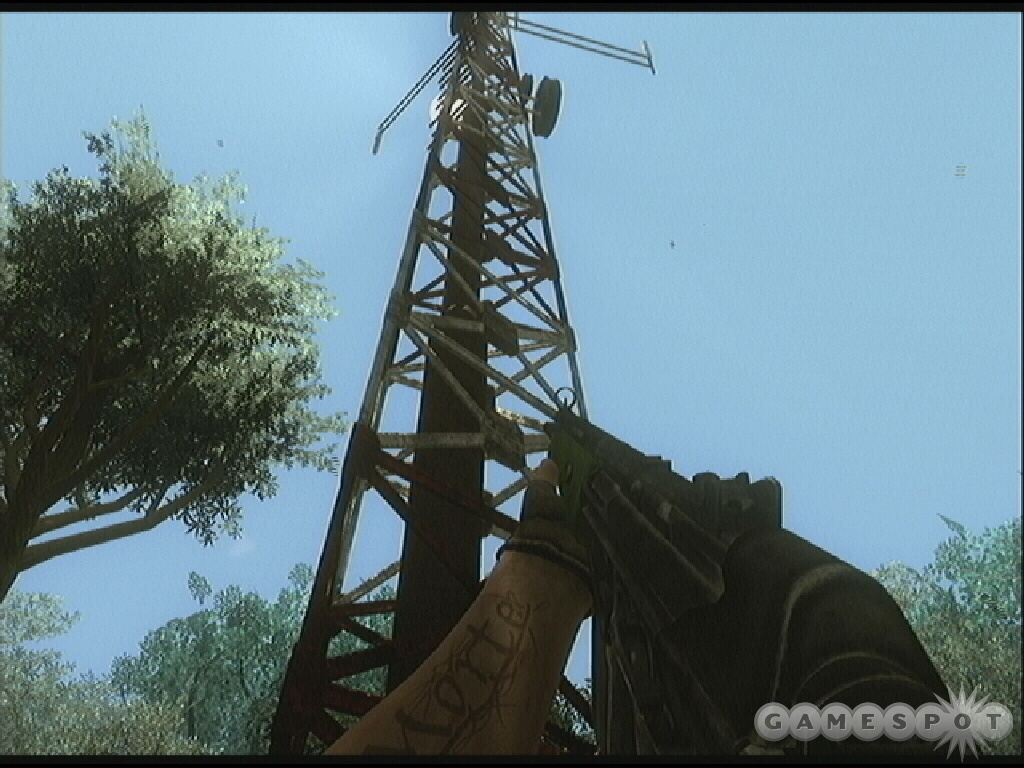
Note that the targets aren’t assigned in the same order every time so expect the order to be different on your play-through. Just check the map for the target location and match it with the walk-through below.
Target #1: Located in Pala. He’s in an alley. Sneak around to an adjacent alley on the northern side. Equip the machete and sneak up behind the smoking target. When no one is watching, attack and eliminate. If you’re heard, run out of the city.
Target #2: Southeast section in Mokuba. Find it south from the eastern cell tower and beyond a guard station. He’s armed with a pistol. Take him out and attempt to avoid riling up the locals.
Target #3: Located in Pala. Find the target smoking in the alleyway. Sneak up behind him with a machete. Make sure no one is paying attention! If you’re heard, be prepared to flee the city.
Target #4: Located northwest from Pala. Find an airboat next to a dock west out of Pala. Your target is in the town of Shwasana. Approach in the airboat from the south. Ignore the guards just south as they shoot at you. Drive up to the bank south of Shwasana. Stick along the south of the village and keep moving until you’re south of the target. You should be able to find a vantage point to snipe from and eliminate the target from long-range.
Target #5: Directly south on the edge of the map-at the airport. Take the bus to the southwest station. Grab a car and drive east either engaging the safe house troops or avoiding them to the south. Continue to the southern side of the airfield. Park the car and look north into the open hanger doors-the target is just inside. Take him down from long-range. Or sneak into the hanger and eliminate him while he takes a nap.
Target #6: A convoy moves along the southern edge of the map near the airfield. Take the bus to the southwest station. Watch the convoy pattern. You can come equipped with a rocket launcher and blast the target or drop some IEDs along the convoy’s path (watch where it crosses north of the airfield for the easiest spot). The target is in the center vehicle; the front and rear vehicles are providing armed escort.
Act 2 Assassination Missions
Locate one of the cellular towers in the area; check the main map. Drive to one of the towers and use the action button next to the tower to activate the assassination mission.
Note that the targets aren’t assigned in the same order every time so expect the order to be different on your play-through. Just check the map for the target location and match it with the walk-through below.
Target #1: There’s a convoy moving through the northeast. It moves near the northeast bus station. Take the bus there and then set up camp alongside the road. Drop IEDs along the road and wait for the convoy to arrive. The target rides in the middle vehicle; it’s flanked by a couple of armed escorts. Destroy the middle car to complete the task. Spread the IEDs carefully and you can eliminate the lead and trailing escort vehicles as well as the target in a single explosion.
Target #2: Take the bus to the northwest station to reach the nearby target. He’s in the town of Sefapane. The target stands in front of the APR building. You can take him out using any method you wish just expect an uprising when you break the cease-fire. Be prepared to exit the city fast and avoid confrontation from the irritated locals.
Target #3: Proceed to the bus station in the middle of the map-the target is inside Mosate Selao. He’s just walking around the streets and he’s clearly marked on the map. Take him out by any means but just realize that if you cause a ruckus the locals will not be pleased and you’ll have to run out of town.
Target #4:Take the bus to the port just outside Mosate Selao-there’s another target hanging around town. Drive into the town. The target walks around the western side of the city. Take him out using any method you wish but just realize that firing a weapon will cause the locals to retaliate. Use a dart gun to maintain silence. Get out of town and back to the port bus station.
Target #5: There’s a target in Dogon Village; it’s west of the northeast bus station and west of the cellular tower nearest that bus station. The town isn’t friendly so it’s best to try and sneak inside. Use a silent weapon so you don’t attract too much attention. You can eliminate enemy guards as you move through Dogon toward the target but keep it quiet. There are some ladders attached to buildings; climb the ladders to get on rooftops for a better shot at the target. Eliminate the target and flee the town.
Target #6: Take the bus to the center station at Port Selao. Check the map and spot the target at the guard station to the east. Drive through Mosate Selao and exit to the east. Get out of the car as you near the guard station. Move on the right side of the road and into the brush. Use a sniper to scope the guard post. Locate the target and then eliminate.
Chapter 6 - Jackal Tapes and Golden AK-47s
Hidden among the vast Far Cry 2 landscape are cassette tapes of the Jackal and Golden AK-47s. We’ve compiled and detailed the locations of the Jackal Tapes and the Golden AK-47s we found while searching through the grasslands, deserts, mountains, and rivers.
Jackal Tapes
Collect the Jackal Tapes for additional story background; plus, you can bring them back to Reuben, who hangs out in Mike’s Bar, and get an achievement upon collecting each area’s set of eight.
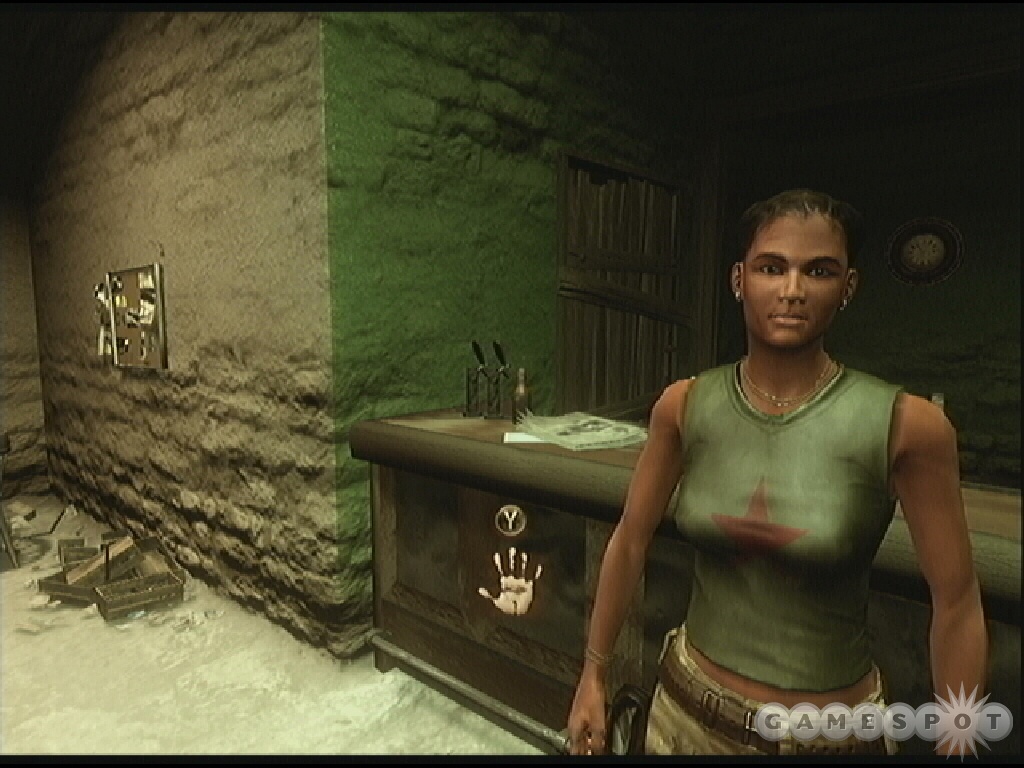
Here are the locations of the Jackal Tapes found in Leboa-Sako, the northern first section explored in Far Cry 2 during Act 1.
- Take the bus to the northwest station and then drive southwest as if you’re going off road toward the underground cell in the area. Find a small outpost just east of the guard station that’s east of North Railyard. Find the tape player in that small outpost.
- Take the bus to the northeast section and then drive north toward the oasis. Go west until you are past the Fort and hit the train tracks. Search the area where the train tracks enter this area of the map and locate a small hut with a tape player.
- Go to the southwest bus station. Drive northwest past the underground cell and toward the two rock formations, one vertical and one horizontal on the map. Drive through and continue northwest and find a crashed airplane. There’s a Jackal cassette tape on the back of the plane.
- Go to either the southwest or southeast bus station. You want to go over to the airfield in the south section. Look directly east of the airfield to spot a half-circle rock formation and black dot on the map. Go to that dot. There’s a plane crash and small camp. There’s a Jackal tape inside.
- Go to the southeast bus station. Drive northeast from here toward the dot on the map (east of the brown circular formation). There’s an enemy camp there and a rundown old bus. Find a tape next to the bus.
- Go to the northwest bus station and drive east along the train tracks. Look at the dots on the map north of the guard station. Go there to find a couple of old buildings. There’s a tape on a bench outside.
- Take one of the western bus stations and drive toward police station located in the western side of the map. Spot the guard station north of the police station. Find a short road just south of that guard station; the road leads to the east. There’s something at the end of it indicated by the dot on the map. It’s a car run into the lake; find a tape next to the dead body.
- Exit Pala to the east and follow the road toward the next map. On it you’ll find "Private Property" to the north. When you reach the four-way intersection, turn south toward the guard post. Instead of going to the guard post, search the edge of the mountain to its west. Check the northeast side of the mountain. In the thick forest there’s a run down vehicle. Look inside for a Jackal tape next to a diamond briefcase.
Here are the locations of the Jackal Tapes found in Bowa-Seko, the southern second section explored in Far Cry 2 during Act 2 and 3.
- From the southwest bus station, grab the dune buggy and drive west along the road. There’s a blue bus on the right side of the road. Inside you’ll find a Jackal tape.
- From the southwest bus station, drive west along the road to the western edge of the map. Continue north along the west edge until you’re on the next map toward the Ranger Station. Search the southwest corner of this map just southwest from the guard station to find a small hut holding a Jackal tape.
- From the northeastern cellular tower, go south along the road toward the river. Once there, search along the bank going south until you find the crashed plane. There’s a Jackal tape there.
- Go to the northwestern bus station. Drive to the northwest corner of the map and go south past the weapon shop. Continue down toward the safe house. Drive southeast from the safe house and locate an abandoned bus and small camp. There’s a tape in the camp. There’s also a diamond briefcase by the nearby rocks.
- On the road that runs south toward the M-S Pipeline, search the right side of the road (if you’re moving south) and find a car that has a Jackal tape running next to it. It’s about halfway down between the safe house to the north and the pipeline to the south.
- Pilot a boat from the port south of Mosate Selao and go southeast to the island of Sehlakalase. Get on the western side and follow the forest path to the rectangle on the map. There’s a farming camp there. Go inside the building and into the basement. Find the tape on the desk.
- Go to northeast bus station and drive west toward the adjacent map containing Dogon Village. Enter the village and hang along the eastern edge. Expect enemies everywhere. Find the staircase up to the northern village area. Continue up toward the northwestern side. You’ll spot a hang glider as well as a bunch of small huts. Search the huts on the far side (use locator if necessary) and locate a Jackal tape inside one.
- Go to the northeast bus station. Drive through the crash site. Follow that road around to the western side and south. There’s an abandoned truck by the lake. Find the tape on the ground.
Golden AK-47s
Search the northern and southern sectors long enough and you may find a Golden AK-47. Although similar to the run-of-the-mill AK-47 you can grab from the weapon shop, the Golden variety offers much greater durability. You can stash one in a primary weapon locker to wield one and keep one behind for future use.
Here are the locations of the Golden AK-47s we’ve found in Leboa-Sako, the northern first section explored in Far Cry 2 during Act 1.
- Go to the northwestern bus station and drive down between the two mountains that are northeast of the southern guard station (the mountains just east of the Cattle Xing). Look on the southeastern side of the northern mountain to find a diamond briefcase by a couple huts. Go to the opposite side of the mountain-the eastern side-and look just north of the tree, a tree that looks like it’s coming out of the mountain. There will be a rock formation next to the mountain that’s basically forming a cave. Break the boards blocking entrance into this "cave" and find the golden AK inside.
- Proceed to the southeastern bus station. Drive north past the guard station onto the next map. Look around the weapon shop onto the adjacent road to the east. There’s a dot on the map. Go to that dot (essentially the southeastern corner of this map). There’s an abandoned shack there with a diamond briefcase inside. Next to it is the golden AK.
- Go to the southwest bus station. Drive northwest past the cell. Go in between the two mountains. Look on the northern side of the western mountain, nearly directly south of the guard station to the north. Get up this mountain by exploring the western side and moving your way east. Look along the edge of the mountain for a boarded-up cavern. Break the boards and grab the AK inside.
- Go to the southeast bus station. Drive west toward the guard station but then turn south toward the lake. Go to the lakefront and spot the hut. Continue south from the hut and keep looking at the mountain to your left. After you move through the water around a big rock, look left on the mountainside and spot a row of green bushes. Walk through the bushes to find the golden AK-47 in a tight alcove.
Here are the locations of the Golden AK-47s we’ve found in Bowa-Seko, the southern second section explored in Far Cry 2 during Act 2 and 3.
- Go to the southwest bus station, drive up to the TaeMoCo Mine. Search the road that runs east of the TaeMoCo Mine. Nearly directly east from the mine’s center there’s a small abandoned outpost along the road. Search inside for a Golden AK-47. Jump through the back window.
- Go to the northeast bus station. Drive southeast along the road and past a couple guard stations. Enter the next map from the road furthest to the east. Go past the cell tower and safe house. Follow the river south just past the guard station. Explore the eastern side close to the mountain. You’ll find a small alcove marked with a red barrel-the golden AK is right behind it.
- Take the bus to the northeast station. Drive through the Crash Site and west onto the next map section. Go west past Sediko. Connect with the road and follow it west. Continue along this road until you reach the wishbone-like fork at the end. Go left toward the southern side and reach the dot on the map at the end. It’s a small outpost, which may include enemies. Spot the hang glider on the cliff. Look over the cliff and spot the AK just below.
- After going through the Heart of Darkness, go south from the nearest safe house. As you move east toward the swamp, find a tree that has fallen over. It connects the northern and southern sides of the passage. Walk across the tree. Find the golden AK-47 at the top.
Chapter 7 - Multiplayer
Far Cry 2 features a collection of solo and team multiplayer modes, including deathmatch, team deathmatch, capture the diamond (basically capture the flag), and uprising, which is similar to other control point capture games. In this section we’ll provide some tips on Far Cry 2 multiplayer, including a rundown of all the available classes and upgrades and specific battle tips for overcoming your competition.
Classes
When you join a Far Cry 2 multiplayer game you’ll have a chance to select your class (and eventually equipment) at the loadout screen. Each class has specific strengths and weaknesses. All classes can receive weapon upgrades, which are tracked underneath the weapon selection. Note that you’ll need to play ranked matches to keep these unlocks.
Use a weapon and over time you begin to build skill with that weapon; three different skills are tracked. Complete the "Operation Manual" bar to increase weapon accuracy; complete the "Maintenance Manual" bar to increase weapon reliability; and complete the "Bandolier" bar to increase weapon ammunition.
Also as you increase in rank by acquiring experience points (from kills and completing game objectives) you gain diamonds, which can be spent to unlock weapons for a specific character class. For instance, spend a diamond on the commando class and you unlock the AK-47, an additional primary weapon; spend two diamonds on the command class and along with the AK-47, you unlock the M-79 grenade launcher, an additional secondary weapon.
Commando
The commando is essentially your standard combat class and certainly a good start for new players. Use the G3-KA4 in short-controlled bursts to increase accuracy. Spending two diamonds unlocks the M-79 grenade launcher giving the commando excellent ability to assault a position-just clear out the defenders with a couple potent grenade tosses, which seems particularly potent online.
Primary Weapons G3-KA4, AK-47 (1 diamond), FAL Paratrooper (3 diamonds) Secondary Weapons Star .45, M-79 Grenade Launcher (2 diamonds) Throw Weapon Molotov Cocktail
Sharpshooter
Players who like to find a nice hiding spot and shoot enemy players from long-rage will want to use the sharpshooter class. You aren’t going to win close-range battles against commandos. Get into a sniper perch, crouch behind a rock, or get inside thick brush. Target enemy defensive positions or keep an eye on your own defended areas to eliminate incoming attackers.
Primary Weapons M1903, Dragunov SVD (1 diamond), AS50 (3 diamonds) Secondary Weapons Makarov, Flare Pistol (2 diamonds) Throw Weapon Grenade
Guerilla
The shotgun makes the guerilla class a close-range combat and ambush specialist. Hide around corners or behind objects and wait for enemies to get close; pounce and blast the enemy with a close-range shotgun burst. Avoid exposure in open areas. Defend key areas by remaining hidden until enemies approach. Unlock the IEDs to further enhance ambush tactics by setting booby traps.
Primary Weapons Homeland 37, SPAS-12 (1 diamond), USAS-12 (3 diamonds) Secondary Weapons MAC-10, IED (2 diamonds) Throw Weapon Molotov Cocktail
Rebel
The rebel classes uses the flamethrower as its base primary weapon; additional unlocks include the rocket launcher and the multiple grenade launcher MGL-140. The rebel can cause chaos when initiating an attack on an enemy position-or obliterate all defenders with a couple rocket blasts-and can effectively repel an attack with multiple explosive shots. Unlock the Uzi for a solid weapon to finish off enemies weakened by your flame and grenades.
Primary Weapons LPO-50, RPG-7 Rocket Launcher (1 diamond), MGL-140 (3 diamonds) Secondary Weapons Makarov, Uzi (2 diamonds) Throw Weapon Grenade
Gunner
The gunner can wield a couple light machine guns, both featuring a large ammo capacity, to help mow down incoming attackers or to provide fire support to a close-range attack team. Avoid run-and-gun; look for a position to remain stationary to increase weapon accuracy on these machine guns. The gunner can also wield the Carl G Rocket Launcher as a primary weapon.
Primary Weapons PKM, Carl G Rocket Launcher (1 diamond), M-249 SAW (3 diamonds) Secondary Weapons Eagle .50, MAC-10 (2 diamonds) Throw Weapon Grenade
Saboteur
The saboteur is for stealth players-the saboteur uses silenced weapons. The dart rifle comes standard issue as the saboteur’s initial primary weapon but the class can unlock a sub-machine gun, the silent MP-5, and an assault rifle, the AR-16. The saboteur also gets IEDs with diamond unlocks; use them to set up traps to aid in team defensive situations while using the dart rifle to snipe incoming attackers. The downside is the dart rifle has low ammo capacity and a low reload time-if you want to snipe, you’re better off with the sharpshooter.
Primary Weapons Dart Rifle, Silent MP-5 (1 diamond), AR-16 (3 diamonds) Secondary Weapons Silent Makarov .6P9, IED (2 diamonds) Throw Weapon Molotov Cocktail
Multiplayer Tips
Use the list of multiplayer tips below to gain an edge on your competition online. These strategies cover classes, combat tips, and working together as a team.
- Instead of adjusting your play style to your selected character class, select your character class based on your play style. If you want to serve on offensive role on your team, consider the commando, saboteur, or rebel classes; if you want to serve a defensive role on your team, consider the sharpshooter, guerilla, or gunner classes. Switching roles and weapons frequently may have higher entertainment value but when you stick to a particular class and spend the diamonds to upgrade it, you gain more powerful weapons. Plus sticking with a specific weapon can unlock accuracy, reliability, and capacity upgrades. It pays to specialize.
- Far Cry 2 isn’t run and gun. This isn’t a game of Quake. Weapons inflict large damage and you won’t last long if you are sticking out in the open and presenting an inviting target for the enemy forces. Be more patient. Look for opportunities to get a jump on your enemy. Take cover behind objects, inside bushes, or around corners. Watch for enemy movements and make sure you get in the first shot. When you are engaged, aim for the enemy’s head for better damage.
- Most of the game modes are team-based (there is a solo deathmatch free-for-all mode). Be a team player. Look for opportunities to aid a teammate in battle-two guns are better than one! Speak frequently with your team so you know which players need assistance. Spread information about enemy locations to better mount an attack or prepare a defense. Far Cry 2 allows you to revive wounded teammates. When you see the health cross on your HUD, quickly get to that location and interact to revive your teammate-in team deathmatch this prevents a kill score and it always prevents respawn time. On the flip side, prevent enemy revives by finishing off your opponent with a kill shot.
- While team deathmatch certainly benefits from an organized team, capture the diamond and uprising basically requires one. Set up an organized offense and defense when going after the diamond or a control point. Uprising is unique because the captain captures the control points-so the team must provide fulfill roles in offense (attacking an enemy defended point), defense (defending a captured point) and escort (protecting the captain). Make sure the appropriate classes are serving the roles. Commandos and guerillas are best at escort (guerillas providing close-range ambush on the attackers) while sharpshooters and gunners aid in control point defense.
- When attacking a position, spread the team out. A single shot from a grenade launcher has been known to wipe out a poorly organized attack force that approaches in one big clump. Don’t let that be you. Attack a position from all angles-surrounding defenders completely providing little options for their counter attack. Sharpshooters and saboteurs can provide long-range support with sniping and stealth tactics respectively. Likewise, on defense be creative. Use IEDs to trap chokepoints-and mix it up to keep the other team guessing. Guerillas should hide near important positions where enemies like to tread. Sharpshooters should keep their scopes locked on pathways to your team’s important positions.
Chapter 8 - XBox 360 Achievements
The table below reveals the Far Cry 2 XBox 360 achievements.
| ACHIEVEMENT | DESCRIPTION | GAMERSCORE |
|---|---|---|
| Stickin’ it to the man | Kill a faction Captain in Leboa-Sako - the Northern Territory. | 10 |
| Wages of Conflict | Acquire all conflict diamonds in the game available through payment or exploration. | 10 |
| Making friends | Save a Buddy from captivity. | 10 |
| The best laid plans | Work with a Buddy to subvert a mission offered by a faction. | 10 |
| Wanderer | Find all the safe houses in Leboa-Sako - the Northern Territory. | 10 |
| Orienteer | Find all safe houses in Bowa-Seko - the Southern Territory. | 10 |
| Investigative Reporter | Turn over the first set of the Jackal’s audio logs to the Journalist. | 10 |
| Messenger | Complete all the available Underground side-quests in both the North and the South. | 10 |
| Supply... | Unlock new weapons by hitting a Convoy. | 10 |
| On the run | Escape the town. | 10 |
| Down but not out | Escape to Bowa-Seko - the Southern territory. | 10 |
| Weapon Specialist | Purchase the manuals and acquire the bandolier for one weapon. | 10 |
| Bagman | Deliver stamped travel documents to the Underground in exchange for medicine. | 10 |
| Lineman | Complete a Mission intercepted from a cellular tower signal. | 20 |
| Dawa ya moto ni moto | Break the ceasefire and reignite the conflict. | 20 |
| Lent a hand | Complete a Buddy side quest. | 20 |
| Out of the frying pan... | Get rescued by a Buddy. | 20 |
| Dr Livingston, I presume | Enter every 1 square kilometer map region of the world. | 20 |
| Pulitzer material | Turn over all the Jackal’s audio logs to the Journalist. | 20 |
| Weapons Expert | Purchase all manuals and acquire the bandoliers for every weapon. | 20 |
| Playing both sides... | Switch sides in Leboa-Sako - the Northern Territory. | 20 |
| ...against the middle | Switch sides in Bowa-Seko - the Southern Territory. | 20 |
| ...and demand | Unlock all weapons by hitting every Convoy. | 20 |
| Prison escape | Escape torture at the old slave outpost. | 20 |
| Last man standing | Wipe out the senior leadership of both Factions and determine who will be the new Warlords. | 30 |
| ...into the fire. | Save a Buddy from a mortal wound. | 30 |
| The third faction | Rescue all Buddies from their respective predicaments. | 30 |
| Ruthless | Subvert all the main faction missions in Leboa-Sako - the Northern Territory. | 30 |
| Cold Blooded | Subvert all the main faction missions in Bowa-Seko - the Southern Territory. | 30 |
| Utility Man | Completed all Missions intercepted from cellular tower signals. | 30 |
| Good night sweet prince | Comfort a Buddy and ease his passing. | 40 |
| Heart of Darkness | Enter the Heart of Darkness | 40 |
| First Response Team | Get highest revives count in a ranked match. | 10 |
| Hired Gun | Reach Rank 5 (Ranked Match) | 20 |
| Superior Captain | Win a round as the Captain in Uprising mode (Ranked Match) | 10 |
| Best in Class | Get highest xp total in one match (Ranked Match) | 20 |
| War Party | Win a match with 16 players (Ranked Match) | 20 |
| Upgraded Player | Upgrade one class 3 times (Ranked Match) | 20 |
| Safari Tour | Play at least one full round in every Official Map (Ranked Match) | 20 |
| Battle Hardened | Play at least one full round in every Game Mode (Ranked Match) | 20 |
| Professional | Reach Rank 10 (Ranked Match) | 30 |
| Mercenary | Reach Rank 20 (Ranked Match) | 30 |
| Field Hospital | Get 500 revives (Ranked Match) | 40 |
| Warlord | Achieve Rank 30 (Ranked Match) | 40 |
| Soldier of Misfortune | Unlock field manuals for all weapons (Ranked Match) | 40 |
| Mapper | Create a map and get it validated in all game modes. | 10 |
| Adventurer | Download and rate 25 usermaps. | 20 |
| The horror... the horror... | Resolve the conflict with the Jackal and facilitate the exodus. | 40 |
Chapter 9 - PlayStation 3 Trophies
The table below reveals the Far Cry 2 PlayStation 3 trophies.
| NAME | DESCRIPTION | TROPHY |
|---|---|---|
| Stickin’ it to the man | Kill a faction Captain in Leboa-Sako - the Northern Territory. | Bronze |
| Wages of Conflict | Acquire all conflict diamonds in the game available through payment or exploration. | Bronze |
| Making friends | Save a Buddy from captivity. | Bronze |
| The best laid plans | Work with a Buddy to subvert a mission offered by a faction. | Bronze |
| Wanderer | Find all the safe houses in Leboa-Sako - the Northern Territory. | Bronze |
| Orienteer | Find all safe houses in Bowa-Seko - the Southern Territory. | Bronze |
| Investigative Reporter | Turn over the first set of the Jackal’s audio logs to the Journalist. | Bronze |
| Messenger | Complete all the available Underground side-quests in both the North and the South. | Bronze |
| Supply... | Unlock new weapons by hitting a Convoy. | Bronze |
| On the run | Escape the town. | Bronze |
| Down but not out | Escape to Bowa-Seko - the Southern territory. | Bronze |
| Weapon Specialist | Purchase the manuals and acquire the bandolier for one weapon. | Bronze |
| Bagman | Deliver stamped travel documents to the Underground in exchange for medicine. | Bronze |
| Lineman | Complete a Mission intercepted from a cellular tower signal. | Bronze |
| Dawa ya moto ni moto | Break the ceasefire and reignite the conflict. | Bronze |
| Lent a hand | Complete a Buddy side quest. | Bronze |
| Out of the frying pan... | Get rescued by a Buddy. | Bronze |
| Dr Livingston, I presume | Enter every 1 square kilometer map region of the world. | Bronze |
| Pulitzer material | Turn over all the Jackal’s audio logs to the Journalist. | Bronze |
| Weapons Expert | Purchase all manuals and acquire the bandoliers for every weapon. | Bronze |
| Playing both sides... | Switch sides in Leboa-Sako - the Northern Territory. | Bronze |
| ...against the middle | Switch sides in Bowa-Seko - the Southern Territory. | Bronze |
| ...and demand | Unlock all weapons by hitting every Convoy. | Bronze |
| Prison escape | Escape torture at the old slave outpost. | Bronze |
| Last man standing | Wipe out the senior leadership of both Factions and determine who will be the new Warlords. | Bronze |
| ...into the fire. | Save a Buddy from a mortal wound. | Bronze |
| The third faction | Rescue all Buddies from their respective predicaments. | Bronze |
| Ruthless | Subvert all the main faction missions in Leboa-Sako - the Northern Territory. | Bronze |
| Cold Blooded | Subvert all the main faction missions in Bowa-Seko - the Southern Territory. | Bronze |
| Utility Man | Completed all Missions intercepted from cellular tower signals. | Silver |
| Good night sweet prince | Comfort a Buddy and ease his passing. | Silver |
| Heart of Darkness | Enter the Heart of Darkness | Gold |
| First Response Team | Get highest revives count in a ranked match. | Bronze |
| Hired Gun | Reach Rank 5 (Ranked Match) | Bronze |
| Superior Captain | Win a round as the Captain in Uprising mode (Ranked Match) | Bronze |
| Best in Class | Get highest xp total in one match (Ranked Match) | Bronze |
| War Party | Win a match with 16 players (Ranked Match) | Bronze |
| Upgraded Player | Upgrade one class 3 times (Ranked Match) | Bronze |
| Safari Tour | Play at least one full round in every Official Map (Ranked Match) | Bronze |
| Battle Hardened | Play at least one full round in every Game Mode (Ranked Match) | Bronze |
| Professional | Reach Rank 10 (Ranked Match) | Silver |
| Mercenary | Reach Rank 20 (Ranked Match) | Silver |
| Field Hospital | Get 500 revives (Ranked Match) | Silver |
| Warlord | Achieve Rank 30 (Ranked Match) | Silver |
| Soldier of Misfortune | Unlock field manuals for all weapons (Ranked Match) | Gold |
| Mapper | Create a map and get it validated in all game modes. | Bronze |
| Adventurer | Download and rate 25 usermaps. | Silver |
| Iron-guts | Earn the highest honors. | Platinum |
| The horror... the horror... | Resolve your conflict with the Jackal to facilitate the exodus. | Gold |
Got a news tip or want to contact us directly? Email news@gamespot.com
Join the conversation