Darkwatch Walkthrough
Capcom's Darkwatch is a gritty, vampire-themed FPS set in the Old West, where the undead are rising from their graves and only one man can put them to rest: Jericho Cross. GameSpot's Walkthrough to Darkwatch will help you save your soul!
Design by Randall Montanari
Jericho Cross isn't a man of subtleties - when he sees something he wants, he goes out and grabs it. His penchant for action, and his unwillingness to follow the law of the land has earned him a number of epithets from the citizenry, with "outlaw" being primary among them. Shortly after the beginning of Darkwatch, though, he'll add "half-blood vampire" to the list, and will have to track down and destroy Lazarus, the demon that cursed his soul. With the help of the Darkwatch, a secret society that has fought against evil, he'll have to chop through zombies, skeletons, and scores of other undead foes to reach Lazarus. But when he does, will he choose to remove the curse that was lain on him, or usurp Lazarus' throne and become the new king of evil?
Darkwatch bills itself as the first vampire Western game, and although we can't confirm its primacy on that count, we can confirm that it is a fun shooter, with fast-paced gameplay and a decently long single-player campaign. GameSpot's Game Guide to Darkwatch is going to supply you with a full walkthrough for the game, along with tips on using your powers, weapons, and on how to survive in general combat. Enjoy!
Weapons
You can only hold two weapon in a time in Darkwatch, a la Halo, so you'll need to choose wisely, depending on the situation and how much ammo you're finding.
Redeemer
The Redeemer is going to be a trusty weapon, and for the standard firearm in the game, it's not as bad as you may think. Although it's almost definitely the weakest weapon in the game, the overall power average still makes it pretty effective, especially when dealing with weak enemies at close range. It can hold a good number of rounds per clip, reloads quickly, and can be fired rapidly by holding down the fire button. Unfortunately, it has a pretty large aiming reticule, meaning that it isn't as accurate as some of the other weapons you'll come across, making it somewhat difficult to get headshots, even at close range, but you can generally kill enemies with rapid-fire shots to the chest without much difficulty. The melee attack is likewise not very powerful, but it can decapitate Reapers and the like if you aim it properly.
Dual Pistols
Although dual pistols don't show up until a few levels into the game, they're still going to be fairly useful when you do come across them. These aren't dual Redeemers, nor are they dual six-shooters, but instead appear to be a pair of large-clip revolvers, each of which can fire around 20 rounds before having to reload. These guns can be fired in automatic mode, however, like the Redeemer, by simply holding down the firing button, but, also like the Redeemer, they'll be subject to some nasty recoil when you attempt to fire them so, making them best for close-range work. They're less than accurate when fired at medium or long range, even when you single-fire them.
Carbine

Although the carbine is found relatively early in the game, it's going to be a faithful companion to you throughout, as it possesses a host of advantages over many of the other weapons in the game. The carbine is essentially an automatic rifle, which can fire single rounds with excellent precision, especially when you use the Blood Vision zooming mode, which draws enemies into sharp contrast with the environment, allowing you to more easily aim for their heads. It can also hold a good number of rounds per clip, can reload individual rounds, which allows you to fire before it's fully reloaded if you need to, and has a good ammo capacity overall. It also fires rapidly, making it suitable for close-range encounters, although you'll ideally want to use dual pistols or a shotgun when things get really hairy.
Shotgun

The king of short-range firepower, the shotgun is going to be something you'll probably want to pair up with your carbine as often as possible. While it isn't always an instant-kill weapon, impacting an enemy with the full spread of pellets will do severe damage to them, and even when you miss with a few, they'll likely impact other enemies on either side of the one you're aiming at. At close range, this is the headshot king; it's especially useful against the quick-moving Banshees after you've drawn them into melee range, as a single shot to their head will kill them instantly. It's also worth noting that it has one of the most powerful melee attacks of any weapon, since it rises straight up the middle of the screen and can pop the heads and arms off of normal enemies with ease.
Crossbow
Of the many weapons in Darkwatch, we found the crossbow to be the least desirable. When fired, its bolts don't actually do any damage to your opponents; instead, you have to wait for the explosive tip of the bolt to detonate (which takes two or three seconds) for them to take a bit of explosive damage. We say "a bit" because these explosions will rarely kill an opponent outright, unless you're aiming at a simple Reaper or a zombie. All of the higher-level enemies, like Banshees or Vipers, will require four or five bolts to kill, at least on the Shootist difficulty level. Since the bolts travel a bit more slowly than regular gunfire, they have a good chance of being dodged. It's also worth noting that the reload time for the crossbow is fairly long, and that the melee attack requires you to be standing almost directly on top of your target.
Another limiting factor here is that enemies hit with a crossbow bolt will usually run and scream until they blow up. While this can help scatter groups of enemies, these enemies will sometimes come running straight at you, causing you to take splash damage from the blast. This is especially true of Banshees, whom will often perform their charge precisely at the least opportune time. If this occurs, be sure to backpedal and double-jump out of the explosion radius as soon as you detect them coming at you.
Range Rifle
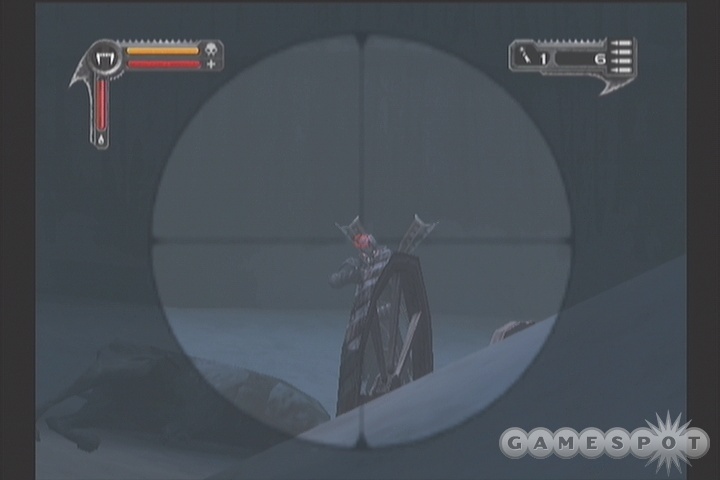
If you're looking to take down something at extremely long range, then the range rifle is your baby. With two levels of zoom, you can focus on distant enemies with relative ease, making it an effective counter-sniper weapon, especially since most enemy snipers will be dropping their own range rifles, giving you plenty of ammo for it. The main drawbacks are the lack of ammo capacity; you can only fire four rounds for the weapon before needing to reload it. This alone makes it difficult to use on enemies that actually attempt to engage you. Since it's easy enough to snipe enemies with the carbine (or perhaps more so, since you can't use Blood Vision with the range rifle), and that weapon can fire more rounds before needing to reload, it's usually going to be preferable to the range rifle for most combat situations.
Rail Rocket
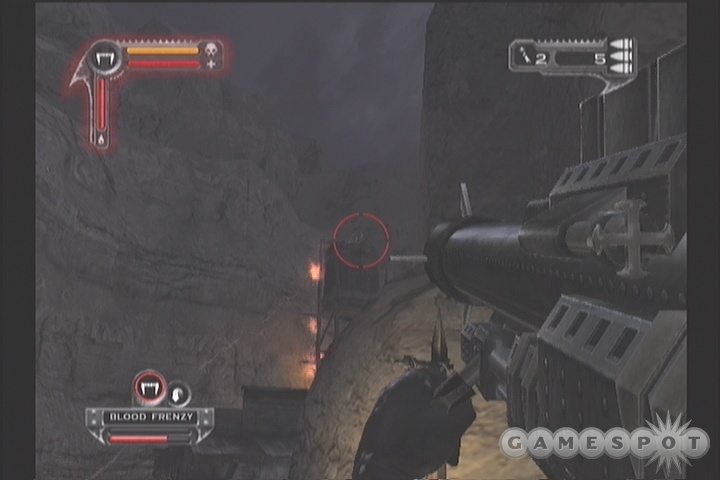
Although the rocket launcher is a venerable member of the friendly FPS arsenal, its implementation in Darkwatch isn't so hot, in our opinion. While it's decent against stationary targets like Marks of Evil, the Rail Rocket suffers from some seriously slow projectiles, which will often pass by the quicker-moving targets as they move around. This wouldn't be so bad if the rocket was a little more powerful, but like the crossbow, it's going to take multiple rockets to take out anything more powerful than a Reaper, and since most enemies will try to close in on you when they spot you, you're going to find yourself being unable to fire rockets much of the time anyway. Thankfully, the Rocket does have perhaps the most powerful melee attack in the game which, although it's fairly slow to "reload," can still pop the heads off of most enemies with a few good whacks, making it useful as a cudgel, if nothing else.
Dynamite
Your only throwing weapon in the game is dynamite, which acts just like a grenade would in any other FPS, save for the fact that its range is a bit greater than you're probably used to; if you want to land a stick of dynamite near an enemy at close range, you'll probably have to aim at the ground between you and your target and let the arc carry it forward. Even though dynamite packs a serious punch, most enemies can also easily avoid it by running away from the sticks, and will definitely take every opportunity to do so. Thus, dynamite is best used against enemies in a small location, where they can't avoid its effects, or against larger enemies like Executioners or Gluttons which won't be able to quickly run away.
You can hold six sticks of dynamite at a time, but pickups for it oddly come in packs of five, so keep that in mind when deciding whether to pick up a bundle of TNT or leave it for later retrieval.
Scepter
Although the scepter only appears in one level of the singleplayer campaign, it'll probably appear more often in the multiplayer portion of Darkwatch. Although it's only capable of melee attacks - it has no ranged capabilities - its melee attacks are the most powerful of any weapon in the game. Note that you can press your normal fire button to swing with it, but if you press the melee attack button, you should be able to swing more rapidly than if you used the fire button.
Powers
Your Judgement Powers in Darkwatch are going to be what you use to give yourself a bit of a vampirical edge over your foes. Your Judgement Powers are obtained by choosing among a set of binary choices that appear throughout the game, where you'll face a dilemma between doing something Good and performing an Evil action. Good actions will yield you Good powers, whereas Evil actions will obviously net you Evil powers. Pretty simple, right?
The most powerful Good and Evil choices come as a result of your interactions with other humans, and will generally involve you either choosing to kill them or choosing to save their life or grant them a mercy killing if they're too wounded to live. These choices are going to result in the biggest shift towards Good or Evil, but there are smaller, less significant choices to be made, which come when you encounter a Victim that Lazarus has left behind. These prisons for the souls of Lazarus' playthings will allow you to either absorb the soul (Evil) or release it (Good). In addition to a minor alignment shift, interacting with a victim will completely restore your health and blood shield, as well as fully charge your Power meter, allowing you to immediately use a Power.
Note that you don't have to choose an alignment and stick with it. If you wish, you can alternate between Good and Evil choices as you proceed through the game, and you'll wind up with a couple of the lower-level powers from each alignment instead of four from one alignment. This isn't recommended, though, as the fourth-level powers are going to be the ones that you're going to be using most later in the game. However, if you do stick with an alignment long enough to get all four powers for it, then it makes no sense to keep choosing that alignment when given the option, unless you're role-playing Jericho or something. Instead, you should start picking the other alignment when given the option to do so; doing so will probably allow you to pick up the first-tier power for the other alignment before the end of the game.
Anyway, there are eight powers total, split up between Good and Evil. If you find every last Victim in the game, it appears that you'll be able to possess up to five powers total; six appears to be outside the realm of possibility, unless there's a secret or code we don't know about. (And given that this is a game published by Capcom, this is a distinct possibility.)
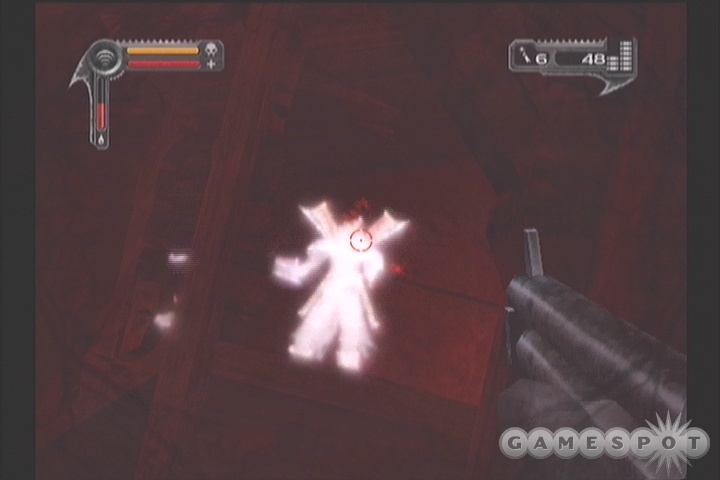
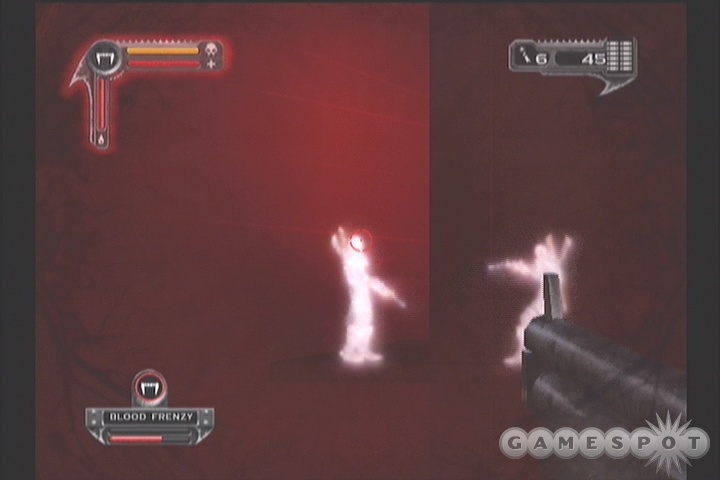
Your powers are fueled by the souls of enemies that you vanquish during combat. After killing an enemy, it'll release red orbs, with more difficult enemies releasing more orbs than mere peons. As you collect these orbs, you'll notice a vertical meter underneath your health and blood shield filling up. When it's full, the Powers bar in the lower left corner of the screen will light up and allow you to use one of your powers. You can only use one power at a time; after you do so, your meter will drain and you'll have to absorb another couple dozen soul orbs to charge it again. Obviously enough, you should hold off on using these powers until you feel sure that you need them; using them every time the meter fills up will often result in you being emptyhanded during a difficult fight.
Good
Silver Bullet
The first power you obtain as a knight of the Good is Silver Bullet, which gives Jericho the power to obtain crisp, cool beer whenever he likes. Mmm...beer. Well, no, we're joking - vampires don't drink beer. Instead, Silver Bullet will ramp up the damage that you deal with ranged weapons for the seven or eight seconds it remains active, and also give you infinite ammo while it remains active, thus obviating the need for you to reload. This is obviously best used in conjunction with a rapid-firing weapon, such as the Dual Pistols, which you can use to fan down multiple enemies or concentrate your fire on one powerful foe.
Fear
With Fear, you can intimidate nearby enemies and cause them to run away from you for a short period of time, giving you a bit of breathing room while your blood shield recharges. Powerful enemies are usually immune to its effects, though. In most cases, unless you're near death, you'll probably want to use Silver Bullet instead and just kill everything instead of causing them to run away.
Vindicator

The fourth-tier powers are going to be pretty much all you're going to use when you unlock them, since they'll allow you to clear the screen of enemies and then absorb the red orbs that they drop, which will hopefully almost completely refill your Powers meter, allowing you to use them again rather more quickly than you can with the earlier powers. Vindicator is arguably the more lethal of the two fourth-tier powers, since it fires a ball of electrical energy that will home in on enemies and kill them instantly. It won't travel on forever, but should be able to kill every enemy in your general vicinity before dissipating.
Mystic Armor
If you're in a real tight spot, Mystic Armor can help forestall your death by giving you a bit more shielding than you'd normally have. When activated, your blood shield and health bars will be covered by metal; any attacks that come at you will have to penetrate this metal before you can take any real damage. When all the metal is worn down, or when the timer on the ability wears away, you'll be back to normal and will be fully capable of dying, so you'll still need to keep an eye on your health while this is active. Again, a defensive power like this is usually going to be less useful in an offensively-minded game like Darkwatch than an offensive power like Silver Bullet. Besides, in most imminent death situations, the amount of time it takes to flip over to the Mystic Armor power and activate it will be longer than it takes to die.
Evil
Blood Frenzy

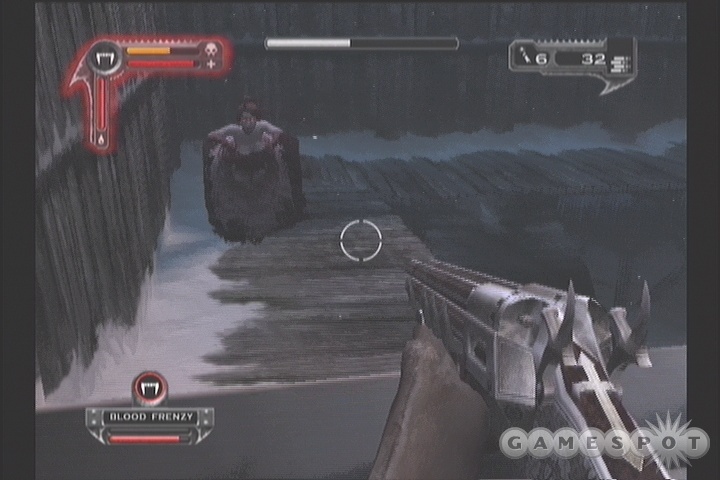
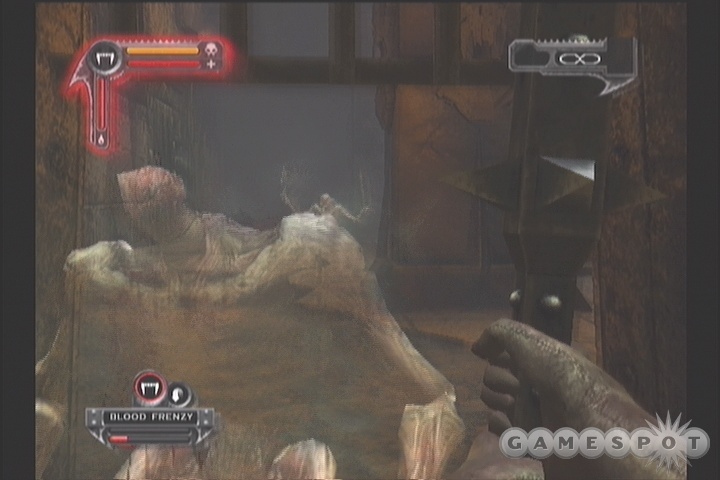
Blood Frenzy is the counterpart to Silver Bullet, but with a twist; instead of focusing on your ranged attacks, it'll supercharge your melee attacks, a la Berserk mode in Doom, letting you take down almost anything with a few good whacks from the butt of your shotgun. What's more, it'll also render you temporarily invulnerable to damage, meaning that you can wade into a crowd of reapers without fearing death. If you have Blood Frenzy, then you should keep it as your highlighted power in the powers bar as often as possible; the invincibility aspect can save your skin if you activate it just before you die.
Turn
The second-level powers are generally going to be less useful than the first-tier powers. Fear, for instance, will turn some of the foes near Jericho into your slaves and force them to turn on their erstwhile comrades, resulting in a bunch of enemies fighting each other. While this is amusing, it also really doesn't prevent other enemies from attacking you, nor does it increase your efficacy in combat, so in most situations it's best to just use Blood Frenzy and kill everything with that rather than go the complicated route by using Turn.
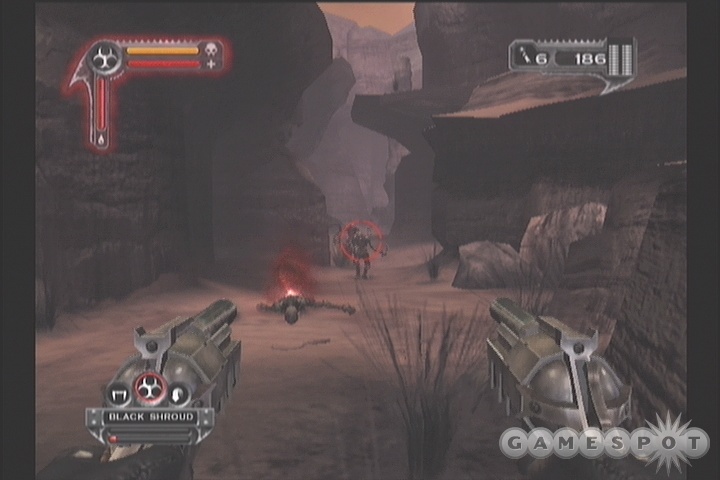
Black Shroud
The Black Shroud power acts almost identically to Mystic Armor, save that it appears to offer slightly less defense, and that it reflects a bit of damage back onto the attacker when they hit you. Since you already have a complete-immunity package in Blood Frenzy, this isn't going to be overly useful to you; when you get into a tight spot, it's better to use Frenzy to get out of it rather than anything else.
Soul Stealer
Soul Stealer is really the only Evil power than can compete with Blood Frenzy, but it does so pretty well. When activated, an arc of evil energy will shoot out in front of Jericho, instantly killing any normal enemy in its path. What's more, enemies that die due to this attack seem to drop many more soul orbs than they normally do, allowing you to recharge your powers meter much more easily than you'd normally be able to do so. This doesn't seek out enemies to kill, though, like Vindicator does, so you'll have to ensure that all of your targets are in front of you before you fire it off.
General Tips
Tense Leaning Action!
Although you have the ability to lean and crouch in Darkwatch, you're probably not going to need to do so very often. Crouching can be useful when you need to duck behind something to reload, but on every difficulty except Deadeye, your blood shield should be more than enough to keep you from getting killed before you can return to real cover. The lean command, however, can occasionally be useful, especially when dealing with Riflemen and Snipers. These enemies, you see, won't fire at you if you happen to lean out at them from behind a corner, making it a relatively easy task to get headshots on them. Just note their location, find a good corner to hide behind, lean out, then zoom in and go for their heads. You can take all the time you need, since you won't get fired on in return. This doesn't seem to work with most other enemies, however, since Snipers and Riflemen are the only foes that don't actually move.
Remove The Head, Or Destroy The Brain
One thing to keep in mind about Darkwatch is that, with few exceptions, enemies are usually going to be much more easily killed with headshots than with body shots, regardless of the weapon you're using. A good headshot seems to do around three or four times as much damage as a shot to any other part of the body, and with most of the weapons you're going to be using, will be capable of instantly killing most foes, even the heartier ones like Banshees. This isn’t true of all weapons - a Redeemer or Dual Pistols will still usually require a few headshots to kill an enemy, even Reapers - but in most cases, you're going to be well served by aiming for the head. The game's auto-lock helps matters somewhat by making your targeting reticule stick to hostile targets, but it usually targets the main body mass of your foe; get used to aiming a bit above it to connect with the head.
Adjust Your Loadout
You can only carry two weapons at any given time in Darkwatch, and although it may seem cool to run around with a rail rocket and a shotgun all the time, you really need to balance your loadout so that you can deal with more varied threats. We found that a good all-purpose pair of weapons were the carbine and the shotgun, with the carbine being useful for long and medium-range threats, and the shotgun being used when enemies get up close and personal. You can adjust either of these weapons as you like, such as by replacing the carbine with the range rifle, or the shotgun with dual pistols, but you'll always want to have one long/medium range weapon to go along with a medium/short range weapon.
Walkthrough
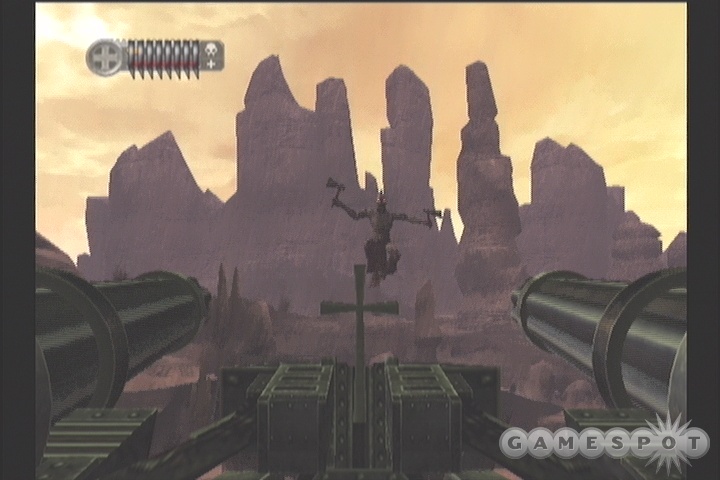
The Wrong Train
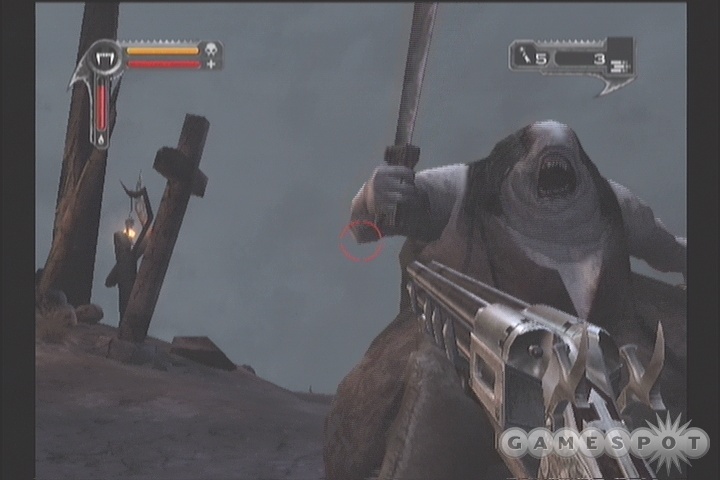
The Wrong Train is Darkwatch's tutorial level, and as such shouldn't be too much of a challenge for you, although you can easily die on Shootist or Deadeye mode, since you won't have your Blood Shield for the first few fights. Just trawl along the train until you come to the meatracks, where you'll encounter your first Skeleton. These guys are classic FPS enemies, in that they charge straight at you and attempt to slash at you with their axes. They're the easiest enemies in the game, but unfortunately, your six-shooter is also the weakest weapon in the game, so you're still going to have a rough time with them. Get headshots if you can, and feel free to just lay the hammer down on them, then whack them with your melee attack when they get close.
Eventually you'll run across a Darkwatch soldier who'll immediately drop dead and bequeath his Redeemer pistol to you, at which point you'll discard your six-shooter and start using the more powerful weapon. The Redeemer can hold many more bullets than the six-shooter, and can also be rapidly fired by holding down the fire button. This latter maneuver will come in handy when you reach the cars that possess multiple skeletons, as you can open the doors, back up, then force the skeletons to move through the gap between the cars, where you can rapid-fire them without having them dodge. Rapid-firing causes a lot of recoil, so unless you can maneuver your enemies into a small corridor, you may find yourself shooting over their heads.
Anyway, you'll shortly run across Cassidy, a comely member of Darkwatch. After you meet up with her, you quickly prove yourself to be massively intelligent by ignoring the rampaging undead foes and blowing open the safe here, unlocking Lazarus, a fearsome vampire foe that appears to be invulnerable to your weapons fire. Way to go, lunkhead. Oddly enough, Cassidy doesn't even seem to be all that mad at you. It's the eyepatch. Chicks dig it.

The remainder of the level takes place on top of the train, where you and Cassidy attempt to prevent Lazarus from escaping. Seeing as how it'd be a mighty short game if you were actually capable of doing so, you won't be able to kill him yet; all you can hope to do is weaken him until he flies off into the ether and leaves you and Cassidy in peace.
Since all you have at your disposal is the Redeemer, that's what you'll have to use on Lazarus and his skeletal cohorts. He has a pretty basic attack pattern, and one that's easy to pick up on. You'll also gain your Blood Shield at the beginning of this fight, the mechanics of which should be familiar if you've ever played Halo: if you take damage, your shield will go down a bit, but if you avoid getting hit for a few seconds, it'll recharge. You take no damage to your health until you lose all of your Blood Shield power.
Anyway, there are two major threats to you in this fight. The first are the appearance of multiple skeletons from the sides of the train; they'll hop up topside and quickly swarm towards you. The trick here is to just stay behind Cassidy and let her take the brunt of the assault while you shoot the skeletons off of her. She seems to be invulnerable to damage, so don't sacrifice yourself to save her or anything. The second thrust of attack comes from Lazarus himself, who will periodically disappear and start warping around the train's roof, eventually winding up close to you and taking a slash at you that's difficult to avoid. You can sometimes force him to come up short with his swing by shooting him as he approaches, but even if he does manage to hit you, he shouldn't manage to take off any health unless your Blood Shield has been depleted. If it's full, it'll be fully drained, but your health should remain intact.
The only real danger to you here, then, is to have your shield drained by the skeletons and then not have enough time to recharge it before Lazarus charges in. If you stay behind Cassidy, though, then this shouldn't be a problem. You can fire away at ol' Lazzy as normal through all this, whether he's near you or charging in, so just keep up your fire until the battle ends. If you need more ammo, walk up close to Cassidy, and she should resupply you automatically when you drop to around 25 shells or so. After enough gunfire, you win! Hooray you!
Ride Like The Devil
Ride Like The Devil is the first of Darkwatch's horse-riding levels, and is fairly brief, so take solace in that fact if you happen to dislike the mechanics for whatever reason. These are essentially rail-shooting levels; although you can move your horse with the left analog stick, your range of motion is pretty small. You can slow it down by pressing backwards, or speed it up by pressing forwards; this isn't so useful against the normal horsemen, but will come in handy against the boss here.
You can aim with the right analog stick, and you'll need to aim around rather quickly to track and shoot all of the Ryders that attempt to shoot you off your horse. If your sensitivity is set on the default setting, then it'll take a couple seconds to move it 180 degrees, so take advantage of the leaning mechanism by pressing left or right on your d-pad to avoid getting hit. You can still rotate your view while you're leaning, so get used to doing so.
After all the enemy horsemen are dead, Lazarus will appear again, apparently having shrugged off the ill effects of being blown up by a metric ton of TNT. He's sprouted wings, you'll note, and will thus be attacking you from the air. As before, he's hittable with your normal weapons, and since you have infinite ammo and don't have to reload, you should try to keep firing on him as much as possible, both to damage him and to avoid the ill effects of his firepower; one of his attacks involves a spread of dark energy balls, which you'll have to shoot before they hit you if you wish to avoid taking damage.

His other attacks include a strafing run of lightning bolts, which can be dodged by moving in a perpendicular line across his angle of attack. In other words, if he's coming at you from the north, then move either east or west to dodge this blow. Even if it hits, it shouldn't damage you beyond draining your shield, though. The real killer comes after the short cutscene that plays in the middle of the fight; Lazarus will subsequently whip out one big energy ball and chuck it on the ground. If you don't manage to get away from the detonation, it'll take off your energy shield and around half of your energy, leaving you capable of taking two hits from it at most before you die. Obviously enough, you'll need to dodge it! Before launching the ball, Lazarus will pause for a few seconds, so try to move laterally to the other side of Cassidy before it blows.
After dealing enough damage to Lazarus, he'll fly off again, leaving you and Cassidy at the Boneyard.
Boneyard
The first thing you'll note when you enter the Boneyard is your new ability, Blood Vision. When you click on your right analog stick, you'll be able to enter Blood Vision mode, which will draw enemies, weapons, and other critical items into sharp contrast, allowing you to easily spot them. This isn't quite as useful as the fact that it also lets you zoom in on your foes, which is helpful considering that you start out standing right next to a Carbine, your first alternate weapon. The Carbine is a highly accurate but slow-firing rifle that can hold twelve rounds at a time before reloading. It offers a good amount of stopping power, so pick it up and head down the ramp nearby.
The gate you wind up at is blocked, but you can shoot it with a single bullet to blow it open instantly. There's Dynamite in front of it, so pick it up and start using it on enemies! This is the only thrown weapon you get in Darkwatch, but it's quite potent. Like any other grenade, you'll be able to throw it and wait for it to detonate, but keep in mind that by default, you'll throw it quite a distance. When aiming at nearby foes, you'll want to aim at the ground in front of them and let the arc take it the extra distance. You'll note that enemies will run from the dynamite when it lands, so you'll want to get it as close as possible to them in order to ensure that it actually kills them when it hits.

As you proceed through the graveyard, keep in mind that Cassidy is again invulnerable, so feel free to stick behind her and let your Carbine do the talking. Soon enough you'll come across Gunslinger enemies, which pack Redeemers and are substantially tougher than the Skeletons to take out. Around the same time as you reach them, though, you'll also be able to pick up the Crossbow, which fires explosive bolts that detonate after they impact a foe (or a wall). Be careful not to fire at an enemy that's close to you, as they may charge at you and catch you in the detonation zone as well as themselves.
Your ultimate goal here is to reach the church on the far side of the graveyard, but it's not a far walk. You won't be able to immediately get inside, though; first you'll have to defeat a few waves of enemies. There'll be two Marks of Evil that pop up, one near the church and another on a hill within spitting distance of it. These will continually spawn in enemies until they're destroyed, so you'll obviously want to blow them up before worrying about the foes that are flooding in. They don't have an obscene amount of health, so if you chuck a few rounds of dynamite at them or hit them with a few crossbow arrows, they should keel over right quick. You should have plenty of Redeemer ammo thanks to all the dead Gunslingers, so you can even use its rapid-firing ability to blow these up in just a few seconds.
After both Marks are dead, head into the church catacombs. Cassidy will leave you behind, so you're on your own...
Devil's Belly Mine
A new weapon awaits you at the beginning of this level, in the form of the Shotgun. As you might expect, this is a close-range powerhouse, capable of taking down most enemies in just a few shots. It also has one of the most powerful melee attachments on it, so if you're going up against a roomful of skeletons, you can often take them all down without firing a shot.

After walking down the steps here, you'll get your first glimpse of a Banshee enemy, but you won't face her just yet. Instead, start working your way through the mines until you reach a large, circular room, which the ghouls predictably want to turn into an abattoir for you. The exits will lock when you enter, leaving you to face off against numerous skeletons and a few Banshees. You also gain the Vampire Jump ability when you enter this room, which allows you to double jump by tapping the jump button twice.
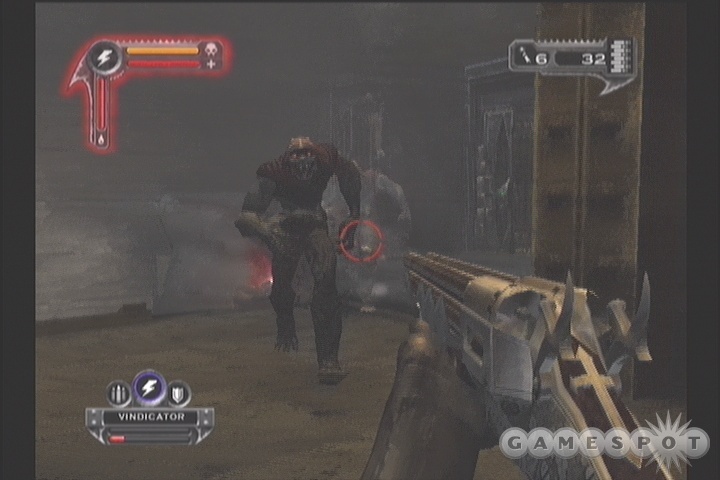
Banshees are a bit more difficult than the enemies that you've been seeing so far, and can actually manage to whittle away at your health if you're not careful. Initially they'll probably try to get close and use melee attacks on you, but you can counter these with your own melee attacks to deal significant damage and perhaps hack off an arm or two. They'll more likely choose to draw back and fling energy bolts at you which have a limited homing ability; if you can hide on the other side of a pillar, these will dissipate harmlessly, allowing you to dart back out and fire away again. If you have a Carbine, then it's probably the best choice for taking down these enemies, with the Shotgun doing well at close range. The Crossbow can also be used, although it can be difficult to track Banshees with its slow-moving bolts, and they'll sometimes charge in towards you when hit, causing you to take damage as well.
After the three Banshees are defeated, though, you'll be able to move on. You'll soon reach a cross-emblazoned door, which leads to the next subsection of this level.
Graveyard
The graveyard is a fairly standard shooting section of this level, so go ahead and start chopping your way through the numerous skeletons that are in your path. Eventually you'll come out to the main section of the graveyard, where the moon ominously rises above a tall cross. If you head up to the cross and clear out all of the skeletons around it, you'll come to your first moral choice in the game. In a fashion similar to a game like Jedi Outcast, you'll have to periodically make a choice between good and evil; your choices will determine what kind of powers your character will obtain. If you choose the good path here, you'll earn the Silver Bullet power, which temporarily increases the power of your projectile attacks; if you go evil, you'll earn Blood Frenzy, which makes all of your melee attacks super powerful and makes you invincible for ten seconds or so. Silver Bullet is the more immediately useful, but they'll both come in handy in different situations.
After you obtain your power, you'll be able to try it out on a few dozen enemies before this subsection ends. A new foe here are the Gluttons, who wield two large swords and can also spit at you from long range. They can take a lot of damage, so try to stay a good distance away from them and hit them from afar with your crossbow or carbine. When everything's dead, you'll be shuffled off to...
The Mines
After freeing Cassidy's soul or devouring her head, move into the first room here and depress the plunger sitting atop a box; you'll need to find numerous plungers in this level to destroy doors that block your progress. After doing so, you'll be able to move down the nearby hall, where you'll come across your first Fading Victim. There are going to be numerous victims throughout the game, where you'll be able to either choose Good or Evil for a corresponding alignment shift.
Around a nearby corner, you'll come to a broken bridge with a Mark at the bottom of it. You'll need to destroy the Mark to move on. There's also a set of Dual Pistols in the hallway near the upper portion of the bridge. These guys can hold a surprising amount of ammo, and can fire very rapidly when you hold down the fire button, but they're not overwhelmingly powerful or accurate. They also prevent you from throwing dynamite while holding them. Use them if you wish, but we found the Redeemer to be a bit better.
With the Mark out of the way, Vampire Jump across the broken bridge to move on.
Mines, Continued
In the first room here, there's a boarded-up corridor near the water tank, so shoot it to find another Victim and a few more points of good or evil. When that's accomplished, jump up to the walkway and find the plunger to clear your path deeper into the mine.
Eventually you'll come to a fire that blocks the corridor; to bypass it, you'll need to crouch into the hole in the wall nearby. You'll eventually drop down behind the fire and find a new enemy, skeletons which carry TNT. If these guys get anywhere near you, they'll detonate their payloads, which will render Jericho into a gooey paste that'll slowly drip down the walls, so be sure to aim for the TNT barrels and shoot them while they're still a good distance off.
If you wish, however, you can just bypass the TNT skellies altogether by running up the ramp to your left and doublejumping up to the top of the chamber. There's another Victim in one of the passages up there, so grab some more energy from it before jumping across the bridge and moving on.
Mines, Continued More
After the skeletons bust out of the wall at the beginning of this subsection, head into their little chamber to find some Dynamite. Around the corner is where things begin to get complicated, especially if you're playing on Shootist difficulty or higher. The large, open room here is filled with riflemen that will constantly respawn, as well as a banshee that's thrown in, just for annoyance's sake. If you stay in the middle of the room and stay exposed for too long, you'll quickly be killed by the sniper fire, so you'll have to move quickly if you want to live.
The goal here is to find and depress three plungers, which will open a reinforced door at the bottom of the room. If you don't have one already, grab a Carbine from the first little hallway and snipe out the two riflemen on the platform in the middle of the room. The hardest plunger to reach here is going to be accessible via a cave on the far side of the room from where you begin, so jump out across the room to reach the middle platform, then look on the far side for the cave system and jump into it. You may find another Victim here; if you do, then look for the hole near it and drop down to reach the plunger.
That's one plunger down; now you need to find the other two. One is on the ground floor of the room, near a small building, while the other is inside the large guard tower elsewhere in the room. If you want to avoid climbing the stairs to the top of the guard tower, try jumping onto its roof and dropping down to the entrance below it. It's best to hit that one first, then go for the one on the ground floor, as the doorway is immediately next to the plunger on the lowest level. When the door pops, you can make a run into the corridor to end the level. There will be a couple more riflemen in said corridor, so you may want to activate your Judgement Power before you head out to take advantage of the invulnerability it affords you.
More Mines!
Yet another dungeon crawl here, but a bit less difficult than the one you just came through. You're going to be finding plenty of dynamite in the corridors up ahead, so feel free to use it liberally as you move along. Also note the presence of a Victim in the first side passage on your left side when you first enter the subsection.
When you reach the cave mouth, feel free to dump all of your dynamite into the cavern beyond as the skeletons jump towards you; there's another bundle in the cavern that you'll be able to pick up for yourself after you clear it out. With that done, drop down into one of the holes here to reach another Glutton, who presides over a Mark of Evil. After taking down the Glutton, feed the Mark dynamite or a salvo of Redeemer shells to quickly destroy it before leaving the level. (As a note, your choice of how to treat Cassidy's corpse has no effect on the final cutscene here.)
Darkwatch Outpost
Well, you've finally arrived at the Darkwatch Outpost, a shining beacon of security in a troubled world and a stalwart bastion for all who would defend the land against the ravages of the undead. And, oh yeah, everyone's dead. Looks like Lazarus got here before you did.
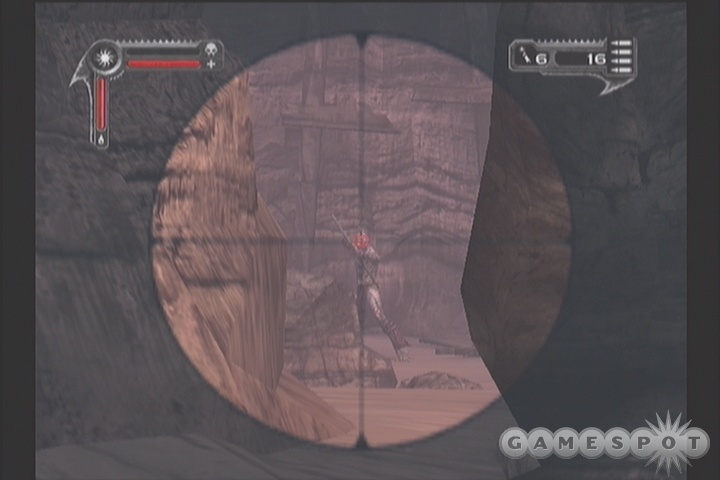
Outside the gate to the outpost, you'll find the Range Rifle, which is Darkwatch's equivalent of a sniper rifle, with two separate zoom levels. It can only hold four shots and has a lengthy reload time, so you won't want to use it in up-close battles, but it'll be handy for headshotting the riflemen inside the fort itself.
With rifle in tow, start making your way through the fort until you reach a small enclosed building, wherein you'll find a pair of fallen Watchmen. These zombified Darkwatch soldiers are essentially Gunslingers, as they pack Redeemers, but have substantially more health than the normal zombies you run across, so they'll take a few hits to kill. There is a Victim here, so just active your Judgement Power of choice and use that to kill them before recharging by using the Victim. There's also a couple of Shotguns in there; if you don't have one, now would be a good time to start building up your ammo for it. You can safely trade in your Range Rifle, as it won't be much use in the fight ahead.
After Cassidy tells you about the Ghost Door elsewhere in the facility, head into the central square of the fort. The goal here isn't to take down one huge boss, but rather to kill off the many Watchmen, Skeletons, Riflemen, and Banshees that start to spawn into the area. Of course, to do so, you'll have to live long enough to kill them all, which necessitates finding cover and keeping yourself alive. The easiest way to do so is to switch over to your shotgun and walk into the small, enclosed structure on the bottom floor of the square; the Watchmen and Skeletons will make a beeline for you, allowing you to pop them off as they approach. While you're inside, the Riflemen won't be able to hit you, so you can save them for the final kills.
After the little cutscene that pops up at the halfway point of the fight (you can gauge your progress by the white bar on top of the screen), you'll shift over to fighting primarily Skeletons and Banshees. The Banshees can be difficult to hit given the wide-open space in the square, so you may find them easier to deal with by again retreating to the smaller room and letting them come to you. They should die with a well-aimed shotgun blast to the head; if you've recharged your Judgement Power, then you can use that as well for a bit of invulnerability while you slam your foes around.
When the bar is fully depleted and you're on your own again, you'll be able to head into the Ghost Door to move to the second part of the level.
Darkwatch Lab
This is a fairly short section of level, but the Watchmen are out in full force, so be careful when you head up the first set of steps. If you have any dynamite, you may want to use it on them to weaken them before wading into battle with your normal weapons, as there are three foes here, each of whom can take a good amount of damage before dying.
After moving on a bit, you'll come to a surgeon's table where you'll need to make another Good or Evil decision. This one's worth a good deal of points, and will likely get you your second power if you've consistently been choosing one side or the other. Feel free to use it and your dynamite here, as you're almost at the end of this subsection.
Torture Maze
Despite the fact that Cassidy's ghost is guiding you along your path, the apparent leader of Darkwatch, Clay Cartwright, doesn't precisely trust you, and perhaps for good reasons if you've been pursuing the "evil" path as you've been playing. (Although all the dialogue appears to be the same either way.) Anyway, after divesting you of your weapons, he's going to put you through the paces in his very own, home-made abattoir - of doom.
Skeleton Pit
Your first challenge is to survive a few waves of skeletons wielding only a two-handed Scepter that Cartwright gives to you. The easiest way to do this is to wait for all of the small skeleton chambers to open up, then back yourself into one of the small rooms and stay there, allowing the skeletons to come to you. Doing so will prevent the skeletons from spawning into the room that you inhabit, thereby cutting the number of foes you have to face by one-third.
The second set of skeletons are actually ghost skeletons, which may seem rather redundant. These guys can take much more damage than their normal counterparts, so you'll have to hit each of them three or four times to finish them off. Still, though, if you stay back in one of the chambers, you should be able to handle them. If you have the Fury power, then feel free to use it when they start swarming you for a bunch of easy kills.
When you've killed every skeleton in your path, you'll have to walk down a nearby hallway to reach the end of this section. The civilians here can be killed if you wish, but doing so doesn't seem to have any effect on your alignment or your progress towards your next ability, so feel free to ignore them if you wish.
The Shooting Gallery
Now that you've proved your prowess with the mace, it's time to buckle down and show Cartwright you know how to shoot. When you enter this next room, take your mace to the back of the heads of the two Gunslingers here to nab their Redeemers, and check around for a Carbine as well, but leave the TNT barrels in place for now; they'll be helpful when dealing with the enemies that are coming your way.
After this initial segment, you'll have to start dealing with more Gunslingers and Riflemen. If you find your blood shield dropping too rapidly, take cover in one of the spawning chambers along the wall and fire at anything that comes your way. Eventually Cartwright will spit out a few more civilians into the room, which you can either kill or avoid. The enemies that pop out afterwards will start shooting at the civilians, though, so if you intend to keep them alive you'd better work quickly and destroy everything. Again, shooting them doesn't really seem to have too much of an effect on anything, so if you just want to be rid of them, dynamite them as they come through the door and go to town on the monsters afterward.
After ducking underneath the flames in the hallway that becomes unlocked, you'll reach the next segment of the dungeon.
Steam Room
When you enter this room, grab a shotgun or two and blow the barrels nearby to grab some more shotgun ammo, as well. Your goal here is to drop down to the bottom of the steam room here and flip three valves, which will shut off the bulk of the steam and allow you to see; while the steam is on you won't be able to see much more than a few feet in front of you, and you'll also have to look for horizontal streams of vapor that will instantly kill you. (Steam moving vertically seems to be harmless.) In order to find the steam valves, you'll need to use your blood vision ability to penetrate the fog. Check the video on this page for a good path from the starting platform to all three valves.
After the valves are shut, you'll be able to see and move freely about the floor of the room, and you'll need to do so, as there will be a few Banshees coming at you. After you take them out, you'll move on to the Sewers.
Sewers

The sewer segment of the level is a relatively short one, and pits you against numerous Vipers, strong melee enemies that act a bit like Lazarus did during your first fight with him on the train in the first level of the game. When you shoot them, they'll warp about a bit before jumping at you and slashing, and they can do a good amount of damage. You should have plenty of Carbine ammo, though, and the Vipers are pretty slow-moving when they're just charging at you, letting you line up headshots. Beyond that, the only difficulty here is in finding a key that unlocks the door leading out, but there's one of those in the sewer tunnel across the way from the locked door itself, near the body of a fallen Darkwatch soldier.
The Abattoir
Your last challenge in the Torture Maze pits you against multiple waves of Gunslingers and Riflemen. You'll need either a Carbine or a Range Rifle to deal with the Riflemen, since they're loathe to move from their chosen spots, but the Gunslingers will usually come to you, allowing you to sit back in one of the spawning chambers along the exterior wall of the room and wait for them to approach, darting out to get headshots before restoring your Blood Shield by hiding in a crevasse. You'll probably want to use a Redeemer to match your Range Rifle, simply because all of the Gunslingers will be dropping extra ammo for it.
After enough sneaking about and hiding and shooting and killing, you'll eventually work through all of the enemies in the first group, allowing Cartwright to shuttle you off to the second phase of this fight, which reveals one of your primary weaknesses: when you're exposed to direct sunlight, you'll lose your Blood Shield, your Vampire Jump, and your Judgement Powers. You'll also be facing off against a Glutton, who can kill you in just a couple of hits if you get too close. Don't do so, then; instead, switch to your Redeemer and use its rapid-fire capability to finish him off. If you dash towards the Shotgun and Dynamite in the center of the cage, you'll probably get slashed by the beast.
When the Glutton's down, quickly grab some dynamite and blow open one of the walls of the cage, which will let you escape from the sunlight and recharge your Shield, the better to deal with the influx of Skeletons that's about to arrive. There's plenty of Dynamite in the middle of the room, so using that in conjunction with your Judgement Powers should let you deal with the Skeletons in short order. Eventually another Glutton will appear in the cage; destroying it will finish the mission.
Baptism Of Fire
Now that you're officially a member of Darkwatch, and have some swanky new threads to work with, as well as a new innuendo-loving partner, you'll have to head into a town that's been ravaged by Lazarus' forces and pacify everything that moves.
Your first task here is to follow in Tala's footsteps and meet her at the top of the ramp near where you begin the level. You'll be under constant attack from Gunslingers and Skeletons, so keep your bloodshield up and don't neglect to use your Judgement Powers to protect yourself when need be. When you do reach the top of the ramp, you'll hook up with Tala, who'll ask you to jump back down to the same place you just came from in order to keep yet more skeletons off her back. The prime difference here is that you're not going to have any Regulators watching your back, so you'll need to be mindful of the TNT skeletons that appear and shoot them before they get too close to you. The Carbine can blow the barrels with one shot, so that should probably be your weapon of choice here; the Redeemer takes two shots, and the Crossbow requires too much time to blow up.
When all of the skels are dead, you and Tala will move on to the next area of the town.
Mine Area
After moving up the canyon here and taking down all of the riflemen, a new weapon will be pointed out to you in a cutscene: the Rail Rocket. This all-purpose explosive delivery system is the most powerful weapon you've yet encountered, but it does have some drawbacks, including the splash damage that you'll take if you aim it at something too close to you, as well as the slow firing and reloading. Even the melee attack with it is slow, albeit powerful.
With the Rail Rocket in tow (you'll probably want to keep your Carbine in the other slot), you can destroy the nearby Mark of Evil and investigate the house that Cassidy points you towards, which is currently infested with Riflemen. When you enter the lower level, bust through the planks underneath the stairway to find a Victim, then head upstairs to reveal a Mark on a very distant ledge. If you have plenty of Carbine ammo and are willing to lean out the window a bit, you can definitely shoot it from where you are, but you're probably better off just whipping out your Rail Rocket and pounding it with missiles. After a few missiles, it'll blow, revealing another one. You won't apparently be able to shoot the second one from your position, but if you shift down a couple windows to the left, you can bust it out with the butt of your weapon and take aim at the new mark from there.
Fortifications
As you head up the canyon walls here, you'll have to choose whether you want to defend the villagers that are running for their lives, or just kill everything that moves and let God sort them out. As in the Torture Maze, killing civilians doesn't really affect your alignment, but you will get another Good vs. Evil choice when you hit the house up at the end of the hill, which does result in a large shift of alignment.
After you make your way through the house on the hill, you'll meet up with a new enemy, which we'll dub the Executioner. These guys pack bladed shotguns, and have arguably the most health of any regular enemy you've encountered thus far in the game, being able to take two rocket blasts to the chest before going down. After you kill off the first couple of Executioners, you can walk or jump around to the cluster of buildings nearby, where the baddies are taking on the villagers and mercilessly slaughtering them. Although Cassidy implores you to help the innocents, you can feel free to chuck some dynamite into the fray if you just want to clear a little room to maneuver.
After you save (or kill) the villagers, a Mark of Evil will appear nearby that will spawn Executioners until you destroy it. Do so to unlock the path to the next area, but don't forget to jump up to the top of the burning building nearby to find a Victim before moving on.
The Regulators
Well surprise, surprise, the Regulators that Tala mentioned at the beginning of the level are actually alive. Two of them, at any rate. After you help them clear out the snipers from the area, they'll blow open a wall nearby, allowing you to move on and hook up with Tala. After you do so, you'll need to move through the town that's under siege until you learn the whereabouts of a Mark inside one of the buildings. When you find and destroy it, you'll be able to move on to the next mission.
The Darkwatch Citadel
This isn't a mission, per se, but rather the introduction of a new mechanic to Darkwatch. Whereas up to now you've been proceeding along a linear progression, you'll now be able to choose from among a few missions that are available to you. Upon completing one, you'll be able to return to the Citadel and choose another, and so on. There are only three missions available to you, so go ahead and talk to the Scientist near your starting area to learn about them. We'll go ahead and choose to do the first mission, Rescue.
When you've accepted the mission, head down to Jenkins, the weapons master. He'll normally allow you to choose a weapon to bring along on a mission, but for now, you'll have to head in empty-handed, for reasons that will become clear soon enough. Head down to the Ghost Door and pass through.
Rescue
The unique aspect of this mission is the inclusion of a Coyote Steamwagon, which is Darkwatch's equivalent of Halo's Warthog. They handle pretty similarly, but you'll be able to take control of the dual machineguns atop the buggy and fire them while you drive. Get used to the controls in the opening area before moving around the bend towards the Mark of Evil that appears; with your machineguns, it shouldn't be too difficult to take out.
After taking down the first Mark, bust your way through the lines of enemies that appear in your path and run them down. You won't take any damage from running enemies over, but the Gunslingers that appear here will damage you with their gunfire if you get hit. Still, they shouldn't be able to drop your Blood Shield all the way, so just run them down until you reach the second Mark. When it's destroyed, turn your guns past the gate beyond to mow down the pair of Keggers that appear, then steel yourself for the difficult fight to come.
Dukes of Darkwatch
The area beyond the keggers is full of buildings and, well, more Keggers. The point here is merely to survive long enough for the white bar to reduce itself all the way down to zero; each enemy that gets destroyed will chop off a small segment of the bar, leaving you that much closer to the end of the gauntlet. The Keggers here are going to be the primary threat to your health, as they'll attempt to run up to your vehicle and blow themselves up; to avoid this fate, you'll absolutely have to keep moving, preferably by running circuits around the exterior wall of the area over and over and over again.
Eventually, there will be both turret gunners and Banshees to further harry your progress. The Banshees are easily ignored or shot, or run over if they happen to be in your path, while the turret gunners aren't much of a threat; their bullets will only lightly graze your Blood Shield, unless you happen to run into a wall and stop or if you get out of your car. If you manage to get a clean shot at a turret gunner, then feel free to take it out, but otherwise you shouldn't have to worry about them.
The best bet here is to, again, just keep running circuits around the arena and wait for the enemies to blow themselves up or otherwise die. The turret gunners will aid you in this, as they'll continually fire at you when you're in their sights, but will sometimes hit Keggers and set them off; the Keggers themselves will often blow up of their own accord. Just hold down the machinegun fire button while you're driving, though; you can get some decent accidental kills just by aiming in front of you. Since you can't independently aim and steer, though, don't try to track a moving enemy too far, lest you steer off course and run smack into a group of Keggers. Don't forget to use your emergency brake to stop yourself if you think you're going to hit a wall on the outside of a turn; hitting a wall will stop you for a few seconds until you can reorient yourself and start moving forward again, which is all the time the Keggers need to finish you off. Check out video for our preferred path around the area.
After the white bar is eliminated, a Mark of Evil will appear inside one of the buildings, so feel free to dismount from the Coyote and head into the building to blow it up. With that out of the way, a Banshee-spewing Mark will appear near the exit from the canyon. It can be difficult to get close enough to it to blow it with Dynamite, so you may want to backtrack to your Coyote and use its turrets to destroy the Mark, which will open the path leading on.
Remember the Citadel
The remaining Regulators have barricaded themselves inside a cave, and are going to enlist you into their desperate defense of their position. If you survived through the previous section of the level, then you shouldn't have many problems here, as your only task is to work your way through a wave of Reapers, then a wave of Banshees with a Glutton attached for good measure. There's plenty of Crossbow and Redeemer ammo scattered about, with a Carbine thrown in for good measure outside the building. If you don't have a Judgement Power on tap, then soak up the blood from the Reapers and use a power on the Glutton when it appears. After it goes down, you'll only have a few Banshees to kill before the level ends.
The Darklight Prism
When you return to the Citadel, queue yourself up for the Darklight Prison level and select either the Shotgun or the Dual Pistols as your weapon from Jenkins, with the Shotgun being somewhat preferable. When you enter the level, you'll encounter an uncomfortable truth: since much of the level takes place in daylight, your vampire powers, including the all-important Blood Shield, are going to be unusable. Thus, you'll need to quickly work your way up the canyon in front of you until you reach the shade of one of the overhangs, which will let you drink blood, restore your Blood Shield, and use your powers once again. The Native American zombies here fling tomahawks at you, so be careful to avoid behind hit by them as you walk up the canyon. When you can charge your Blood Shield you'll be able to take a few hits and you won't have to worry as much about avoiding damage. If you run severely low on health, you can find a Blood Canteen near the end of the canyon.
After killing a number of the zombies, another wave of enemies will appear. If you stay underneath one of the overhangs, then you should be able to avoid the attention of the Banshees, whom the Regulators will deal with, and concentrate on the next group of Zombies. When all the foes are defeated, you'll meet up with Jared, a crusty old regulator, who'll be standing before the passage to the next area. Before you move on, though, backtrack through the canyon you just came from to stock up on shotgun ammo and to find a Tainted Victim nearby.
The Door
In the next area, you'll come to another long canyon, but this one possesses none of the handy shady spots of the last; you'll have to stay in the sun in order to pass through. First, grab one of the Range Rifles near the Regulators, then use it to take down the bow-toting Zombies at the other end of the canyon. When they're all down, Jared and the other regulator will start moving down the canyon, at which point a Mark of Evil will appear. If you stay behind the Regulators, they'll take the brunt of the enemy attack, allowing you to launch dynamite at the Mark from long range until it blows up.
The Canyon
Well, since there's only so many different words for "canyon," head into the next area and expect to see some pretty familiar terrain features. The Banshees at the beginning of this level should be lured into the first little cave and taken down there, so that you can recharge your Blood Shield while they attack. After they're dead, move into the pathway beyond the cave, pick up one of the Dual Pistols in the area (if only because there's plenty of ammo for it), then drop down into a little trap the zombies have set for you.
When you reach the TNT barrels, you'll have to drop down next to them, but you'll be prevented from passing on due to the wall of fire that pops up nearby. All you can do here is hide in the small alcove near the TNT and wait for a few waves of zombies to come at you; after they're all dead, the fire will disappear and allow you to pass. Don't forget to use your Judgement Powers if you get swamped here, as it can easily happen due to the frequency at which the zombies appear.
After clearing the flames, stick to the left side of the wall of the subsequent canyon to stay in the shade as you proceed down the path, killing off numerous zombies as you do so. After defeating another pair of Banshees in the shade of a cave, you'll move on to the next subsection.
Canyonero!
Well, this section of the level is even more canyon-y than the last. Immediately after you begin, you'll be faced with a Good or Evil choice. Going evil will force you to kill Jared as well, but c'est la vie. You should earn your third Judgement Power here, which will come in handy at the end of the level.
Before moving down the canyon, turn around and head into the cave you just left to find a Tainted Victim and more dynamite, should you be needing any. With that in hand, you can start slowly but surely progressing down the canyon floor while attempting to stick to the dark spots. Sometimes the shade's appearance is somewhat arbitrary, so you never really can tell whether or not a spot is going to be in sunlight or in shade until you move around in it and try to recharge your Blood Shield. The best strategy here is to move slowly up the canyon, marking out shady spots, then proceeding forward to spawn in enemies before retreating to the shade and letting them come to you while firing away. It's slower than just charging ahead like a madman, but you're much more likely to survive.
After proceeding far enough down the canyon (be sure to keep an eye out for Tainted Victims), you'll hit a checkpoint and run into a little cutscene detailing the appearance of a Mark of Evil that's guarded over by Keggers. There's plenty of dynamite scattered around the area, so just use that to blow the Mark while protecting yourself from the Keggers by shooting their barrels with your carbine or dual pistols. When the Mark has blown, you can move on; don't miss one last Victim in a cave to the right of the doorway that opens.
The Darklight Prism
After passing through the loading screen, snipe out any enemies in your view, then drop down into one last canyon to finally find the Darklight Prism. Now, if you don't have a Judgement Power available to you, then find the Victim on the far side of the canyon and absorb its soul to charge yourself up. After you enter the canyon, Cassidy will quickly point out the location of the Darklight Prism, allowing you to charge over there and take over the position, preferably after dynamiting the enemies nearby.
Now, the final challenge of the level is to protect the Darklight Prism from the hordes of Lazarus. To do so, you can hop into the turret near the Prism and use it to mow down the incoming enemies, but before you do so, try to activate one of your Judgement Powers, especially Black Shroud or Mystic Armor if you have them. There appears to be something of a bug in the game, where an activated power will remain active much longer than it normally would while you're inside a turret. (The same bug appeared in the Star Wars Episode III game, oddly enough.) If you can increase your defense while in the turret, then you'll be able to survive any number of hits without dying, letting you pick off your foes with ease. Even if you're not invulnerable, though, you shouldn't have any problems keeping the horde at bay with your dual machineguns.
After all of the enemies are dead (the last few waves will include Keggers, so be careful), head into the cave that opens up to return to the Citadel.
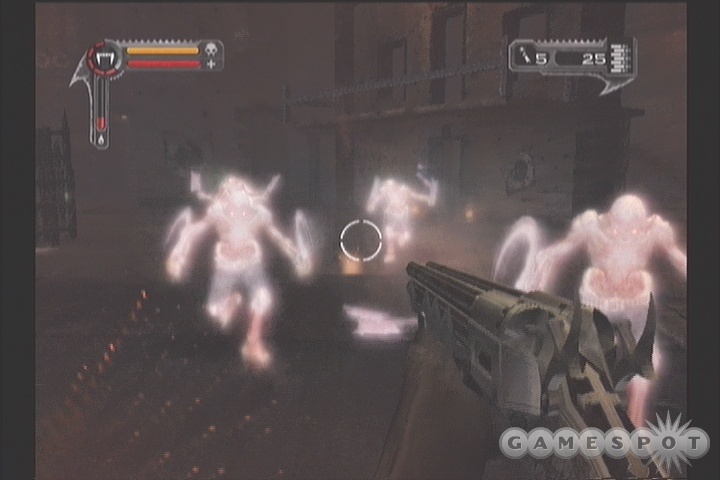
Invasion
A shotgun is going to be handy for the earlier portions of Invasion, which take place inside a lengthy cave filled with zombies. Immediately after leaving the first little alcove you spawn in, note the two barrels stacked atop one another near the corpse; the topmost of these has a good amount of shotgun ammo in it.

There's a Victim at the bottom of the path here, but a stone wall blocks your passage, forcing you to backtrack a bit and pass through a cave system. Eventually you'll come to a checkpoint where you can drop back down to the circular passage. Before heading down the slope, though, take a right and trek up to the other side of the stone wall and blast the barrels there to find a Carbine. It'll be helpful in taking down the bow-wielding zombies that are watching over the lower sections of the path.
As you walk down the corridor, try to build up and save a Judgement Power. When you reach the end of the path, you'll have to drop down into a pit, where you and a Glutton will be going mano-a-mano; having a power ready to activate at this point will make it easier to survive.
The Village
After saving or murdering the innocent that requests your help at the beginning of this mission, head up the path in front of you until you hear Cassdy say "Be careful - something's coming!" To the left of this area will be the village proper, which is overrun with zombies. You'll need to proceed slowly as you go, since more enemies will be spawning in as you head through. Note also that there are two Victims to drain here; one on top of a building along the left wall of the area, and another in the basement of that same building (where zombies burst out from behind the wall).
After killing all of the initial zombies, a Mark of Evil will appear that bars the gate leading on. Destroying it will let you pass on to the final encounter.
The Siege
As with so many other end-of-level fights, you're going to be faced with a cadre of enemies to kill until a little white bar at the top of your screen is completely depleted. This time, you're going to be facing a bit of a stiffer challenge, as the enemies here are usually going to be Vipers and Banshees, a tough combo. If you don't have them yet, you'll probably want to look around for a shotgun and a carbine, which makes a decent pair of weapons for this particular enemy set. You can also find a couple of Rail Rockets if you look hard enough.

The fight is split up into three segments of roughly equal length. In the first, you'll have to take on Vipers, so use your shotgun and carbine to good effect. The second features pairs of Banshees, which can be a bit more difficult to deal with than the Vipers, thanks to their ranged attacks. You may find them easier to deal with if you can get their attention, then retreat into one of the buildings near the bottom of the cliff and attempt to lure them in to close-range combat, where you can shotgun their heads right off.
Lastly, you'll have to deal with rampaging zombies. You should have plenty of dynamite in your possession, and plenty of ammo to boot, so go to town on these guys. If you run across a Rail Rocket, use it to destroy groups of enemies in one swift stroke to finish the level.
Hangtown
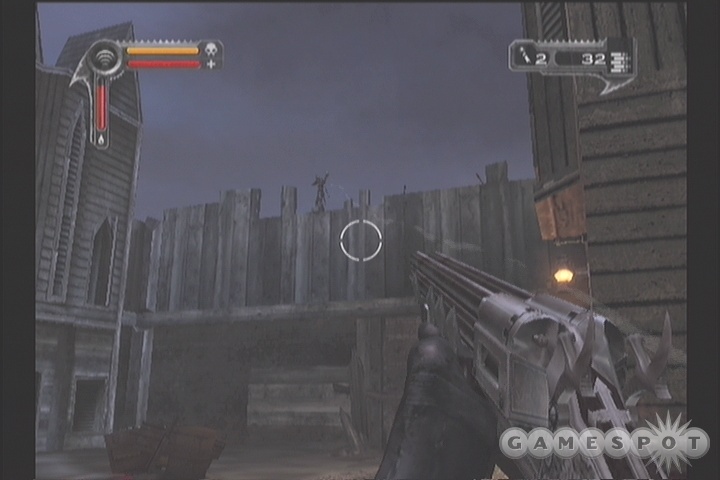
Your next mission is the only one available after you complete the previous three. Hangtown is a charmingly-named establishment that's been overrun by Lazarus' forces, and it's up to you and the Regulators to go in and cleanse the area.

After meeting up with the Regulator commander in the mortician's office, you'll need to outfit yourself with the copious weapons upstairs from his position and across the street in the Sheriff's office. When you're fully laden, walk past the burning cart in the street to reach the northern side of town, where you'll quickly start running across Vipers and Riflemen. Your two Regulator teammates are going to quickly die due to the Viper slashes, so if you don't want to join them, you'd be wise to retreat back to the upper floor of the Sheriff's office, where you'll have plenty of ammo to draw from as you repel the Vipers. They'll usually jump up to the balcony of the building, letting you blast them with shotgun rounds to the head. When all of the Vipers are dead, start picking off the Riflemen with your Carbine.
Eventually, you'll be ordered to regroup at the hotel, which is at the end of the crossroad, across from the Sheriff's office. Unfortunately, when this sequence begins, you'll be warped to the northern part of town, no matter where you are. Even though you're in the open, resist the temptation to just run towards the church; instead, find cover from the riflemen, kill the two Vipers, then start methodically killing the snipers while slowly walking down the road. You should be able to stay far enough away from them to avoid their fire relatively easily, while your Blood Vision will let you nab some easy headshots. With them out of the way, you should have a much easier time taking down the four remaining Vipers, especially if you wait for them in the second floor of the Mortician's building.
After all that's done, the Hotel will finally open up. If you fight your way inside of it, you'll find a passage leading on.
The Saloon
When you enter this area, you'll start out with another Good or Evil choice. If you've managed to stick with your initial alignment choice and have found most of the Victims scattered throughout the game, there's a decent chance that you've already obtained all four Judgement Powers available to you for that alignment. If that's the case, then go ahead and pick the opposite alignment choice here, which will net you the first Power from the alignment you've been neglecting.
When you enter the Saloon, you'll be able to outfit yourself from another large cache of weapons. Again, the carbine and the shotgun are going to be a decent pair of weapons to fall back on, as you'll have to deal with both ranged and melee attackers in the next set of fights.
The initial waves are going to be difficult to repel, as there are both shotgun-toting Executioners and Keggers running about, with Riflemen in the background. The important thing here is to try and keep the Reapers away from the Saloon, as they'll likely kill your teammates if they happen to detonate up close, which will make it harder for you to keep all the enemies off your back by yourself.
After two waves of foes, you'll get a warning about a Mark of Evil inside a nearby house. This Mark is going to continually spawn Keggers, so you'll need to be very careful when approaching it; it's best to try and get an angle on it from the street outside the house and blow it with a Carbine, but if you have Blood Frenzy, you can use that power's invulnerability feature to get up close and personal while you whack on it with your Shotgun.
After that's done, another Mark of Evil will pop up at the top of the street; pound it to open up the path leading to the next subsection.
The Church
When Tala moves on and leaves you alone in the streets of Hangtown, defeat the two Gluttons in the path, then go to work on the many snipers that stand between you and the church. This is a pretty short subsection regardless, with only a minor skirmish with Vipers being any challenge to you. There are two Victims in the area with the Vipers, so feel free to use your Judgement Powers to kill them, then quickly replenish yourself before exiting the level through the gates.
The Morning After
Well, bet you didn't see that coming, pardon the pun. After the amorous encounter, you'll be called upon to defend the Darkwatch Citadel from the invading forces of Lazarus, who's eager to sacrifice them for his own gain. What he's up to isn't immediately clear, but for now you can't worry about it; you just have to get to the Ghost Door and close it before any more hellspawn can get through.
After grabbing the shotgun and Redeemer out of your room, meet up with the two Regulators nearby, who are defending a junction room against the invading Vipers. It can be difficult to evade the Vipers in this room, since it's fairly small, but if you stick near the Regulators, you really shouldn't have to; you'll distract the Vipers away from your teammates and encourage them to attack you, allowing the Regulators to concentrate their fire and let you take down each target much more quickly than you'd be able to individually. So long as both Regulators remain alive, then, try to stay close to them. When they die, you'll have to start jumping and hopping about to evade the Viper's slashes. You'll want to check the room for some dynamite and extra ammo for your shotgun; if the Regulators die, be sure to switch your Redeemer for the carbine one of them drops.
When the cutscene plays that reveals the door to the Ghost Door opening, head through and fight your way to the portal, where Tala is handily killing off the remaining Regulator defenders; it seems as though this was her plot all along.
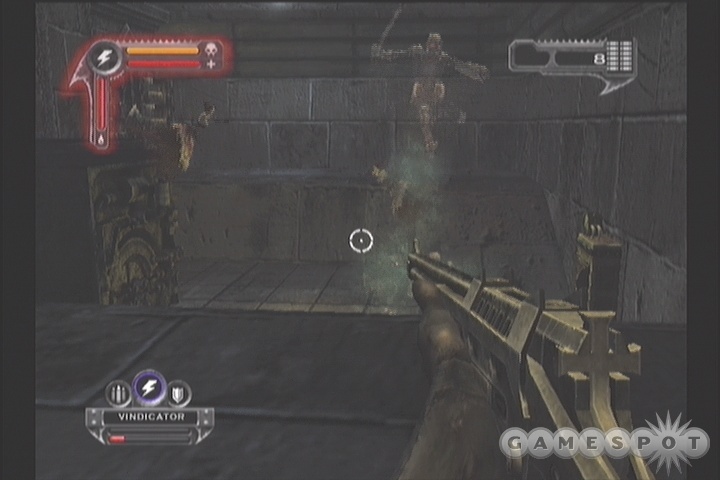
After Tala moves on, you'll need to take out Vipers until the portal closes. These guys are worth a lot of blood per kill, so feel free to use your Vindicator or Soul Stealer on them, even if it only kills a pair of them. You should be able to almost fully recharge your meter with four kills or so. When that's done, backtrack until you reach the junction room again, wherein you'll have to kill a Phantom Viper in addition to a normal one. As with phantom Reapers, the Viper here is going to take substantially more damage than its normal brethren, so you'd be wise to have either a first-level offensive power or a fourth-level killing power queued up during the fight. Otherwise, you'll have to rely on headshots at close range with your shotgun to take him down.
The Armory
The path to the Armory is thick with undead Regulators and Riflemen, but at least you'll know that there's plenty of ammo waiting for you around the corner, so feel free to chuck a bunch of dynamite at anything that moves. The main room of the Armory is going to be a bit busy, though, so if possible use Vindicator or Soul Reaper to clear it out, or get the attention of the Regulators, then draw them back into one of the corridors for a dynamite clearing.
Before leaving the armory, be sure to grab a Carbine and stock it full of ammo. When you leave via the next corridor, you're going to come out into an exterior area with more Riflemen and Regulators. It's best to hang back near the door, wait for some of the Regulators to come towards you, kill them with your shotgun, then use your Carbine with Blood Vision to track and kill any remaining enemies before heading out into the square. Feel free to return to the armory for more Carbine ammo should you need it.
After taking out the numerous snipers in the area, start walking down the railroad tracks until you reach the next area.
Rail Station
When you enter this area, grab one of the Range Rifles on the stoop near you, kill the two Regulators nearby, then start sniping away all the Riflemen up top while keeping an eye out for Keggers that'll be approaching you. Don't forget that Riflemen won't usually fire at you if you lean around a corner to take aim at them.
A more challenging room comes next, where you'll have to take on Gluttons, Keggers, and numerous snipers. Start slow, and try to take down one of the Gluttons as quickly as possible with a Judgement power before focusing on the other. If you can get them both into one place for a double kill, so much the better. After they're dead, the Keggers will start to appear, so do your best to prevent them from offing you, retreating back into the rear corridor if you need to. With them out of the way, you can focus on the snipers and systematically take them out with your Range Rifle until you clear the path to the rear of the room, where you'll be able to enter the central stairway, leading down to the Power Room.
Before you can reach the Power Room, though, you'll have to head through some more passages, then deal with a bit of a problem; it seems as though the door leading to the Power station is stuck, so you'll have to wait for one of the Regulators to open it up. Of course, while you're waiting, a pair of Gluttons and miscellaneous other demons will pop in behind you, so be quick with the dynamite or your Judgement Powers to be rid of them.
Power Room
The Power Room is one large obstacle, as you won't be able to pass through until the engines here have been shut off. They won't impede your movement or anything; they merely control the lock on the far door. In order to shut them down, you'll need to enter the two antechambers on either side of the main room, then flip the switches in each of them. Of course, the snipers, banshees, and reapers in the area will be doing their best to ensure that you're unable to complete that goal.
We find it easiest to just ignore their fire while moving to the first antechamber, and attempt to lure as many enemies as possible into the antechamber before unleashing a Vindicator or Soul Stealer power on the crowd; you'll likely get enough souls to immediately refill your meter. Don't worry if you lose health, as each room has a Blood Canteen in it, thoughtfully left behind by the Darkwatch just in case a blood-sucking fiend should happen to walk through. You shouldn't have quite as many enemies to deal with on your way to the next antechamber, although they'll obviously be respawning all the while, so move quickly to flip the second switch before exiting the room. If at all possible, attempt to have a Judgement Power available when head to the next room.
The Vault
Uh-oh. If you thought Lazarus was intimidating before, he achieves a whole new realm of awfulness upon destroying and absorbing the Darklight Prism. You won't have to face him immediately, however; instead, he'll leave behind a heaping helping of latchers-on to deal with you. This is going to be a somewhat more rough assortment than you're used to facing, however, as it includes an opening volley of four Executioners. You probably won't have a level-four power available to you, though, so you'll have to rely on your reflexes if you want to survive. If you run around, you can find some dynamite, a Rail Rocket, and other goodies to help you deal with your foes.
Subsequent waves include Banshees, Reapers, and more Executioners, who'll arrive in some fairly frightening concentrations. Using your fourth-level Judgement Powers and then quickly collecting the orbs that drop from your foes to recharge your power level will be a critical aspect of actually surviving these fights. If you have Vindicator, then you can be a little more lenient about choosing when to fire; if you're using Soul Stealer, though, you'll need to be sure that all of your enemies are in front of you, preferably by backing yourself into a corner.
When everything's dead, move out to the next area for your fight with Lazarus.
Showdown
The boss fight with Lazarus is going to seem incredibly difficult the first time you attempt to play through it, thanks to the fact that you're stripped of all your weapons save for a Redeemer when it begins. Even though there are plenty of weapons scattered around, the Redeemer will likely be what you use to kill off Lazarus in the end, if only because there's plenty of ammo for it. Note that all of the weapons here, as well as the Blood Canteens, will continue to respawn after you pick them up, perhaps after 30 or 60 seconds have gone by. Most of the weapons are Redeemers, but if you favor a Carbine, then note the position of its pickup, near where you begin the fight, and periodically return to it for more ammo. The dual pistols are also decent for taking on Lazarus, but ammo for them is fairly scarce.
Anyway, there are four segments to this fight. In the first, it'll just be you and Lazarus, one on one. If he appears to be a lot more powerful than Cross, then that's because he is; he can kill you in just a couple of hits. He only possesses a couple of attacks here, though, which, if sometimes difficult to dodge, are least somewhat predictable. His first attack consists of the same spread-of-hellfire that he used on you way back in the Ride Like The Devil chapter, so try to stay on the ground as much as possible; since he'll angle his attack downwards, this will let you jump over the bombs as they approach. He also throws down a pair of homing missiles, quite larger than the smaller spreads, from time to time. If you have ammo to share, it's best to just shoot these to blow them up before they get close to you. Otherwise, you can try to jump while moving perpendicularly away from the bolts to dodge them.
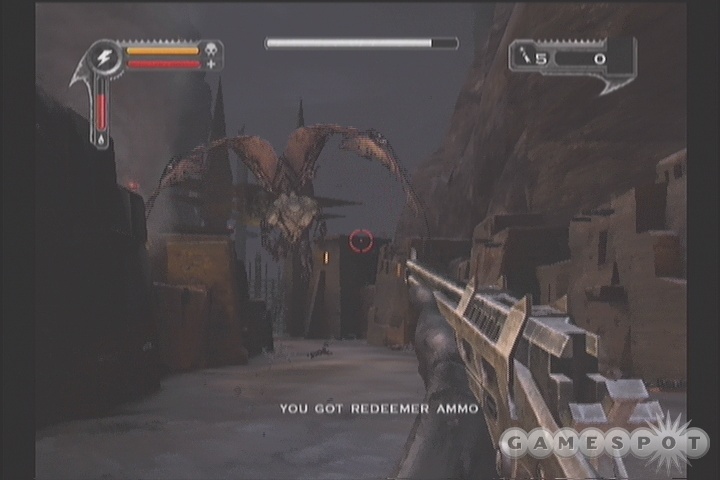
While dodging Lazarus' fire, try to be consistently moving away from him, backpedaling and firing at him while he chases you. He doesn't move too fast, so you shouldn't have too many problems keeping away from him. The main cause for alarm will be when you reach one end of the road and have to turn around; when you pass underneath Lazarus, his hellfire will be difficult to dodge due to the short distance it has to travel and the poor visibility while attempting this maneuver. You may want to try to jump atop some of the buildings on either side of the path before backtracking, as it'll give you a bit of lateral distance between yourself and Lazarus.
Second and Third Phases
The next two phases of the fight take place in the same area as the first does. The main distinguishing feature is that Lazarus will summon in multiple Reapers to help harry you during these phases. You shouldn't have to stress yourself too much about this, though, as they're still among the easiest foes in the game, and will even give you a chance to replenish your health a bit thanks to the orbs that they drop when they're killed. During the third phase, the Reapers are replaced with Phantom Reapers, and Lazarus debuts a new attack, which sends multiple whirlwinds down the main road towards you. There are gaps in the whirlwind wall, so try to fit yourself between them as best you can to avoid the minor, but constant damage that comes after contacting any of the pillars of wind.
Fourth Phase
Even though it'll take a long time with only a Redeemer, you will eventually run Lazarus down to around one-quarter health and open the gates to the bridge, where the final confrontation will take place. Lazzy doesn't gain any especially noteworthy new abilities here, but your own range of motion will be somewhat constrained thanks to the narrow width of the bridge and the fact that Phantom Reapers will constantly be spawning and harassing you. Luckily, there will also be plenty of ammo and health spawning on the bridge, so as long as you can avoid getting hammered too badly, you can rely on there being a couple of Blood Canteens available to you at any given time.
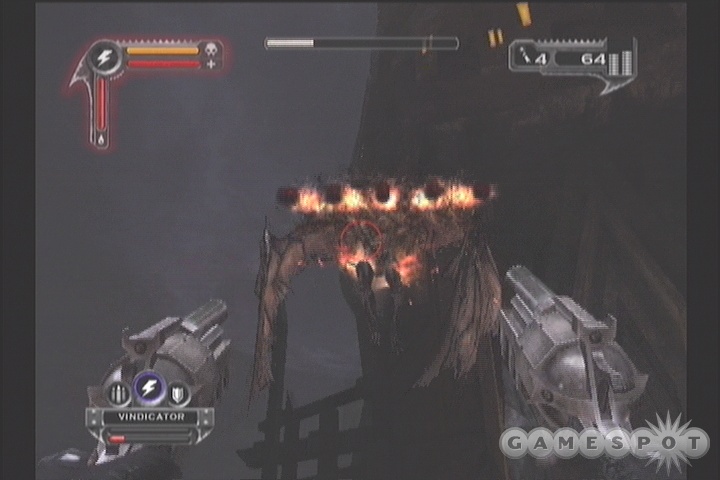
Beyond that, this is simply a matter of keeping your wits about you. You may find it useful to switch from the Carbine to pick up a Shotgun and Dual Pistols; hitting Lazarus with a Carbine can be difficult here due to his swooping flying pattern. Dual Pistols will give you a much better chance of making contact. If you have the Silver Bullet power, then using it in conjunction with Dual Pistols should allow you to take down a good amount of Lazarus' health or even kill him altogether if you knock some of his life off beforehand.
After you manage to kill off Lazarus, you'll be faced with the final Good vs. Evil choice in the game. You'll be able to decide whether you want to use Lazarus' body to remove his curse on your soul, or if you want to suck what remaining power resides in his corpse and become the new badass in town. Regardless of which you choose, the rest of the game doesn't change all that much.
The Right Train
Your goal now is to get to Deadfall, wherever that is. In order to do so, you'll have to hop onto a Darkwatch train that's been conveniently overrun by Lazarus's undead minions. Get ready for another brief horse-riding mission.

The controls for the pony ride are the same as they were the first time you rode a horse, so you shouldn't have too steep of a learning curve. The primary annoyance here lies in the Riflemen which perch themselves atop the train cars. If you stay in the open too long, they'll do a number on your health, so try to stay behind the train as much as possible, darting out to get a bead on a single target before moving on to the next, pausing near the train to recharge your Blood Shield as often as necessary. Also be sure to look out for a phantom rider that'll appear behind you during this little scrum.
After you've cleared off all of the Riflemen, you'll be able to mount the train via the ladder at the very end of it. When you've done so, kill off the Riflemen inside, then move up the steps there to find a flywheel on the balcony overlooking the tracks; spin it to open a nearby door, which will let you move on.
Although there'll be more phantom riders attempting to take potshots at you from outside the train, just ignore them for the moment and concentrate on killing the Reapers you encounter as you move up. When you reach the smashed ceiling, jump up and fall down into the next car to begin a rather serious fight against numerous Reapers. Be sure to grab a Shotgun before you fall down here, as you'll need its close-range firepower if you want to survive your travails. You'll need to kill eight or ten Phantom Reapers in all if you want to survive, so if you have Vindicator or Soul Stealer available, wait for four of them to spawn and then go to town.
After you get through the Phantom Reapers, you'll have to exit the train car and sit through one more turret adventure to finish off the level.
Deadfall
Well, it seems like a lot of bad things have been happening to Deadfall. Marks of Evil are popping up all over the place, and the entire town has been overrun with Banshees and Riflemen. Even though Deadfall hasn't been mentioned even once up until now, to the best of our recollection, we're going to assume that it's an important location and do our damnedest to clean it out.

At the outset here, just wait for all of the phantom Reapers to jump up into your traincar and take them out with melee attacks. When they stop coming, lean out and blow up some of the barrels on the tracks opposite you to dispatch the Riflemen there. Off to the left, beyond the distant tracks, is a Regulator manning a machinegun, but before you reach him, head right and jump into the car on the tracks near where you start to find another Victim. This will charge up your Judgement Power level to maximum, which will be handy when approaching the turret.
When you get close to the Regulator, he'll be blown out of the turret, allowing you to run up to it and take control. Unfortunately, there are Keggers in the area, so if they're running towards you, you may not have time to get to the turret and take them down without dying. If you have a Vindicator or Soul Stealer power available, though, you can clear all of the foes out before hopping into the turret. After 30 seconds of incoming foes, the flood will die down and you'll be able to move on. Around the corner, another little fight ensues before you can move on to the next section of the level.
The New Threat
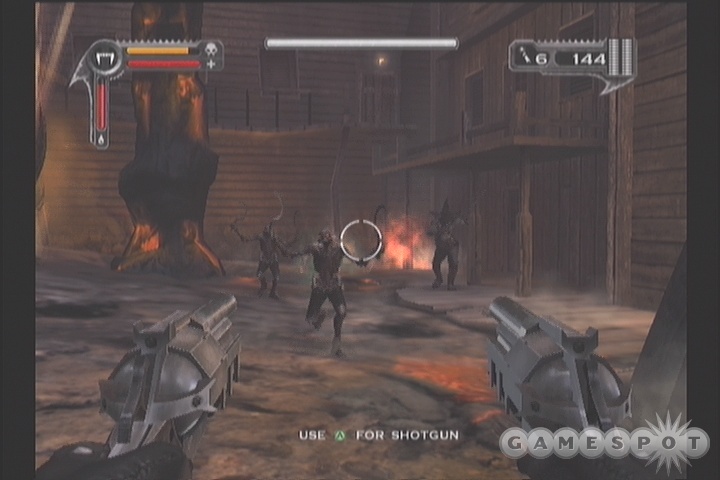
One of the first few enemies you encounter in this section of the level will be a phantom Banshee. Banshees are already difficult enough to kill, but their phantom variants will be even tougher, since they can take numerous headshots and have projectiles that move much more quickly. Your best bet for these guys is to use a Vindicator or Soul Stealer attack, preferably when you have a few other targets in your line of sight. If you manage to kill three or four enemies with one of these attacks, you should be well on your way to achieving another full Judgement meter, allowing you to put out two or three of them in a row without stopping. Hooray!
You'll have to kill three of the phantom Banshees before you can move on to the next area; you'll know you've killed everything when a cannonball detonates a house in this area and blows open the passage. Your real challenge awaits here, as a Mark of Evil will appear that will spawn infinite phantom Banshees, or at least a great number of them. If you happen to have a Vindicator or Soul Stealer available, then you may want to walk right up to the Mark, aim your power so that it'll get as many enemies as possible, then use dual pistols to blow the Mark away in short order. If you don't have pistols, then Silver Bullet or Blood Frenzy will let you quickly dispatch it.
Ghost Town
This is about as straightforward a mission as they come: in order to pass through this area, you're just going to need to kill as many enemies as possible, most of the phantom Banshee, phantom Reaper, and sniper variations. Just go slowly, checking around every corner for snipers before rushing on, and using your fourth-level Power on large concentrations of enemies. Near the first pair of snipers that you encounter, you'll see a flaming building; if you jump through the flames, you can reach a semi-hidden Victim, which will charge you up should you need extra health.
Shortly after maneuvering through an abandoned building, you'll come to a checkpoint and another Mark of Evil. This one is going to be tough to get to, so you may want to return to the building and pick up the Rail Rocket there and use that to blast the Mark from extremely long range; it's at the end of a long corridor, though, so you may wind up hitting enemies before your rockets can reach the Mark itself. If you have a power up, then you can just use Blood Frenzy (should you have it) to get up close and personal with the Mark, which will wipe out all of the enemies in the area.
Mark My Words
There's going to be more fun with Marks as you move through the next loading screen. Although it's spitting out Executioners, the Mark at the beginning of this section is at least close to you, allowing you to again Blood Frenzy it or take it down with dual pistols. You may be able to switch from the pistols to a shotgun here, depending on how many Executioners pop up.
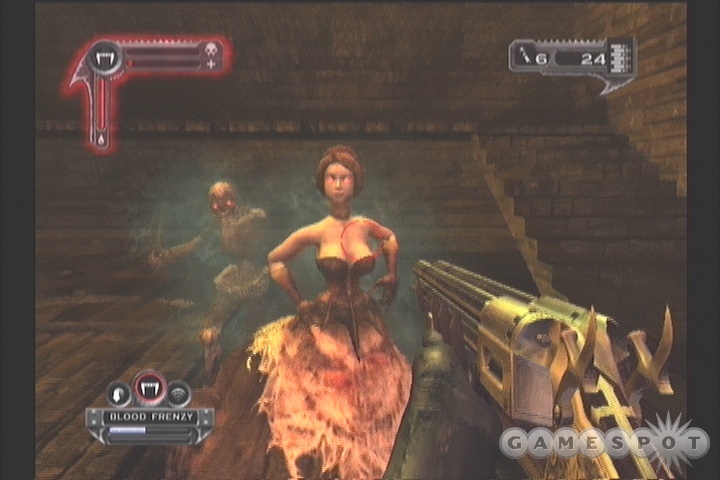
In fact, it'd be wise to do so, because you'll need to pass through a nearby building to reach the next open area, and the building's corridors are infested with more Executioners. Shotgun blasts at close range are your best bet for taking them down, since they appear in single numbers. There is a Victim in the last hidden room that an Executioner pops out of, so if you get backed up or hemmed in, feel free to use a Power to bust through; you'll be able to refill your meter at the Victim.
And The Streets Ran Thick With...Lava
So, Tala is apparently trying to bring about Hell on Earth, from the looks of things; Deadfall's streets are now running with fire, which will burn you should you step into it. You'll thus need to stick to the balconies and awnings of the town's streets, of which there are luckily plenty.
At the outset, though, you'll be facing off against numerous phantom Banshees and Reapers. There's one Banshee at the outset, with another one spawning in shortly after the level begins, so if possible, lure them both into the small room where you begin the level and blast them with a power for a quick kill.
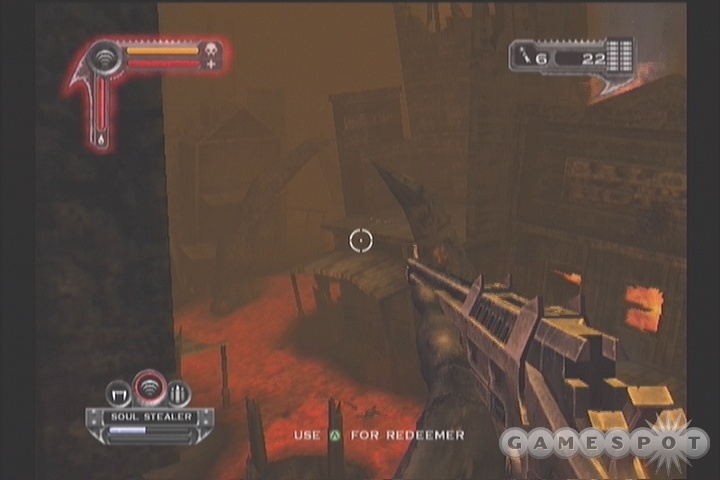
After this opening volley is done with, the rest of this level is essentially a corridor crawl, where the best advice is, as usual, to proceed slowly and take out the snipers as they make their presences known. You'll probably have to trade in your carbine for a range rifle (sob), since carbine ammo is so scarce here, but you'd be advised to keep a shotgun instead of the Rail Rocket, at least until you run out of ammo for it. Rockets aren't much use against the phantom Banshees, who'll either dodge its blast at long range, hit them with their own projectiles, or get close enough to you to get you into the splash damage zone. If you do choose a Rail Rocket, then try to lure Banshees in and use its powerful melee attack on them. Also, don't neglect to back up when you encounter a Banshee; rushing forward to meet them when they spawn will often force you to engage snipers at the same time.
Most of this area won't be too hard if you just proceed slowly, but the final fight, against a Mark of Evil and two simultaneous phantom Banshee guards, can be tough. If you have Blood Frenzy, then by all means get up close and pound on it; if not, then you'll still want to use a Power to clear out the Banshees before getting up close and dynamiting or otherwise destroying the Mark.
Curse of the West
Spoilers Ahoy!
Obviously enough, if you've gotten this far, then you're probably ready for spoilers, but keep in mind that, depending on whether you chose to absorb Lazarus' powers or to use his body to cleanse you of the curse, you're going to be fighting against different bosses, so if you want to play through the game again based on that choice, then you may want to hold off on reading this section.
...still there? If so, here we go.
Now, if you chose the Evil path when Lazarus went down, then you'll be facing off against Cassidy in ghost form; if you went good, then you'll be going up against Tala in demon form. The not-so-surprising thing about this is that both forms are pretty much identical, so if you're looking for a wildly different challenge based on your actions, you won't find one. Both of them move and attack in roughly the same manner, meaning that if you can beat one of them, the other one shouldn't be a problem (if you want to play against a different boss, you'll have to return to the Showdown stage and beat Lazarus again and choose a different path.
As mentioned, both bosses will be fairly similar in their attack patterns. They each have four roughly congruous attacks, which we'll describe here.
First Attack: The first attack here is similar to Lazarus' chain-of-hellfire attack. This consists of five or seven balls of energy thrown in a straight line at you. These are relatively easy to dodge, jump over, or avoid by running behind one of the five sacrificial mashers in the level.
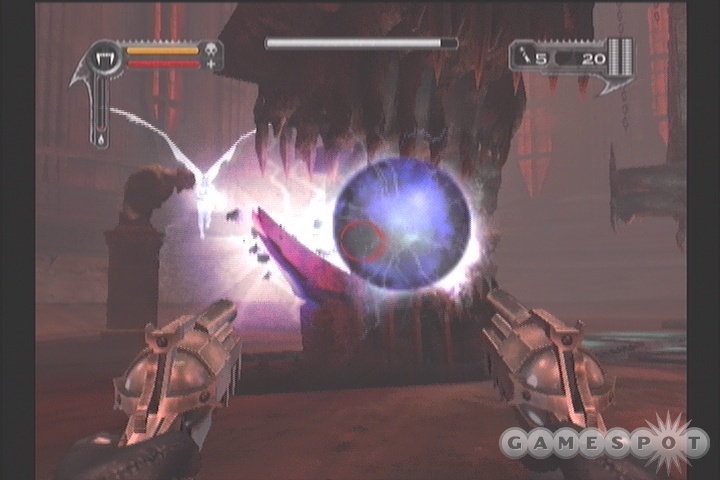
Second Attack: Cassidy will fling one massive homing energy ball at you; Tala will throw three smaller ones. Cassidy's attack is easier to shoot down, because of its size, but is the more damaging when it actually hits due to the fact that it can actually harm you before impact with its energy field. If you try to run away, it'll just wind up doing more damage to you, so do your best to either shoot it or hide behind a masher to make it impact there instead of on yourself. Tala's energy balls can be shot, as well, but it's going to be easier to just hide behind a solid object for them as well.
Third Attack: After a couple of mashers have fallen, the bosses will whip out a lightning wave attack, which will send lightning streaming out in front of them in a tall wave. This can't be jumped over or hidden from, since the lightning will crawl over the top of the mashers and fall back down to the ground when it reaches the other side. Your best bet is to jump to either side of the boss and avoid the lightning by moving to the side. You'll also notice that the lightning beams move horizontally as they move across the ground; if you're quick, you can dash forward between them and avoid any damage. Luckily, even if you get caught by the full force of this blast, it won't drain your shield too much, at least not on Shootist difficulty.
Fourth Attack: This is where things start to get really rough, especially for people going up against Cassidy. Tala's fourth attack consists of a cloud of hellfire that's dispersed in a wide arc in front of her; getting hit by it will fully drain your shields and take off a good amount of your life as well. When she starts using this attack, your best bet to just run up to her and get as close to her as possible; since she fires it from way up in the air, it's relatively easy to run underneath the cloud as it passes overhead. If she's a fair distance away from you, you can also attempt to jump over it. Alternately, if you doublejump backwards away from her, the cloud will often dissipate before it reaches you.
Cassidy is another story entirely. Her energy attack doesn't have a set boundary, so it can't be jumped over or walked under; in fact, it seems to form a ball completely around her and expand in 360 degrees from there. The only want to avoid its effects is thus to back away as far as possible and let the wave dissipate before it hits you. This is going to be difficult to do, but after a while you should get used to the animations that lead up to the wave being issued, then just reflexively start double-jumping backwards. It's best to try and keep Cassidy in the middle of the room while she's throwing these things out; if she backs out of the ring of mashers you may not have a lot of room between her and the wall, thus forcing you to take damage from the energy wave when it hits. It's generally best to rush in to fire at her, back away when she throws out an energy wave, rush in again to fire some more, and so on; this will keep her in roughly the same position if you can string a few of these maneuvers together.
Killing the Beast
Now, when you've gotten the attack patterns down, actually finishing off the end boss isn't all that hard. Since you'll enter the fight without any weapons but the Redeemer, you'll need to pick up some more of them. They're scattered around the edge of the room and between the mashers. We preferred to use the dual pistols on the bosses, but the carbine can also work well, since they don't move around quite as much as Lazarus did during your fight with him.
For most of the fight, you're going to want to stay near the five virgin mashers in the center of the room and rotate around them to force your foe's first two attacks to impact the mashers instead of yourself; it's a lot easier to dodge their fire if you happen to be behind an obstacle, rather than on open ground. We found it best to stick near the dual pistols pickup, which respawns every 20 or 30 seconds or so, quickly enough to ensure that you'll never run dry. Just dodge fire, wait for your enemy to expose herself, then blast off a clip before ducking whatever they send your way. This is going to work with near total efficiency against the first and second attacks of whomever you're facing. The third and fourth attacks won't be blocked by the mashers, but you won't be gaining any real benefit by retreating to open space, anyway, so just stand your ground and attempt to get out of the way whenever possible.
Beyond that, a simple matter of unloading your weapon on the target, switching between dual pistols and carbine fire depending on distance, will eventually wear down your target and kill them after a few minutes of fighting. You'll notice that, after you take off one-fifth or so of their health, a cutscene will play detailing the death of one of the vestal virgins in the mashers; if you happen to be running low on health, then you can run over to the masher that just dropped to find a host of red orbs there. The pedestals between a few of the mashers will also constantly respawn orbs, but only one at a time, so it's useful to swing by them if you happen to need a smaller boost to your health in the interim. Beyond that, the virgin-mashings don't seem to have much of an effect on the boss, besides signaling when they'll be whipping out new attacks. Although you might expect them to morph into some super-sized ultraboss when all of the sacrifices are made, nothing really occurs; just keep shooting to finish them off.
You do get different prerendered cinematic endings based on your choice regarding Lazarus' body, so if you want to see them both, just return to the Showdown level and choose something different.
Got a news tip or want to contact us directly? Email news@gamespot.com
Join the conversation