Champions of Norrath Walkthrough
Snowblind Studios has proven once again that they're the leaders of the action-RPG genre on consoles, with Champions of Norrath. This walkthrough includes tips on using all five character classes, full skill trees for all classes, and a walkthrough for the campaign.
Design by James Cheung
An army of goblins and orcs attack the treetop city of Kelethin, the home of the Faydwer wood elves. You’ve been called upon to aid the wood elf king Liethkorias in repelling the invaders and discovering what lurks behind the vicious attacks against his people. Snowblind Studios’ and Sony Online Entertainment’s role-playing game Champions of Norrath features five character classes, dozens of unique skills, and an epic adventure spanning five acts and diverse locations.
This GameSpot game guide for Champions of Norrath includes coverage of all five character classes (revealing the complete skill tree and statistics) and a full walk-through.
- General Strategies - This section offers general strategies for building your character efficiently and effectively.
- Barbarian Warrior - Look here for tips on using the Barbarian Warrior as well as complete statistics for the barbarian’s skill tree.
- Wood Elf Ranger - This section offers tips on the Wood Elf Ranger and includes all statistics for the ranger’s complete skill tree
- High Elf Cleric - This section covers the High Elf Cleric and reveals complete statistics for the cleric’s skill tree.
- Erudite Wizard - Check this section for tips on using the Erudite Wizard. You’ll also find full statistics for the wizard’s skill tree.
- Dark Elf Shadow Knight -This section provides tips on the Dark Elf Shadow Knight and includes complete statistics for the shadow knight skill tree.
- Walk-through - Look here for a complete walk-through for Champions of Norrath.
Chapter 1 - General Strategies
Success in Champions of Norrath is about building your character efficiently and effectively. Knowing where to put your attribute and skill points can mean the difference between a dominant character and a weak character. This section offers general strategies for success in Champions of Norrath.
- There are four attributes that are common to each character class. The strength attribute increases melee damage and carrying capacity. Strength is most important to the barbarian and also important to the cleric and shadow knight; both the cleric and shadow knight rely on melee combat in combination with their spell abilities. The intelligence attribute increases total mana and mana regeneration rate. Wizards rely the most on intelligence. For a wizard, nearly every attribute point should be spent on intelligence. Both clerics and shadow knights also require intelligence to fund their spells. Dexterity increases the damage for ranged weapons and the ability to hit with all weapons. Increased damage is always important so focus your ranger’s attributes on dexterity. Stamina increases health and health regeneration. You can offset stamina with health points and agile movement--basically trying to avoid taking damage! You can also offset stamina with jewelry and item sockets that focus on increases health, health regeneration, or stamina.
- The character skill trees should also be treated with care. Avoid dropping skill points haphazardly. Check over the character’s skills and form a plan on how to spend each point. It’s much better to focus on one or two spells and boost them to high level than to focus on four spells at lower levels. Bear in mind that you can only accommodate two spells in your "quick use" buttons anyway. Look for good combinations, such as the cleric’s stunning blinding light and damaging hammer of wrath or the shadow knight’s confusing engulfing darkness and damaging disease shield.
- You gain more skills points for each level as you reach certain milestones. At level seven, you gain two skill points for each time you advance a new level. When you reach level seventeen, you start to gain three skill points for each level. And once you make it to level twenty-seven, you gain four skill points for each new level...and so on.
- Combat success relies on a number of factors. First, try not to overwhelm your character with enemies. Move cautiously through new areas and attempt to lure most enemies to your position instead of charging them. If you’re overwhelmed, retreat and wait for some of the enemies to reverse course in the other direction. Second, don’t neglect the block button if you’re a toe-to-toe fighter. It’s practically mandatory against tougher enemies, specifically boss characters. Third, look for ways to use your environment to your advantage. Lure enemies around pillars to get in first strikes; trap an enemy between rocks to strike a few hits; force an enemy to walk over a campfire to cause some burn; and fight in tight hallways for better damage from area effect spells or so you can concentrate on the lead enemy before facing the others.
- Enhance your character’s attributes with special items that can be inserted into weapons and armor. Wait for items that specifically increase your character’s strengths. Don’t just insert a new item because you found one. An increase of 6% poison resistance likely won’t help your wizard as much as waiting for that boost in mana regeneration.
- Purchase jewelry with elemental resistances; most of the shops carry these and you’ll find their effectiveness increases at each subsequent shop. Carry one of each on hand so you can easily boost your resistances as needed. You can even double or triple up on resistances to maximize your protection. Don't forget to change jewelry when the situation When faced against magic-user enemies wielding cold magic, switch to your inventory and equip your cold resistances.
Chapter 2 - Barbarian Warrior
Description: Primarily a tank that absorbs and deals damage.
Strengths: Regenerates mana by defeating enemies. Can wield any weapon type.
Weaknesses: Virtually no magic. Mana does not regenerate while idle.
Strength: 35
Intelligence: 20
Dexterity: 25
Stamina: 35
Health: 53/53
Mana: 16/16
Armor: 29
Attack: 37
Damage: 19-24
Resist Fire: 0%
Resist Cold: 0%
Resist Poison: 0%
Resist Disease: 0%
Resist Magic: 0%

Initial Weapon: Tarnished Axe
Initial Armor: Tattered Patchwork Armor, Tattered Patchwork Boots, Tattered Patchwork Leggings, Tattered Patchwork Gloves
Initial Equipment: 2 Gate Scrolls, 2 Minor Healing Tonic, 2 Lesser Mana Vial, 500 gold
Initial Skills: Rank 1 Blunt Weapons (Increases blunt weapon damage by 15%), Rank 1 Slashing (Increases slashing weapon damage by 15%)
The Barbarian Warrior is the tank. He’s built to absorb tons of damage and dish out it out in equal measure. A barbarian should focus attribute points primarily on strength; the greater the strength, the greater the melee damage. Dexterity and stamina play a less important, but still important, role. Dexterity affects the ability to hit with melee weapons, which translates to receiving maximum damage for each strike. Stamina increases hit points and health regeneration. As much damage as the barbarian will sustain, the more hit points the better. Skillful use of health potions and item sockets can help the barbarian increase stamina sufficiently without the use of attribute points.
Focus on a weapon type and concentrate on that skill. It’s wasteful to spend points on blunt weapons and slashing. Choose a path and stick with it. Another decision is between shield bash and dual wield. Shield bash is an effective skill that offers stun ability against your opponents. But you must use one hand for a shield. Dual wield means two weapons so you won’t be using a shield in one hand. Once again, don’t waste any points.
Dual wield can be extremely deadly with two strong weapons, appropriate advancement in the weapon skills, and in combination with a lot of points in the critical hit skill. Slam is also extremely useful to increase your damage. And once you reach level 20, ancestral call is a must-have as you move through the next difficulty levels.
Mana is definitely an issue for the barbarian--it doesn’t regenerate. So if you plan to use skills that require mana, you better have potions on hand. Skills that require mana are slam, shield bash, critical hit, ground pound, charge, cyclone, and ancestral call.
Barbarian Warrior Skills
This section reveals all Barbarian Warrior skills and their effect at each rank.
Blunt Weapons
Required Level: 1
Description: This skill increases damage when blunt weapons are used.
Rank 1: Increases blunt weapon damage by 15%.
Rank 2: Increases blunt weapon damage by 20%.
Rank 3: Increases blunt weapon damage by 25%.
Rank 4: Increases blunt weapon damage by 30%.
Rank 5: Increases blunt weapon damage by 35%.
Rank 6: Increases blunt weapon damage by 40%.
Rank 7: Increases blunt weapon damage by 45%.
Rank 8: Increases blunt weapon damage by 50%.
Rank 9: Increases blunt weapon damage by 55%.
Rank 10: Increases blunt weapon damage by 60%.
Rank 11: Increases blunt weapon damage by 65%.
Rank 12: Increases blunt weapon damage by 70%.
Rank 13: Increases blunt weapon damage by 75%.
Rank 14: Increases blunt weapon damage by 80%.
Rank 15: Increases blunt weapon damage by 85%.
Rank 16: Increases blunt weapon damage by 90%.
Rank 17: Increases blunt weapon damage by 95%.
Rank 18: Increases blunt weapon damage by 100%.
Rank 19: Increases blunt weapon damage by 105%.
Rank 20: Increases blunt weapon damage by 110%.
Slashing
Required Level: 1
Description: This skill increases damage when slashing weapons are used.
Rank 1: Increases slashing weapon damage by 15%.
Rank 2: Increases slashing weapon damage by 20%.
Rank 3: Increases slashing weapon damage by 25%.
Rank 4: Increases slashing weapon damage by 30%.
Rank 5: Increases slashing weapon damage by 35%.
Rank 6: Increases slashing weapon damage by 40%.
Rank 7: Increases slashing weapon damage by 45%.
Rank 8: Increases slashing weapon damage by 50%.
Rank 9: Increases slashing weapon damage by 55%.
Rank 10: Increases slashing weapon damage by 60%.
Rank 11: Increases slashing weapon damage by 65%.
Rank 12: Increases slashing weapon damage by 70%.
Rank 13: Increases slashing weapon damage by 75%.
Rank 14: Increases slashing weapon damage by 80%.
Rank 15: Increases slashing weapon damage by 85%.
Rank 16: Increases slashing weapon damage by 90%.
Rank 17: Increases slashing weapon damage by 95%.
Rank 18: Increases slashing weapon damage by 100%.
Rank 19: Increases slashing weapon damage by 105%.
Rank 20: Increases slashing weapon damage by 110%.
Slam
Required Level: 3
Description: Slam is a more powerful version of the standard melee attack.
Rank 1: Boost damage by 100%.
Rank 2: Boost damage by 110%.
Rank 3: Boost damage by 120%.
Rank 4: Boost damage by 130%.
Rank 5: Boost damage by 140%.
Rank 6: Boost damage by 150%.
Rank 7: Boost damage by 160%.
Rank 8: Boost damage by 170%.
Rank 9: Boost damage by 180%.
Rank 10: Boost damage by 190%.
Rank 11: Boost damage by 200%.
Rank 12: Boost damage by 210%.
Rank 13: Boost damage by 220%.
Rank 14: Boost damage by 230%.
Rank 15: Boost damage by 240%.
Rank 16: Boost damage by 250%.
Rank 17: Boost damage by 260%.
Rank 18: Boost damage by 270%.
Rank 19: Boost damage by 280%.
Rank 20: Boost damage by 290%.
Bind Wound
Required Level: 3
Description: This skill increases your health regeneration rate.
Rank 1: 120% health regen rate.
Rank 2: 130% health regen rate.
Rank 3: 140% health regen rate.
Rank 4: 150% health regen rate.
Rank 5: 160% health regen rate.
Rank 6: 170% health regen rate.
Rank 7: 180% health regen rate.
Rank 8: 190% health regen rate.
Rank 9: 200% health regen rate.
Rank 10: 210% health regen rate.
Rank 11: 220% health regen rate.
Rank 12: 230% health regen rate.
Rank 13: 240% health regen rate.
Rank 14: 250% health regen rate.
Rank 15: 260% health regen rate.
Rank 16: 270% health regen rate.
Rank 17: 280% health regen rate.
Rank 18: 290% health regen rate.
Rank 19: 300% health regen rate.
Rank 20: 310% health regen rate.
Barbarian Warrior Skills - cont.
Dodge
Required Level: 5
Description: This skill improves your ability to evade ranged attacks.
Rank 1: 5% chance of miss.
Rank 2: 8% chance of miss.
Rank 3: 11% chance of miss.
Rank 4: 14% chance of miss.
Rank 5: 17% chance of miss.
Rank 6: 20% chance of miss.
Rank 7: 23% chance of miss.
Rank 8: 26% chance of miss.
Rank 9: 29% chance of miss.
Rank 10: 32% chance of miss.
Rank 11: 35% chance of miss.
Rank 12: 38% chance of miss.
Rank 13: 41% chance of miss.
Rank 14: 44% chance of miss.
Rank 15: 47% chance of miss.
Rank 16: 50% chance of miss.
Rank 17: 53% chance of miss.
Rank 18: 56% chance of miss.
Rank 19: 59% chance of miss.
Rank 20: 62% chance of miss.
Endurance
Required Level: 5
Description: This skill increases your carrying capacity.
Rank 1: +15 more pounds.
Rank 2: +30 more pounds.
Rank 3: +45 more pounds.
Rank 4: +60 more pounds.
Rank 5: +75 more pounds.
Rank 6: +90 more pounds.
Rank 7: +105 more pounds.
Rank 8: +120 more pounds.
Rank 9: +135 more pounds.
Rank 10: +150 more pounds.
Rank 11: +165 more pounds.
Rank 12: +180 more pounds.
Rank 13: +195 more pounds.
Rank 14: +210 more pounds.
Rank 15: +225 more pounds.
Rank 16: +240 more pounds.
Rank 17: +255 more pounds.
Rank 18: +270 more pounds.
Rank 19: +285 more pounds.
Rank 20: +300 more pounds.
Shield Bash
Required Level: 5
Description: A rushing attack that requires a shield. Delivers high damage and a chance of stunning enemies.
Rank 1: 40-60 damage for 1 enemy, 20% chance of stun for 4 seconds.
Rank 2: 48-72 damage for 1 enemy, 22% chance of stun for 5 seconds.
Rank 3: 56-84 damage for up to 2 enemies, 24% chance of stun for 5 seconds.
Rank 4: 64-96 damage for up to 2 enemies, 26% chance of stun for 6 seconds.
Rank 5: 72-108 damage for up to 2 enemies, 28% chance of stun for 6 seconds.
Rank 6: 80-120 damage for up to 2 enemies, 30% chance of stun for 7 seconds.
Rank 7: 88-132 damage for up to 3 enemies, 32% chance of stun for 7 seconds.
Rank 8: 96-144 damage for up to 3 enemies, 34% chance of stun for 8 seconds.
Rank 9: 104-156 damage for up to 3 enemies, 36% chance of stun for 8 seconds.
Rank 10: 112-168 damage for up to 3 enemies, 38% chance of stun for 9 seconds.
Rank 11: 120-180 damage for up to 4 enemies, 40% chance of stun for 9 seconds.
Rank 12: 128-192 damage for up to 4 enemies, 42% chance of stun for 10 seconds.
Rank 13: 136-204 damage for up to 4 enemies, 44% chance of stun for 10 seconds.
Rank 14: 144-216 damage for up to 4 enemies, 46% chance of stun for 11 seconds.
Rank 15: 152-228 damage for up to 5 enemies, 48% chance of stun for 11 seconds.
Rank 16: 160-240 damage for up to 5 enemies, 50% chance of stun for 12 seconds.
Rank 17: 168-252 damage for up to 5 enemies, 52% chance of stun for 12 seconds.
Rank 18: 176-264 damage for up to 5 enemies, 54% chance of stun for 13 seconds.
Rank 19: 184-276 damage for up to 6 enemies, 56% chance of stun for 13 seconds.
Rank 20: 192-288 damage for up to 6 enemies, 58% chance of stun for 14 seconds.
Critical Hit
Required Level: 8
Description: Improves your chances of registering a critical hit during an attack. Provides similar skills to teammates within aura range.
Rank 1: 10% chance of critical, duration of 20s, aura radius 6 feet.
Rank 2: 13% chance of critical, duration of 21s, aura radius 7 feet.
Rank 3: 16% chance of critical, duration of 22s, aura radius 8 feet.
Rank 4: 19% chance of critical, duration of 23s, aura radius 9 feet.
Rank 5: 22% chance of critical, duration of 24s, aura radius 10 feet.
Rank 6: 25% chance of critical, duration of 25s, aura radius 11 feet.
Rank 7: 28% chance of critical, duration of 26s, aura radius 12 feet.
Rank 8: 31% chance of critical, duration of 27s, aura radius 13 feet.
Rank 9: 34% chance of critical, duration of 28s, aura radius 14 feet.
Rank 10: 37% chance of critical, duration of 29s, aura radius 15 feet.
Rank 11: 40% chance of critical, duration of 30s, aura radius 16 feet.
Rank 12: 43% chance of critical, duration of 31s, aura radius 17 feet.
Rank 13: 46% chance of critical, duration of 32s, aura radius 18 feet.
Rank 14: 49% chance of critical, duration of 33s, aura radius 19 feet.
Rank 15: 52% chance of critical, duration of 34s, aura radius 20 feet.
Rank 16: 55% chance of critical, duration of 35s, aura radius 21 feet.
Rank 17: 58% chance of critical, duration of 36s, aura radius 22 feet.
Rank 18: 61% chance of critical, duration of 37s, aura radius 23 feet.
Rank 19: 64% chance of critical, duration of 38s, aura radius 24 feet.
Rank 20: 67% chance of critical, duration of 39s, aura radius 25 feet.
Dual Wield
Required Level: 10
Description: This skill will allow you to wield a weapon in each hand.
Rank 1: 62% of normal damage per weapon.
Rank 2: 64% of normal damage per weapon.
Rank 3: 66% of normal damage per weapon.
Rank 4: 68% of normal damage per weapon.
Rank 5: 70% of normal damage per weapon.
Rank 6: 72% of normal damage per weapon.
Rank 7: 74% of normal damage per weapon.
Rank 8: 76% of normal damage per weapon.
Rank 9: 78% of normal damage per weapon.
Rank 10: 80% of normal damage per weapon.
Rank 11: 82% of normal damage per weapon.
Rank 12: 84% of normal damage per weapon.
Rank 13: 86% of normal damage per weapon.
Rank 14: 88% of normal damage per weapon.
Rank 15: 90% of normal damage per weapon.
Rank 16: 92% of normal damage per weapon.
Rank 17: 94% of normal damage per weapon.
Rank 18: 96% of normal damage per weapon.
Rank 19: 98% of normal damage per weapon.
Rank 20: 100% of normal damage per weapon.
Barbarian Warrior Skills - cont.
Ground Pound
Required Level: 15
Description: A two-handed hammer or mace is used to strike the ground and damage enemies in the area. Higher ranks stun enemies as well.
Rank 1: 56-84 damage with radius of 6 feet.
Rank 2: 64-96 damage with radius of 7 feet.
Rank 3: 72-108 damage with radius of 8 feet.
Rank 4: 80-120 damage with radius of 9 feet.
Rank 5: 88-132 damage with radius of 10 feet.
Rank 6: 96-144 damage with radius of 11 feet.
Rank 7: 104-156 damage with radius of 12 feet.
Rank 8: 112-168 damage with radius of 13 feet.
Rank 9: 120-180 damage with radius of 14 feet.
Rank 10: 128-192 damage with radius of 15 feet. 10% chance of stunning enemies for 2s.
Rank 11: 136-204 damage with radius of 16 feet. 13% chance of stunning enemies for 2s.
Rank 12: 144-216 damage with radius of 17 feet. 16% chance of stunning enemies for 3s.
Rank 13: 152-228 damage with radius of 18 feet. 19% chance of stunning enemies for 3s.
Rank 14: 160-240 damage with radius of 19 feet. 22% chance of stunning enemies for 3s.
Rank 15: 168-252 damage with radius of 20 feet. 25% chance of stunning enemies for 3s.
Rank 16: 176-264 damage with radius of 21 feet. 28% chance of stunning enemies for 4s.
Rank 17: 184-276 damage with radius of 22 feet. 31% chance of stunning enemies for 4s.
Rank 18: 192-288 damage with radius of 23 feet. 34% chance of stunning enemies for 4s.
Rank 19: 200-300 damage with radius of 24 feet. 37% chance of stunning enemies for 4s.
Rank 20: 208-312 damage with radius of 25 feet. 40% chance of stunning enemies for 5s.
Charge
Required Level: 15
Description: A running attack that deals tremendous damage when enemy is hit. Higher ranks add radial damage and improve steering.
Rank 1: 120-144 damage.
Rank 2: 130-156 damage.
Rank 3: 140-168 damage.
Rank 4: 150-180 damage.
Rank 5: 160-192 damage.
Rank 6: 170-204 damage.
Rank 7: 180-216 damage.
Rank 8: 190-228 damage.
Rank 9: 200-240 damage.
Rank 10: 210-252 damage, area damage 55-66 within radius of 3 feet. 2% turning ability.
Rank 11: 220-264 damage, area damage 58-70 within radius of 4 feet. 2% turning ability.
Rank 12: 230-276 damage, area damage 61-73 within radius of 6 feet. 2% turning ability.
Rank 13: 240-288 damage, area damage 64-77 within radius of 7 feet. 3% turning ability.
Rank 14: 250-300 damage, area damage 67-80 within radius of 8 feet. 3% turning ability.
Rank 15: 260-312 damage, area damage 70-84 within radius of 10 feet. 3% turning ability.
Rank 16: 270-324 damage, area damage 73-88 within radius of 11 feet. 4% turning ability.
Rank 17: 280-336 damage, area damage 76-91 within radius of 12 feet. 4% turning ability.
Rank 18: 290-348 damage, area damage 79-95 within radius of 14 feet. 4% turning ability.
Rank 19: 300-360 damage, area damage 82-98 within radius of 15 feet. 5% turning ability.
Rank 20: 310-372 damage, area damage 85-102 within radius of 16 feet. 5% turning ability.
Riposte
Required Level: 15
Description: A creature striking the player has a chance of being hit back.
Rank 1: 24-29 damage on counter hit, with a 10% chance of success.
Rank 2: 28-34 damage on counter hit, with a 10% chance of success.
Rank 3: 32-38 damage on counter hit, with a 10% chance of success.
Rank 4: 36-43 damage on counter hit, with a 10% chance of success.
Rank 5: 40-48 damage on counter hit, with a 10% chance of success.
Rank 6: 44-53 damage on counter hit, with a 10% chance of success.
Rank 7: 48-58 damage on counter hit, with a 10% chance of success.
Rank 8: 52-62 damage on counter hit, with a 10% chance of success.
Rank 9: 56-67 damage on counter hit, with a 10% chance of success.
Rank 10: 60-72 damage on counter hit, with a 10% chance of success.
Rank 11: 64-77 damage on counter hit, with a 10% chance of success.
Rank 12: 68-82 damage on counter hit, with a 10% chance of success.
Rank 13: 72-86 damage on counter hit, with a 10% chance of success.
Rank 14: 76-91 damage on counter hit, with a 10% chance of success.
Rank 15: 90-96 damage on counter hit, with a 10% chance of success.
Rank 16: 84-101 damage on counter hit, with a 10% chance of success.
Rank 17: 88-106 damage on counter hit, with a 10% chance of success.
Rank 18: 92-110 damage on counter hit, with a 10% chance of success.
Rank 19: 96-115 damage on counter hit, with a 10% chance of success.
Rank 20: 100-120 damage on counter hit, with a 10% chance of success.
Cyclone
Required Level: 10
Description: Spinning attack damages multiple enemies. Higher ranks boost damage, allow multiple revolutions, and better control.
Rank 1: 30% of normal damage per hit. 1 revolution(s). 40% motion control.
Rank 2: 33% of normal damage per hit. 1 revolution(s). 42% motion control.
Rank 3: 36% of normal damage per hit. 1 revolution(s). 44% motion control.
Rank 4: 39% of normal damage per hit. 2 revolution(s). 46% motion control.
Rank 5: 42% of normal damage per hit. 2 revolution(s). 48% motion control.
Rank 6: 45% of normal damage per hit. 2 revolution(s). 50% motion control.
Rank 7: 48% of normal damage per hit. 2 revolution(s). 52% motion control.
Rank 8: 51% of normal damage per hit. 2 revolution(s). 54% motion control.
Rank 9: 54% of normal damage per hit. 3 revolution(s). 56% motion control.
Rank 10: 57% of normal damage per hit. 3 revolution(s). 58% motion control.
Rank 11: 60% of normal damage per hit. 3 revolution(s). 60% motion control.
Rank 12: 63% of normal damage per hit. 3 revolution(s). 62% motion control.
Rank 13: 66% of normal damage per hit. 3 revolution(s). 64% motion control.
Rank 14: 69% of normal damage per hit. 4 revolution(s). 66% motion control.
Rank 15: 72% of normal damage per hit. 4 revolution(s). 68% motion control.
Rank 16: 75% of normal damage per hit. 4 revolution(s). 70% motion control.
Rank 17: 78% of normal damage per hit. 4 revolution(s). 72% motion control.
Rank 18: 81% of normal damage per hit. 4 revolution(s). 74% motion control.
Rank 19: 84% of normal damage per hit. 5 revolution(s). 76% motion control.
Rank 20: 87% of normal damage per hit. 5 revolution(s). 78% motion control.
Ancestral Call
Required Level: 20
Description: Tap the Ancestors for more power. Boosts attack speed and damage. Higher ranks create aura of influence to boost fellow players.
Rank 1: 125% damage, 110% speed, 20s duration, aura radius 4 ft.
Rank 2: 130% damage, 112% speed, 21s duration, aura radius 5 ft.
Rank 3: 135% damage, 114% speed, 22s duration, aura radius 5 ft.
Rank 4: 140% damage, 116% speed, 23s duration, aura radius 6 ft.
Rank 5: 145% damage, 118% speed, 24s duration, aura radius 6 ft.
Rank 6: 150% damage, 120% speed, 25s duration, aura radius 7 ft.
Rank 7: 155% damage, 122% speed, 26s duration, aura radius 7 ft.
Rank 8: 160% damage, 124% speed, 27s duration, aura radius 8 ft.
Rank 9: 165% damage, 126% speed, 28s duration, aura radius 8 ft.
Rank 10: 170% damage, 128% speed, 29s duration, aura radius 9 ft.
Rank 11: 175% damage, 130% speed, 30s duration, aura radius 9 ft.
Rank 12: 180% damage, 132% speed, 31s duration, aura radius 10 ft.
Rank 13: 185% damage, 134% speed, 32s duration, aura radius 10 ft.
Rank 14: 190% damage, 136% speed, 33s duration, aura radius 11 ft.
Rank 15: 195% damage, 138% speed, 34s duration, aura radius 11 ft.
Rank 16: 200% damage, 140% speed, 35s duration, aura radius 12 ft.
Rank 17: 205% damage, 142% speed, 36s duration, aura radius 12 ft.
Rank 18: 210% damage, 144% speed, 37s duration, aura radius 13 ft.
Rank 19: 215% damage, 146% speed, 38s duration, aura radius 13 ft.
Rank 20: 220% damage, 148% speed, 39s duration, aura radius 14 ft.
Chapter 3 - Wood Elf Ranger
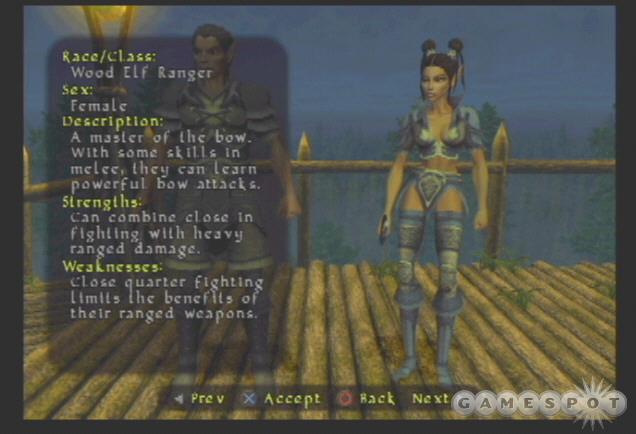
Description: A master of the bow. With some skills in melee, they can learn powerful bow attacks.
Strengths: Can combine close in fighting with heavy ranged damage.
Weaknesses: Close quarter fighting limits the benefits of their ranged weapon.
Strength: 28
Intelligence: 25
Dexterity: 35
Stamina: 27
Health: 41/41
Mana: 21/21
Armor: 34
Attack: 37
Damage: 15-19
Resist Fire: 0%
Resist Cold: 0%
Resist Poison: 0%
Resist Disease: 0%
Resist Magic: 0%
Initial Weapons: Cracked Short Sword, Battle Worn Shortbow, 40 Arrows
Initial Armor: Tattered Patchwork Armor, Tattered Patchwork Boots, Tattered Patchwork Leggings, Tattered Patchwork Gloves
Initial Equipment: 2 Gate Scrolls, 2 Minor Healing Tonic, 2 Lesser Mana Vial, 500 gold
Initial Skills: Rank 1 Blunt Weapons (Increases blunt weapon damage by 15%), Rank 1 Slashing (Increases slashing weapon damage by 15%)
Though the he or she can be used as a melee fighter, the ranger’s initial stats and archery skill (as well as the ranged-based skills) means any players should focus on ranged weaponry to gain the most benefits from this class. Dexterity is your attribute focus with a minor in intelligence to fund the skills that require mana. Archery should be your primary skill focus early on. Check the shops often for upgraded bows so you can continue to ramp up your damage through the early part of the game. Carry a melee weapon, though, for when enemies get close. Switch to it quickly with the "L1" button. Ranged weaponry is your focus, however, so concentrate your attribute and skill points in that direction.
Poison arrow and fire arrow are solid skills and are effective early on. Choose your route (poison becomes good later for area effect and fire damage helps break enemies' blocks) and add a few points while focusing primarily on your archery skill and critical hit. You may wish to add multi-fire, which increases projectiles and damage percentage of your current bow. Regeneration will be useful but should be focused on by very high level rangers.
Entangle can aid a ranged-based character greatly. Trap enemies in the entanglement and you’re free to fire away at the immobile target. Critical hit is a good choice as you continue to gain levels through the end of your first play through and subsequent games. It’s also beneficial in multiplayer as it provides an aura for teammates.
Wood Elf Ranger Skills
This section reveals all Wood Elf Ranger skills and their effect at each rank.
Blunt Weapons
Required Level: 1
Description: This skill increases damage when blunt weapons are used.
Rank 1: Increases blunt weapon damage by 15%.
Rank 2: Increases blunt weapon damage by 20%.
Rank 3: Increases blunt weapon damage by 25%.
Rank 4: Increases blunt weapon damage by 30%.
Rank 5: Increases blunt weapon damage by 35%.
Rank 6: Increases blunt weapon damage by 40%.
Rank 7: Increases blunt weapon damage by 45%.
Rank 8: Increases blunt weapon damage by 50%.
Rank 9: Increases blunt weapon damage by 55%.
Rank 10: Increases blunt weapon damage by 60%.
Rank 11: Increases blunt weapon damage by 65%.
Rank 12: Increases blunt weapon damage by 70%.
Rank 13: Increases blunt weapon damage by 75%.
Rank 14: Increases blunt weapon damage by 80%.
Rank 15: Increases blunt weapon damage by 85%.
Rank 16: Increases blunt weapon damage by 90%.
Rank 17: Increases blunt weapon damage by 95%.
Rank 18: Increases blunt weapon damage by 100%.
Rank 19: Increases blunt weapon damage by 105%.
Rank 20: Increases blunt weapon damage by 110%.
Slashing
Required Level: 1
Description: This skill increases damage when slashing weapons are used.
Rank 1: Increases slashing weapon damage by 15%.
Rank 2: Increases slashing weapon damage by 20%.
Rank 3: Increases slashing weapon damage by 25%.
Rank 4: Increases slashing weapon damage by 30%.
Rank 5: Increases slashing weapon damage by 35%.
Rank 6: Increases slashing weapon damage by 40%.
Rank 7: Increases slashing weapon damage by 45%.
Rank 8: Increases slashing weapon damage by 50%.
Rank 9: Increases slashing weapon damage by 55%.
Rank 10: Increases slashing weapon damage by 60%.
Rank 11: Increases slashing weapon damage by 65%.
Rank 12: Increases slashing weapon damage by 70%.
Rank 13: Increases slashing weapon damage by 75%.
Rank 14: Increases slashing weapon damage by 80%.
Rank 15: Increases slashing weapon damage by 85%.
Rank 16: Increases slashing weapon damage by 90%.
Rank 17: Increases slashing weapon damage by 95%.
Rank 18: Increases slashing weapon damage by 100%.
Rank 19: Increases slashing weapon damage by 105%.
Rank 20: Increases slashing weapon damage by 110%.
Archery
Required Level: 1
Description: Enhances your ability to damage enemies with bow attacks.
Rank 1: Extra 15% damage.
Rank 2: Extra 20% damage.
Rank 3: Extra 25% damage.
Rank 4: Extra 30% damage.
Rank 5: Extra 35% damage.
Rank 6: Extra 40% damage.
Rank 7: Extra 45% damage.
Rank 8: Extra 50% damage.
Rank 9: Extra 55% damage.
Rank 10: Extra 60% damage.
Rank 11: Extra 65% damage.
Rank 12: Extra 70% damage.
Rank 13: Extra 75% damage.
Rank 14: Extra 80% damage.
Rank 15: Extra 85% damage.
Rank 16: Extra 90% damage.
Rank 17: Extra 95% damage.
Rank 18: Extra 100% damage.
Rank 19: Extra 105% damage.
Rank 20: Extra 110% damage.
Regeneration
Required Level: 15
Description: A character with regeneration will regain their mana more quickly. Higher rank gives greater speed of regeneration.
Rank 1: 10% faster mana regeneration.
Rank 2: 15% faster mana regeneration.
Rank 3: 20% faster mana regeneration.
Rank 4: 25% faster mana regeneration.
Rank 5: 30% faster mana regeneration.
Rank 6: 35% faster mana regeneration.
Rank 7: 40% faster mana regeneration.
Rank 8: 45% faster mana regeneration.
Rank 9: 50% faster mana regeneration.
Rank 10: 55% faster mana regeneration.
Rank 11: 60% faster mana regeneration.
Rank 12: 65% faster mana regeneration.
Rank 13: 70% faster mana regeneration.
Rank 14: 75% faster mana regeneration.
Rank 15: 80% faster mana regeneration.
Rank 16: 85% faster mana regeneration.
Rank 17: 90% faster mana regeneration.
Rank 18: 95% faster mana regeneration.
Rank 19: 100% faster mana regeneration.
Level 20: 105% faster mana regeneration.
Wood Elf Ranger Skills - cont.
Multi Fire
Required Rank: 3
Description: Fires multiple arrows at once. Higher ranks boost arrow count and speed.
Rank 1: 2 arrows totaling 120% current bow damage.
Rank 2: 2 arrows totaling 130% current bow damage.
Rank 3: 2 arrows totaling 140% current bow damage.
Rank 4: 3 arrows totaling 150% current bow damage.
Rank 5: 3 arrows totaling 160% current bow damage.
Rank 6: 3 arrows totaling 170% current bow damage.
Rank 7: 3 arrows totaling 180% current bow damage.
Rank 8: 3 arrows totaling 190% current bow damage.
Rank 9: 4 arrows totaling 200% current bow damage.
Rank 10: 4 arrows totaling 210% current bow damage.
Rank 11: 4 arrows totaling 220% current bow damage.
Rank 12: 4 arrows totaling 230% current bow damage.
Rank 13: 4 arrows totaling 240% current bow damage.
Rank 14: 5 arrows totaling 250% current bow damage.
Rank 15: 5 arrows totaling 260% current bow damage.
Rank 16: 5 arrows totaling 270% current bow damage.
Rank 17: 5 arrows totaling 280% current bow damage.
Rank 18: 5 arrows totaling 290% current bow damage.
Rank 19: 6 arrows totaling 300% current bow damage.
Rank 20: 6 arrows totaling 310% current bow damage.
Endurance
Required Level: 8
Description: This skill increases your carrying capacity.
Rank 1: +15 more pounds.
Rank 2: +30 more pounds.
Rank 3: +45 more pounds.
Rank 4: +60 more pounds.
Rank 5: +75 more pounds.
Rank 6: +90 more pounds.
Rank 7: +105 more pounds.
Rank 8: +120 more pounds.
Rank 9: +135 more pounds.
Rank 10: +150 more pounds.
Rank 11: +165 more pounds.
Rank 12: +180 more pounds.
Rank 13: +195 more pounds.
Rank 14: +210 more pounds.
Rank 15: +225 more pounds.
Rank 16: +240 more pounds.
Rank 17: +255 more pounds.
Rank 18: +270 more pounds.
Rank 19: +285 more pounds.
Rank 20: +300 more pounds.
Cold Arrow
Required Level: 5
Description: Shoots a blast of super cooled gas that freezes enemies. Higher ranks increase damage, velocity, and freeze time.
Rank 1: +6 cold damage, velocity of 41 feet per second, and freeze time of 3 seconds.
Rank 2: +11 cold damage, velocity of 42 feet per second, and freeze time of 3 seconds.
Rank 3: +16 cold damage, velocity of 42 feet per second, and freeze time of 4 seconds.
Rank 4: +21 cold damage, velocity of 42 feet per second, and freeze time of 4 seconds.
Rank 5: +26 cold damage, velocity of 43 feet per second, and freeze time of 4 seconds.
Rank 6: +31 cold damage, velocity of 43 feet per second, and freeze time of 5 seconds.
Rank 7: +36 cold damage, velocity of 44 feet per second, and freeze time of 5 seconds.
Rank 8: +41 cold damage, velocity of 44 feet per second, and freeze time of 5 seconds.
Rank 9: +46 cold damage, velocity of 45 feet per second, and freeze time of 6 seconds.
Rank 10: +51 cold damage, velocity of 45 feet per second, and freeze time of 6 seconds.
Rank 11: +56 cold damage, velocity of 46 feet per second, and freeze time of 6 seconds.
Rank 12: +61 cold damage, velocity of 46 feet per second, and freeze time of 7 seconds.
Rank 13: +66 cold damage, velocity of 47 feet per second, and freeze time of 7 seconds.
Rank 14: +71 cold damage, velocity of 47 feet per second, and freeze time of 7 seconds.
Rank 15: +76 cold damage, velocity of 48 feet per second, and freeze time of 8 seconds.
Rank 16: +81 cold damage, velocity of 48 feet per second, and freeze time of 8 seconds.
Rank 17: +86 cold damage, velocity of 49 feet per second, and freeze time of 8 seconds.
Rank 18: +91 cold damage, velocity of 49 feet per second, and freeze time of 9 seconds.
Rank 19: +96 cold damage, velocity of 49 feet per second, and freeze time of 9 seconds.
Rank 10: +101 cold damage, velocity of 50 feet per second, and freeze time of 9 seconds.
Critical Hit
Required Level: 10
Description: Improves your chances of registering a critical hit during an attack. Higher ranks provide similar skills to teammates within aura range.
Rank 1: 10% chance of critical, duration of 15s.
Rank 2: 13% chance of critical, duration of 16s.
Rank 3: 16% chance of critical, duration of 17s.
Rank 4: 19% chance of critical, duration of 18s.
Rank 5: 22% chance of critical, duration of 19s, aura radius 2 feet.
Rank 6: 25% chance of critical, duration of 20s, aura radius 3 feet.
Rank 7: 28% chance of critical, duration of 21s, aura radius 3 feet.
Rank 8: 31% chance of critical, duration of 22s, aura radius 4 feet.
Rank 9: 34% chance of critical, duration of 23s, aura radius 4 feet.
Rank 10: 37% chance of critical, duration of 24s, aura radius 5 feet.
Rank 11: 40% chance of critical, duration of 25s, aura radius 5 feet.
Rank 12: 43% chance of critical, duration of 26s, aura radius 6 feet.
Rank 13: 46% chance of critical, duration of 27s, aura radius 6 feet.
Rank 14: 49% chance of critical, duration of 28s, aura radius 7 feet.
Rank 15: 52% chance of critical, duration of 29s, aura radius 7 feet.
Rank 16: 55% chance of critical, duration of 30s, aura radius 8 feet.
Rank 17: 58% chance of critical, duration of 31s, aura radius 8 feet.
Rank 18: 61% chance of critical, duration of 32s, aura radius 9 feet.
Rank 19: 64% chance of critical, duration of 33s, aura radius 9 feet.
Rank 20: 67% chance of critical, duration of 34s, aura radius 10 feet.
Dual Wield
Required Level: 20
Description: This skill will allow you to wield a weapon in each hand.
Rank 1: 62% of normal damage per weapon.
Rank 2: 64% of normal damage per weapon.
Rank 3: 66% of normal damage per weapon.
Rank 4: 68% of normal damage per weapon.
Rank 5: 70% of normal damage per weapon.
Rank 6: 72% of normal damage per weapon.
Rank 7: 74% of normal damage per weapon.
Rank 8: 76% of normal damage per weapon.
Rank 9: 78% of normal damage per weapon.
Rank 10: 80% of normal damage per weapon.
Rank 11: 82% of normal damage per weapon.
Rank 12: 84% of normal damage per weapon.
Rank 13: 86% of normal damage per weapon.
Rank 14: 88% of normal damage per weapon.
Rank 15: 90% of normal damage per weapon.
Rank 16: 92% of normal damage per weapon.
Rank 17: 94% of normal damage per weapon.
Rank 18: 96% of normal damage per weapon.
Rank 19: 98% of normal damage per weapon.
Rank 20: 100% of normal damage per weapon.
Wood Elf Ranger Skills - cont.
Poison Arrow
Required Level: 15
Description: Fires a burst of toxic gas that spawns a poison cloud. Higher ranks boost damage, size of poison cloud, and poison duration.
Rank 1: +40 poison damage, cloud radius of 1 foot, duration 3 seconds.
Rank 2: +43 poison damage, cloud radius of 2 feet, duration 3 seconds.
Rank 3: +46 poison damage, cloud radius of 2 feet, duration 4 seconds.
Rank 4: +49 poison damage, cloud radius of 3 feet, duration 4 seconds.
Rank 5: +52 poison damage, cloud radius of 3 feet, duration 4 seconds.
Rank 6: +55 poison damage, cloud radius of 4 feet, duration 4 seconds.
Rank 7: +58 poison damage, cloud radius of 5 feet, duration 5 seconds.
Rank 8: +61 poison damage, cloud radius of 5 feet, duration 5 seconds.
Rank 9: +64 poison damage, cloud radius of 6 feet, duration 5 seconds.
Rank 10: +67 poison damage, cloud radius of 6 feet, duration 5 seconds.
Rank 11: +70 poison damage, cloud radius of 7 feet, duration 6 seconds.
Rank 12: +73 poison damage, cloud radius of 8 feet, duration 6 seconds.
Rank 13: +76 poison damage, cloud radius of 8 feet, duration 6 seconds.
Rank 14: +79 poison damage, cloud radius of 8 feet, duration 6 seconds.
Rank 15: +82 poison damage, cloud radius of 9 feet, duration 7 seconds.
Rank 16: +85 poison damage, cloud radius of 10 feet, duration 7 seconds.
Rank 17: +88 poison damage, cloud radius of 11 feet, duration 7 seconds.
Rank 18: +91 poison damage, cloud radius of 11 feet, duration 7 seconds.
Rank 19: +94 poison damage, cloud radius of 12 feet, duration 8 seconds.
Rank 20: +97 poison damage, cloud radius of 12 feet, duration 8 seconds.
Minor Healing
Required Level: 20
Description: A minor healing spell which restores health to the caster for one and a half seconds.
Rank 1: 15 percent of healing.
Rank 2: 18 percent of healing.
Rank 3: 21 percent of healing.
Rank 4: 24 percent of healing.
Rank 5: 27 percent of healing.
Rank 6: 30 percent of healing.
Rank 7: 33 percent of healing.
Rank 8: 36 percent of healing.
Rank 9: 39 percent of healing.
Rank 10: 42 percent of healing.
Rank 11: 45 percent of healing.
Rank 12: 48 percent of healing.
Rank 13: 51 percent of healing.
Rank 14: 54 percent of healing.
Rank 15: 57 percent of healing.
Rank 16: 60 percent of healing.
Rank 17: 63 percent of healing.
Rank 18: 66 percent of healing.
Rank 19: 69 percent of healing.
Rank 20: 72 percent of healing.
Fire Arrow
Required Level: 10
Description: Shoots an arrow of hot fire. Higher ranks increase damage, speed, and size of fire.
Rank 1: +31 fire damage, velocity of 32 feet per second, and radius of 8 inches.
Rank 2: +36 fire damage, velocity of 34 feet per second, and radius of 8 inches.
Rank 3: +41 fire damage, velocity of 36 feet per second, and radius of 9 inches.
Rank 4: +46 fire damage, velocity of 38 feet per second, and radius of 9 inches.
Rank 5: +51 fire damage, velocity of 40 feet per second, and radius of 10 inches.
Rank 6: +56 fire damage, velocity of 42 feet per second, and radius of 10 inches.
Rank 7: +61 fire damage, velocity of 44 feet per second, and radius of 10 inches.
Rank 8: +66 fire damage, velocity of 46 feet per second, and radius of 11 inches.
Rank 9: +71 fire damage, velocity of 47 feet per second, and radius of 11 inches.
Rank 10: +76 fire damage, velocity of 49 feet per second, and radius of 12 inches.
Rank 11: +81 fire damage, velocity of 51 feet per second, and radius of 12 inches.
Rank 12: +86 fire damage, velocity of 53 feet per second, and radius of 13 inches.
Rank 13: +91 fire damage, velocity of 55 feet per second, and radius of 13 inches.
Rank 14: +96 fire damage, velocity of 57 feet per second, and radius of 13 inches.
Rank 15: +101 fire damage, velocity of 59 feet per second, and radius of 14 inches.
Rank 16: +106 fire damage, velocity of 61 feet per second, and radius of 14 inches.
Rank 17: +111 fire damage, velocity of 62 feet per second, and radius of 15 inches.
Rank 18: +116 fire damage, velocity of 64 feet per second, and radius of 15 inches.
Rank 19: +121 fire damage, velocity of 66 feet per second, and radius of 15 inches.
Rank 20: +126 fire damage, velocity of 68 feet per second, and radius of 16 inches.
Entangle
Required Level: 12
Description: Halts enemies where they stand when successful. Higher ranks increase how many are affected, duration, and success percentage.
Rank 1: Up to 1 enemy for 5 seconds. 50% chance of success per enemy.
Rank 2: Up to 1 enemy for 5 seconds. 52% chance of success per enemy.
Rank 3: Up to 2 enemies for 6 seconds. 54% chance of success per enemy.
Rank 4: Up to 2 enemies for 6 seconds. 56% chance of success per enemy.
Rank 5: Up to 2 enemies for 6 seconds. 58% chance of success per enemy.
Rank 6: Up to 3 enemies for 7 seconds. 60% chance of success per enemy.
Rank 7: Up to 3 enemies for 7 seconds. 62% chance of success per enemy.
Rank 8: Up to 3 enemies for 7 seconds. 64% chance of success per enemy.
Rank 9: Up to 4 enemies for 8 seconds. 66% chance of success per enemy.
Rank 10: Up to 4 enemies for 8 seconds. 68% chance of success per enemy.
Rank 11: Up to 4 enemies for 8 seconds. 70% chance of success per enemy.
Rank 12: Up to 5 enemies for 9 seconds. 72% chance of success per enemy.
Rank 13: Up to 5 enemies for 9 seconds. 74% chance of success per enemy.
Rank 14: Up to 5 enemies for 9 seconds. 76% chance of success per enemy.
Rank 15: Up to 6 enemies for 10 seconds. 78% chance of success per enemy.
Rank 16: Up to 6 enemies for 10 seconds. 80% chance of success per enemy.
Rank 17: Up to 6 enemies for 10 seconds. 82% chance of success per enemy.
Rank 18: Up to 7 enemies for 11 seconds. 84% chance of success per enemy.
Rank 19: Up to 7 enemies for 11 seconds. 86% chance of success per enemy.
Rank 20: Up to 7 enemies for 11 seconds. 88% chance of success per enemy.
Explode Arrow
Required Level: 20
Description: Hurls an arrow of explosive charge at enemies. Higher ranks expand area of effect, damage, and velocity.
Rank 1: 100-150 damage covering radius of 0 feet. Velocity of 34 feet per second.
Rank 2: 104-156 damage covering radius of 0 feet. Velocity of 35 feet per second.
Rank 3: 108-162 damage covering radius of 0 feet. Velocity of 36 feet per second.
Rank 4: 112-168 damage covering radius of 0 feet. Velocity of 38 feet per second.
Rank 5: 116-174 damage covering radius of 4 feet. Velocity of 39 feet per second.
Rank 6: 120-180 damage covering radius of 4 feet. Velocity of 40 feet per second.
Rank 7: 124-186 damage covering radius of 4 feet. Velocity of 41 feet per second.
Rank 8: 128-192 damage covering radius of 4 feet. Velocity of 42 feet per second.
Rank 9: 132-198 damage covering radius of 5 feet. Velocity of 43 feet per second.
Rank 10: 136-204 damage covering radius of 5 feet. Velocity of 44 feet per second.
Rank 11: 140-210 damage covering radius of 5 feet. Velocity of 45 feet per second.
Rank 12: 144-216 damage covering radius of 5 feet. Velocity of 46 feet per second.
Rank 13: 148-222 damage covering radius of 6 feet. Velocity of 47 feet per second.
Rank 14: 152-228 damage covering radius of 6 feet. Velocity of 48 feet per second.
Rank 15: 156-234 damage covering radius of 6 feet. Velocity of 49 feet per second.
Rank 16: 160-240 damage covering radius of 6 feet. Velocity of 50 feet per second.
Rank 17: 164-246 damage covering radius of 7 feet. Velocity of 51 feet per second.
Rank 18: 168-252 damage covering radius of 7 feet. Velocity of 52 feet per second.
Rank 19: 172-258 damage covering radius of 7 feet. Velocity of 54 feet per second.
Rank 20: 176-264 damage covering radius of 7 feet. Velocity of 55 feet per second.
Chapter 4 - High Elf Cleric
Description: Strong melee class with substantial magic ability. Can learn offensive and defensive spells.
Strengths: Calling on the divine, they can deal damage to undead creatures. Buffing spells benefit teammates.
Weaknesses: Limited to using blunt weapons.
Strength: 26
Intelligence: 36
Dexterity: 27
Stamina: 26
Health: 45/45
Mana: 28/28
Armor: 30
Attack: 35
Damage: 16-20
Resist Fire: 0%
Resist Cold: 0%
Resist Poison: 0%
Resist Disease: 0%
Resist Magic: 0%

Initial Weapon: Tarnished Mace
Initial Armor: Tattered Patchwork Armor, Tattered Patchwork Boots, Tattered Patchwork Leggings, Tattered Patchwork Gloves
Initial Equipment: 2 Gate Scrolls, 2 Minor Healing Tonic, 2 Lesser Mana Vial, 500 gold
Initial Skills: Rank 1 Blunt Weapons (Increases blunt weapon damage by 15%), Rank 1 Holy Strike (18-22 regular damage, 35-42 damage to undead)
The High Elf Cleric is a potent character class for both single and multiplayer. In multiplayer mode, the cleric’s aura effects (such as healing and undead shield) provide benefits for your teammates. And the cleric should have little trouble excelling given the great quantity of undead in Norrath--many of the cleric’s spells are specialized against the undead. Cleric players should focus their attributes on strength and intelligence. Much like the shadow knight class, the cleric will combine melee weaponry with devastating spells.
The cleric’s blinding light spells is one of the most useful in the game; much like the shadow knight’s engulfing darkness, blinding light offers the chance to confuse and temporarily disable your enemies. While disabled you’re free to pummel the creature with your blunt weaponry (add some skill points to blunt weapon and upgrade your blunt weapon frequently!) or spell attacks. Use blinding light in combination with hammer of wrath for a formidable one-two punch. While the enemy remains confused, the hammer of wrath inflicts the damage.
Additional skill points in healing will help keep your cleric healthy or you could increase your endurance and spend the gold coins and use the added weight for additional health potions. Blessed is another skill worth looking at; it aids in mana regeneration and can help you cast your blinding light and hammer combination more frequently. But you’ll have to adjust your spell book frequently to accommodate the spells.
High Elf Cleric Skills
This section reveals all High Elf Cleric skills and their effect at each rank.
Blunt Weapons
Required Level: 1
Description: This skill increases damage when blunt weapons are used.
Rank 1: Increases blunt weapon damage by 15%.
Rank 2: Increases blunt weapon damage by 20%.
Rank 3: Increases blunt weapon damage by 25%.
Rank 4: Increases blunt weapon damage by 30%.
Rank 5: Increases blunt weapon damage by 35%.
Rank 6: Increases blunt weapon damage by 40%.
Rank 7: Increases blunt weapon damage by 45%.
Rank 8: Increases blunt weapon damage by 50%.
Rank 9: Increases blunt weapon damage by 55%.
Rank 10: Increases blunt weapon damage by 60%.
Rank 11: Increases blunt weapon damage by 65%.
Rank 12: Increases blunt weapon damage by 70%.
Rank 13: Increases blunt weapon damage by 75%.
Rank 14: Increases blunt weapon damage by 80%.
Rank 15: Increases blunt weapon damage by 85%.
Rank 16: Increases blunt weapon damage by 90%.
Rank 17: Increases blunt weapon damage by 95%.
Rank 18: Increases blunt weapon damage by 100%.
Rank 19: Increases blunt weapon damage by 105%.
Rank 20: Increases blunt weapon damage by 110%.
Holy Strike
Required Level: 1
Description: A bolt of light that harms on impact, particularly undead creatures. Higher ranks give damage and tracking.
Rank 1: 18-22 regular damage, 35-42 damage to undead.
Rank 2: 22-26 regular damage, 45-54 damage to undead.
Rank 3: 26-31 regular damage, 55-66 damage to undead.
Rank 4: 30-36 regular damage, 65-78 damage to undead.
Rank 5: 34-41 regular damage, 75-90 damage to undead. 1 degree turn rate.
Rank 6: 38-46 regular damage, 85-102 damage to undead. 1 degree turn rate.
Rank 7: 42-50 regular damage, 95-114 damage to undead. 2 degree turn rate.
Rank 8: 46-55 regular damage, 105-126 damage to undead. 2 degree turn rate.
Rank 9: 50-60 regular damage, 115-138 damage to undead. 2 degree turn rate.
Rank 10: 54-65 regular damage, 125-150 damage to undead. 2 degree turn rate.
Rank 11: 58-70 regular damage, 135-162 damage to undead. 3 degree turn rate.
Rank 12: 62-74 regular damage, 145-174 damage to undead. 3 degree turn rate.
Rank 13: 66-79 regular damage, 155-186 damage to undead. 3 degree turn rate.
Rank 14: 70-84 regular damage, 165-198 damage to undead. 3 degree turn rate.
Rank 15: 74-89 regular damage, 175-210 damage to undead. 4 degree turn rate.
Rank 16: 78-94 regular damage, 185-222 damage to undead. 4 degree turn rate.
Rank 17: 82-98 regular damage, 195-234 damage to undead. 4 degree turn rate.
Rank 18: 86-103 regular damage, 205-246 damage to undead. 4 degree turn rate.
Rank 19: 90-108 regular damage, 215-258 damage to undead. 5 degree turn rate.
Rank 20: 94-113 regular damage, 225-270 damage to undead. 5 degree turn rate.
Endurance
Required Level: 5
Description: This skill increases your carrying capacity.
Rank 1: +15 more pounds.
Rank 2: +30 more pounds.
Rank 3: +45 more pounds.
Rank 4: +60 more pounds.
Rank 5: +75 more pounds.
Rank 6: +90 more pounds.
Rank 7: +105 more pounds.
Rank 8: +120 more pounds.
Rank 9: +135 more pounds.
Rank 10: +150 more pounds.
Rank 11: +165 more pounds.
Rank 12: +180 more pounds.
Rank 13: +195 more pounds.
Rank 14: +210 more pounds.
Rank 15: +225 more pounds.
Rank 16: +240 more pounds.
Rank 17: +255 more pounds.
Rank 18: +270 more pounds.
Rank 19: +285 more pounds.
Rank 20: +300 more pounds.
Shield Bash
Required Level: 5
Description: A rushing attack that requires a shield. Delivers high damage and a chance of stunning enemies.
Rank 1: 24-36 damage to 1 enemy, 20% chance of stun for 4 seconds.
Rank 2: 28-42 damage to 1 enemy, 22% chance of stun for 4 seconds.
Rank 3: 32-48 damage to up to 2 enemies, 24% chance of stun for 5 seconds.
Rank 4: 36-54 damage to up to 2 enemies, 26% chance of stun for 5 seconds.
Rank 5: 40-60 damage to up to 2 enemies, 28% chance of stun for 6 seconds.
Rank 6: 44-66 damage to up to 2 enemies, 30% chance of stun for 6 seconds.
Rank 7: 48-72 damage to up to 3 enemies, 32% chance of stun for 7 seconds.
Rank 8: 52-78 damage to up to 3 enemies, 34% chance of stun for 7 seconds.
Rank 9: 56-84 damage to up to 3 enemies, 36% chance of stun for 8 seconds.
Rank 10: 60-90 damage to up to 3 enemies, 38% chance of stun for 8 seconds.
Rank 11: 64-96 damage to up to 4 enemies, 40% chance of stun for 9 seconds.
Rank 12: 68-102 damage to up to 4 enemies, 42% chance of stun for 9 seconds.
Rank 13: 72-108 damage to up to 4 enemies, 44% chance of stun for 10 seconds.
Rank 14: 76-114 damage to up to 4 enemies, 46% chance of stun for 10 seconds.
Rank 15: 80-120 damage to up to 5 enemies, 48% chance of stun for 11 seconds.
Rank 16: 84-126 damage to up to 5 enemies, 50% chance of stun for 11 seconds.
Rank 17: 88-132 damage to up to 5 enemies, 52% chance of stun for 12 seconds.
Rank 18: 92-138 damage to up to 5 enemies, 54% chance of stun for 12 seconds.
Rank 19: 96-144 damage to up to 6 enemies, 56% chance of stun for 13 seconds.
Rank 20: 100-150 damage to up to 6 enemies, 58% chance of stun for 13 seconds.
High Elf Cleric Skills - cont.
Healing
Required Level: 8
Description: Restores health to the caster. Higher ranks heals teammates via aura.
Rank 1: 15 percent health.
Rank 2: 20 percent health.
Rank 3: 25 percent health.
Rank 4: 30 percent health.
Rank 5: 35% health, 5 ft aura, 15% health to teammates.
Rank 6: 40% health, 5 ft aura, 20% health to teammates.
Rank 7: 45% health, 6 ft aura, 25% health to teammates.
Rank 8: 50% health, 6 ft aura, 30% health to teammates.
Rank 9: 55% health, 7 ft aura, 35% health to teammates.
Rank 10: 60% health, 7 ft aura, 40% health to teammates.
Rank 11: 65% health, 8 ft aura, 45% health to teammates.
Rank 12: 70% health, 8 ft aura, 50% health to teammates.
Rank 13: 75% health, 9 ft aura, 55% health to teammates.
Rank 14: 80% health, 9 ft aura, 60% health to teammates.
Rank 15: 85% health, 10 ft aura, 65% health to teammates.
Rank 16: 90% health, 10 ft aura, 70% health to teammates.
Rank 17: 95% health, 11 ft aura, 75% health to teammates.
Rank 18: 100% health, 11 ft aura, 80% health to teammates.
Rank 19: 105% health, 12 ft aura, 85% health to teammates.
Rank 20: 110% health, 12 ft aura, 90% health to teammates.
Holy Armor
Required Level: 8
Description: Preserves player’s health by converting a portion of incoming damage into a reduction in mana.
Rank 1: 5% of damage transferred to mana. Duration of 10 seconds.
Rank 2: 8% of damage transferred to mana. Duration of 10 seconds.
Rank 3: 11% of damage transferred to mana. Duration of 11 seconds.
Rank 4: 14% of damage transferred to mana. Duration of 11 seconds.
Rank 5: 17% of damage transferred to mana. Duration of 11 seconds.
Rank 6: 20% of damage transferred to mana. Duration of 11 seconds.
Rank 7: 23% of damage transferred to mana. Duration of 12 seconds.
Rank 8: 26% of damage transferred to mana. Duration of 12 seconds.
Rank 9: 29% of damage transferred to mana. Duration of 12 seconds.
Rank 10: 32% of damage transferred to mana. Duration of 12 seconds.
Rank 11: 35% of damage transferred to mana. Duration of 13 seconds.
Rank 12: 38% of damage transferred to mana. Duration of 13 seconds.
Rank 13: 41% of damage transferred to mana. Duration of 13 seconds.
Rank 14: 44% of damage transferred to mana. Duration of 13 seconds.
Rank 15: 47% of damage transferred to mana. Duration of 14 seconds.
Rank 16: 50% of damage transferred to mana. Duration of 14 seconds.
Rank 17: 53% of damage transferred to mana. Duration of 14 seconds.
Rank 18: 56% of damage transferred to mana. Duration of 14 seconds.
Rank 19: 59% of damage transferred to mana. Duration of 15 seconds.
Rank 20: 62% of damage transferred to mana. Duration of 15 seconds.
Blessed
Required Level: 8
Description: A blessed character will regain their mana more quickly. A higher ranked blessing will give greater speed of regeneration.
Rank 1: 90% faster mana regeneration for the duration of the spell.
Rank 2: 100% faster mana regeneration for the duration of the spell.
Rank 3: 110% faster mana regeneration for the duration of the spell.
Rank 4: 120% faster mana regeneration for the duration of the spell.
Rank 5: 130% faster mana regeneration for the duration of the spell.
Rank 6: 140% faster mana regeneration for the duration of the spell.
Rank 7: 150% faster mana regeneration for the duration of the spell.
Rank 8: 160% faster mana regeneration for the duration of the spell.
Rank 9: 170% faster mana regeneration for the duration of the spell.
Rank 10: 180% faster mana regeneration for the duration of the spell.
Rank 11: 190% faster mana regeneration for the duration of the spell.
Rank 12: 200% faster mana regeneration for the duration of the spell.
Rank 13: 210% faster mana regeneration for the duration of the spell.
Rank 14: 220% faster mana regeneration for the duration of the spell.
Rank 15: 230% faster mana regeneration for the duration of the spell.
Rank 16: 240% faster mana regeneration for the duration of the spell.
Rank 17: 250% faster mana regeneration for the duration of the spell.
Rank 18: 260% faster mana regeneration for the duration of the spell.
Rank 19: 270% faster mana regeneration for the duration of the spell.
Rank 20: 280% faster mana regeneration for the duration of the spell.
Undead Shield
Required Level: 10
Description: Any undead creature attacking the protected individual will receive damage. Aura for teammates at higher ranks.
Rank 1: 5% of damage returns for 10 seconds, with an aura that grants 3% damage.
Rank 2: 10% of damage returns for 11 seconds, with an aura that grants 6% damage.
Rank 3: 15% of damage returns for 12 seconds, with an aura that grants 9% damage.
Rank 4: 20% of damage returns for 14 seconds, with an aura that grants 12% damage.
Rank 5: 25% of damage returns for 15 seconds, with an aura that grants 15% damage.
Rank 6: 30% of damage returns for 16 seconds, with an aura that grants 18% damage.
Rank 7: 35% of damage returns for 17 seconds, with an aura that grants 21% damage.
Rank 8: 40% of damage returns for 19 seconds, with an aura that grants 24% damage.
Rank 9: 45% of damage returns for 20 seconds, with an aura that grants 27% damage.
Rank 10: 50% of damage returns for 21 seconds, with an aura that grants 30% damage.
Rank 11: 55% of damage returns for 22 seconds, with an aura that grants 33% damage.
Rank 12: 60% of damage returns for 24 seconds, with an aura that grants 36% damage.
Rank 13: 65% of damage returns for 25 seconds, with an aura that grants 39% damage.
Rank 14: 70% of damage returns for 26 seconds, with an aura that grants 42% damage.
Rank 15: 75% of damage returns for 27 seconds, with an aura that grants 45% damage.
Rank 16: 80% of damage returns for 29 seconds, with an aura that grants 48% damage.
Rank 17: 85% of damage returns for 30 seconds, with an aura that grants 51% damage.
Rank 18: 90% of damage returns for 31 seconds, with an aura that grants 54% damage.
Rank 19: 95% of damage returns for 32 seconds, with an aura that grants 57% damage.
Rank 20: 100% of damage returns for 34 seconds, with an aura that grants 60% damage.
Hammer of Wrath
Required Level: 10
Description: Summons a hammer that attacks enemies. Higher ranks gives damage, duration, and chance for a spin move.
Rank 1: 40-48 damage, lasts for 15 seconds, 18% chance for spin attack.
Rank 2: 42-50 damage, lasts for 17 seconds, 20% chance for spin attack.
Rank 3: 44-53 damage, lasts for 19 seconds, 23% chance for spin attack.
Rank 4: 46-55 damage, lasts for 21 seconds, 25% chance for spin attack.
Rank 5: 48-58 damage, lasts for 23 seconds, 28% chance for spin attack.
Rank 6: 50-60 damage, lasts for 25 seconds, 30% chance for spin attack.
Rank 7: 52-62 damage, lasts for 27 seconds, 32% chance for spin attack.
Rank 8: 54-65 damage, lasts for 29 seconds, 35% chance for spin attack.
Rank 9: 56-67 damage, lasts for 31 seconds, 37% chance for spin attack.
Rank 10: 58-70 damage, lasts for 33 seconds, 40% chance for spin attack.
Rank 11: 60-72 damage, lasts for 35 seconds, 42% chance for spin attack.
Rank 12: 62-74 damage, lasts for 37 seconds, 44% chance for spin attack.
Rank 13: 64-77 damage, lasts for 39 seconds, 47% chance for spin attack.
Rank 14: 66-79 damage, lasts for 41 seconds, 49% chance for spin attack.
Rank 15: 68-82 damage, lasts for 43 seconds, 52% chance for spin attack.
Rank 16: 70-84 damage, lasts for 45 seconds, 54% chance for spin attack.
Rank 17: 72-86 damage, lasts for 47 seconds, 56% chance for spin attack.
Rank 18: 74-89 damage, lasts for 49 seconds, 59% chance for spin attack.
Rank 19: 76-91 damage, lasts for 51 seconds, 61% chance for spin attack.
Rank 20: 78-84 damage, lasts for 53 seconds, 64% chance for spin attack.
High Elf Cleric Skills - cont.
Blinding Light
Required Level: 10
Description: A blinding flash causes nearby creatures to become confused. Higher rank gives more range, damage, duration, and effectiveness.
Rank 1: 50% chance of effect, 35-42 damage per second for 3 seconds with 2 foot radius.
Rank 2: 52% chance of effect, 38-46 damage per second for 3 seconds with 2 foot radius.
Rank 3: 54% chance of effect, 41-49 damage per second for 4 seconds with 3 foot radius.
Rank 4: 56% chance of effect, 44-53 damage per second for 4 seconds with 3 foot radius.
Rank 5: 58% chance of effect, 47-56 damage per second for 4 seconds with 3 foot radius.
Rank 6: 60% chance of effect, 50-60 damage per second for 5 seconds with 3 foot radius.
Rank 7: 62% chance of effect, 53-64 damage per second for 5 seconds with 4 foot radius.
Rank 8: 64% chance of effect, 56-67 damage per second for 5 seconds with 4 foot radius.
Rank 9: 66% chance of effect, 59-71 damage per second for 6 seconds with 4 foot radius.
Rank 10: 68% chance of effect, 62-74 damage per second for 6 seconds with 4 foot radius.
Rank 11: 70% chance of effect, 65-78 damage per second for 6 seconds with 5 foot radius.
Rank 12: 72% chance of effect, 68-82 damage per second for 7 seconds with 5 foot radius.
Rank 13: 74% chance of effect, 71-85 damage per second for 7 seconds with 5 foot radius.
Rank 14: 76% chance of effect, 74-89 damage per second for 7 seconds with 5 foot radius.
Rank 15: 78% chance of effect, 77-92 damage per second for 8 seconds with 6 foot radius.
Rank 16: 80% chance of effect, 80-96 damage per second for 8 seconds with 6 foot radius.
Rank 17: 82% chance of effect, 83-100 damage per second for 8 seconds with 6 foot radius.
Rank 18: 84% chance of effect, 86-103 damage per second for 9 seconds with 6 foot radius.
Rank 19: 86% chance of effect, 89-107 damage per second for 9 seconds with 7 foot radius.
Rank 20: 88% chance of effect, 92-110 damage per second for 9 seconds with 7 foot radius.
Dismiss Undead
Required Level: 25
Description: A powerful spell that is extremely damaging to undead. Damage goes up with rank.
Rank 1: 50-60 regular damage, 250-300 damage to undead, lasts 3 seconds.
Rank 2: 57-68 regular damage, 257-308 damage to undead, lasts 3 seconds.
Rank 3: 64-77 regular damage, 264-317 damage to undead, lasts 4 seconds.
Rank 4: 71-85 regular damage, 271-325 damage to undead, lasts 4 seconds.
Rank 5: 78-94 regular damage, 278-334 damage to undead, lasts 4 seconds.
Rank 6: 85-102 regular damage, 285-342 damage to undead, lasts 4 seconds.
Rank 7: 92-110 regular damage, 292-350 damage to undead, lasts 5 seconds.
Rank 8: 99-119 regular damage, 299-359 damage to undead, lasts 5 seconds.
Rank 9: 106-127 regular damage, 306-367 damage to undead, lasts 5 seconds.
Rank 10: 113-136 regular damage, 313-376 damage to undead, lasts 5 seconds.
Rank 11: 120-144 regular damage, 320-384 damage to undead, lasts 6 seconds.
Rank 12: 127-152 regular damage, 327-392 damage to undead, lasts 6 seconds.
Rank 13: 134-161 regular damage, 334-401 damage to undead, lasts 6 seconds.
Rank 14: 141-169 regular damage, 341-409 damage to undead, lasts 6 seconds.
Rank 15: 148-178 regular damage, 348-418 damage to undead, lasts 7 seconds.
Rank 16: 155-186 regular damage, 355-426 damage to undead, lasts 7 seconds.
Rank 17: 162-194 regular damage, 362-434 damage to undead, lasts 7 seconds.
Rank 18: 169-203 regular damage, 369-443 damage to undead, lasts 7 seconds.
Rank 19: 176-211 regular damage, 376-451 damage to undead, lasts 8 seconds.
Rank 20: 183-220 regular damage, 383-460 damage to undead, lasts 8 seconds.
Root
Required Level: 20
Description: Halts enemies where they stand when successful. Higher ranks increase how many are affected, duration, and success percentage.
Rank 1: Up to 1 enemy for 5 seconds. 50% chance of success per enemy.
Rank 2: Up to 1 enemy for 5 seconds. 52% chance of success per enemy.
Rank 3: Up to 2 enemies for 6 seconds. 54% chance of success per enemy.
Rank 4: Up to 2 enemies for 6 seconds. 56% chance of success per enemy.
Rank 5: Up to 2 enemies for 6 seconds. 58% chance of success per enemy.
Rank 6: Up to 3 enemies for 7 seconds. 60% chance of success per enemy.
Rank 7: Up to 3 enemies for 7 seconds. 62% chance of success per enemy.
Rank 8: Up to 3 enemies for 7 seconds. 64% chance of success per enemy.
Rank 9: Up to 4 enemies for 8 seconds. 66% chance of success per enemy.
Rank 10: Up to 4 enemies for 8 seconds. 68% chance of success per enemy.
Rank 11: Up to 4 enemies for 8 seconds. 70% chance of success per enemy.
Rank 12: Up to 5 enemies for 9 seconds. 72% chance of success per enemy.
Rank 13: Up to 5 enemies for 9 seconds. 74% chance of success per enemy.
Rank 14: Up to 5 enemies for 9 seconds. 76% chance of success per enemy.
Rank 15: Up to 6 enemies for 10 seconds. 78% chance of success per enemy.
Rank 16: Up to 6 enemies for 10 seconds. 80% chance of success per enemy.
Rank 17: Up to 6 enemies for 10 seconds. 82% chance of success per enemy.
Rank 18: Up to 7 enemies for 11 seconds. 84% chance of success per enemy.
Rank 19: Up to 7 enemies for 11 seconds. 86% chance of success per enemy.
Rank 20: Up to 7 enemies for 11 seconds. 88% chance of success per enemy.
Convert Enemy
Required Level: 15
Description: Converts enemies to friendlies. Undead are immune. 10 second cast recovery time.
Rank 1: Converts up to 1 enemy for 15 seconds. Odds of conversion are 40%.
Rank 2: Converts up to 1 enemy for 16 seconds. Odds of conversion are 42%.
Rank 3: Converts up to 2 enemies for 17 seconds. Odds of conversion are 44%.
Rank 4: Converts up to 2 enemies for 18 seconds. Odds of conversion are 46%.
Rank 5: Converts up to 2 enemies for 19 seconds. Odds of conversion are 48%.
Rank 6: Converts up to 2 enemies for 20 seconds. Odds of conversion are 50%.
Rank 7: Converts up to 2 enemies for 21 seconds. Odds of conversion are 52%.
Rank 8: Converts up to 2 enemies for 22 seconds. Odds of conversion are 54%.
Rank 9: Converts up to 3 enemies for 23 seconds. Odds of conversion are 56%.
Rank 10: Converts up to 3 enemies for 24 seconds. Odds of conversion are 58%.
Rank 11: Converts up to 3 enemies for 25 seconds. Odds of conversion are 60%.
Rank 12: Converts up to 3 enemies for 26 seconds. Odds of conversion are 62%.
Rank 13: Converts up to 3 enemies for 27 seconds. Odds of conversion are 64%.
Rank 14: Converts up to 4 enemies for 28 seconds. Odds of conversion are 66%.
Rank 15: Converts up to 4 enemies for 29 seconds. Odds of conversion are 68%.
Rank 16: Converts up to 4 enemies for 30 seconds. Odds of conversion are 70%.
Rank 17: Converts up to 4 enemies for 31 seconds. Odds of conversion are 72%.
Rank 18: Converts up to 4 enemies for 32 seconds. Odds of conversion are 74%.
Rank 19: Converts up to 5 enemies for 33 seconds. Odds of conversion are 76%.
Rank 20: Converts up to 5 enemies for 34 seconds. Odds of conversion are 78%.
Repulse Undead
Required Level: 15
Description: Knocks away undead creatures and does severe damage to them. Higher rank gives higher radius and damage.
Rank 1: 200 damage with 6 foot radius.
Rank 2: 210 damage with 7 foot radius.
Rank 3: 220 damage with 7 foot radius.
Rank 4: 230 damage with 8 foot radius.
Rank 5: 240 damage with 8 foot radius.
Rank 6: 250 damage with 9 foot radius.
Rank 7: 260 damage with 9 foot radius.
Rank 8: 270 damage with 10 foot radius.
Rank 9: 280 damage with 10 foot radius.
Rank 10: 290 damage with 11 foot radius.
Rank 11: 300 damage with 11 foot radius.
Rank 12: 310 damage with 12 foot radius.
Rank 13: 320 damage with 12 foot radius.
Rank 14: 330 damage with 13 foot radius.
Rank 15: 340 damage with 13 foot radius.
Rank 16: 350 damage with 14 foot radius.
Rank 17: 360 damage with 14 foot radius.
Rank 18: 370 damage with 15 foot radius.
Rank 19: 380 damage with 15 foot radius.
Rank 20: 390 damage with 16 foot radius.
Chapter 5 - Erudite Wizard
Description: Pure spell caster. Can learn powerful direct damage and area of effect spells.
Strengths: Able to deal damage from great distances. Can imbue weapons with elemental energy.
Weaknesses: Not proficient in melee combat. Limited in weapon usage. May not use shields.
Strength: 23
Intelligence: 39
Dexterity: 25
Stamina: 28
Health: 38/38
Mana: 33/33
Armor: 31
Attack: 34
Damage: 14-20
Resist Fire: 0%
Resist Cold: 0%
Resist Poison: 0%
Resist Disease: 0%
Resist Magic: 0%

Initial Weapon: Worn Quarterstaff
Initial Armor: Tattered Cloth Armor, Tattered Cloth Boots, Tattered Cloth Leggings, Tattered Cloth Gloves
Initial Equipment: 2 Gate Scrolls, 2 Minor Healing Tonic, 2 Lesser Mana Vial, 500 gold
Initial Skills: Rank 1 Blunt Weapons (Increases blunt weapon damage by 15%), Rank 1 Shock of Frost (30-36 cold damage)
The Erudite Wizard is the spell-casting class. The initial statistics reveal weak strength but strong intelligence, perfect for building your mana reserve and its regeneration rate. Mana will be the lifeblood of the erudite wizard. Focus on spell attacks and generally avoid combat at all cost. There’s little reason to expend points in blunt weapons unless you plan to utilize the wizard’s cold, fire, and lightning weapon skills (though note that these skills are also useful in multiplayer for their aura effects). But it’s generally better to use ranged attacks and the wizard’s spell skills fit the bill.
Intelligence is the most important wizard attribute. As a pure spellcaster, you should be doing little melee fighting so strength and dexterity should be an afterthought. Concentration is the wizard’s most important spell. As stated, mana is the lifeblood of the spellcaster. Put skill points into concentration to boost your mana regeneration rate. Combine concentration with items that further improve your mana regeneration (or intelligence) as well as saving your weapon and equipment sockets for mana stones.
The wizard’s array of cold spells has the added benefit of freezing and slowing down your enemies. Slower enemies mean more opportunities to cast more damaging spells. When choosing your skills, don’t haphazardly put points in each spell just so you can use it. Focus your skill points in concentration and particularly spells (ideally area effect), such as frost storm, to inflict the most damage as possible. Combined with a high mana regeneration rate (and ample mana potions as a safety net), the wizard can become almost untouchable at higher levels.
Erudite Wizard Skills
This section reveals all Erudite Wizard skills and their effect at each rank.
Blunt Weapons
Required Level: 1
Description: This skill increases damage when blunt weapons are used.
Rank 1: Increases blunt weapon damage by 15%.
Rank 2: Increases blunt weapon damage by 20%.
Rank 3: Increases blunt weapon damage by 25%.
Rank 4: Increases blunt weapon damage by 30%.
Rank 5: Increases blunt weapon damage by 35%.
Rank 6: Increases blunt weapon damage by 40%.
Rank 7: Increases blunt weapon damage by 45%.
Rank 8: Increases blunt weapon damage by 50%.
Rank 9: Increases blunt weapon damage by 55%.
Rank 10: Increases blunt weapon damage by 60%.
Rank 11: Increases blunt weapon damage by 65%.
Rank 12: Increases blunt weapon damage by 70%.
Rank 13: Increases blunt weapon damage by 75%.
Rank 14: Increases blunt weapon damage by 80%.
Rank 15: Increases blunt weapon damage by 85%.
Rank 16: Increases blunt weapon damage by 90%.
Rank 17: Increases blunt weapon damage by 95%.
Rank 18: Increases blunt weapon damage by 100%.
Rank 19: Increases blunt weapon damage by 105%.
Rank 20: Increases blunt weapon damage by 110%.
Shock of Frost
Required Level: 1
Description: A bolt of ice is fired at enemies for cold damage. Higher rank gives more damage and shrapnel.
Rank 1: 30-36 cold damage.
Rank 2: 36-43 cold damage.
Rank 3: 42-50 cold damage.
Rank 4: 48-58 cold damage.
Rank 5: 54-65 cold damage, 3 pieces of ice shrapnel for 27-32 damage.
Rank 6: 60-72 cold damage, 3 pieces of ice shrapnel for 31-37 damage.
Rank 7: 66-79 cold damage, 4 pieces of ice shrapnel for 35-42 damage.
Rank 8: 72-86 cold damage, 4 pieces of ice shrapnel for 39-47 damage.
Rank 9: 78-94 cold damage, 4 pieces of ice shrapnel for 43-52 damage.
Rank 10: 84-101 cold damage, 4 pieces of ice shrapnel for 47-56 damage.
Rank 11: 90-108 cold damage, 5 pieces of ice shrapnel for 51-61 damage.
Rank 12: 96-115 cold damage, 5 pieces of ice shrapnel for 55-66 damage.
Rank 13: 102-122 cold damage, 5 pieces of ice shrapnel for 59-71 damage.
Rank 14: 108-130 cold damage, 5 pieces of ice shrapnel for 63-76 damage.
Rank 15: 114-137 cold damage, 6 pieces of ice shrapnel for 67-80 damage.
Rank 16: 120-144 cold damage, 6 pieces of ice shrapnel for 71-85 damage.
Rank 17: 126-151 cold damage, 6 pieces of ice shrapnel for 75-90 damage.
Rank 18: 132-158 cold damage, 6 pieces of ice shrapnel for 79-95 damage.
Rank 19: 138-166 cold damage, 7 pieces of ice shrapnel for 83-100 damage.
Rank 20: 144-173 cold damage, 7 pieces of ice shrapnel for 87-104 damage.
Bind Wound
Required Level: 10
Description: This skill increases your health regeneration rate.
Rank 1: 120% health regen rate.
Rank 2: 130% health regen rate.
Rank 3: 140% health regen rate.
Rank 4: 150% health regen rate.
Rank 5: 160% health regen rate.
Rank 6: 170% health regen rate.
Rank 7: 180% health regen rate.
Rank 8: 190% health regen rate.
Rank 9: 200% health regen rate.
Rank 10: 210% health regen rate.
Rank 11: 220% health regen rate.
Rank 12: 230% health regen rate.
Rank 13: 240% health regen rate.
Rank 14: 250% health regen rate.
Rank 15: 260% health regen rate.
Rank 16: 270% health regen rate.
Rank 17: 280% health regen rate.
Rank 18: 290% health regen rate.
Rank 19: 300% health regen rate.
Rank 20: 310% health regen rate.
Bolt of Shock
Required Level: 5
Description: Fires a bolt of lightning at creatures. At higher ranks the lightning will chain to others.
Rank 1: 46-68 damage.
Rank 2: 51-77 damage.
Rank 3: 57-85 damage.
Rank 4: 62-94 damage.
Rank 5: 68-102 damage. Chains up to 2 enemies.
Rank 6: 74-110 damage. Chains up to 2 enemies.
Rank 7: 79-119 damage. Chains up to 3 enemies.
Rank 8: 85-127 damage. Chains up to 3 enemies.
Rank 9: 90-136 damage. Chains up to 3 enemies.
Rank 10: 96-144 damage. Chains up to 4 enemies.
Rank 11: 102-152 damage. Chains up to 4 enemies.
Rank 12: 107-161 damage. Chains up to 4 enemies.
Rank 13: 113-169 damage. Chains up to 5 enemies.
Rank 14: 118-178 damage. Chains up to 5 enemies.
Rank 15: 124-186 damage. Chains up to 5 enemies.
Rank 16: 130-194 damage. Chains up to 6 enemies.
Rank 17: 135-203 damage. Chains up to 6 enemies.
Rank 18: 141-211 damage. Chains up to 6 enemies.
Rank 19: 146-220 damage. Chains up to 7 enemies.
Rank 20: 152-228 damage. Chains up to 7 enemies.
Frost Storm
Required Level: 8
Description: This area effect spell creates a temporary storm of frost and ice in front of the caster.
Rank 1: 16-24 damage, radius of 2 feet, 2s duration.
Rank 2: 19-29 damage, radius of 2 feet, 2s duration.
Rank 3: 22-34 damage, radius of 3 feet, 3s duration.
Rank 4: 26-38 damage, radius of 3 feet, 3s duration.
Rank 5: 29-43 damage, radius of 3 feet, 3s duration.
Rank 6: 32-48 damage, radius of 4 feet, 4s duration.
Rank 7: 35-53 damage, radius of 4 feet, 4s duration.
Rank 8: 38-58 damage, radius of 4 feet, 4s duration.
Rank 9: 42-62 damage, radius of 5 feet, 5s duration.
Rank 10: 45-67 damage, radius of 5 feet, 5s duration.
Rank 11: 48-72 damage, radius of 5 feet, 5s duration.
Rank 12: 51-77 damage, radius of 6 feet, 6s duration.
Rank 13: 54-82 damage, radius of 6 feet, 6s duration.
Rank 14: 58-86 damage, radius of 6 feet, 6s duration.
Rank 15: 61-91 damage, radius of 7 feet, 7s duration.
Rank 16: 64-96 damage, radius of 7 feet, 7s duration.
Rank 17: 67-101 damage, radius of 7 feet, 7s duration.
Rank 18: 70-106 damage, radius of 8 feet, 8s duration.
Rank 19: 74-110 damage, radius of 8 feet, 8s duration.
Rank 20: 77-115 damage, radius of 8 feet, 8s duration.
Erudite Wizard Skills
Endurance
Required Level: 8
Description: This skill increases your carrying capacity.
Rank 1: +15 more pounds.
Rank 2: +30 more pounds.
Rank 3: +45 more pounds.
Rank 4: +60 more pounds.
Rank 5: +75 more pounds.
Rank 6: +90 more pounds.
Rank 7: +105 more pounds.
Rank 8: +120 more pounds.
Rank 9: +135 more pounds.
Rank 10: +150 more pounds.
Rank 11: +165 more pounds.
Rank 12: +180 more pounds.
Rank 13: +195 more pounds.
Rank 14: +210 more pounds.
Rank 15: +225 more pounds.
Rank 16: +240 more pounds.
Rank 17: +255 more pounds.
Rank 18: +270 more pounds.
Rank 19: +285 more pounds.
Rank 20: +300 more pounds.
Wizard Beam
Required Level: 10
Description: A beam of energy from the caster latches onto enemies. Ranks bring damage and range.
Rank 1: 38-46 damage per second. The beam is 6 feet long.
Rank 2: 40-48 damage per second. The beam is 6 feet long.
Rank 3: 42-50 damage per second. The beam is 7 feet long.
Rank 4: 44-53 damage per second. The beam is 7 feet long.
Rank 5: 46-55 damage per second, with 7 foot beam. 1 tendrils, 4 feet long.
Rank 6: 48-58 damage per second, with 8 foot beam. 1 tendrils, 4 feet long.
Rank 7: 50-60 damage per second, with 8 foot beam. 2 tendrils, 4 feet long.
Rank 8: 52-62 damage per second, with 8 foot beam. 2 tendrils, 5 feet long.
Rank 9: 54-65 damage per second, with 9 foot beam. 2 tendrils, 5 feet long.
Rank 10: 56-67 damage per second, with 9 foot beam. 3 tendrils, 5 feet long.
Rank 11: 58-70 damage per second, with 9 foot beam. 3 tendrils, 5 feet long.
Rank 12: 60-72 damage per second, with 10 foot beam. 3 tendrils, 5 feet long.
Rank 13: 62-74 damage per second, with 10 foot beam. 4 tendrils, 6 feet long.
Rank 14: 64-77 damage per second, with 10 foot beam. 4 tendrils, 6 feet long.
Rank 15: 66-79 damage per second, with 11 foot beam. 4 tendrils, 6 feet long.
Rank 16: 68-82 damage per second, with 11 foot beam. 5 tendrils, 6 feet long.
Rank 17: 70-84 damage per second, with 11 foot beam. 5 tendrils, 6 feet long.
Rank 18: 72-86 damage per second, with 12 foot beam. 5 tendrils, 7 feet long.
Rank 19: 74-89 damage per second, with 12 foot beam. 6 tendrils, 7 feet long.
Rank 20: 76-91 damage per second, with 12 foot beam. 6 tendrils, 7 feet long.
Concentration
Required Level: 3
Description: This skill increases your mana regeneration rate.
Rank 1: 135% mana regeneration rate.
Rank 2: 150% mana regeneration rate.
Rank 3: 165% mana regeneration rate.
Rank 4: 180% mana regeneration rate.
Rank 5: 195% mana regeneration rate.
Rank 6: 210% mana regeneration rate.
Rank 7: 225% mana regeneration rate.
Rank 8: 240% mana regeneration rate.
Rank 9: 255% mana regeneration rate.
Rank 10: 270% mana regeneration rate.
Rank 11: 285% mana regeneration rate.
Rank 12: 300% mana regeneration rate.
Rank 13: 315% mana regeneration rate.
Rank 14: 330% mana regeneration rate.
Rank 15: 345% mana regeneration rate.
Rank 16: 360% mana regeneration rate.
Rank 17: 375% mana regeneration rate.
Rank 18: 390% mana regeneration rate.
Rank 19: 405% mana regeneration rate.
Rank 20: 420% mana regeneration rate.
Cold Weapons
Required Level: 15
Description: Gives an ice effect to your weapons, higher ranks increase damage, duration, aura size, and aura effect.
Rank 1: 14-17 additional cold damage for 15 seconds.
Rank 2: 16-19 additional cold damage for 17 seconds.
Rank 3: 18-22 additional cold damage for 19 seconds.
Rank 4: 20-24 additional cold damage for 21 seconds.
Rank 5: 22-26 additional cold damage for 23 seconds.
Rank 6: Adds 24-29 damage for 25 seconds, with a 12 foot aura giving 25-30 damage.
Rank 7: Adds 26-31 damage for 27 seconds, with a 13 foot aura giving 26-31 damage.
Rank 8: Adds 28-34 damage for 29 seconds, with a 14 foot aura giving 27-32 damage.
Rank 9: Adds 30-36 damage for 31 seconds, with a 15 foot aura giving 28-34 damage.
Rank 10: Adds 32-38 damage for 33 seconds, with a 16 foot aura giving 29-35 damage.
Rank 11: Adds 34-41 damage for 35 seconds, with a 17 foot aura giving 30-36 damage.
Rank 12: Adds 36-43 damage for 37 seconds, with a 18 foot aura giving 31-37 damage.
Rank 13: Adds 38-46 damage for 39 seconds, with a 19 foot aura giving 32-38 damage.
Rank 14: Adds 40-48 damage for 41 seconds, with a 20 foot aura giving 33-40 damage.
Rank 15: Adds 42-50 damage for 43 seconds, with a 21 foot aura giving 34-41 damage.
Rank 16: Adds 44-53 damage for 45 seconds, with a 22 foot aura giving 35-42 damage.
Rank 17: Adds 46-55 damage for 47 seconds, with a 23 foot aura giving 36-43 damage.
Rank 18: Adds 48-58 damage for 49 seconds, with a 24 foot aura giving 37-44 damage.
Rank 19: Adds 50-60 damage for 51 seconds, with a 25 foot aura giving 38-46 damage.
Rank 20: Adds 52-62 damage for 53 seconds, with a 26 foot aura giving 39-47 damage.
Shock of Fire
Required Level: 15
Description: Hurls an explosive ball of fire at enemies. Higher ranks boost damage and add area effect damage to resulting explosion.
Rank 1: 130-194 damage.
Rank 2: 136-204 damage.
Rank 3: 142-214 damage.
Rank 4: 149-223 damage.
Rank 5: 155-233 damage, 36-54 area damage of radius 2 feet.
Rank 6: 162-242 damage, 38-56 area damage of radius 3 feet.
Rank 7: 168-252 damage, 39-59 area damage of radius 5 feet.
Rank 8: 174-262 damage, 41-61 area damage of radius 6 feet.
Rank 9: 181-271 damage, 42-64 area damage of radius 7 feet.
Rank 10: 187-281 damage, 44-66 area damage of radius 8 feet.
Rank 11: 194-290 damage, 46-68 area damage of radius 10 feet.
Rank 12: 200-300 damage, 47-71 area damage of radius 11 feet.
Rank 13: 206-310 damage, 49-73 area damage of radius 12 feet.
Rank 14: 213-319 damage, 50-76 area damage of radius 14 feet.
Rank 15: 219-329 damage, 52-78 area damage of radius 15 feet.
Rank 16: 226-338 damage, 54-80 area damage of radius 16 feet.
Rank 17: 232-348 damage, 55-83 area damage of radius 18 feet.
Rank 18: 238-358 damage, 57-85 area damage of radius 19 feet.
Rank 19: 245-367 damage, 58-88 area damage of radius 20 feet.
Rank 20: 251-377 damage, 60-90 area damage of radius 21 feet.
Lightning Weapons
Required Level: 12
Description: Gives an electrical charge to your weapons, higher ranks increase damage, duration, aura size, and aura effect.
Rank 1: 6-7 additional lightning damage for 15 seconds.
Rank 2: 8-10 additional lightning damage for 17 seconds.
Rank 3: 10-12 additional lightning damage for 19 seconds.
Rank 4: 12-14 additional lightning damage for 21 seconds.
Rank 5: 14-17 additional lightning damage for 23 seconds.
Rank 6: Adds 16-19 damage for 25 seconds, with a 8 foot aura giving 21-25 damage.
Rank 7: Adds 18-22 damage for 27 seconds, with a 9 foot aura giving 22-26 damage.
Rank 8: Adds 20-24 damage for 29 seconds, with a 10 foot aura giving 23-28 damage.
Rank 9: Adds 22-26 damage for 31 seconds, with a 11 foot aura giving 24-29 damage.
Rank 10: Adds 24-29 damage for 33 seconds, with a 12 foot aura giving 25-30 damage.
Rank 11: Adds 26-31 damage for 35 seconds, with a 13 foot aura giving 26-31 damage.
Rank 12: Adds 28-34 damage for 37 seconds, with a 14 foot aura giving 27-32 damage.
Rank 13: Adds 30-36 damage for 39 seconds, with a 15 foot aura giving 28-34 damage.
Rank 14: Adds 32-38 damage for 41 seconds, with a 16 foot aura giving 29-35 damage.
Rank 15: Adds 34-41 damage for 43 seconds, with a 17 foot aura giving 30-36 damage.
Rank 16: Adds 36-43 damage for 45 seconds, with a 18 foot aura giving 31-37 damage.
Rank 17: Adds 38-46 damage for 47 seconds, with a 19 foot aura giving 32-38 damage.
Rank 18: Adds 40-48 damage for 49 seconds, with a 20 foot aura giving 33-40 damage.
Rank 19: Adds 42-50 damage for 51 seconds, with a 21 foot aura giving 34-41 damage.
Rank 20: Adds 44-53 damage for 53 seconds, with a 22 foot aura giving 35-42 damage.
Erudite Wizard Skills
Fire Flares
Required Level: 18
Description: Creates flares that orbit the caster. Higher ranks give more flares, impact damage, and area of effect damage.
Rank 1: 86-103 damage on impact, 1 flare that lasts 8 seconds.
Rank 2: 90-108 damage on impact, 1 flare that lasts 9 seconds.
Rank 3: 94-113 damage on impact, 2 flares that last 10 seconds.
Rank 4: 98-118 damage on impact, 2 flares that last 11 seconds.
Rank 5: 102-122 damage on impact, 2 flares that last 12 seconds.
Rank 6: 106-127 damage on impact, 3 flares that last 13 seconds.
Rank 7: 110-132 damage on impact, 32-38 area effect damage, 3 flares that last 14 seconds.
Rank 8: 114-137 damage on impact, 33-40 area effect damage, 3 flares that last 15 seconds.
Rank 9: 118-142 damage on impact, 34-41 area effect damage, 4 flares that last 16 seconds.
Rank 10: 122-146 damage on impact, 35-42 area effect damage, 4 flares that last 17 seconds.
Rank 11: 126-151 damage on impact, 36-43 area effect damage, 4 flares that last 18 seconds.
Rank 12: 130-156 damage on impact, 37-44 area effect damage, 5 flares that last 19 seconds.
Rank 13: 134-161 damage on impact, 38-46 area effect damage, 5 flares that last 20 seconds.
Rank 14: 138-166 damage on impact, 39-47 area effect damage, 5 flares that last 21 seconds.
Rank 15: 142-170 damage on impact, 40-48 area effect damage, 6 flares that last 22 seconds.
Rank 16: 146-175 damage on impact, 41-49 area effect damage, 6 flares that last 23 seconds.
Rank 17: 150-180 damage on impact, 42-50 area effect damage, 6 flares that last 24 seconds.
Rank 18: 154-185 damage on impact, 43-52 area effect damage, 7 flares that last 25 seconds.
Rank 19: 158-190 damage on impact, 44-53 area effect damage, 7 flares that last 26 seconds.
Rank 20: 162-194 damage on impact, 45-54 area effect damage, 7 flares that last 27 seconds.
Fire Storm
Required Level: 20
Description: A storm of fire is created that sets enemies within it alight. At higher ranks the damage, radius, and duration go up.
Rank 1: 78-94 damage per second within a 2 foot radius for 2 seconds.
Rank 2: 83-100 damage per second within a 2 foot radius for 2 seconds.
Rank 3: 88-106 damage per second within a 3 foot radius for 3 seconds.
Rank 4: 93-112 damage per second within a 3 foot radius for 3 seconds.
Rank 5: 98-118 damage per second within a 3 foot radius for 3 seconds.
Rank 6: 103-124 damage per second within a 4 foot radius for 4 seconds.
Rank 7: 108-130 damage per second within a 4 foot radius for 4 seconds.
Rank 8: 113-136 damage per second within a 4 foot radius for 4 seconds.
Rank 9: 118-142 damage per second within a 5 foot radius for 5 seconds.
Rank 10: 123-148 damage per second within a 5 foot radius for 5 seconds.
Rank 11: 128-154 damage per second within a 5 foot radius for 5 seconds.
Rank 12: 133-160 damage per second within a 6 foot radius for 6 seconds.
Rank 13: 138-166 damage per second within a 6 foot radius for 6 seconds.
Rank 14: 143-172 damage per second within a 6 foot radius for 6 seconds.
Rank 15: 148-178 damage per second within a 7 foot radius for 7 seconds.
Rank 16: 153-184 damage per second within a 7 foot radius for 7 seconds.
Rank 17: 158-190 damage per second within a 7 foot radius for 7 seconds.
Rank 18: 163-196 damage per second within an 8 foot radius for 8 seconds.
Rank 19: 168-202 damage per second within an 8 foot radius for 8 seconds.
Rank 20: 173-208 damage per second within an 8 foot radius for 8 seconds.
Cone of Frost
Required Level: 25
Description: Shoots a cone of frost from the fingertips dealing cold damage to your foes. Higher ranks improve damage, cone width, and range.
Rank 1: 180-270 damage, 20 foot range, 1 degree cone.
Rank 2: 184-276 damage, 21 foot range, 5 degree cone.
Rank 3: 188-282 damage, 22 foot range, 9 degree cone.
Rank 4: 192-288 damage, 23 foot range, 13 degree cone.
Rank 5: 196-294 damage, 24 foot range, 17 degree cone.
Rank 6: 200-300 damage, 25 foot range, 21 degree cone.
Rank 7: 204-306 damage, 26 foot range, 25 degree cone.
Rank 8: 208-312 damage, 27 foot range, 29 degree cone.
Rank 9: 212-318 damage, 28 foot range, 33 degree cone.
Rank 10: 216-324 damage, 29 foot range, 37 degree cone.
Rank 11: 220-330 damage, 30 foot range, 41 degree cone.
Rank 12: 224-336 damage, 31 foot range, 45 degree cone.
Rank 13: 228-342 damage, 32 foot range, 49 degree cone.
Rank 14: 232-348 damage, 33 foot range, 53 degree cone.
Rank 15: 236-354 damage, 34 foot range, 57 degree cone.
Rank 16: 240-360 damage, 35 foot range, 61 degree cone.
Rank 17: 244-366 damage, 36 foot range, 65 degree cone.
Rank 18: 248-372 damage, 37 foot range, 69 degree cone.
Rank 19: 252-378 damage, 38 foot range, 73 degree cone.
Rank 20: 256-384 damage, 39 foot range, 77 degree cone.
Root
Required Level: 23
Description: Halts enemies where they stand when successful. Higher ranks increase how many are affected, duration, and success percentage.
Rank 1: Up to 1 enemy for 5 seconds. 50% chance of success per enemy.
Rank 2: Up to 1 enemy for 5 seconds. 52% chance of success per enemy.
Rank 3: Up to 2 enemies for 6 seconds. 54% chance of success per enemy.
Rank 4: Up to 2 enemies for 6 seconds. 56% chance of success per enemy.
Rank 5: Up to 2 enemies for 6 seconds. 58% chance of success per enemy.
Rank 6: Up to 3 enemies for 7 seconds. 60% chance of success per enemy.
Rank 7: Up to 3 enemies for 7 seconds. 62% chance of success per enemy.
Rank 8: Up to 3 enemies for 7 seconds. 64% chance of success per enemy.
Rank 9: Up to 4 enemies for 8 seconds. 66% chance of success per enemy.
Rank 10: Up to 4 enemies for 8 seconds. 68% chance of success per enemy.
Rank 11: Up to 4 enemies for 8 seconds. 70% chance of success per enemy.
Rank 12: Up to 5 enemies for 9 seconds. 72% chance of success per enemy.
Rank 13: Up to 5 enemies for 9 seconds. 74% chance of success per enemy.
Rank 14: Up to 5 enemies for 9 seconds. 76% chance of success per enemy.
Rank 15: Up to 6 enemies for 10 seconds. 78% chance of success per enemy.
Rank 16: Up to 6 enemies for 10 seconds. 80% chance of success per enemy.
Rank 17: Up to 6 enemies for 10 seconds. 82% chance of success per enemy.
Rank 18: Up to 7 enemies for 11 seconds. 84% chance of success per enemy.
Rank 19: Up to 7 enemies for 11 seconds. 86% chance of success per enemy.
Rank 20: Up to 7 enemies for 11 seconds. 88% chance of success per enemy.
Fire Weapons
Required Level: 20
Description: Adds a flame effect to your weapons, higher ranks increase damage, duration, aura size, and aura effect.
Rank 1: 21-25 additional fire damage for 15 seconds.
Rank 2: 23-28 additional fire damage for 17 seconds.
Rank 3: 25-30 additional fire damage for 19 seconds.
Rank 4: 27-32 additional fire damage for 21 seconds.
Rank 5: 29-35 additional fire damage for 23 seconds.
Rank 6: Adds 31-37 damage for 25 seconds, with a 2 foot aura giving 15-18 damage.
Rank 7: Adds 33-40 damage for 27 seconds, with a 2 foot aura giving 16-19 damage.
Rank 8: Adds 35-42 damage for 29 seconds, with a 3 foot aura giving 17-20 damage.
Rank 9: Adds 37-44 damage for 31 seconds, with a 3 foot aura giving 18-22 damage.
Rank 10: Adds 39-47 damage for 33 seconds, with a 3 foot aura giving 19-23 damage.
Rank 11: Adds 41-49 damage for 35 seconds, with a 4 foot aura giving 20-24 damage.
Rank 12: Adds 43-52 damage for 37 seconds, with a 4 foot aura giving 21-25 damage.
Rank 13: Adds 45-54 damage for 39 seconds, with a 4 foot aura giving 22-26 damage.
Rank 14: Adds 47-56 damage for 41 seconds, with a 5 foot aura giving 23-28 damage.
Rank 15: Adds 49-59 damage for 43 seconds, with a 5 foot aura giving 24-29 damage.
Rank 16: Adds 51-61 damage for 45 seconds, with a 5 foot aura giving 25-30 damage.
Rank 17: Adds 53-64 damage for 47 seconds, with a 6 foot aura giving 26-31 damage.
Rank 18: Adds 55-66 damage for 49 seconds, with a 6 foot aura giving 27-32 damage.
Rank 19: Adds 57-68 damage for 51 seconds, with a 6 foot aura giving 28-34 damage.
Rank 20: Adds 59-71 damage for 53 seconds, with a 7 foot aura giving 29-35 damage.
Cone of Fire
Required Level: 28
Description: Fires a cone of flame in front of the caster. Higher rank gives more damage and larger cone.
Rank 1: 275-330 damage per second. The cone is 30 degrees wide.
Rank 2: 280-336 damage per second. The cone is 30 degrees wide.
Rank 3: 285-342 damage per second. The cone is 30 degrees wide.
Rank 4: 290-348 damage per second. The cone is 31 degrees wide.
Rank 5: 295-354 damage per second. The cone is 31 degrees wide.
Rank 6: 300-360 damage per second. The cone is 31 degrees wide.
Rank 7: 305-366 damage per second. The cone is 31 degrees wide.
Rank 8: 310-372 damage per second. The cone is 31 degrees wide.
Rank 9: 315-378 damage per second. The cone is 32 degrees wide.
Rank 10: 320-384 damage per second. The cone is 32 degrees wide.
Rank 11: 325-390 damage per second. The cone is 32 degrees wide.
Rank 12: 330-396 damage per second. The cone is 32 degrees wide.
Rank 13: 335-402 damage per second. The cone is 32 degrees wide.
Rank 14: 340-408 damage per second. The cone is 33 degrees wide.
Rank 15: 345-414 damage per second. The cone is 33 degrees wide.
Rank 16: 350-420 damage per second. The cone is 33 degrees wide.
Rank 17: 355-426 damage per second. The cone is 33 degrees wide.
Rank 18: 360-432 damage per second. The cone is 33 degrees wide.
Rank 19: 365-438 damage per second. The cone is 34 degrees wide.
Rank 20: 370-444 damage per second. The cone is 34 degrees wide.
Chapter 6 - Dark Elf Shadow Knight
Description: Primarily a melee class with some disease and pet spells.
Strengths: Can summon the undead. Uses corrosive short and long range spells.
Weaknesses: Weaker against disease immune enemies. Spells cost more percentage of mana.
Strength: 28
Intelligence: 30
Dexterity: 27
Stamina: 30
Health: 43/43
Mana: 23/23
Armor: 30
Attack: 36
Damage: 17-22
Resist Fire: 0%
Resist Cold: 0%
Resist Poison: 0%
Resist Disease: 0%
Resist Magic: 0%
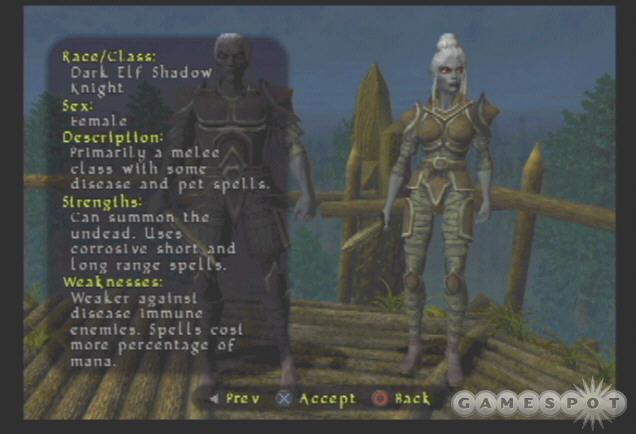
Initial Weapon: Worn Short Sword
Initial Armor: Tattered Patchwork Armor, Tattered Patchwork Boots, Tattered Patchwork Leggings, Tattered Patchwork Gloves
Initial Equipment: 2 Gate Scrolls, 2 Minor Healing Tonic, 2 Lesser Mana Vial, 500 gold
Initial Skills: Rank 1 Blunt Weapons (Increases blunt weapon damage by 15%), Rank 1 Slashing (Increases slashing weapon damage by 15%)
The Dark Elf Shadow Knight combines combat prowess with dark magic (specializing in disease spells) and best for players hoping to combine toe-to-toe combat with damaging and debilitating spells. Shadow knight players will want to focus their attribute points in strength, for melee combat, and intelligence, for spell casting. You could choose the dexterity route if you’re using ranged weaponry, though melee weapons will be better in the long run because the shadow knight possesses the blunt weapons and slashing skills to boost your melee damage. Stamina points are always an option but you could boost that attribute with magical jewelry or just be sure to hold on to a lot of health potions.
Engulfing darkness is one of the most powerful shadow knight skills. Use it to temporarily stun enemies (including nearly every boss) and provide an easy opportunity to engage with your weapon or spell attacks. Engulfing darkness can be cast quickly so it’s rather easy to stun a small group. It’s also area effect and can stun several adjacent enemies at once--plus it even inflicts a small amount of damage! Use it to stun a tough enemy while you engage weaker foes or use it to stun a group of weaker foes while you engage their tougher counterpart.
The shadow knight’s disease spells are also quite useful. Disease bolt provides a good ranged attack that fires quickly with decent damage; this spell is more useful early on than later when the enemies before more plentiful and much tougher. Disease trail leaves a tail of disease behind the shadow knight and can even be used to block passages temporarily; enemies tend to avoid the trail. Disease shield is handy against enemy mobs. You can inflict disease damage while blocking their attacks.
Summon skeleton provides a "target" for your enemies to focus on; meanwhile you’re launching disease spells or engulfing darkness. At higher levels, harm touch is the perfect addition to a shadow knight specializing in melee combat. As for the general skills, a few points in endurance helps you carry more load (typically filled by more potions) and bind wound will increase your health regeneration rate.
Dark Elf Shadow Knight Skills
This section reveals all Dark Elf Shadow Knight skills and their effect at each rank.
Blunt Weapons
Required Level: 1
Description: This skill increases damage when blunt weapons are used.
Rank 1: Increases blunt weapon damage by 15%.
Rank 2: Increases blunt weapon damage by 20%.
Rank 3: Increases blunt weapon damage by 25%.
Rank 4: Increases blunt weapon damage by 30%.
Rank 5: Increases blunt weapon damage by 35%.
Rank 6: Increases blunt weapon damage by 40%.
Rank 7: Increases blunt weapon damage by 45%.
Rank 8: Increases blunt weapon damage by 50%.
Rank 9: Increases blunt weapon damage by 55%.
Rank 10: Increases blunt weapon damage by 60%.
Rank 11: Increases blunt weapon damage by 65%.
Rank 12: Increases blunt weapon damage by 70%.
Rank 13: Increases blunt weapon damage by 75%.
Rank 14: Increases blunt weapon damage by 80%.
Rank 15: Increases blunt weapon damage by 85%.
Rank 16: Increases blunt weapon damage by 90%.
Rank 17: Increases blunt weapon damage by 95%.
Rank 18: Increases blunt weapon damage by 100%.
Rank 19: Increases blunt weapon damage by 105%.
Rank 20: Increases blunt weapon damage by 110%.
Slashing
Required Level: 1
Description: This skill increases damage when slashing weapons are used.
Rank 1: Increases slashing weapon damage by 15%.
Rank 2: Increases slashing weapon damage by 20%.
Rank 3: Increases slashing weapon damage by 25%.
Rank 4: Increases slashing weapon damage by 30%.
Rank 5: Increases slashing weapon damage by 35%.
Rank 6: Increases slashing weapon damage by 40%.
Rank 7: Increases slashing weapon damage by 45%.
Rank 8: Increases slashing weapon damage by 50%.
Rank 9: Increases slashing weapon damage by 55%.
Rank 10: Increases slashing weapon damage by 60%.
Rank 11: Increases slashing weapon damage by 65%.
Rank 12: Increases slashing weapon damage by 70%.
Rank 13: Increases slashing weapon damage by 75%.
Rank 14: Increases slashing weapon damage by 80%.
Rank 15: Increases slashing weapon damage by 85%.
Rank 16: Increases slashing weapon damage by 90%.
Rank 17: Increases slashing weapon damage by 95%.
Rank 18: Increases slashing weapon damage by 100%.
Rank 19: Increases slashing weapon damage by 105%.
Rank 20: Increases slashing weapon damage by 110%.
Disease Bolt
Required Level: 3
Description: Fires a bolt of disease at a target. At higher ranks the bolt does more damage and tracks its targets.
Rank 1: 23-28 damage.
Rank 2: 27-32 damage.
Rank 3: 31-37 damage.
Rank 4: 35-42 damage.
Rank 5: 39-47 damage, 1 degrees of motion for tracking.
Rank 6: 43-52 damage, 1 degrees of motion for tracking.
Rank 7: 47-56 damage, 2 degrees of motion for tracking.
Rank 8: 51-61 damage, 2 degrees of motion for tracking.
Rank 9: 55-66 damage, 2 degrees of motion for tracking.
Rank 10: 59-71 damage, 3 degrees of motion for tracking.
Rank 11: 63-76 damage, 3 degrees of motion for tracking.
Rank 12: 67-80 damage, 3 degrees of motion for tracking.
Rank 13: 71-85 damage, 4 degrees of motion for tracking.
Rank 14: 75-90 damage, 4 degrees of motion for tracking.
Rank 15: 79-95 damage, 4 degrees of motion for tracking.
Rank 16: 83-100 damage, 5 degrees of motion for tracking.
Rank 17: 87-104 damage, 5 degrees of motion for tracking.
Rank 18: 91-109 damage, 5 degrees of motion for tracking.
Rank 19: 95-114 damage, 6 degrees of motion for tracking.
Rank 20: 99-119 damage, 6 degrees of motion for tracking.
Bind Wound
Required Level: 5
Description: This skill increases your health regeneration rate.
Rank 1: 120% health regen rate.
Rank 2: 130% health regen rate.
Rank 3: 140% health regen rate.
Rank 4: 150% health regen rate.
Rank 5: 160% health regen rate.
Rank 6: 170% health regen rate.
Rank 7: 180% health regen rate.
Rank 8: 190% health regen rate.
Rank 9: 200% health regen rate.
Rank 10: 210% health regen rate.
Rank 11: 220% health regen rate.
Rank 12: 230% health regen rate.
Rank 13: 240% health regen rate.
Rank 14: 250% health regen rate.
Rank 15: 260% health regen rate.
Rank 16: 270% health regen rate.
Rank 17: 280% health regen rate.
Rank 18: 290% health regen rate.
Rank 19: 300% health regen rate.
Rank 20: 310% health regen rate.
Dark Elf Shadow Knight Skills - cont.
Life Tap
Required Level: 5
Description: Enables you to convert your foes' essence into mana or health. Hold down the block button after slaying an enemy to retrieve your bounty.
Rank 1: 10% chance, 15 units.
Rank 2: 11% chance, 20 units.
Rank 3: 11% chance, 25 units.
Rank 4: 12% chance, 30 units.
Rank 5: 13% chance, 35 units.
Rank 6: 14% chance, 40 units.
Rank 7: 14% chance, 45 units.
Rank 8: 15% chance, 50 units.
Rank 9: 16% chance, 55 units.
Rank 10: 17% chance, 60 units.
Rank 11: 17% chance, 65 units.
Rank 12: 18% chance, 70 units.
Rank 13: 19% chance, 75 units.
Rank 14: 20% chance, 80 units.
Rank 15: 20% chance, 85 units.
Rank 16: 21% chance, 90 units.
Rank 17: 22% chance, 95 units.
Rank 18: 23% chance, 100 units.
Rank 19: 23% chance, 105 units.
Rank 20: 24% chance, 110 units.
Disease Trail
Required Level: 8
Description: A stream of diseased cloud is left behind the caster, as rank goes up so does the damage and duration.
Rank 1: 10-12 damage per second, lasting 3 seconds.
Rank 2: 12-14 damage per second, lasting 3 seconds.
Rank 3: 14-17 damage per second, lasting 4 seconds.
Rank 4: 16-19 damage per second, lasting 4 seconds.
Rank 5: 18-22 damage per second, lasting 4 seconds.
Rank 6: 20-24 damage per second, lasting 5 seconds.
Rank 7: 22-26 damage per second, lasting 5 seconds.
Rank 8: 24-29 damage per second, lasting 5 seconds.
Rank 9: 26-31 damage per second, lasting 6 seconds.
Rank 10: 28-34 damage per second, lasting 6 seconds.
Rank 11: 30-36 damage per second, lasting 6 seconds.
Rank 12: 32-38 damage per second, lasting 7 seconds.
Rank 13: 34-41 damage per second, lasting 7 seconds.
Rank 14: 36-43 damage per second, lasting 7 seconds.
Rank 15: 38-46 damage per second, lasting 8 seconds.
Rank 16: 40-48 damage per second, lasting 8 seconds.
Rank 17: 42-50 damage per second, lasting 8 seconds.
Rank 18: 44-53 damage per second, lasting 9 seconds.
Rank 19: 46-55 damage per second, lasting 9 seconds.
Rank 20: 48-58 damage per second, lasting 9 seconds.
Endurance
Required Level: 10
Description: This skill increases your carrying capacity.
Rank 1: +15 more pounds.
Rank 2: +30 more pounds.
Rank 3: +45 more pounds.
Rank 4: +60 more pounds.
Rank 5: +75 more pounds.
Rank 6: +90 more pounds.
Rank 7: +105 more pounds.
Rank 8: +120 more pounds.
Rank 9: +135 more pounds.
Rank 10: +150 more pounds.
Rank 11: +165 more pounds.
Rank 12: +180 more pounds.
Rank 13: +195 more pounds.
Rank 14: +210 more pounds.
Rank 15: +225 more pounds.
Rank 16: +240 more pounds.
Rank 17: +255 more pounds.
Rank 18: +270 more pounds.
Rank 19: +285 more pounds.
Rank 20: +300 more pounds.
Engulfing Darkness
Required Level: 8
Description: Creates a cloud of darkness that confuses and harms enemies. Higher ranks increase damage and confusion.
Rank 1: 16-24 area damage, 50% chance of confusion, 1 second of confusion.
Rank 2: 18-28 area damage, 52% chance of confusion, 2 seconds of confusion.
Rank 3: 21-31 area damage, 54% chance of confusion, 2 seconds of confusion.
Rank 4: 23-35 area damage, 56% chance of confusion, 3 seconds of confusion.
Rank 5: 26-38 area damage, 58% chance of confusion, 3 seconds of confusion.
Rank 6: 28-42 area damage, 60% chance of confusion, 4 seconds of confusion.
Rank 7: 30-46 area damage, 62% chance of confusion, 4 seconds of confusion.
Rank 8: 33-49 area damage, 64% chance of confusion, 5 seconds of confusion.
Rank 9: 35-53 area damage, 66% chance of confusion, 5 seconds of confusion.
Rank 10: 38-56 area damage, 68% chance of confusion, 6 seconds of confusion.
Rank 11: 40-60 area damage, 70% chance of confusion, 6 seconds of confusion.
Rank 12: 42-64 area damage, 72% chance of confusion, 7 seconds of confusion.
Rank 13: 45-67 area damage, 74% chance of confusion, 7 seconds of confusion.
Rank 14: 47-71 area damage, 76% chance of confusion, 8 seconds of confusion.
Rank 15: 50-74 area damage, 78% chance of confusion, 8 seconds of confusion.
Rank 16: 52-78 area damage, 80% chance of confusion, 9 seconds of confusion.
Rank 17: 54-82 area damage, 82% chance of confusion, 9 seconds of confusion.
Rank 18: 57-85 area damage, 84% chance of confusion, 10 seconds of confusion.
Rank 19: 59-89 area damage, 86% chance of confusion, 10 seconds of confusion.
Rank 20: 62-92 area damage, 88% chance of confusion, 11 seconds of confusion.
Disease Shield
Required Level: 10
Description: A disease cloud that follows the character. At higher ranks the damage, radius, and duration go up.
Rank 1: 20-24 damage per second within a 2 foot radius for 5 seconds.
Rank 2: 22-26 damage per second within a 2 foot radius for 5 seconds.
Rank 3: 24-29 damage per second within a 3 foot radius for 5 seconds.
Rank 4: 26-31 damage per second within a 3 foot radius for 6 seconds.
Rank 5: 28-34 damage per second within a 3 foot radius for 6 seconds.
Rank 6: 30-36 damage per second within a 3 foot radius for 6 seconds.
Rank 7: 32-38 damage per second within a 4 foot radius for 6 seconds.
Rank 8: 34-41 damage per second within a 4 foot radius for 7 seconds.
Rank 9: 36-43 damage per second within a 4 foot radius for 7 seconds.
Rank 10: 38-46 damage per second within a 4 foot radius for 7 seconds.
Rank 11: 40-48 damage per second within a 5 foot radius for 7 seconds.
Rank 12: 42-50 damage per second within a 5 foot radius for 8 seconds.
Rank 13: 44-53 damage per second within a 5 foot radius for 8 seconds.
Rank 14: 46-55 damage per second within a 5 foot radius for 8 seconds.
Rank 15: 48-58 damage per second within a 6 foot radius for 8 seconds.
Rank 16: 50-60 damage per second within a 6 foot radius for 9 seconds.
Rank 17: 52-62 damage per second within a 6 foot radius for 9 seconds.
Rank 18: 54-65 damage per second within a 6 foot radius for 9 seconds.
Rank 19: 56-67 damage per second within a 7 foot radius for 9 seconds.
Rank 20: 58-70 damage per second within a 7 foot radius for 10 seconds.
Dark Elf Shadow Knight Skills - cont.
Riposte
Required Level: 15
Description: A creature striking the player has a chance of being hit back.
Rank 1: 24-29 damage on counter hit, with a 10% chance of success.
Rank 2: 28-34 damage on counter hit, with a 10% chance of success.
Rank 3: 32-38 damage on counter hit, with a 10% chance of success.
Rank 4: 36-43 damage on counter hit, with a 10% chance of success.
Rank 5: 40-48 damage on counter hit, with a 10% chance of success.
Rank 6: 44-53 damage on counter hit, with a 10% chance of success.
Rank 7: 48-58 damage on counter hit, with a 10% chance of success.
Rank 8: 52-62 damage on counter hit, with a 10% chance of success.
Rank 9: 56-67 damage on counter hit, with a 10% chance of success.
Rank 10: 60-72 damage on counter hit, with a 10% chance of success.
Rank 11: 64-77 damage on counter hit, with a 10% chance of success.
Rank 12: 68-82 damage on counter hit, with a 10% chance of success.
Rank 13: 72-86 damage on counter hit, with a 10% chance of success.
Rank 14: 76-91 damage on counter hit, with a 10% chance of success.
Rank 15: 90-96 damage on counter hit, with a 10% chance of success.
Rank 16: 84-101 damage on counter hit, with a 10% chance of success.
Rank 17: 88-106 damage on counter hit, with a 10% chance of success.
Rank 18: 92-110 damage on counter hit, with a 10% chance of success.
Rank 19: 96-115 damage on counter hit, with a 10% chance of success.
Rank 20: 100-120 damage on counter hit, with a 10% chance of success.
Summon Skeleton
Required Level: 15
Description: Raises a skeleton warrior to assist in battle. Higher ranks add an enchanted weapon.
Rank 1: Level 13 skeleton with a 5% chance of having an enchanted weapon.
Rank 2: Level 14 skeleton with a 10% chance of having an enchanted weapon.
Rank 3: Level 15 skeleton with a 15% chance of having an enchanted weapon.
Rank 4: Level 16 skeleton with a 20% chance of having an enchanted weapon.
Rank 5: Level 17 skeleton with a 25% chance of having an enchanted weapon.
Rank 6: Level 18 skeleton with a 30% chance of having an enchanted weapon.
Rank 7: Level 19 skeleton with a 35% chance of having an enchanted weapon.
Rank 8: Level 20 skeleton with a 40% chance of having an enchanted weapon.
Rank 9: Level 21 skeleton with a 45% chance of having an enchanted weapon.
Rank 10: Level 22 skeleton with a 50% chance of having an enchanted weapon.
Rank 11: Level 23 skeleton with a 55% chance of having an enchanted weapon.
Rank 12: Level 24 skeleton with a 60% chance of having an enchanted weapon.
Rank 13: Level 25 skeleton with a 65% chance of having an enchanted weapon.
Rank 14: Level 26 skeleton with a 70% chance of having an enchanted weapon.
Rank 15: Level 27 skeleton with a 75% chance of having an enchanted weapon.
Rank 16: Level 28 skeleton with a 80% chance of having an enchanted weapon.
Rank 17: Level 29 skeleton with a 85% chance of having an enchanted weapon.
Rank 18: Level 30 skeleton with a 90% chance of having an enchanted weapon.
Rank 19: Level 31 skeleton with a 95% chance of having an enchanted weapon.
Rank 20: Level 32 skeleton with a 100% chance of having an enchanted weapon.
Shield Bash
Required Level: 15
Description: A rushing attack that requires a shield. Delivers high damage and a chance of stunning enemies.
Rank 1: 40-60 damage for 1 enemy, 20% chance of stun for 4 seconds.
Rank 2: 48-72 damage for 1 enemy, 22% chance of stun for 5 seconds.
Rank 3: 56-84 damage for up to 2 enemies, 24% chance of stun for 5 seconds.
Rank 4: 64-96 damage for up to 2 enemies, 26% chance of stun for 6 seconds.
Rank 5: 72-108 damage for up to 2 enemies, 28% chance of stun for 6 seconds.
Rank 6: 80-120 damage for up to 2 enemies, 30% chance of stun for 7 seconds.
Rank 7: 88-132 damage for up to 3 enemies, 32% chance of stun for 7 seconds.
Rank 8: 96-144 damage for up to 3 enemies, 34% chance of stun for 8 seconds.
Rank 9: 104-156 damage for up to 3 enemies, 36% chance of stun for 8 seconds.
Rank 10: 112-168 damage for up to 3 enemies, 38% chance of stun for 9 seconds.
Rank 11: 120-180 damage for up to 4 enemies, 40% chance of stun for 9 seconds.
Rank 12: 128-192 damage for up to 4 enemies, 42% chance of stun for 10 seconds.
Rank 13: 136-204 damage for up to 4 enemies, 44% chance of stun for 10 seconds.
Rank 14: 144-216 damage for up to 4 enemies, 46% chance of stun for 11 seconds.
Rank 15: 152-228 damage for up to 5 enemies, 48% chance of stun for 11 seconds.
Rank 16: 160-240 damage for up to 5 enemies, 50% chance of stun for 12 seconds.
Rank 17: 168-252 damage for up to 5 enemies, 52% chance of stun for 12 seconds.
Rank 18: 176-264 damage for up to 5 enemies, 54% chance of stun for 13 seconds.
Rank 19: 184-276 damage for up to 6 enemies, 56% chance of stun for 13 seconds.
Rank 20: 192-288 damage for up to 6 enemies, 58% chance of stun for 14 seconds.
Convert Undead
Required Level: 20
Description: Converts undead to friendlies. 10 second cast recovery time.
Rank 1: Converts up to 1 enemy for 15 seconds. Odds of conversion are 40%.
Rank 2: Converts up to 1 enemy for 16 seconds. Odds of conversion are 42%.
Rank 3: Converts up to 1 enemy for 17 seconds. Odds of conversion are 44%.
Rank 4: Converts up to 2 enemies for 18 seconds. Odds of conversion are 46%.
Rank 5: Converts up to 2 enemies for 19 seconds. Odds of conversion are 48%.
Rank 6: Converts up to 2 enemies for 20 seconds. Odds of conversion are 50%.
Rank 7: Converts up to 2 enemies for 21 seconds. Odds of conversion are 52%.
Rank 8: Converts up to 2 enemies for 22 seconds. Odds of conversion are 54%.
Rank 9: Converts up to 3 enemies for 23 seconds. Odds of conversion are 56%.
Rank 10: Converts up to 3 enemies for 24 seconds. Odds of conversion are 58%.
Rank 11: Converts up to 3 enemies for 25 seconds. Odds of conversion are 60%.
Rank 12: Converts up to 3 enemies for 26 seconds. Odds of conversion are 62%.
Rank 13: Converts up to 3 enemies for 27 seconds. Odds of conversion are 64%.
Rank 14: Converts up to 4 enemies for 28 seconds. Odds of conversion are 66%.
Rank 15: Converts up to 4 enemies for 29 seconds. Odds of conversion are 68%.
Rank 16: Converts up to 4 enemies for 30 seconds. Odds of conversion are 70%.
Rank 17: Converts up to 4 enemies for 31 seconds. Odds of conversion are 72%.
Rank 18: Converts up to 4 enemies for 32 seconds. Odds of conversion are 74%.
Rank 19: Converts up to 5 enemies for 33 seconds. Odds of conversion are 76%.
Rank 20: Converts up to 5 enemies for 34 seconds. Odds of conversion are 78%.
Harm Touch
Required Level: 25
Description: Massive boost in damage to melee attacks.
Rank 1: 336-504 damage, 5 seconds to recast.
Rank 2: 346-518 damage, 5 seconds to recast.
Rank 3: 355-533 damage, 6 seconds to recast.
Rank 4: 365-547 damage, 6 seconds to recast.
Rank 5: 374-562 damage, 6 seconds to recast.
Rank 6: 384-576 damage, 7 seconds to recast.
Rank 7: 394-590 damage, 7 seconds to recast.
Rank 8: 403-605 damage, 7 seconds to recast.
Rank 9: 413-619 damage, 8 seconds to recast.
Rank 10: 422-634 damage, 8 seconds to recast.
Rank 11: 432-648 damage, 8 seconds to recast.
Rank 12: 442-662 damage, 9 seconds to recast.
Rank 13: 451-677 damage, 9 seconds to recast.
Rank 14: 461-691 damage, 9 seconds to recast.
Rank 15: 470-706 damage, 10 seconds to recast.
Rank 16: 480-720 damage, 10 seconds to recast.
Rank 17: 490-734 damage, 10 seconds to recast.
Rank 18: 499-749 damage, 11 seconds to recast.
Rank 19: 509-763 damage, 11 seconds to recast.
Rank 20: 518-778 damage, 11 seconds to recast.
Chapter 7 - Walk-through
This section offers a complete walk-through of Champions of Norrath. Many of the dungeon areas in Norrath are randomized. Each time you play through the game, the dungeon’s layout or even number of floors may differ slightly, though the quests and objectives remain the same. Certain areas of the walk-through (such as the levels of an optional dungeon) may differ from your experience but the quests and their solution remain the same.
Act I
Kelethin, a treetop city occupied by the Wood Elves, is under attack by goblins and orcs. The Wood Elf king Liethkorias has requested your assistance in turning back the goblin and orc assault.
Kelethin
Proceed through this elevated town and speak with the guards if you wish. You’re guided toward the shop, which will lead into your first quest. Find Thareil near the elevator and speak with him. He says the Faydark lift is off limits by order of Leithkorias. The lift is off limits until all goblins and orcs in town are destroyed.
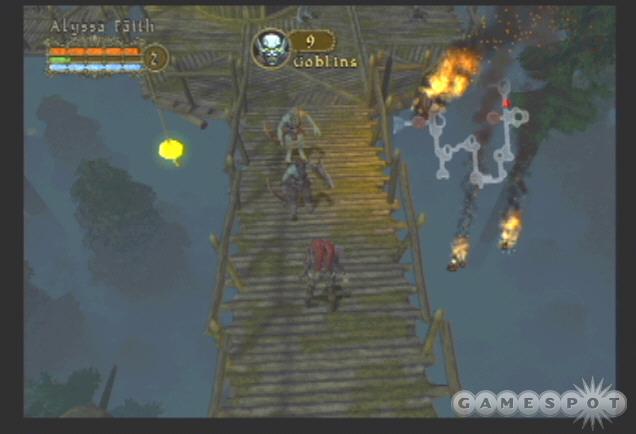
Quest: Vanquish Goblins--Kill all of the goblins inside of Kelethin and the elevator will once again be safe to use.
Continue beyond the lift and find Nenmar, the local shopkeeper. Enter his shop and spend your initial 500 gold pieces if you wish. You’ll return to Nenmar whenever you use a gate scroll during the first act.
Move along and activate the portal, which can be used to quickly transport to any area with an active portal (it’s the only one active now, however). As you move beyond the portal, you’re shown the number of goblins remaining in town. You must eliminate them all before Thareil will allow you to use the lift. Comb every inch of Kelethin to find every goblin. Return to the lift when finished and speak with Thareil and he permits you to use the lift.
Lesser Faydark
Make your way down the road and watch as the battle rages between good and evil. You’ll automatically engage in conversation with Elgoain, lieutenant in the Faydark battalion. He tells you the location of a goblin cave; the goblins keep their plundered spoils hidden away there.
Quest: Upgrade--Locate the goblins’ main cave, venture inside, and locate a magical item.
You can’t move past Elgoain until you complete this task. Move into Lesser Faydark and activate the portal, which can be used to return to Kelethin (or you could use a gate scroll when needed to return to the shop). Battle goblins and firebeetles as you explore the forest. Block the firebeetles’ initial charge attack to sustain as little damage as possible then counter with your weapon or spells.
You do have allies in the forest. Occasionally you’ll encounter a group of friendly soldiers that are engaged in their own battle. Assist them by attacking the goblins quickly; an overwhelmed ally can perish. You can also lure goblins and Faydark’s other minions (particularly the tough dire badgers) to these ally groups and use them as added assistance against your enemy.
Thoroughly explore the forest to find all enemies (for maximum experience) and all chests (for maximum loot). Use gate scrolls as needed to return to Kelethin and Nenmar and sell off your valuables for more gold, which can be used to purchase better equipment. Stock up on health and mana potions and don’t forget a gate scroll upon leaving.
Careful exploration will also uncover an optional goblin cave that leads into the "Hidden Tunnels" below Lesser Faydark. It’s definitely recommended that you explore as much ground and acquire as much experience as possible so you gain levels, skills, and attribute points to make other sections of the game a bit easier. Be wary of the goblin magic users in these tunnels. The magic users can resurrect slain goblins so it’s to your advantage to kill the magic user on sight.

Two dire badgers and a burly goblin protect the main goblin cave. Lure the badgers away and into the line of fire of any remaining allies in the area. If this isn’t possible, lure one badger away so you aren’t forced to battle both beasts at once.
Move into the main goblin cave (also called "Hidden Tunnels") and battle the assortment of melee, ranged, and magic-wielding goblins. It’s important to move carefully through these tunnels. Large goblin groups do exist and if you alert the entire group, it’s very possible to become overwhelmed. Don’t hesitate to retreat and engage a few goblins at a time. Find the staircases leading down; there’s a second and third level to clear in this goblin cave.
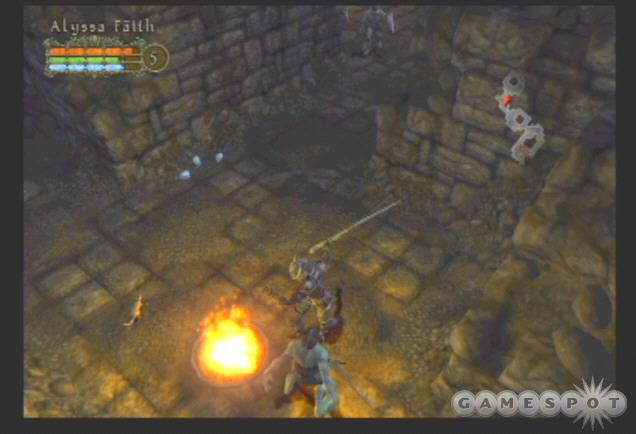
The bottom level contains a portal, which can be activated. It also features a goblin mini-boss. Defeat the goblin boss; he’s slow and can be pelted with ranged weaponry or spells. If you fight toe-to-toe, use block then counter with your own attacks. Defeat the boss to complete the quest and receive your magical item.
You’re told you’re now properly equipped and can return to Lesser Faydark. Use the portal to return to Lesser Faydark. You’re told that the Wood Elf guards have moved on and are instructed to go to Greater Faydark and help fight off the Orcs.
Find Hathnul near the entrance to Greater Faydark and speak with him. He states that the orcs are retreating deeper into the forest and that everyone who is able must report immediately to the Commander near the river.
Greater Faydark

Make your way down the Greater Faydark road and find more allies engaged in battle against the orc horde. As you did in Lesser Faydark, assist these allies at every turn. Keep them alive and they can assist you in subsequent battles. Lure orcs to the allies and allow your fellow soldiers to join in the fight.
Like Lesser Faydark, there are optional goblin caves to explore in Greater Faydark. As always, it’s highly recommended to take advantage of these optional areas to help build your character’s experience as well as your character’s bank account. A stronger character may find future battles less difficult. As you did in the "Hidden Tunnels" of Lesser Faydark, work carefully through these dungeons and try to alert as few enemies as possible. Beware of magic users and defeat them quickly to avoid enemy resurrections.

Work your way up the river and locate a band of soldiers standing near a closed gate. There’s likely a portal nearby so activate it then approach the soldiers to automatically speak with them.
The soldiers inform you that the orcs have sealed themselves inside the forest ruins and scouts have spotted the orc chief’s entourage riding into the camp. Your allies expect an impending attack. The gate needs to be open. There is likely a way to open the gate from inside the orc caves down the river. Elgoain has gone ahead in an attempt to find a way to open the gate.

Quest: Open the Gates--Follow the river to the lower orc caves, find the switch, and open the ruin gates.
Continue to follow the river to its end. There you will find the orc cave that leads to the gate switch.
Orc Caves
The challenge has increased since the goblin caves: orcs are basically the goblins' more powerful cousins. But the adversaries you face remain mostly the same. You’ll battle melee, ranged, and magic-using orcs. Crush the magic users as quickly as possible to avoid their spells and resurrection abilities. Don’t alert too many enemies at once. The orcs are surprisingly agile and can surround you quickly. If there are too many in the room, retreat and lure a few away from the pack.
You’ll discover Elgoain near the end of the orc cave first level. Speak with him and learn his legs have been shattered by your enemies. There’s some elfdraught in to the cave below. He requests that you bring him the elfdraught to help his wounds.

Quest: Save Elgoain--Quickly, find Elfdraught and bring it to Elgoain.
Use the portal on this first level then locate the staircase into the lower section. Battle through the orc horde and locate the elfdraught before moving deeper. It’s resting on the ground and can be hard to detect. Look for its glowing outline against the rocky floor. Return to the previous floor and speak with Elgoain. He’s extremely gracious but still unable to join you. He does give you his weapon as a reward. Return to level two and find the entrance deeper into the orc caves and down to level three.
Traverse the narrow pathways throughout this third level of the orc caves. There’s also a portal here, which can be activated and used to return to previous areas throughout Faydark. Approach the far end of the cave’s third level and spot the gate switch--heavily protected of course!
A gang of well-armored orcs and their mini-boss leader protect the switch. Lure the lesser minions away from the boss. These armored foes aren’t particularly quick and would be susceptible to any ranged attack or spells in your arsenal. If you’re a close-range fighter, avoid a gang battle and take on as few as possible in a single fight. Battle the orc mini-boss with ranged attack to take advantage of his questionable speed or use blocks and counter attacks to finish him off. Use the gate switch. The forest gates are now open and you’re told to return to Greater Faydark. Use the portal. Back at the gate, enter through and into the next area.
The Forest Ruins of Faydark
Orc catapults bombard Faydark with their heavy catapults. As you move through the Faydark Ruins, beware of the flaming projectiles crashing around you. Avoid being set on fire and sustaining unnecessary damage. Once again you have allies in the area, so use them! Lure Faydark’s enemies into the hands of your allies and use them in the fight to make your job much easier.
You’ll reach a narrow "gauntlet" path winding back and forth. Avoid the fireballs crashing around you and approach Oetheilas on the other side. You’ll note that the path looks unusable just beyond Oetheilas--too much catapult fire! Oetheilas states that the orcs have dragged out every catapult in creation to hammer the position. In order to reach Commander Turanin, you must eliminate the catapults to clear the route.
Quest: Destroy the Catapults!--Take out all the catapults and clear the way.

Search the areas to the left and right of Oetheilas to find most of the catapults (there are 10 in all and your current destroyed tally is marked at the top of the screen). Each corner contains a mini-boss to defeat in order to reach the catapults. To destroy the catapults, ignite the ammunition cart adjacent to the heavy artillery weapon. As stated, not all of the catapults are located here. You may have passed a catapult or two near the beginning of the Faydark Ruins area. Return and search the alcoves along the area’s edge (including near the very entrance to the ruins) to find any remaining catapults you may have missed.
Upon clearing out the catapults, move beyond Oetheilas and into the enclosed area beyond. Find the portal there and activate it. Speak with Oetheilas again if you wish then to Commander Turanin.
Turanin tells you that he’s received word that the orcs and goblins had stolen a scroll from Mayong Mistmoore, one of the most dangerous vampires in the Faydark. Your orders are to track down the orc leader, retrieve the scroll, and bring it back to Turanin.
Quest: Retrieve Black Scroll--Locate the orc leader, take the Black Scroll from him, and return it to the Wood Elf Commander.
After the conversation, descend the staircase into the next area.
Faydark Ruins

The webs scattered around the floor will give a good indication on what you’re facing in the depths of the Faydark Ruins: giant spiders! Poison resistance will certainly help here, though the spiders aren’t particularly tough foes at least in small numbers. The spiders can and will appear from below; you’ll spot them crawling over the railing from the depths of the ruins. For maximum experience, hang around the area where spiders appear so you can alert and defeat them all.
Fight to the far end of the Faydark Ruins to activate the portal. Use the gate scroll and visit Nenmar for any last minute preparations. Move into the adjacent chamber to find the orc chieftan you’ve been chasing this entire time. There’s a lot of room to maneuver so you should be able to utilize any ranged weapons or spells against this tough adversary. The orc leader does attack quickly, however; his charge assault is particularly fast and powerful. Utilize your block button and counter immediately.
Upon defeating the orc leader, grab the loot (and among them, the battle plans) and return to Commander Turanin.
Back to The Forest Ruins of Faydark
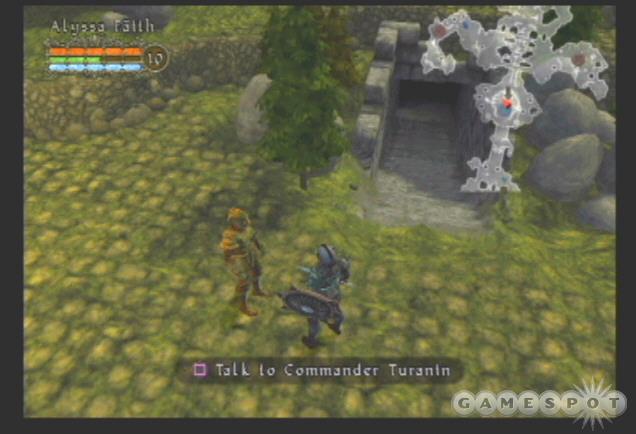
The Commander can’t thank you enough and even says you may have single-handedly turned the tide in the war. But he does have another task for you. There’s an orc shaman in an encampment nearby causing all sorts of trouble for Turanin’s men.
Quest: Kill Orc Shaman--Penetrate orc encampment and kill orc shaman.
Move beyond Turanin’s camp and find the large gate. Activate the gate switch nearby to open the gate into the encampment. Comb the large camp area and battle all enemies. There are ally soldiers in the area and they will help you battle the orcs around the camp’s perimeter. Defeat the orc shaman patrolling the camp’s center on sight to complete the objective.
Return to Turanin and report your success. During your absence he was able to decipher the scroll retrieved from the orc leader. It’s a map to the underworld.
Quest: Locate Underworld Entrance--Find the Wood Elf scout inside the forest ruins. He will lead you to the entrance to the Underworld.
After receiving your new objective from Commander Turanin, return to the staircase and descend into the ruins.
Back to the Faydark Ruins

You’ll find the Wood Elf scout, your pal Oetheilas, near the ruin entrance. An arrow in the bottom corner of the screen indicates the direction to the Underworld. Oetheilas’ health bar lies at the top of the screen. Keep him safe and protected from the vicious spider attacks throughout the ruins.
Traverse the entire area (clearing out all the spiders for maximum experience) and find the entrance to the Underworld at the far end. Oetheilas automatically locates the device that opens the door. But it’s as far as he can go. Enter the door into the next chamber...

...and meet the orc leader once again. He taunts you a bit about the vicious bite of a spider--an ominous warning of what’s to come. The orc leader leaves and ushers in a giant spider boss. Poison resistance will certainly help here. The spider launches a webbing to pull you close then attacks with its fangs. Block the assault and use your weapon to break away from the clutches of the web. If you possess solid ranged attacks (or spells) then maneuver in a circular pattern around the sluggish spider and fire off your attacks. Defeat the beast and enter the Underworld to complete the act.
Act II
"Certain that Leithkorias’ champion had been slain, the orc leader forged deep into the Underworld. But his overconfidence would prove his undoing, for the champion yet lived, and was closing fast upon his trail."
Blackdelve Reach
You automatically speak to the gnome near the entrance. Apparently your new domain has their own problems: mammoth ants. They’re crawling all throughout the city. After the conversation, press on and reach the sea’s edge. Find the sign marked "Viggs Ship Shoppe" and speak with Bingham Viggs. He discusses a boat he’s been working on and he needs a hand. His apprentice Kol needs help fixing a broken pump. But to reach this apprentice you must solve the ant problem plaguing the town.

Quest: Kill Giant Ant Queen--Find entrance to giant ant caves, locate the ant queen, and destroy her.
Make your way past the ship shoppe and speak with Olak. He also discusses the ant problem and has his own theories regarding the problem’s cause. It’s the noise the lava riders are making; it has stirred up the ants and now they’re swarming all over town. He reiterates the town’s desire to finish off the ant queen.
Continue past Olak and find Stinmir near a small hut. This is the act’s shop. You’ll come here each time you use a gate scroll. Take the time to sell off any gathered loot and check his supplies for better weapons, armor, and magical items.
Move into the village area and battle the ants taking over the town. Work your way down several sets of stairs to the bottom area. Here you’ll find the entrance into the next area--deep into the ant colony.
Ant Hill
Battle your way through the ant colony. Watch for the burrows in the walls. Ants will enter through these holes. Each time you eliminate an ant another appears from the hole. You can stand in front of the hole and attack the ants as they enter. Poison and fire resistances will aid you throughout the colony; there are some ants that carry poison and fire ants that inflict fire damage. Move slowly so you don’t trigger too many ants at once.
Work your way around the colony and don’t forget to activate the portal as you near the entrance to the next level. Return to Stinmir as needed to upgrade your weapons and equipment and sell off the plentiful loot you may find in the colony.
Pave through the second level of the ant hill and find the ant queen making more ants in the back corner of the colony. Your first goal when facing the ant queen is to avoid moving too far to the left and right side of the chamber. There are additional ant foes lurking about and they will just make the battle more difficult. Remain close to the center if possible and battle only the ant queen.

Block the queen’s charge and stinger attack at her approach. When she moves off from the attack, counter with your ranged weapons and spells or chase her down and use your melee attacks. After you eliminate the queen, a passage opens at her start position. Before leaving, clear the chamber off any remaining ants. Exit through the passage and return to Blackdelve Reach.
Back to Blackdelve Reach
You automatically speak with Olak upon your arrive back into Blackdelve Reach. Receive your gold pieces reward. Return to the ship shoppe and speak with Brigham Viggs. He’s still complaining about the lava pump. He says his apprentice is in the Blackdelve Lava Field.
Quest: Help Kol--Find Kol in the Blackdelve Lava Fields and help him repair the lava pump.
Search the other side of Blackdelve, across from the ship shoppe, and find the home of Melman Froes. His daughter, Tenya, is missing. Apparently she’s through the lava field and into the Caverns of the Fallen.
Quest: Return Nobleman’s Daughter--Find Tenya and send her home to her father.
Move beyond the Froes’ residence and find the ladder descending into the lava fields.
Blackdelve Lava Fields
Fire resistance will definitely prove effective throughout the lava fields. Here you’ll face more potent fire beetles than you faced earlier in the game. Also, the lava golems hurl magma projectiles at you. These stone golems should be countered with ranged attacks while they stand in the hazardous lava. When they approach at close-range, retreat to use your ranged weaponry or spells again or block their attacks and counter with your own powerful melee weaponry.
A bit of exploration reveals that one of the field exits is blocked by one of the stone golems. Nothing you do will get you past this point so continue to explore elsewhere. Somewhere on this first lava field section you’ll find Kol. Speak with him to find out the status of the broken pump. Apparently the way to the pump is blocked and the only way to reach it is to use a lava runner to cross the hazardous lava. To fix the pump, you’ll have to find the exchanger.
Quest: Fix Pump--Get a lava runner, find the exchanger, and insert it into the lava pump.
Descend to the next level of the lava fields and battle through the firebeetles and stone golems to the far back corner of the level. Here you’ll find the exchanger resting on the ground. It’s very tough to see on the black ground so you may want to turn up your brightness. If you can’t find it, check your inventory to see if you happen to pick it up when you were grabbing some discarded loot.
With the exchanger in hand, return to the previous section of the lava fields and search the far upper corner to find a small station adjacent to the lava runner, a motorized vehicle that can traverse the dangerous lava heat. Speak with the gnome mechanic. He explains the use of the lava rider and allows you to take it out for a spin. Get into the lava rider. You can ram enemies while in the vehicle; ramming can kill your foes, though it does take quite awhile.
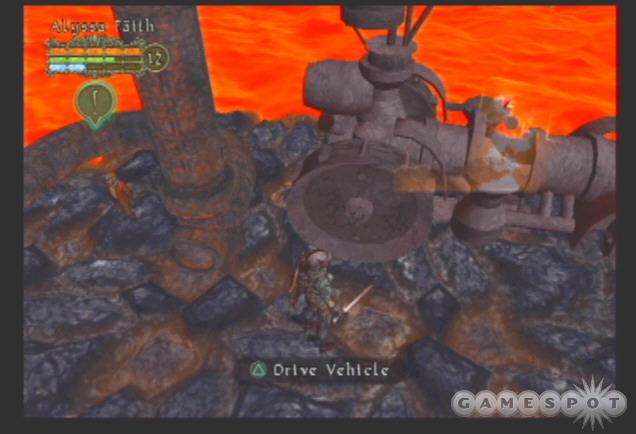
Use the lava runner to drive beyond Kol’s position across the lava to the back corner. Follow the bridge to the lava pump. Approach and fix the station. Return inside the lava runner and drive to Kol. Speak with him and he congratulations you and says you should let Master Viggs know the pump has been repaired.
Make your way back to the lava fields exit. On the way, near the blocked entrance, stone golems ambush you. But they’re called off by an unexpected ally. The way to the Caverns of the Fallen is opened.
Caverns of the Fallen
Proceed down the path and find Tenya Froes on the left side of the path. She’s in the Caverns of the Fallen searching for her lost kittens. She knows why you’re here--her father has sent you to find her and return her home. She makes you a deal: find her kittens and she’ll consider returning home.
Quest: Return Tenya’s Kittens--Find Tenya’s kittens and bring them to her.
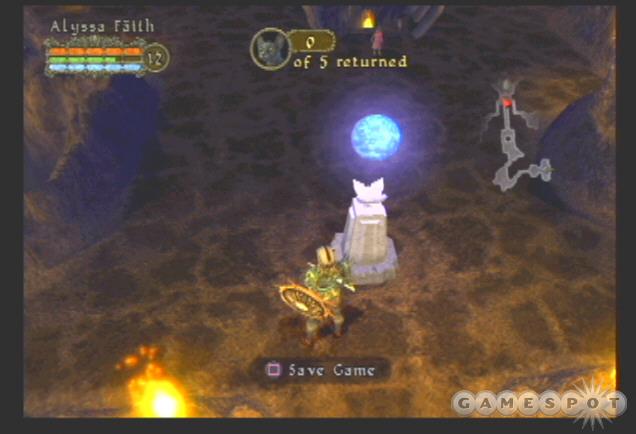
There’s an indicator at the top of the screen that reveals how many kittens have been found and returned. Continue through the caverns and find Tenya again blocking the exit. Before you can proceed, you must find those kittens. There are five paths that branch from the caverns exit. Each one leads to a kitten protected by a horde of ghouls. These creatures are deadly fast; undead bonuses will certainly help. Weaken them with ranged attacks if possible before engaging at close-range. Move cautiously to avoid being swarmed by their quick attacks.
Upon rescuing a kitten, return the critter to Tenya standing near the center of the branching routes. She’ll thank you and usher you toward the next animal. Return all five to complete the quest and open the exit. Once Tenya leaves the area, descend into the next level of the caverns.
Plenty of undead await you in the second level of the caverns. Look for enemy creatures actually in battle with one another. Take advantage and eliminate them (from a distance if possible). Ignore the catapults as they can’t be destroyed. As the cavern narrows, the battles become tougher. Area effect damage attacks or spells will prove extremely useful against the tightly packed undead gangs. Work your way to the far back end of the cavern to encounter an army of undead.
You must defeat the sizable army to unlock the castle. You’re told how many soldiers remain at the top of the screen. The army approaches from nearly every side at the start. If you have the brute strength, you can power through the closest soldiers before making a quick retreat. If you rely on ranged spells or attacks, move away from the group and make a stand elsewhere.
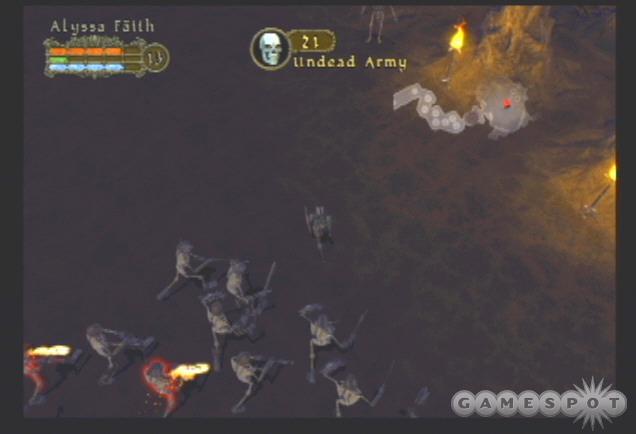
The undead troops aren’t particularly quick. You can practically lead the entire group in a circular formation around the chamber and turn and attack as necessary. Defeat the entire army to open the castle route--and also summon an additional mini-boss foe. Ranged attackers will find the battle easier. A close-range fighter must try and block the undead knight’s attacks and counter quickly. The knight also summons a fiery apparition to make the battle even tougher. Move away and lure the fiery ghost away so you can concentrate on fighting the knight. After a successful battle, enter the next area.
The Castle of Lord Vanarhost

A cleric specializing against the undead or weaponry with undead-killing benefits will make the castle much easier--being the castle of a vampire, it’s filled with undead minions. You’ll battle ghouls and skeletons of various types (archers, fighters, etc). Battle through the hallways and finally reach a posh sitting room and encounter the uniquely dressed Sylea. She has an urgent need: a flower called the bloodwine. It diminishes her vampire urges to feed. Get her the bloodwine and she’ll lead you through the castle to the orc leader you’re pursuing.
Quest: Find Bloodwine--Find bloodwine in Blackdelve Reach and return it to Sylea.

Maneuver through the indicated exit. It sends you through a cell room. Remember this location because you’ll rescue someone from this cell later in the act. Follow the hallways to the exit door and exit back to the shores of Blackdelve Reach.
Blackdelve Beach
It appears the ghouls have made their way down to Blackdelve Beach and the Blackdelve Boat Launch. Ignore the boat launch for now (though you will return here later) and descend the staircases to the shoreline. Cross the docks to the far back corner and find the squiggly bloodwine plant. Pick it up and return to the castle.
Back to The Castle of Lord Vanarhost
Return to Sylea with the bloodwine. She leads you into a new section of the castle and allows you to eavesdrop on a conversation between the orc leader and Lord Vanarhost.
Blackdelve Boat Launch
Before continuing through the castle, return to Blackdelve Reach and visit Brigham Viggs on the Blackdelve Boat Launch. With the lava pump repaired the ship has been completed. But if he turns his back on Vanarhost, he’ll need protection. Apparently Melman and Tenya Froes are in position of a ruby that keeps them safe from the vampires.
Quest: Obtain Ruby--Get ruby from Melman Froes and bring it to Viggs.
Return to the castle and use a gate scroll to transport to the main section of Blackdelve Reach. Move to Melman’s residence and speak with him about returning his daughter and obtaining the ruby. Viggs is pleased with the jewel and has his ship ready...but you do need a navigator. Perhaps there’s one in the castle cells? Return to the castle.
Back to The Castle of Lord Vanarhost Again
Move beyond the balcony where you eavesdropped on the orc leader and the vampire. Combat the hordes of undead and battle through the halls until you reach the entrance into the next level of the castle. This section is filled with ghostly mini-boss apparitions. The best way to combat them is away from their undead escorts. Block their scythe attack then pummel them with your own close-range or spell weaponry. If possible, use ranged attacks to steer clear of the slower undead and boss adversaries.
Follow the route to the chamber at the far end and find Lord Vanarhost and Sylea waiting for you. Although it appears an impending battle awaits you, it’s actually a trap. Lord Vanarhost opens a trap door and sends you into the castle dungeons with his collection of nefarious vampires.
Castle Dungeons
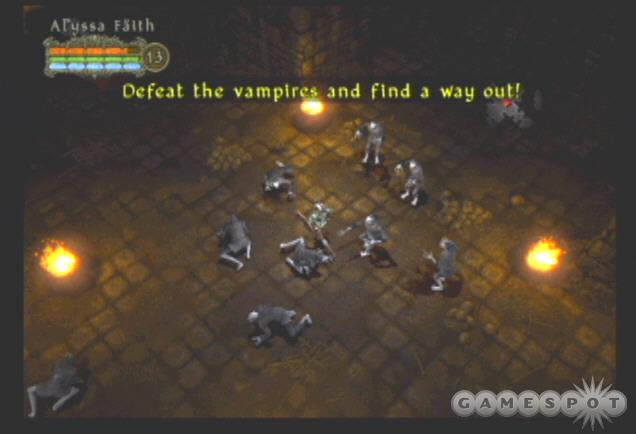
You’re under attack immediately from the vampires. You’re instructed to defeat the vampires and find a way out of the dungeons. The vampires are insanely quick. Spells and weapons effective against the undead will certainly be helpful. Back away from the initial horde if possible and try to eliminate a few away from the pack to make the overall group much easier. The vampires are so quick that it’s very easy to get overwhelmed even if you just take a single step in the wrong direction.
If attacking the vampires up close, be sure your character faces the foe while swinging. The vampires are so quick that it’s very easy to make a misstep and attack air instead of the creature. Meanwhile additional vampires are entering the hall and inflicting damage against your inaccurate character. Battle through the dark halls of the dungeon and find the entrance back to the castle.
Back to The Castle of Lord Vanarhost Yet Again
You enter the room from which you left (the wide open trap door still remains). Continue to work your way through the castle beyond this room. You’ll face additional halls of undead troops as well as the mini-boss grim reaper-like apparitions. After a save game pedestal, a large chamber and Lord Vanarhost await.
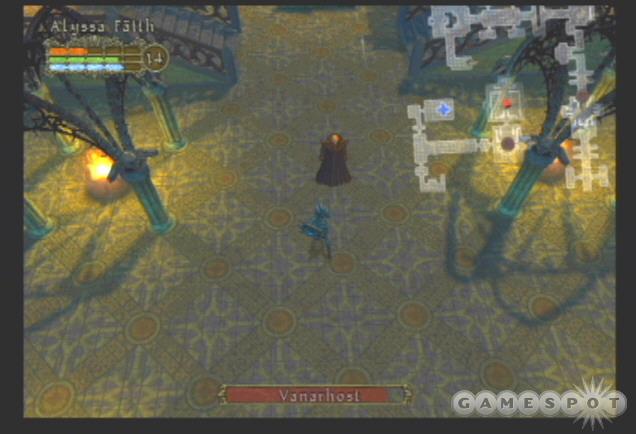
Vanarhost transforms between bat and vampire form for his attacks. Block his swooping flying attack then counter quickly with your preferred attack. When he moves back off screen, prepare to block again then counter his strikes. A cut scene interrupts the action once Vanarhost has been nearly killed. Sylea comes through again on her debt to you--she literally stabs the castle lord in the back. She also hands you the prison key.
Enter the door marked "Castle Prison" to return to a previously explored section of the castle. Cross the posh room ahead and into the cell area. Unlock the cells with the key and greet Babik Nurn in the first cell on the right. Conveniently, he’s a navigator!
Quest: Protect Babik Nurn--Guide navigator to the pier in Blackdelve Reach.
An indicator in the bottom corner of the screen points the way to Blackdelve Reach; a second indicator at the top of the screen reveals Babik Nurn’s health. Keep him safe and escort him to the exit onto the Blackdelve shores. It’s the same location where you recovered the bloodwine for Sylea.
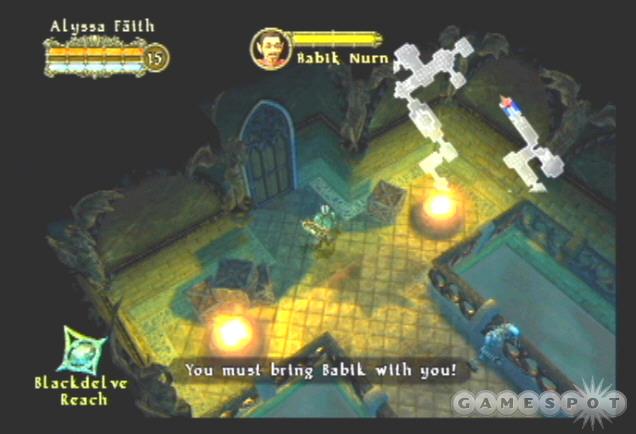
There’s a small glitch that occurs in this section that may cause Babik Nurn to be invisible. You’ll know it has occurred when you rescue him from the cell and you can’t see him inside. If this happens, you won’t see him running with you as you escort him to the exit. Instead, he’ll appear statue-like in various rooms as you move through the castle. Since you must leave the castle with Babik Nurn, getting his rigid body close enough to the exit is a challenge. When you see him standing there, move a few screens away and back again until he moves closer and closer to the exit door. Repeat the process several times until he’s close enough to permit you to exit.
Blackdelve Boat Launch
Protect Babik from the ghouls scattered across the Blackdelve shore. Locate the boat launch and move along the dock to Viggs. Speak with him with Babik in tow to complete the quest and the act.
Act III
"A great wound on the face of Norrath, the Pit of Ill Omen was a mighty sea imprisoned on all sides by towering cliffs. IT was a hidden world, containing grasslands, tropical islands, and even stretches of desert within its chaotic interior, all knotted together by mysterious ancient gates, part of an old riddle that no explorer had yet been able to solve. Having barely survived the perilous journey into the Pit, the wooden boat, in urgent need of repair, soon found itself the prey of another force. Not long after their arrival, evil magic filled the sky of the Pit, and lightning lashed down from above. The tired vessel found it had nowhere to flee, and the storms tore the ship apart. But there were survivors, and that meant the battle for Norrath was not yet over."
Water’s Edge
As the act opens, you automatically speak with Davel Grom; he updates you on the islands’ situations. Apparently they have a bit of a problem with slavers. He also tells you about the portals that serve as a transport device between the islands. Finally, Davel tells you about the horn of Ill Omen.
Quest: Obtain the Horn of Ill Omen--Follow any leads you can to find the location of the horn. Once found, bring it to Davel.
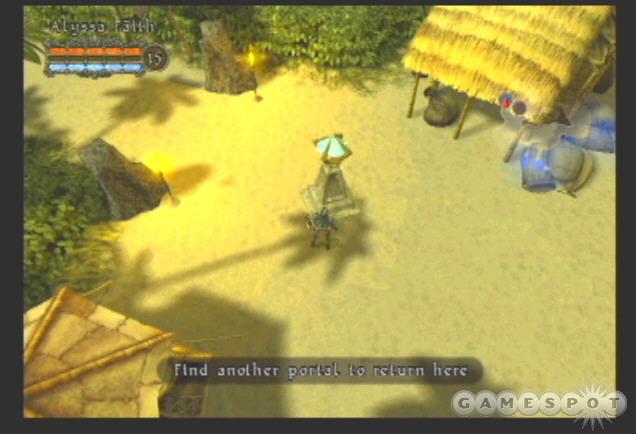
Quest: Explore the Island--Look around the island for the ancient portals that Davel spoke of.
Explore the initial island and search its crates and shells for additional loot. When ready to move on, find the sandbar that connects to an adjacent island. Activate the portal on this island then find the entrance to the island caves near its center.
Island Cave
Reptilian guards populate this first island cave. These are melee-based warriors that should perish rather easily to your preferred weapon or spell. Maneuver through the dank caverns and clear each room of its enemies. Explore corners for loot and gold and make your way to the other side and find Rondo in a large chamber. Speak with him.
You couldn’t tell from the wide shot but Rondo has been bound and gagged. He can’t utter a word other than "Hmmph!" until you remove the gag. He confirms the worst: it’s a trap!
Dark elves surround you and Rondo. You must protect Rondo from the dark elves to complete the task. If Rondo dies, you must reload and try again. Concentrate your weapons and spells on the dark elves around Rondo before facing the others. You’ll be attacked by other elves while saving Rondo so have health potions armed and ready.
Rondo tells you about the slavers and their camp on the western island. It also sounds like your orc nemesis was also involved in the ambush. He points the way to the portal that leads to western island and briefly tells you about his brother Lazlo. He requests that you find a way to rescue Lazlo from the slavers. Finally, he tells you he’s headed back to Water’s Edge to repair his shop. He’ll serve as the merchant for the rest of the act; whenever you use a gate scroll, you’ll return to him at Water’s Edge.
Quest: Find Lazlo--Rondo’s brother, Lazlo, may know the secrets of the portals. Find him for more information.
Enter the portal when ready to enter the next area.
Hidden Shore
Battle through additional reptilian guards and proceed to the edge of the ocean. Here you’ll find an underwater cave. But you can’t go through just yet (as it states, you can’t breathe underwater). Instead, return to the beach and face the cave. Find the very narrow path between the sand and the rocks going to the right side of the shore.
As you approach the next section, Kerriel the mermaid automatically contacts you. She needs a favor: she’s looking for a conch shell and will reward you if you can return one to her.
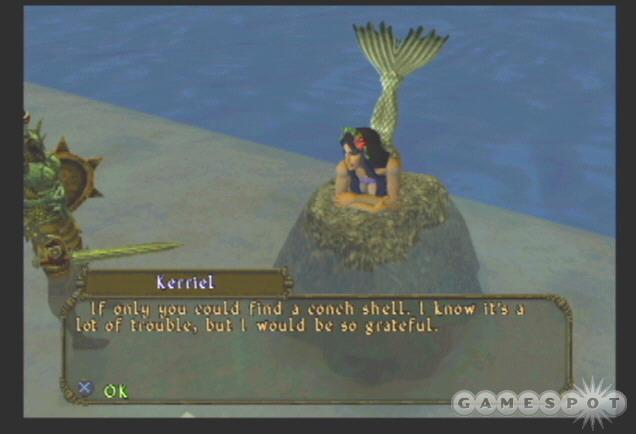
Quest: Find a Conch Shell--Kerriel the mermaid will reward you if you can find a conch shell and bring it to her.
Continue to explore the island and find another portal. Activate it and move along. Follow the winding path through the dunes (combating the guards throughout the way) until you reach the gargantuan beast at its end. He has a powerful attack so it’s highly recommended that you keep your distance and attack at range if possible. If not then you must use block and counter attacks to withstand his punishment. Move past the giant and into the next cave area.
Tropical Cave
This is a short set of caves that connect the Hidden Shore and the Western Island. You’ll face more reptilian guards here. The challenge isn’t too difficult. Take the time to search for loot and gold through the dark tunnels and exit the other side into the next island.
Western Island
As you enter the Western Island, walk forward and automatically spot Babik Nurn captured and caged. He survived the storm! But he’s unwilling to come out of his cage. It isn’t even locked! The island is crawling with slavers and, frankly, he think it’s safer inside the cage than out. He does provide some information on Lazlo and does say he’ll exit the cage if all slavers on the island are eliminated. A counter appears at the top of the screen that reveals the number of slavers left on Western Island and its two caves.
Quest: Kill the Slavers--Find all of the slavers hiding on and around the island and kill them.
The slavers are much tougher opponents than those reptilian guards. Comb the island cautiously and alert as few slavers as possible. There are large groups hiding out in various sections of the island so it’s best to move slowly and fight just a few at a time to avoid being punished for hasty exploration. Check each nook and cranny of the island to find shells serving as chests; pillage the items and gold from each.
You may find the cave entrances while exploring Western Island. Remain outside the caves until you have hunted down all slavers outside of the caves. You’re notified when all slavers on the island exterior have been killed. Now it’s time to explore the caves.
Tropical Cave 2 and 3
Explore the two new caves attached to Western Island to find the remaining slavers. You’ll encounter an assortment of enemies inside the cave, including more reptilian guards, slavers, and dark elves. Beware of the magic users (equip resistances if possible) and eliminate all enemies through both caves to complete the quest.
Once all slavers have been killed, return to Babik Nurn and let him know the coast is clear. After a brief conversation (and a small gift related to Lazlo), Babik departs. You’re told to visit him on Water’s Edge; he may have something for you there as well. Use the portal and return to Water’s Edge.
Back to Water’s Edge
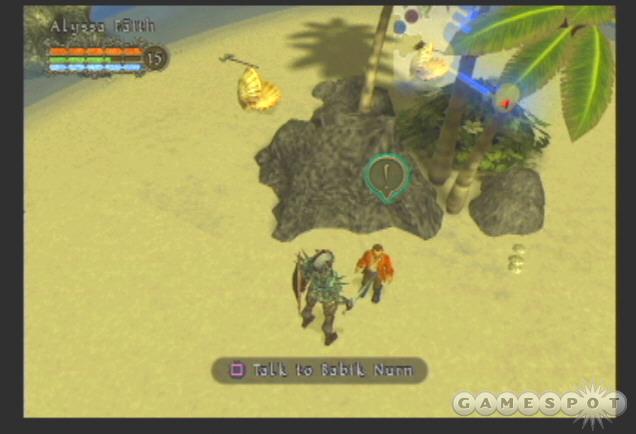
The opening cut scene reveals Babik making his way across the dock to the small island. Follow him out on the dock and to the island and speak with him. He says he was combing the beach and found a beautiful shell--the same one the mermaid wants! Return to Kerriel on the Hidden Shore.
Back to the Hidden Shore
Speak with Kerriel and tell her about the conch shell. She’s delighted and rewards you with the ability to breathe underwater. The perfect reward for someone hoping to explore that underwater cave! Move along the shore to the underwater cave and enter. Now equipped with the ability to breathe underwater, you can safely explore the next area.
Sea Cave
The undead populate the bottom of the sea as well. Movement is slower throughout this underwater cave--for you and your adversaries. Use this to your advantage with ranged weaponry and spells if available. But even a barbarian brute shouldn’t have much trouble against the slow-moving enemies. It’s easy to tackle just a few at a time as you push your way across the sea floor.
Your goal is to find a broken portal. It will send you to the next location. Find it at the far back end of the sea cave. Search every nook and cranny for treasure before moving on. The portal isn’t a two-way route; once you move through, you’re sent to the next location and the sea cave becomes a distant memory.
Ashen Plain
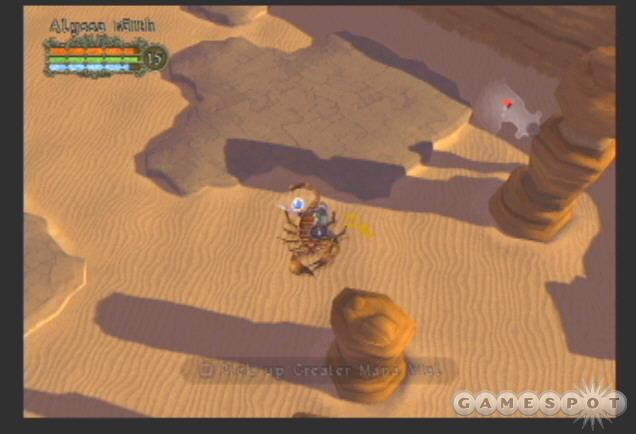
The challenge ramps up considerably in the deserts of the Ashen Plain. Here you will encounter giant scorpions and an assortment of desert warriors, both melee and magic-using. The magic-using enemies can teleport during your strikes and even resurrect the surprisingly powerful melee warriors. Stun skills or spells like the Shadow Knight’s engulfing darkness will certainly help you tackle the magic-users more easily. Plus, beefing up your resistances before moving through the area will certainly help as even some of the warriors wield enhanced weaponry. None of these foes can be taken lightly. Terminate the magic users as quickly as possible if you can so you don’t have to deal with resurrected warriors.
The Ashen Plain is also a very large area. There’s a portal that can be activated and used to return to other portals in the act. There’s also a broken portal that doesn’t appear to be working just yet. Search the corners and edges for every possible encounter if you wish to maximize experience and treasure. Otherwise, cross the desert to the far middle side to find the entrance into the temple, your next destination.
Mormaz’s Temple
Similar enemies occupy Mormaz’s Temple. As in the Ashen Plain, the magic-users are particularly dangerous. Increases resistances will help protect you against cold, fire, poison, and shock damage--expect combinations of each throughout the temple. Move cautiously through each large room and make every effort to terminate the magic-users first and foremost. Magic-users in the area can cast ranged spells against you and even resurrect their fallen comrades.
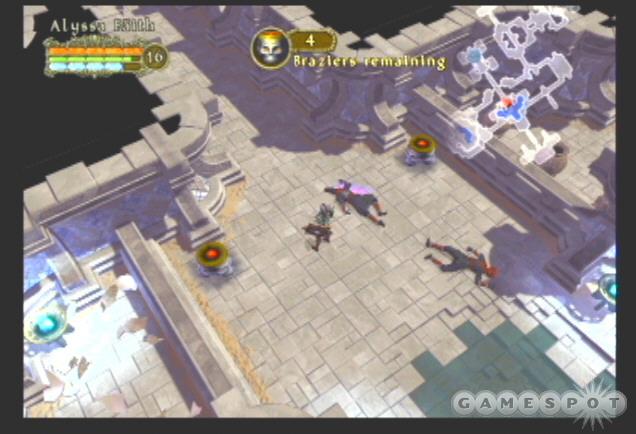
The temple has a symmetrical layout. It’s a very large area with a lot of enemies to slaughter for experience and lots of loot to collect. Stay on the wide camera view so you can see those magic-users closing in around you and can counter accordingly. Your eventual goal lies at the far opposite end of the temple. Don’t hesitate to explore along the sides of the temple for all the optional rooms and enemies. Use gate scrolls frequently and return to Rondo to restock on potions.
At the opposite end find Mormaz. He knows why you’ve arrived: to find the Horn of Ill Omen. He says you must find a way into the sealed temple within the Ashen Plain and once inside extinguish the braziers of hate that burn within. To get into the temple you’ll need a new item: Mormaz’s heart.

Quest: Extinguish the Braziers--Find a way into the sealed temple and unlock it by extinguishing all the braziers that burn within it.
Retrace your steps out of Mormaz’s Temple and return to the Ashen Plain.
Back to the Ashen Plain
The way toward the sealed temple is the broken portal in the Ashen Plain. It didn’t work before but now you possess the key: Mormaz’s heart. Expect to encounter additional enemies in the Ashen Plain. Battle your way to the broken portal and approach it to enter the next area.
The Grass Sea
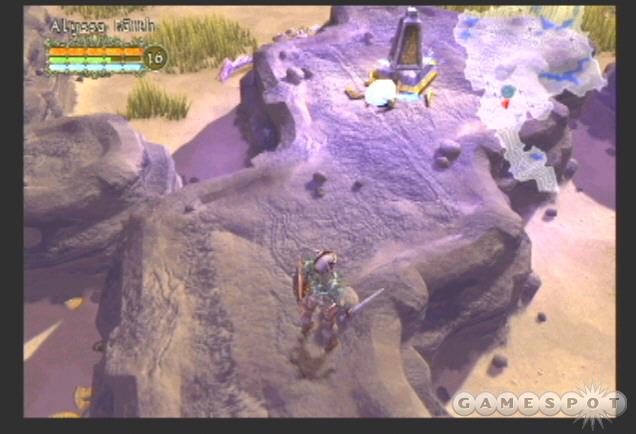
Giants roam the Grass Sea, though these behemoths aren’t as formidable as some of the giants you’ve encountered in the past. At close-range, utilize your block button to counter the giants’ attacks. If you have the ability, utilize ranged weapons and spells and pummel the giant from a safe distance.
Your goal is to find a broken portal on one of the grey rocky hills. Locate the staircase along the edge of the hill and ascend. Maneuver across the rock, approach the portal and you’re automatically transported into the Sealed Temple.
Sealed Temple
The dangers throughout the Sealed Temple are as great as those found in the Ashen Plain and Mormaz’s Temple. You’ll face tough temple warriors and a mixture of melee and magic-using adversaries. Increase your resistances if possible as you’ll face possible damage from poison, fire, cold, and electricity. Tackle the magic-users on sight if possible to avoid their damaging ranged spells and their ability to resurrect slain troops.
The quest states you must extinguish the braziers--small lit cauldrons of fire--scattered throughout the Sealed Temple. An indicator at the top of the screen reveals the total number of braziers and counts down each time you extinguish one (just stand next to the brazier and press the action button). Search every room and every corner of every room to locate the braziers. Look for the orange glow that encircles the brazier. Rotate your camera to observe a room from each angle; this will help spot each and every brazier.
Extinguish all braziers to open a skull-faced sealed door in the far back end of the temple. Maneuver through the open passage, defeat the remaining guards, and exit through the far passage and back to the Ashen Plains.
Back to the Ashen Plains
You exit the Sealed Temple back into the desert of the Ashen Plains. Defeat any remaining enemies if you wish (for added experience) and make your way back to Mormaz’s Temple.
Back to Mormaz’s Temple
Cross the large temple to King Mormaz in the back chamber. You may face enemies that weren’t killed on the first time through. Take the opportunity to maximize your experience gain through this area. Speak with King Mormaz and learn there’s a portal behind him. But the only way to access it is for Mormaz to die--and he doesn’t want to go without a fight.
Increases resistances will aid greatly here. Mormaz isn’t the only problem; he summons some minions (those you encountered throughout the temple) to aid him in battle. Pummel Mormaz from long-range with your own spells or ranged attacks or tackle him up close with your preferred weaponry and attacks. You’re notified that the portal is activated once Mormaz has been slain.
Tower of Clouds
The portal behind King Mormaz transports you high into the air--into the Tower of Clouds. The enemies populating the tower are a formidable mix of melee, ranged, and magic-users. You’ll also face towering centurions. They’re slow and best attacked at range. If you’re a close-range expert, block their attack and counter. Boost your resistances if possible to aid you against the spell attacks and enchanted weaponry. Even though you’re high in the sky, you can still use the gate scrolls to return to Rondo back on Water’s Edge to check his shop items, restock your potions, and adjust your inventory as needed.
Follow the Tower of Clouds until you reach another towering giant at its far end. This Zeus-like figure explains his relationship to the orc leader and also explains his oath to defeat you in battle! Use ranged attacks, long-range spells, attack him with quick melee strikes (maneuver around him) to take advantage of his slower movements. Defeat this cloud king in battle and watch as a cage lowers releasing Lazlo.
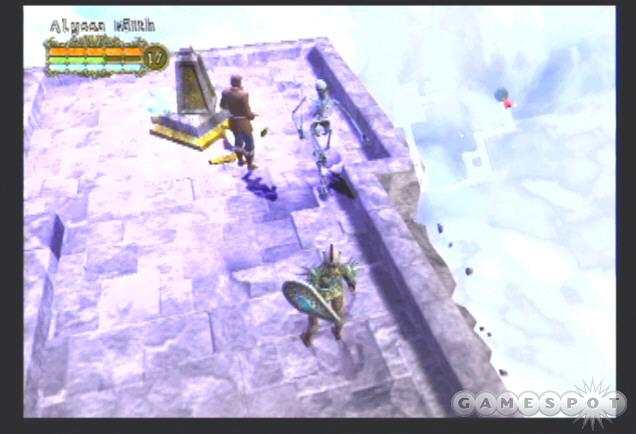
You automatically speak with Lazlo and learn of his disturbing condition. He tells you of a secret portal that even the giant is too big to move through. Lazlo also tells you about the horn. Follow him to the portal. Enter the portal.
The Frozen Sea
Lazlo tells you that he’s hidden pieces of a raft in this area; he did this so he could formulate an escape plan at some point. Five pieces of the raft are hidden among the shipwrecks.

Quest: Make a Raft--Gather the pieces of the raft that Lazlo has hidden inside the ships.
Battle all sorts of walrus and polar bear-like creatures throughout this icy and snow-covered area. The raft parts look like barrels, oars, and wrapped packages. Find them adjacent to the wrecked ships scattered throughout the area. Approach each raft part and use the action button to pick it up. An indicator at the top of the screen reveals how many parts have been collected.
Once you’ve gathered all the pieces, you’re told to return to Lazlo to find a good place to construct the raft. Return to Lazlo and speak with him. Once he leaves, continue down the path where he stood and follow the indicator to Bronzeholt.
Bronzeholt
This is a very short section with a few enemies similar to those creatures you encountered at the Frozen Sea. Just continue along the path until you reach the dock. The raft is constructed nearby. Approach the raft and use the action button to launch.
The Depths
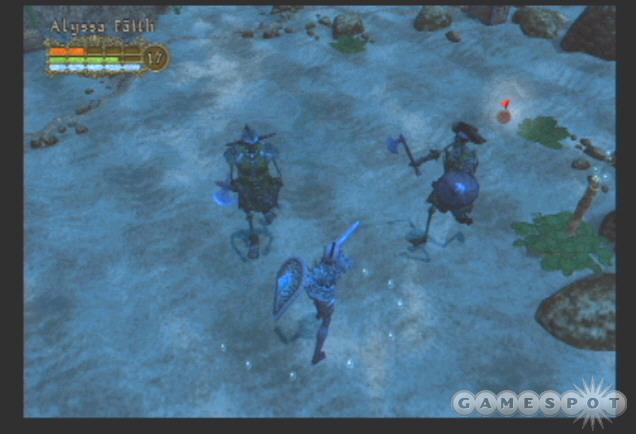
You’ve reached another underwater section (thanks to Kerriel, you can still breathe!) but it’s much wider and larger than the underwater sea caves you explored earlier. Undead still populate these depths so weapons and spells effective against them will certainly be to your advantage. Explore this wide chamber to find the entrance to its second level on the opposite side as the entrance.
The second level closely resembles the underwater sea cave from earlier. It has tight, winding hallways. Battle your way through the cave’s undead occupants to the final chamber. Here you’ll encounter a large sea creature protecting the Horn of Ill Omen you’ve sought throughout the act. The encounter is similar to other boss battles. Ranged weapon and spell attacks will be the most effective; since it’s a melee creature it’s to your advantage to steer clear of its close-range attacks. If you want to battle head-on, block its strikes and counter with your best weapon assaults.
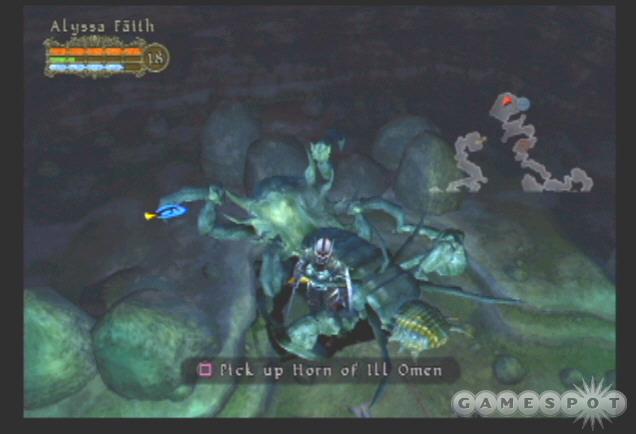
Pick up the Horn of Ill Omen off of the sea floor and use the nearby portal to return to the Water’s Edge. Time to complete the first quest of the act: giving the horn to Davel.
Back to Water’s Edge
Once at Water’s Edge, return to the first island you explored as the act begun. Speak with Davel with Horn in hand to complete the quest. His first words should give you an indication that something isn’t quite right. You were tricked! Davel is the orc leader in disguise. And now you’ve handed over the very weapon he needed.
Act IV
"It has been decided, the impending war was to be halted. Somehow, Innoruuk’s Army would be destroyed, or Norrath would fall into an era of misery and suffering...a time foretold as the Era of Hate."
City of Khathuun
Speak with Gol Nazyn near the town entrance. He’s also the act’s shopkeeper. He immediately discusses his prices--which are abnormally high--and gives you a way to remedy that. He’s looking for seven curiosities scattered around the dungeons. Bring him the curiosities and he’ll lower his prices and include an additional reward.
Quest: Gather the 7 Trinkets for Gol--Hidden in the Dungeons of Khathuun are seven trinkets; gather them all and bring them to Gol Nazyn for a reward.
Explore Khathunn (break some crates, search some chests) and discover that the residents (except for Gol for now) aren’t very friendly. In fact, they attack you on sight! These enemies are a combination of melee, ranged, and magic-users. Protect yourself by increasing resistances against magical spells. You’re searching for the entrances to the Khathunn dungeons. They’re positioned along the edges of town. It doesn’t matter how you tackle these dungeons and most are virtually identical in the beasts you’ll face inside.
Dungeons of Khathuun
The creatures occupying the Khathunn dungeons look like walking eyeballs. As timid as that may sound, the reality is much different. These creatures are some of the most vicious in the game. The larger versions are particularly brutal. If the enter close proximity to your character, expect a quick, vicious assault; one that can drain your health in a matter of seconds. Furthermore, it’s tough to counter these quick attacks because you’re being assaulted so quickly that you can’t get off strikes or spells.
Keep these creatures at a distance if possible and weaken them with any ranged weaponry or spells you might possess. If you do battle them at close-range, attempt to lure solo enemies away from the pack and engage them in single encounters (or against just a few enemies) to avoid being throttled and surrounded by a gang of foes.
The curiosities that Gol Nazyn seeks are scattered through the Khathuun dungeons and even within Khathuun itself. Moving through one of the dungeons sends you into North Khathuun and additional dungeons. Search the grounds for the glowing outline of the small curiosity trinkets that Gol desires. There are seven in total and you can return any number to Gol at any time (they’ll be removed from your inventory).
Maneuver through all unexplored dungeons and search every corner of them (and Khathuun itself) for the seven small curiosities. Return to Gol once you have found a total of seven.
He rewards you with lower prices and something he’s trying to get off his hands for a long time--a piece of Innoruuk himself. This "shard of hate" is automatically entered into your inventory. Take the chance to shop with Gol. His prices are fairer now and you’ll need the upgrades and full stock of health and mana potions for the dangers ahead. Soon you’ll be in a big battle and won’t be able to return to Gol for additional wares.
After receiving the shard, make your way to the center of town. A cut scene interrupts your advance; a door opens releasing additional residents and all are not pleased to see you still hanging around. Defeat these adversaries and enter the open door and into the arena.
The Arena
You’re initially surrounded by an army of humanoid enemies. These foes are extremely fast and approach from all sides. Make a hasty retreat and attempt to split the group into more manageable numbers. Any stun attack or spell should be used to help manage the enemy numbers. Use your most potent close-range spells or attacks to counter the speedy enemy groups.
Defeating the first army unleashes a second. It’s smaller but still a formidable crew. They’re mammoth orc warriors and approach from all sides. Their abilities seem random so you may face a few with enchanted weaponry; any resistances boost you possess will prove extremely useful. They’re much slower than the first group so you can use ranged attacks and spells more easily.
Crushing the orcs cues your main adversary to make an appearance and spout evil taunts in your direction. He unleashes the arena beast, likely the toughest foe you’ve faced thus far. The beast’s long neck provides extremely long range. He can strike you from a distance so if you are planning to use ranged attacks or spells be sure to keep far away and out of the beast’s long range. Even attacking the beast’s rear at close-range leaves you susceptible to its attack.
Use the pillars that encircle the arena as help against the beast. Run behind and through these pillars. The beast can’t maneuver around these structures very easily. The beast’s hesitation and lack of mobility provides an opportunity for you to make your assault. Eliminate the beast and you’re rewarded with a second shard of hate.

Exit the arena and return to the city. Move down the unexplored alley (combating any enemies impeding your progress) and find the blockage ahead. Use the shards of hate in the lock on the floor to open the passage into the next area.
The Hanging Gardens
The Hanging Gardens is a short map filled with more undead troops. Some of the recesses can be confusing to navigate. Maneuver around them to find the route deeper into the garden. Your goal lies at the far end. Approach the circular pit in the ground to conclude the act and enter the final stage of your journey.
Act V
"It seemed to be the beginning of the end for the people of Norrath. Innoruuk’s Army had assembled, the planar barriers were about to fall, and it seemed as if nothing could stop his advance. Yet as the Army of Hate prepared itself for war, a strange presence was felt in the darkened alleys of Innoruuk’s Plane. A dagger, which not only threatened the heart of his army, but the black heart of the Prince himself. And so, with victory and ruin balanced on the edge of a blade, Innoruuk was forced to take matters into his own hands."
The Plane of Air
Approach and speak with Natasia. She’s been waiting for you and tells you that you’re to return to the Plane of Hate as the next part of your journey. Natasia also serves as this act’s shop. Take the opportunity to upgrade your weaponry, equipment, and jewelry and stock up on health and mana potions.
Before following her instructions, explore the Plane of Air and activate the portal nearby. Return to Natasia when you have concluded your exploration and tell her you’re ready to return to the Plane of Hate.
The Plane of Hate
Cross the vicious Plane of Hate; it’s covered with speedy ghouls and an assortment of melee, ranged, and magic-using adversaries. Added resistances will aid you against the magic users, which should be taken out as quickly as possible. Move slowly across the plane and avoid a battles that contain magic users and fast ghouls, which can catch up to you when you’re trying to chase down the magical adversary.
Traverse the rocky plane to its far end. The bridge there appears to be out. Turn around and approach a doorway across from the bridge. You’re told it doesn’t open either. Turn back around and move toward the bridge to initiate the cut scene and a boss encounter.
Battle this impressive looking minion at the edge of the Plane of Hate. He’s not as challenging as some of your recent tougher engagements. Use your character’s preferred attacks. Ranged and long-range spells will certainly prove the most lethal but a bruising barbarian or an engulfing darkness-wielding shadow knight should have little trouble as well.
Cauldron of Hate and the Halls of Despair
You must find a way to destroy the barrier between the Cauldron of Hate and Innoruuk’s lair. To do so, you must guide souls through the Halls of Despair and into the Plane of Air.
Quest: Destroy Innoruuk’s Barrier--Lead the souls from the Cauldron of Hate through the Halls of Despair to the Plane of Air.
You begin in the Cauldron of Hate. Move around the area and three souls will appear around you. Be sure to activate the portal down here by standing close. Lead the souls toward one of the doors along the area’s edge; this moves into the Halls of Despair.
The challenge is to keep the souls safe from the enemies that occupy the Halls of Despair. Also, steer clear of the hazardous lava scattered throughout the halls. Stand in the lava and you burn to a crisp immediately.
The enemies throughout the halls will key their attacks on your souls--even to their detriment. Maneuver cautiously into a new room and lure the closest enemies toward your position. They’ll likely ignore you and head straight for the souls. As they move toward the souls, pummel them with ranged attacks, spells, or melee attacks. Watch your souls carefully as its easy to lose track of them and then all of a sudden they’re under attack by enemy warriors. Stick between the souls and any enemies. If all three souls perish, you must start over. If any survive, you’ll reach the entrance to the Plane of Air and transport to Natasia.
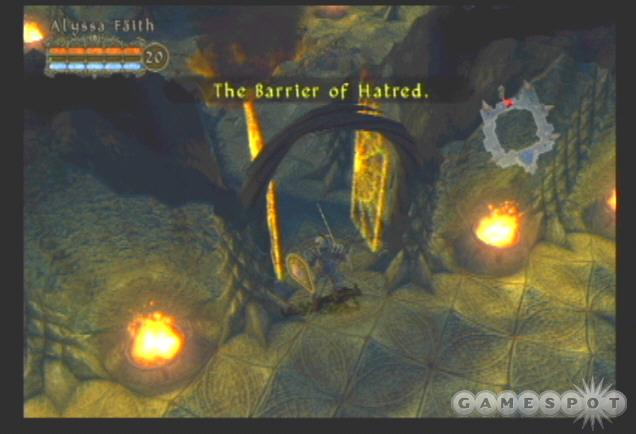
Repeat the process (using the portal to return to the Cauldron) until enough souls have been collected to remove the barrier from the Cauldron of Hate. Be sure to save your game in the Plane of Air once all souls have been collected. From this point on, the game ends abruptly at failures and you’ll have to reload a save game, not a checkpoint, to resume your progress. Save after the Cauldron to avoid playing the section over again.
With sufficient souls rescued, move back through the portal to the Cauldron of Hate and continue through the open Barrier of Hatred and into the pit ahead.
Innoruuk’s Lair

Before facing Innoruuk, you must break the five seals that imprison Firionia Vie. The seals are the large stone skulls around the perimeter of Innoruuk’s Lair. Destroy each one to set her free and complete the objective. It’s best to steer clear of Innoruuk during this task. Move away from him on sight and proceed toward another seal. Work your way around the perimeter of the lair and out of Innoruuk’s line of sight. If you’re struck down, the game ends in an Epilogue. To try again you’ll have to reload your last save game, which hopefully is after the Cauldron of Hate!
Back to The Plane of Air
Freeing Firionia Vie completes the task and transports you back to the Plane of Air. You must purge yourself of hate before facing Innoruuk for the final confrontation. Move along the edge of the plane and find the branch that leads to the purging. Use the action button to initiate the purge. You’re automatically sent back to Innoruuk’s Lair.
Back to Innoruuk’s Lair
Innoruuk uses a ranged fireball attack. Dodge it by maneuvering between the projectiles or keeping your distance. His close-range attack is particularly deadly. He swings his gigantic hammer with impunity and it doesn’t take more than a few solid strikes to put you down for the count.
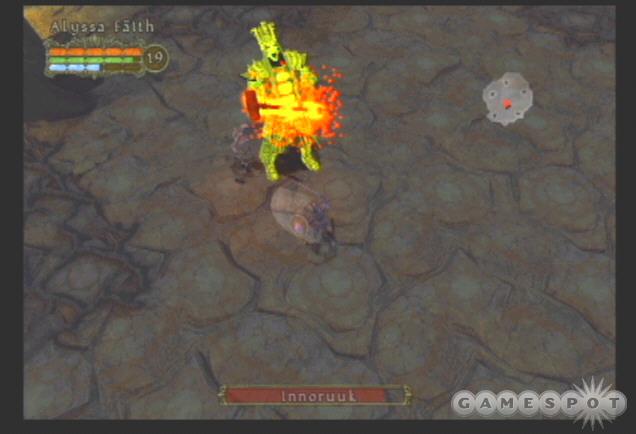
The key is to strike Innoruuk so he loses his hammer. Without his hammer, he’s extremely vulnerable to your assault. You can help extend the damage during his vulnerable moments by inflicting elemental damage. For instance, poison causes him to stutter giving you more time to score successful strikes. Cold damage slows him down and fire damage causes additional burning damage.
Keeping your distance is a good idea when Innoruuk carries the hammer. If you’re a barbarian, get in strikes when you can and turn up the heat once he drops the hammer. Defeating Innoruuk completes Champions of Norrath. Now it’s time to start all over again on the next difficulty level!
Got a news tip or want to contact us directly? Email news@gamespot.com
Join the conversation