Bulletstorm Walkthrough
Dead Echo is out for revenge. Our Bulletstorm Walkthrough provides a full walkthrough, strategies for collecting skillpoints, and locations of hidden collectibles.
Dead Echo is out for revenge. Our Bulletstorm Game Guide provides a full walkthrough, strategies for collecting skillpoints, and locations of hidden collectibles. Here's what's inside:
- Walkthrough: A walkthrough of the single player Campaign mode
- Secrets: Locations of news robots and bottles hidden in the Campaign
- Xbox 360 Achievements: Boost your Gamerscore with a huge list of Achievements
- Playstation 3 Trophies: Gain new Trophies for your collection
Act 0: Prologue
Road to Hell
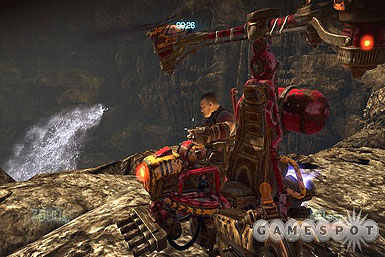
Start off by complete two sets of quick time events: Punishing the bounty hunter and closing the airlock. Don't worry so much about quick time events in Bulletstorm, the game will automatically freeze if you take too long and not punish you for making mistakes. Follow Rell to meet up with Doc and head through the lift to the bridge.

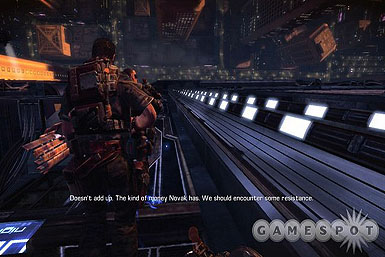
You'll be in a flashback to a few years earlier. You'll be using Doc's boosts to walk on the side of a building. March down the wall and kick the elevator out of the way. Continue behind the rest of the team and breach the window ahead. Shoot Novak during the quick time event and get ready for a short fight with Sarrano's guards. Your allies will provide enough cover for the encounter to end quickly.
You'll be brought back to the present and will discover that Ishi is fairly scratched up. Help carry him to the infirmary and listen to Doc's plan. Follow Rell and you'll be ambushed by three Skulls--a band of thugs on the planet. Take them down with melee kicks to send them into the burning wreckage. After the fight return to Rell and exit out of your ship in style. Don't rely on your gun too much: using kicks will be more useful in the long run.

Watch a scene and you'll gain the use of the Echo Leash. Use your new toy to open the capsule and grab the parts to save Ishi's life (thankfully Rell will lug them for you). Use your Leash to get passed obstacles and throw your enemies into hazards.
Head back to the ship and give the parts to Doc. The Skulls will strike and there is little you can do. Watch as Doc dies and blow up the canister in Rell's arms to complete the prologue.
Act 1: Stygian Badlands
Just Like the Old Days
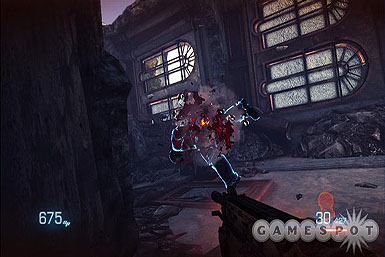
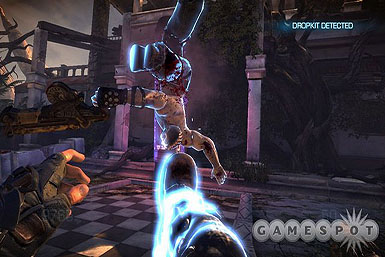
Make a path through the wreckage by detonating explosive barrels and kicking scraps out of the way. You'll soon arrive at a Dropkit. These can be used to upgrade your weapons and check status on Skillshots. Simply Leash the kit to access the terminal. The first order of business is to gain 1,200 skillpoints to gain upgrades. Leash the enemies ahead to gain Voodoo Doll Skillshots worth about 100 points each.
The next area is filled with cacti and barrels to gain more points through Pricked and Enviro-Mental shots. Above will be a turret gunner, but they can be easily dealt with by leashing them down from their perch. As you move up the stairs you gain points by quick reacting to "critical events". Press the on screen button right away to maximize your bonus. When ready, head down through the gate and on to the next chapter.
Last Train from Explosion Town
Start by using the dropkit to replenish your ammo and buy upgrades as needed. Next slide down the water fall and kick the Skulls below. There will be a door ahead that Ishi will bust through, leading to the Skull's storage area. Complete the critical event reaction and then destroy the docked copters hanging above.
Leash and kill the enemies that arrive. Critical reaction again to spot a manned copter that can be rifled down for a Skyjack Skillshot. Leash the controls to the door and head outside. Destroy another copter and take the lift down. Kick in the barriers to Pancake the enemies and head up the ramp to a turret gunner. Leash this fool and pilfer his minigun. You'll want to use this on the pack of choppers that appears.


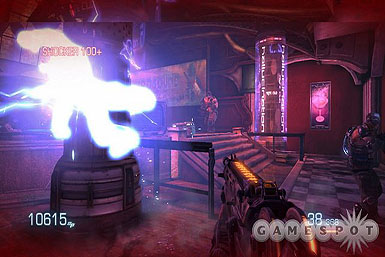
After the battle, move ahead to gain some Shocker kills and a crictical event with Ishi. You'll next face off with a minigun miniboss. You can use the dropkit to gain Peacemaker Carbine charges. The alternative is to simply run behind the area the boss emerged from and grab a minigun of your own. Use this new tool to kill the boss and any cronies that arrive.
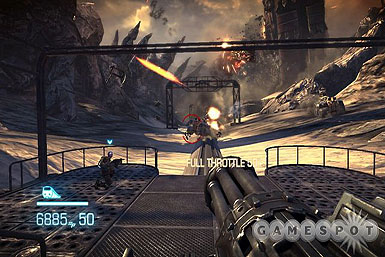
Following the next cutscene, you'll be riding on a train. You'll have access to a minigun to help take down tanks and vultures and minigun bosses quickly. A giant wheel will appear in the distance and fire off spinning torpedoes. When the torpedoes come, shoot them down to keep from dying. Take the wheel off coarse by shooting the tanks on either side: First the right and then the left.

Whatever it is, it's Pissed
Run through the lower ridges and you'll spot a Vulture chopper in the distance. Take it down along with the other Skulls on foot, and enter the cave. There are tons of eggs that need to be shot up. However, this will waken some natural beast in the distance. Run like hell and give Ishi support to fix up the vulture, making your escape and ending the first Act.
Act 2: Paradise Lost
Damsel in Distress
Follow Ishi and crouch under the first barrier. Slide down the mountain and you'll be near the outskirts of the resort town. Leash the broken pipe to create a passage. There will be a look trigger to gain some extra points.
You'll fight a group of enemies: two are normal foes but one is too quick to leash. Get in close and blast this thug with your rifle. After the fight, continue down the hill to face more enemies with rockets. This is a good place to score Graffiti and Fish Food, but keep in mind that knocking enemies into the water will prevent you from collected their ammo. Leash the nearby dropkit to spend points as needed before moving on. There will be another robot as you turn the corner to the right.
The next area has some explosive barrels and enough cacti to score up Pricked Skillshots. A look trigger will acquire again as you enter the next zone: a retro disco. There are two bottles of booze, so drink up and get ready to brawl. A minigun boss will appear for some Bossed points. Take his drop minigun and clear out the enemies that emerge from the left. Remain on the disco floor and you'll gain the disco inferno bonus. Before exiting head to the other end of the club and grab two more bottles of alcohol.
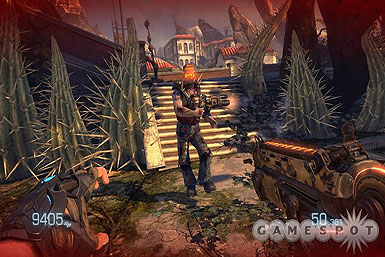
Outside you'll face off against enemies that are up on a ledge. Worse yet, some of them are too fast to be leashed. Take cover at shoot out the rocketers before cleaning up the slower enemies. Head down the stairs and repeat the same process. Grab the bottle booze and press the switch to meet a new group of enemies.
These guys are armed with Flailgun, but instead of firing them normally, they will charge you and place it around your neck. You can survive a single blast, but it will leave you gravely weakened. To prevent this, shot the Flailguns out of their hands.
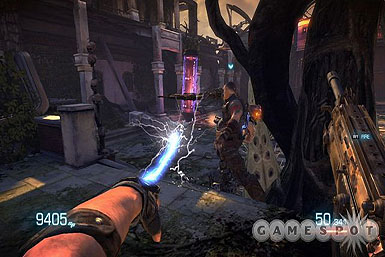
Drink up and smash the robot ahead. Run over the roof tops and you'll be in a great place to score Vertigo, Shocker, and Sucker. There is even a minigun boss that can be taken down with a Enviro-Mental shot to the explosive barrels behind him. Head to the town square and meet Trishka. She will run off, leaving you to climb over the broken trees on the right.
Smash the nearby robot and arm your Flailgun. Enemies will dash toward you, but your explosive force will be enough to rack up Bombshells and Gang Bangs. Shoot out the large disco ball above and move to the final fight. There is a minigun boss who fights like all the other incarnations. After nailing him with a Bossed, grab his gun and mow down the remaining enemies to finish the chapter.
Worst Family Fun Vacation Ever
Start off the chapter by destroying the news robot near the start. You'll face off against shotgun wielders that are tougher than any of the previous Skulls. However they can be easily kicked into the miniature buildings for Kill-O-Watt bonus. Take the new Boneduster (Most likely replacing the Screamer) and take down the rest of the forces.Join Ishi at the terminal and quick time event passed the giant Mechaton. Leash the controls to open the gate and head up the ladder on the right. There will be booze on the ground as you emerge from the hole.
Pile through the next wave of enemies and you'll come to the Mechaton again. Even though Ishi instructs you to keep firing, it isn't nessacary to waste ammo. Just wait for him to open the door and continue on. Move down the steps and quick time event the Mechaton's controls from the Skull's hands. You can now fully control the Mechaton with your secondary/charge button and fire lasers as your primary.
Order the Mechaton to clear a path through the two doors as you make your way up the ramp. Take cover to avoid fire and order the Mechaton to kill off the Skulls. Concentrate its laser fire on the minigun bosses before taking done the lesser thugs. Afterwards order the Mechaton to clear a path by busting the van blocking its path.
In the next section concentrate fire on the choppers and leave the ground grunts for last. You'll first Sweep the enemies up front, and then attack those that emerge from the rear. Finally turn back to the front and clear out the remaining forces. Have the Mechaton destroy the gate and march off to the end of the chapter.
Act 3: The Dam
One Sniper Means a Dozen
The entire zone is collapsing and you'll need to exit out rapidly. Leash an escape and slide down to get to safety. You'll meet a new enemy: The Kreeps. They are fast so using the leash and kick wont work most of the time (unless they are close to a hazard). You'll also spot a sniper--avoid his shots by ducking behind barriers and run in close. Steal his rifle and take down the next wave of snipers. You can move the bullet to hit moving targets.The gate to the next area is malfunctioning and Ishi will try and repair it. Snipe down the enemies on the tower and Ishi will mess with the bridge controls. Next, shoot down the enemies across the water with your rifle. Move across the open gate and face the Kreeps at closer range.
You can use the water in the next area to get lots of Fish Food points. Also, enter the first building to destroy another robot. Passed the boats grab the booze and score some Intoxicated points. Once the hordes of weirdoes are dealt with, take the elevator down to the next Area. There is a robot and booze in the room, but concentrate on the Kreeps first. After killing the enemies Head on and finish the Chapter.
A Dam Fine Mess
You'll be surrounded on all sides by Kreeps, making it dangerous to come out of cover. If you've upgraded the Leash (Or have the spare points) use Thumper charges and your sniper rifle to take out the ambushers. Leash down the next bridge and use your shotgun to eliminate the Kreeps. Afterwards use your rifle to clean up anything that remains.Head underground and grab the booze to the right. Kill the enemies and head down the elevator to the fires below. Use the terrain hazards for Skillshots and your shotgun to take down the waves of enemies. You'll meet face-to-face with Trishka and head to a three way fight with the Kreeps and Skulls.
There is robot on the balcony to the right for your collection. Grab the sniper rifle and take down both groups of the enemies--there are less Kreeps, so it might be more helpful to leave them as distractions and kill off the Skulls first. There is another robot on the bottom and plenty of shotgun wielders. Use Vertigo as much as possible in this area to conserve ammo defeat the Skulls speedily. When Flailgun collars charges appear, kill them quickly and head for the dam.
Use your kick to knock Skulls into the dam's turbines and gain hordes of easy points. Leash the charges to destroy the dam and collapse to the waters below. The Skulls won't be pleased and will deploy a few Vulture copters to flank your position. Help Trish and Ishi take out the Vultures on the lower level.
Act 4: Forbidden Zone
The Only Way Through
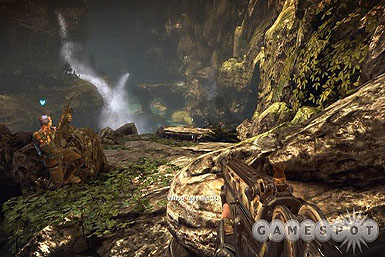
Kick down the first sign to form a bridge. The area is filled with fruit that can blind and stun the enemies by kicking the vegetation in their face. Since the foes are still too fast for your Leash, use your carbine rifle to take out the Kreeps with ease. After the fight, crouch through the path Trishka finds and kill off the robot. Leash the fan on the left to move to the next area.

The plants in the area will slurp up and eat up a lone Kreep, resulting in a critical event to gain some extra skillpoints. Kick down the next door and grab the cable to slide across the chasm. Here, there will be legions of Kreep snipers coming up next so use your own Head Hunter sniper rifle to deal with them.
After another cutscene, you come to an area blocked by a barrier of cars. Trishka will ask you to solve this problem in a few seconds. Take down the globe behind you to clear a path. If you stall, Trishka will do it for you. Beyond the barrier enter the tent on the left to get another robot. As you're attacked by Skulls use the cacti to gain some Pricked points. Next, a new Bouncer boss will appear. Shoot its backpack to blow off the boss's armor; he will now be vulnerable to his body and helm shots just like the minigun boss.
Maneaters Prefer Tight Spots
This stage introduces psychotropic spores that will blur vision. They can however be used against the enemies to confuse them as well. The wild plant life will pull Ishi down a hole, leaving just you and Trishka for this chapter.
Use the cacti and maneater plants to take down the Skull hordes. If you get caught on a maneater, escape quickly as it can mean instant death. There are also a lot of Flailgun collar enemies that can be used to score Bombshell points.
Destroy the robot ahead and take down the Banshee cruiser and Vultures the Skull summon. A mingun boss will appear, so take him down and grab his gun to easily massacre the rest of the Skulls. Use the maneaters to kill off the remaining enemies, but be sure not to get attacked by the plants yourself.
Stock up on ammo as you will need a huge supply to take down the next boss. Use your charges and normal carbine shots to take down its first meter. Afterwards, it will attempt to regenerate, so stop it by shooting down the glowing balls on its body. After all of the orbs are cleared off, it will enter a new form. Avoid the spores and mash the button to move out of the way of it's mouth. Take out the tentacles that emerge to keep it from regenerating again. Use your charges from the carbine, Flailgun and Bouncer.
Itchin to Crumble
You'll meet up with Ishi again at the start of the chapter. Travel with your two allies who will show the path through the crushed building. Use your leash to Voodoo the Skulls and take the mounted machine gun to mow down more the enemies from a far. Call down the elevator and head up to the next area. There will be another robot to mutilate, but otherwise continue to the next area.
There are lots of Skulls here, but also lots of terrain hazards to score Vertigo and Voodoo points. Run ahead and cross the window floor quickly, as it will crack under your weight. Stop to grab a beer on the ground and keep going. Take down the minigun boss and use Voodoo to score loads of points. Soon, the building will crumble and you'll need to run like mad. Ignore the enemies and just keep going to finish the Act.
Act 5: Burnout Paradise
Crash Resistant
There is a robot at the start that you should eliminate. For this chapter you Will fight nothing but Skulls over and over in a single location. Some minibosses will appear and you'll need to blast their backpacks to kill them. After several waves, Flailgun collar enemies will also appear for Bombshell points. Use Vertigo as much as possible by kicking Skulls over the ledges. After some time Trishka will repair a broken tram; take it for a ride and you'll get a critical event reaction to spot a new enemy type: the Burnout.
How Do We Solve This
You'll be stormed by lots of Burnouts right from the start of the chapter. Shoot the red glowing balls to kill them as any other attack won't harm them. Both the Boneduster shotgun and Flailgun work well due to their large area of fire. After the first fight, there will be a robot and dropkit in the next zone. Slide under the grate and access the controls on the other side quickly to get Trishka and Ishi in the room. Use the Flailgun and Bouncer to take out the enemies quick. Grab booze in the center of the room and get prepared for a grueling dash.The Burnouts in the next area will keep respawning non-stop. Use a Thumper charge if needed, but otherwise keep running. You'll come to a giant Burnout boss that can't be killed with weapons, but can be stunned. Stun it with the Flailgun and push it with kicks into the helicopter to gain Minced Meat for 1250 points.
I See We're All a Bit Upset
Climb across to the hotel and gain some critical event points. Inside will be a storm of Kreeps that are best dealth with weapons rather than trying to Leash them. After a scene, You'll split from Ishi and follow Trishka to the zone below. Time your climbing to the next place for extra points.
Crouch below the pipes and follow Trishka further. More Burnouts will attack, followed by a giant Burnout that will kill itself in a pool of fluid. Climb up the ramps and ladders to return ot the surface. There is booze as you exit the hole, so feel free to drink it up. There will be Skull pipe wielders and a robot in the next room. On the outside, you'll run into more enemies and there are plenty of hazards for extra points. Use a critical event reaction to spot a Bouncer boss. As with before, destroy the boss's armor to expose their weakness.
After the fight, there will be a robot leading to the next area. Slide under the gate to arrive at a jammed bus. Leash it out of the way and a gang of Burnouts will near. Use the Flailgun or Vertigo them for quick kills. Kick the car down to make a path and spot the Hekaton for some more points. Meet back up with Ishi and take the Skull copter into the air. Focus some fire on helping Ishi and blow up rogue Vultures. However, your main objective and key target is the rampaging Hekaton.
Act 6: To the Ulysses
Daddy'll Get You Out
With Trishka out of the picture, you'll team up with Ishi and Sarrano for this fight. First, destroy the news robot to knock another one off your checklist. There will be a minigun boss that can be killed for Bossed points. However, the main thing is to grab his dropped gun. Use it to clear out most of the remaining Skulls. If the minigun runs low on charges you can resort to using the terrain for large amount of Outburst skillshots.
A critical event reaction will pop up next, revealing a new Penetrator miniboss. His week point is the inverse of the Bouncer boss: aim for the belly to destroy his armor defenses. Take the Penetrator drillgun and add it to your arsenal. If you wish, take the time to upgrade it further. Even with your new gadget, your Leash is the best bet in the next area for racking up Outburst and Friendly Fire Skillshots.
You'll soon grab another dropkit for replenishing supplies; there is also a robot that can be destroyed. You'll face another Bouncer miniboss for points and several Flailgunner charges that can be killed for up to x4 Bombshell multiplier. Smash another news robot and get ready for the chapter's final battle.
Kick and detonate use the lamps around the area to score Afterburner and Enviro-Mental skillshots. An elevator in the distance will summon both Penetrator and Bouncer bosses. Since you're already near the end of this fight, feel free to let loose with any stored charges.
Bad Trouble a Knockin'
For the bulk of this chapter you'll want to switch out your weapons for close range alternatives. Arm yourself with Boneduster along with either the Bouncer or Flailgun. Within the first few minutes you'll sink into a river of toxic waste. Rush out of the deadly mess and get back to safe ground. You'll face off against Burnouts in the next few areas, making your explosives and shotgun very important for clearing them out.Next, complete a critical event reaction to spot a strange type of mutant (Your allies fail to notice it, however). You'll be separated from your allies and will have to go in alone for a bit. The Flailgun is your best bet for taking out the Burnouts on your own. After scoring up Gang Bang and Minefield skillshots, you'll rendezvous with Ishi again. Kill the nearby newsbot and use your Leash to help out Serrano.
Kreeps will appear from the rafters and take down the remaining Burnouts. Switch to a Head Hunter rifle via a dropkit and out snipe the Kreeps; they will first attack from in front, then move to the other side of the room, forcing you to switch up your cover. After concluding the Kreep fight, slide under the gate, leash the bridge and shoot via quick time events. During the process you'll get a good look at the Mutates from earlier.
These new enemies will explode on impact, making it very important to kill them quickly. Head to the lift ahead and power it up. The Mutates will climb up the side and attempt to destroy the gears, which could spell doom. Be quick with the Flailgun and annihilate the fiends before they can do you in. Even after reaching the top, time is short. Dash like mad through the closing door way. Take some breathing room to collect another bottle before arriving at the Ulysses.
Ponderin' the Bodies
At the start of the Act complete a critical event trigger to spot a few Burnouts. Like always resort to the Flailgun or kick them Voodoo Doll style for easy kills. Use your Leash to clear a path and jam the next door by leashing over a crate. The Ulysses has a gas leak, making it unwise to use firearms. A single shot could ignate the entire ship. Instead stick to only the Leash and kicking until further notice. The lack of guns isn't really a handy cap, as there are many fans throughout the ship for Suck Skillshots.You'll come to the ship's power core where rampant energy will be flowing. It's too wild to just advance through. However, your Leash can stop the energy for a short time, allowing you to pass over any charged obstacles. Flailgun the remaining Burnouts and you'll come upon a giant Burnout boss similar to the one from Act 5. This time Flailgun it, Leash and kick to knock it into the livewires; this kill will also net you the Grilled Meat skillshot for a cool 1250 points.
You'll come to a nuke where Sarrano will instruct you how to disarm it. Follow the quick time event to be tricked into actually arming the nuke. Follow Ishi around the ship to try and locate an escape route. Leash and climb accordingly to the on screen command and you will soon be saved by an old friend: Trishka.
Act 7: The Departure
That Thing's Leaving Without Us
It's all out mayhem as you enter yet another three way brawl between your team, the Skulls, and the Kreeps. The Skulls out number the Kreeps, so concentrate on the former first. Go for the Skull minigun boss and use his dropped weapon to clear out the remaining Kreeps. There are lots of terrain hazards to easily score up Pricked skillshots and points. Just around the corner is another bottle of alcohol and a news robot.Your team will split up for now: Trishka and Ishi will take the low ground while you cover them from up high. Use your kicks to throw down the enemies and let them become your allies' problem. Smash through the next door to find yet another newsbot and a tasty bottle of beer. A Penetrator boss should be your next key target. After killing him off with belly shots, reload everything at a dropkit and get ready for two Bouncer bosses attacking your friends.
You'll come to a small room filled with bosses and other Skulls. First kill a minigun boss, followed by a Bouncer boss. A new horde of Skulls will enter with a second minigun boss and a Penetrator boss. As with other multi-miniboss fights kill the lighter armored foes first before going for the beefier foes. Soon a timer will start up. You have only two minutes to make it to the escape ship as it flies off. Not nearly enough time to just run, instead leash unto the ramp to complete the chapter.
I Don't Hold You Accountable
It's late in the game, but you'll now be introduced to a new enemy type: The Echo Shocktrooper. They wield Peacemaker Carbines and aren't afraid to abuse the charge abilities. A single charge from their guns can put you in low health, making it more necessary than ever to take cover. Keep in mind that beacuse you are now on a Confederate ship, there are a sparse amount of dropkit--to gain ammo you'll need to kill the enemies and take their guns.In the next area you can easily quell the batch of Echoes by leashing and hitting buttons to eject their cargo pods. You'll at first be able to jettison six soldiers, followed by another wave in the next room. After his fight Trishka will march off on her own, leaving just you and Ishi. Continue on and leash the turret gunner from his post. Man the minigun and use it mow down Sarrano's troops. You'll be flanked on both sides and Ishi will be busy with the door.
It's up to just you clear out the room. Your Boneduster is great for taking out the Echoes that attempt to rush you. You can also Leash and kick for some handy terrain kills such as Shocker. If you really run low on weapons, just stick with your own carbine and any remaining charges. After clearing the guards, it's time for the showdown with Sarrano: It's no battle however, just a quick time event that will leave you stranded on the planet.
Hook back up with Trishka and use the dropkit to arm up with whatever you like. Head to the Ulysses and you'll have to fight it out with more Echoes. Nothing too special about the fight, but they do have a height advantage. Enter inside the ship and you'll be greeted by a 50 second timer. The Echoes will try adn block you, so make a mad dash for the escape pods. A lone soldier will try to steal the last escape pod from you, so kill him and enter the craft to finish Bulletstorm.
Xbox 360 Achievements
| Achievement Name | How To Earn | Reward |
|---|---|---|
| Destructive Beat | Complete the Campaign on Very Easy or Easy Difficulty | 20 |
| Violent Melody | Complete the Campaign on Normal Difficulty | 30 |
| Major Malfunction | Destroy 50% of the Newsbots in the Single Player Campaign | 10 |
| Insecticide | Destroy 50% of the Electroflies in the Single Player Campaign | 10 |
| Space Pirate | Drink at least 20 bottles of Nom Juice in the Single Player Campaign | 10 |
| Straight Edge | Destroy at least 20 bottles of Nom Juice in the Single Player Campaign | 10 |
| Fits Like a Glove | Meet your new best friend | 15 |
| Patched Up | Receive a software upgrade for your leash | 15 |
| All Bow to Heavy Metal | Big head, big headache | 15 |
| Size Matters | Use your biggest weapon | 15 |
| Damsel in Distress | Rescue the princess | 15 |
| Destroyer of Worlds | Cause major destruction | 15 |
| Weed Killer | Tidy up the back yard | 15 |
| Minced Meat | Take out the Mall's biggest customer | 15 |
| Grilled Meat | Prepare a big meal using improvised electric stove | 15 |
| Armed and dangerous | Grow as a person, experience betrayal. Again. | 15 |
| Stowaway | Catch a ride | 15 |
| Pointless | Execute at least 10 Headshots before you find the first DropKit | 10 |
| Disco Inferno | Kill all enemies without leaving the dance floor in the city outskirts | 10 |
| Chop-Chopper | Kill the enemy inside the airborne helicopter in the park | 30 |
| Red Barrels | Explode all the red barrels on the rooftop while in a helicopter | 10 |
| No Man Left Behind | Kill all enemies while escaping from the collapsed building | 20 |
| I might be late | Kill all enemies during the sprint to the jumpship | 20 |
| Just one last thing | Kill all enemies before you reach the escape capsule | 20 |
| Om Nom Nom! | Feed a flytrap with a Nom parasite | 10 |
| Wannabe | Perform 10 different Single Player Skillshots | 10 |
| Somebody | Perform 25% of the Single Player Skillshots | 20 |
| Big Cheese | Perform 50% of the Single Player Skillshots | 30 |
| Celebrity | Perform 75% of the Single Player Skillshots | 40 |
| Remembrance | Play three different Echoes | 10 |
| Shooting Star | Get at least 1 star on each of the first 14 Echoes | 10 |
| Bounty Hunter | Have a total of at least 75,000 points in Echoes Mode's total high score | 20 |
| Guerrilla Tactics | Execute at least 25 different Skillshots in one Echo round | 10 |
| Halfway There | Get at least 21 stars in Echoes Mode | 15 |
| Old School | Finish an Echo round without executing a single Skillshot | 15 |
| Enforcer | Get at least 15,000 points in one Echo round | 20 |
| Star struck | Get 3 Stars on 10 different Echoes | 10 |
| Like A Boss | Defeat a miniboss in Anarchy mode | 5 |
| Anarchy Master | Achieve a score of at least 50,000 as a team in Anarchy mode | 30 |
| Team Player | Complete 200 team challenges in your career in Anarchy mode | 10 |
| Final Echo | Achieve level 65 in Anarchy mode | 40 |
| Environment Master | Perform every Anarchy environment Skillshot | 20 |
| Brutal Chorus | Complete the Campaign on Hard Difficulty | 40 |
| Total Malfunction | Destroy all Newsbots in the Single Player Campaign | 20 |
| Master of Disaster | Earn 2,000 points or more at once | 40 |
| Supernova | Get 3 stars on each of the first 14 Echoes | 40 |
| Pest Control | Destroy all Electroflies in the Single Player Campaign | 20 |
| Blood Symphony | Complete the Campaign on Very Hard Difficulty | 50 |
| Golden Idol | Perform every Single Player Skillshot in the game | 50 |
| Hoarder | Have a total of at least 150,000 points in Echoes Mode's total high score | 40 |
Playstayion 3 Trophies
| Trophy Name | How To Earn | Reward |
|---|---|---|
| Destructive Beat | Complete the Campaign on Very Easy or Easy Difficulty | Bronze |
| Violent Melody | Complete the Campaign on Normal Difficulty | Bronze |
| Major Malfunction | Destroy 50% of the Newsbots in the Single Player Campaign | Bronze |
| Insecticide | Destroy 50% of the Electroflies in the Single Player Campaign | Bronze |
| Space Pirate | Drink at least 20 bottles of Nom Juice in the Single Player Campaign | Bronze |
| Straight Edge | Destroy at least 20 bottles of Nom Juice in the Single Player Campaign | Bronze |
| Fits Like a Glove | Meet your new best friend | Bronze |
| Patched Up | Receive a software upgrade for your leash | Bronze |
| All Bow to Heavy Metal | Big head, big headache | Bronze |
| Size Matters | Use your biggest weapon | Bronze |
| Damsel in Distress | Rescue the princess | Bronze |
| Destroyer of Worlds | Cause major destruction | Bronze |
| Weed Killer | Tidy up the back yard | Bronze |
| Minced Meat | Take out the Mall's biggest customer | Bronze |
| Grilled Meat | Prepare a big meal using improvised electric stove | Bronze |
| Armed and dangerous | Grow as a person, experience betrayal. Again. | Bronze |
| Stowaway | Catch a ride | Bronze |
| Pointless | Execute at least 10 Headshots before you find the first DropKit | Bronze |
| Disco Inferno | Kill all enemies without leaving the dance floor in the city outskirts | Bronze |
| Chop-Chopper | Kill the enemy inside the airborne helicopter in the park | Bronze |
| Red Barrels | Explode all the red barrels on the rooftop while in a helicopter | Bronze |
| No Man Left Behind | Kill all enemies while escaping from the collapsed building | Bronze |
| I might be late | Kill all enemies during the sprint to the jumpship | Bronze |
| Just one last thing | Kill all enemies before you reach the escape capsule | Bronze |
| Om Nom Nom! | Feed a flytrap with a Nom parasite | Bronze |
| Wannabe | Perform 10 different Single Player Skillshots | Bronze |
| Somebody | Perform 25% of the Single Player Skillshots | Bronze |
| Big Cheese | Perform 50% of the Single Player Skillshots | Bronze |
| Celebrity | Perform 75% of the Single Player Skillshots | Bronze |
| Remembrance | Play three different Echoes | Bronze |
| Shooting Star | Get at least 1 star on each of the first 14 Echoes | Bronze |
| Bounty Hunter | Have a total of at least 75,000 points in Echoes Mode's total high score | Bronze |
| Guerrilla Tactics | Execute at least 25 different Skillshots in one Echo round | Bronze |
| Halfway There | Get at least 21 stars in Echoes Mode | Bronze |
| Old School | Finish an Echo round without executing a single Skillshot | Bronze |
| Enforcer | Get at least 15,000 points in one Echo round | Bronze |
| Star struck | Get 3 Stars on 10 different Echoes | Bronze |
| Like A Boss | Defeat a miniboss in Anarchy mode | Bronze |
| Anarchy Master | Achieve a score of at least 50,000 as a team in Anarchy mode | Bronze |
| Team Player | Complete 200 team challenges in your career in Anarchy mode | Bronze |
| Final Echo | Achieve level 65 in Anarchy mode | Bronze |
| Environment Master | Perform every Anarchy environment Skillshot | Bronze |
| Brutal Chorus | Complete the Campaign on Hard Difficulty | Silver |
| Total Malfunction | Destroy all Newsbots in the Single Player Campaign | Silver |
| Master of Disaster | Earn 2,000 points or more at once | Silver |
| Supernova | Get 3 stars on each of the first 14 Echoes | Silver |
| Pest Control | Destroy all Electroflies in the Single Player Campaign | Silver |
| Blood Symphony | Complete the Campaign on Very Hard Difficulty | Gold |
| Golden Idol | Perform every Single Player Skillshot in the game | Gold |
| Hoarder | Have a total of at least 150,000 points in Echoes Mode's total high score | Gold |
| Dead Echo | Acquire all trophies in Bulletstorm | Platinum |
Got a news tip or want to contact us directly? Email news@gamespot.com
Join the conversation