Black Walkthrough
Criterion's Black has been making waves with some high-profile trailers. Now that it's finally arrived in stores, GameSpot's Walkthrough will get you through all of the game's many difficult fights.
Design: Randall Montanari
EA and Criterion's Black has been turning heads for the past couple of years now, first in back-room, press-only demonstrations, then busting out in more public trailers over the past half-year or so. With an emphasis on stylish action and huge explosions, Black is certainly a visual showcase for the systems it runs on.
Luckily for you, Black is also a pretty decent shooter in its own right. Although it doesn't have any multiplayer, it should satisfy your solo cravings for destructions, with its largely destructible environments and excellent animations. And, of course, the guns. Having been described at one point as "gun porn", Black contains some incredibly realistic renditions of real-world weapons. On top of all this, Black also features a shadowy (and more than a little melodramatic) plot featuring back-room dealings and one seriously flawed soldier.
GameSpot's Game Guide for Black features a full walkthrough, including tips on how to proceed through the game and a full fifteen videos to help you through the roughest parts of the game. Enjoy!
General Tips
Like Ducks In A Barrel
One of the tricks of the trade in Black is the fine art of shooting grenades after you've thrown them. When you throw a grenade at an enemy, they'll usually book it for cover in whatever direction will get them the furthest away from your payload in the shortest amount of time. They're fast, too, and will usually succeed in getting out of harm's way before the grenade detonates. Since you can't cook your grenades by holding onto them, your only real option when attempting to grenade an opponent will be to rely on the almighty shoot-the-grenade trick.
It's pretty simple, really; when you chuck a grenade, quickly bring your crosshairs back down to the area where you threw the grenade and start firing at it. While you might think that a grenade would be an awfully small target to hit, the game gives you the benefit of the doubt in most cases, and so long as your crosshairs are anywhere near the grenade, it'll instantly blow up, hopefully before your target is able to run. This is obviously going to be most useful against hard targets like masked and riot shield enemies, who can take a huge amount of damage before finally going down.
Know Your Enemies
There are three basic types of foes in the game: normal soldiers, masks, and riot shields.
Normal soldiers are pretty much just grunts, but there are around 1,500 of them in the Seventh Wave army, so you're going to have to take a bunch of them down before you complete the game. These guys wield SMGs, assault rifles, and RPGs, by and large. Shooting them in the chest is an effective way to take them down, but if you manage to get a headshot on them, they'll go down in one shot, accompanied by an appropriately satisfying "plink" sound as their helmets pop off.
Masks are buffed-up versions of normal soldiers, with metal masks on their faces to protect them from headshots. They also pack shotguns, which will let them do an extreme amount of damage when they get close to you, and a buffed-up amount of body armor.
If you manage to hit a Mask in the head from behind, they can still be vulnerable to headshots, since the mask doesn't wrap all the way around. Alternately, if you manage to land two or three headshots from the front, you'll knock the mask off, allowing you to finish off the enemy with one more shot to the head. If you have to take them down the old-fashioned way, you can just unload on their chest area. They'll eventually get knocked down, then staggar back up, but if you keep firing at them, they'll go down eventually. A grenade at the feet of a mask-wearing enemy will be an instant kill.
The Riot Shield wielding foes are the ones you really need to watch out for. These guys pack either Magnums or SMGs, but are more dangerous because of their defensive capabilities than due to their offensive prowess. Their riot shields will usually protect them from almost all damage, but there are ways to get around them, if you know what you're doing.
To be specific, there are actually two kinds of riot shield foes. One will approach with a small, clear shield that can apparently be fractured and eventually destroyed by gunfire, while the other one will use a metal shield that cannot be destroyed. Regardless, the only way you can really kill these guys is to bypass the shield and attack their bodies or heads. (They do have helmets that will allow them to take a bunch of damage up top, however.) The easiest way to do this is to throw a grenade behind them and shoot it. If you throw a grenade in front of a shield-wielding opponent, they'll put their shield down and it won't do any damage whatsoever.
Know Your Weapons
One of the odd properties of the weapons in Black is the way they deal with accuracy and range. For most weapons, the first shot of a burst will be perfectly accurate, landing precisely where you aim your crosshairs. Even if you're a good distance from your opponent, firing off one snap round at their head will usually result in a kill. As in most other games, though, holding down the fire button will cause your shots to both pull upwards (recoil effects) and become less accurate, relative to the position of your crosshairs (spread). Thus, when dealing with enemies at a distance, you'll want to restrict yourself to either single shots to the head, or short, three or four-round bursts.
What's more curious is that most of the weapons in Black actually have a maximum range, beyond which their bullets actually disappear. This is mostly an issue with extremely long distances, on maps such as the dockyard or the bridge, but if you attempt to use an M16 or an AK-47 to snipe away at someone extremely far away, you'll notice that they won't take any damage and you won't be able to see where the bullet hit. Again, after it passes a certain distance, it'll just disappear. Some weapons, like the MAC-10 or the shotguns, will have a much smaller range than other weapons, while others, like the sniper rifle, can apparently fire as far as you can see.
No-Blur Reload
If you hate the blur effect that pops up when you reload a weapon, simply hit the reload button, cancel it with a melee attack, then hit reload again. This will allow you to reload without blurring your vision, but it will take slightly longer than a normal reload.
Walkthrough
As a note, this guide is written on the assumption that you're playing on Hard mode. As such, our strategies will generally be focused on the fact that you won't be able to pick up health packs, which makes the experience of playing on hard a bit different than the experience of playing on easy or normal difficulties.
Mission One: Veblensk City Street
Veblensk is the first mission in Black, and really acts as something more of a prologue than anything else. Although there aren't enough inline tips to really have it act as a "tutorial" per se, it's still a very brief mission that you should be able to get through in around ten minutes or so, or perhaps half that when you get used to the way enemies spawn and know where everything happens. Most of the levels in the game are much longer, obviously.
Objective: Rendezvous with Black Cell
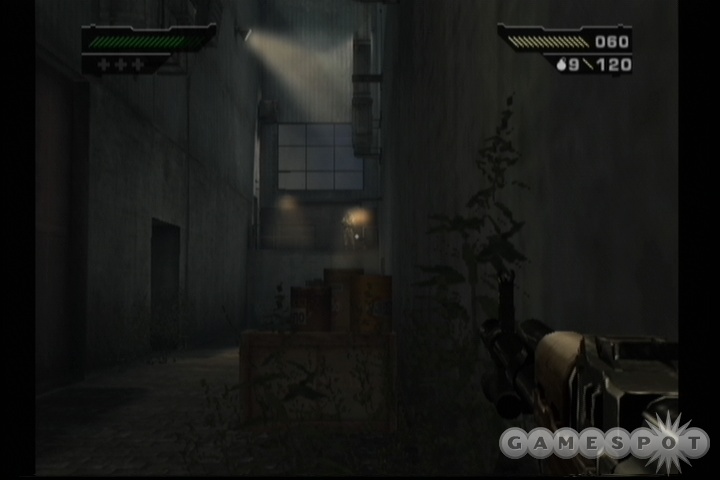
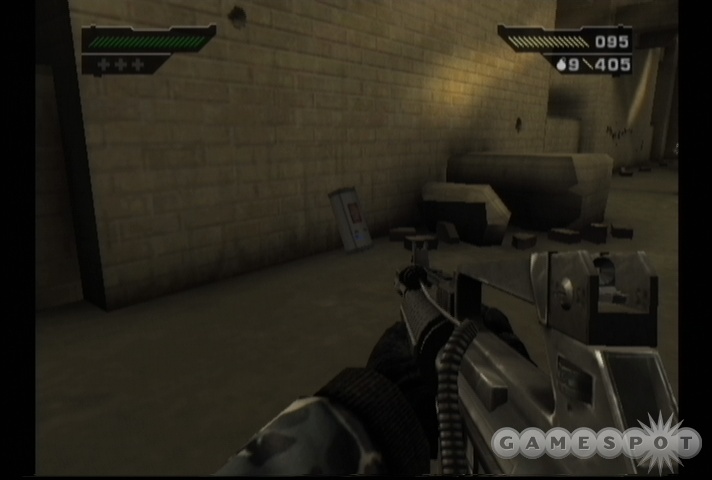
As you enter the level, you'll have only a lowly pistol to work with, but luckily for you, there's a shotgun and some ammo waiting for you. Pick it up, then shoot down the nearby door. In another fortuitous turn of events, there's an AK-47 and ammo waiting for you outside the door, so tab back to your pistol and pick up the AK with it out; you'll drop the pistol in exchange for picking up the more powerful AK. Get used to using it, as it'll be your primary weapon for the next few levels of gameplay. There are also some grenades in a room near the top of the stairs here.
At the bottom of the steps, your first enemy soldier will be standing next to a car. If you want to take him down with your weapons, feel free. Otherwise, a single shotgun blast to the car will blow it up and take him with it.
At this point, you can either take a right and head down the street, or proceed across the street into the alley nearby. There's nothing integral waiting for you either way, and the paths will eventually converge again, near a pair of destroyed cars and a glass phonebooth.
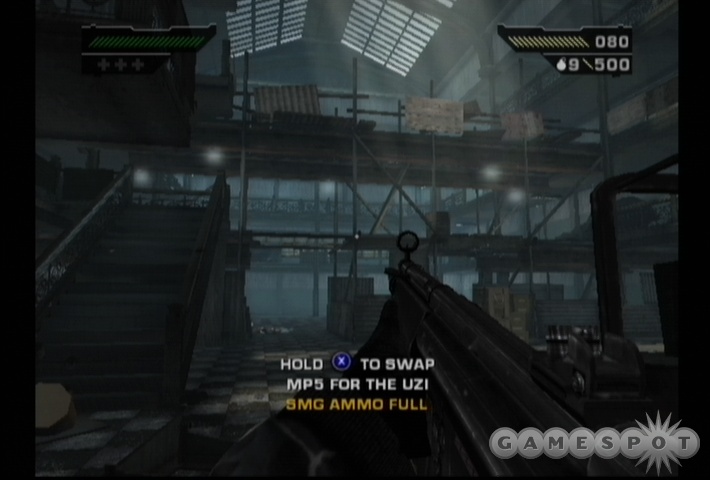
Move down the street near the phonebooth, but duck into the building on your right to find the Recon Objective for the level. Recon Objectives supposedly give you some kind of advantage in the mission subsequent to the one you find them in, but in any case, they fulfill your secondary objectives requirement, so you might as well grab it. Upstairs, you can find an Uzi, which you may want to switch your shotgun for, if you're a fan of spray-n-pray gunfighting. They both have their strengths and weaknesses, but in any case, if you don't like what you pick up, you won't have to carry it much longer. The Uzi also counts as the "hidden" Armament Objective.
Outside the museum, two of your Black teammates are defending themselves against a terrorist assault. These teammates are essentially unkillable, so you don't have to rush to defend them; instead, you can sit back and use your AK-47 to plunk anyone that dares jump over the wall or come out of the museum. Feel free to blast fools for a while, but be sure to pick up any ammo that drops, and health packs if you need them.
Objective: Assault The Museum
Eventually, the doors to the museum will burst open, and a few more terrorists will come forth. Shoot them, but before you head inside, check out the building across the street, near the barricaded wall, to find the first Blackmail Objective. Blackmail objectives come in the form of safes or laptops or other objects; your crosshair will turn blue when you look at them. This indicates that they're intended to be destroyed, so shoot at the laptop in the building until it blows.
With that done, head into the museum. There's a soldier behind a barricade inside. There are four more guards inside, two on the steps and two more on the upper floor. When they're all dead, the soldiers outside will bust through the wall and start coming in. You can help kill them if you wish, but your teammates should be able to staunch the flow.
Before you leave the museum, be sure to grab the two Intel Objectives inside. One of them is on the first landing on the flight of stairs; it's a small red book attached to the wall. The second is a small white box near the railing up top, where the two soldiers were. It looks a bit like a health pack, but is, in fact, a "black box."
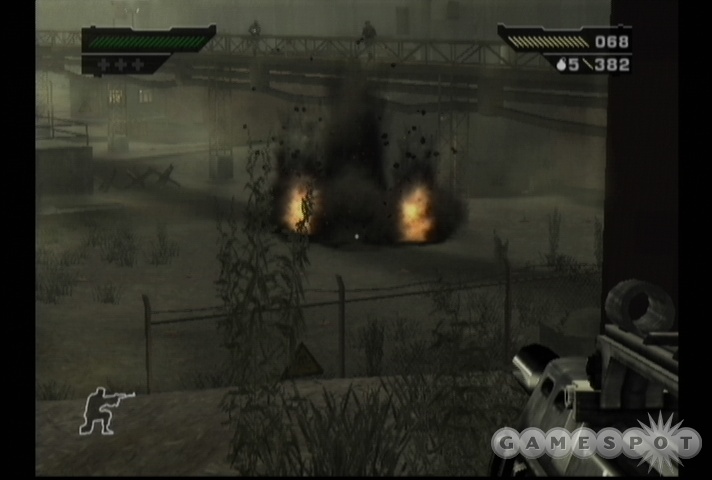
While you're up top, you can also head out onto the museum's outside balcony. There's a terrorist with an RPG in the tower to your right. If you can goad him into firing, then withdraw into the museum until his rounds hit, you should be able to head back outside and take aim at the explosive box in the tower with your AK. Hitting it will destroy the tower.
When all of the terrorists that were coming through the wall, they left behind a pretty sizable hole, so head out to the street and cross over to find an RPG leaning against the building there. You'll obviously want to use it against any sizable number of terrorists that you stumble across; if you haven't taken out the RPG terrorist in the tower, then firing a round up at him will definitely remove him from your cares.
Objective: Eliminate Reinforcements
At this point, you can again either charge up the street, or head into the nearby alleyway to move on towards the build that was attached to the tower. Keep in mind that the second Blackmail Objective is in a bombed-out building across from the phonebooth near the RPG. When you near the next concentration of terrorists, use your RPG to destroy the flatbed truck near them; pretty explosions! You should also keep one round in reserve for when you approach the truck, as a pair of gunners will appear in the windows above it.
When you kill off the last few terrorists near the unexploded car, turn around and look in the guardhouse here to find the last Blackmail Objective. The last Intel Objective is tacked to the wall near the top of the ramp here; grab it and head into the corridor to end the mission.
Mission Two: Treneska Border Crossing
Objective: Find the Treneska Border Crossing
You start this mission with naught but a pistol to your name. It's good that the government is so willing to provide you with proper equipment. You'll find an AK-47 soon enough, so don't worry about it. The pistol does come equipped with a silencer, which reduces the loudness of the shots, but reduces damage. You won't need it overmuch.
Note that the Treneska level is much more open-ended than the City Street; there are plenty of paths to choose from, but every so often you'll be squeezed into a bottleneck. If you get lost, just keep pressing forward, looking for more guys to shoot. If worst comes to worst, try to find a beaten-down road and follow that.

To begin with, head right and hug the rocks on the edge of the level until you come to a cave. Kill the soldiers here to grab an AK, then explore the cave to find a suppressor for the AK-47. Suppressing your fire can be useful, if you're good at getting headshots, but most of the time, you'll probably just need the extra firepower you get from firing unsuppressed, especially on the higher difficulties.
From the cave, head back out towards the main part of the level and start heading down one of the paths there. You'll eventually find the ruined foundation of a building on top of a hill, complete with a flaming barrel in the middle of it. If you poke around here, you should be able to find a shotgun which you can trade in for your pistol, but be mindful of the large numbers of enemies in the area; you'll probably have to engage in a protracted firefight if any of them see you.
Eventually, you'll either head to the right and through a cave, or to the left over some more hills, and you'll come to the border crossing checkpoint.
Objective: Cross The Border
The border crossing checkpoint is more of a chokepoint, really; you don't have any gaps in the coverage, so you're going to have to go through guns blazing. You definitely want to approach the border crossing from the far end of the road here. If you exit from the cave, you can sneak up on the guard towers and blow the truck there to cause a ruckus, but doing so will leave plenty of soldiers in the woods who'll most likely be attracted by the sound and come running, causing you to fight a battle on two sides. So if you come out of the cave, take the path leading up nearby, then wrap around until you hit the chainlink fence. Bust the explosives there to make a passageway, and start making your way down the woods along the road, killing people as you go. First aid can be tough to come by here, so minimize your exposure and do your best to avoid staying in the open.

Assaulting the checkpoint itself can be a risky proposition, but you can obviously make inroads by blowing the truck in the road and the fuel tank off to the left of it. The fuel tank will blow a hole in the building on the other side of the fence, which will be an ideal spot for you to hide and take stock of the situation. If you still have people firing on you from the direction of the forest, take them out. When you're ready to deal with the soldiers running around between all of the buildings, just take out your AK and start firing on them from the window, tagging any explosives that you see that might wind up making your job easier.
There isn't much we can say in the way of tips here. You're going to be taking damage from all the gunfire, but most of the first aid kits that are dropped will be dropped in the middle of the courtyard here, making it difficult to reach them without getting killed. Just proceed cautiously and use headshots to take down distant enemies.

When you're ready to move on, start checking out the nearby buildings. Some of these buildings have secure doors; you'll need to have either a shotgun or a grenade to blow them open. The first building, on the other side of the checkpoint from the first truck that exploded, has the first Intel Objective lying on a desk inside, near some shotgun ammo and grenades. The large, two-story building nearby has the first Blackmail Objective on its second floor; note that there are a pair of soldiers that will attack you as you go up the stairs. The second Blackmail Objective is found in the big one-story building on the other side of the courtyard. The second Intel Objective is actually in the same building, but you'll have to head outside and find the solid door near the bottom of the guardtower nearby, then blow it open to head inside and nab the black box. The last building here doesn't contain any objectives, but it does have some ammo supplies.
By the time you explore all of the buildings here, the far gate should've been blown open by an RPG, so kill the incoming soldiers, then walk up the road and take out the RPG soldier near the tunnel. Just walk slowly up towards him, firing on him with your AK, until he goes down; if you keep on moving, most of his shots should fly over your head.
Objective: Cross the Vlodnik Canal
When you reach the end of the tunnel here, you'll have another branching path to decide from. To the left, you can head into the woods and hopefully flank some of the defenders of the bridge over the canal; the right path follows along the road and will leave you much more open to fire.
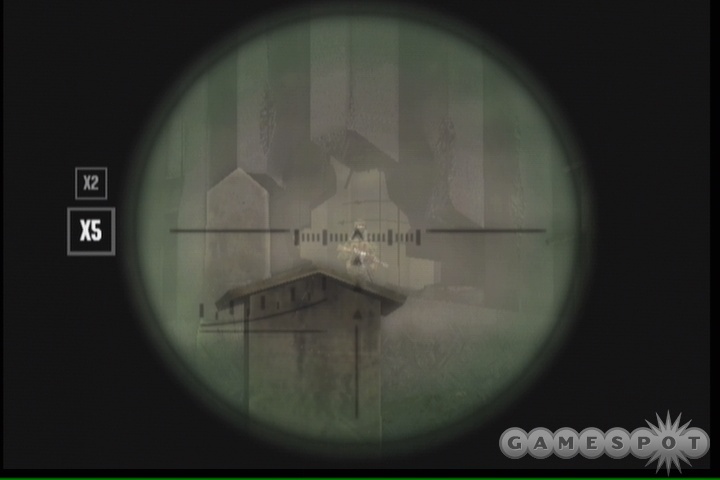
It's probably best to head left initially. If you head through the woods, you can stick to the left rock wall to eventually come to a small shack with the third Blackmail Objective inside. You can then either head down the canal to wrap around underneath the bridge leading across the canal, or head back up into the woods. If you poke around in the main body of the woods a bit, and look for the highest elevation possible. When you reach a hill that overlooks a bridge, you'll find the hidden Armament Objective, an RPG, with a bit of extra ammo. Yeah, baby!
Before you go crazy with the RPG, backtrack down the road that leads to the bridge a bit. If you proceed backwards, you can head up into the hills on the opposite side of the road to reach the ruined house that overlooks the bridge on that side. This is something of a dead end, but you will find more RPG ammo inside, which will make crossing the bridge that much easier for you.
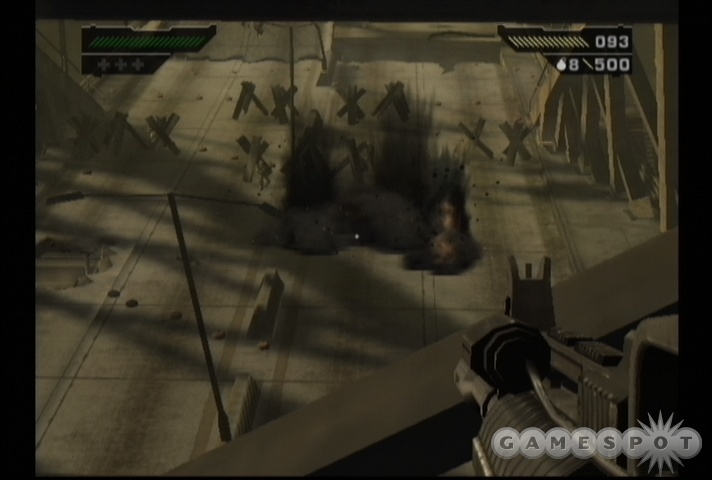
When you're ready to hit the bridge, go to it! It's going to be a tall order to get across the bridge, especially on Hard or Black Ops difficulties, but it's definitely doable, especially with your RPG and the whole shooting-grenades trick. Unfortunately, there are a lot of enemies here, so you might even find yourself running out of ammo if you don't constantly move forward and picking up the rifles of the enemies you take down. There are a couple of trucks, though, as well as a lot of explosives scattered about, so chucking grenades down the bridge will help thin out the enemies even beyond their own explosive capabilities.
If you have enough RPG ammo, be sure to take down the guardtower on the far side of the bridge, and hit the explosives by the small building beneath it when you can. When you clear out all of the soldiers, head to the far end of the bridge and enter the building there to find another Intel Objective.
Objective: Find The Merjakni Farm
Again, you'll have two paths to take when you clear the bridge, but both of them lead to the same bunker. Proceed towards it from the left side. When you get close, try to eliminate a few of the defenders with your silenced AK. If that doesn't work, just chuck a grenade or two towards the center of the bunker to set off some of the explosives there, then find the ramp leading down on its left side and head in. Be prepared for a few reinforcements!
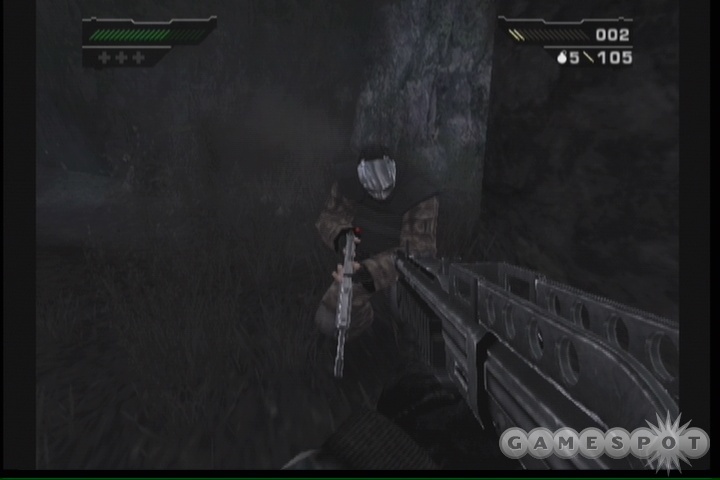
As you make your way down the valley here, you're going to run across a pair of exceedingly tough shotgun-wielding foes. These guys have facemasks that prevent you from getting headshots, so you'll probably be best off just unloading on them with your AK into their chest. Eventually they'll get knocked over, but they won't be dead; move in close and finish them off at point-blank range. Don't forget to reload your AK before moving on to the next foe, and if you're running out of RPG ammo, then trade it for a shotgun here.
There are actually four separate paths to take when you reach the forest again: one far to the right, one far to the left, and two between them. If you take the middle-left path and look around for some soldiers standing near a barrel, you should also spy the Recon Objective near a fallen log.
Objective: Sweep The Farm Building
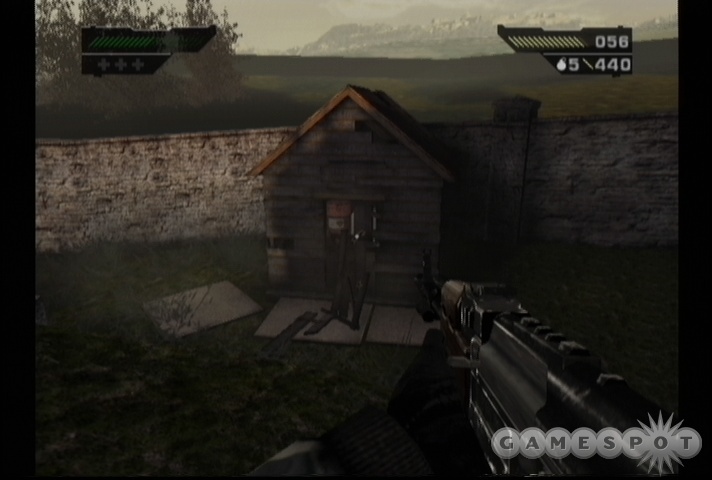
When you reach the farm, you'll probably say to yourself, "It's quiet...too quiet." Yep, the inevitable ambush is going to occur soon, so be sure to leave the explosive objects right where they are. Start looking for objectives.
You can find the fourth Intel Objective pasted to one of the walls on the stairwell leading to the top of the large tower-esque building here. The small building near the gas canister and the tractor has another Blackmail Objective. When you head into the main, multi-story farmhouse, you'll find a Blackmail Objective on the first floor (red laptop), and the fifth Intel Objective on the top floor.
Objective: Defeat Enemy Patrols
When you reach the top of the building, the totally and completely unpredictable counterattack will occur. Enemies will sweep towards the building from the same direction you approached and start coming up the stairs. You can try to take out some of them with your AK from the top floor, if you wish. You should have plenty of explosives left to hit. A few soldiers will be entering the building, though, and coming up the steps to reach you. If you camp out over the steps and just wait for them to walk up, you should be able to pound them as they reach you. Don't forget that you can chuck grenades through the missing floorboards, as well.
Objective: Clear All Outbuildings
After all of the incoming soldiers are dead, you'll be tasked with clearing the rest of the buildings here and making the area safe for your evac to approach. This is pretty much what you might expect, i.e. a hard-target search through every inhouse, outhouse, doghouse, penthouse, and roadhouse in this area!
Well...that got away from us. Anyway, most of the buildings here are fairly small, making the whole shooting-the-grenade trick pretty useful. When you've cleared all of the buildings, you'll automatically leave the mission.
Mission Three: Naszran Town
For the duration of Naszran town, McCarver will be your pointman...pointwoman...pointperson. Some damn thing. Anyway, she's along for the ride, and like your teammates in the first mission, is apparently unkillable, so hey - that's something.
Objective: Cross Naszran Town
Your first objective here is to cross through a graveyard. No such crossing is ever easy, however, especially when you have to hold your breath while you're getting shot at by a sniper. The sniper isn't too difficult to deal with, though; his shots will impact the gravestones, if you crouch behind them, allowing you to dash from cover to cover while he's reloading. Proceed along the right side of the graveyard, using your SMG to blow the explosives near the fence to knock it down, then get close enough to the building to allow yourself to hit the barrels stacked at its base. Detonating them will kill the sniper in the window, allowing you to move in.
Inside the building, check the stairs leading down to the basement to find the first Blackmail Objective. There's also an Intel Objective on the stairs leading up to the second floor, so grab it before heading up to the top and grabbing the sniper rifle there.
As soon as you pick up the sniper rifle, enemies will begin pouring out of the church further down the road. With the rifle, though, you should be able to pick off most of them before they get within firing range of you. Even if they get close enough to fire on you, you shouldn't worry overmuch, as they'll probably still be beyond their ideal firing range and will miss most of their shots.
After you take out a pair of the shotgun, facemask-packing foes, you should eventually reach a bit of a lull in the flow of enemies, so you can try to cross the ground to reach the church itself. Another gunner will pop up in the tower there, so when McCarver points him out, be ready to snipe him. After clearing the rest of the fools in the graveyard, move into the blown-open tomb and proceed onward and upward.
Objective: Take Sniper Positions
Man, a whole lotta people must've died here at some point, because there's yet another huge graveyard awaiting you on the far side of the tomb passages. There are plenty of soldiers patrolling around, but if you still have your sniper rifle, you should be able to start taking random soldiers down from long range.
The "sniper positions" that the objective refers to two locations. One is the large, cylindrical mausoleum to the left, and the other is the Parthenonish building off to the right. We found it easiest to approach the Parthenon first, then creep along the path connecting the two buildings until enemies pop in. Taking them out from long range will allow you to stroll in with minimal difficulties, but as always, keep your head moving.
Objective: Repel Enemy Reinforcements
When you enter the domed building to take the second sniper position, reinforcements will start issuing in from nearby, near the large fountain. Start taking them out with your sniper rifle, using the car and the explosive barrels to decimate the waves. After gunning down a dozen or so soldiers, you'll complete the objective, and McCarver will tell you about a tunnel system hidden in the basement of the neaby building.
Before you head out to the building, though, it's time to polish off a couple more secondary objectives. Leave the domed sniper position and circle around to its rear. There are couple of soldiers in a bunker here, as well as a small shack. If you shoot the door to the shack, then blow the barrel inside, you'll complete the second Blackmail Objective. There's also an M203 grenade launcher inside, which is your Armament Objective. You can trade it for your sniper rifle at this point, if you choose. There's extra ammo for it in the shack, as well as in the small bunker nearby.
Regardless of your choice of weaponry, you'll need to head into the nearby building, blow the doors leading to the living room, pick up the Intel Objective by the couch, then drop into the tunnels to move on. You'll find another Blackmail Objective in the corner of the first room here, in the form of a safe that can be blown up.
Proceed through the tunnels, blowing away any cinder walls that stand in your path. You can use your AK for that with minimal problems. The tunnels are linear, and will eventually take you to Sniper Alley.
Objective: Cross Sniper Alley
Sniper Alley takes its name from the fact that there are going to be plenty of soldiers, snipers and otherwise, standing in the buildings around the trench through which you have to pass. The path is initially fairly linear, RPG soldiers notwithstanding, so follow it until you come to a tunnel section, which leads up to a ramp. The aforementioned soldiers will be firing on you from above. It's a bit unwieldy to try and snipe them, so if you still have the M203, feel free to use that and lob grenades at them from a distance. It's trickier to land grenades than it is to land sniper shots, but it's generally quicker, and you'll have the added bonus of taking out multiple foes without having to zoom in.
When you hit the tunnel, do your best to clear out the area a bit, then head up to the top of the trenches and look around until you find the multi-story building that's hosting a little terrorist convention. You'll have to head in through the ground floor, but watch out for multiple enemies when you do so. As you make your way up, you'll be able to find a Blackmail Objective on the second floor. When you hit the third floor, head through the destroyed wall leading into the next building, grab the Intel Objective that's attached to the wall, then start heading downstairs.
You'll have to drop down to the bottom floor through a hole in the tile, but when you do, you'll discover the Recon Objective lying underneath a table in your path. Moving on will take you to another part of Sniper Alley. Although by this point you might as well call it RPG-Wielding Soldier Alley, because there's a paucity of actual snipers.
Anyway, the path is, again, fairly linear at the outset. You'll find another RPG if you missed the first one. From there, head down to the long trench, and explore the small room in the building where the first RPG soldier fires on you. You'll find another Intel Objective on the wall and another Blackmail Objective beneath the table.
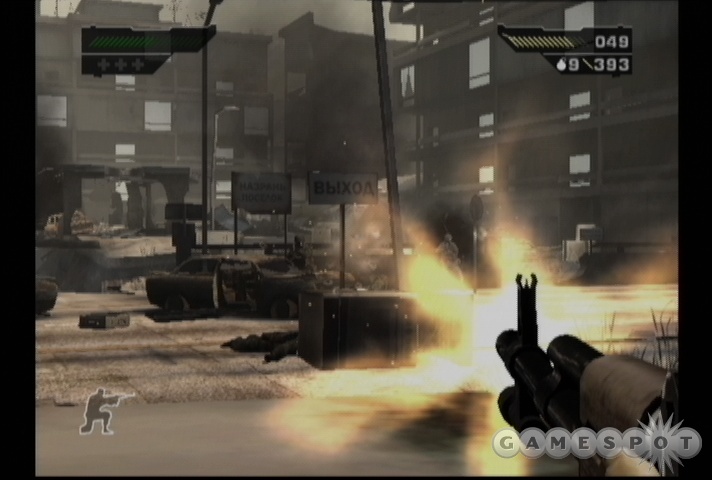
From here, keep following the trenches until you work your way up to the center of the area. You're going to be in the ruins of some buildings, facing a huge apartment block across the street. This seems to be where most of the enemies have holed themselves up, and they're going to launch themselves at you in a last-ditch effort to prevent you from accessing their base. For now, just hunker down behind one of the overturned refrigerators in the street and use your AK to blast anyone that comes at you. Although it may seem like they're just infinitely spawning, you should notice the spawn patterns changing after the third wave or so, so hold your ground and don't charge forward (unless you run out of ammo).
After you take out a couple of RPG soldiers and the dust clears a bit, move forward towards the apartment building. In addition to the guard tower that you've probably blown up by now, there's a machinegun emplacement near the entrance to the building, so serve up another RPG round there, but be ready for an increased flow of soldiers coming from the building itself after you do so. When you're ready to move in, though, just head inside to end the mission.
Mission Four: Naszran Foundry
Well, since you can't take out the leaders of the Seventh Wave, you've been tasked with destroying one of the factories that they use to construct the weapons that they sell.
Objective: Find Naszran Foundry
Immediately after taking control of yourself at the beginning of this fight, walk up to the railing in front of you and scope out the scene below. There are plenty of soldiers milling about down there, including a pair that'll be talking near a truck. Go ahead and blow it up to take the two of them out, then start using the rest of the explosives in the area to score some cheap kills on the rest of the soldiers here.
After you make your way up the hill here, you'll note that the path branches in two, with the left leading to more buildings, while the right will lead you towards a more roughhewn cavern. To begin with, take the right path, kill the soldiers on it (you can squash them by shooting at the large pipes to the rear of the canyon, which will then roll on top of them), then cross the two ore rails to reach the large building there. This is the only way to reach the second floor, where the Recon Objective is located. When you have that, start firing on the nearby soldiers, but before you head in their direction, backtrack a bit, back towards the branch in the path. One of the small buildings here has the first Blackmail Objective inside of it.
Objective: Navigate Through the Minefield
As you move down the path here, you'll eventually come upon a minefield. The mines here aren't really difficult to see; they're large, circular objects that are scattered around on the ground. You can blow them up by shooting at them or throwing grenades into their midst; either way, you'll set them off, and often cause some real pretty chain reactions.
Obviously enough, you want to proceed fairly slowly here, scouting the ground for mines and ensuring that you don't rush headlong into enemy reinforcements. You can find a silencer for your weapon by checking the first small hut you come to. The second hut, which is located past the first pair of raised gas tanks, has the first Intel Objective inside of it.
Keep moving on until you're clear of the minefield; you'll be told verbally when this is the case, and you should see a canal coming up around that time. The tower atop the canal will soon feature an RPG soldier, but you can take him out before it becomes a problem by shooting at the truck nearby; the latter will blow up the former, preventing you from having to scurry about when the RPGs start flying.
Objective: Find Naszran Foundry
When you're past the minefield and have dealt with the enemies near the canal, head down into it and follow the path leading into the sewers. The sewers are fairly short, but will lead to another canal that skirts the main buildings of the foundry (which is frickin' huge, by the way). When you reach the canals, McCarver will set up in sniper position; she'll deal with some of the threats in the exterior parts of the level from now on, but won't be able to hit everything, so in most cases you'll want to still assume that you have to kill all of your foes on your own.
After making your way down the canal, find the ramp leading up to the upper level here and start cleaning out the enemies in the area. You'll soon come to a large interior room, wherein the first major ambush of the level will occur. The room will be mostly empty when you first enter, but when you head far enough inside, the predictable waves of enemies will come crashing in. If you get overwhelmed, try to head for the rear of the room, where the walkway flooring will protect you from the fire of the soldiers on the second floor of the area. When you've cleared out the ground floor to your satisfaction, you can start lobbing grenades up top, or just get into a position to start blasting away at your foes.
Before you head upstairs, though, check the small control room on the ground floor (you'll need to blow the door open) to find the second Blackmail Objective, as well as a Magnum, which acts as your Armament Objective. When you do take the stairs upwards, you'll be able to find an Intel Objective pasted to the wall.
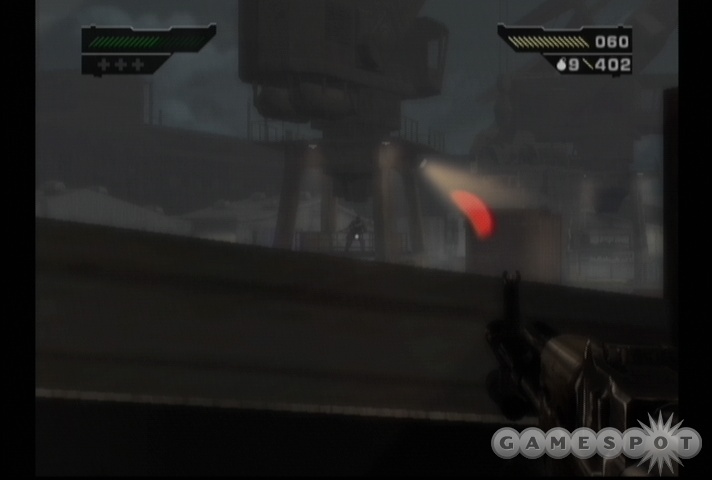
The Towers
When you finally head out of the abattoir you've been spending your time in, you'll find yourself atop two huge fuel towers. Don't worry, they're not going to blow up...yet. Your path here is circumscribed, so all you can do is take a right from the entrance to the towers and start circling it. You'll find that the path eventually branches, with a set of steps leading on to the second tower. The path continues around the first tower, but the end of that path only features some ammo, so you might as well just head to the second tower as soon as you're able to do so.
Now, when you do reach the second tower, you can either try to run past the enemies here, or proceed slowly and cautiously, killing as you go. Regardless, you'll have to deal with both enemies on the walkways, and enemies that'll fire at you from nearby buildings. The enemies on the walkways are obviously going to be taken out from point-blank range, but the enemies on the balconies are tougher to shoot at. Since you don't have any cover, you might want to just quickly eliminate them by shooting through the windows behind them; there are machines behind them that will detonate when fired upon.
When you reach the end of the steps that lead back down to the ground floor, cautiously start making your way across the ground, but be careful of the RPG soldier that appears when you're on your way.
After a bit of a firefight or ten, hop across the bridge that's overwatched by a machinegunner, then make your way around the corner to another small footbridge where an RPG is waiting for you. As soon as you pick it up, an RPG soldier will appear on one of the fuel towers here, but if you use your own RPG, you can fire anywhere on the fuel tower to cause one of the biggest explosions thus far in the game. From there, pick up the small white box underneath the stairs here (it's an Intel Objective), then head upstairs to reach the interior of the foundry.
Objective: Disable Weapon Manufacturing Capacity
Inside the foundry, you'll come across a little storage area where a P90 is haphazardly laying around, waiting for someone to put it to use. If you think you're that someone, feel free to pick it up. It takes the same kind of ammo as your G36C, but can hold more rounds in a clip. It also has a slightly longer reload time, and a wicked amount of recoil and spread. It's not a weapon intended to make headshots at range, but is going to be a stronger up-close-and-personal weapon than the G36C. Personally, we preferred the G36C and the shotgun, but that's just our opinion.
Anyway, fight your way into the room neaby. This is a multi-story room, with plenty of stairs leading up to higher levels. Your goal is to destroy four weapon manufacturing machines in this room. There's one on the first level, one on the second, and two on the third. There's also an Intel Objective near the first set of stairs leading up to the second objective, and a Blackmail Objective on a desk on the second level. Actually, it's not quite on the second level; it's in a small chamber across a gap from you, where two soldiers will attempt to shoot you from. Look for a laptop on the table there and blow it away to earn the objective.
When you've destroyed all four of the machines (normal gunfire will do the trick), return to the room where you saw the P90. A new passageway will have opened up, leading to the smelter.
Objective: Destroy Metal Smelter Control Panels
With a large, open room that doesn't afford you many hiding places, the key thing to remember here is that the enemies are heavily scripted. Although there'll only be a couple in the room when you first peek inside, more will begin appearing as soon as you hit the first ramp leading downwards. Thus, it's best to hit the ramp, wait for the enemies to begin appearing, then quickly backtrack to the P90 room and use the doorway there as cover for assaulting the enemies. There'll be at least four waves of them, which will spawn progressively further back towards the far end of the room, but with the G36C on your side, you should be able to get plenty of headshots from long range. Be especially careful with the machinegunners on the upper platforms; they have a brighter muzzle flash than their counterparts do, so you'll know when they're firing on you. They do a lot of damage in a small amount of time.
When the area's clear a bit, start making your way back to the end of the room. There's a small glass sideroom there; head inside, kill the soldiers within, and blow the laptop to find the fourth Blackmail Objective. With that done, start climbing the ramp to the top of the room, and look along the walls to find the fifth Intel Objective.
With all of the objectives done, you'll know that you have to be somewhere near the end of the level, and indeed you are. Your goal now is to destroy the three control panels on the smelters, then escape the building. Now, if you want to try something interesting, you may want to destroy the farthest smelter panel first, then work your way backwards with the other two, saving the one closest to the rear of the room for last. ("Rear" referring to the rear of the room from the perspective of where you originally entered.) If you do so, and manage to destroy the last smelter's panel while you're on the ground floor, you should have an easier time in the ensuing firefight. If you destroy the last smelter panel while you're on the walkways, then you'll have to deal with both enemies firing on you from below and enemies rushing up the walkways to engage you at point-blank range. It's a tough fight either way, but if you can avoid getting boxed in, you should be able to repeat your earlier headshotting efforts to clear a path.
To exit the level, you need to reach the P90 room one last time, at which point you'll automatically be jettisoned back to the menu screen.
Mission Five: Tivliz Asylum
Now that you know where your target's holed up, it's time to go in and attempt to apprehend him.
Objective: Gain Access to Tivliz Asylum Interior
You begin with two teammates at the beginning of the level, who are both going to be pretty big helps during your assault on the asylum. Since they're unkillable, try to let them do the hard work as much as possible. You'll need to do most of the killing, obviously, but your teammates are useful at least as meatshields.
To begin with, you're going to have to cross the Asylum courtyard, which is unfortunately cluttered with the Seventh Wave's wares; numerous APCs, trucks, and other vehicles are scattered around the area. Most of them are destructible, so try not to stand too close to something that might explode if enemies shoot at it.
Proceed forward through the courtyard until you get pegged by an RPG soldier on the walkway. Killing him will spawn in a machinegun nest at the rear of the yard. If you can get an eye on him, perhaps through the door of the ruined truck in front of him, you should spot a large fuel tank to the right of his position. Blowing that will take care of the problem...permanently.
Sweep around to the left and wrap around from the corner of the courtyard, being mindful of another RPG soldier who'll appear on the walkway in the middle of the area. Near where the machinegun emplacement was set up, there's a small room with a Blackmail Objective hidden inside.
From here, you have to walk a ways to reach the entrance to the asylum. Before heading into the warzone, though, scout around near the low barrier to find an RPG and some ammo; in a small room nearby, you'll come across an Intel Objective. The RPG is going to be useful when assaulting the entrance to the building, which is guarded by two RPG gunners and a machinegun emplacement in front of the entrance.
When approaching the building, use the RPG to take out any enemy RPG soldiers that happen to harrass you. When you've gotten within grenade range of the bunker, start pelting it with any grenades you have. It appears to be impervious to small arms fire, but there are plenty of grenades in this area, so just keep chuckin' em until it goes boom. You can also use the RPG on it, of course; it won't be very useful when you go inside, so you'll probably want to switch it for a shotgun or something similar.
Objective: Find Entry to Lower Levels
The main asylum building here revolves around a single, large, open room with multiple stories. There are men here. Men who want to meet your bullets. Let's let them get acquainted, shall we?
You'll find a suppressor for your MP5 before you reach the main room, however; if you wish, you can get some silent kills with it instead of charging in, guns blazing. A firefight is pretty much inevitable, though, so be prepared for a gun battle. You don't have much in the way of cover, so keep cool and proceed slowly towards the stairs leading up to the second level.
The small door here leads to a set of cells. Cells with weak walls. Cells with weak walls that you can shoot through with a shotgun. Somewhere, Christopher Lowell feels pain. Shoot through the walls to bypass the blockade in the hallway, but be ready for a new type of enemy; a riot-shield wearing SMG gunner. You can't shoot through the riot shield, so try to land a grenade at his feet and shoot it. If you don't have grenades, you'll have to try and get around the soldier and shoot him from the rear, or just rush him with a shotgun and wait for him to swing the shield at you before popping him.
Before heading back out to the large room, be sure to shoot through all the walls that you can in this area. There's a Blackmail Objective in one of the rooms, and another (behind the boarded-up door) that contains an M16, which is also this level's Armament Objective, and is a damn fine weapon to boot. You won't have a lot of ammo for it immediately, but if you hang onto it, you'll find more just when you need it most.
Moving On
Anyway, moving through the hallway nearby will open you up to fire from numerous gunners on a high walkway. You can pause to try and take them out, if you wish, or you can just run down the hallway and try to get to cover as soon as possible. (Just don't miss the Intel Objective lying on a table here.) When you're through the hallway, take an immediate left into the doorway nearby to reach the stairs leading up to the third floor.
The showers here are an oubliette straight out of The Rock; initially, there'll only be soldiers on the walkways on either side of the room, but eventually more enemies will appear on the ground level at the far end of the room. When you kill everyone off, check the stairwells leading to the walkways. One of the walkways has a Blackmail Objective, while the other holds an Intel Objective and some grenades. Be careful, though, as heading onto either of the walkways will spawn in more enemies below you, including the shotgun-wielders, who can be awkward to encounter at close range.

Moving on from the showers, you'll encounter another set of cells, with another riot shield-wielding foe right in the middle of them. This set of cells is a lot more dangerous than the first, since enemies will be firing at you from the windows. If possible, duck into the hallway and head into the cells on the left, instead of those on the right. You'll have to shoot through more walls this way, but you'll be able to concentrate on the enemies that are in your face instead of those which you probably can't even hit due to the glare from the windows.
Anyway, if you clear these rooms out, you'll find an Intel Objective on a table, as well as more assault rifle ammo for the M16, if you still have it. When you leave back into the central room, you'll eventually find a ramp leading down to the second level, and there you'll find a set of stairs leading down to the lower levels.
The Lobby Sequence
When you hit the bottom of the stairs, head into the small room nearby to grab the Recon Objective. With it in tow, gingerly head into the room here; you can kind of tell that something bad is going to happen, just from looking at it.
Indeed, as soon as you enter the room, the doors close behind you, and a flood of enemies will start pouring in from nowhere in particular, ready to sacrifice themselves to stop your forward progress. And sacrifice themselves they will! Obviously enough, taking them all on across open ground is going to be suicidal, so your best bet is to run into the area, hug the left wall, then duck into one of the side rooms and use it as cover while you take down the rest of the soldiers. There aren't an extremely large number of them, so this should be fairly doable. Before heading down the stairs nearby, search the rooms on the ground floor for the fifth Blackmail Objective.
Objective: Eliminate Valencio's Bodyguards
At the bottom of the nearby stairs, you'll come across another room that's pretty much identical to the one you left behind upstairs. The main difference here is that there are going to be one million enemies coming at you. Most of the infinite spawns in the game thus far haven't really been "infinite"; the enemies will stop coming after a certain period of time, or when you get close enough to the spawnpoint. Here, however, you're going to be dealing with a huge number of foes that won't stop coming until you've cleared the level. Let's get ready for some fun!
If you don't have any grenades, then this fight can be difficult. Begin by walking into the room, shooting the unarmored foe that appears, then grenade-shooting the two riot shield foes in the center of the area. If you don't have any grenades, then just ignore them completely and head up one of the stairs nearby, but wrap around the walkway to pass over the area where you initially entered the room; there are two boxes of grenades here for you. From there, quickly fight your way down the upper catwalks until you reach one of the small rooms near the far end of the area. These are spawning rooms for the soldiers, who'll continually drop in from the ceiling. You should know what to do by now.
Anyway, after killing enough of the soldiers that drop in from the ceiling, you'll complete the Kill The Bodyguards objective. As soon as you see that this objective is done, head out from your little room of death, kill any nearby enemies, then start shooting the soldiers that drop from the windows at the rear of the room. These guys drop grenades (or most of them do), in addition to the normal health packs. You'll need plenty of them, too, since there's another machinegun emplacement that will have appeared at the bottom of the area, near the bottom of the stairs by the room where you were camping out earlier. Although there are still going to be plenty of soldiers gunning for you, all you need to do to win the level is drop four or five grenades in front of the machinegun, then quickly run down to the area that opens up and head through.
Note that none of this is probably as simple as it sounds; be sure to check the video on this page to get a clearer idea of what we mean. You can expect to try this sequence a few times before succeeding at it, especially on hard difficulty.
Mission Six: Vratska Dockyard
With Valencio's information, you think you have enough intel to track Lennox, and are going to hit a dockyard that he and his men have taken over. As in the asylum mission, you're going to start with a pair of teammates, although this time they'll be with you for the entire mission. (Although why they still trust you after you blatantly disregarded your orders in the last mission is open to question.)
Objective: RV With Second Black Ops Team
You start this mission with a MAC-10 and a Remington shotgun. Neither are particularly good for long-range work, but unfortunately, you're going to need to do some ranged shooting if you want to survive in the large open areas of the docks. Replacing one of these weapons with an assault rifle should be a priority, but it won't be possible until you're a ways into the mission. Get used to the MAC-10's extreme recoil and spread in the meantime.
First Dockhouse
Sweep down the wooden docks near your starting point to pick up some grenades before shooting the soldiers ahead. Walk down amidst the large pipes to reach the first dock. Unfortunately, neither your MAC-10 nor your Remington will have enough range to fire back on the soldiers in the windows above the dock, so you'll have to walk down fairly close to the stairs leading up to the office before your teammates will approach close enough to support you. When they're nearby, though, you can blow the door with your boomstick, chuck in a grenade, then sweep inside to clear the area. There's not much to be found aside from ammo.
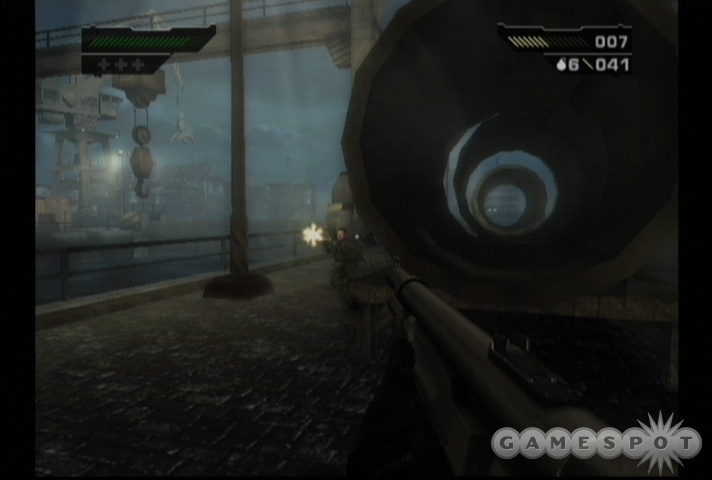
When you're ready to leave the dock, start making your way through the soldiers on the far side. An open shipping container on your left when you leave the dock building will contain a sniper rifle, which acts as your oh-so-hard-to-find Armament Objective for the level. Equip it and zoom in on the crane in the distance; you should see a sniper setting himself up on the lower level. Shooting the explosives there will eliminate any threats from that direction. Apart from that, though, the sniper rifle won't be too useful to you in upcoming fights (and you have only five shots for it anyway), so you will probably want to trade it back in for a shottie.
Making your way through the shipping container maze will take you alongside a big ship that's in drydock. Before following it into the dockhouse proper, though, take a right and follow it lengthwise, towards the sea. If you poke around in the shipping containers near the crane, you can find an Intel Objective pasted to a wall.
Second Dockhouse
Heading back to the dockhouse, you should see a small branch in your path just before you enter the roofed area. One side heads into the building, but if you take a left, you'll be able to wrap around into the alley behind it. The alleyway is as nondescript as you might think, but if you poke around in the open containers, you'll find an AK-47, which should be a welcome upgrade over either of your weapons. And although few of your enemies will be using assault rifles, you should be able to find plenty of ammo for the weapon scattered around the level.
Now, if you continue around the alley, you'll eventually come to a door that leads right into the middle of the dockhouse. Entering through here has some advantages, although you'll have to quickly take out an RPG soldier that appears on the ship itself. Namely, your teammates will likely advance in front of you and enter the enemy field of fire, allowing you to sit back while they shoot away at most of the targets in the area. When you feel that the situation has been sufficiently mollified, sweep in, clear out any remaining targets, then blow one of the doors leading into the office and poke around a bit. You'll find the Recon Objective inside, and, if you blow off the door leading to the upper catwalk here, you'll come across another sniper rifle.
Of course, getting the sniper rifle isn't exactly safe, as there's an enemy machine gunner perched across the way. You're on the edge of his range, though, so if you backtrack down the catwalk a ways, then turn around and sight in, you should be able to pop him without taking any return fire. Alternately, you can aim at the fuel tanks underneath the tower to blow it sky-high.
There's apparently no way to get into or onto the ship here, and there also doesn't appear to be any secret stuff underneath it, so continue along the docks here until you reach the sniper's tower. Climbing the stairs here will lead you to a small office; grab the Intel Objective off the wall and carry on. Eventually you'll come to another office, inside a building, where you can pick up both another Intel Objective and an M209 machinegun. Do so. You won't have much ammo for the MG at the moment, but you'll find a surprising number of pickups through the rest of the level.
Machinegunning
After you hit the exterior portion of the level again, take a left and scope out the action near the building across the canal. There's another machinegunner on the railing here, but he'll die automatically if you fire on the fuel tanks near the base of the building. Do so, then clear out the rest of the soldiers to move on. You can find an SMG suppressor by heading up the stairs attached to the building you just exited from. Heading into the building you just blew up will net you another Intel Objective, as well as more ammo for your M209, if you look at the spot where the machinegunner died.
Continue along the shore here. When you see another pair of fuel tanks sitting beside a shipping container, directly in your path, near the corner of a building, destroy them to obtain a Blackmail Objective.
Objective: Defeat Ambushing Enemies
When you arrive at a large, open area with a guardhouse and numerous parked cars, get ready for a firefight, as you're going to be ambushed by enemies when you start walking across the lot. There are plenty of destructibles in the area, though, so watch your fire and wait for an enemy to get in front of them before blowing them up.
Your teammates have the right idea here, as they get onto a little raised platform and use it to get an angle on the enemies around you. You don't want to actually get on the platform with them, but instead, you can hide on the ground behind it while peeking your head out to take potshots at the enemies coming from the far building here. Be ready for enemies on your flank; note the fuel tanks at the very bottom of the building near the platform, and blow them up when it seems propitious to do so. There'll also be an RPG gunner in the far building at some point. You can either shoot him directly, or shoot at the valve on the oil pipe in front of him to blow him up right quick.
Eventually you'll start dealing with shotgunners and riot shield enemies that'll pop out of the main doors of the building; around this time, it'd be wise to start chucking grenades. When the smoke clears and no more enemies are forthcoming, check the small guardhouse behind the raised platform to find another Blackmail Objective. Proceed through the building that was issuing forth the troops. Searching near the steps leading up will reveal an Intel Objective pasted to the wall.
The Trainyard
Move up into the office overlooking the trainyard here. There'll be another machinegunner in a tower nearby, as well as a sniper in the glass hallway overlooking the trainworks below. Luckily, you'll have a sniper rifle of your own to use, as well as some extra ammo, so feel free to grab it and take down the sniper before heading down to the ground level.
From here, you have to proceed through a long sniper's maze. There are going to be snipers on pretty much all of the cranes you see off in the distance, as well as plenty of soldiers on the ground. Your teammates will do a good job of dealing with the lower enemies, but you'll probably wind up having to take down the snipers yourself, so listen for the sharp crack of their rifles and take cover! As mentioned, they'll all be stationed on the medium levels of the cranes, below the actual machinery portion of the devices, so they should be easy to see, although you may need to move around a bit.
But we're probably getting ahead of ourselves. After killing the first sniper and moving down to ground level, cross over to the left side of the area and take the stairs up to where the first sniper was positioned. There's actually a small room just underneath the high glass hallway, where another sniper rifle is positioned, as well as the third and final Blackmail Objective. The doorway here is where you'll want to park yourself for a while. You can use your M203 to fire on soldiers beneath the cranes, while flipping over to your sniper rifle to take out enemy snipers or particularly distant enemies.
When you start making your way across the ground level, it can help to try and just stick to the left wall and ride the catwalks until you get to cover. Hide in the corners formed by the buildings when you hear a sniper rifle being fired; if you're lucky, your teammates will be following closely enough to deal with the sniper before you even have to.
Eventually, you'll reach a gated area, beyond which a larger concentration of enemies are hiding. There's no mystery to this area; you need to run in, hit your foes hard, then run into the building behind them to finish the level.
Mission Seven: Graznei Bridge
Apparently, you have to cross a bridge in this mission. Let's go, shall we?
Objective: Cross Graznei Bridge
Begin by heading out from your initial starting point and climbing one of the steps up to the ground floor of the bridge. You have two options here: you can stick to the ground floor and fight your way through the enemies there, or you can climb up onto the girders that overlook the bridge and use them as a sniping point from which to fire on the enemy soldiers from above. Even though you don't have a sniper rifle, and the girders are impassible, you can still climb up and eliminate most of the enemies from a height, rather than be forced to take them on from the street. We recommend the latter method, ourselves; just get up there, shoot some fools, then drop back down when you run out of targets. Note that you can also take the steps back down to the bottom of the bridge, but they're similarly impassible, without possessing the benefit of letting you fire on the soldiers on the road.
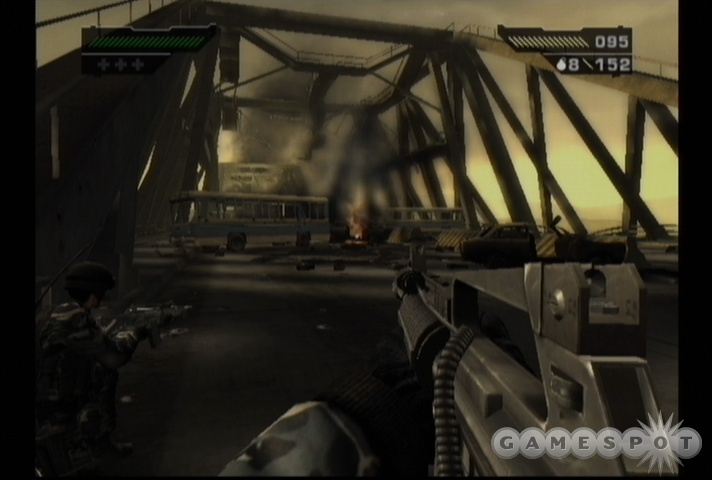
When you reach the barricade at the end of the path, kill any remaining soldiers in the area, then peek your head through the roadblock to see what awaits you. You'll come across an unpleasant surprise, as there are three soldiers parked in and on top of a bus nearby, as well as a few other jarheads milling about. If you still have your M203 (you started the round with it as an alternate weapon), you can land a round on the bus to kill the soldiers there. More threatening, though, is the RPG soldier on a platform to the left of the barricade. To kill him, pop your head out until he fires a round, duck, then dash out and make a hard left until you reach the girders on the left side of the bridge.
Don't actually go up the girders, though, at least not yet; instead, just sit at the bottom of it, and dash out to the right with your M16 zoomed in until you can just barely see the RPG soldier. Start blasting him from this vantage point, and you should be able to kill him without taking any return fire. It'll help if your teammates come up and fire on him as well, of course.
When the RPG soldier is done, head up to the girders again, but be prepared for a tougher fight this time; there will be a shotgun enemy on your way up, so you might want to get his attention, then backtrack down the ramp and let him run towards you while you pelt him with bullets. This set of girders actually can be followed across to the far side of the bridge, at least on the right side, but what's better is the appearance of an RPG on the far side. This is the Hidden Armament for the level, so be sure to grab it.
Go ahead and use the RPG to destroy any gunners inside the buses on the north side of the bridge here. When you get the verbal cue to move on, you can trade the RPG back in for whatever you dropped, then head down to the bridge level and take one of the stairs leading under the bridge to move on.
Halfway There
There's a small enclosed area underneath the bridge at this point. You'll find a suppressor for your M16 here, as well as a few mask-wearing shotgunners. Grab the Intel Objective by one of the doors, and look around near the body of the last shotgunner here to find a Blackmail Objective leaning up against a wall.
After you make your way back to the bridge, you'll have to proceed underneath it for a way until you can reach the surface again. When you do, though, you'll be on your own for a bit of time, since your teammates will follow at their own laggard pace. Feel free to use your M203 to clear out any nearby threats, especially those that cluster around the schoolbuses here. When your teammates arrive, start sniping away at any targets on the bridge itself.
You'll note that you can proceed along underneath the bridge here, if you wish, but as before, it eventually dead-ends. If you follow it along the left side of the bridge until you hit the next set of steps, though, you'll find the Recon Objective for the mission. Hooray!
Instead, you'll have to proceed across the middle of the bridge, past the point where your teammates are holed up. You'll probably have to make a bit of a straight run across open ground; if you still have the M203, keep it active and shell the buses in your path with it until you can make it to them. You should be in the direct center of the bridge now, where the two sets of girders both dip to the ground level. Watch out for an RPG soldier on the left side of the forward girders.
When you have a chance to move, head to the girder ramps, but head backwards in the direction from which you were coming before. There is a sniper rifle up here, as well as a small briefcase in the middle of the girders; this is the second Blackmail Objective. With the sniper rifle, start picking off enemies on the bridge until you run out of ammo, then set it down and retrieve whatever you dropped.
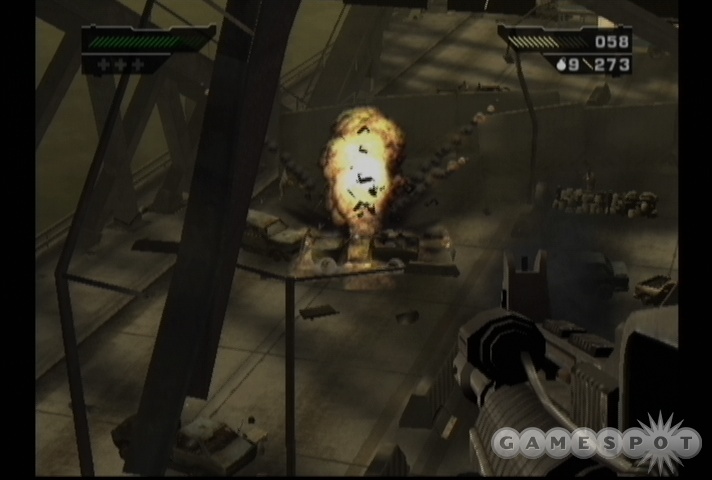
Move back down the girder ramp, but climb up the ramp on the north side to tower over the final stretch of bridge. You'll find both an RPG and some more M203 ammo up here, allowing you to pelt the soldiers below with all kinds of heavy explosives. What's more, there are plenty of mines in the area, which will of course set off some immensely satisfying strings of explosions that will help you clear out any remaining soldiers.
Before jumping over the ramp to the far end of the bridge, take the steps leading down below the ramp. There's an M203 machinegun there, if you need one, as well as another Intel Objective pasted to the wall nearby.
Objective: Gain Entry to Spetriniv Gulag 6
Now that you've reached the ramp at the end of the bridge, pause for a second before going over. Hang back and shoot as many of the mines scattered around in front of the gulag as possible. While they might be handy for eliminating opponents in the upcoming firefight, they're much more likely to wind up blowing you up when you accidentally run across them.
The basic sequence of events here goes a little like this. There'll be a couple of soldiers in the bus when you hop the ramp, so use your M203 or RPG to blow them up. If you have an RPG, then you can hit the two machinegunners near the central bunker before you jump over the ramp, which will be helpful. There'll also eventually be an RPG soldier on the walkway above the main doors; he'll pace back and forth, so he can be tough to pin down. If you haven't used up the RPG rounds yet, use one on him. Obviously enough, you'll want to be hiding behind the bus while all this goes down.
After taking down most of the threats in your way, you'll gain a new objective: to destroy the doors leading into the gulag. Doing so can be accomplished either by grenades, RPG rounds, or M203 grenades. When you've blown off one of the doors, run up to them, chuck a grenade at the two riot shield soldiers inside, then shoot it to kill them. Grab the Intel Objective off the wall before proceeding into the doors, which will end your mission.
Mission Eight: Spetrinev Gulag
Wow, 16 secondary objectives? Looks like we're going to be having a good time tracking them all down. Even if you (or we) don't find them all, though, getting eight shouldn't be a problem.
Objective: Gain Entry To Underground Complex
Check the small rooms near your starting point to find a suppressor for your MP5. Oddly enough, for this ultimate mission in the game, you don't even get an assault rifle. (Your M16 from last mission apparently morphed into an MP5 while you weren't looking.) Ammo for assault rifles will be pretty slim here, so you're going to want to keep your MP5 for the bulk of the mission.
There are going to be a few empty buildings here that you'll have to pass through or around. When you reach a shotgun-blastable door, you can either hit it or head around the corner to enter the basement of the building there. Kill everything that moves, then grab the first Intel Objective by the wall before moving on up. There'll be a soldier walking the hallway here; club him in the back of the head, then proceed to the end of the hallway where there's another room with an Intel Objective inside of it.
You're on the first floor now (after coming up from the basement), so poke around and find one of the two stairwells leading up to the second floor. There's nothing of great concern there, so kill anything that moves before heading up to the third floor. There'll be another Intel Objective near the top of the stairs here.
Head up to the fourth floor, and be ready for some heavier firefights here. Keep your ears open for a machinegunner, as one will appear in the basement and fire up at you; you'll be able to take him down with a grenade, if you wish.
Assaulting the Gulag

Elsewhere on the fourth floor, you'll find a G36C and a couple sticks of ammo overlooking the entrance to a building. Since ammo for assault rifles is so scarce, trade in your Remington for the G36C for a moment and use it to snipe the hell out of the enemies in the windows of the building and in the courtyard below. If you kill as many enemies as possible, including a machinegunner or two in the bunker in front of the doors, you should cause a few masks to issue forth from the building. They'll probably move out of your field of view fairly quickly, but just continue to shoot any available targets. Doing it from here will make your job much easier later on.
If you take the ramp nearby back down to the third level, you'll discover a sniper rifle by a window. This is the not-so-hidden Armament Objective for the level, so pick it up, if only for a moment. There's a fire escape leading to the ground level from this floor, but as soon as you head out, you'll hear the telltale sound of an RPG being fired. Move back towards the window near the sniper rifle, and look towards the highest level of the building that's slightly to your right; you should be able to pop the RPG soldier from here.
Fight your way down to the ground floor outside, then check the building near the stairwell exit to find a Blackmail Objective and another sniper rifle. (Be ready for the masks that you saw earlier to attack you here, as they surely will.) Instead of attacking the building directly, try to lure out some of the defenders by getting their attention with gunshots.
As you approach the building, another RPG soldier will appear in one of the top right corner windows. He'll be directly behind an air conditioning unit, so if you can snipe the red box in front of him, down he'll go. Again, though, instead of charging into the building's courtyard, find the stairs that run alongside the building where you sniped out the first RPG soldier and use your shotgun or a grenade to blow the door there open. There's another shotgunnable door inside; if you take the stairs all the way up, you'll find an RPG for your pleasurable usage. Of course, by this point there probably aren't any more enemies in the courtyard itself, so you won't have much use for it. At least, not for the moment....
When you're ready to finally get into the building, head down to the courtyard and walk far enough in to cause enemies to start spawning behind the bunker. There'll be plenty of foes to take care of at this point, but the most deadly will be the four or six riot shield enemies that'll be packing Magnums. You'll want to draw back beneath the bridge structure and let these guys come to you; when you see them, you can take a couple out with a well-aimed RPG round, but the rest will probably need to be taken down with grenades at their feet. Shoot the grenades, and voila; no more bad guy.
Bunker Entrance
After you've cleared out the enemies in the courtyard, head into the building to reach a checkpoint. (Note that you should be able to find an M249 and some ammo for it in front of the bunker. It'll be worth picking up. Be sure to check for as many grenades as you can find, as well.) After heading down the stairs and busting through some wood (use gunfire to break through, not the grenades), you'll come to a cellblock, where another very difficult fight will ensue. Initially you'll just be fighting regular soldiers, but soon enough, you're going to be facing off against masks and riot shields, and they'll overwhelm you if you don't act quickly. Unfortunately, there will also be gunners in the upper levels of the cellblock, waiting for you to make one wrong move
In our learned opinion, we recommend that you rush these guys. Just rush em! If you have six or more grenades when you head into the cellblock, then you should be able to rush into the smaller room at the end of the cellblock (heading through the passageway near an Intel Objective) before the gunners upstairs rip you to pieces. Just keep chucking grenades at the feet of the riot shield enemies and shooting them. Just be absolutely sure that you land the grenades behind the riot shield enemies, as they can survive a point-blank grenade blast, so long as their shield is between them and the grenade when it goes off.
Anyway, you'll undoubtedly take a bunch of damage as you go forward, but most of the masks and riot shield foes should drop health packs, so if you move quickly enough, you might be able to survive. Alternately, if you want to hole up and wait for them to come to you, you can do so while taking cover from the enemies above by examining the right side of the cellblock. There's a shotgunnable door there (with a convenient shotgun right next to it), so blasting through and hiding in the bathroom nearby will give you a little hidey hole in which to wait for your attackers. There's also a Blackmail Objective on top of the lockers here.
When you're through with the enemies, check the small rooms beyond the cellblock for the Recon Objective, then find the stairs leading downwards. Pass through the corridor here, picking up the Intel Objective along the way, until you reach more cells. When you find a seemingly impassible wall, check the nearby cell for an RPG and some ammo, then either shotgun or grenade the wall to pass through.
The Boiler Room
Grenade your way through the doors, then repeat the process on one of the machinegun bunkers that stand in your way. You're now in the grungy industrial plant of the gulag. Follow the path down the railway here, which will eventually split into three separate subpaths, one heading left, one heading right up a flight of stairs, and one heading straight into the boiler room itself. The left path leads to an Intel Objective, and eventually wraps around to the boiler room as well, while the right path takes you above the boiler room to a smaller room, where an RPG is waiting for you, along with another Intel Objective.
Obviously enough, the boiler room is going to be the scene for another long-winded battle, so be ready for a lengthy fight. Your best bet here is to hole up near the entrance to the boiler room via the central passage, near the steps leading down from the RPG room, and draw enemies back to you so that you can pelt them with your MP5 or the RPG itself, in the case of riot shield foes. This will create a small pile of health packs and ammo for you to pick up when you happen to need a pick-me-up.
Objective: Hunt Down Seventh Wave Suspect Lennox
When you're clear of the boiler room, head down into the hallway below and fire an RPG round at the MG bunker nearby to blow it to smithereens. (By the way, don't you just love smithereens? We can't get enough of those little guys.) If you don't have an RPG, there's one located in a small chamber nearby. When you pass by the bunker, poke your head inside to find another Blackmail Objective.
Make your way down into another boiler room-ish scenario. You can either assault the enemies here straight on, or take the side passage to find a set of steps leading to the catwalks above the room. The danger of the catwalks is that you won't have any cover to hide behind, and you'll likely be flanked by enemies that come through the boiler room and pop up behind you.
Anyway, move down the tunnel beyond this room until it branches in two. The left path will lead you to an Intel Objective and an RPG, which you should grab if you don't have one already. Use it to the destroy the bunker down the right hall, which itself has another Intel Objective inside of it. If you haven't done so yet, grab one of the M249s in the area and take the extra ammo afforded you on the stairwell. Get ready for another fight!

The Basement Fight
Alright, here's going to be some fun times. This is one of the most difficult fights in the entire game on hard difficulty, and even on the lower difficulties the number of enemies that you'll be fighting against will be tremendous.
With an M249 in hand, stay in the doorway leading down from the ramp, but do not go into the room right away. If you do, the doors close behind you. Instead, hang back and start shooting people from the doorway. There are going to be plenty of targets to choose from, including plenty of enemies with their own machineguns. You want to keep shooting people at least until you see machinegunners and masked enemies appear on the catwalks just above the doorway. There are two of each type of enemy here, with one pair coming out of the left room above and the other pair coming from the right. The machinegunners will usually come to the middle walkway to fire down on you, allowing you to kill them with your own M249, but the masks will often hang back. If you have any grenades, chuck them up towards the sides of the catwalk above you and hope that they catch the shotgunners there.
When you well and truly run out of enemies to shoot, then you'll have to enter the room and head up the stairs nearby to reach one of the two small rooms here, which will be your primary dwelling spot for the rest of the fight. If you need any health or grenades in the meantime, pick up anything on the floor nearby. An Intel Objective should be in one of the rooms here, inside a locker.
Anyway, when you hit one of these rooms, you'll have to start mowing down the enemies as they appear, and they'll appear in droves. There are going to be plenty more machinegun foes appearing, as well as numerous mask shotgunners and riot shields. These latter types of enemies will typically spawn on the lower portion of the room and make their ways towards the stairs in an attempt to get up close and personal with you, so be ready with the grenade shooting when they finally do get to you. You can dash out of your room to quickly loot the healthpacks they drop if you wish.
After a few more minutes of killing, you'll eventually start getting machinegunners in the bunkers at the far end of the room, as well as RPG soldiers on the catwalks. Ugh! The RPG soldiers are obviously going to be the biggest danger to you here, as they'll usually land their shots directly on your own catwalk, and thus cause some pretty severe damage to you. They also move around on the catwalks, so you can't assume that they'll be in the same spot after you duck out from your room.
If you still have any RPG rounds, then that weapon is obviously going to be the best way to take down the opposing RPG soldiers, but there'll be four or six of them spawning in waves, and you're not going to have that much ammo. You'll have to use your M203 to take at least a couple of them down. The basic process for this is as such: wait in one of the rooms until you have at least two bars of health. (If you go down to one bar, it'll quickly regenerate to two if you wait a moment.) Two bars should let you survive a glancing blast from a rocket, assuming you keep moving away from the blast. With two bars of health, strafe out onto the catwalk and start moving towards the other room. When you see the blast of the RPG heading towards you, start firing away at the source of it, and try to keep your recoil in check. With any luck, you'll dodge the worst of the blast, take down the RPG soldier, and avoid getting hit by the machinegunners in the bunkers below.
There's no simple, easy way to get past this section, unfortunately, at least not that we've discovered; you just have to gut it out and do your best to kill off those RPG gunners without getting blown away. You've probably spent around ten minutes on the fight at this point, so getting killed now will be pretty damn annoying! On medium or lower difficulties, you can probably walk down into the middle of the room, but even then you'll be giving the RPG soldiers a better angle on you.
After killing all of the RPG soldiers, start taking down the machinegunners in the bunkers. After killing enough of them, you'll eventually shoot one that causes the entire bunker structure to explode, allowing you to pass through and...end the game? Yep, you get to watch the nonsensical end cutscene and get ready to wait for Black 2.
Mission One
This video walkthrough shows off a few of the tougher parts of the first mission of the game.
Crossing the Canal
Crossing the canal is quite a tall task on Hard difficulty, but is made quite a bit easier if you have a good supply of grenades and RPG rounds. Just remember that you have to keep pressing forward to pick up the health packs that your enemies drop, especially if you really are playing on Hard and can't keep any in your inventory.
Clearing The Outbuildings
Shooting grenades has never been this fun! It's especially helpful here, since many of these outbuildings will have masked enemies, which are pretty tough to kill with your normal weapons.
Sniper!
If you ever wanted to pretend to be Billy Zane or Tom Berenger (and really, who hasn't?), then this mission should be right up your alley. First you have to walk across the graveyard to actually get to the sniper rifle without getting sniped yourself, though.
Big Ups
Actually landing M203 grenades can be difficult, due to the way the grenades are lobbed instead of traveling in a straight line, but when you get used to it, the weapon should make your journey through sniper alley quite a bit easier. If you managed to find it, that is.
Warehouse Cockroaches
Oof - there are guys coming from every which way! Here's a tip: even though we picked up the Magnum in this video, it's not actually all that useful unless you're really awesome at aiming. Stick with your assault rifle for a better chance of getting through alive.
The Gas Towers
In retrospect, rushing past the guards on the towers just caused more problems than they solved. It's best to go slowly and kill everything you see before moving on. Either way, you're going to be rewarded with a heck of a bang at the end.
Smelters
If you want to make this fight easier, you may want to try shooting the furthest smelter machinery first; this might delay the appearance of the enemies here and make it easier to live through the ensuing fight.
The Asylum
It's an abandoned Indian insane asylum built on a caveman burial ground! And you'll have to fight your way through a million goons to reach the entrance! Oh, brrr.
Hordes of Crazies
It's especially fun when enemies drop into the room through holes in the ceiling. Then again, we suppose that the last thing required of a game like Black is logic. It's fun!
Ambush!
Be sure to wait to blow the stuff up here until you actually have an enemy that'll be killed by it. In particular, the RPG soldier that appears in the upper left window should be brought forward before you blow the valve in front of him.
Assaulting the Gulag
The machinegunners and RPG soldiers here are going to be quite a handful. Even worse are the riot shield soldiers that pop out of the doors when they're opened. If you have enough health, though, feel free to run past them and into the Gulag to end the mission.
Forcing the Entry
"Hello? Is this Aleksandr Solzhenitsyn? Oh, really? Well, hello; I'm a big fan of your work. Yeah, I'm just calling because I thought it'd be amusing to let you know that I'm trying to fight my way into a gulag. Isn't that a hoot? ...hello? Hello?"
ZERRGGGGG
These shotgunners and riot shield enemies can be taken with grenades, so long as you avoid their shields. Be sure to throw the grenades behind them before shooting them, or their shields will absorb the blast!
The End!
The game has a pretty intense ending! Just try to stay healthy and do your best not to get the crap kicked out of you by the 40 or so enemies that you'll have to take on in this final room. It's a hell of a fight, but on the easier difficulties you can probably afford to be a bit more reckless than we are here; it took us 10 or 15 minutes to finally clear the room out.
Got a news tip or want to contact us directly? Email news@gamespot.com
Join the conversation