Battlefield 1942 Updated Preview
We go back to the front lines of World War II with an updated version of this promising first-person shooter. New screenshots, movies, and impressions inside.
See it in Action!
One of this year's most promising action games, Battlefield 1942, recently went gold. Developed by Swedish developer Digital Illusions, the game is a World War II-based first-person shooter unlike any other in the genre. While it lets teams of players control five different types of infantry, it also lets them commandeer a variety of naval, air, and land-based vehicles, including aircraft carriers, submarines, P-51s, B-17s, TU-34s, Shermans, and a host of other Russian, German, British, American, and Japanese weapons of war. All this adds up to a multiplayer combat experience that's incredibly diverse, but not at the expense of being fun and action packed. We've chronicled the general gameplay elements of Battlefield 1942 in our earlier previews, but we recently had the chance to play a nearly complete build of the game, so we're taking this opportunity to bring you details, screenshots, and movies on perhaps the four most varied levels that you'll find in Battlefield 1942 in order to ease the wait for the game's ship date.
Battlefield 1942 includes 16 of the most memorable battles of World War II--four from each of the North African, European, Eastern, and Pacific theaters of war. In this preview, we're examining the battles of Kharkov in the Ukraine, Berlin in Germany, Ardennes in Belgium, and Guadalcanal in the South Pacific. All of these maps require that you capture and hold a majority number of control points, yet different tactics need to be employed on each level in order for victory to be achieved. We'll start with the Eastern front.

Launched by the Russians in May of 1942, the offensive to take Kharkov cost the Red Army dearly. Though figures are sketchy, it is estimated that nearly a quarter of a million Russian soldiers lost their lives in the two-week battle to take back this Ukrainian town. The victory at Kharkov provided the Germans with the stepping stone they needed to launch their offensive against Stalingrad the following month, when the fiercest fighting of the Eastern front took place. In the game itself, Kharkov is a large map shaped like an inverted "U". The Germans and Russians start on either side of the map, and both sides are tasked with capturing a series of control points that are spread throughout the destroyed husks of Kharkov's buildings, which are located in and around the center of this level. The task of capturing these points is perhaps a little tougher for the Germans, since they have to cross a river in order to get to the central part of the city, and the bridge acts as a choke point. Regardless, the control points are the same distance from the starting areas of both teams, so a mad rush to reach the center of the map almost always ensues at the start.
Adding to the fast pace of Kharkov is a control point located on top of a hill that overlooks the main respawn locations of both teams, making it a perfect area from which to launch artillery strikes. And in fact, located on top of this hill are two medium-range Katyusha rocket-artillery launchers that have the ability to reach nearly every other control point on the map. With proficient use of scouts and artillery, the first team to reach this area can dictate the outcome of any Kharkov match. However, both the Russians and the Germans have their own airbases, and they can each launch a pair of fighters to bomb any control points that are otherwise proving to be too much for ground forces to overtake, including the aforementioned hilltop. Kharkov is one of the most frantic maps in Battlefield 1942, and it requires the coordinated use of infantry, armor, air, and artillery for both teams. However, even Kharkov doesn't match the fevered pace of yet another Eastern front map: Berlin.

The Russian offensive against the German capital of Berlin was the last major battle in the Eastern front of World War II. The city had already been devastated by months of nonstop air raids before the Russian invasion, and this devastation is clearly evident in the game. The map itself is probably one of the smallest in Battlefield 1942, and it doesn't involve any air, naval, or artillery units--it's strictly an infantry and armor battle. Berlin is divided into a about a half dozen city blocks, with German control points located throughout. The onus is on the Russian team to liberate and hold a majority of these areas, though doing so will invariably prove easier said than done. Because of the nature of the destroyed city, many areas in the level make for excellent sniper nests. Furthermore, most of the control points are protected by at least a pair of MG-42 machinegun turrets, and the best way to overcome these defenses is by launching a coordinated attack that's designed to overwhelm the enemy with sheer numbers. And even though the few tanks that are available in this level can be deadly against any infantry caught in the cramped quarters of Berlin's city streets, the map's numerous alleys and open windows make it relatively easy for rocket infantry to maneuver and attack a tank's weak rear armor. Historically, many people died in the Battle of Berlin, including thousands of civilians, and at its maximum capacity of players, this Battlefield 1942 map does a good job of suggesting the violence of that battle.
Guadalcanal and the Bulge
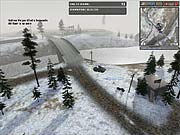
Across the European continent, the fighting was no less fierce. In the winter of 1944, the Germans were retreating from France in order to shore up their lines closer to home, and the Allies were still recuperating from failed assaults on Arnhem and Lorraine. The Germans seized this opportunity to launch an attack aimed at splitting the US and British armies. While the attack was initially successful, constant Allied relief was able to turn the tide of the battle, which ultimately became Germany's last offensive in the war. This snowy map is one of the largest in Battlefield 1942, and both teams start on opposite ends of the level. A river cuts right through the level and separates the respawn areas of the Germans and Americans. Only a pair of bridges connects the two land masses, and both will act as choke points that the opposing team can take advantage of. While most of the control points are located on the American half of the map, the Germans have a unique advantage because of an easily defensible hill that overlooks most of the level and is located immediately to the south of their starting point. The Germans have another advantage because of their superior hardware--three Panzers as opposed to a pair of Shermans. Neither team has any airfields, so all the fighting will be done on the ground. Invariably, the Allied team can achieve victory if they can withstand the German artillery barrage on their control points and successfully defend the bridges on the north and south ends of the map.
On the other side of the world, Americans were fighting an equally brutal battle with a different enemy. The battle to take Guadalcanal was initially a strange one--having learned that the Japanese were building an airbase on this Solomon island to launch attacks on Allied shipping, US Marines took Guadalcanal completely unopposed. Two days later, however, the US Navy battle group that inserted the Marines into the island came under attack by the Japanese and was forced to retreat, leaving the Marines alone and without any support. Despite the overwhelming odds against them, the Marines held out for nearly six months and successfully defended Guadalcanal. In the game, the island is obviously not to scale with its real-world counterpart, and it'll only take you 10 minutes or so to walk from one end to the other. Doing so is no easy feat, however, especially with the Japanese base on the south end of the island and Japan's airbase to the north. If the US team can manage to capture this strip, it can have access to fighters of its own. Unfortunately, the airbase is located closer to the Japanese side's respawn area than it is to the American side's. Evening the odds somewhat is the natural geography of the island itself. Guadalcanal is a long strip that runs north to south, and most of it is made up of impassable hilly terrain. Additionally, only a single, narrow road connects both ends of the island along the cliffs of the island's western shore, so most of the fighting is done on the east end, with American players descending from their hilltop base down onto the flats where the Japanese airstrip is located. The high location of their base gives the Americans a slight advantage over the Japanese, but otherwise, Guadalcanal seems more suited to players on the Axis team.

Interestingly enough, Guadalcanal is the only Pacific-theater level in Battlefield 1942 that doesn't contain any naval units. While the lack of naval units stays true to history, the other three maps in this campaign--Iwo Jima, Midway, and Wake Island--exemplify this game's diversity. Each of these maps involves the combined efforts of infantry, armor, artillery, and naval combat from both teams. You won't really appreciate Battlefield 1942 until you step onto the bridge of the USS Yorktown and pilot the massive aircraft carrier single-handedly in the Battle of Midway, or take the conn of a submarine and slip beneath the waves to attack surface ships. Whether you prefer fighting on foot, in the air, or on the sea, Battlefield 1942 really lets you do it all. If you're a fan of World War II or just of online action games in general, and you're looking for something that truly is extraordinary, then Battlefield 1942 deserves your attention. We'll have a full review of the game soon, but in the meantime, you can get your fill of this game with a host of new gameplay images and footage that we've added to our screenshot and movie galleries, as well as from the recently released playable demo.
Got a news tip or want to contact us directly? Email news@gamespot.com
Join the conversation